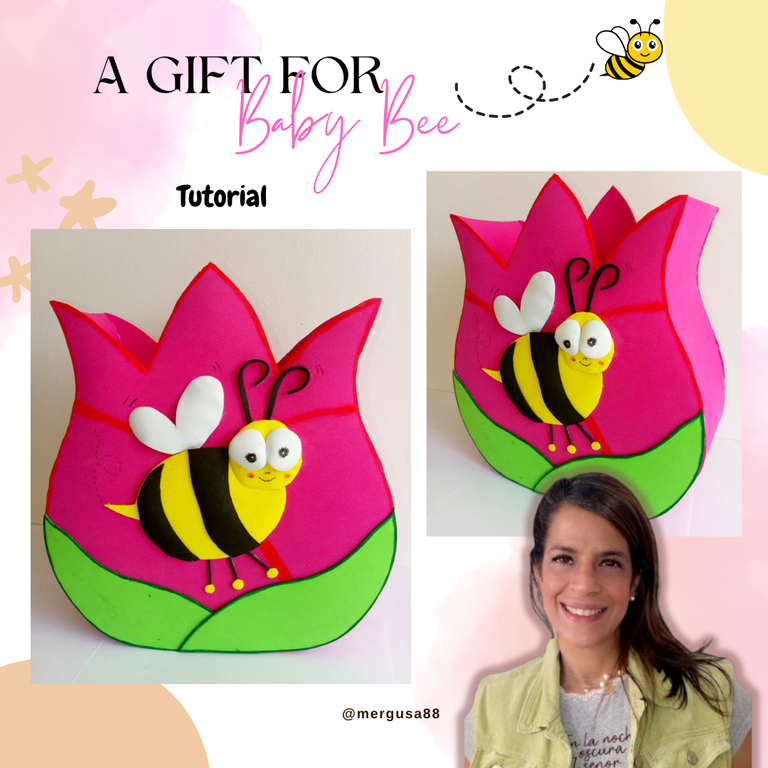

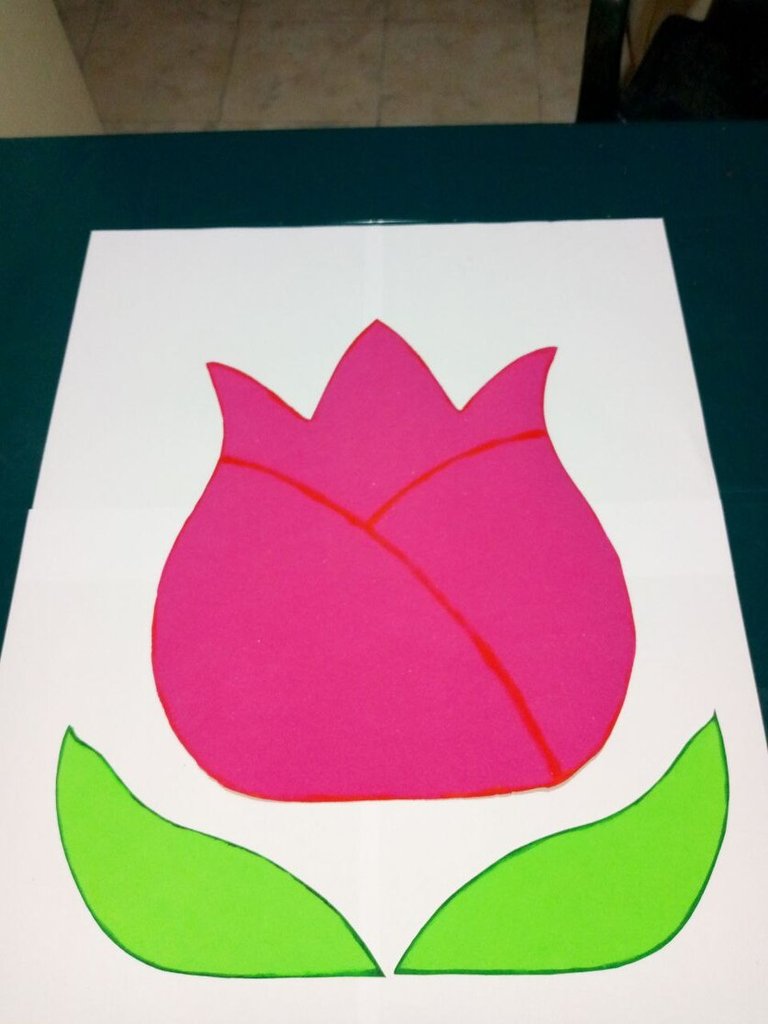
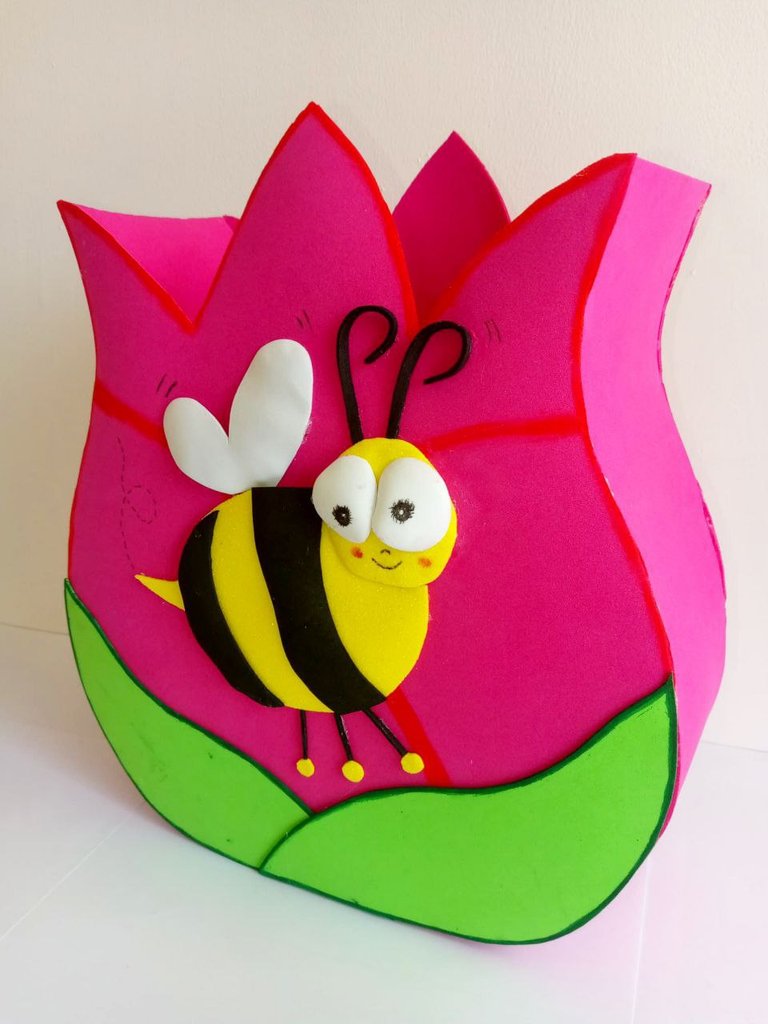
Es un placer volver a escribir para esta comunidad, esta vez quiero enseñarles un regalito que hice para mi hermosa sobrina "Alma", cariñosamente llamada en HIVE "Baby Bee" 🐝 y si no la conoces te invito a conocerla en el blog de @ramisey.
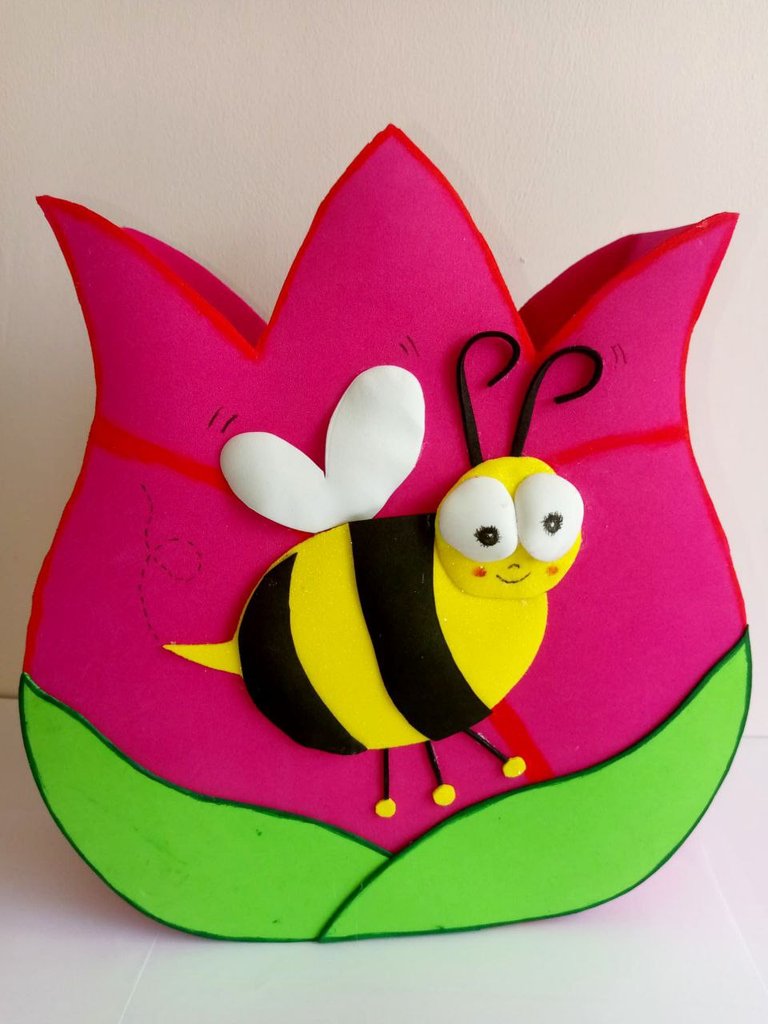
Este es un proyecto en Foami , tiene forma de un tulipán con una graciosa abejita. Me servirá para meterle algunas cositas más, que quiero darle de regalo. Para los que no saben, yo vivo en la Isla de Margarita y ella está en Cumaná. ¡Espero cruzar pronto el mar para dárselos! 🛳️🎁
¡ Así que manos a la obra!
It's a pleasure to write again for this community, this time I want to show you a little gift I made for my beautiful niece "Alma", affectionately called in HIVE "Baby Bee" 🐝 and if you don't know her I invite you to meet her in @ramisey's blog.
This is a Foami project in the shape of a tulip with a cute little bee. It will be useful to put some more things in it, that I want to give her as a present. For those who don't know, I live on Margarita Island and she is in Cumaná.
I hope to cross the sea soon to give them to her! 🛳️🎁
So let's get to work!
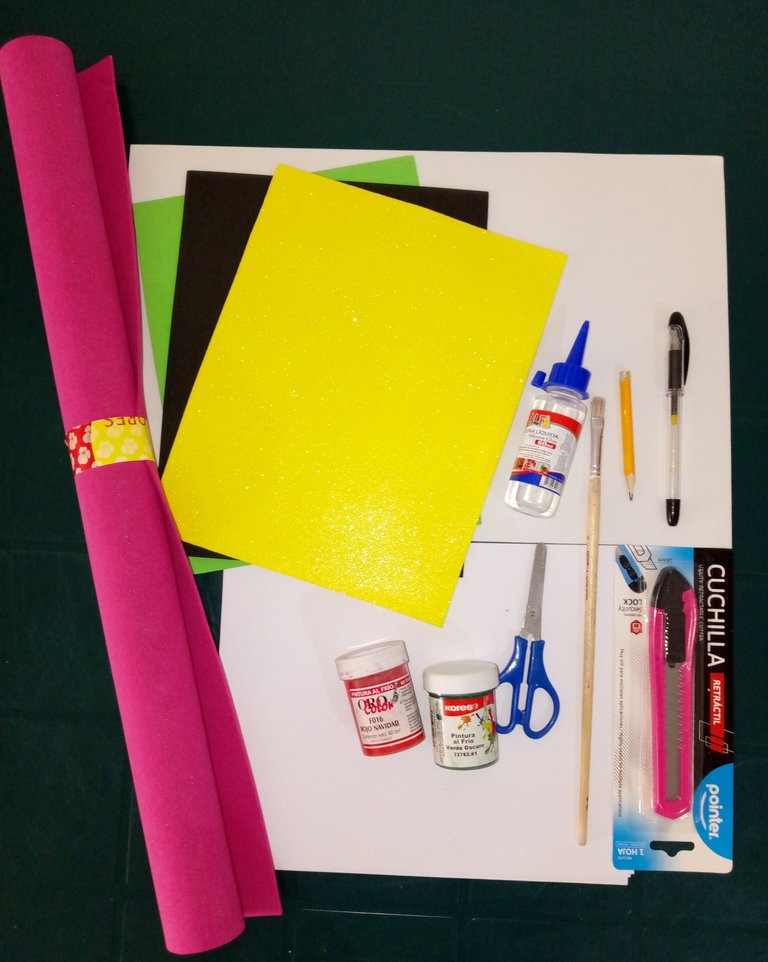
*Foami fucsia (1 rollo)
*Foami amarillo, verde, blanco y negro
*Silicón frío o caliente
*Exacto o tijeras
*Pinturas al frío
*Pinceles
*Marcador negro
*Lápiz
*Regla
*Plancha de ropa (opcional) para termoformar el foami
*Foami fuchsia (1 roll)
*Foami amarillo, verde, blanco y negro
*Hot or cold silicone
*Exact or Scissors
*Cold paints
*Brushes
*Black marker
*Pencil
*Ruler
*Clothes iron (optional) for thermoforming of the foami

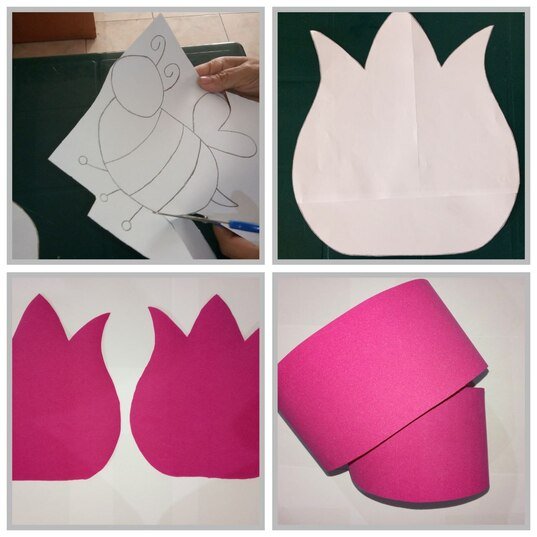
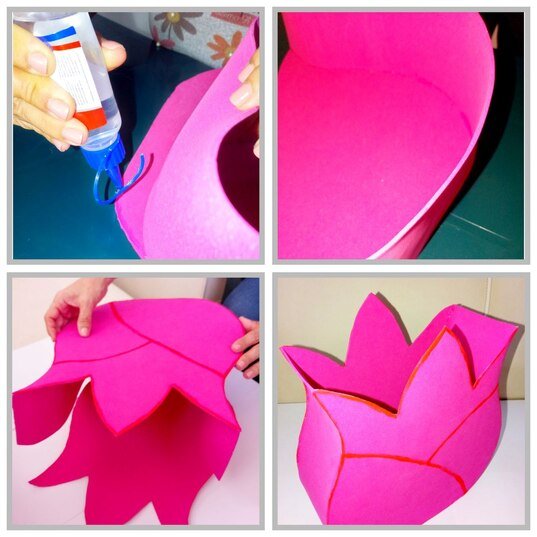
PASO 1: Lo primero que hice fue hacer los moldes en hojas de papel blanco para luego calcar en el foami del color correspondiente. Algunas pieza las corté doble en el foami, te las indico aquí:
Tulipán: 2 veces
Hoja: 2 veces
Ojo de abeja: 2 veces
Para el lateral del tulipán corté una tira de foami de 79 x 10 c.m
STEP 1: The first thing I did was to make the moulds on sheets of white paper and then trace them onto the foami in the corresponding colour. Some of the pieces were double cut in the foami, I indicate them here:
Tulip: 2 times
Leaf: 2 times
Bee's eye: 2 times
For the side of the tulip I cut a 79 x 10 cm strip of foami.
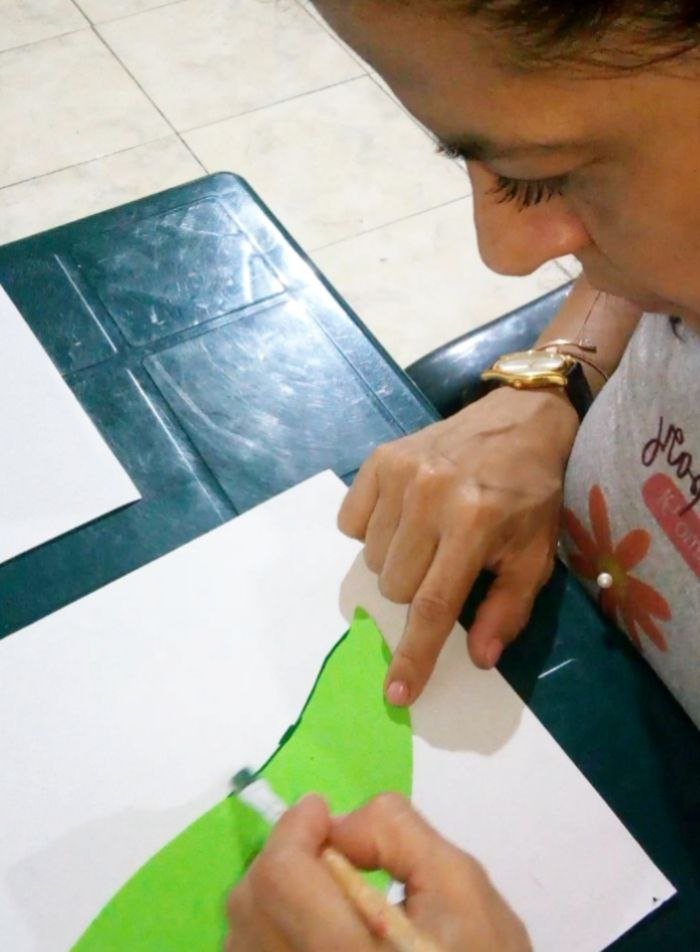
PASO 2: Una vez cortadas todas las piezas procedí a decorar con la pintura al frío los bordes de las hojas y del tulipán. Utilicé un verde más oscuro y rojo en el tulipán para darle contraste y hacer la diferencia de colores.
STEP 2: Once all the pieces were cut I proceeded to decorate the edges of the leaves and the tulip with cold paint. I used a darker green and red on the tulip to give it contrast and make the colour difference.
PASO 3 : Una vez que estaban secas las piezas, empecé a armar el tulipán: apliqué silicón en el borde de la tira lateral y pegué a ésta el delantero y la parte de atrás. Este paso es el que demanda un poco más de tiempo y paciencia ya que debes tratar que queden parejos los bordes. En cada paso aplica una cantidad generosa de silicón para que fijen bien.
STEP 3 : Once the pieces were dry, I started to assemble the tulip: I applied silicone on the edge of the side strip and glued the front and the back to it. This step is the one that takes a bit more time and patience as you have to try to get the edges even. In each step apply a generous amount of silicone to fix them well.
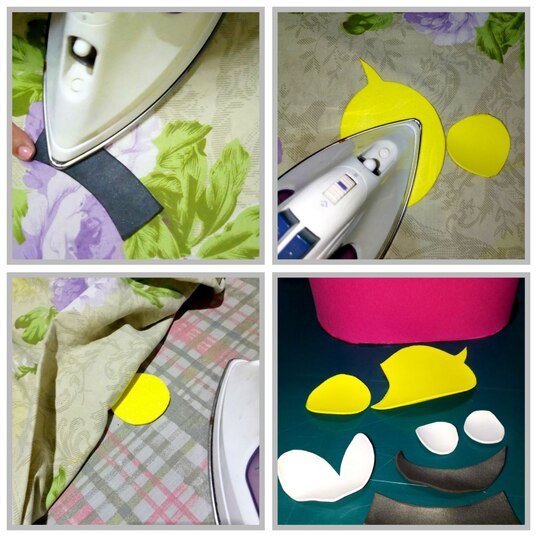
PASO 4: Ahora toca pegar la abejita, pero antes quise termoformar algunas las piezas, lo que significa tomar la plancha y pasarla por encima de las piezas para que se doble un poco y dar el efecto de relieve. Para algunas piezas utilicé la plancha directamente y para otras probé la técnica de poner tela sobre la figura y plancharlo varias veces (esta última me pareció mejor).
STEP 4: Now it's time to glue the little bee, but first I wanted to thermoform some of the pieces, which means to take the iron and pass it over the pieces so that it bends a little and gives the relief effect. For some pieces I used the iron directly and for others I tried the technique of putting a cloth over the figure and ironing it several times (I thought the latter was better).
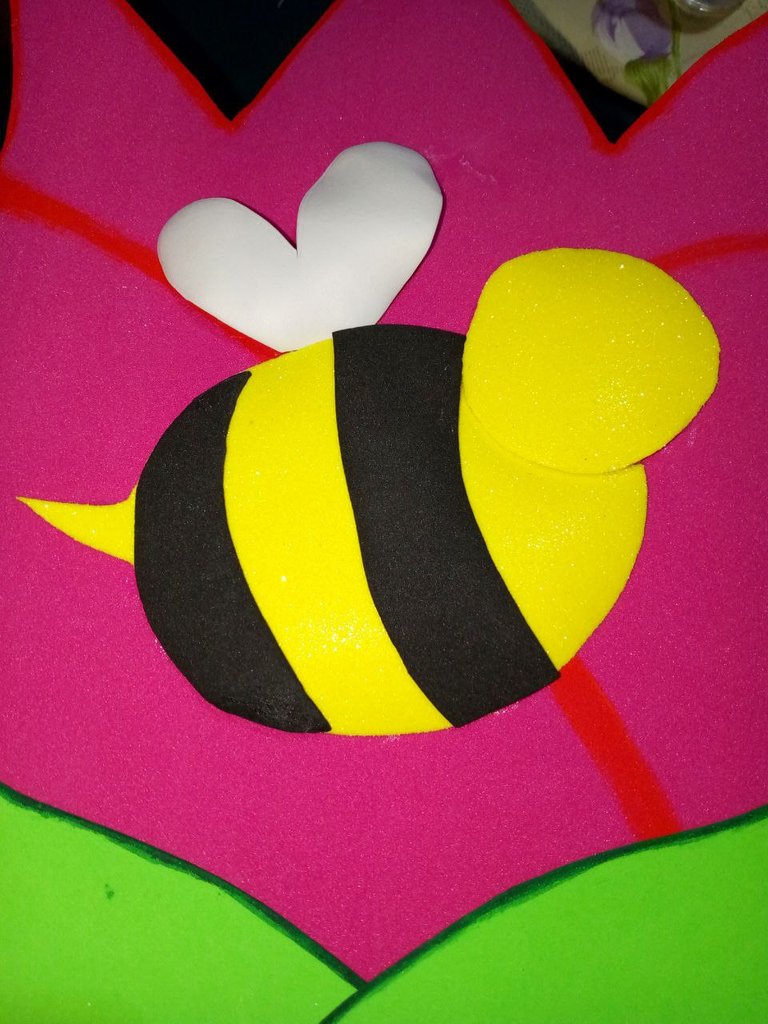
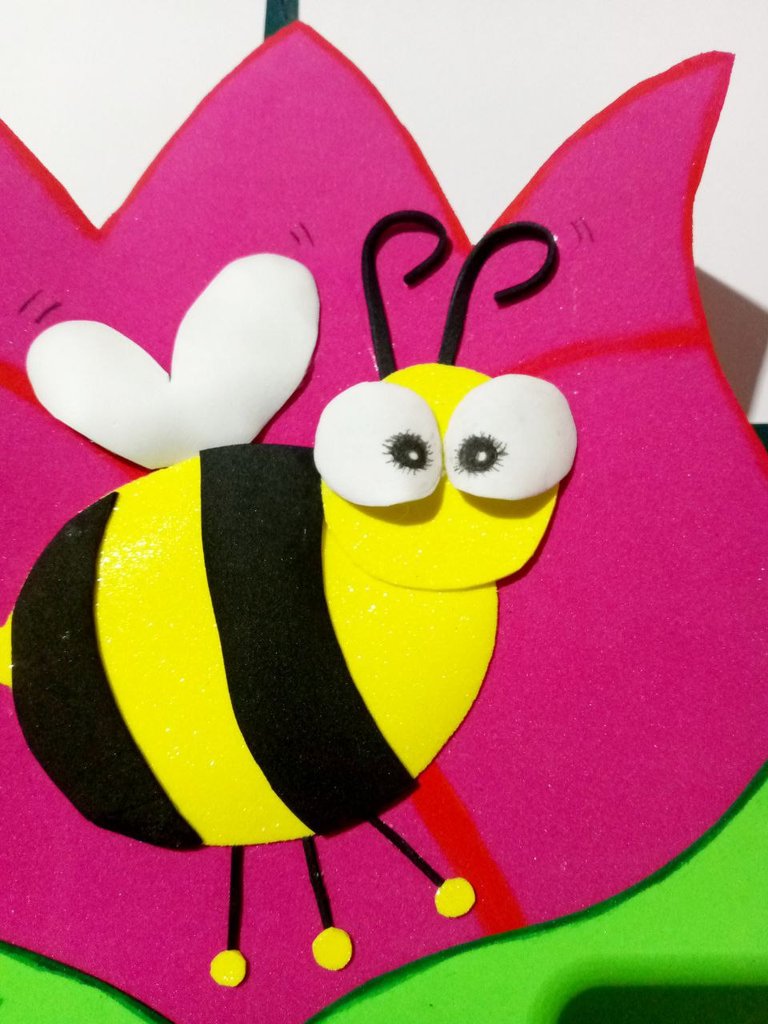
PASO 5 : Corté unas tiras finas de foami negro, para las patas y un poco más gruesa para las antenas. Uní las hojas y las pegué al tulipán .Pinté los ojos, naríz y boca con marcador negro. Añadí algunos detalles como el espiral y unas pequeñas ondas alrededor de la abeja.
STEP 5 : I cut thin strips of black foami for the legs and a bit thicker for the antennae. I joined the leaves together and glued them to the tulip. I painted the eyes, nose and mouth with black marker. I added some details like the spiral and some small waves around the bee.
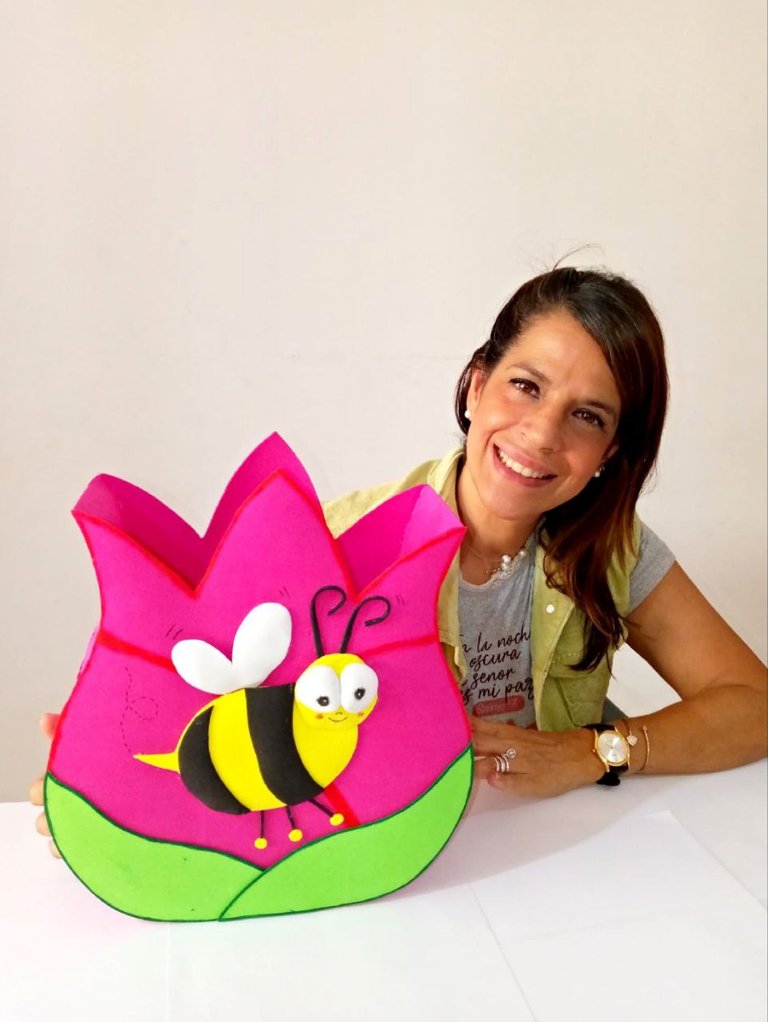
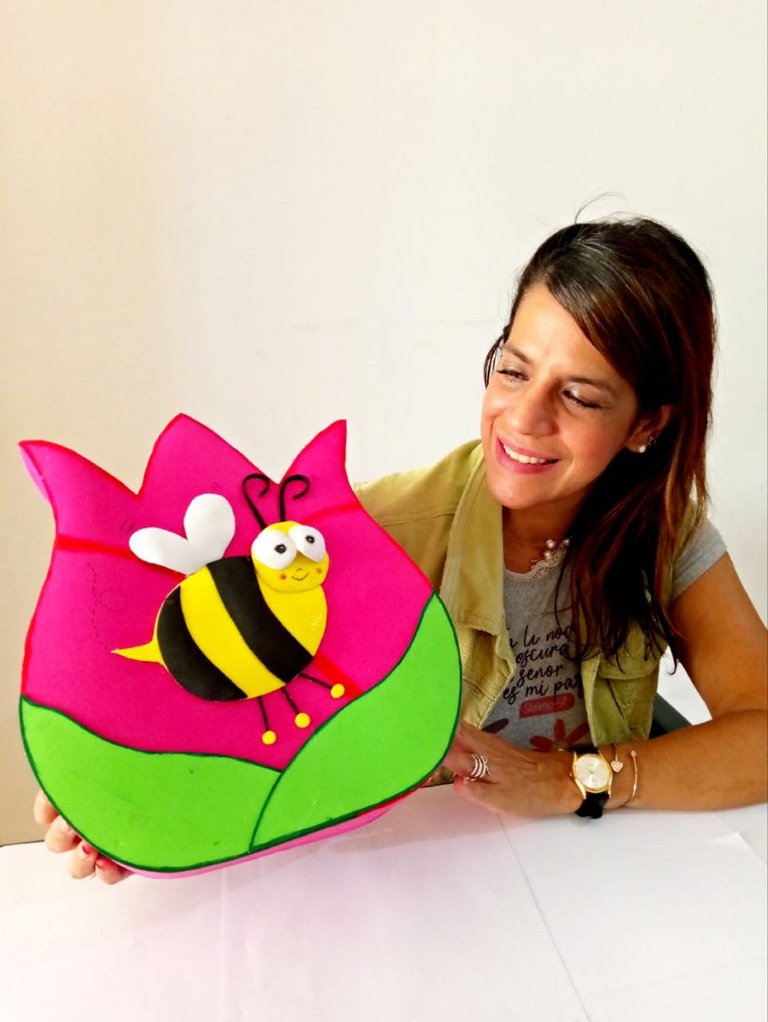
Termino mostrando el resultado final de este lindo proyecto.
I finish showing the final result of this nice project.
Ha sido un placer escribir para ustedes y enseñarles este tutorial para elaborar este lindo detalle para regalar, les envío un caluroso abrazo.
Y como siempre quedo atenta a sus comentarios, sugerencias e ideas para compartir . Que tengan un maravilloso día lleno de alegrías 💜
It has been a pleasure to write for you and show you this tutorial to make this nice gift, I send you a warm hug.
And as always I remain attentive to your comments, suggestions and ideas to share. Have a wonderful day full of joy 💜.

Todas las fotografías fueron tomadas con mi teléfono móvil // All photos were taken with my mobile phone.
Portada editadas en Canva collages en App GridArt // Photographs edited in Canva and collages in GridArt App
Separadores realizados en Canva // Dividers made in Canva
Traducción realizada con www.deepl.com // Translation made with www.deepl.com

Congratulations @mergusa88! You have completed the following achievement on the Hive blockchain And have been rewarded with New badge(s)
Your next target is to reach 60 posts.
You can view your badges on your board and compare yourself to others in the Ranking
If you no longer want to receive notifications, reply to this comment with the word
STOPCheck out our last posts:
Gracias equipo @hivebuzz por la notificación 😉
¡Eso es perfecto @mergusa88! ¡Eres un verdadero profesional de Hive! ¡Adelante hacia esa nueva meta!
I must confess that this is very beautiful and creative of you.
Very grateful for the comment and support , it encourages me to keep on creating and doing 😉💖
Exelente trabajo, muy hermoso, feliz fin de semana 🌹🌷🌸💮🪷🥀🌻🪻🌺💐🌼🌼☘️
Gracias amiga @taniagonzalez por pasarte por aquí , que bueno que te gustó esta manualidad. Buen fin de semana para ti también🌹
🌹🌷
Agradecida por la mención🤩 @yennysferm71. Saludos!
¡Ay amiga, pero qué belleza de tulipán!!!, creí que era más pequeño, es un proyecto delicado y tierno, ideal para reglar, se refleja el amor con el que lo hiciste para tu sobrina que lindo detalle.❤️
Awww gracias!!! es un tulipán tamaño grande ☺️ como para regalar con cositas dentro, tambíen ideal hasta para entregar como cotillón en una fiesta infantil. Siii con muchísimo amor para mí sobri♥️
Quedó precioso 😍😘, gracias por el hermoso detalle para Baby Bee. Amo la combinación de colores y, por supuesto, la pequeña abeja para hacer honor al apodo de tu sobrina.
Espero que nos veamos pronto 😘
Gracias Yesi!!! 🤗 lo hice con muchisimo amor para mí sobri linda, con colores vibrantes, alegres y con su abejita, que me recuerda siempre a ella ♥️🐝 Un abrazo apretado y que nos veamos prontooo 🙏
Que ternura!
Gracias @danigada18 es un gusto tenerte por acá, me alegra que te haya gustado 😉
Que lindura, te quedó demasiado cuchi amiga 💕
Gracias Clau ¡¡¡ por pasarte y dejarme tu bonito comentario 💛
Very creative
yes very creative work, I enjoyed doing it. Thanks¡¡¡