Hola, colonias digitales que conforman el universo de Hive. Reciban un fuerte abrazo.
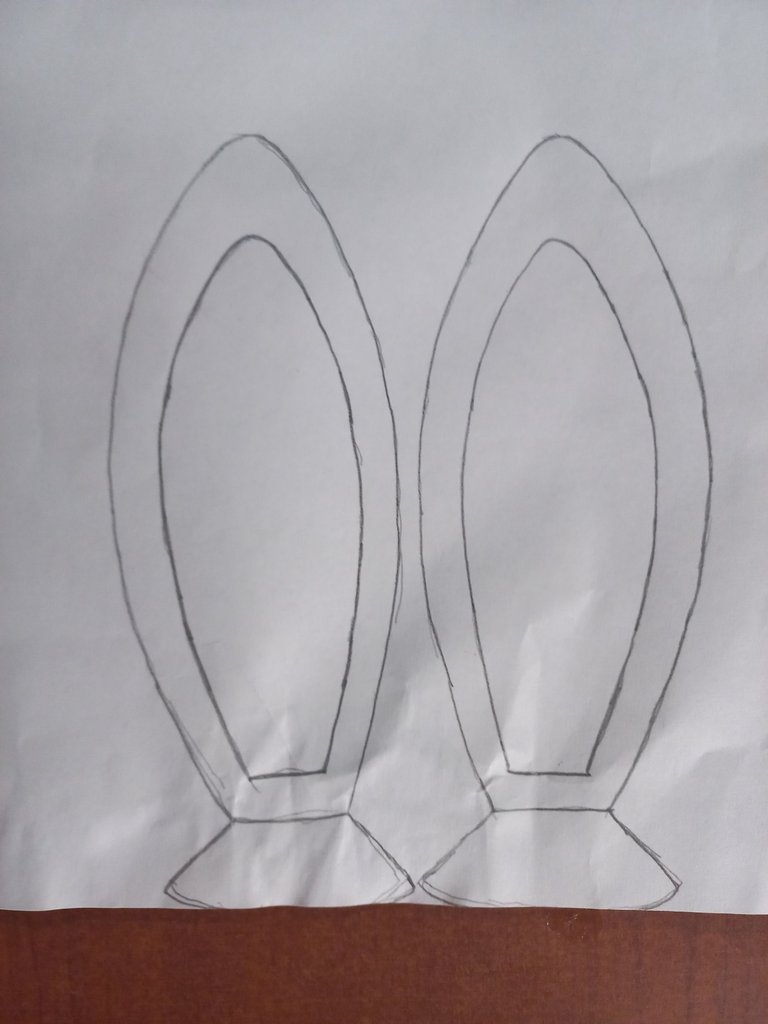
Hoy les traigo unas Orejas de Conejo: Para añadir un Toque Mágico al Disfraz del Conejo Blanco "Alicia en el País de las Maravillas".
Hello, digital colonies that make up the Hive universe. Receive a big hug.
I hope you're doing well from the other side of the screen.
Today I bring you some Rabbit Ears: To add a Magical Touch to the “Alice in Wonderland” White Rabbit Costume.
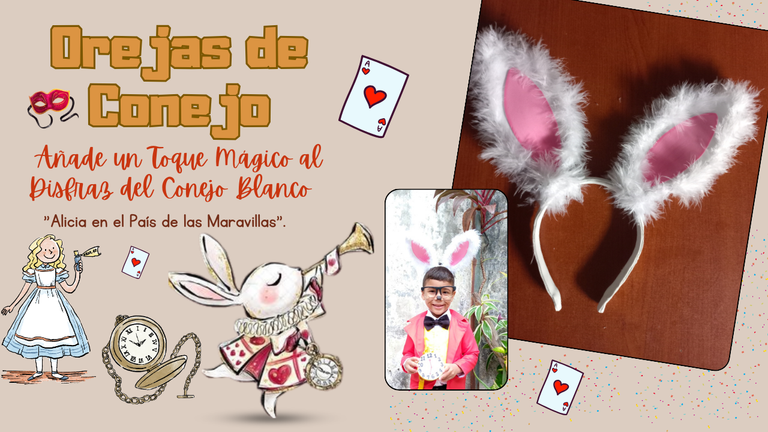
Hoy quiero compartir con ustedes un proyecto muy especial que hice para el pequeño de la casa. La temática del carnaval de este año en su jardín de infancia es "Alicia en el País de las Maravillas", y a él le tocó disfrazarse del adorable Conejo Blanco. Como abuela orgullosa y amante de las manualidades, me embarqué en la misión de crear unas orejas de conejo que complementaran su disfraz a la perfección. Además, será un hermoso compartir en el jardín de infancia, donde él podrá disfrutar y lucir su disfraz con orgullo.
En este paso a paso, les mostraré cómo realicé las orejas usando materiales sencillos que cualquiera puede encontrar. Espero que esta guía no solo les sea útil, sino que también los inspire, pero sobre todo que disfruten del proceso creativo tanto como yo.
¡Vamos a comenzar!
En este paso a paso, les mostraré cómo realicé las orejas usando materiales sencillos que cualquiera puede encontrar. Espero que esta guía no solo les sea útil, sino que también los inspire, pero sobre todo que disfruten del proceso creativo tanto como yo.
¡Vamos a comenzar!
Today I want to share with you a very special project I made for the little boy in the house. The theme of this year's carnival in his kindergarten is “Alice in Wonderland”, and he got to dress up as the adorable White Rabbit. As a proud grandmother and craft lover, I embarked on a mission to create bunny ears that would complement his costume perfectly. Plus, it will make for a lovely kindergarten share, where he can enjoy and wear his costume with pride.
In this step by step guide, I will show you how I made the ears using simple materials that anyone can find. I hope you find this guide not only useful, but also inspiring, but most of all that you enjoy the creative process as much as I do.
Let's get started!
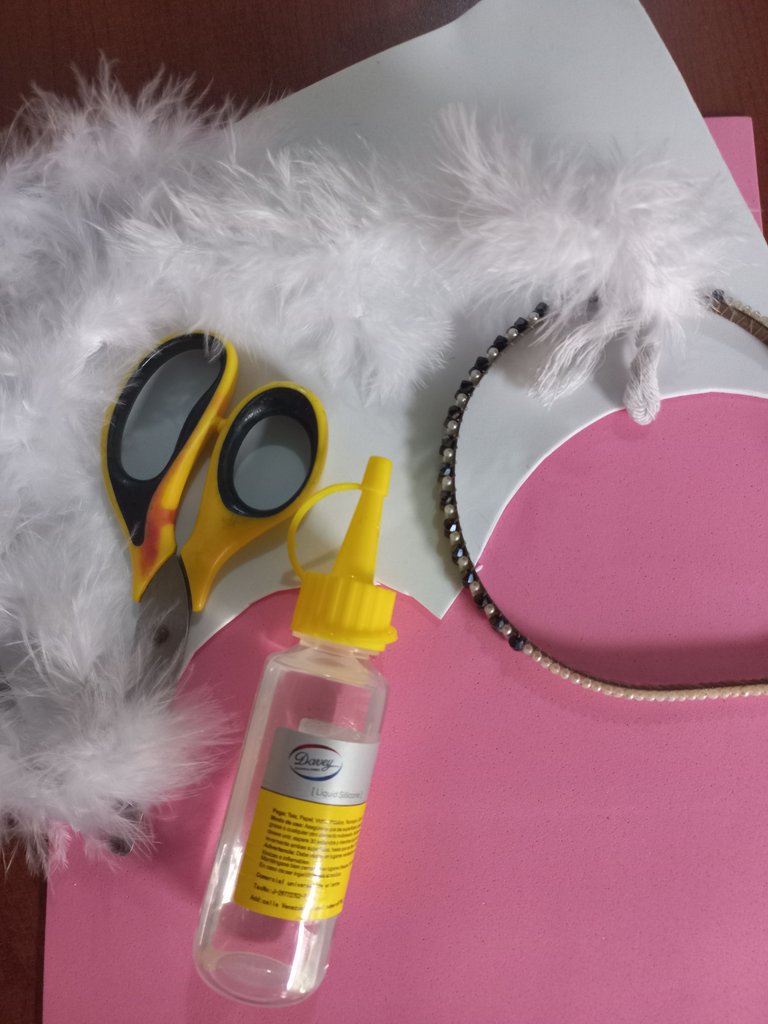
Materiales
1. Tijera
2. Silicon liquido
3. Foami Blanco y Rosado
4. cinta Marabú blanco 1 metro (Es un tipo de cinta hecha con plumas)
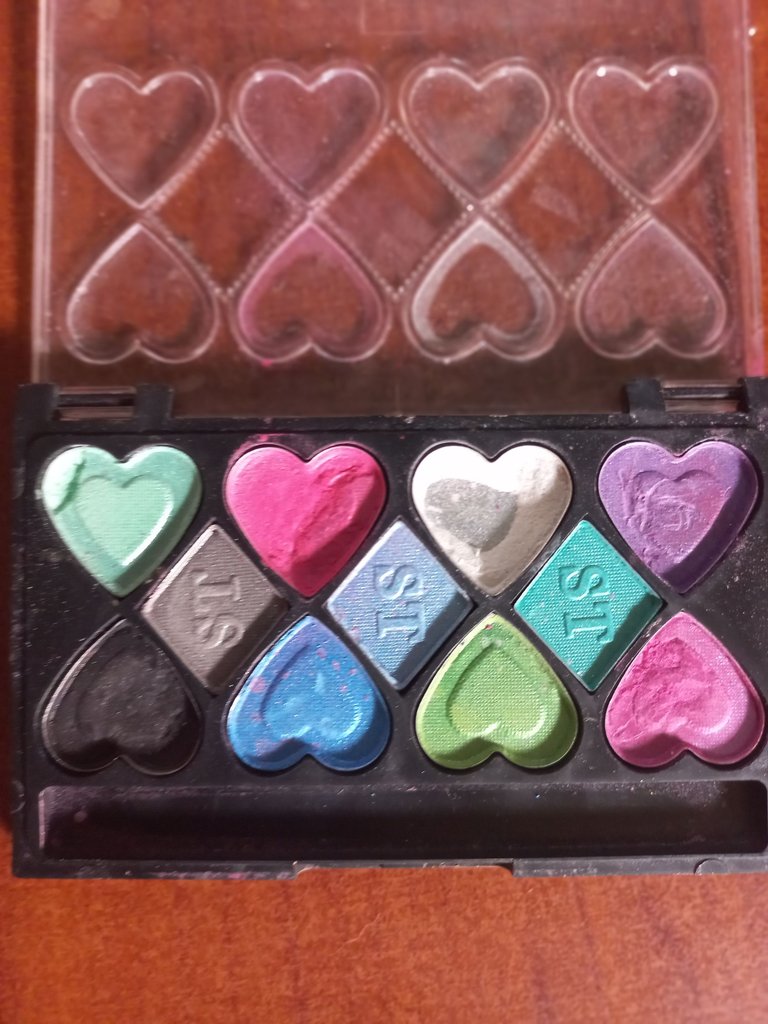
5. Maquillaje facial (Sombras)
6. Diseño
7. Cintillo (Diadema)


1. Tijera
2. Silicon liquido
3. Foami Blanco y Rosado
4. cinta Marabú blanco 1 metro (Es un tipo de cinta hecha con plumas)
5. Maquillaje facial (Sombras)
6. Diseño
7. Cintillo (Diadema)
Materials
1. Scissors
2. Liquid silicon
3. White and Pink Foami
4. White Marabu ribbon 1 meter (It is a type of ribbon made with feathers)
5. Facial Makeup (Shadows)
6. Design
7. Headband
 |  |  |
|---|
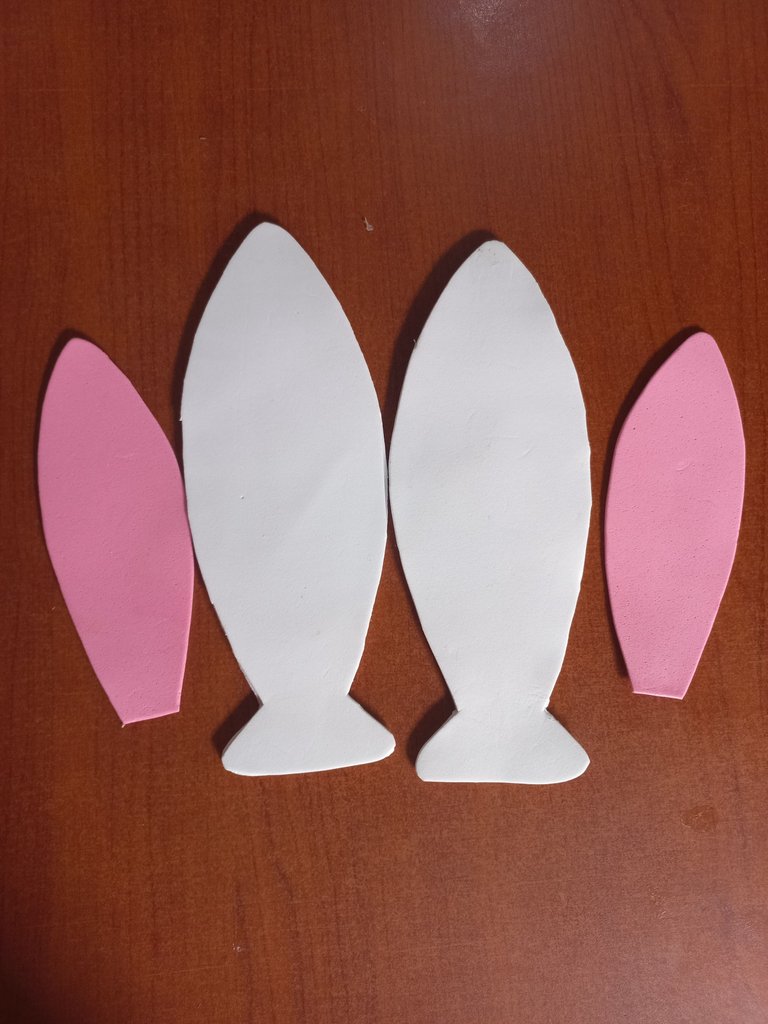
Con el diseño ya recortado, procedemos a transferirlo utilizando un lápiz suave y trazamos cuidadosamente los contornos, en cada uno de los foamis correspondientes. Para darle mayor dureza se cortan cuatro piezas blancas (esto es a criterio propio) y dos rosadas.
With the design already cut out, we proceed to transfer it using a soft pencil and carefully trace the contours on each of the corresponding foamis. To make it harder, we cut four white pieces (this is at our own discretion) and two pink ones.
 |  |
|---|
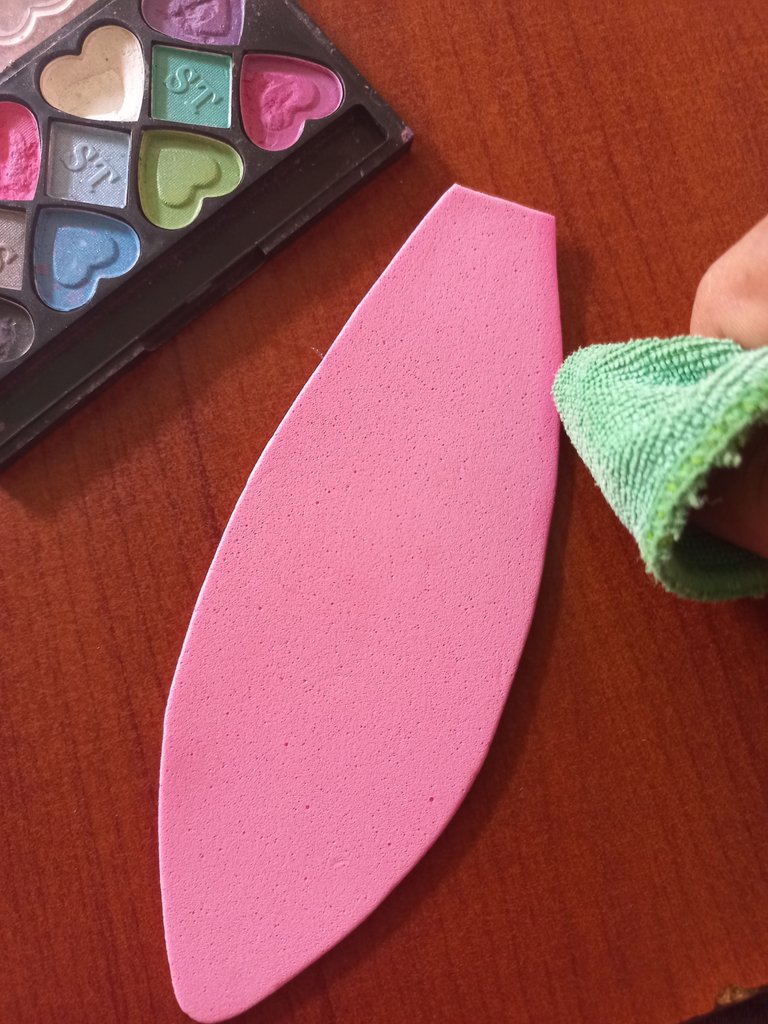
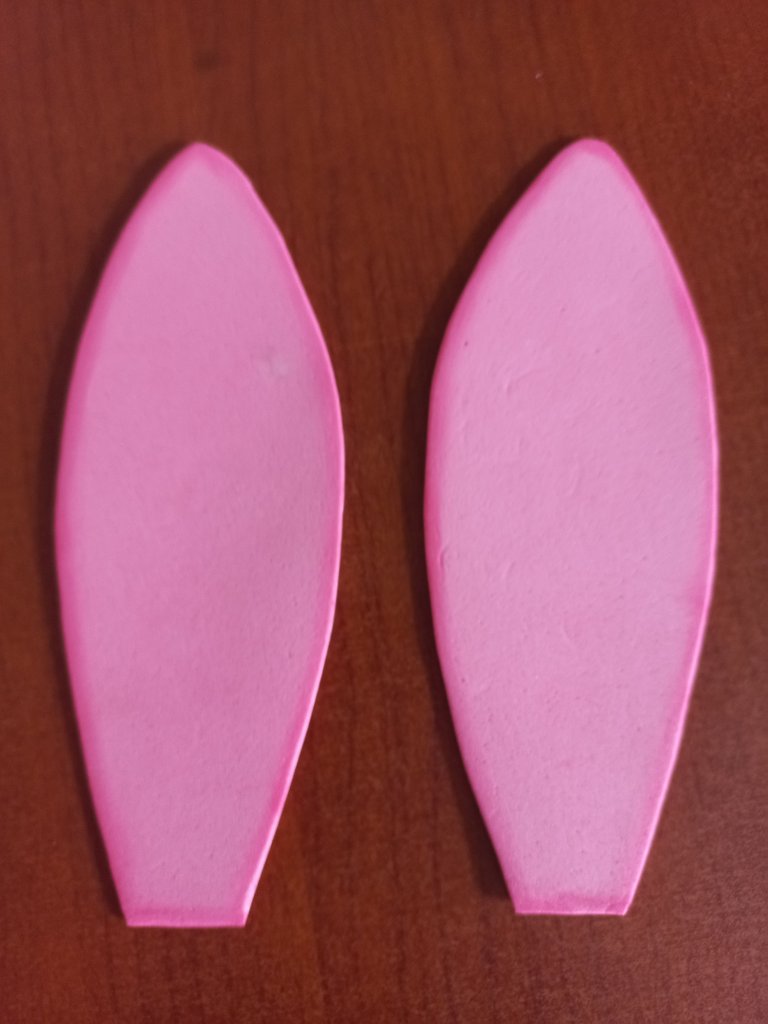
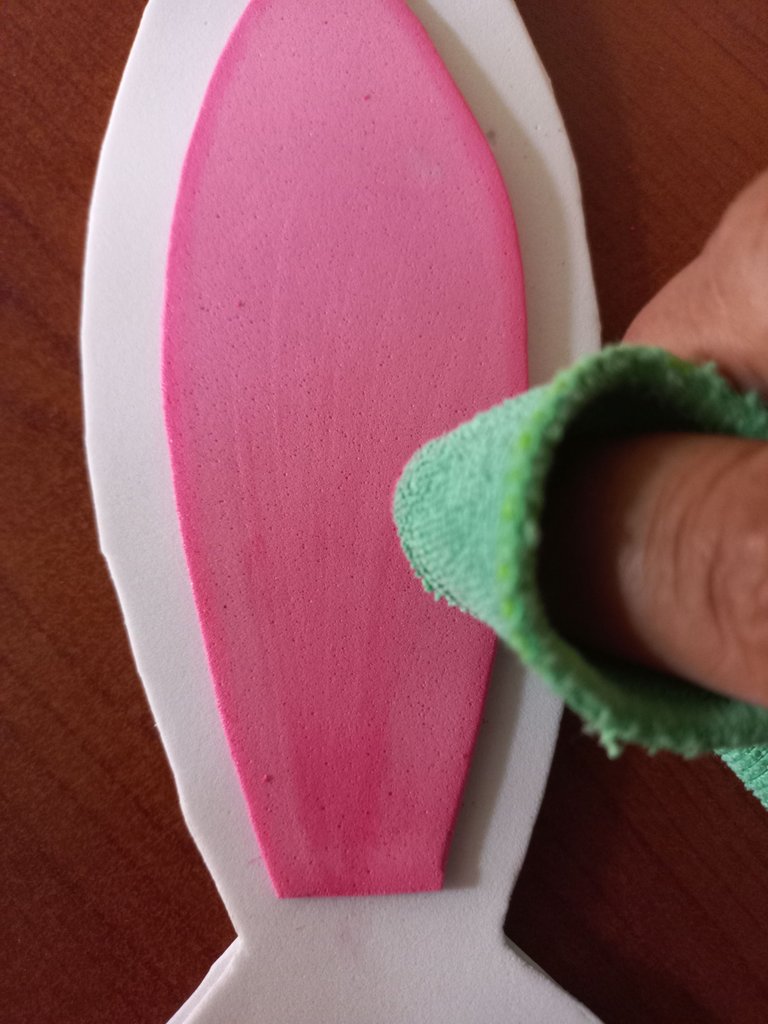
Ahora que ya tenemos nuestras piezas listas, es momento de darle un toque especial a la pieza en tono rosado para crear un efecto de profundidad. Para ello utilizaremos la sombra en tono rosa y un pañito seco. Toma una pequeña cantidad de sobra rosa con el pañito seco, pasa suavemente el pañito por el contorno de la pieza rosada, difuminando el color a lo largo de todo el borde. Esto le dará un hermoso efecto. Una vez sombreado la pieza rosada, se pega sobre la pieza blanca. Asegúrense de ubicarla bien en el centro. Para darle el toque final, apliquen pequeñas líneas desde abajo hacia arriba en el centro de la pieza rosada. Si es necesario, repitan el proceso hasta obtener el efecto deseado.
Now that we have our pieces ready, it is time to give a special touch to the pink piece to create an effect of depth. To do this we will use the pink shadow and a dry tissue. Take a small amount of pink shadow with the dry tissue, gently wipe the tissue along the contour of the pink piece, blurring the color all along the edge. This will give a beautiful effect. Once the pink piece is shaded, glue it onto the white piece. Be sure to place it well in the center. For the finishing touch, apply small lines from the bottom to the top in the center of the pink piece. If necessary, repeat the process until the desired effect is achieved.
 |  |  |
|---|
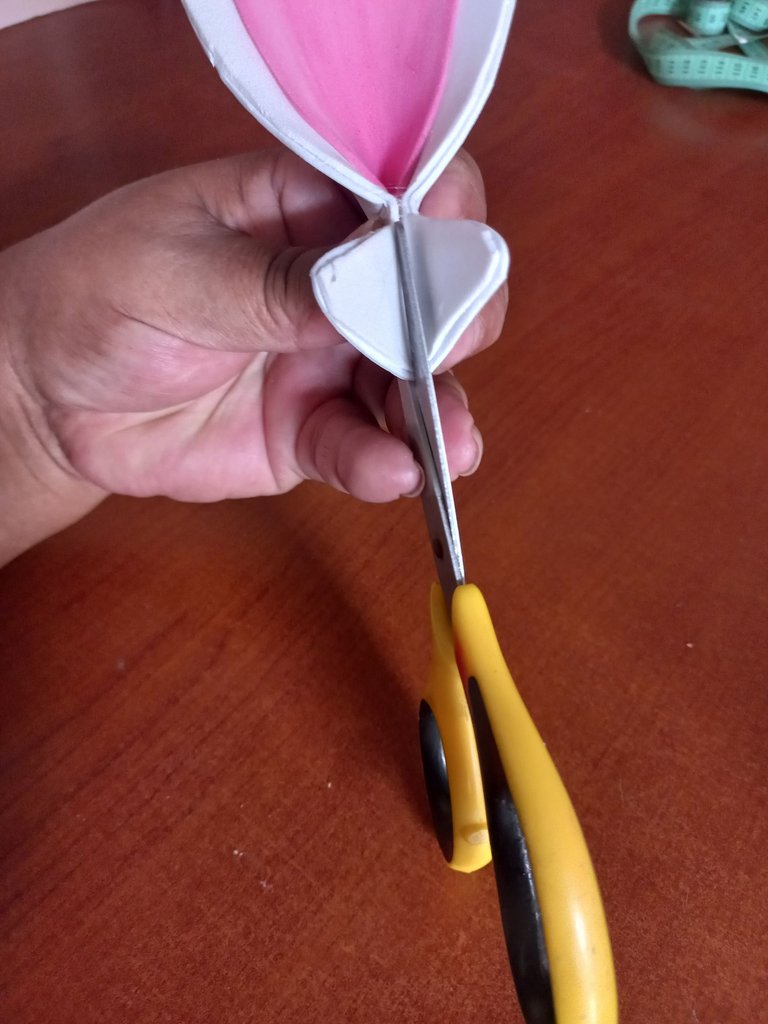
Lo que realmente hará que nuestras orejas de conejo se destaquen es el siguiente paso. Vamos a darle esa forma curva encantadora que las hará lucir más realistas y menos rectas. Toma la lengüeta de soporte y coloca un poco de pegamento en la base. Puedes utilizar tus dedos o una herramienta suave para presionar hasta que el pegamento se seque y cortamos al centro de la base.
What will really make our bunny ears stand out is the next step. Let's give them that lovely curved shape that will make them look more realistic and less straight. Take the support tab and place some glue on the base. You can use your fingers or a soft tool to press down until the glue dries and we cut to the center of the base.
 |  |
|---|
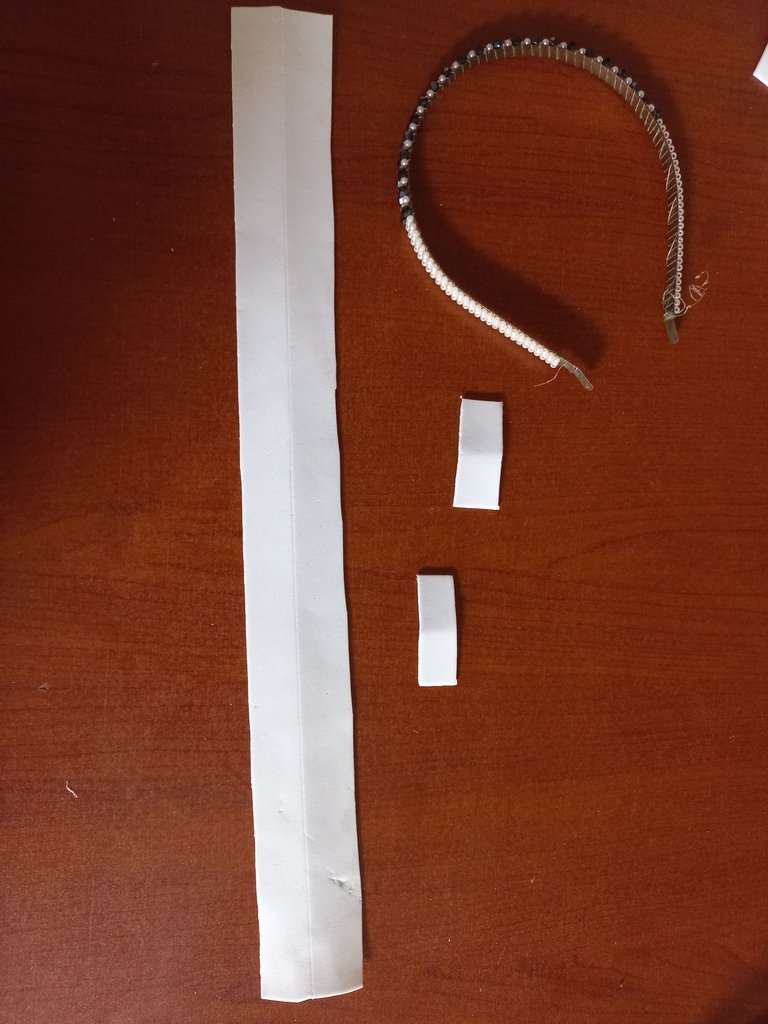
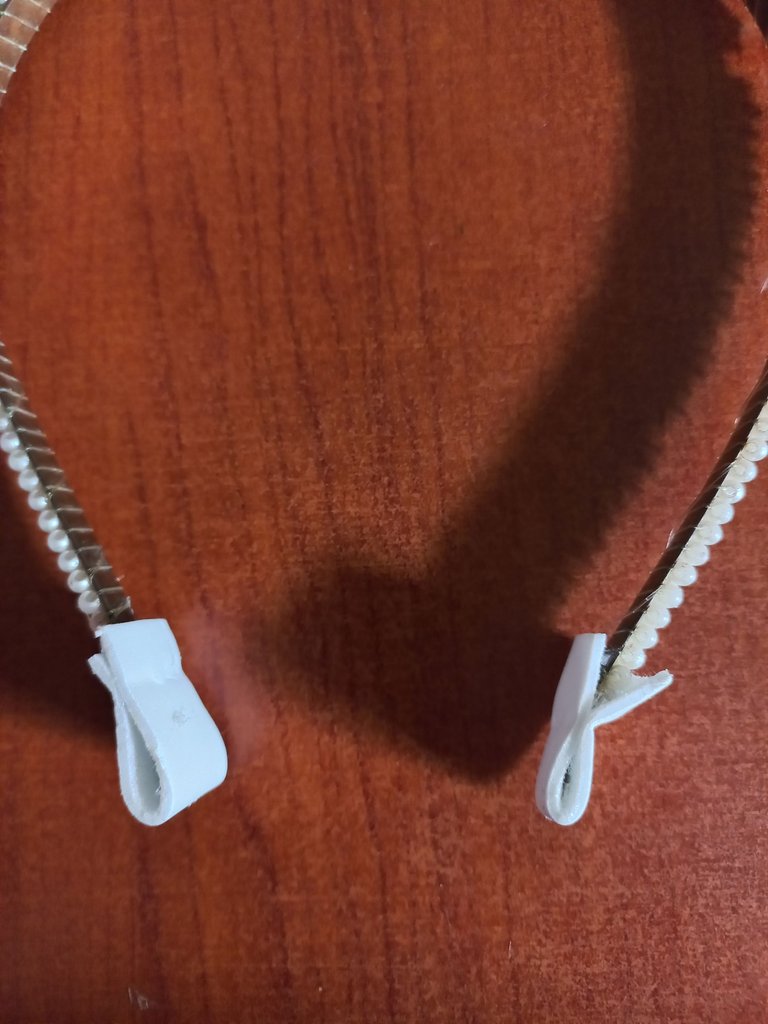
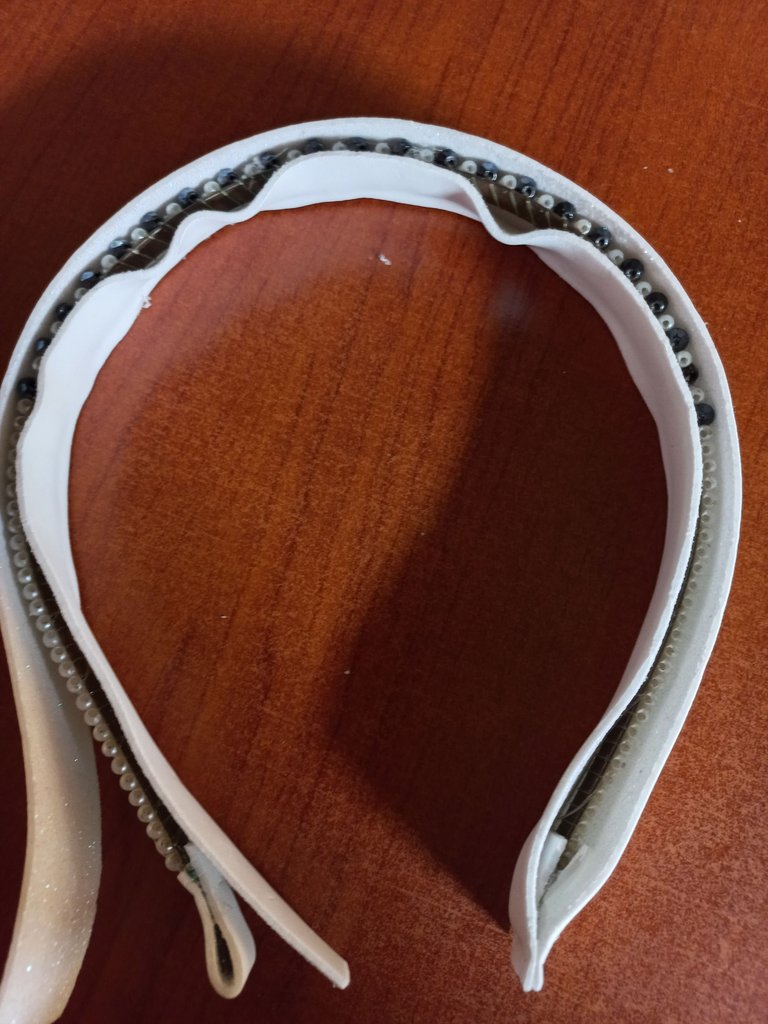
Prepararemos nuestra pieza final. Cortamos una tira de foami blanco de 39 centímetros de largo por 4 centímetros de ancho. Luego, cortamos dos tiras más pequeñas de 3 centímetros de largo por 1,5 centímetros de ancho. Con las cintas pequeñas, cubrimos cuidadosamente las puntas del cintillo para que queden bien protegidas. Tomamos la tira más larga y la utilizamos para cubrir el resto del cintillo. Asegurándonos de pegarla bien y sin arrugas.
We will prepare our final piece. We cut a strip of white foami 39 centimeters long by 4 centimeters wide. Then, we cut two smaller strips 3 centimeters long by 1.5 centimeters wide. With the small ribbons, we carefully cover the ends of the headband so that they are well protected. We take the longer strip and use it to cover the rest of the headband. Make sure to glue it well and without wrinkles.
 |  |
|---|
 |  |
|---|
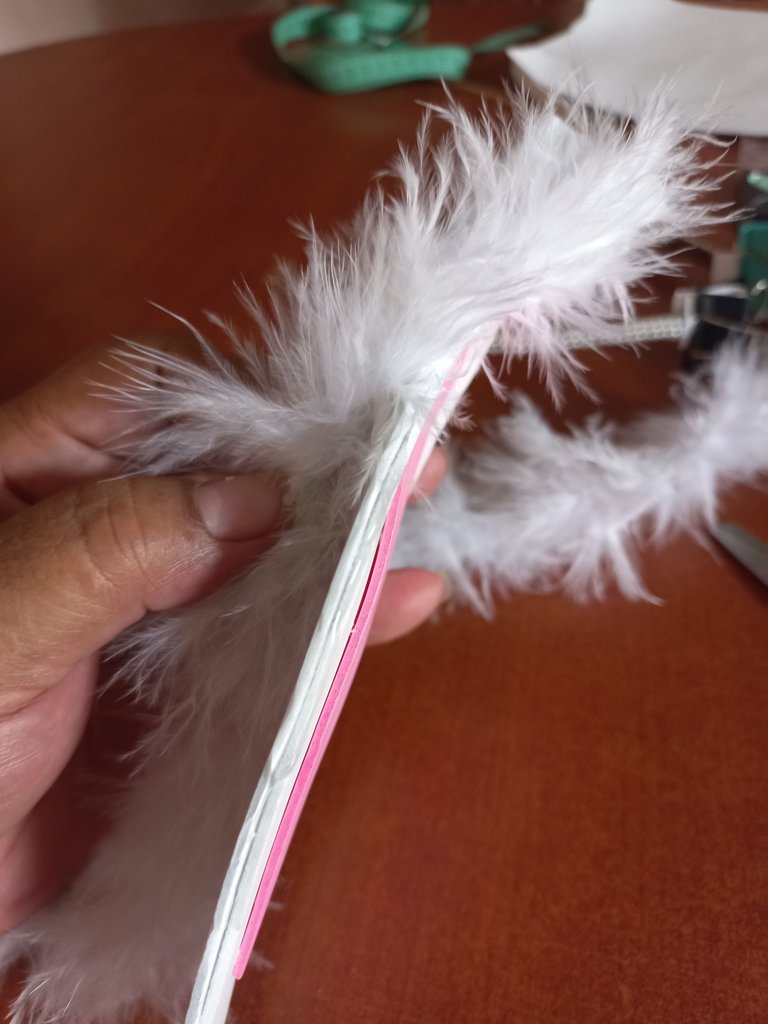
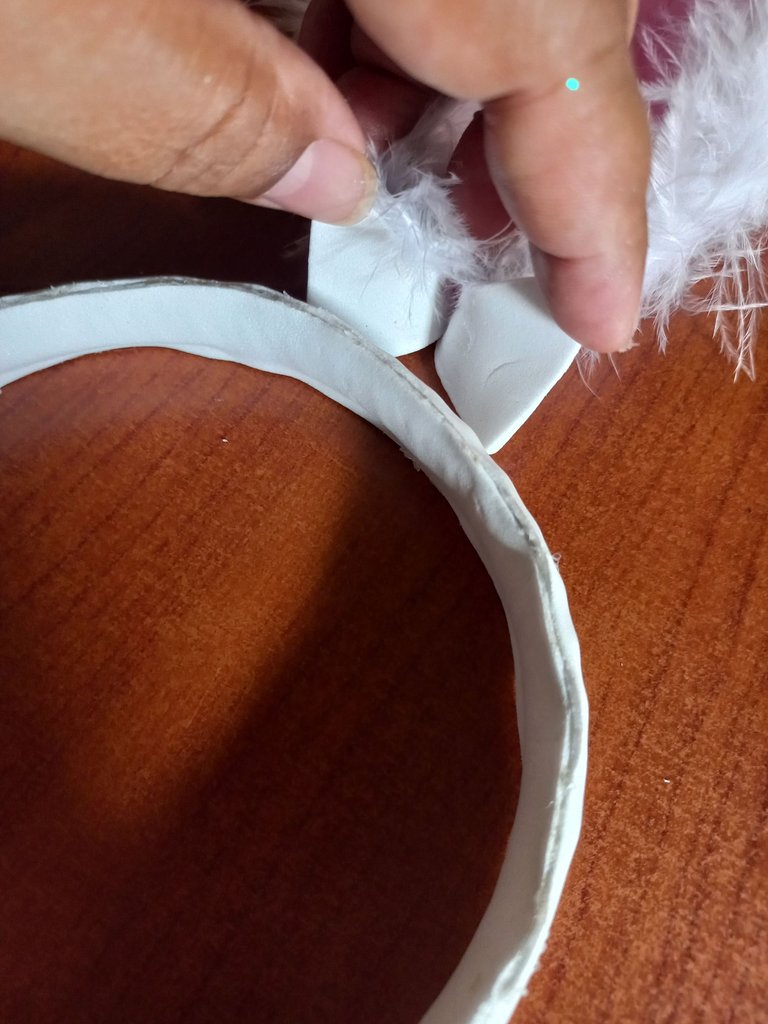
Ahora vamos a unir todas las piezas y darle ese toque especial que hará que nuestras orejas de conejo sean únicas y adorables: Tomamos las orejas y cubrimos todo el borde con la suave cinta de marabú. Esto les dará un acabado encantador y esponjoso. Pegamos la base de las orejas al cintillo, asegurándonos de que queden bien fijadas y en la posición correcta. Para un acabado perfecto, cubrimos la unión entre las orejas y el cintillo con más cinta de marabú. Esto no solo ocultará las uniones, sino que añadirá un toque extra de estilo.
Now let's put all the pieces together and give it that special touch that will make our bunny ears unique and adorable: We take the ears and cover the whole edge with the soft marabou ribbon. This will give them a lovely fluffy finish. We glue the base of the ears to the headband, making sure they are secure and in the right position. For a perfect finish, we cover the joint between the ears and the headband with more marabou tape. This will not only hide the joints, but will add an extra touch of style.
 |  |
|---|
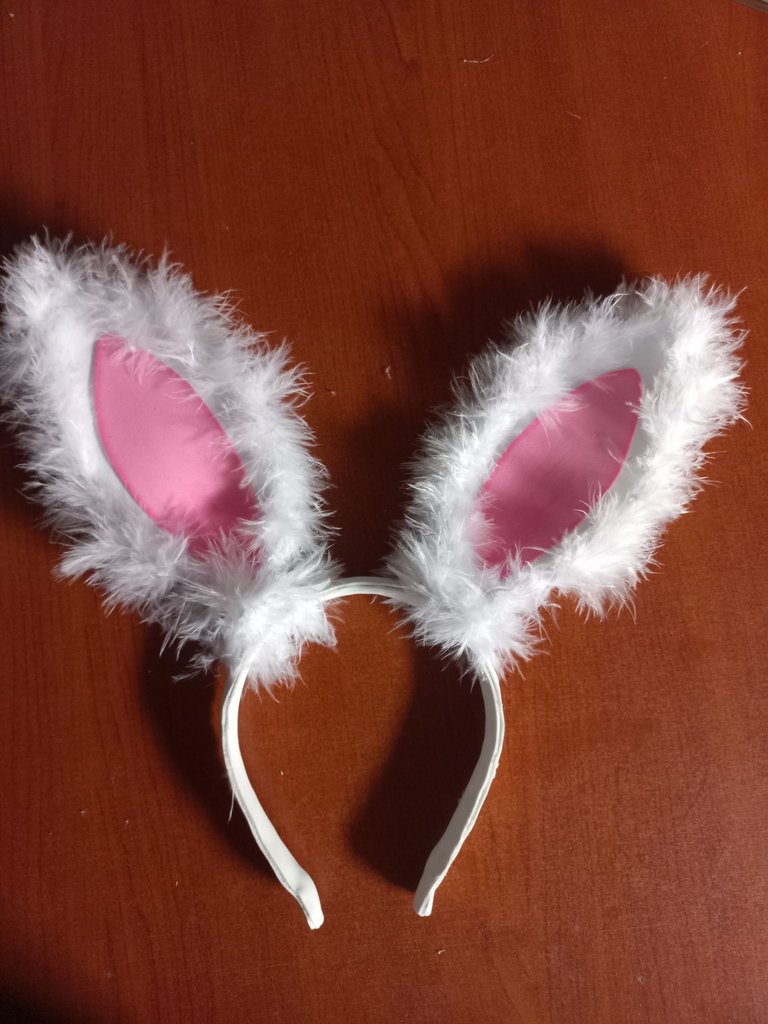
Nuestras orejas de conejo están listas para lucirlas espectacularmente. ¡Disfruta del resultado!
Our rabbit ears are ready to show off spectacularly - enjoy the result!
Foto de mi autoría / Photo by me
Traducción: DeepL Translate / Translation: DeepL Translate
Traducción: DeepL Translate / Translation: DeepL Translate
Quedaron lindas las orejas de conejo, me imagino la alegría de su nieto al llevar con orgullo su disfraz, esta es la mejor etapa de los niños 🥰, felicidades por tan lindo trabajo 😊
Me alegra que te hayan gustado. La verdad es que ver la sonrisa de mi nieto al llevar su disfraz es lo mejor de todo. ¡Es una etapa tan mágica y llena de imaginación! 🐰✨ Agradezco tus palabras, ¡Un abrazo! 🥰
Congratulations @mily0202! You have completed the following achievement on the Hive blockchain And have been rewarded with New badge(s)
Your next target is to reach 20 posts.
You can view your badges on your board and compare yourself to others in the Ranking
If you no longer want to receive notifications, reply to this comment with the word
STOPCheck out our last posts:
It is stylish, elegant, and beautiful. Love its design. It looks amazing. Nice work! Keep it up!
Thank you so much! 😊 I'm glad you liked it. Your support means a lot to me. i'll keep working with enthusiasm! hugs! 🌟✨
Te quedaron super bellas😍😍, nuestro bebé si que lucio en su actividad con tan hermosa creación!!