
Hola hiver's como están ,como está la comunidad DIY ? Hoy quiero compartirles un nuevo modelo de moño para decorar nuestro cabello , con unos efecto de pétalo que lo hace ver muy bonito pero también elegante para aquellas que no las convence tanto la moda de lazos coquette 😊tranquilas hay para todas, está opción está muy lindo pero no luce tan infantil o aniñado ,como los lazos más grandes , tiene un toque más serio , ideal para adornar una colita de caballo ,o una media cola ,y darle un toque más profesional o serio.
materiales
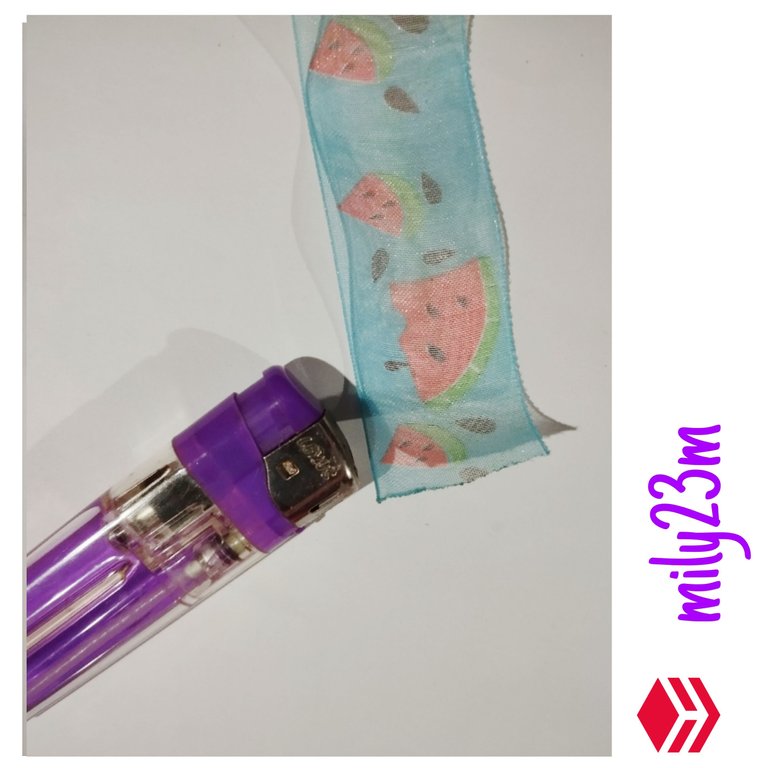
- Cinta organza
- Tijeras
- Hilo y aguja
- Yesquero
- Pistola de silicón caliente y barras de silicón.
- Regla
Hello Hiver's, how are you, how is the DIY community? Today I want to share with you a new bun model to decorate our hair, with a petal effect that makes it look very pretty but also elegant for those who are not so convinced by the fashion of flirty bows 😊don't worry, there is something for everyone.This option is very cute but it doesn't look as childish or childlike, like the larger bows, it has a more serious touch, ideal for decorating a ponytail, or a half-tail, and giving it that extra touch.
materials
- Organza ribbon
- Scissors
- Thread and needle
- Tinderbox
- Hot glue gun and silicone bars.
- Ruler
 )
)
 )
)
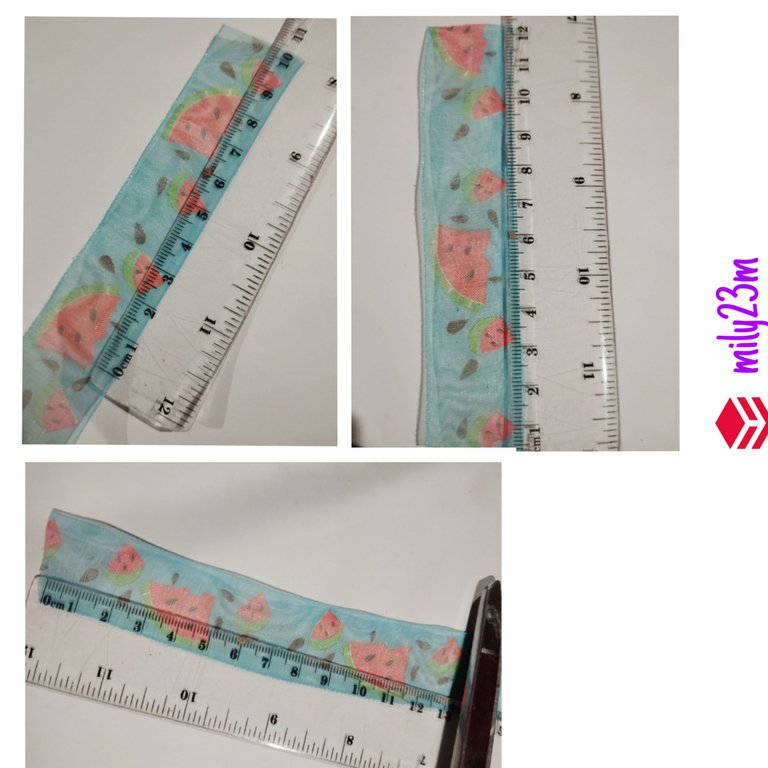
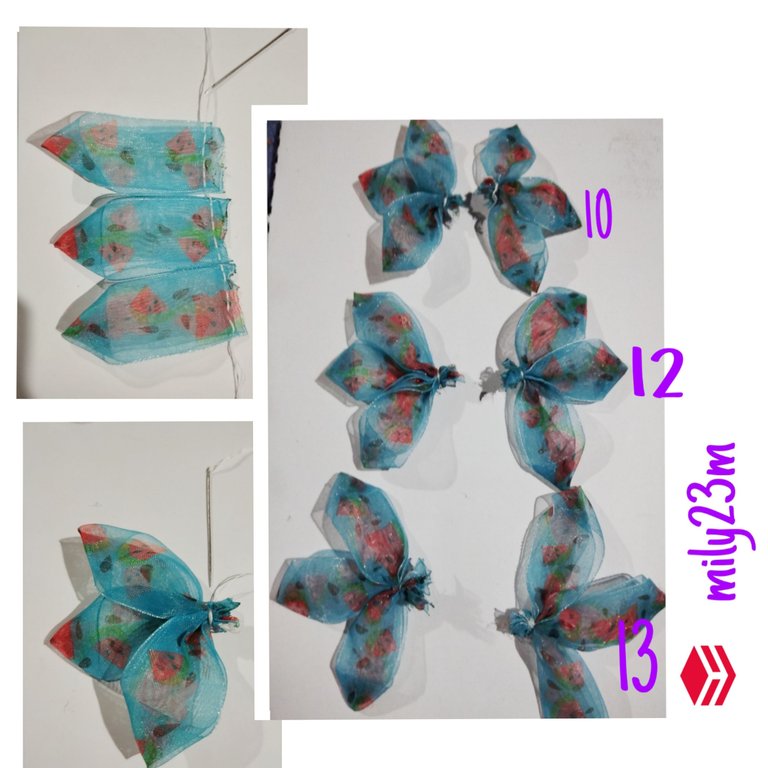
- Cortaremos los listones en tres tamaños diferentes , 3 listones de 10cm, 3 listones de 12 cm, 3 listones de 13cm, con un Yesquero cauterizar los extremos para que no se deshilache.
- We will cut the slats in three different sizes, 3 10cm slats, 3 12cm slats, 3 13cm slats, with a Plasterer cauterize the ends so that they do not fray
 )
)
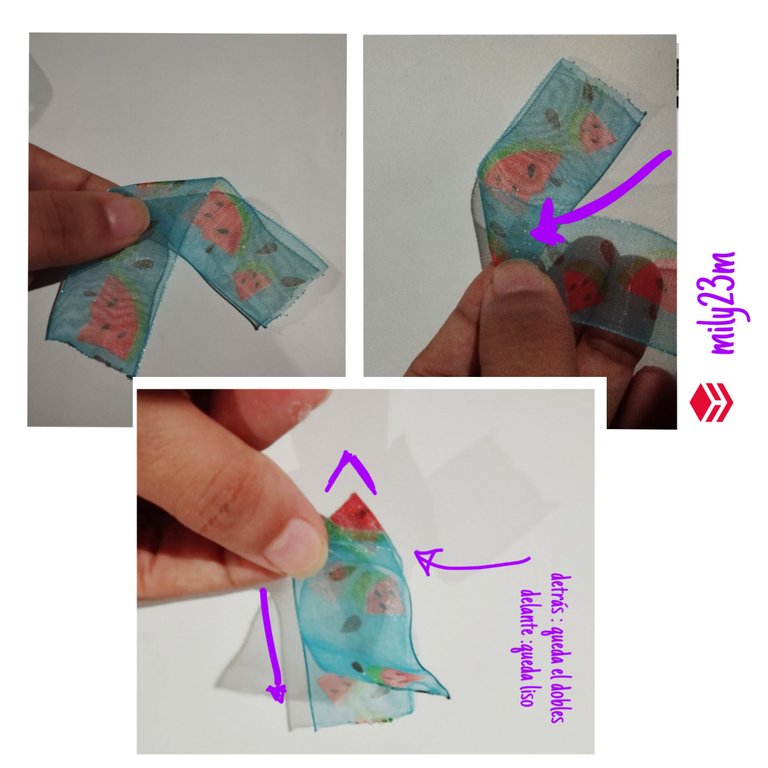
2.Para hacer los pétalos, tomamos el listón y lo doblamos , la idea es abrirlo y hacer una v ,colocar un pequeño punto de silicón caliente,y doblar ,tienes que tener en cuenta que es untar apenas el silicón para que no quede una mancha , también puedes hacerlo con silicón frío para mayor facilidad ,puedes verlo como una especie de triangulo ,que doblas a la mitad para formar el pico ,esto será el pétalo, hacer lo mismo con los 9 listones.
2.To make the petals, we take the ribbon and fold it, the idea is to open it and make a v, place a small dot of hot silicone, and fold, You have to keep in mind that you only need to spread the silicone so that there is no stain left. You can also do it with cold silicone for greater ease. ,you can see it as a kind of triangle,which you fold in half to form the peak, this will be the petal, do the same with the 9 ribbons.
 )
)
3.Por cada tres listones del mismo tamaño, con la aguja e hilo, coser y halar para que pueda juntarse, darle algunas vueltas con el hilo para asegurar, te quedarán 3 piezas de pétalos de tres tamaños.
3.For every three ribbons of the same size, with the needle and thread, sew and pull so that it can come together, turn it a few times with the thread to secure, you will have 3 pieces of petals of three sizes.
 )
)
4.Colocar una gota de silicón en el medio de los petalos más grandes, y poner el pétalo mediano, a este colocar una gota de silicón y poner encima los pétalos más pequeños ,asegurar con unas puntadas de hilo, hacer esto con los otros también, de forma que quedarán dos piezas del lazo , para unirlo junte las dos piezas encima una de la otra tratando que quede lo más recto posible ,con puntadas de hilo y le dí varias vueltas para asegurarlo.Puedes dejarlo con hilo ,pero para mejor apariencia tapar con un listo la unión.
4.Place a drop of silicone in the middle of the largest petals, and put the medium petal, place a drop of silicone on this and put the smallest petals on top, secure with a few stitches ,Do this with the others as well, so that there will be two pieces of the bow, to join it, join the two pieces on top of each other, trying to make it as straight as possible, with thread stitches and and gave it several turns to secure it. You can leave it with thread, but for a better appearance cover the joint with a tape.
 )
)
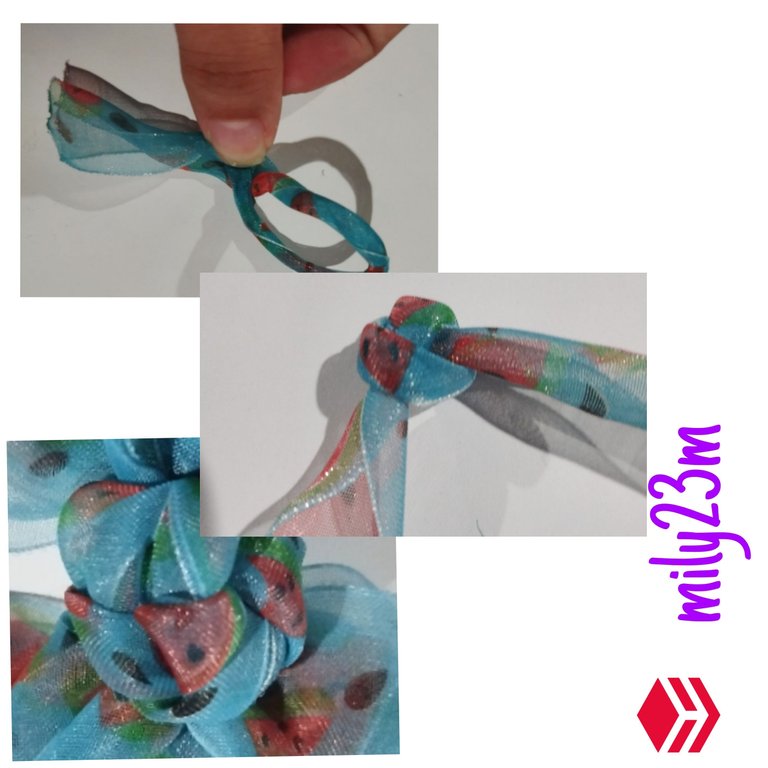
5.Con un liston de aproximadamente 12cm , lo enrolle e hice un nudo suelto, luego hice otro nudo ,y por tercera vez otro nudo ,la idea es ir enrollando los extremos ,de forma que quede una especie de rosita, con silicón caliente lo pegue al centro del lazo.Depende de a dónde lo quieres colocar lo puedes pegar en un cintillo,o en un gancho.
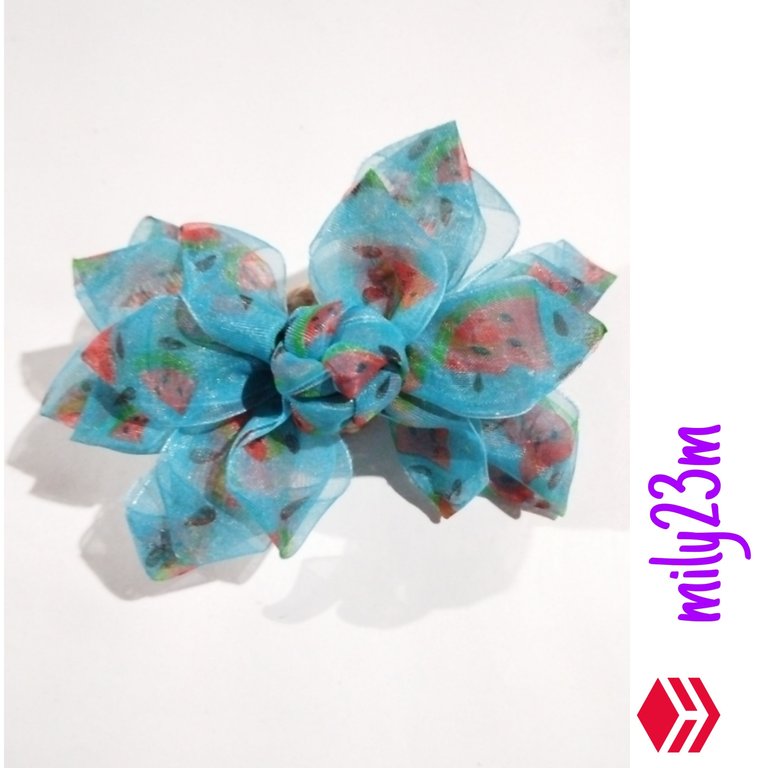
Y listo ! Así quedaría , queda muy bonito y elegante , todo sería que toque le puedas dar !☺️💞.
5.With a ribbon of approximately 12 cm, I rolled it up and made a loose knot, then I made another knot, and for the third time another knot, the idea is to roll the ends,so that it is a kind of little rose, with hot silicone I glue it to the center of the bow. Depending on where you want to place it, you can glue it on a headband, or on a hook.
And ready ! This is how it would look, it looks very pretty and elegant, everything would be what touch you can give it!☺️💞.
 )
)
Muchas gracias por leerme espero que les gustará , si tienen algún comentario es bienvenido me gustaría leerlos😊.
Imágenes tomadas por mi , equipo Redmi Note 12, fotos editadas en Pics art , portada y banners , creadas en Inshoot y creador de gifs , Traducido en Google translate.
Thank you very much for reading I hope you like it, if you have any comments it is welcome I would like to read them😊.
Images taken by me, Redmi Note 12 team, photos edited in Pics art, cover and banners, created in Inshoot and gif creator, Translated in Google translate.
Very beautiful!
Thank you very much @danigada18 ☺️💙 I'm glad you liked it
Congratulations @mily23m! You have completed the following achievement on the Hive blockchain And have been rewarded with New badge(s)
Your next target is to reach 400 upvotes.
You can view your badges on your board and compare yourself to others in the Ranking
If you no longer want to receive notifications, reply to this comment with the word
STOP