Aunque hoy día hay aplicaciones y filtros para salir bellas en las fotos aunque estés en tu peor momento y sin necesidad de maquillaje, es posible que te haya pasado muchas veces que toman una foto en alguna fiesta o reunión o como es mi caso que me tomo fotos para mis redes de trabajo y no da tiempo de siquiera maquillarse. En estos casos, recurrir a Photoshop es una opción clásica y que personalmente es mi opción favorita para editar fotos.
En esta oportunidad les voy a mostrar un breve pero muy práctico tutorial que aprendí hace muchos años y que hoy día sigo utilizando y es sobre cómo cambiar el color de labios de una manera bastante realista.
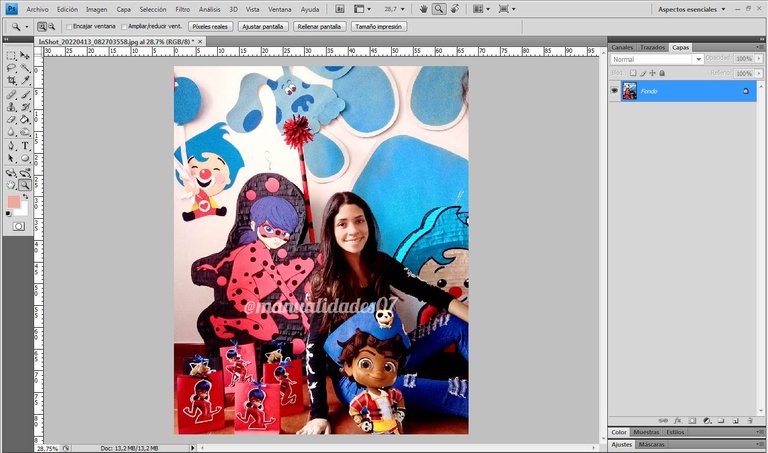
En primer lugar lo que vamos a hacer es abrir la imagen en Photoshop, no te preocupes si no tienes una versión muy moderna, las funciones que vamos a utilizar hoy son básicas de este programa. También creo que existe Photoshop online por si no lo tienen instalado en sus computadoras.
Although today there are applications and filters to look beautiful in photos even if you are at your worst and without makeup, it is possible that it has happened to you many times that you take a picture at a party or meeting or as is my case that I take pictures for my work networks and there is no time to even make up. In these cases, resorting to Photoshop is a classic option and it is personally my favorite option to edit photos.

In this opportunity I am going to show you a brief but very practical tutorial that I learned many years ago and that I still use today and it is about how to change the lip color in a very realistic way.

First of all what we are going to do is open the image in Photoshop, don't worry if you don't have a very modern version, the functions we are going to use today are basic of this program. I also believe there is Photoshop online in case you don't have it installed on your computer.
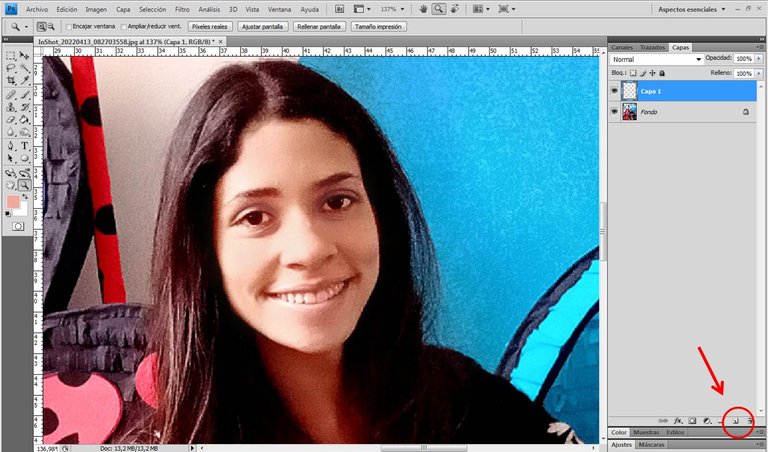
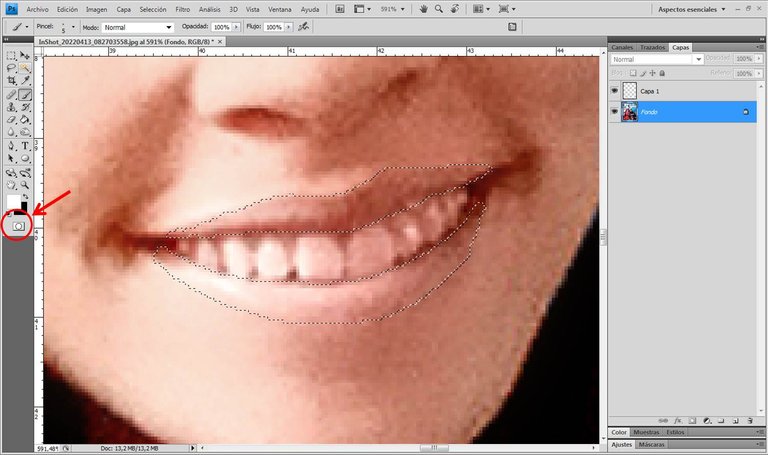
Una vez abierta la foto, vamos a crear una nueva capa.
Once the photo is open, we are going to create a new layer.
Luego le vamos a dar clic en el icono de Mascara rápida, automáticamente los colores se van a configurar en blanco y negro y así se debe quedar.
Siempre vamos a trabajar sobre la imagen original, no en la capa creada.
Then we are going to click on the Quick Mask icon, automatically the colors will be set to black and white and it should stay that way.

We will always work on the original image, not on the created layer.
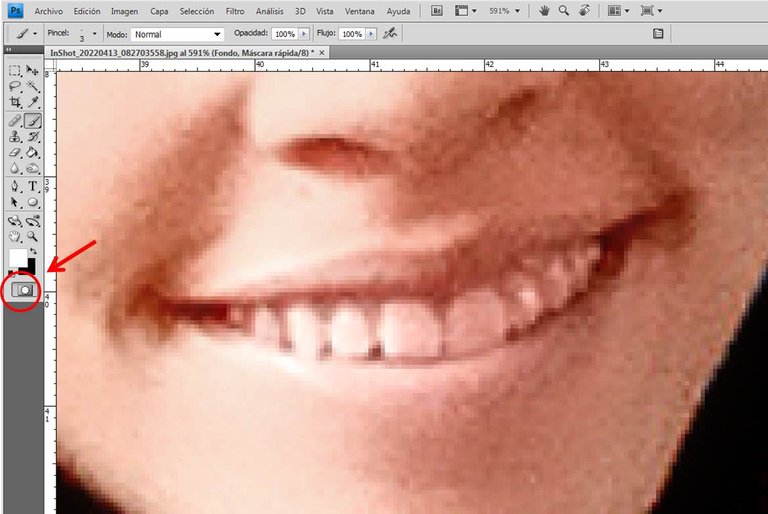
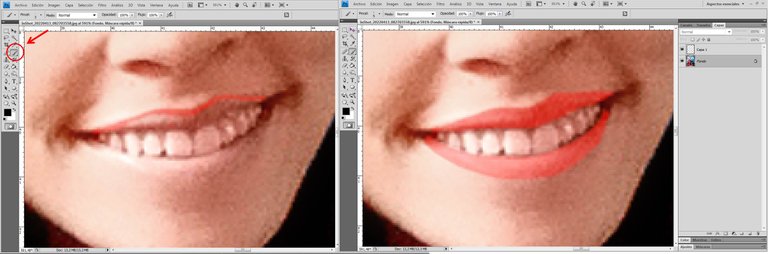
Ya seleccionada la Máscara rápida, comenzamos a delinear con la herramienta pincel con mucho cuidado de no seleccionar los dientes, partes de la encía o alrededor de los labios.
Recomiendo establecer la configuración del pincel con una opacidad menor a 100% para que no queden los bordes del labio tan definidos; yo no lo hice en esta oportunidad porque mi foto no es muy nítida, igualmente esto siempre va a depender de la calidad de tus fotos y el acabado que desees conseguir.
Once the Quick Mask is selected, we start to outline with the brush tool being very careful not to select the teeth, parts of the gum or around the lips.

I recommend setting the brush settings with an opacity lower than 100% so that the edges of the lip are not so defined; I did not do it this time because my photo is not very sharp, but this will always depend on the quality of your photos and the finish you want to achieve.
Terminado este proceso, volvemos a darle clic al icono de Máscara rápida y de esta manera, nuestra boca se va a ver seleccionada con un montón de rayitas grises que se mueven alrededor de la pieza. En este momento lo que queda seleccionado es todo lo que está afuera de esta selección, por lo que vamos a darle a – Selección – Invertir – y ahora si tenemos seleccionada nuestra boca.
Como esas rayitas no nos permiten ver bien el trabajo, nos vamos a - Vista - Extras – y desmarcamos esa opción, lo que va a hacer esta acción es que a pesar de que la pieza sigue seleccionada, no vamos a ver las rayitas y podremos jugar mejor con los colores.
Once this process is finished, click again on the Quick Mask icon and this way, our mouth will be selected with a bunch of little gray lines that move around the piece. At this point what remains selected is everything that is outside this selection, so let's click on - Selection - Invert - and now we have our mouth selected.

As these lines do not allow us to see the work well, we go to - View - Extras - and uncheck that option, what this action will do is that although the piece is still selected, we will not see the lines and we can play better with the colors.
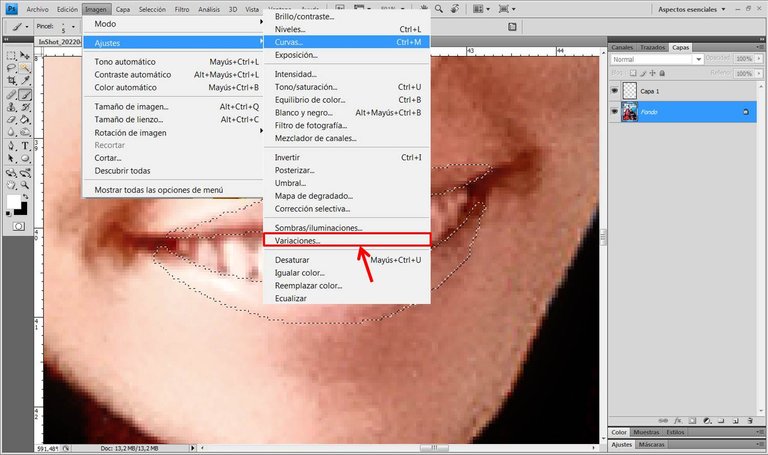
Ahora sí, la parte divertida.
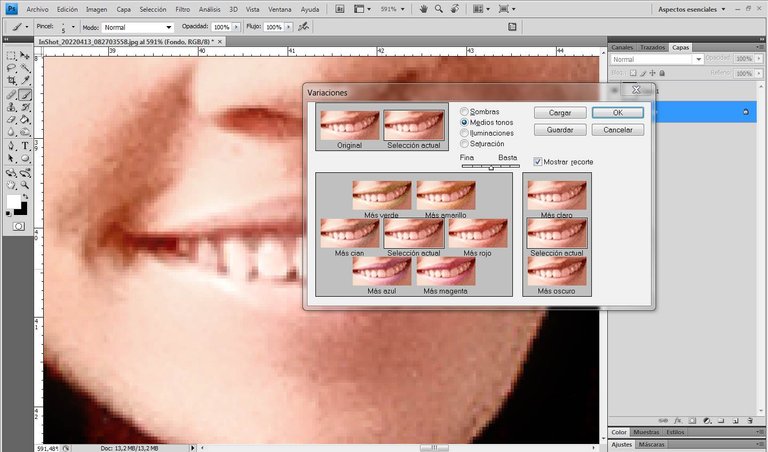
Ya con nuestra boca seleccionada vamos a ir – Imagen – Ajustes – Variaciones -. A mí me fascina esta opción porque te permite jugar con las tonalidades de una manera muy amplia; si la quieres más roja, más azul, mas verde, más claro, más oscuro; y te va a arrojando una vista previa de cómo se verá una vez que le des a -Ok- o -aceptar-.
Now, the fun part.

Now with our mouth selected we go to - Image - Adjustments - Variations -. I love this option because it allows you to play with the tonalities in a very wide way; if you want it more red, more blue, more green, lighter, darker; and it will give you a preview of how it will look once you press -Ok- or -accept-.
Aquí estuve jugando un buen rato y no encontraba qué color escoger para presentarles así que escogí varios.
Here I was playing around for a while and I couldn't figure out which color to choose to present to you so I chose several.

¿Por qué prefiero esta técnica por sobre las aplicaciones móviles?
Puede ser porque sea vieja escuela (no tan vieja) y en muchas cosas no termino de adaptarme a usar un celular para todo.
Pero también, he intentado hacer esto en aplicaciones, así como disimular las ojeras u otros efectos con los que a veces edito mis fotos para no verme tan zombi y no he conseguido nada que haga un trabajo tan detallado, es súper difícil delinear un labio en el teléfono con el dedo.
Espero como siempre que este tutorial te sea de utilidad.
Gracias por leerme.
Why do I prefer this technique over mobile apps?

It may be because I'm old school (not so old) and in many things I don't quite adapt to using a cell phone for everything.

But also, I've tried to do this in apps, as well as disguise dark circles or other effects that I sometimes edit my photos with to not look so zombie-like and I haven't gotten anything that does such a detailed job, it's super hard to outline a lip on the phone with your finger.

I hope as always you find this tutorial helpful.

Thanks for reading.
Translated with www.DeepL.com/Translator (free version)

The rewards earned on this comment will go directly to the person sharing the post on Twitter as long as they are registered with @poshtoken. Sign up at https://hiveposh.com.
Nunca lo he utilizado, gracias por el tutorial, me gustó 😘❤️
Ah bueno ya sabes. No elimines fotos por verte enferma y sin vida jajajaja. Gracias por tu comentario 😍