
Saludos C/ Hive DIY, Bienvenidos a mi blog. Nos encontramos nuevamente aquí, para seguir compartiendo trabajos manuales, en ésta ocasión les mostraré paso a paso como realicé una linda bolsa de regalo utilizando acetato para lograr una hermosa transparencia. Quédense conmigo...
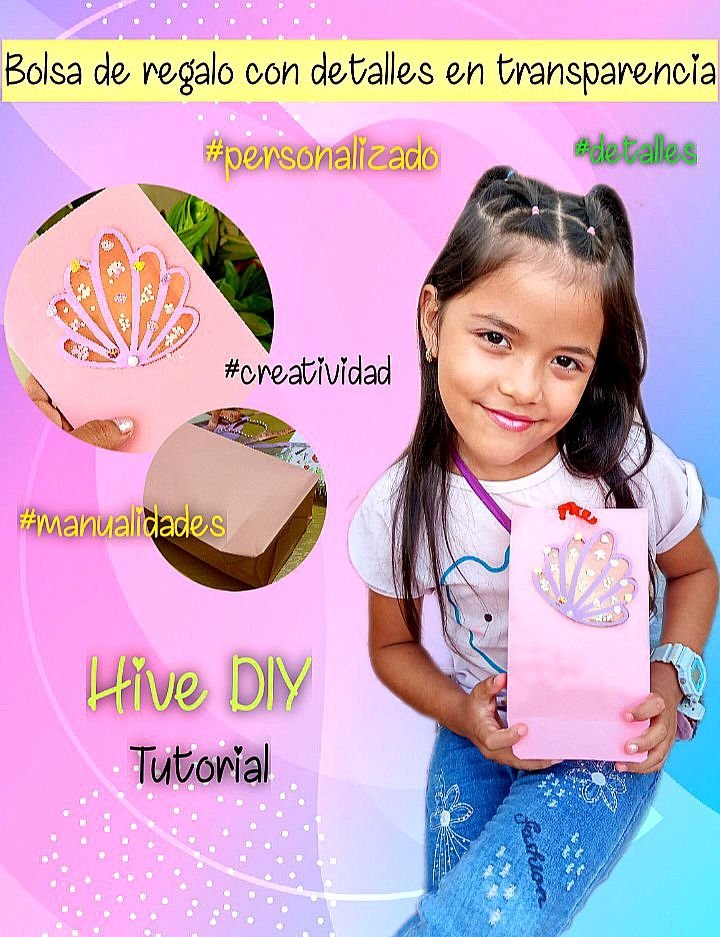
Sabemos que en Hive hay excelentes creadores y cada trabajo tiene su dedicación, su esmero, su esfuerzo y creatividad. Me decidí a realizar ésta bolsa de regalo a propósito del cumpleaños de una amiguita de mi hija (Ma de los Angeles). Ésta bolsita personalizada tiene como foco de atención una ventana realizada con acetato transparente en forma de ostra como parte de la temática de sirena, y lo que para mí es importantísimo es lograr realizar éste trabajo utilizando material reciclado. Sigan conmigo y verán como se hace...
Materiales utilizados
Cartulina rosada (cuadrado de 35 cm ancho x 30 cm de largo), tijeras, pegamento, lapiz.
Cartulina color lila, acetato fino reciclado, pegamento o cinta adhesiva doble cara, tijeras, exacto, regla, cinta métrica de costura, lápiz.
Procedimiento
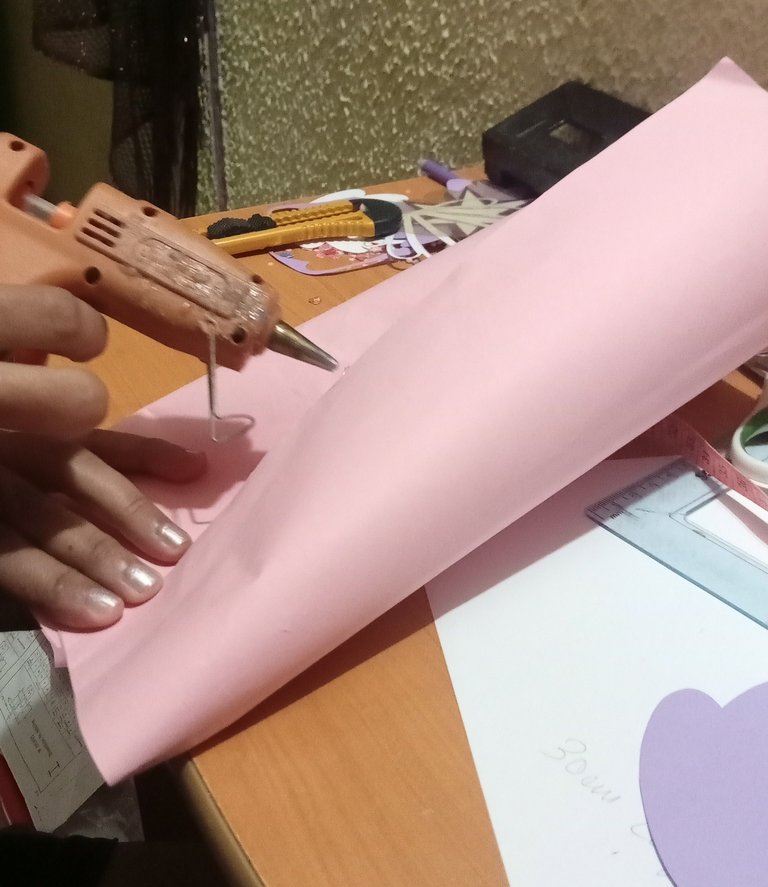
Paso I
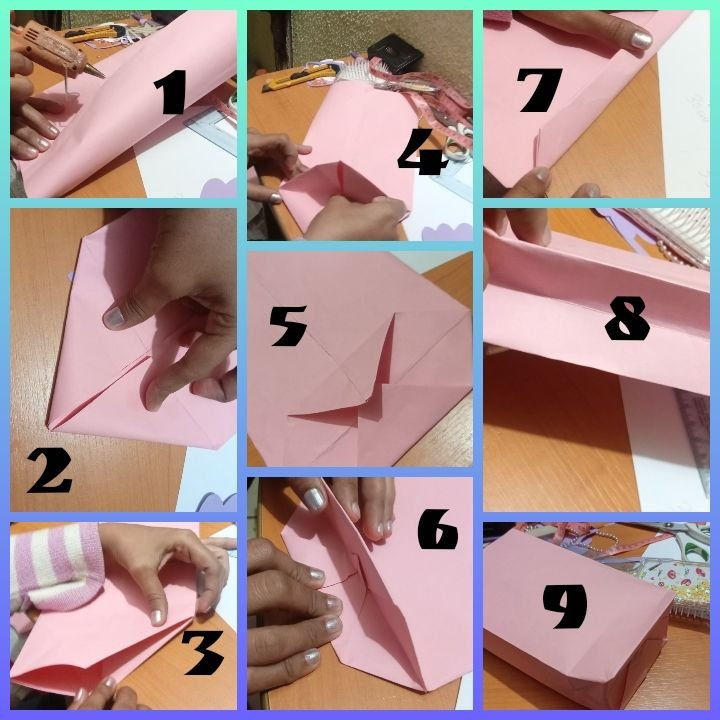
Tenemos un recuadro de cartulina rosada con las siguientes medidas: 35 cm ancho por 30 cm de largo. Tomando lo ancho como referencia, debemos llevar al centro ambos lados y unir con pegamento como se muestra en la imagen.
Seguidamente formar 2 triángulos en uno de los extremos que será parte de la base de nuestra bolsa. Ahora debemos introducir el triángulo formado en cada lado, de la nueva pestaña formada doblar hacia el centro de la base y utilizar pegamento para sellar lo que es ahora la base de nuestra bolsa. Por último doblamos 2 cm en cada lado de la bolsa para terminar con la forma deseada. Para entender mejor el proceso veamos la imagen.
Paso II
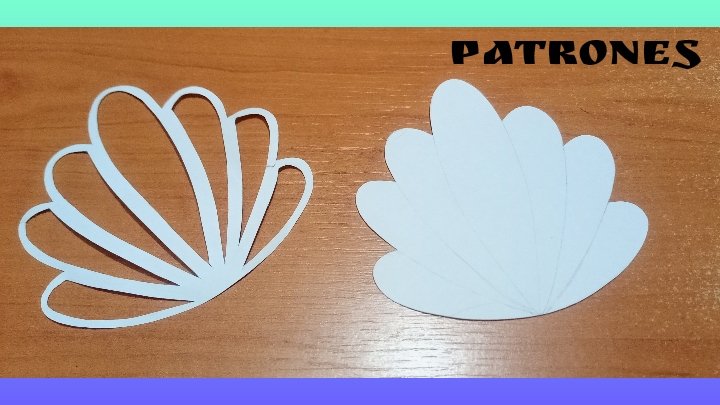
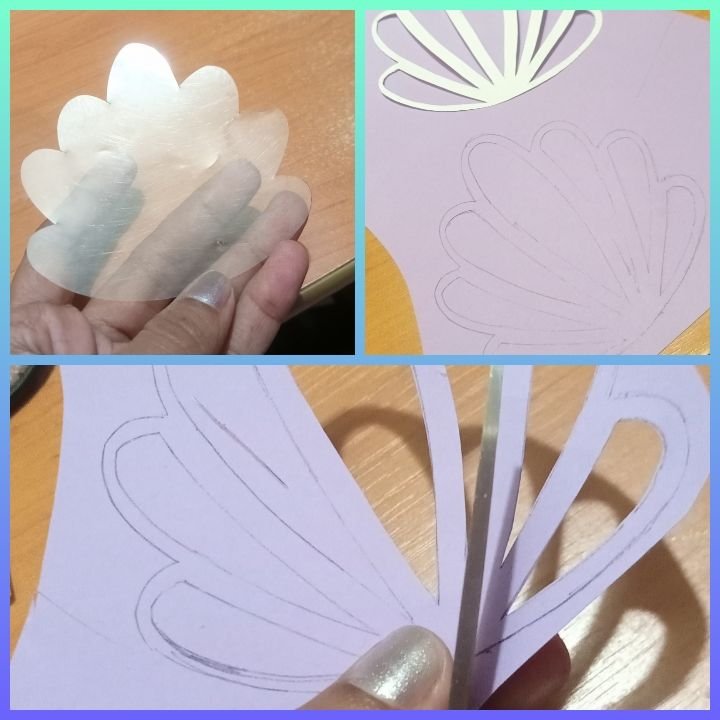
Ya tenemos nuestra bolsa de regalo, vamos a trabajar con la ostra en acetato. Primero debemos hacer los patrones de ostra, en éste caso los realicé a mano, pero pueden buscar en la web. Realicé 2 patrones, una para el acetato, y otra para la cartulina.
Paso III
Vamos a marcar los patrones en el acetato y la cartulina. Ver imágenes.
Paso IV
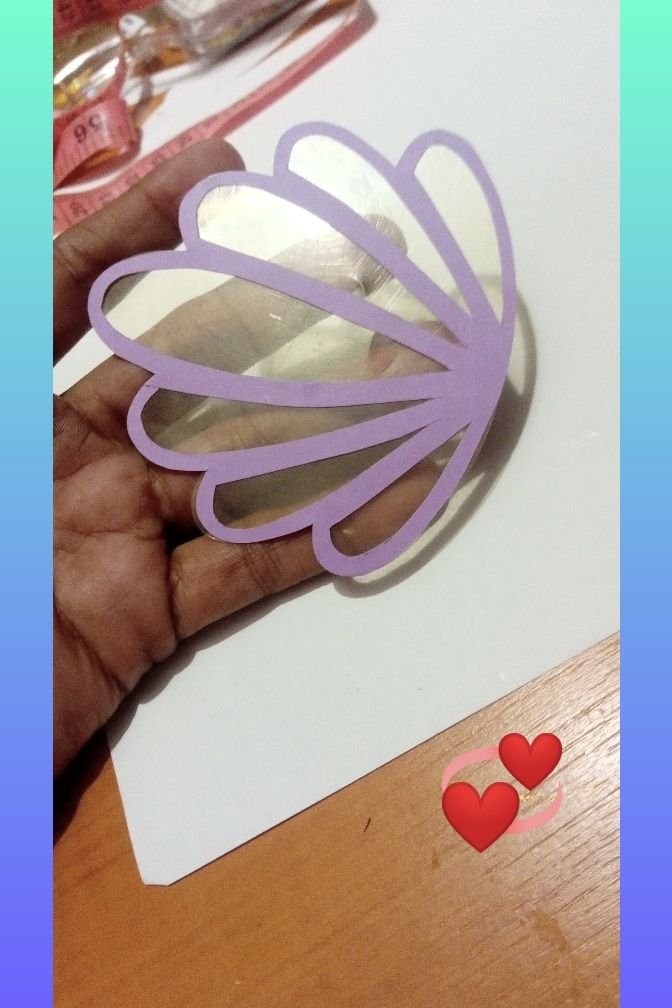
Agregamos pegamento para unir la cartulina y el acetato. Ya ven como queda de hermoso.
Paso V
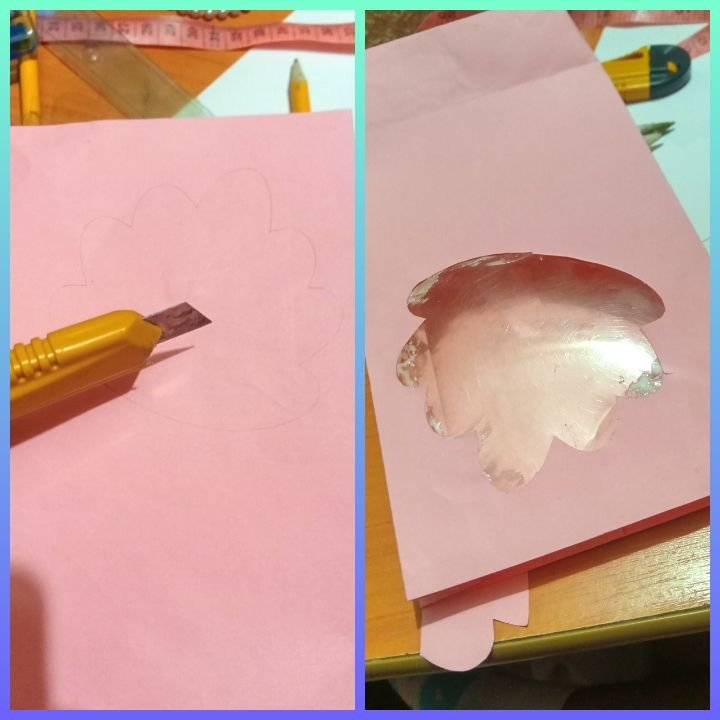
En éste paso marcamos con lápiz la bolsita para saber dónde pegaremos la ostra y cortamos para que se pueda ver el interior de la bolsa.
Paso VI
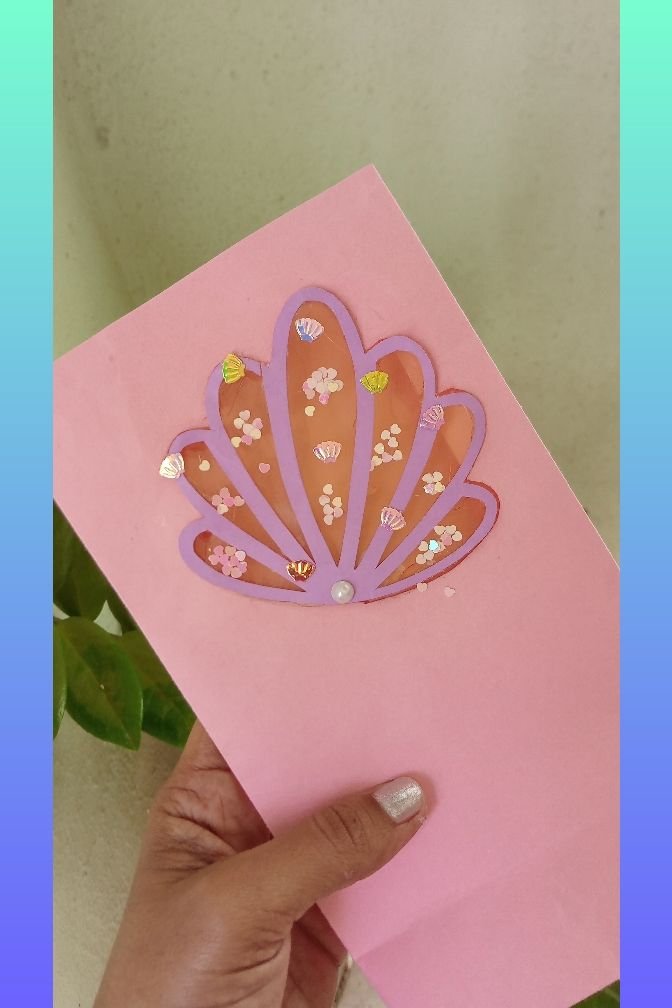
En éste punto agregamos más detalles a la ostra, utilizando confetti de ostra y corazones, que podemos conseguirlo en cualquier mercería. Y por último la pegamos a la bolsa, en la parte donde cortamos para que se vea el interior.

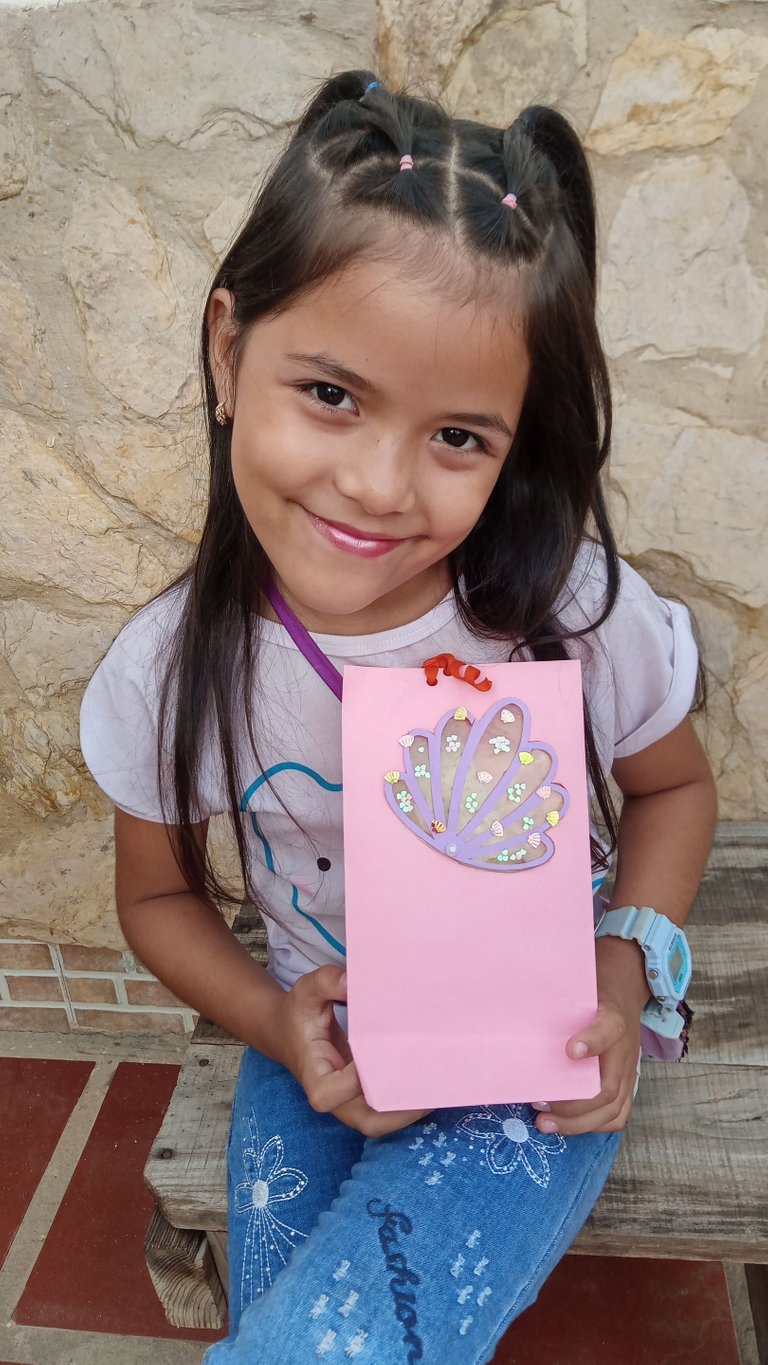
Trabajo terminado
Listo nuestro trabajo. Un detalle para resaltar cualquier obsequio, con mucho cariño, personalizado, y a mi hija le encantó tanto que quiere que le haga una para ella.
Siempre que realicemos trabajos manuales y tengamos la oportunidad de reutilizar materiales no desaprovechemos la ocasión, no sólo activamos la creatividad también podemos contribuimos con la preservación del medio ambiente.
Hasta pronto queridos amigos creativos de DIY, gracias por leer mi post y llegar hasta éste punto.
Utilizado traductor de Google para llevar el post al idioma ingles.
Banner personal y separadores de idiomas hechos en Canva.

Cover made in poster maker.
For the bag.
For the oyster in acetate.
Joining the two sides of our box.
Forming our bag.
Patterns.
Marking and cutting.
Joining the parts of the oyster.
Marking and bag cutting.
The confetti.
Adding the final details.
My doll ready for the birthday of the little friend with the gift.
The photographs are my own, captured with an Alcatel 5007G mobile phone.
Personal banner and language dividers made in Canva.
Greetings C/ Hive DIY, Welcome to my blog. We meet again here, to continue sharing crafts, this time I will show you step by step how I made a nice gift bag using acetate to achieve a beautiful transparency. Stay with me...
We know that in Hive there are excellent creators and each work has their dedication, care, effort and creativity. I decided to make this gift bag for the birthday of a friend of my daughter (Ma de los Angeles). This personalized bag has as its focus a window made with transparent acetate in the shape of an oyster as part of the mermaid theme, and what is very important for me is to be able to carry out this work using recycled material. Follow me and you will see how it is done...
Materials used
Pink construction paper (square 35 cm wide x 30 cm long), scissors, glue, pencil.
Lilac cardboard, thin recycled acetate, glue or double-sided tape, scissors, exact, ruler, sewing tape measure, pencil.
Procedure
Step I
We have a square of pink cardboard with the following measurements: 35 cm wide by 30 cm long. Taking the width as a reference, we must bring both sides to the center and join with glue as shown in the image.
Next, form 2 triangles at one of the ends that will be part of the base of our bag. Now we must introduce the triangle formed on each side, from the new flange formed, fold towards the center of the base and use glue to seal what is now the base of our bag. Finally we fold 2 cm on each side of the bag to finish with the desired shape. To better understand the process let's see the image.
Step II
We already have our gift bag, we are going to work with the oyster in acetate. First we must make the oyster patterns, in this case I made them by hand, but you can search the web. I made 2 patterns, one for the acetate, and one for the cardboard.
Step III
We are going to mark the patterns on the acetate and cardboard. See images.
Step IV
We add glue to join the cardboard and the acetate. You see how beautiful it is.
Step V
In this step we mark the bag with a pencil to know where we will stick the oyster and cut so that the inside of the bag can be seen.
Step VI
At this point we add more details to the oyster, using oyster confetti and hearts, which we can get at any haberdashery. And finally we glue it to the bag, in the part where we cut so that the interior can be seen.
Job done
Ready our work. A detail to highlight any gift, with a lot of love, personalized, and my daughter loved it so much that she wants me to make one for her.
Whenever we do manual work and we have the opportunity to reuse materials, we should not miss the opportunity, not only do we activate creativity, we can also contribute to the preservation of the environment.
< /P>
See you soon dear DIY creative friends, thanks for reading my post and getting to this point.
See Used Google translator to translate the post into English.
Muy linda la bolsita.
Me gustó mucho el detalle de la otra en acetato. Es la bolsa perfecta para entregar un hermoso obsequio. Saludos.