¡¡¡ Saludos y bendiciones, mi hermosa y creativa comunidad de #HiveDiy!!!
Greetings and blessings, my beautiful and creative #HiveDiy community!!!
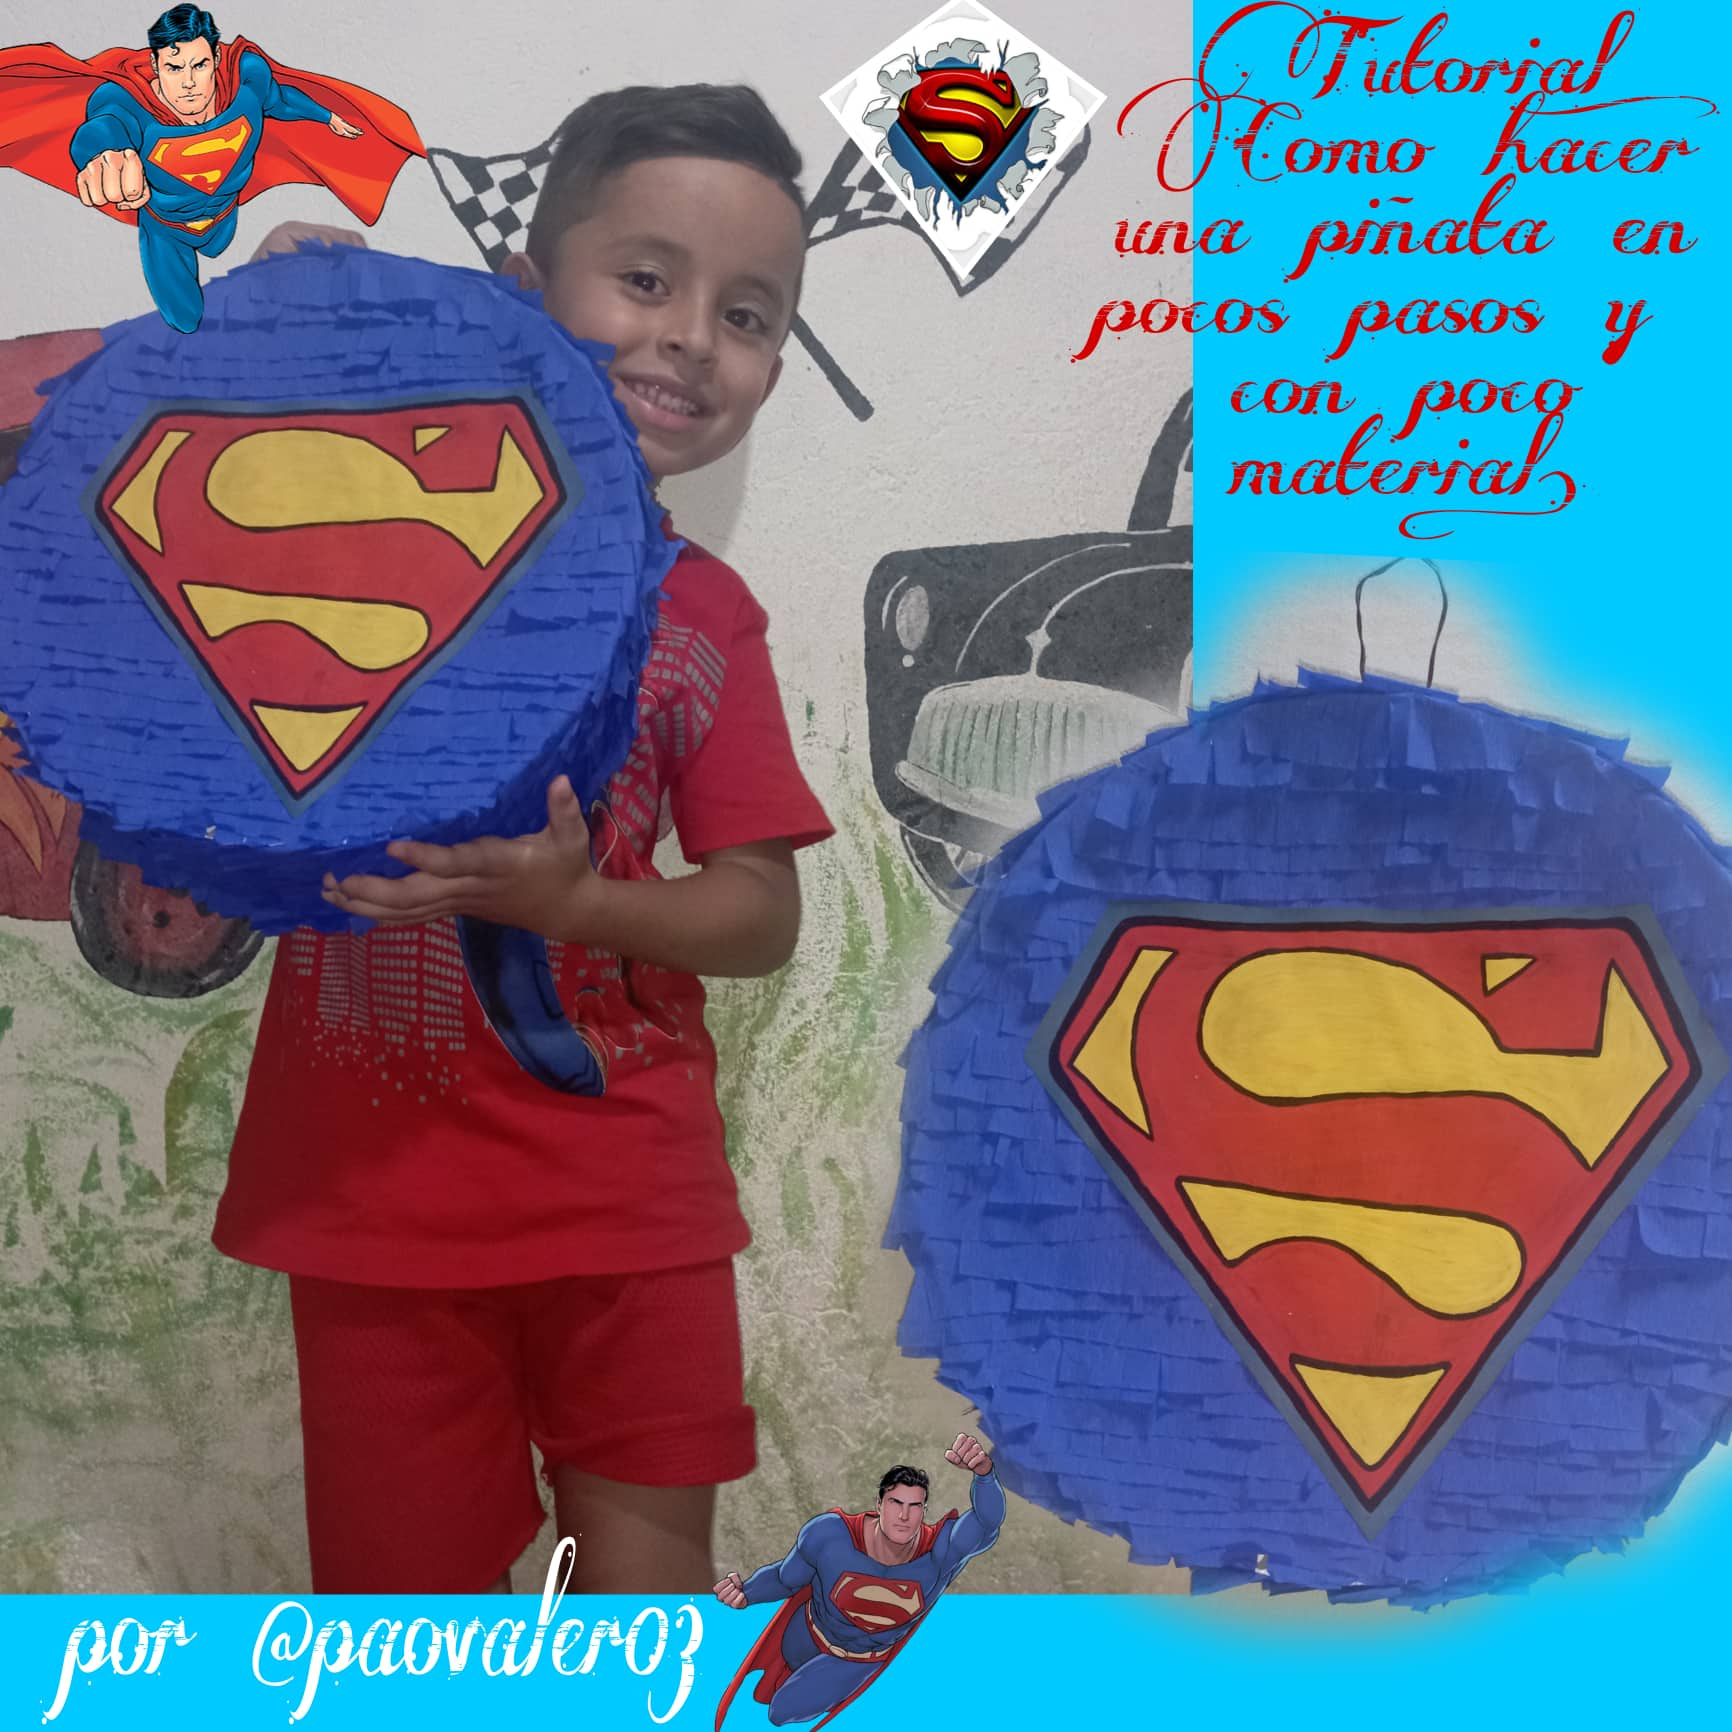
Espero se encuentren muy bien.. que esten pasando un lindo y bendecido miercoles... Les doy la bienvenida a mi blog creativo, en esta oportunidad me gustaria compartir con ustedes la elaboracion de una sencilla pero muy bonita piñata con tematica de "SUPERMAN" que le hice a mi hijo Cesar, ya que se acerca su cumpleaños numero 6, y superman, es su superhéroe favorito.
I hope you are very well... that you are having a nice and blessed Wednesday... I welcome you to my creative blog, this time I would like to share with you the elaboration of a simple but very nice piñata with the theme of "SUPERMAN" that I did to my son Cesar, since his 6th birthday is coming up, and superman, is his favorite superhero.
Desde que nacio mi hijo, simpre ha sido para mi una costumbre que en cada cumpleaños, yo con mis manos, esfuerzo, y dedicacion le hago sus arreglos, piñatas cotillones, Poniendo en ellos ese amor tan grande que siento por el, ver su alegria y emocion, mientras me pongo manos a la obra con todo, no tiene precio alguno. Aunque me falta experiencia, me divertidi mucho con el elaborando su piñata de cumpleaños.
Since my son was born, it has always been a custom for me that on each birthday, with my hands, effort, and dedication, I make his arrangements, party favors piñatas, putting in them that great love that I feel for him, see his joy and emotion, while I get down to work with everything, is priceless. Although I lack experience, I had a lot of fun with him making his birthday piñata.
Espero les guste y se animen a realizar junto a sus hijos esta divertida tarea.. Los invito a que me acompañen hasta el final...
I hope you like it and are encouraged to carry out this fun task with your children. I invite you to accompany me until the end...
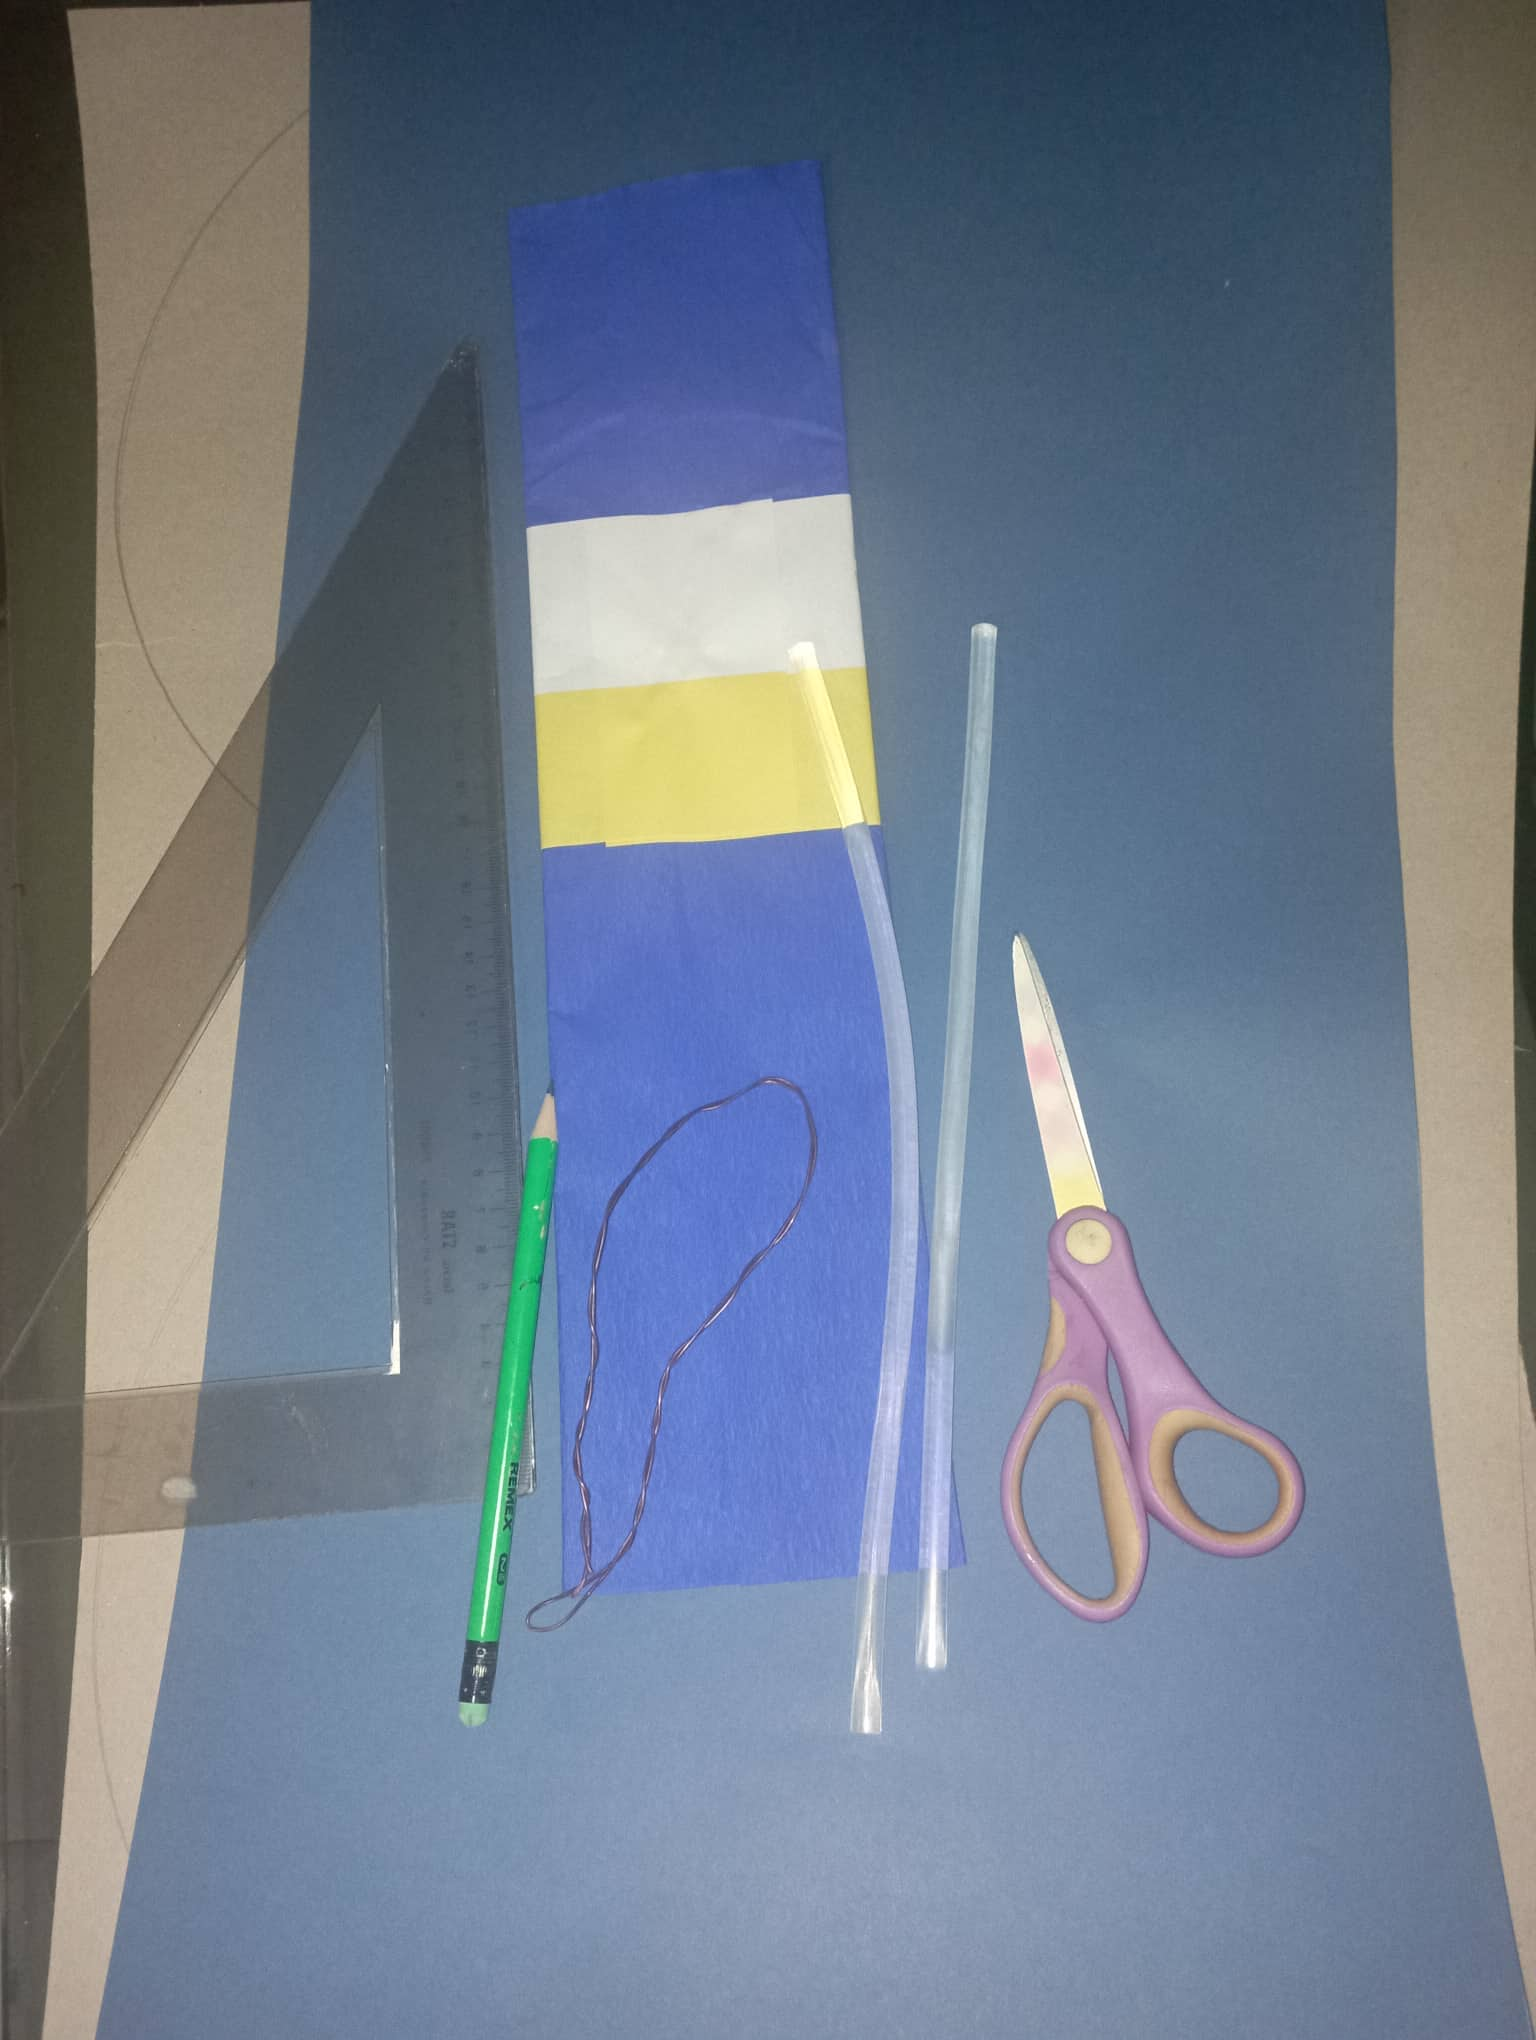
Materiales:
- Carton
- Papel crepe.
- Cartulina azul.
- Silicon caliente.
- Pega blanca.
- Engrudo para piñatas.
- Papel.
- Tijeras.
- Alambre de cobre.
- Pinturas y pinceles.
Materials:
- Cardboard
- Crepe paper.
- Blue cardboard.
- Hot silicone.
- White glue.
- Paste for piñatas.
- Paper.
- Scissors.
- Copper wire.
- Paints and brushes.
Pasos a seguir...
Steps to follow...
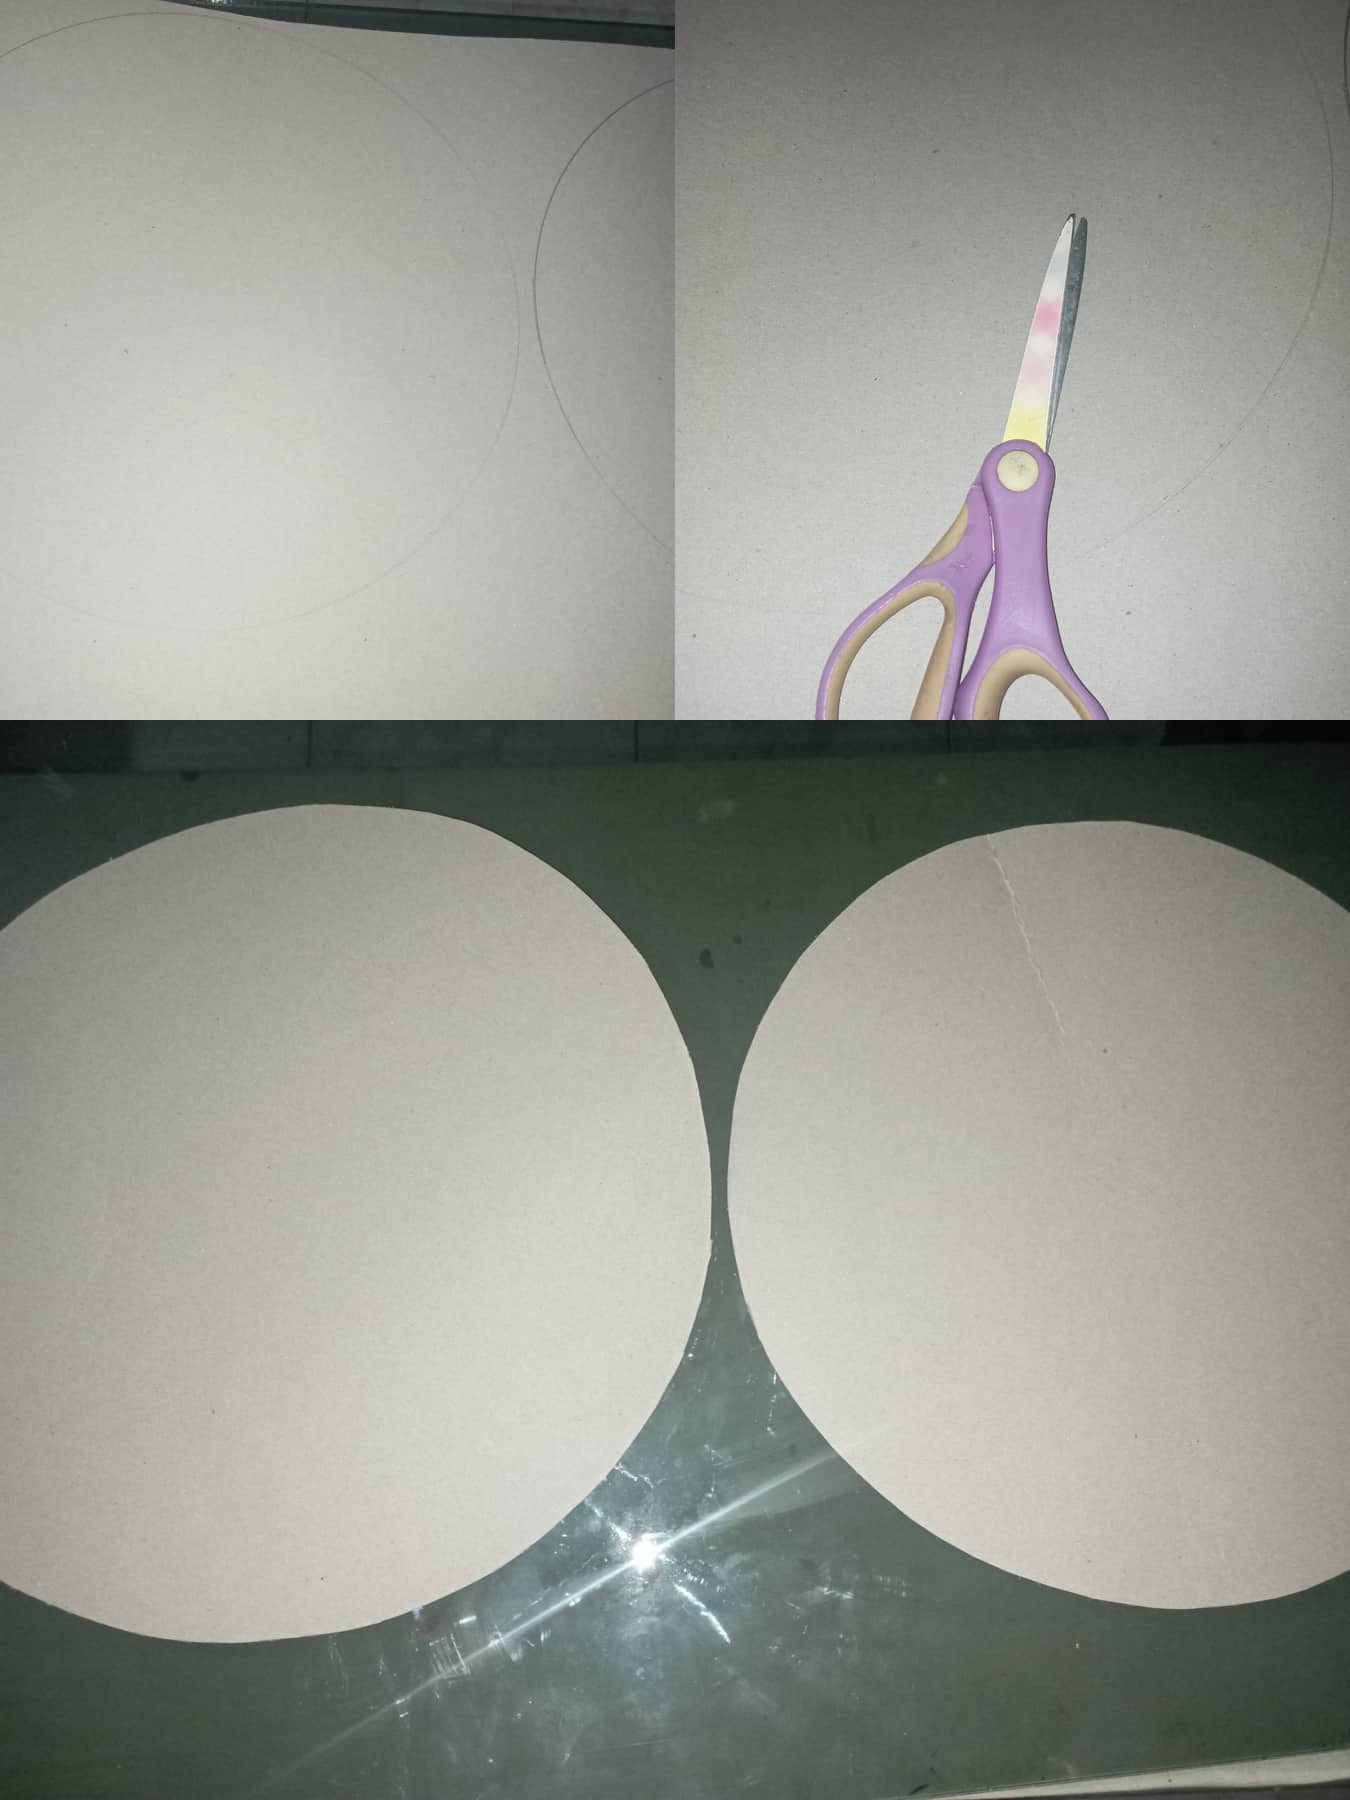
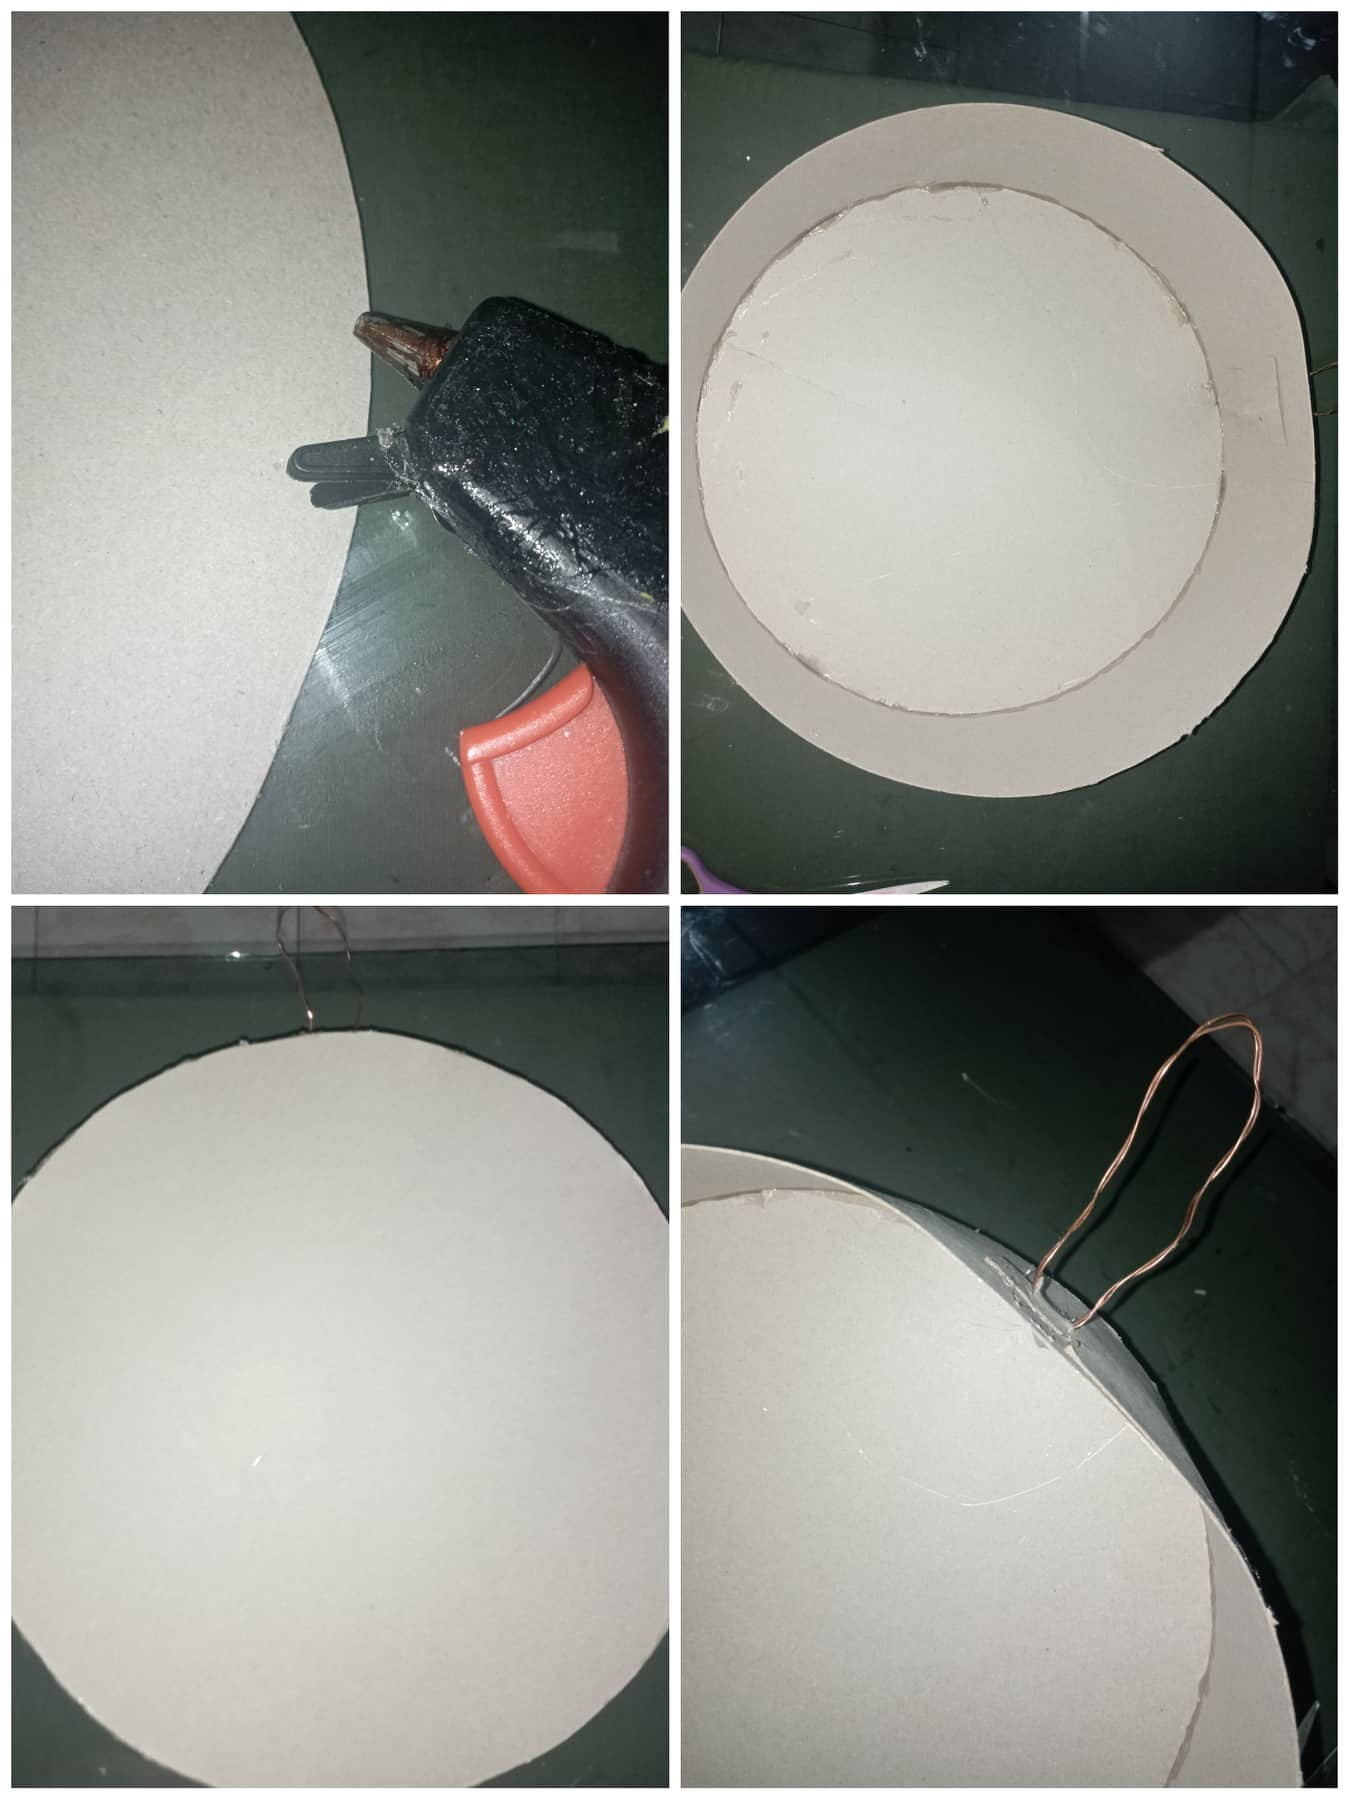
- Lo primero que hice fue marcar en el carton 2 circulos de de 31x31 cm cada uno, y recorte.
- The first thing I did was mark on the cardboard 2 circles of 31x31 cm each, and cut them out.
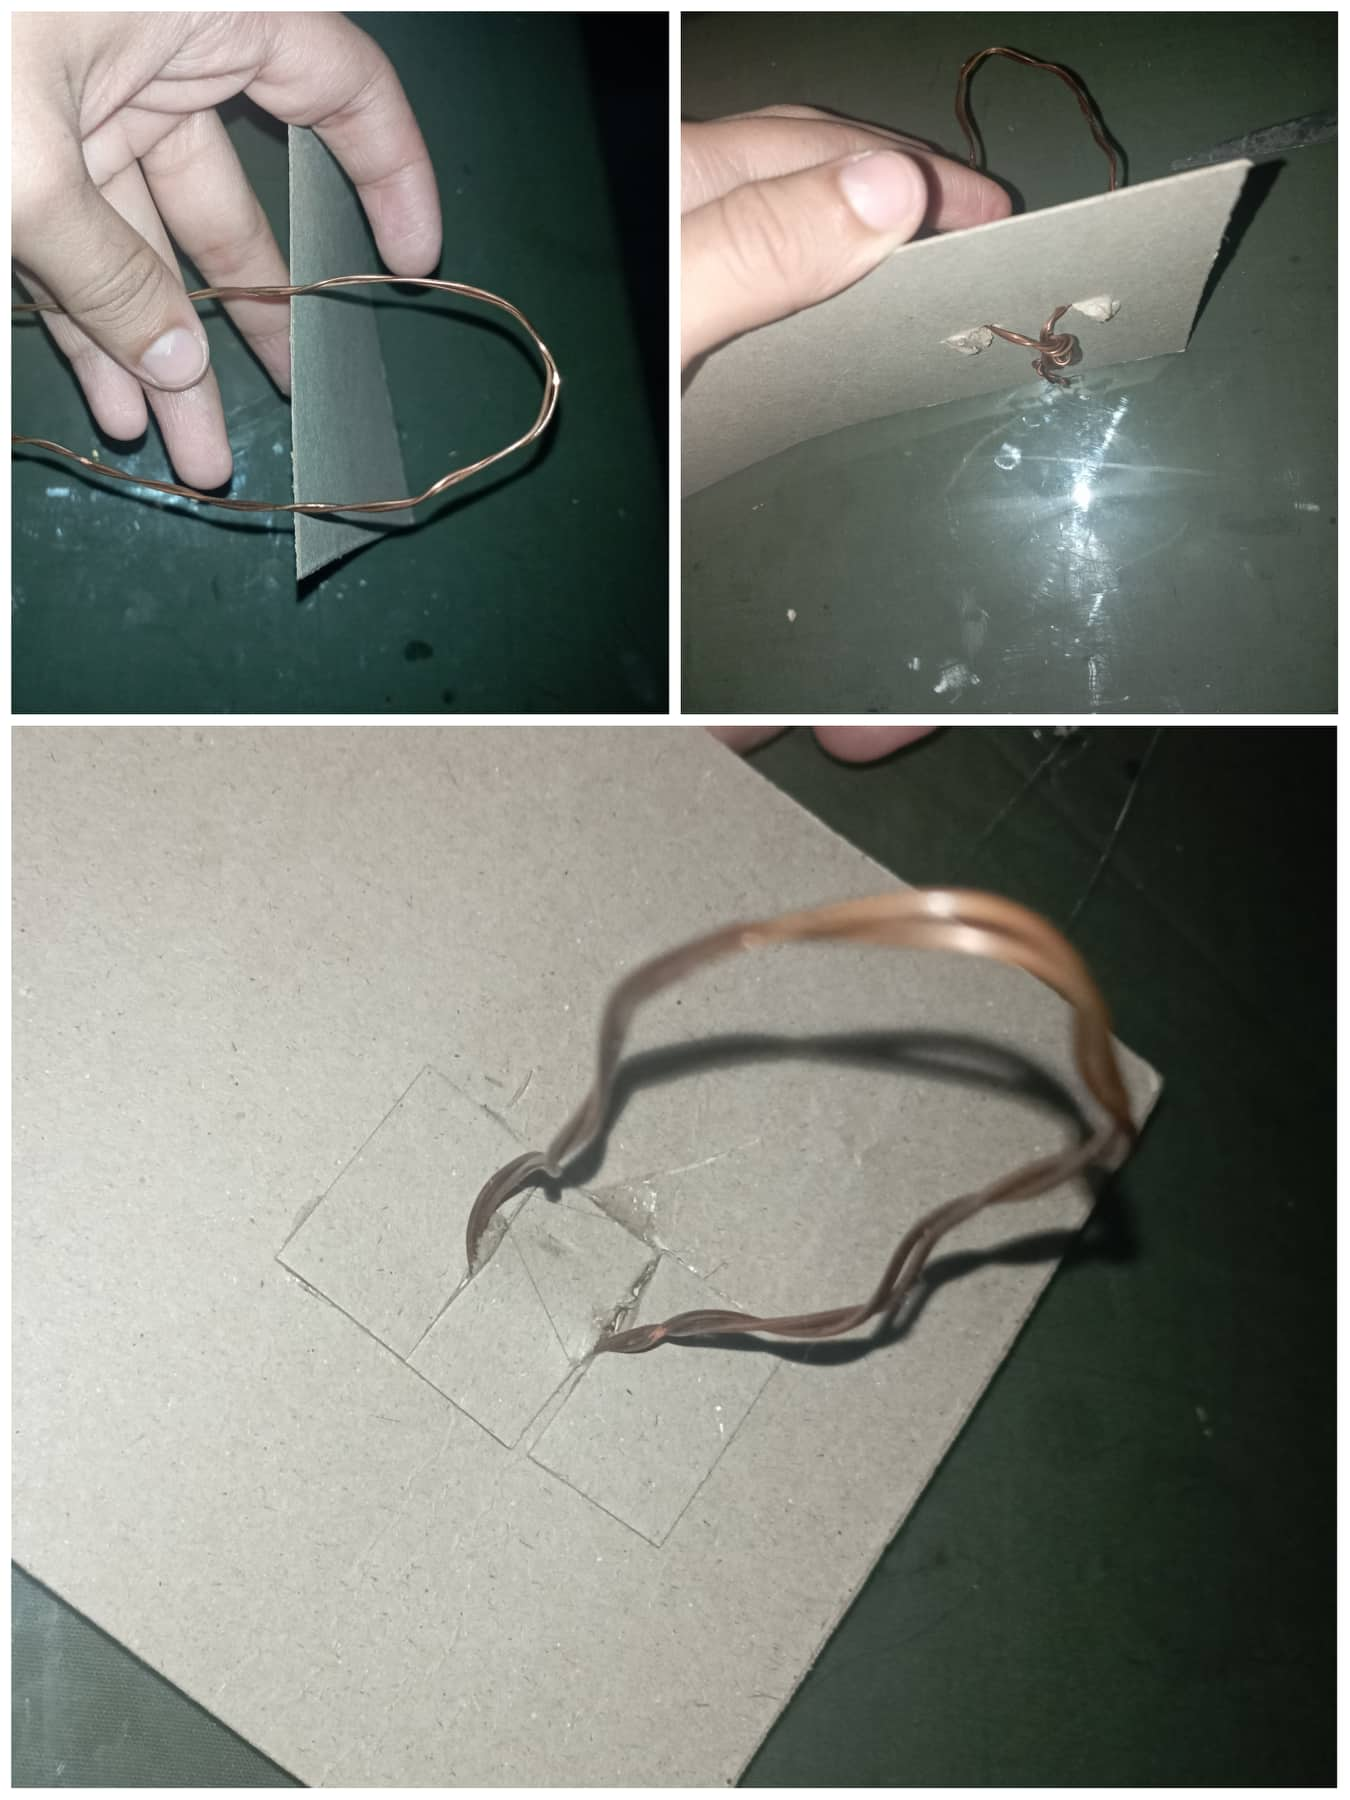
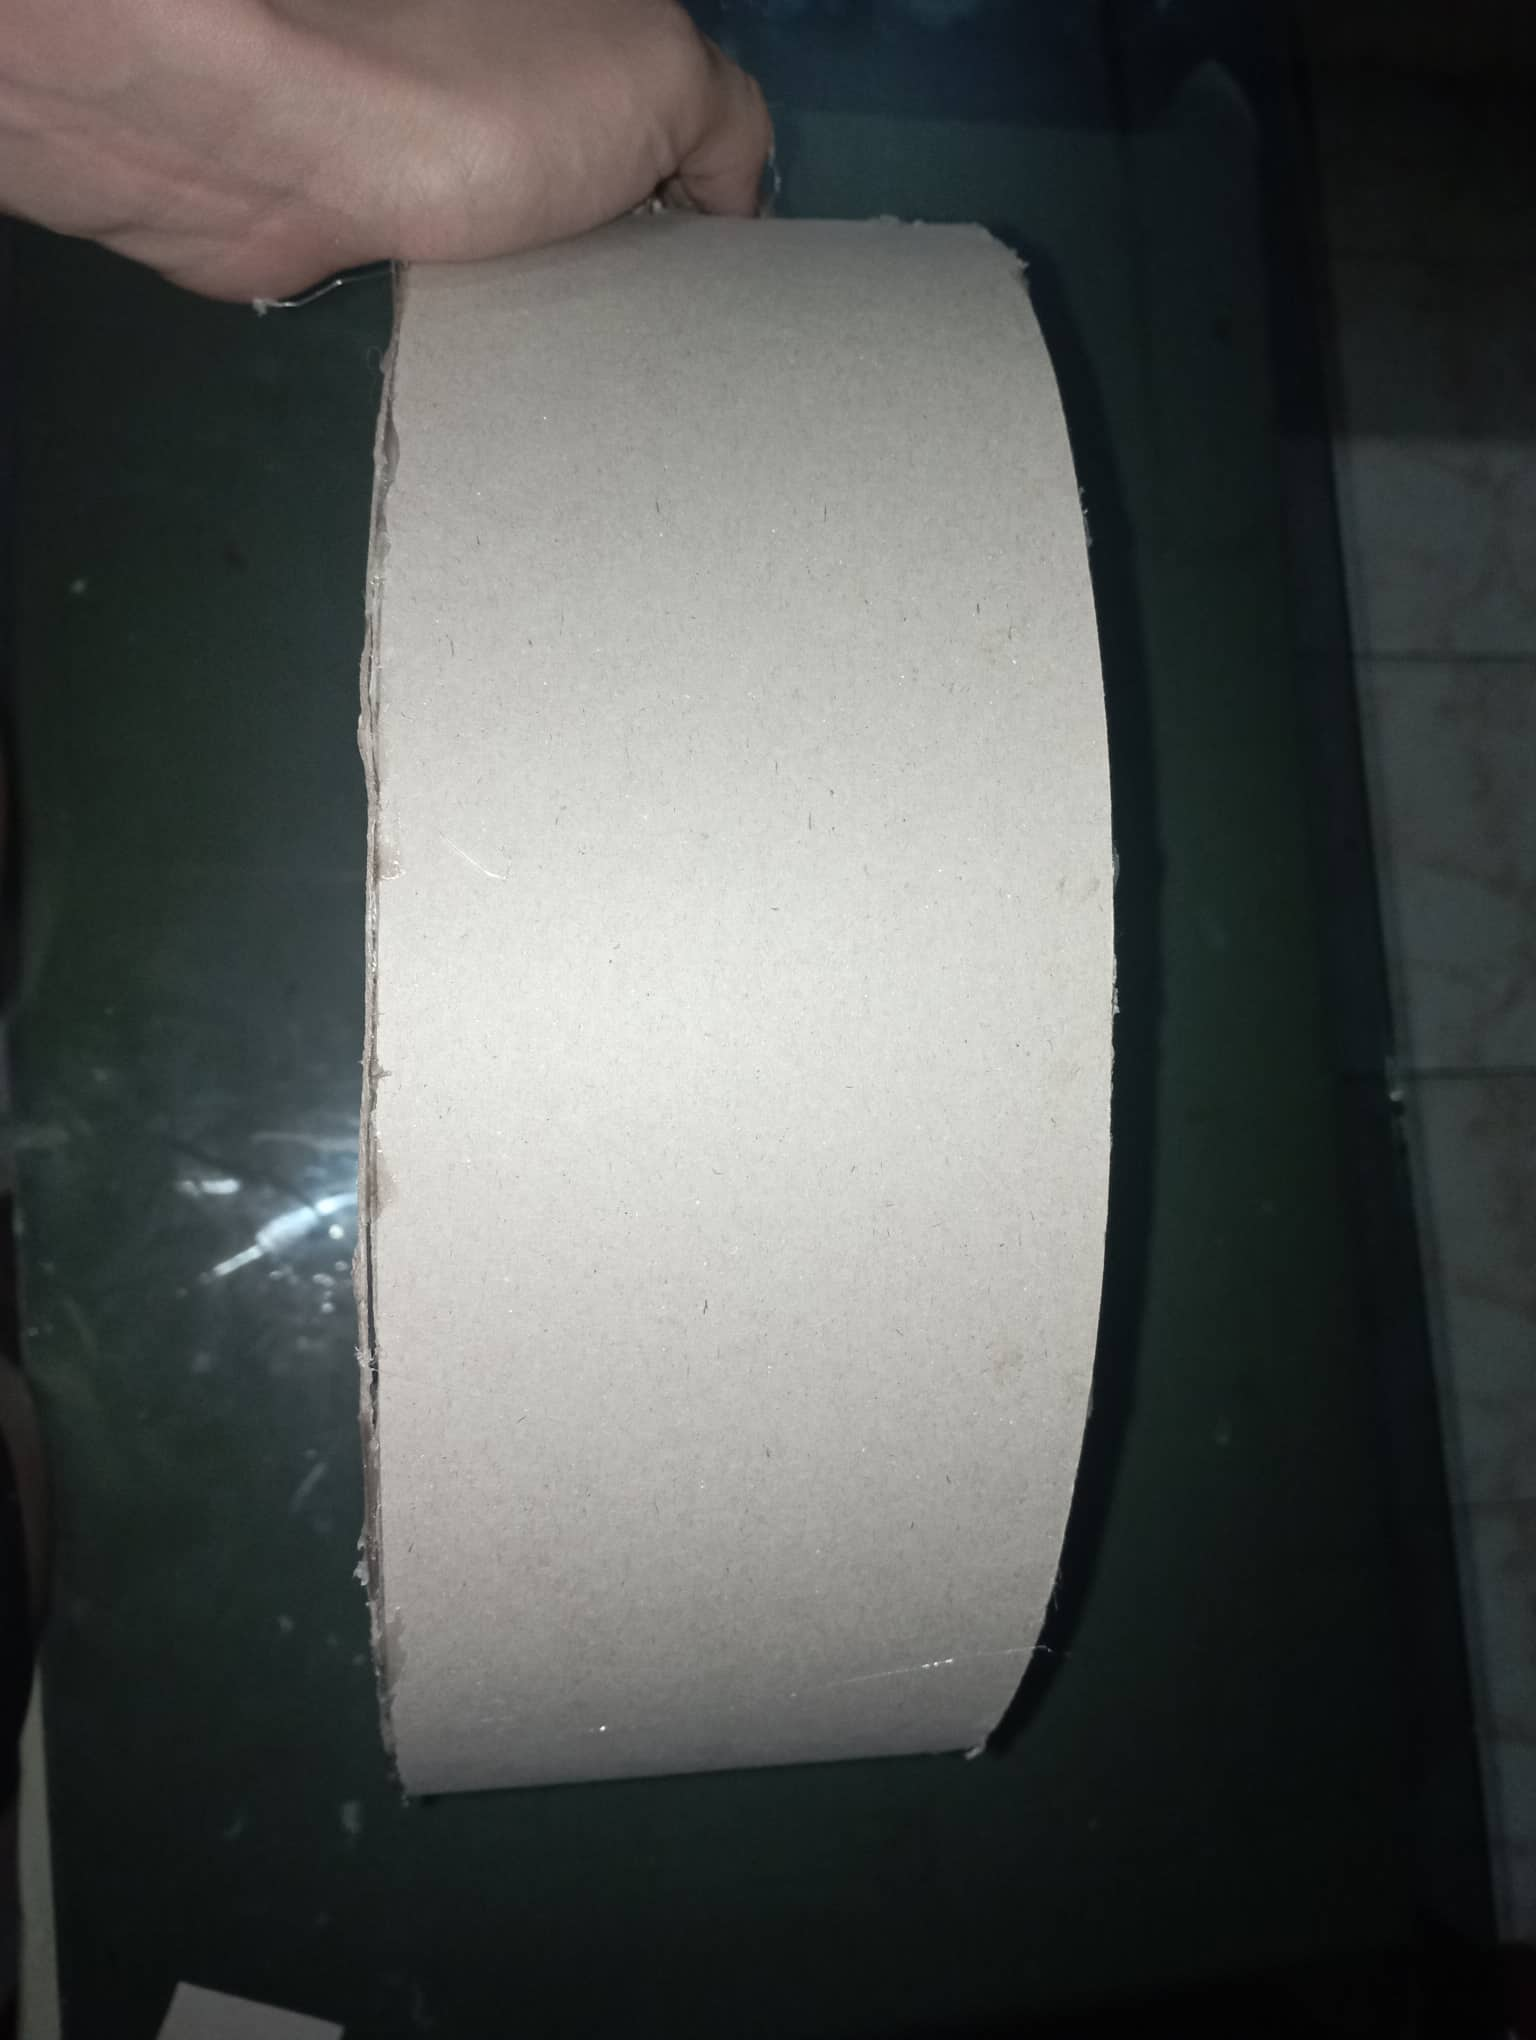
- Luego del carton recorte un tira de 11cm.
- After the cardboard cut a strip of 11cm.

- En uno de los extremo de la tira que recorte anteriormente, coloque el alambre de cobre reforzandolo con trozos de carton como se indica la foto.
- In one of the ends of the strip that you previously cut, place the copper wire, reinforcing it with pieces of cardboard as indicated in the photo.
- Luego pegue la tira a uno de los circulos, y el otro circulo encima, y de esta manera obtenemos la base de lo que sera la piñata.
- Then glue the strip to one of the circles, and the other circle on top, and in this way we obtain the base of what will be the piñata.
- Para reforzar la piñata, pegue por todo el borde papel con endgrudo.( El engrudo lo prepare de siguente manera: coloque en un holla un poco de agua con harina de trigo a fuego lento hasta que espese, luego deje enfriar muy bien.) o pueden utilizar tambien pegamento blanco.
- To reinforce the piñata, stick paper with paste all over the edge. (Prepare the paste as follows: place a little water with wheat flour in a saucepan over low heat until it thickens, then let cool very well.) Or you can also use white glue.

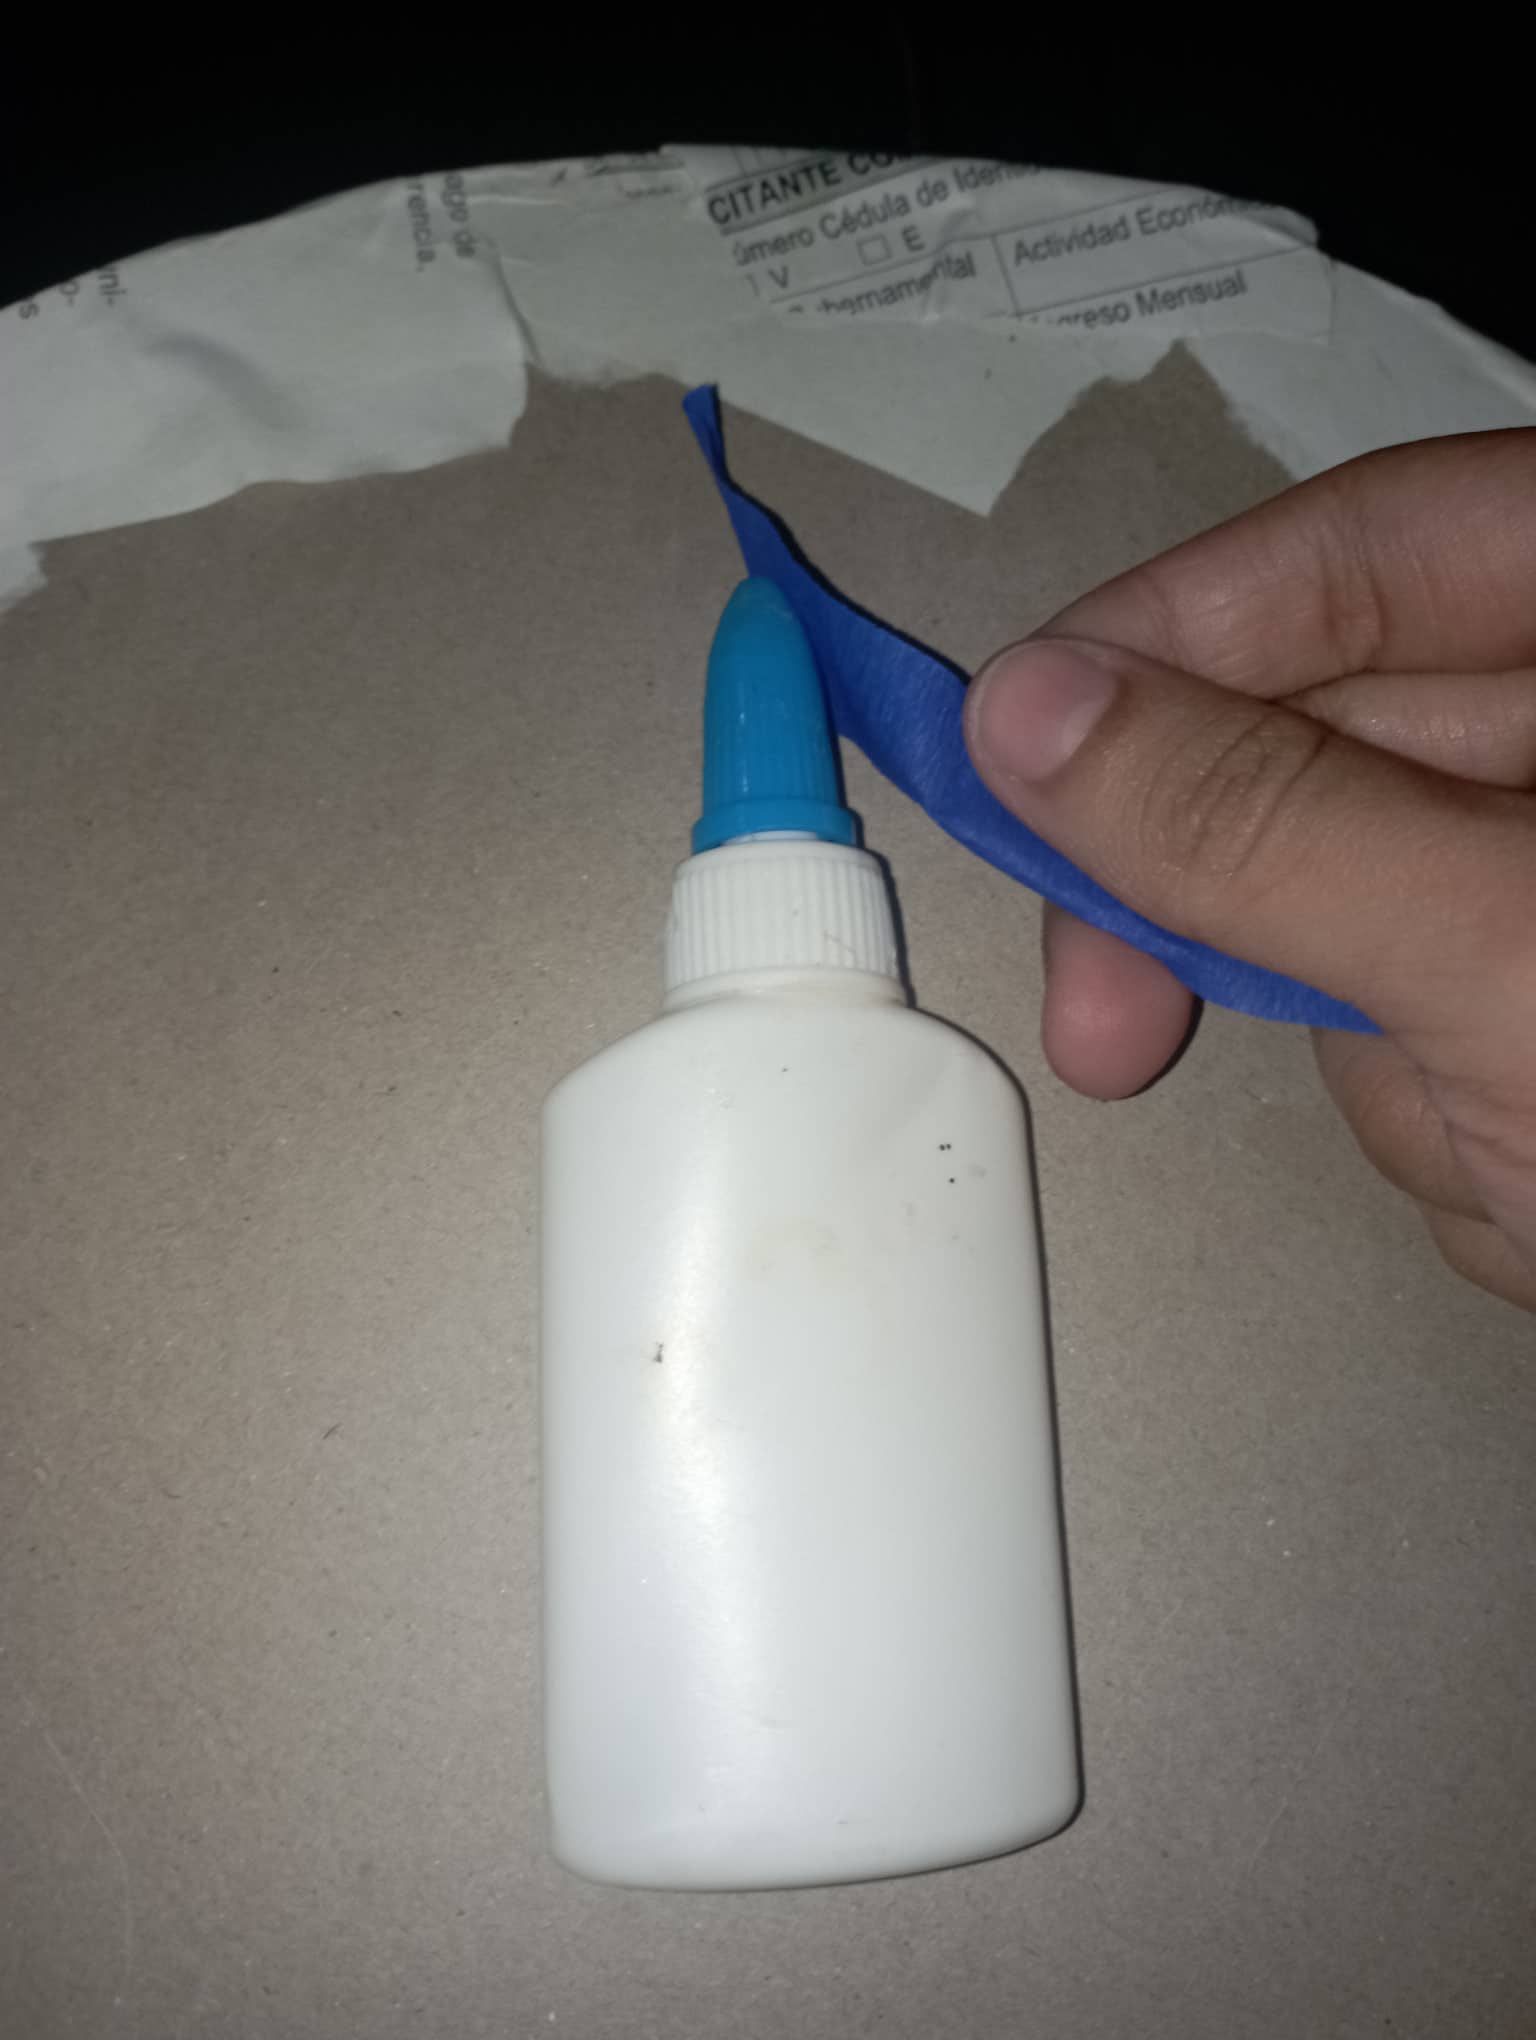
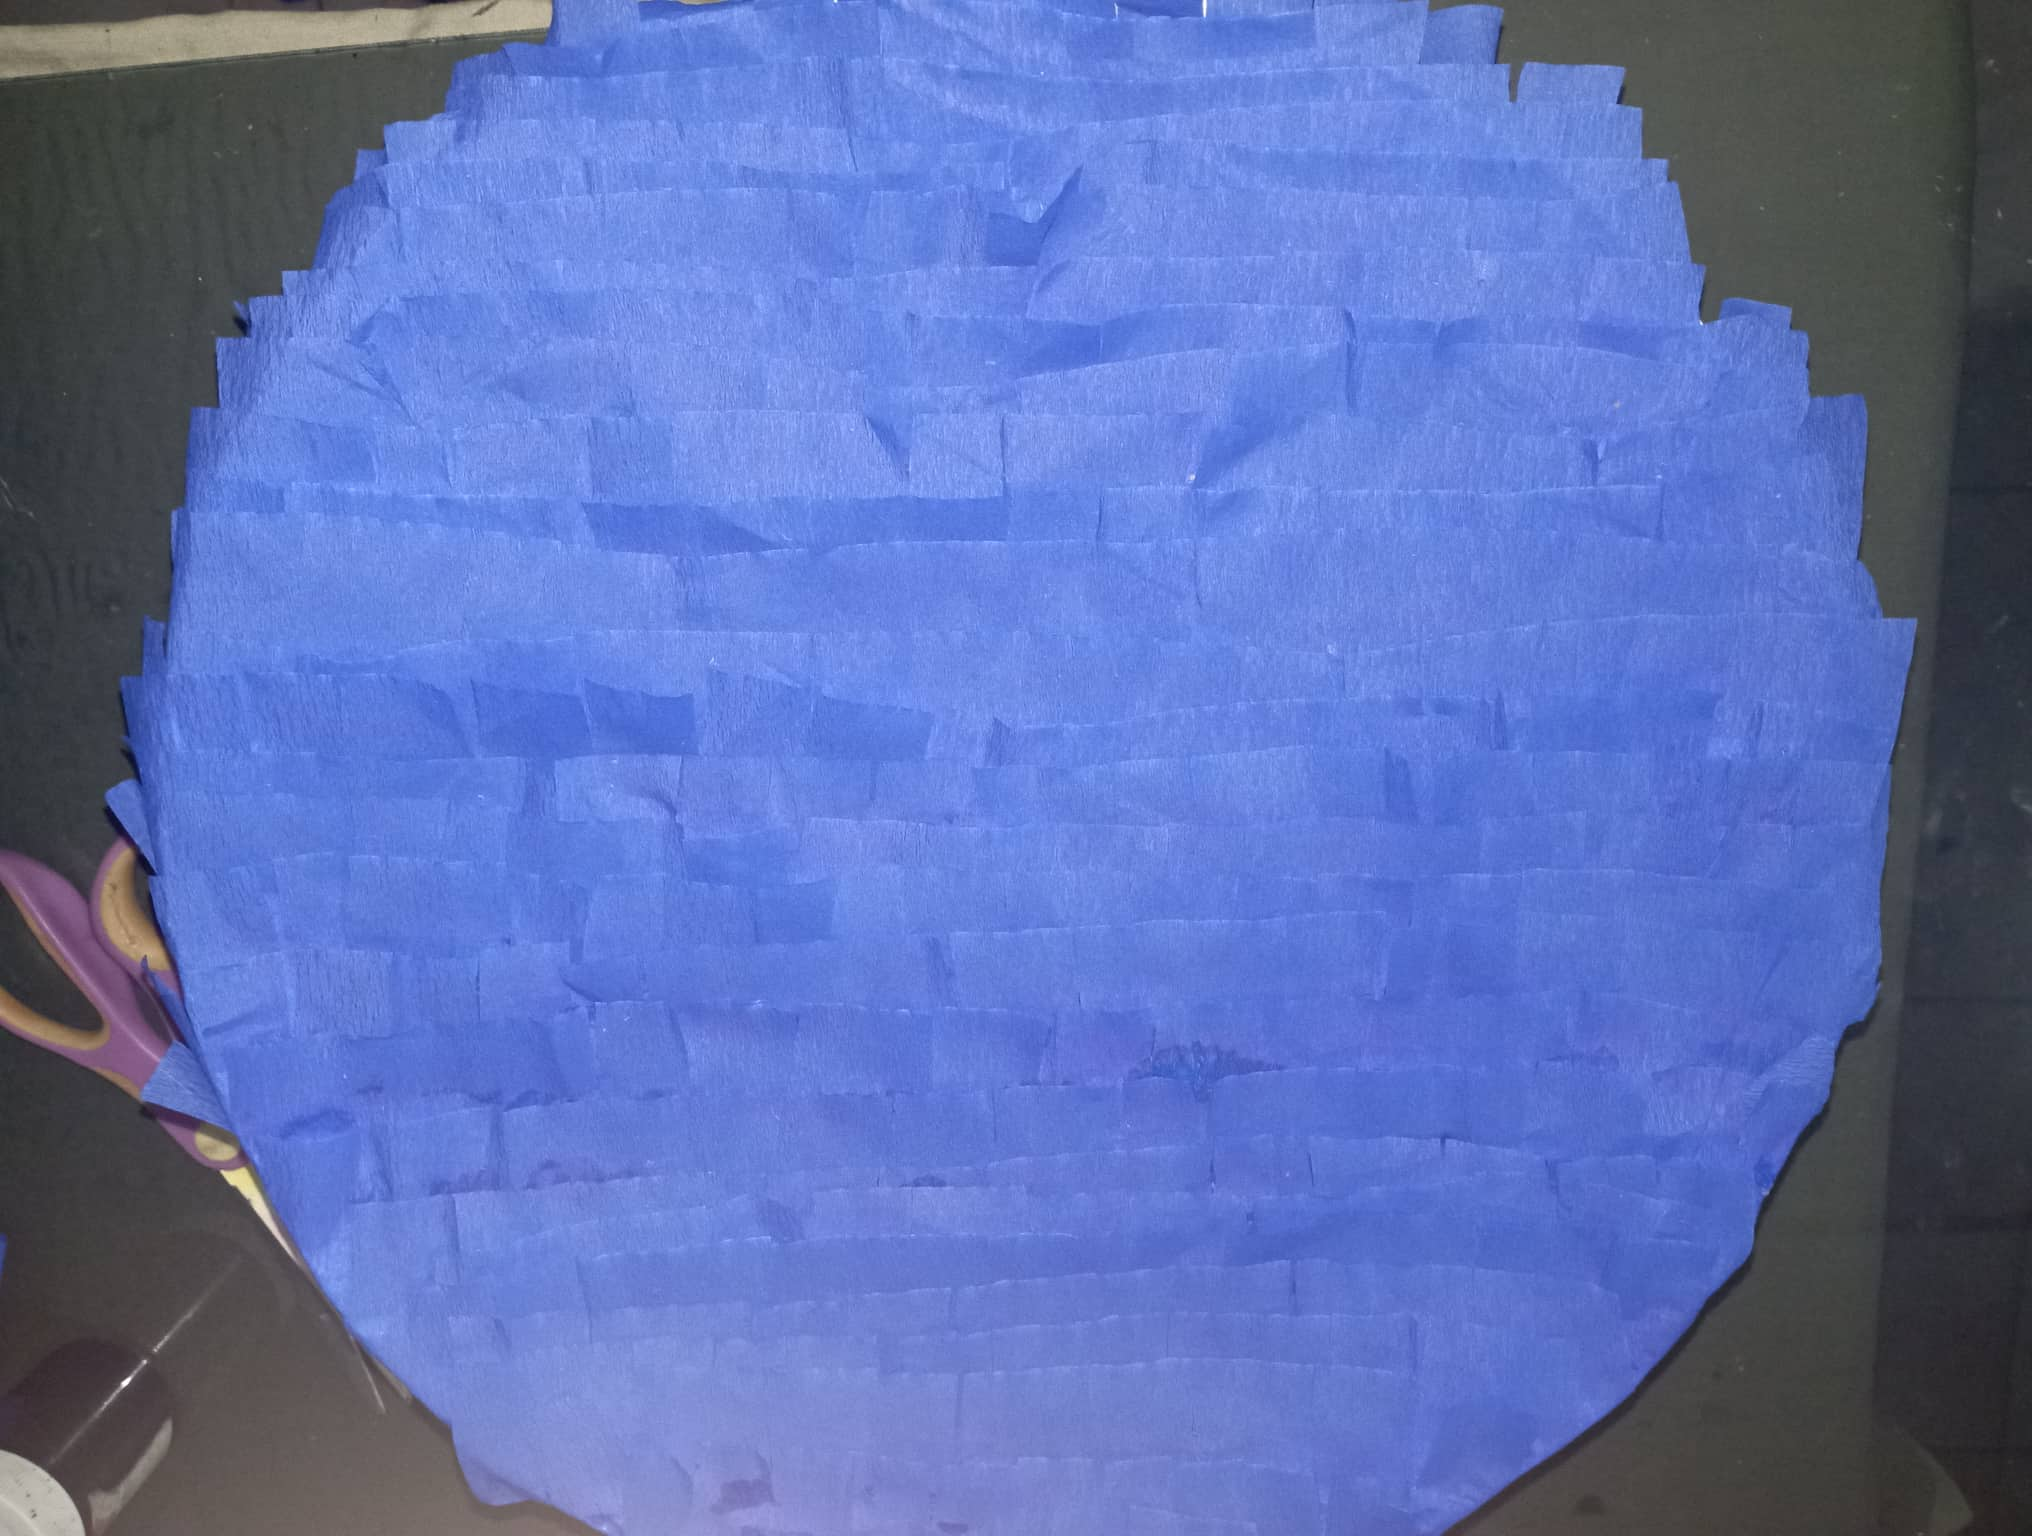
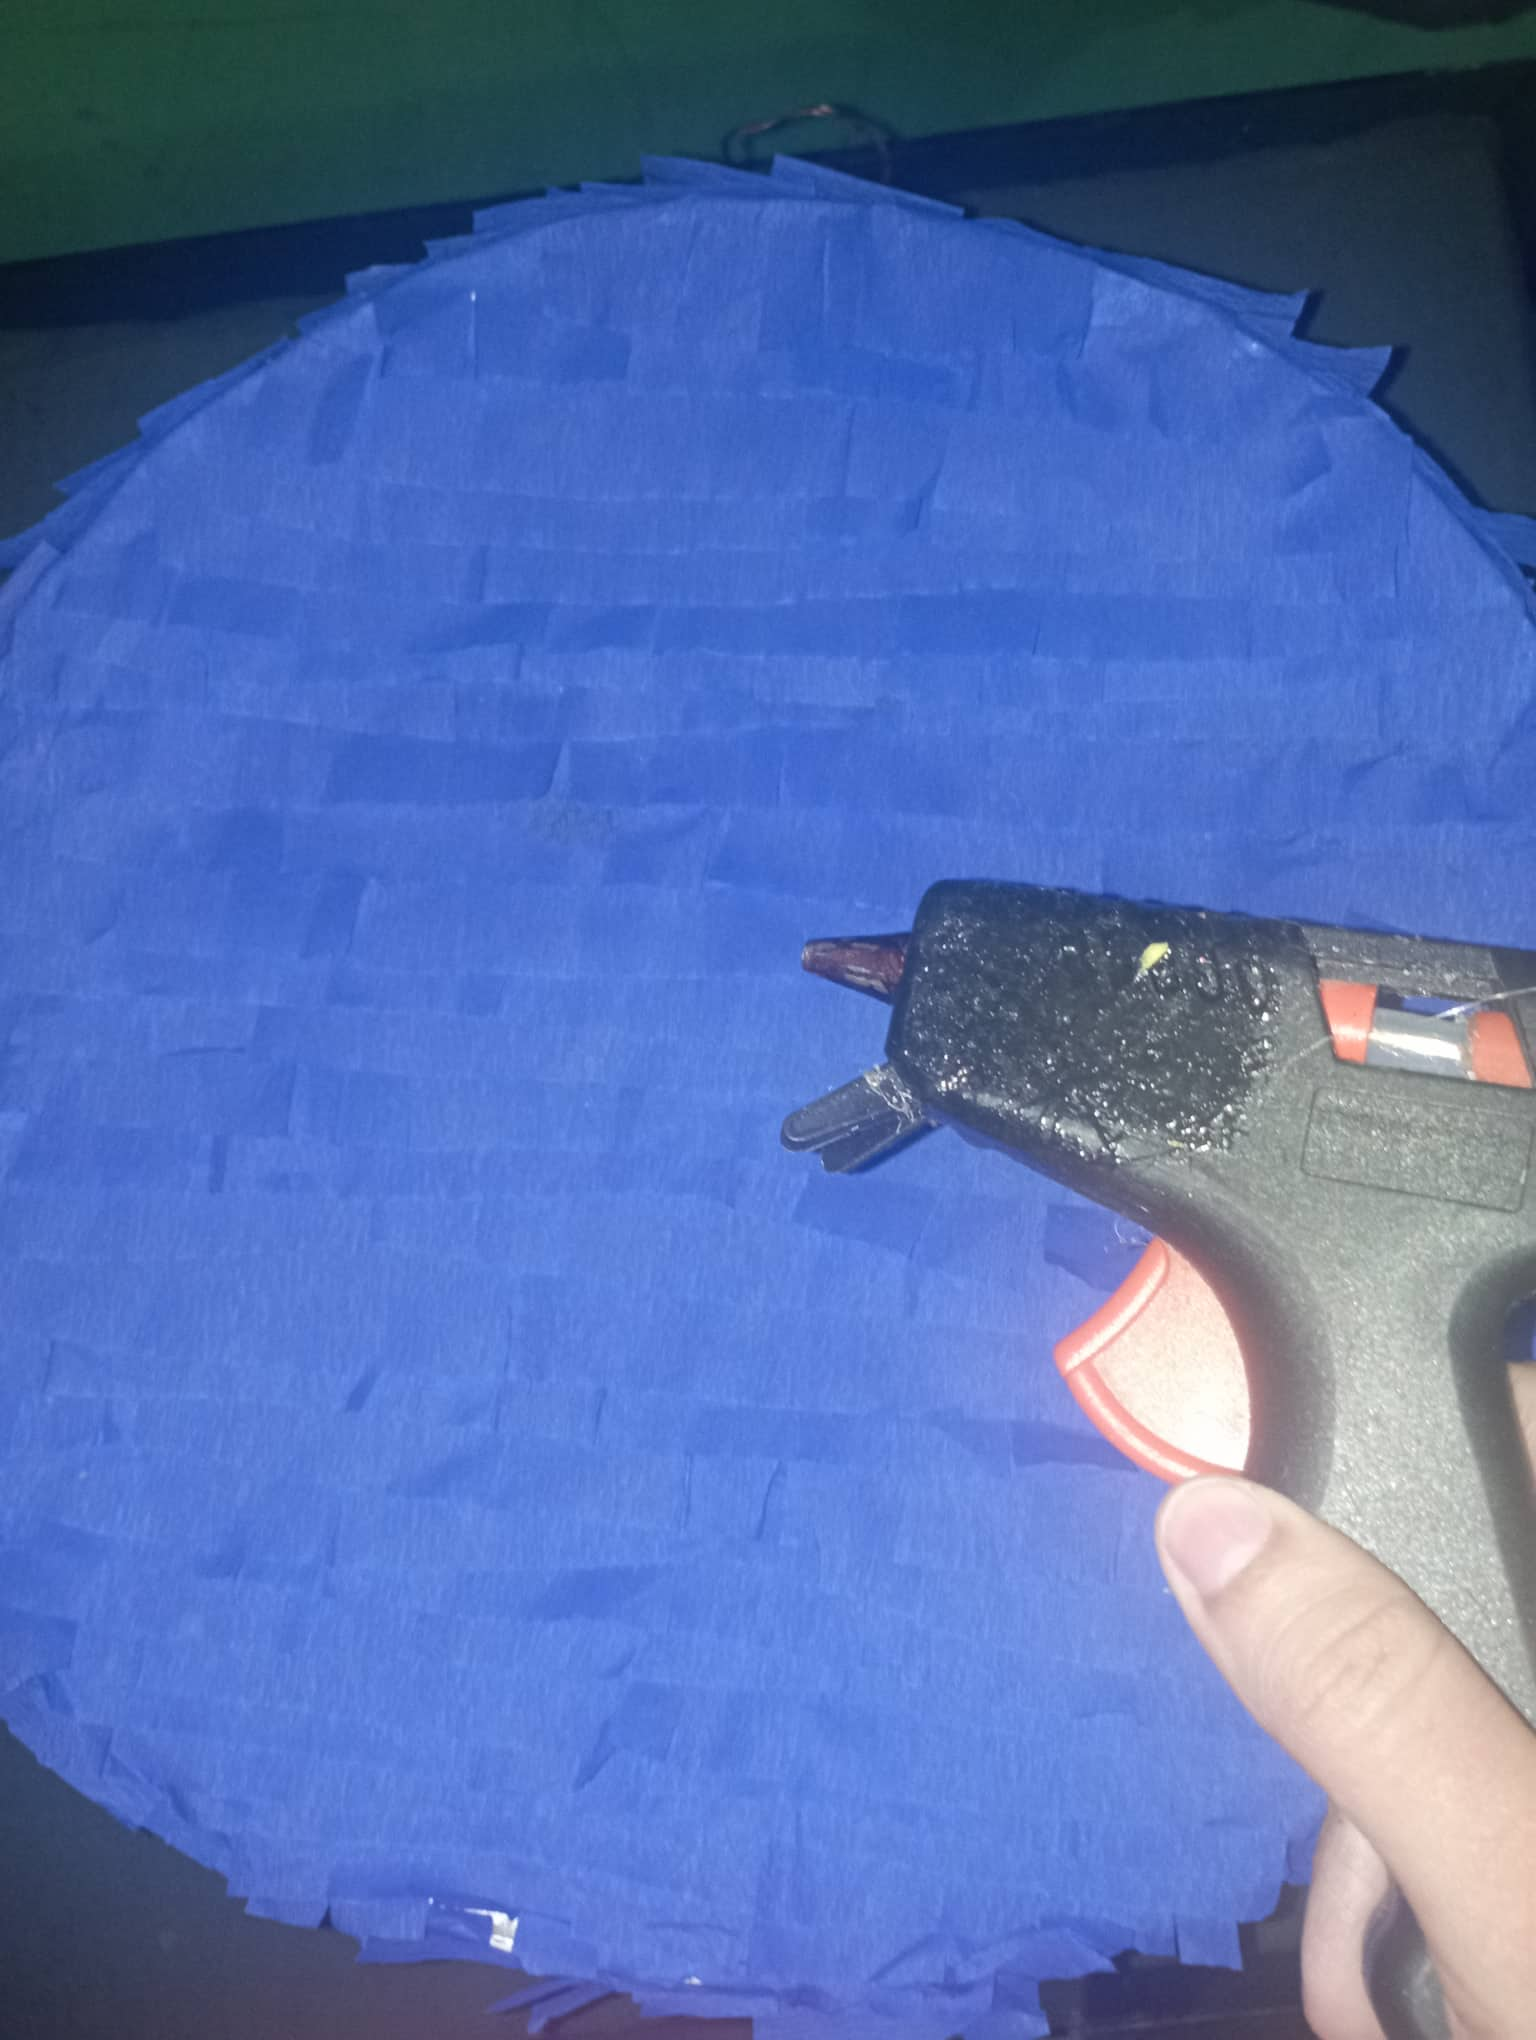
- Luego de reforzar la piñata, y dejar secar muy bien procedi a forrarla con el papel crepe, recortando tiras a la cuales hice cortes por todo el lago y pegando por toda la piñata con pega blanca.
- After reinforcing the piñata, and letting it dry very well, I proceeded to line it with crepe paper, cutting strips to which I made cuts all over the lake and pasting all over the piñata with white glue.
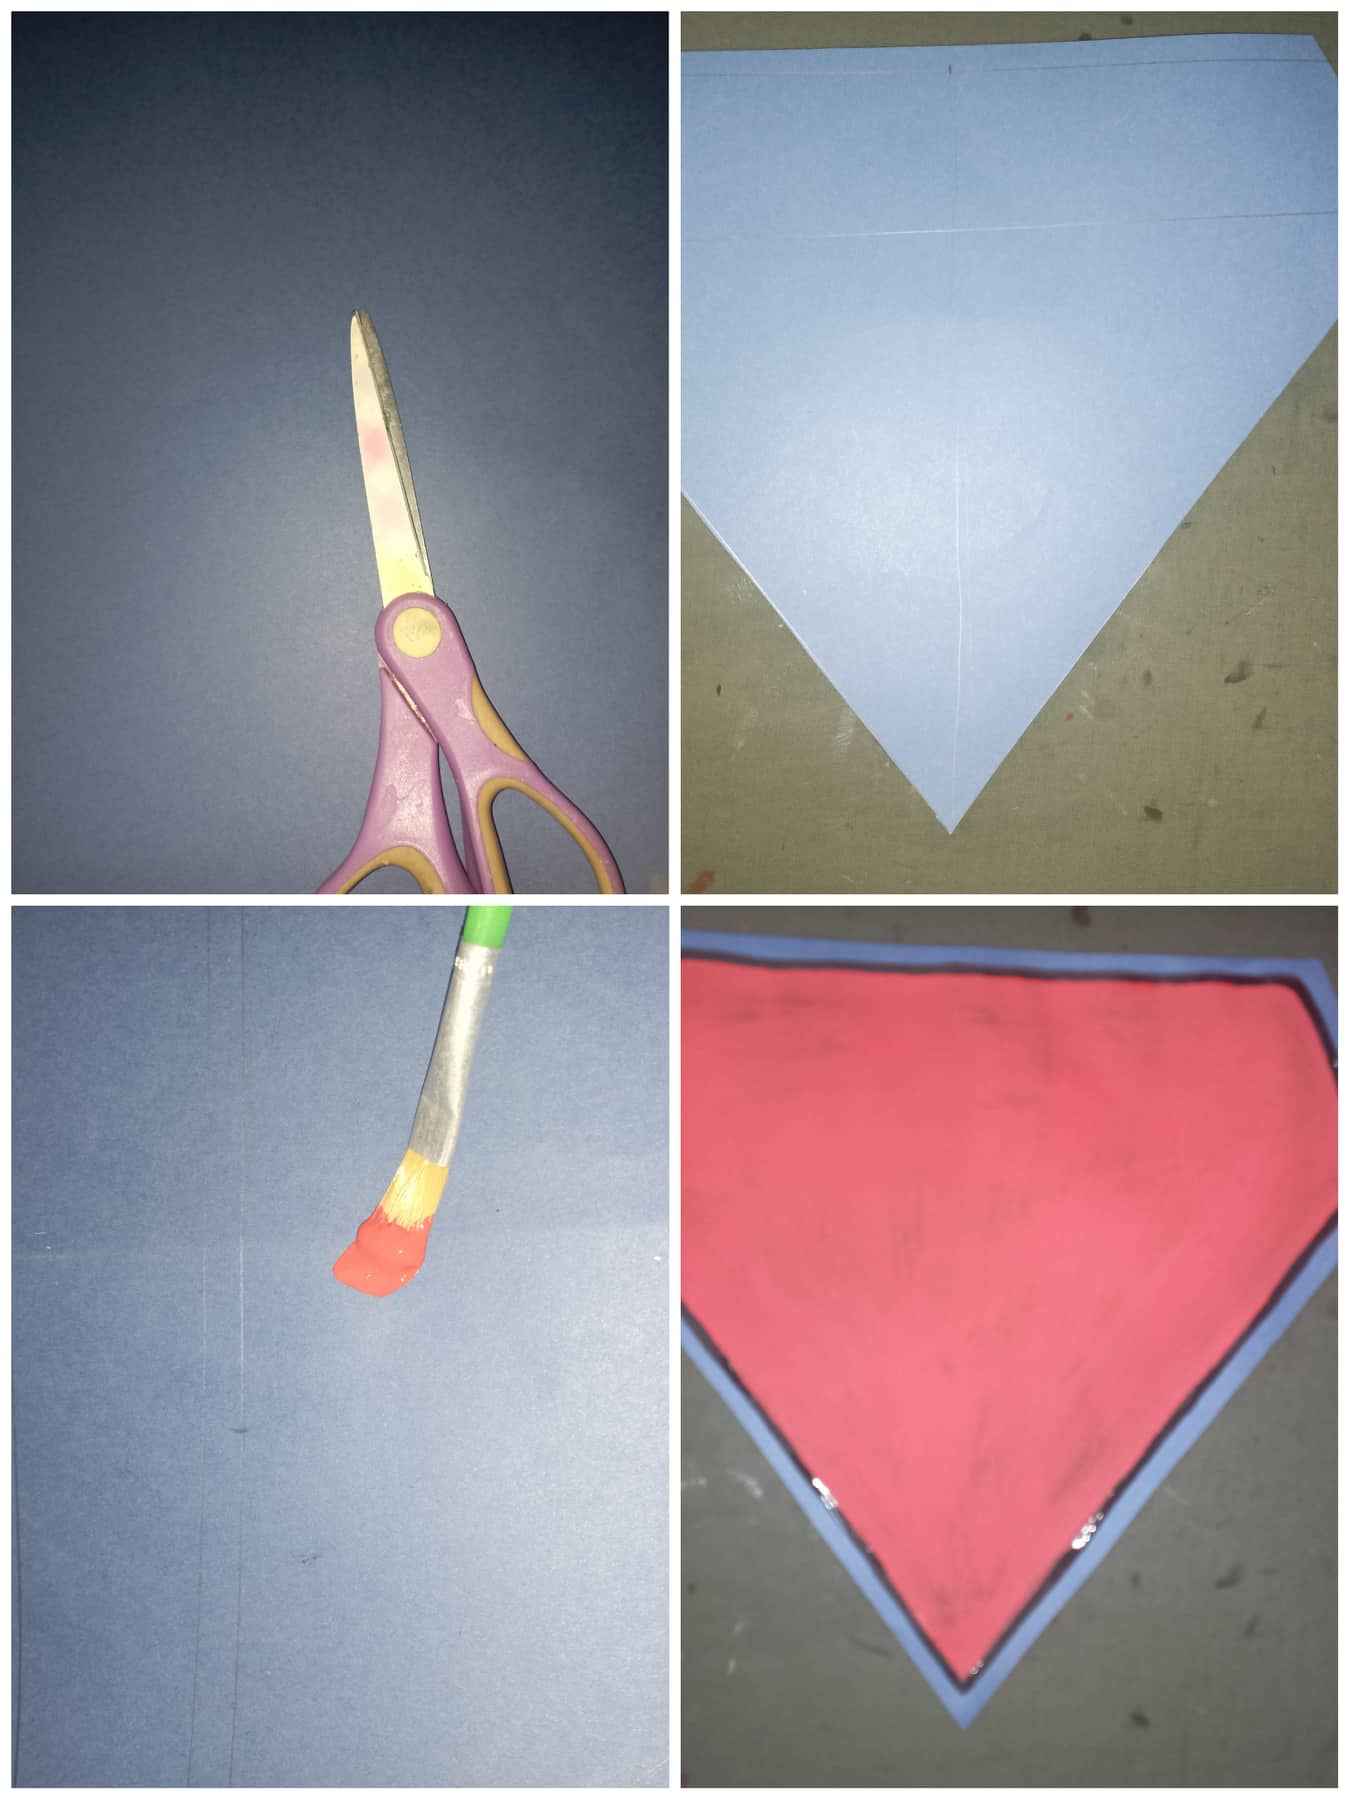
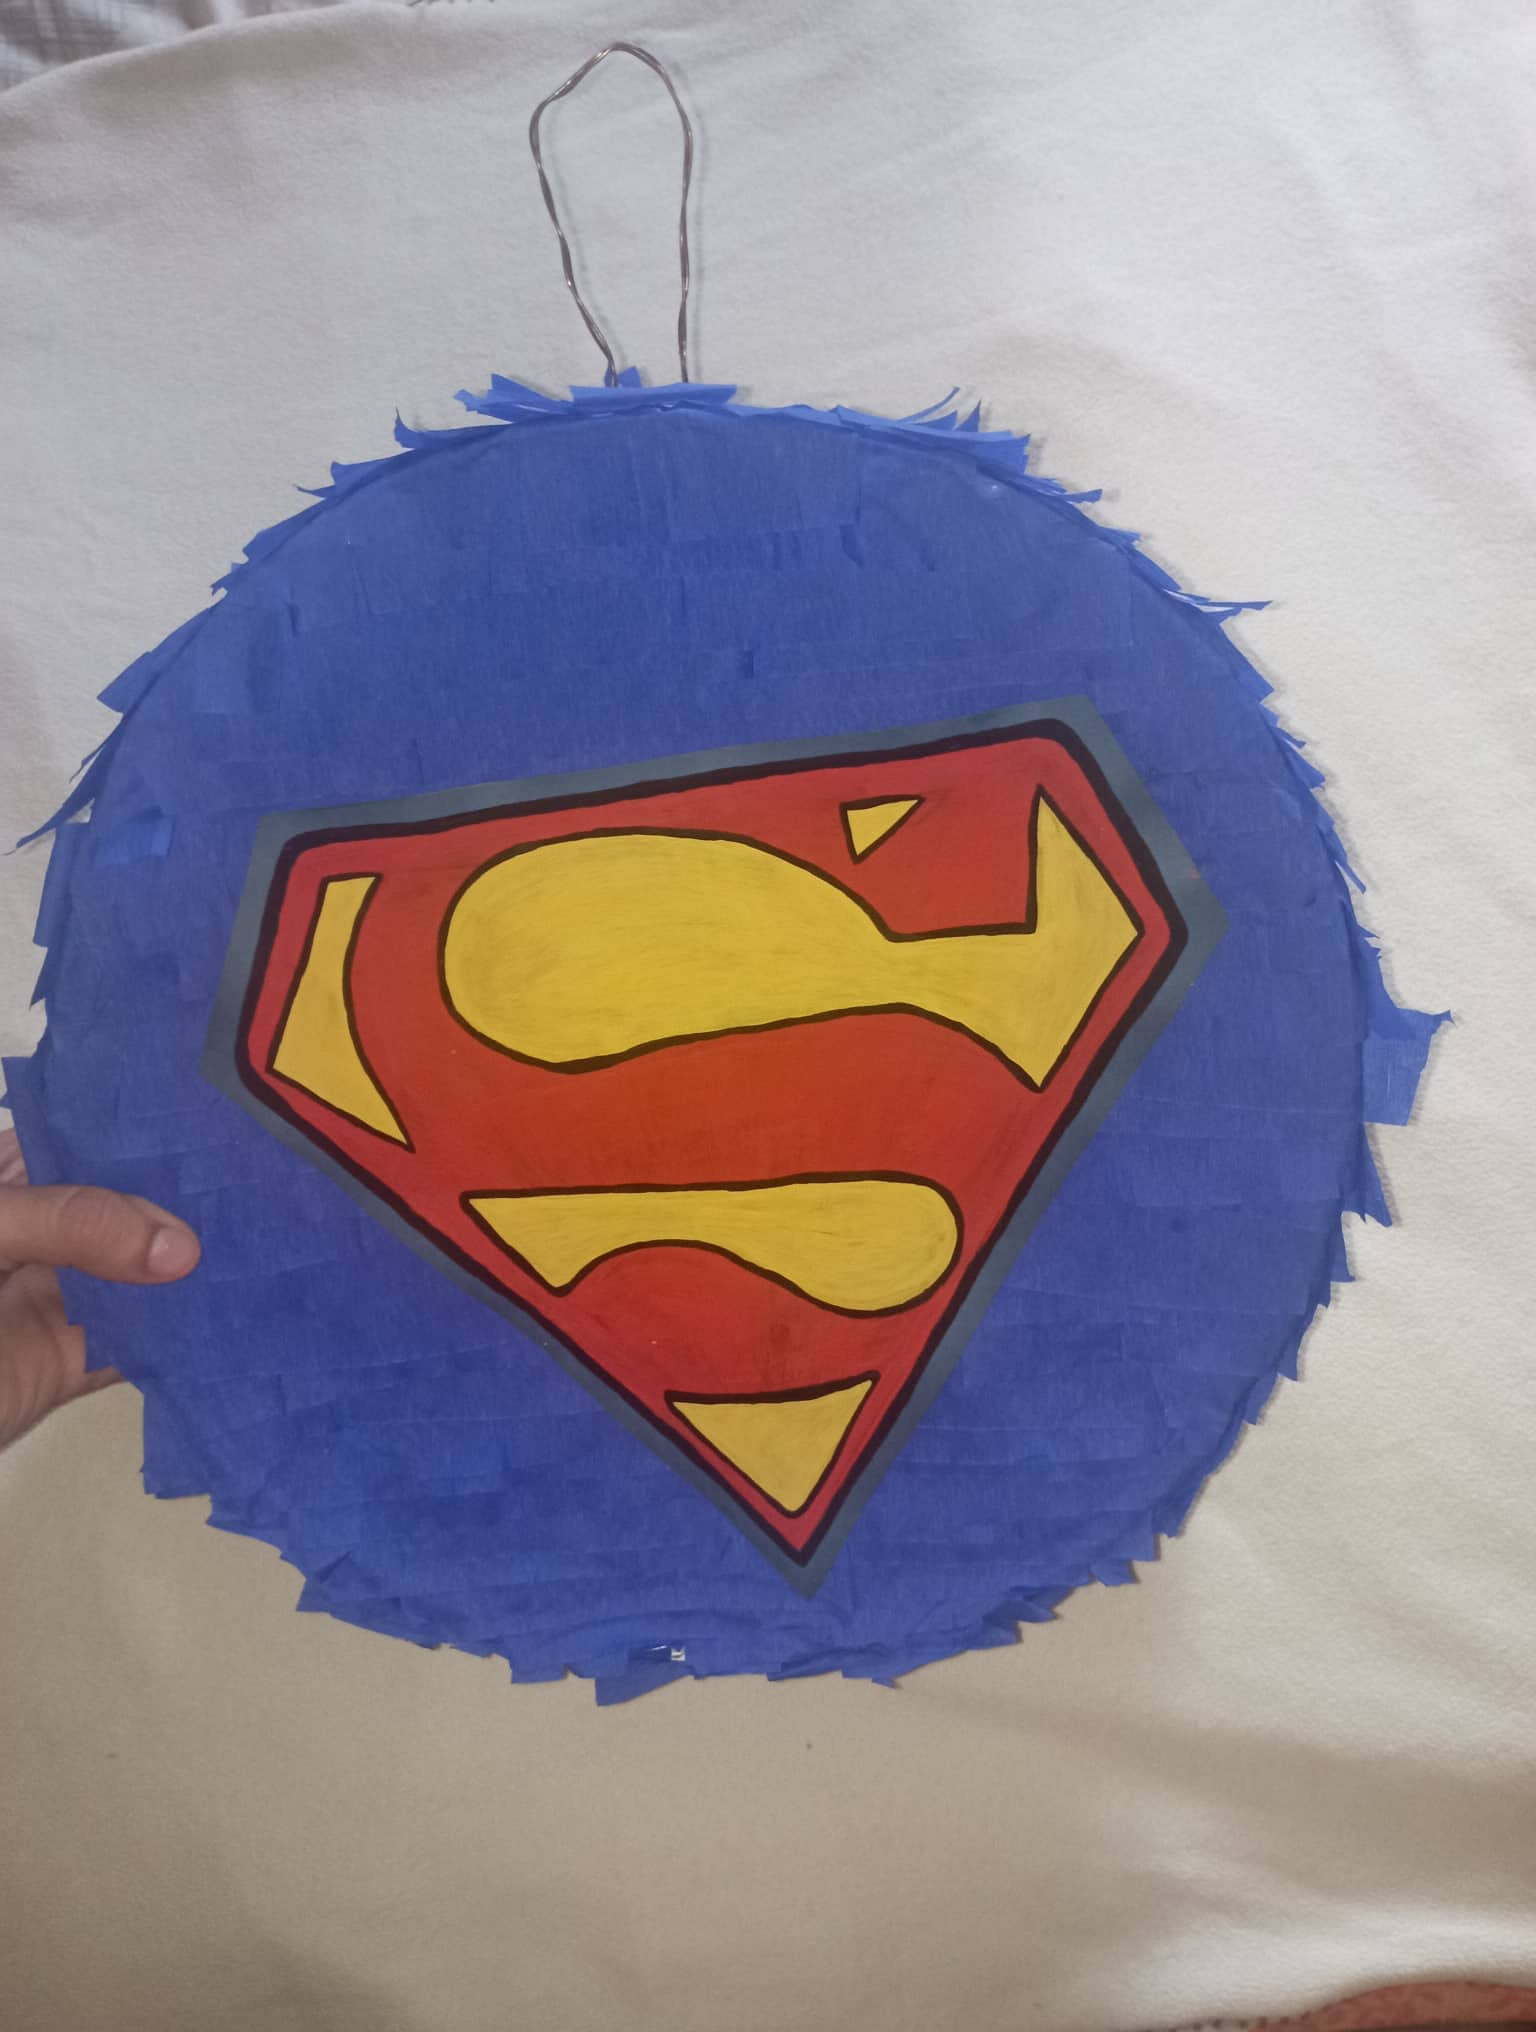
- En la cartulina azul marque, recorte y pinte el logo de superman como se indica en la foto.
- On the blue cardboard mark, cut and paint the superman logo as indicated in the photo.
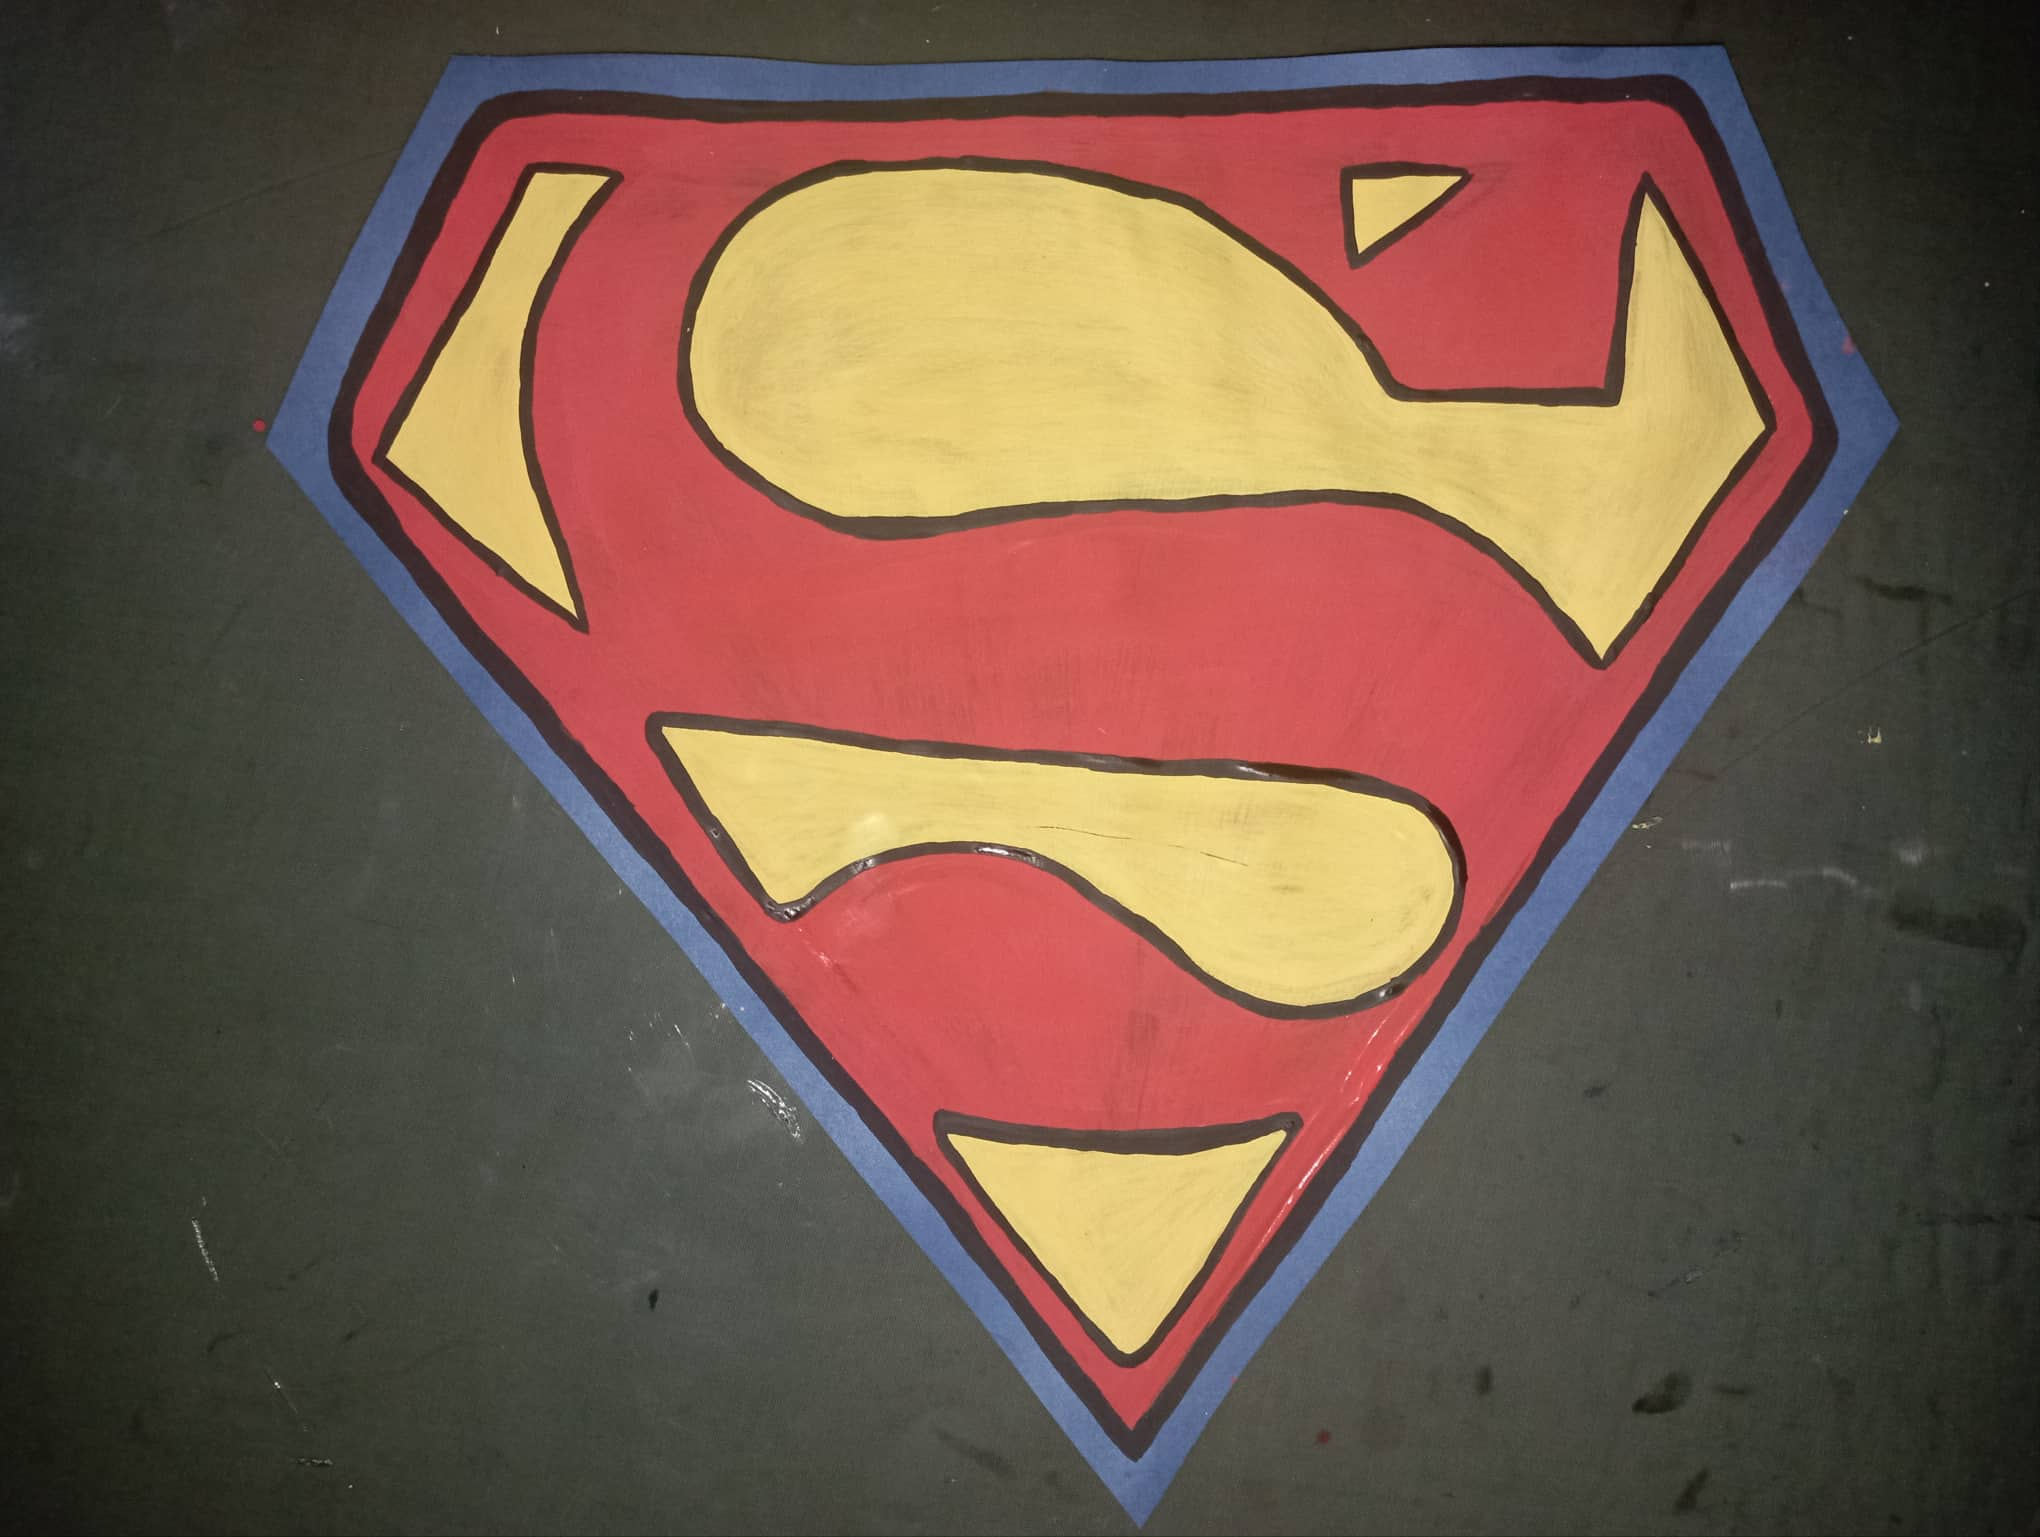
- Por ultimo pegue el logo a la piñata.
- Finally glue the logo to the piñata.
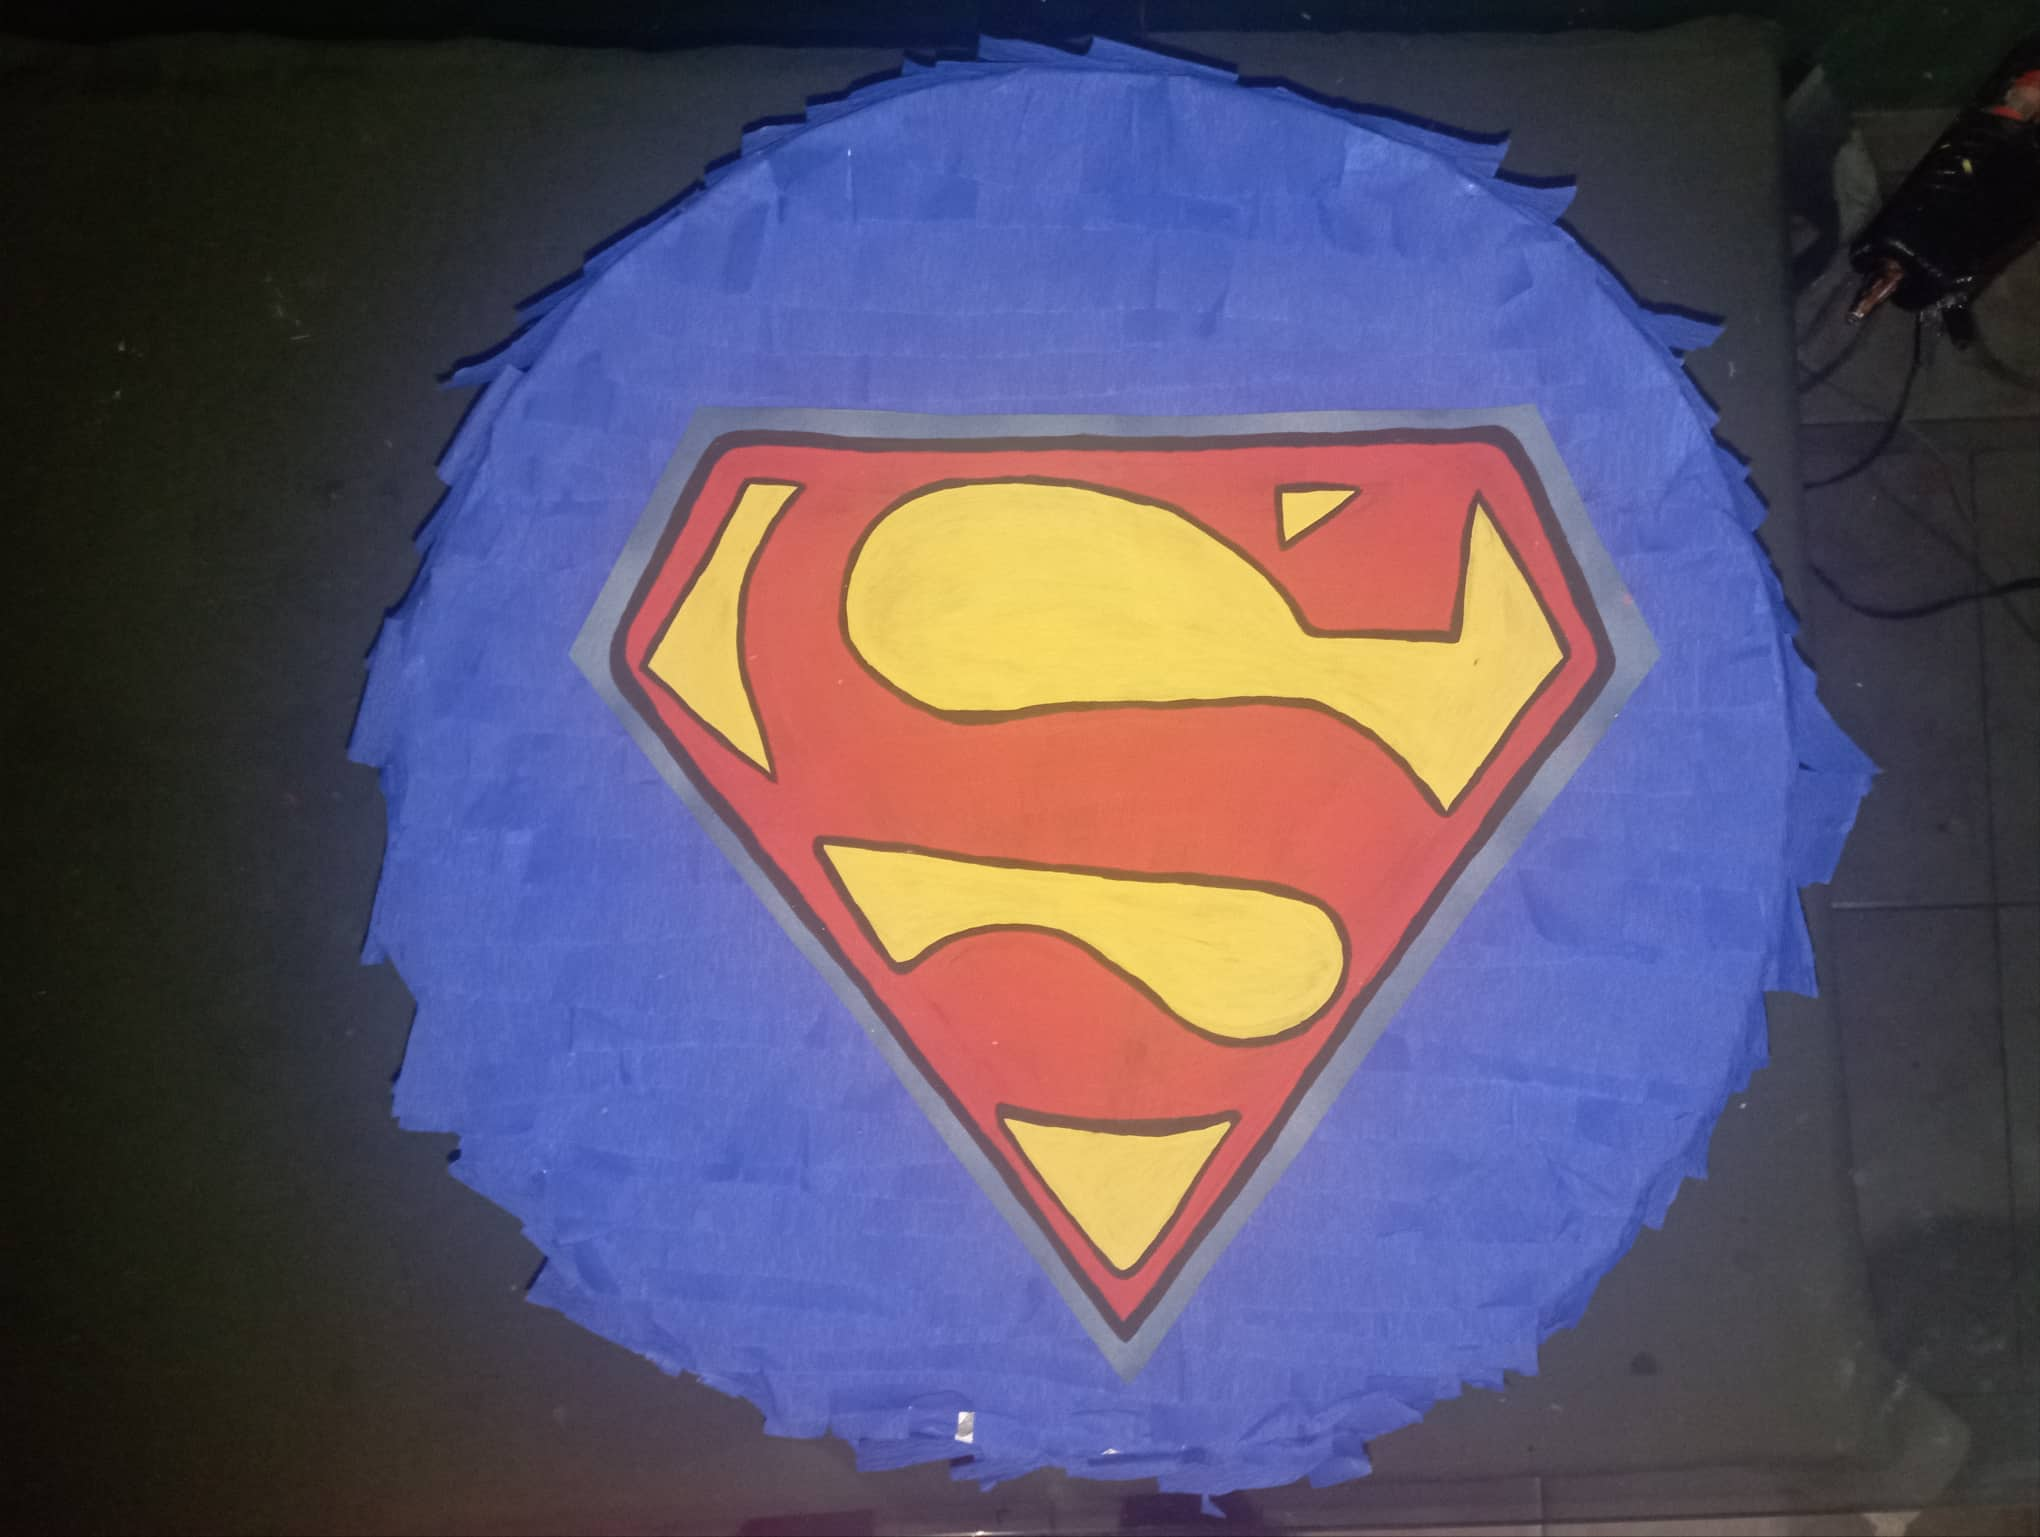
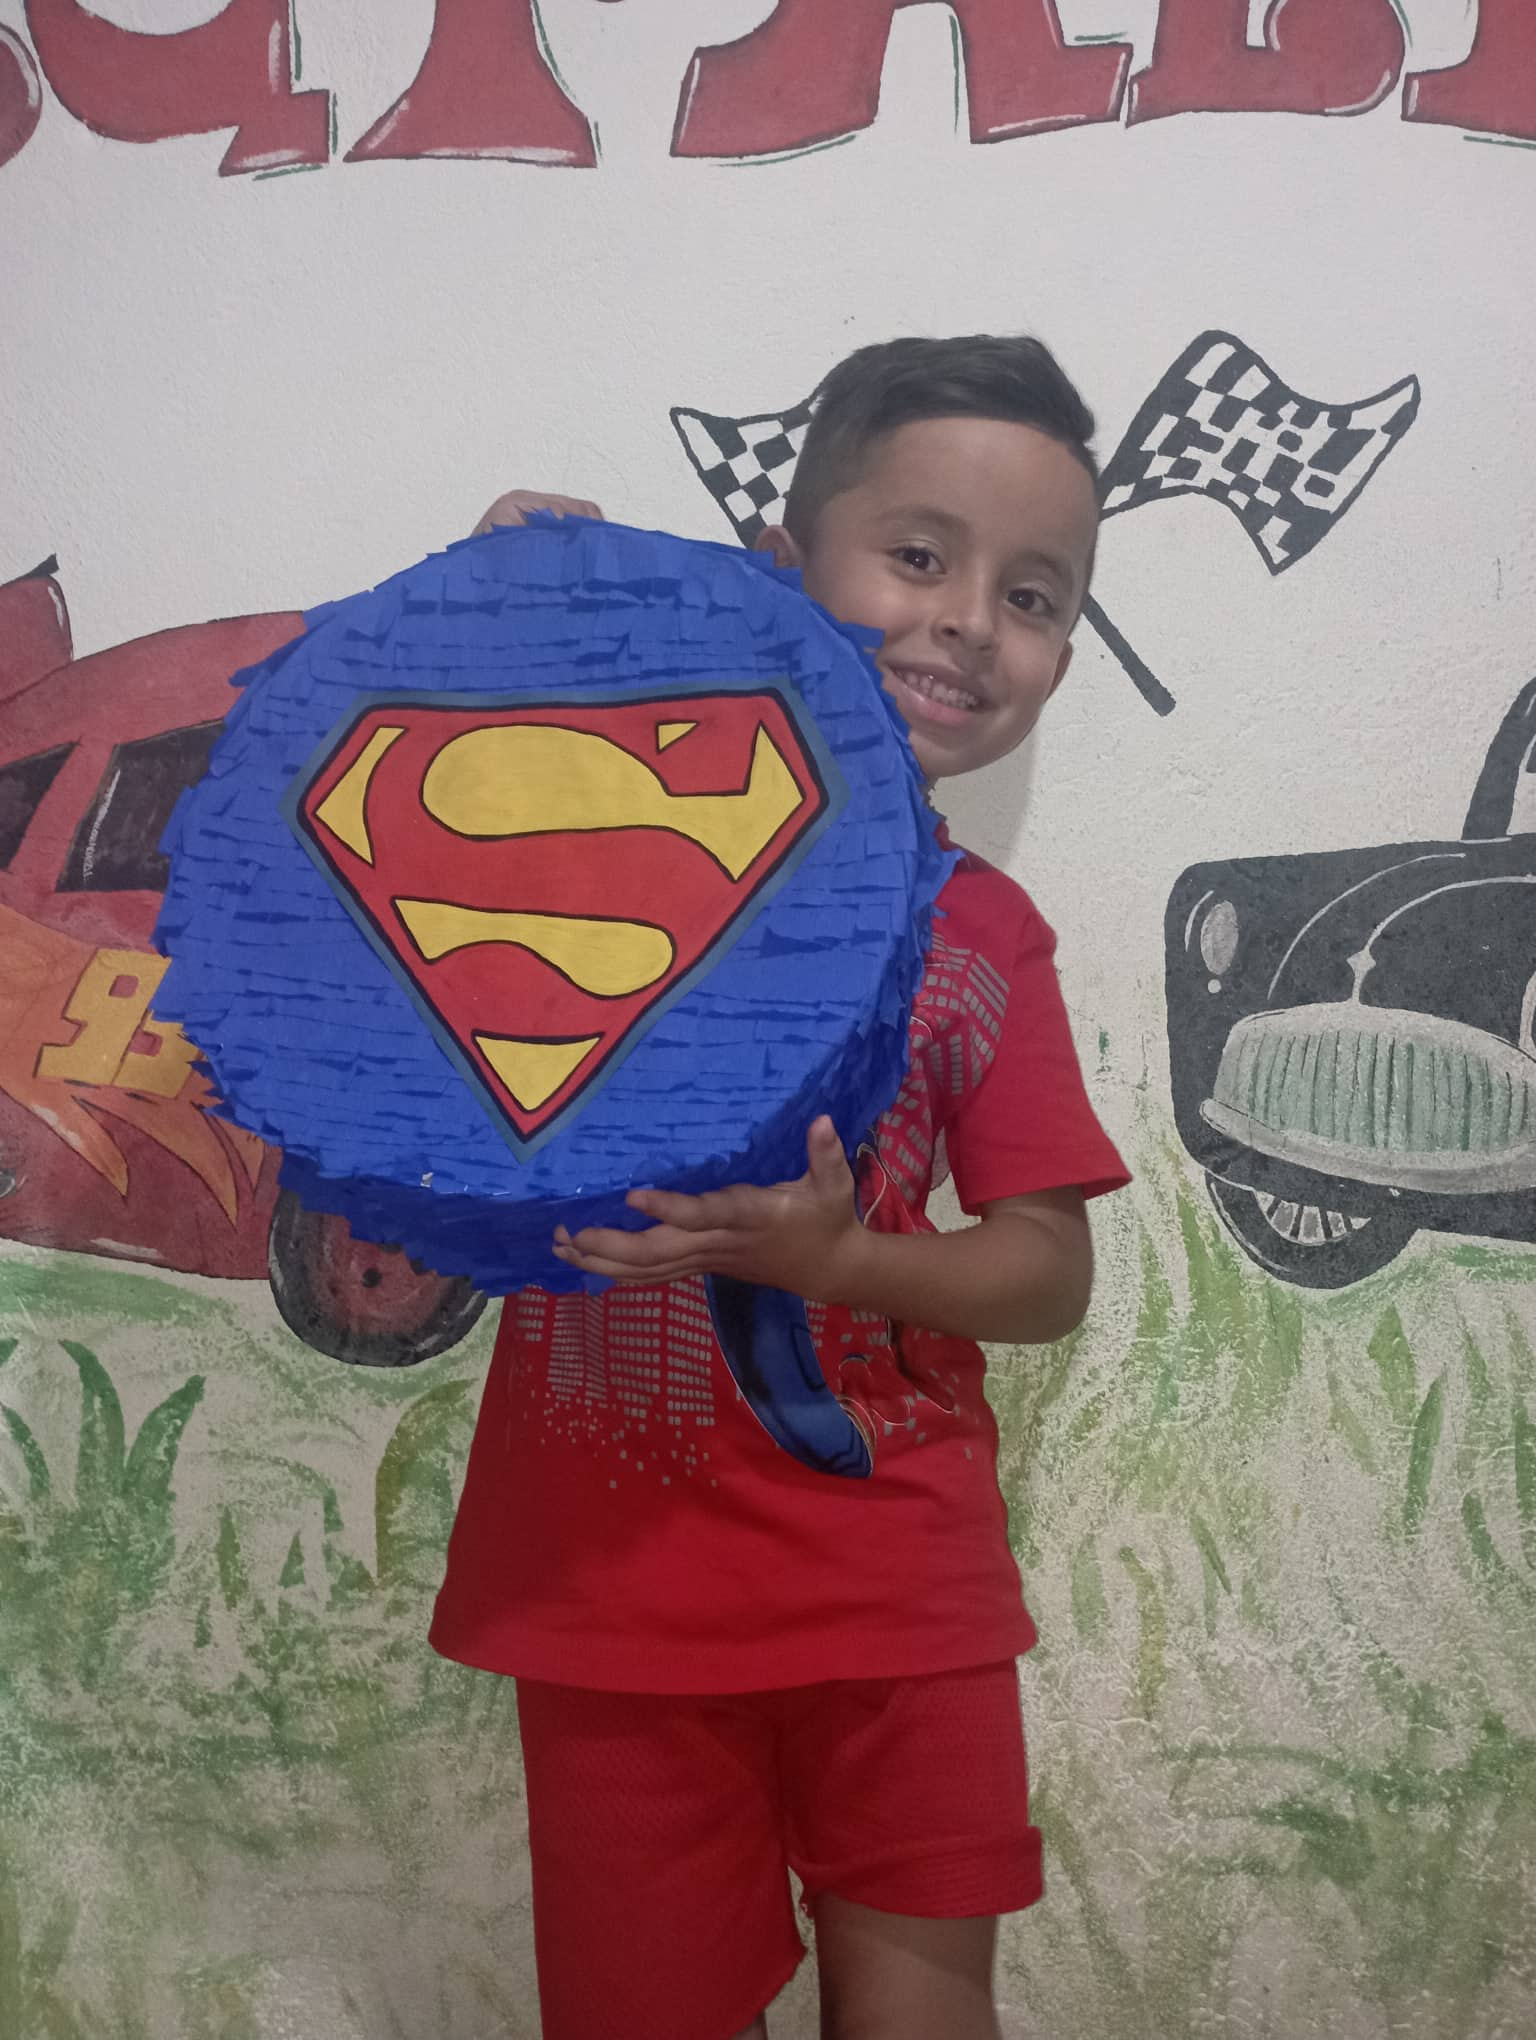
Este el resultado final de esta sencilla pero a la vez muy bonita piñata con tematica de superman.
This is the final result of this simple but at the same time very nice superman-themed piñata.
Gracias por regalarme un poco su tiempo y acompañarme hasta el final....
Dios los bendiga enormemente....
Thank you for giving me a little of your time and accompanying me until the end....
God bless you enormously....
Las fotografias son de mi autoria, capturadas desde mi telefono inteligente Redmi 10 y editadas en la APP Picsart.
Contenido original publicadi y reservado en HIVEBLOG.
Texto traducido en el traductor de google.
The photos are my own, captured from my Redmi 10 smartphone and edited in the Picsart APP.
Original content posted and reserved on HIVEBLOG.
Text translated in google translator.
🎆🎇🎉🎊🌧️💐✨🌾🌱🌹🌙🌿🍃🥀⚡🌺☘️🍀🌈🌷⭐🪴🌵🌸🌟💮🌴🌳💫☀️💮☔🌲🌳🌍🌌🌠☄️🏵️🐝🌻🌼🍄🐞🦋💙☕💜🍍🎆🎇🎉🎊
Pero que bonita quedó.... Me encantó lo sencilla que se ve de montar... gracias por compartir.
🎆🎇🎉🎊🌧️💐✨🌾🌱🌹🌙🌿🍃🥀⚡🌺☘️🍀🌈🌷⭐🪴🌵🌸🌟💮🌴🌳💫☀️💮☔🌲🌳🌍🌌🌠☄️🏵️🐝🌻🌼🍄🐞🦋💙☕💜🍍🎆🎇🎉🎊
Grácias amiga bendiciones ❤️