Bienvenidos | Welcome
Saludooos, gente linda de Hive, espero que se encuentren muy bien. El día de hoy les traigo un tutorial para aprender a hacer un lindo mini calendario 2022 📅✨ Desde que inició el año estuve muy pendiente de traerles este tutorial, pero por algunos motivos de salud no pude subirlo antes 😞 espero que les guste mucho y que les sea de utilidad 💖😊
Sin más que decir, comencemos.
Greetings, beautiful people of Hive, I hope you are feeling great. Today I bring you a tutorial to learn how to make a nice mini calendar 2022 📅✨ Since the beginning of the year I was very pending to bring you this tutorial, but for some health reasons I could not upload it before 😞 I hope you like it very much and that you find it useful 💖😊.
Without more to say, let's get started.
Materiales | Materials:
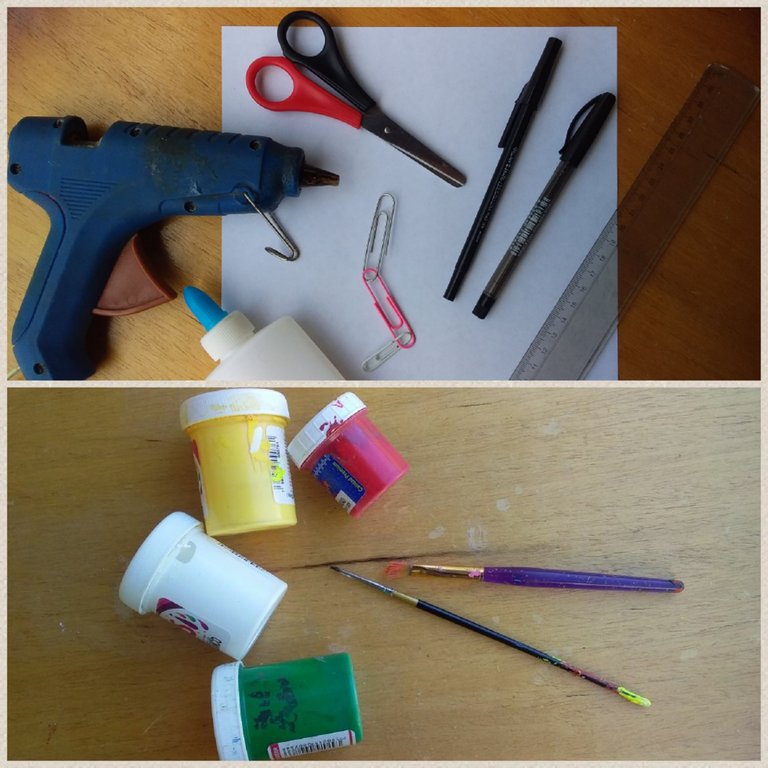
| Hoja de papel | Pega escolar | Regla |
|---|---|---|
| Boligráfos | Pega caliente | Clips |
| Tijeras | Pinturas | Pinceles |
| Sheet of paper | School glue | Ruler |
|---|---|---|
| Pencil | Hot glue | Clips |
| Scissors | Paints | Brushes |
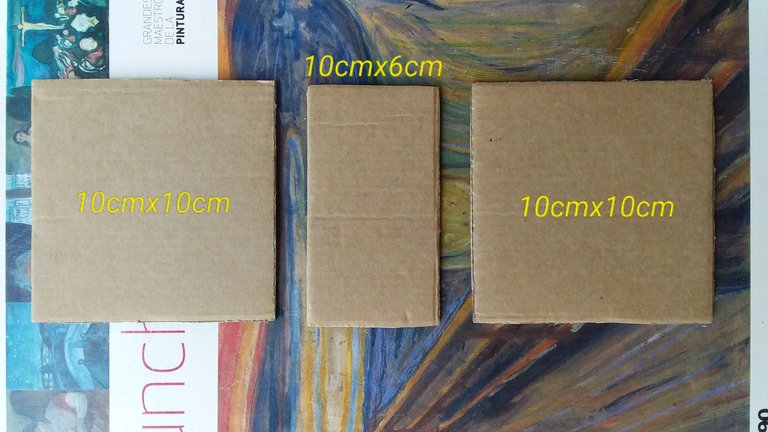
Además,necesitaremos 3 piezas de cartón. Acá las medidas que utilicé. 🙋♀️
In addition,we will need 3 pieces of cardboard. Here are the measurements I used. 🙋♀️
📅Proceso | Process📅
Paso 1 | Step 1
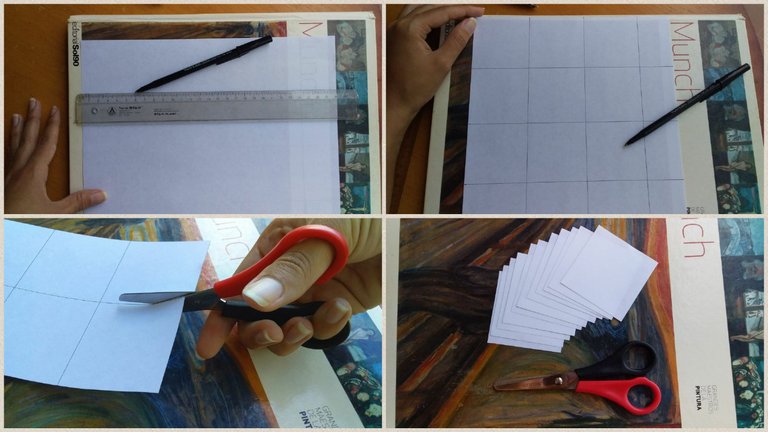
Lo primero que haremos será tomar papel, lápiz y regla, luego trazaremos 12 cuadrados de 6x6cm y los cortaremos.
The first thing we will do is to take paper, pencil and ruler, then we will trace 12 squares of 6x6cm and cut them.
Paso 2 | Step 2
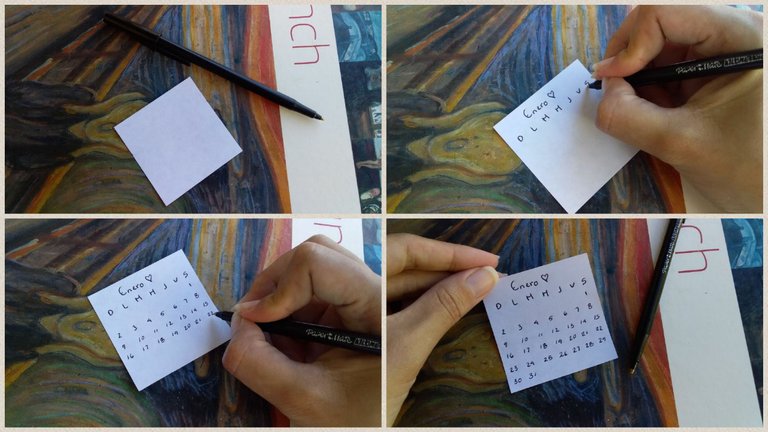
En cada cuadrito de papel escribiremos el mes, los días de la semana y los números. Para esto puedes usar de guía algún calendario 2022 de internet.😁
On each paper square we will write the month, days of the week and the numbers. For this you can use a 2022 calendar from the internet as a guide.😁
Paso 3 | Step 3
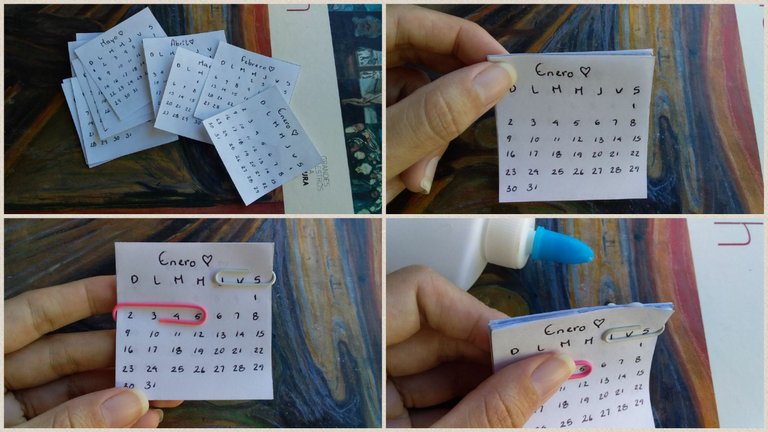
Una vez tengamos listos los 12 meses, los sujetaremos con un par de clips y aplicaremos un poco de pega escolar por encima y dejaremos secar.
Once we have the 12 months ready, we will fasten them with a couple of clips and apply a little school glue on top and let them dry.
Paso 4 | Step 4

Ahora, pegaremos nuestras piezas de cartón.
Now, we will glue our cardboard pieces.
Paso 5 | Step 5
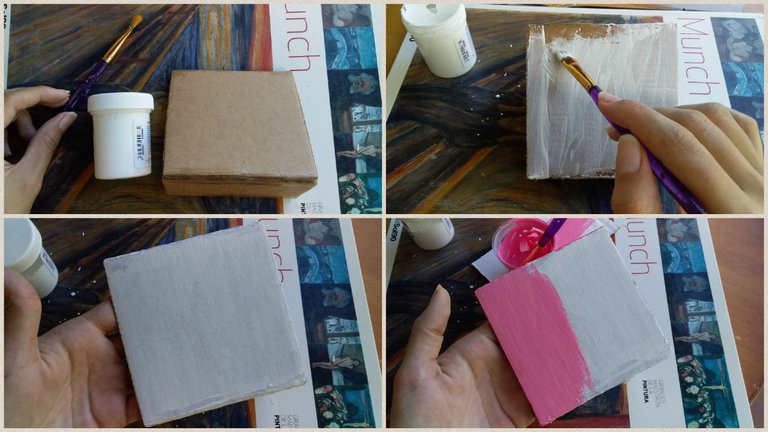
En mi caso apliqué unas capas de pintura blanca y luego un tono rosa.
In my case I applied a few coats of white paint and then a pink tone.
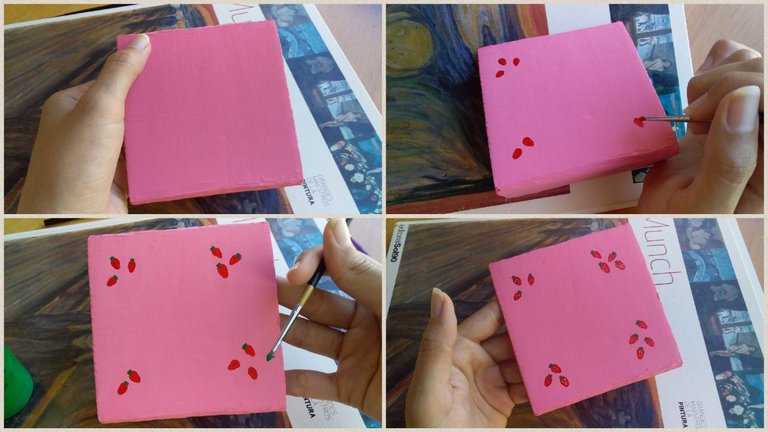
Para que se viera más bonito les hice unas pequeñas fresas, pero tu puedes decorar como desees. Puedes pintar, usar stickers, glitter, tela, lo que sea que quieras.😁
To make it look prettier I made some little strawberries, but you can decorate as you wish. You can paint, use stickers, glitter, fabric, whatever you want.😁
Paso 6 | Step 6

Pegaremos nuestros meses a la pieza de cartón y listo!
We will glue our months to the cardboard piece and that's it!
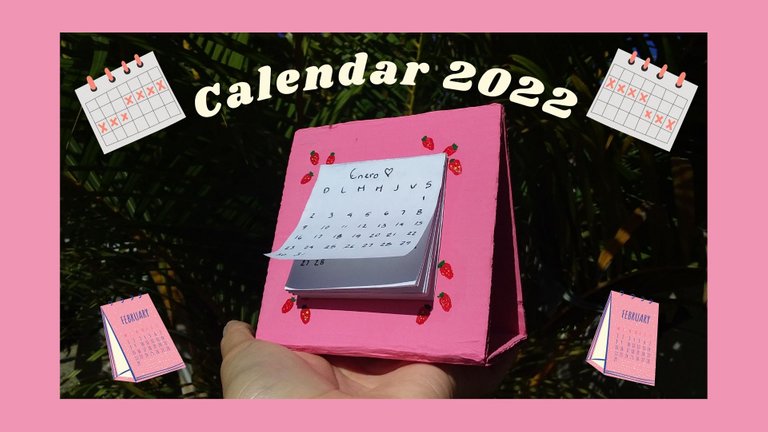
📅Resultado | Result📅

Y este es el resultado de nuestro mini calendario 2022 😊💖 espero les haya gustado!
Muchas gracias por leerme.💖
And this is the result of our mini calendar 2022 😊💖 I hope you liked it!
Thank you very much for reading me 💖.