There is a break in my pottery course for almost 6 months, so I've started playing around with the clay at home as I can't wait that long. I had no idea I could become so excited about something. My teacher sold me some clay and also gave me the tools that I was using in her class until my new tools are delivered. Suddenly I was set to work at home!
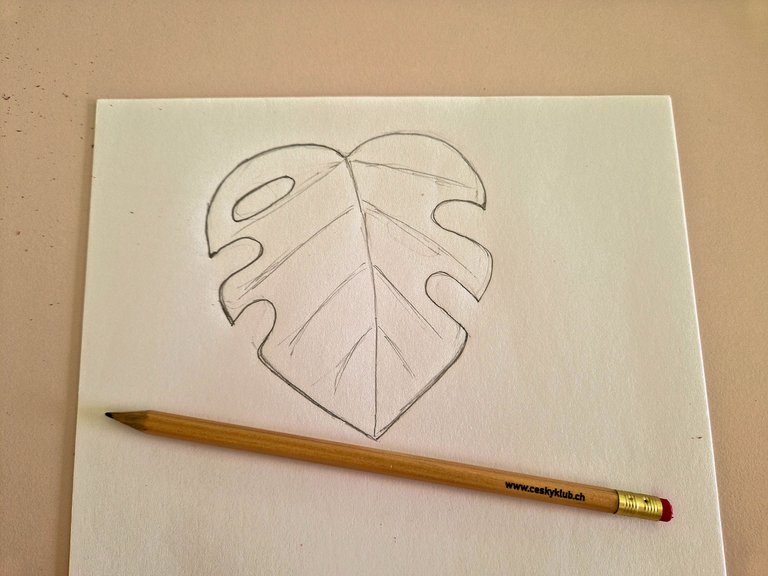
I'm sure I don't need to say that I love interior plants. My favourite plant is a monstera. I have a couple of them at home, and they were my first inspiration. I sat in front of one of them while I was working on my stencils. I wanted to make a small as well as a big dish to hold some snacks. I can't draw well, so this was a challenge to me, but in the end I'm happy with the result. Let me show you what I did!
Well, I told you I can't draw, so don't judge me too much. I had to do some corrections after I finished the first drawing as I realized that the hole was too close to the middle of the dish, so it wouldn't be able to hold anything. This is my final draft.
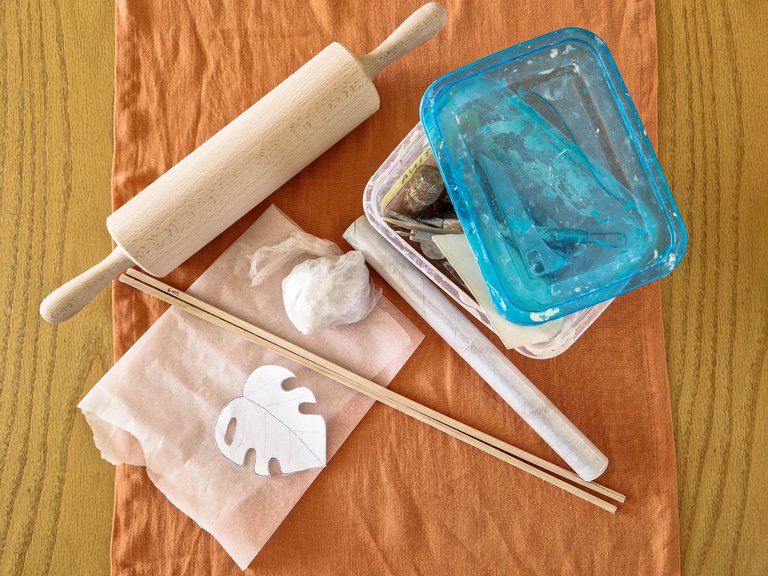
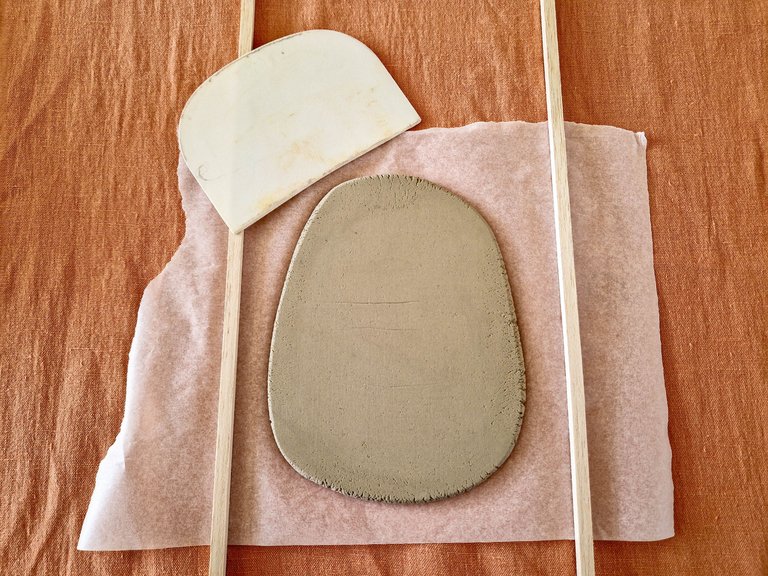
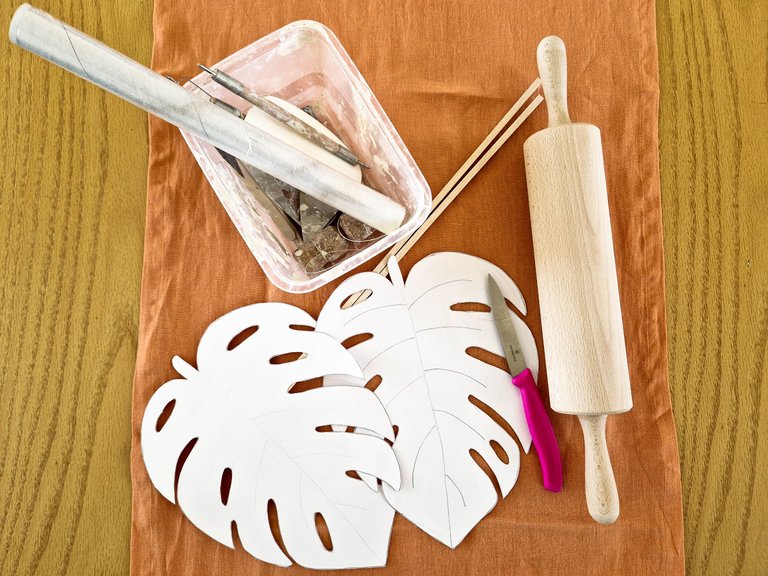
And here are the tools that I used to work with the clay. My teacher told me to use some linen towel with little to no structure, and as this was the only linen towel that I had it had to do the job. Then I used the kitchen plastic foil wrap, a small baking paper piece, a rolling pin that I normally use to roll out cake dough, two 6mm thick wooden sticks, and the tools from my class.
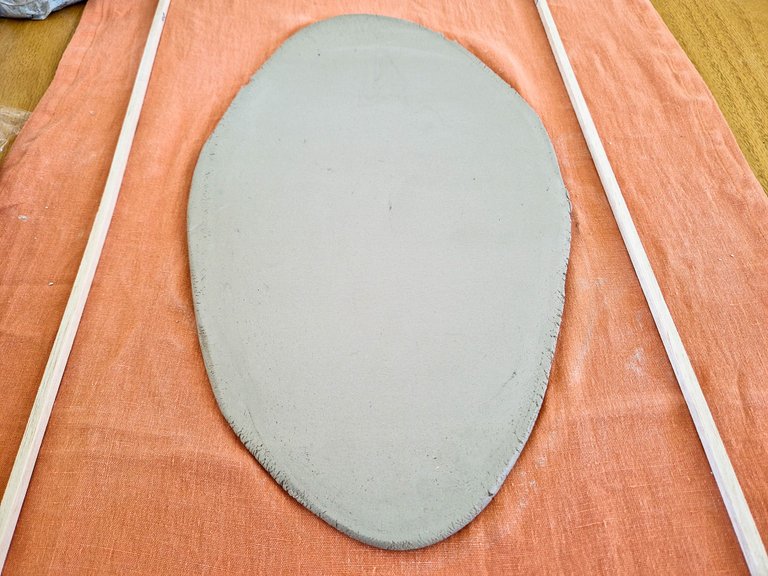
First I wedged the clay to make sure that there are no air bubbles. Then I placed it between the wooden sticks on a baking paper and started rolling it out.

I rolled it a bit, then placed the plastic foil wrap on it and flipped it around to continue rolling out. I repeated this process a few times until I got the desired thickness of 6mm.
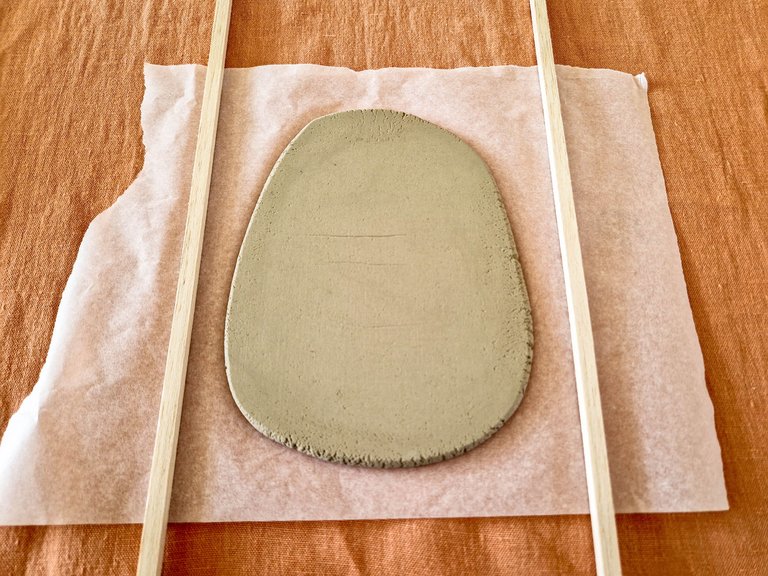
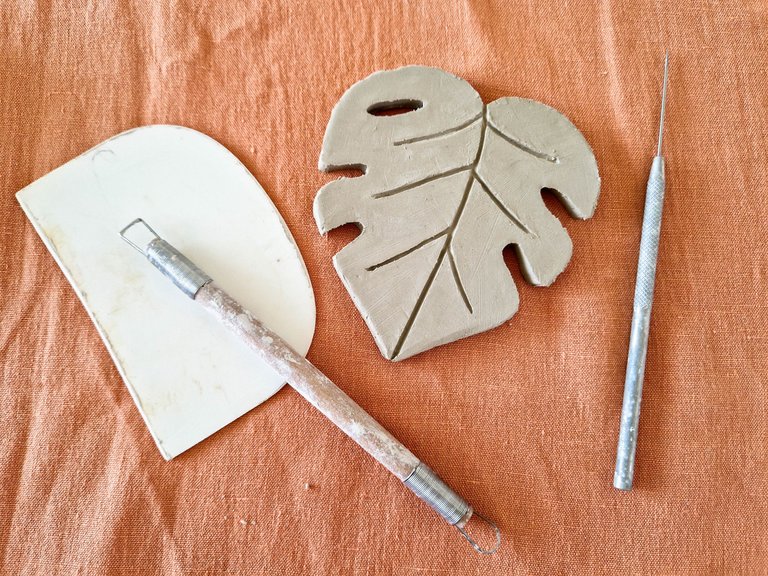
I have no idea how you call this tool, but it is used to compress the clay. You move it with a bit of pressure over the clay until all small imperfections are cleaned.
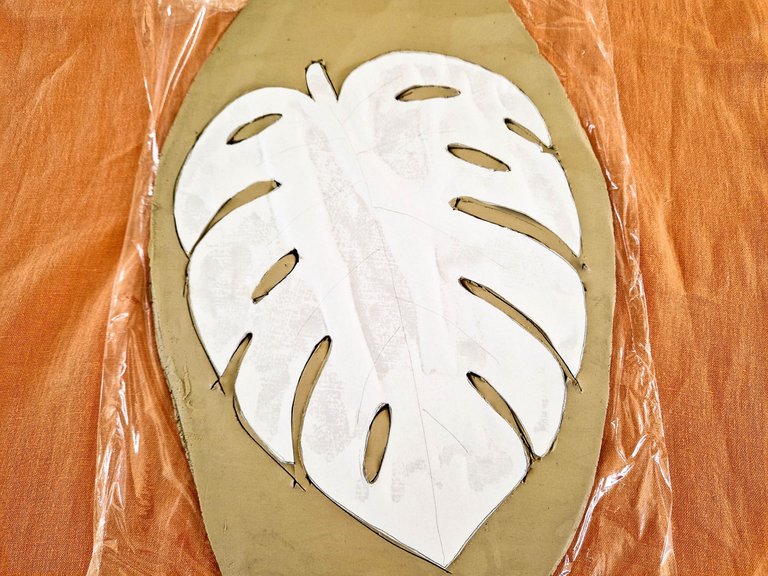
Then I placed my paper stencil on my slab. It wasn't clever to make the stencil out of paper as it started to quickly absorb the moisture and became very soft, so I had to hurry. I need to figure out how to create stencils that we last longer.
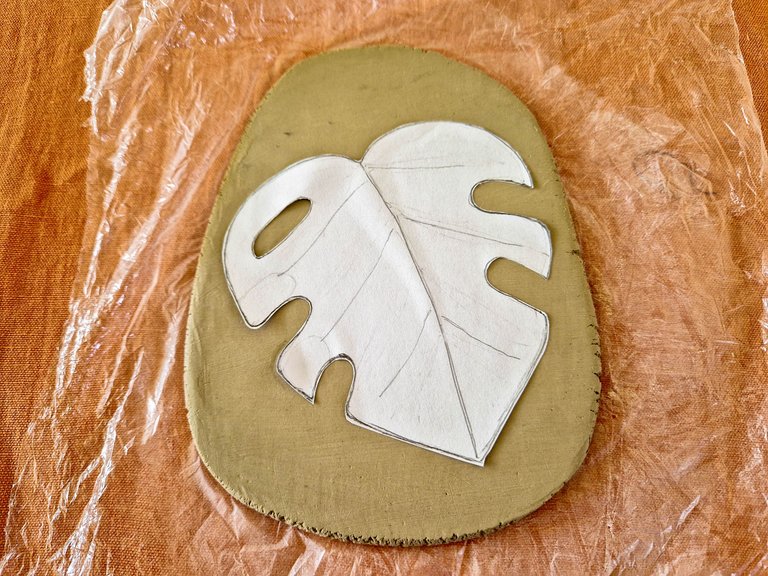
I moved the slab on an old newspaper and cut it out with a long metal nail. It worked pretty well. I have ordered a special knife to cut it, so I will be better equipped for next time.

I moved it back to the plastic foil wrap because I thought that I was done with cutting when I realized that I forgot a small piece. I didn't want to move it back, so I cut it out on it.
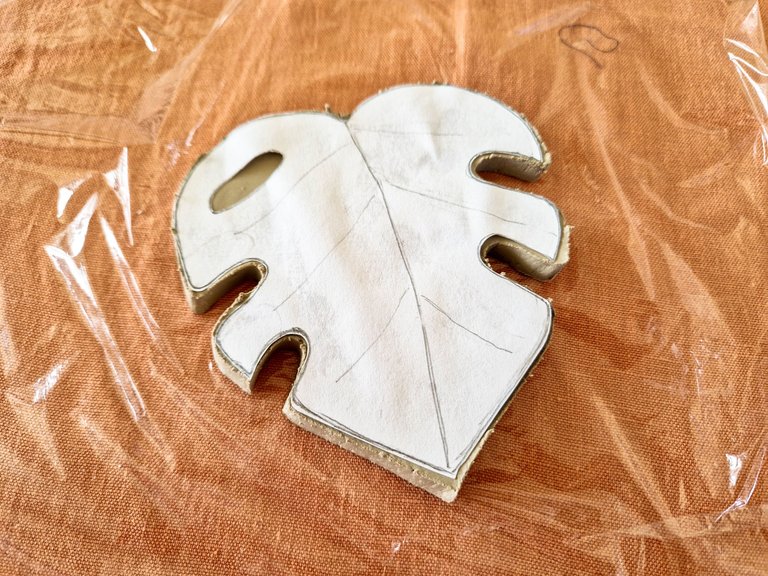
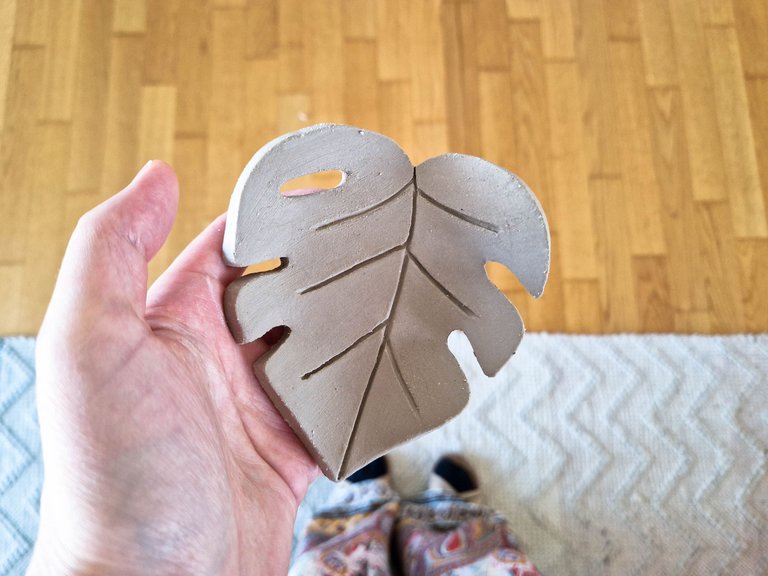
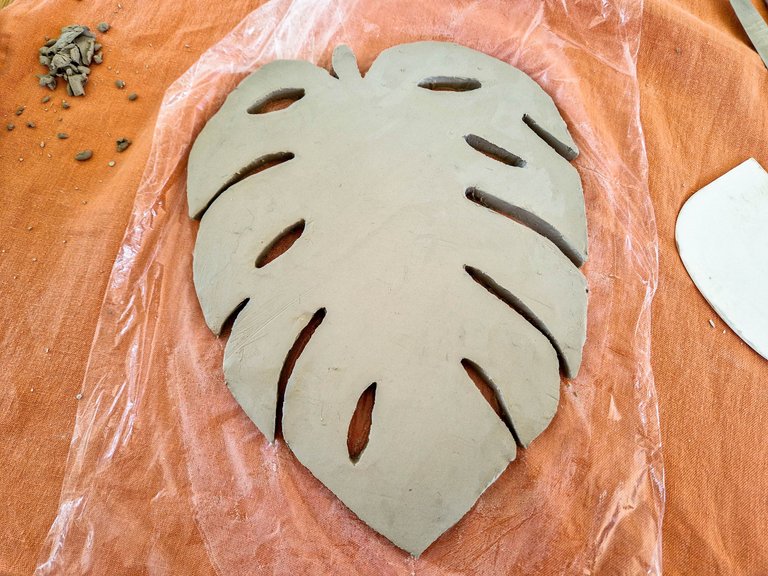
When I finished I removed the stencil. At this point I started to doubt myself because I really didn't like it...
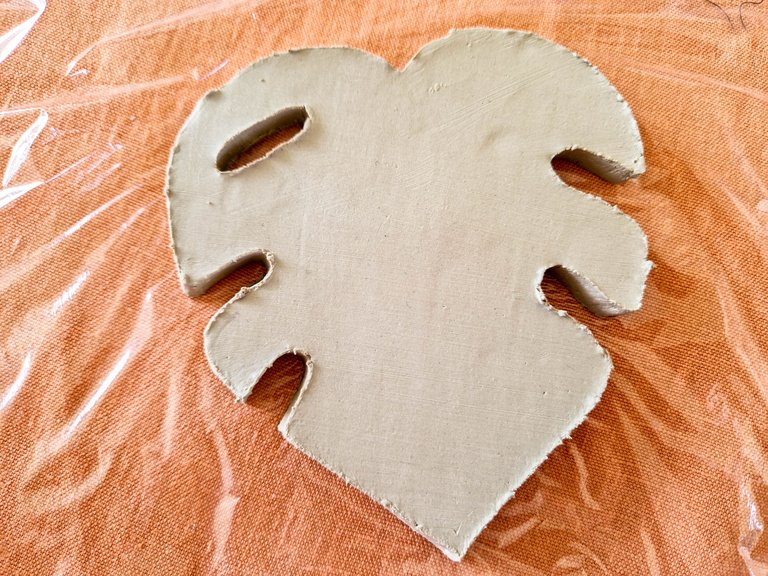
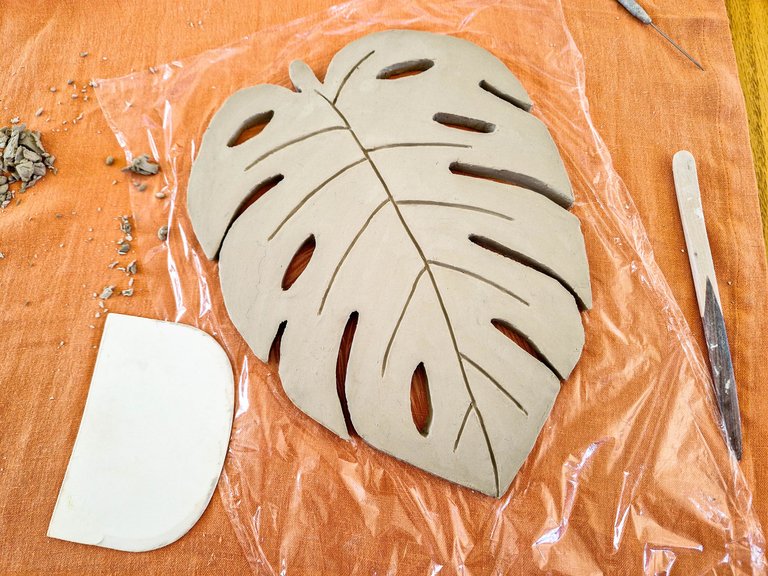
Until I created the veins... Then it started to look much better!

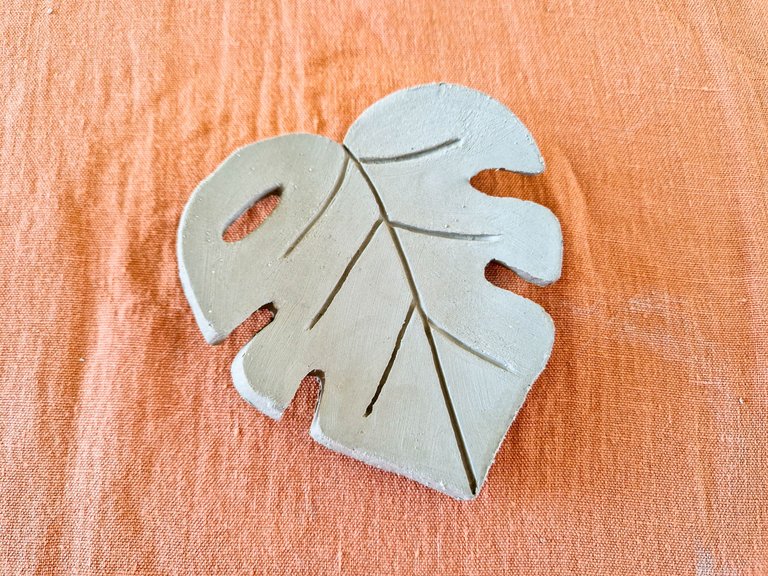
I let it dry a bit before I cleaned it with a slightly wet sponge. I brushed it lightly over the imperfections. The clay absorbs water quickly, so you can only do little adjustments if you don't want to end up with a totally different shape, or a shapeless slab.
Then it was drying for about an hour before I shaped the clay to a dish. This is my very first item that I created without the potter wheel and I must say that I need a lot of practice to feel comfortable with the process. It all took a bit long, but next time I will make it faster by using a fan. This speeds up the drying process.
Let's move to the bigger dish! I was not sure if I really liked the first stencil, so I drew another one. In the end I liked them both 😊
I repeated the process, just here I had to be more careful as the clay slab was much bigger. I was paying attention to any air bubbles when I was compressing both sides of the slab - always compress both sides!
Next I cut the shape out of the slab. This one was more difficult than the smaller one because there were more holes and round edges.
And then I removed the excess of the clay...
Finished by making the veins before letting it dry to be able to shape the dish...
And this is how it looks like after I shaped it...
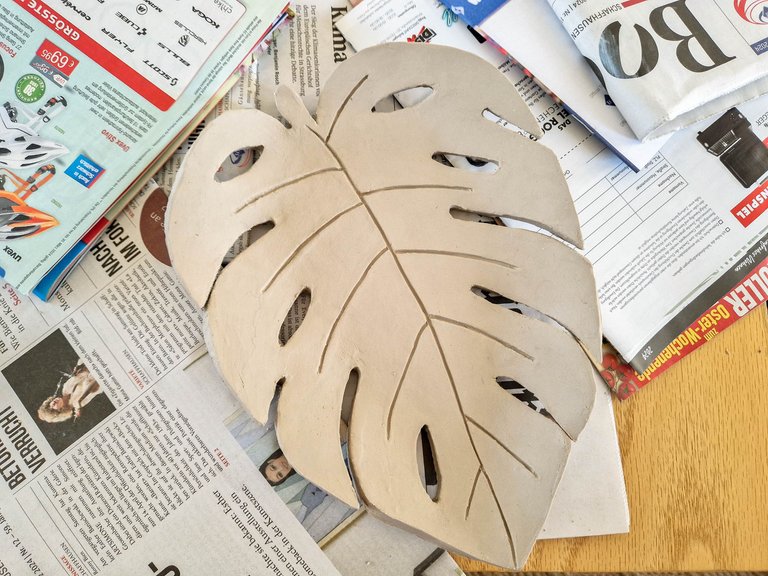
I have made 4 small dishes and 2 big ones during a couple of days. All of them are bone dry now and ready to be bisque fired. Today, I'm going to bring them for firing, and hopefully glaze them next week. Of course, I will take you through the process too!
See you next time...
Wow good job @plantfuljourney! What a nice Monstera dishes 👏 I wish to have one at my place. I look forward to seeing the finished pieces 😊
Thank you! 😊 Let's see if you like the finished pieces and if you would really like to have one we could agree on something 😊 I see that you're in Germany, so it wouldn't be too difficult for me to ship it...
Quite a process and neatly done. The leaves have a special look, and with the correct tools, you will get even better as time goes on.
!PIZZA
The tools have arrived a couple of days ago, so I'm already playing around with them 😊 Thank you!
I am glad that you now have the tools, and that you will have some great fun with them.
!PIZZA and !LUV
plantfuljourney, papilloncharity sent you LUV. 🙂 (1/10) tools | trade | connect | wiki | daily
Made with LUV by crrdlx.
$PIZZA slices delivered:
@papilloncharity(2/15) tipped @plantfuljourney (x2)
If you cut through the veins they would also make very nice soap holders, dunno why I thought of that as soon as I saw it
Soap holders is a good idea, but I'm not sure if it would work like that as they would probably break in the kiln. But I have some other shapes for soap holders in mind already 😊
Wow those are really great Martina. So fun and creative.
Thank you Sara! I'm happy you like them 😍
¡¡¡Buen trabajo!!! Gracias por publicar tu excelente contenido en Hive Diy, hermosa manualidad, me imagino que no ser fácil hacerla por el material, me gusto mucho los detalles que le diste.
Tu comunidad artesana ahora es testigo
