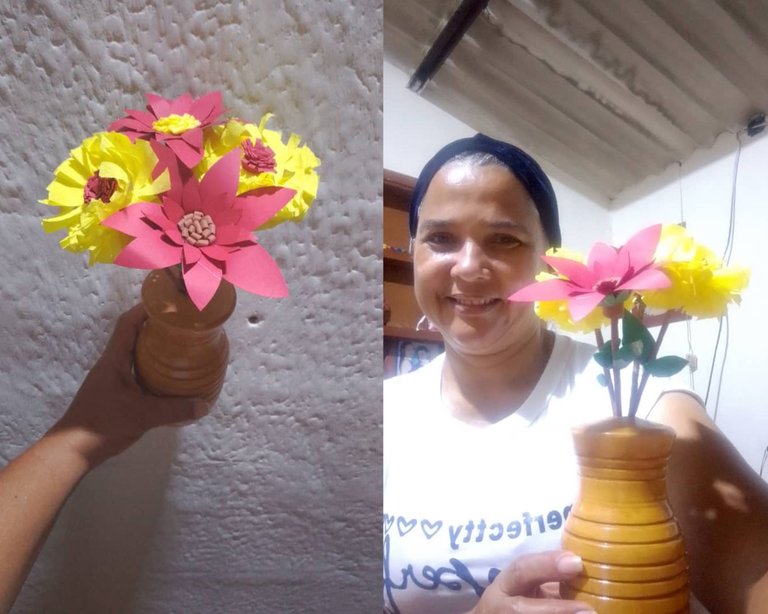
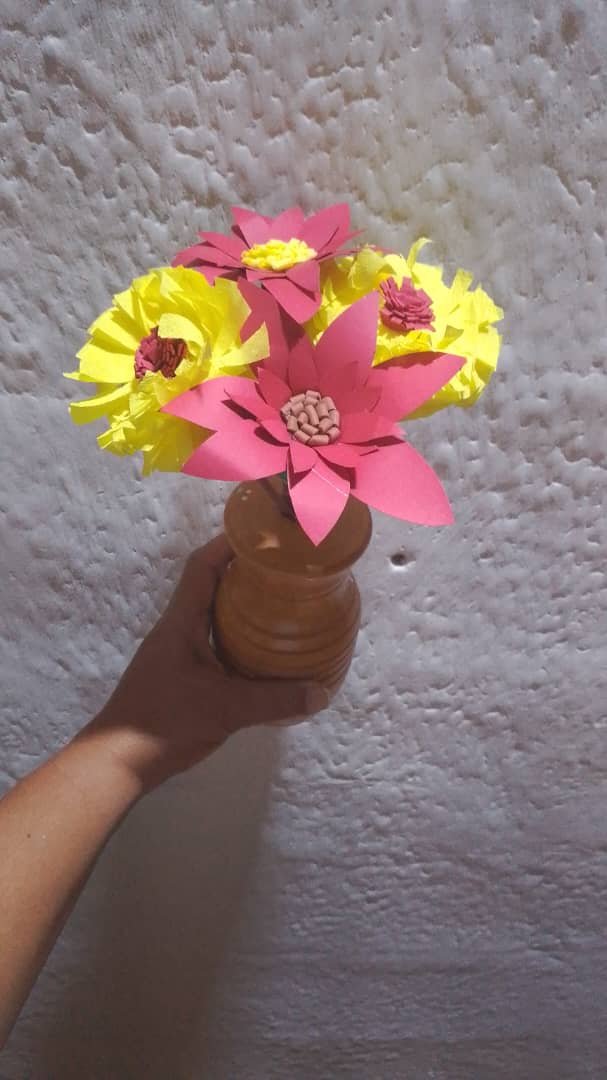
Hola muy buenas noches tengan todos mis amigos , espero que se encuentren bien, Dios les bendiga a todos , les quiero compartir unas flores que realicé para decorar mi porrón artesanal, es una reliquia, como persona que ama las flores me gusta siempre decorar con ellas , la naturales son encantadoras ,pero lo cierto es que estás duran más , realicé no solamente dos tonos distintos, sino también dos modelos distintos como pueden apreciar
Hello very good evening to all my friends, I hope you are well, God bless you all, I want to share with you some flowers that I made to decorate my handmade porrón, is an heirloom, as a person who loves flowers I always like to decorate with them, the natural are lovely, but the truth is that these last longer, I made not only two different shades, but also two different models as you can appreciate
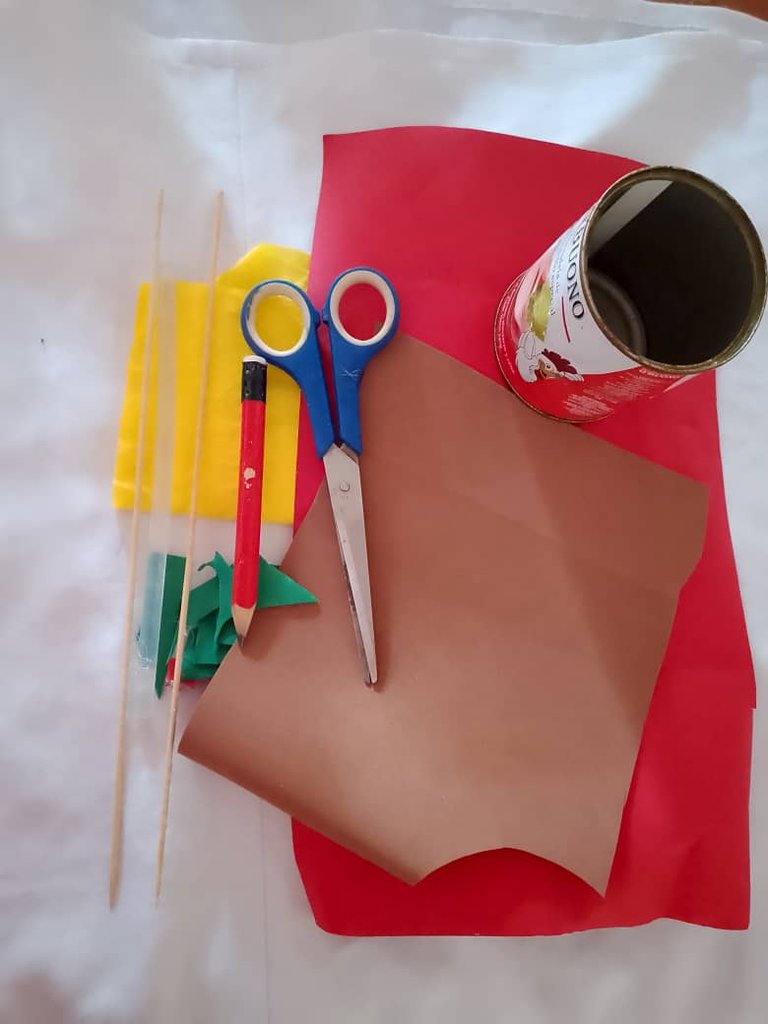
Materiales para realizar nuestras flores:
-Papel crepé
-Cartulina
-Palito de altura
-Foamis
-Tijera
-Silicon
Materials to make our flowers:
-Crepe paper
-Cardboard
-Stick of height
-Foamis
-Scissors
-Silicon
Pasos para realizar nuestras flores de papel :
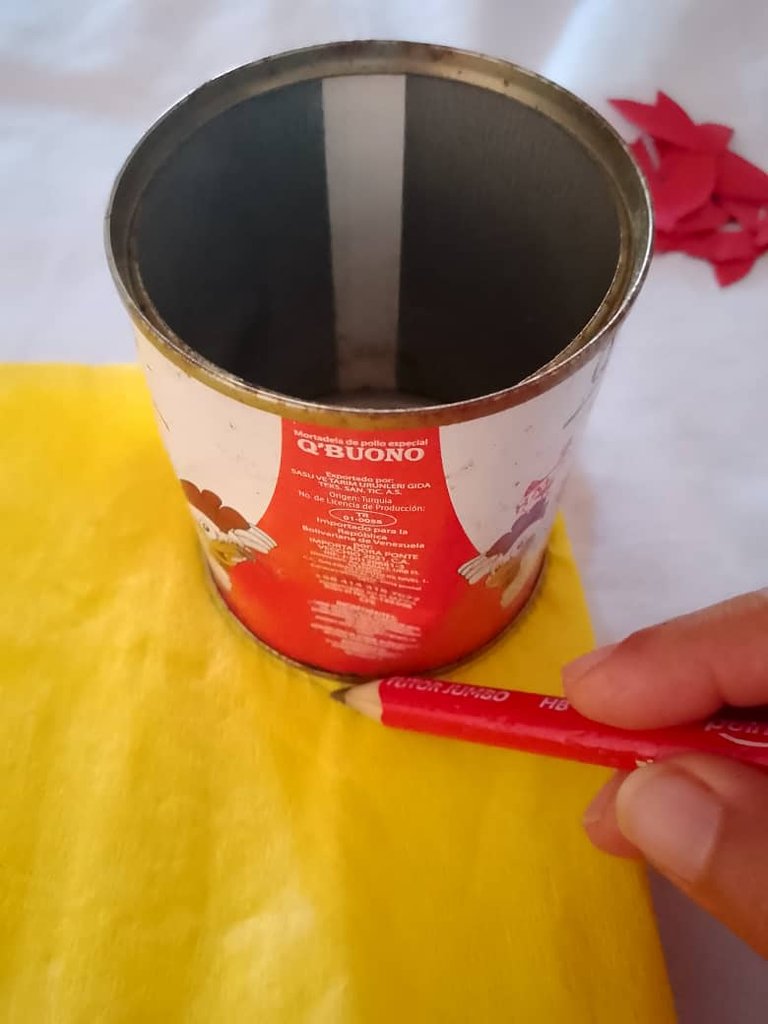
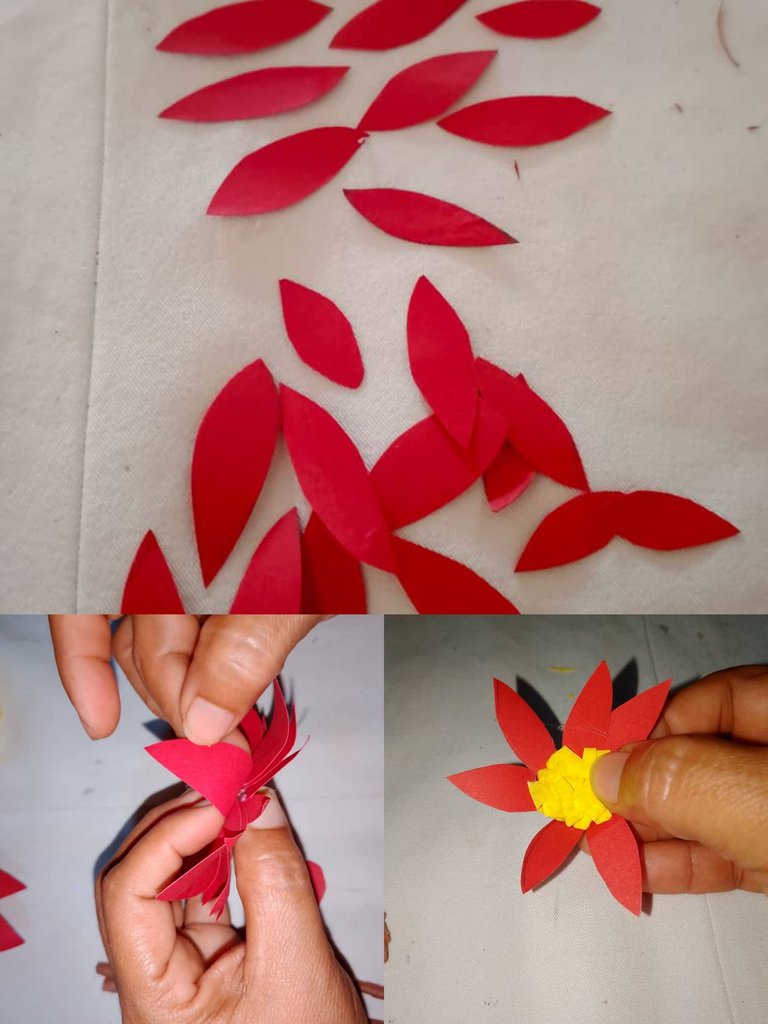
Paso número 1: comenzaremos primeramente realizando el modelo de flores amarillas, primeramente tomaremos el papel crepé , con la ayuda de un objeto redondo realizaremos un círculo para proceder realizando nuestras flores
Steps to make our paper flowers:
Step number 1: we will start firstly making the yellow flowers model, first we will take the crepe paper , with the help of a round object we will make a circle to proceed making our flowers
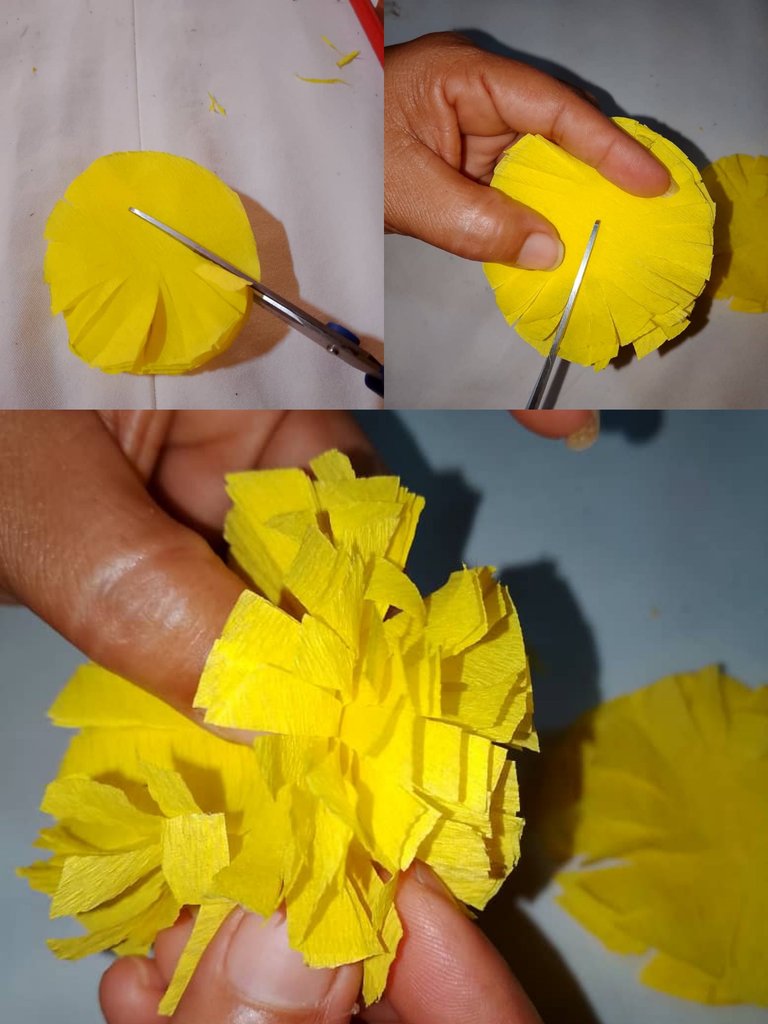
Paso número 2: luego vamos a continuar tomando nuestras piezas redondas de papel crepé, juntamos y realizaremos varios recortes tipo flecos , alrededor del círculo , como son varios flecos y capas vamos a ir levantando y moldeando hasta obtener nuestro diseño
Step number 2: then we will continue taking our round pieces of crepe paper, we will put together and make several fringe-like cuts, around the circle, as there are several bangs and layers we will be lifting and shaping until we get our design.
Paso número 3: luego continuaremos tomando un recorte de cartulina, realizamos varios flecos , enrollamos y pegamos en todo el centro de nuestras flores , culminando nuestro primer modelo
Step number 3: then continue taking a cardboard cutout, we make several bangs, roll and glue around the center of our flowers, culminating our first model.

Paso número 4: a continuación en el cuarto paso vamos a continuar realizando el otro modelo de flores de cartulina, comenzamos recortando varios pétalos puntiagudos , una vez recortados comenzamos a pegar punta con punta hasta formar nuestra flor de varios pétalos , luego vamos a proceder tomando nuestro papel crepé amarillo, recortamos una tira , convertimos en flecos , enrollamos y pegamos en todo el centro de la flor , finalizando este diseño
Step number 4: then in the fourth step we will continue making the other model of cardboard flowers, we start by cutting out several pointed petals, once cut out we start gluing tip to tip to form our flower of several petals, then we will proceed taking our yellow crepe paper, we cut a strip, we turn into bangs, roll and glue around the center of the flower, finishing this design.
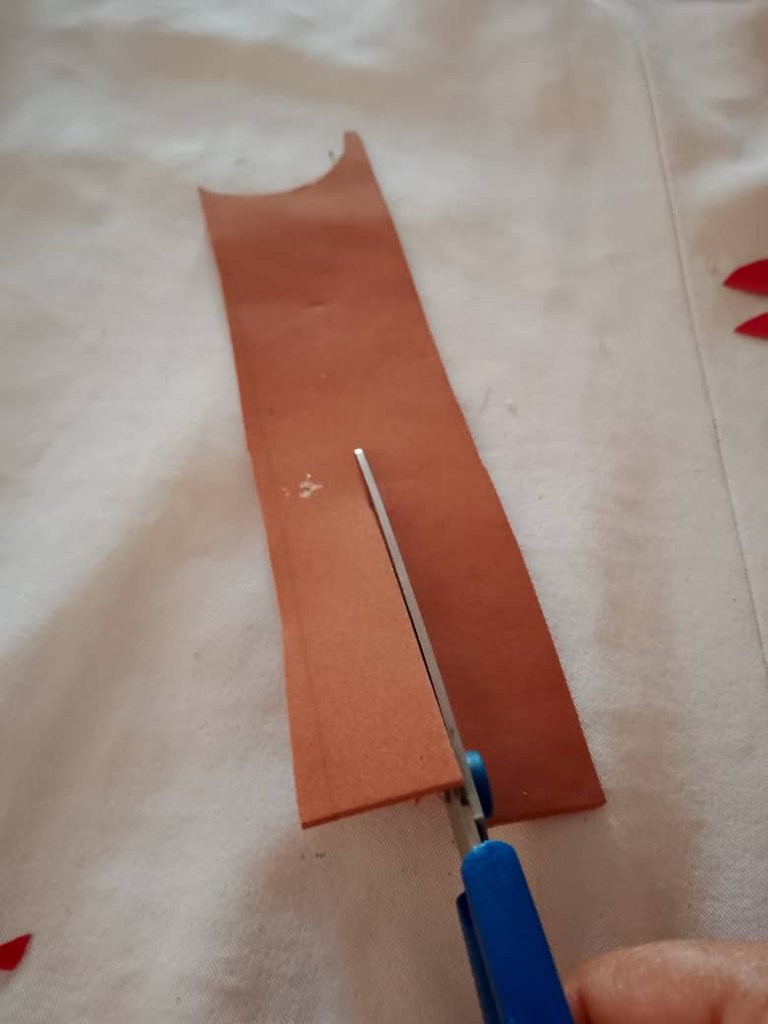
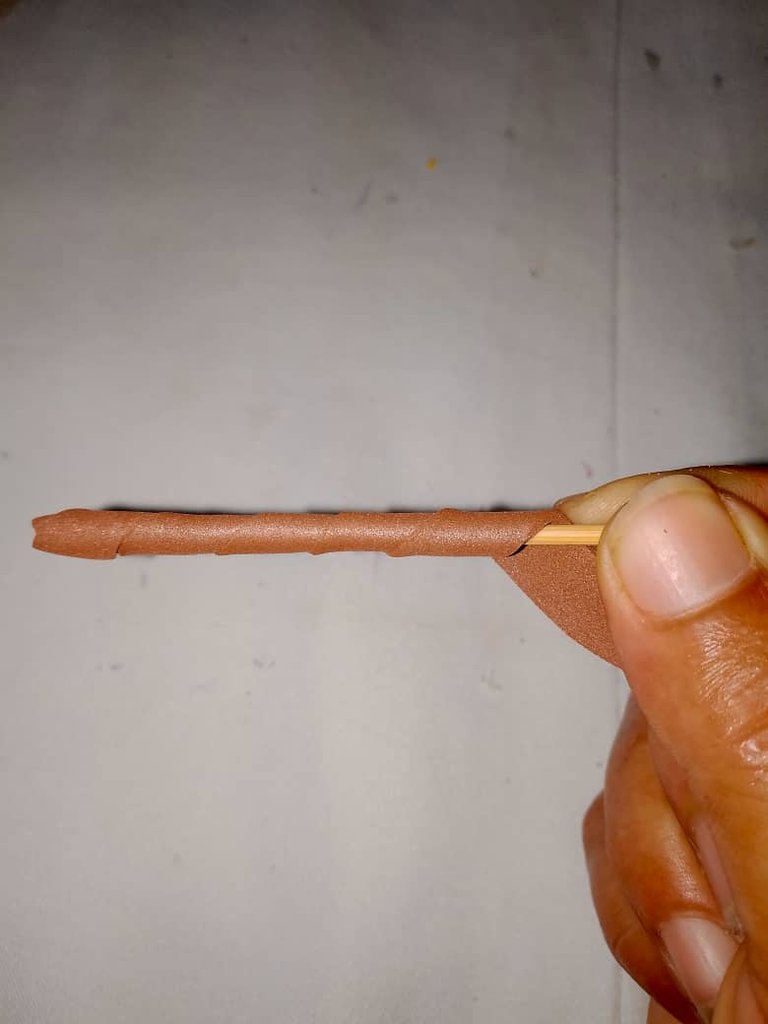
Paso número 5: luego vamos a continuar tomando nuestro foamis color marrón , recortamos varias tiras , comenzamos a pegar en el palito de altura de forma enrollada hasta cubrirlo y formar el tallo de nuestras flores
Step number 5: then we will continue taking our brown foamis , we cut several strips , we begin to paste on the stick in a rolled up way to cover it and form the stem of our flowers.
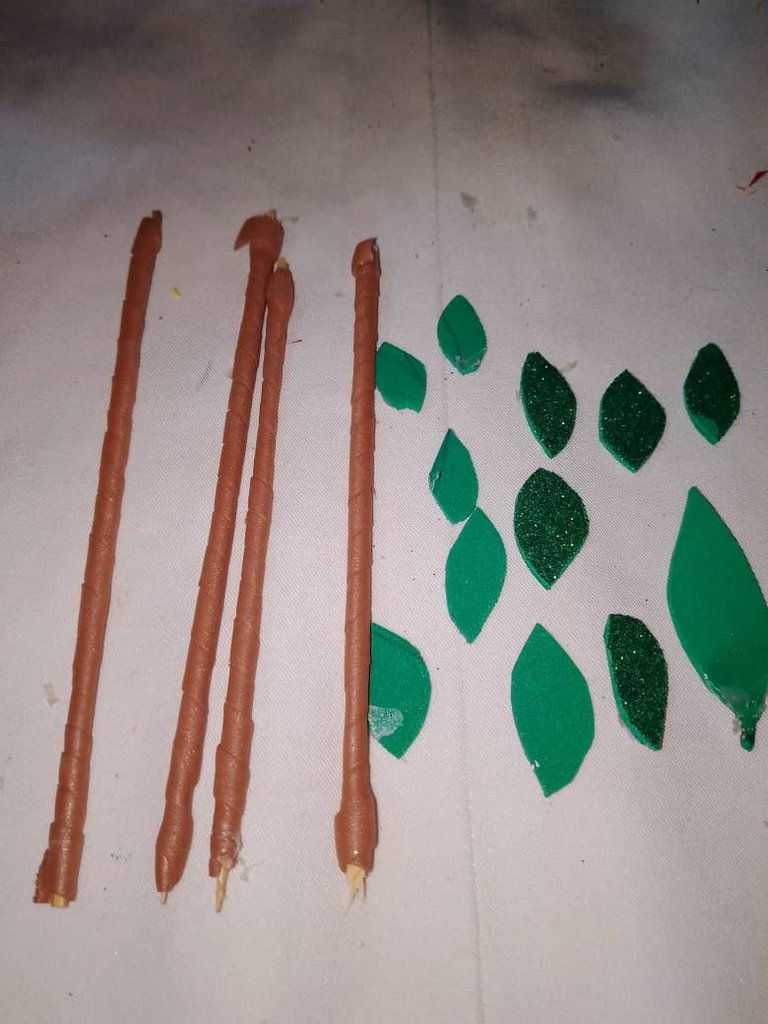
Paso número 6 : así van a quedar nuestros tallos y adicional realizaremos varias hojas para adornar , como pueden observar amigos
Step number 6: this is how our stems are going to look like and we will also make several leaves to decorate, as you can see my friends.
Paso número 7 : finalmente continúe tomando los palitos de altura y los pegué a las flores para poder colocarlas dentro de mi porrón artesanal, espero les guste este modelo tan sencillo y llamativo amigos , es un proceso facil y estoy segura que lo sabrán hacer , gracias por su maravillosa atención, hasta la próxima amigos , que descansen
Step number 7 : finally I continue taking the sticks of height and glued them to the flowers to be able to place them inside my handmade porrón, I hope you like this model so simple and striking friends, it is an easy process and I am sure you will know how to do it, thanks for your wonderful attention, until next time friends, have a rest.
This post has been manually curated by @bhattg from Indiaunited community. Join us on our Discord Server.
Do you know that you can earn a passive income by delegating to @indiaunited. We share more than 100 % of the curation rewards with the delegators in the form of IUC tokens. HP delegators and IUC token holders also get upto 20% additional vote weight.
Here are some handy links for delegations: 100HP, 250HP, 500HP, 1000HP.
100% of the rewards from this comment goes to the curator for their manual curation efforts. Please encourage the curator @bhattg by upvoting this comment and support the community by voting the posts made by @indiaunited.
Me parece una idea muy linda para decorar algún espacio especial en nuestro hogar, gracias por compartir, saludos 🥰
Muchas gracias amiga
Que linda combinacion de colores y que buen trabajo realizado, quedo realmente decorativo y muy elegante 😘 esas flores duraran para siempre jeje
Gracias amiga ,si jaja es lo bueno
Hermoso trabajo. Es increíble ver cómo con materiales simples puedes lograr hacer cosas tan bellas.
Beautiful work. The combination of tones adds a lovely depth to the flowers. such elegant result. Bravo
Congratulations @rameuris! You have completed the following achievement on the Hive blockchain And have been rewarded with New badge(s)
Your next payout target is 3000 HP.
The unit is Hive Power equivalent because post and comment rewards can be split into HP and HBD
You can view your badges on your board and compare yourself to others in the Ranking
If you no longer want to receive notifications, reply to this comment with the word
STOP