Hola mis bellos amigos! ❣️
Hello my beautiful friends! ❣️
Dios los bendiga de una manera especial! 😇 Espero que todos los que hacen vida en esta hermosa comunidad estén bien. Yo feliz de poder compartir mis ideas con ustedes. Hoy les traigo una manualidad muy fácil de hacer donde utilicé principalmente materiales de provecho como ramas secas. Hice para ustedes un hermoso triciclo para cactus, ya que muchos de ellos tienen raíces pequeñas y pueden sobrevivir en poca tierra. Te invito a que veas el tutorial y conozcas el paso a paso.!
God bless you in a special way! 😇 I hope everyone who makes life in this beautiful community is well. I am happy to share my ideas with you. Today I bring you a very easy craft to do where I mainly used useful materials such as dry branches. I made for you a beautiful tricycle for cacti, since many of them have small roots and can survive in little soil. I invite you to watch the tutorial and get to know the step by step.!
Materiales que necesitás:
- Ramas secas.
- Silicón.
- Tenazas.
- Trozos redondos de madera.
- Barniz.
- Alambre fino de cobre(opcional).
Materials you need:
- Dry branches.
- Silicone.
- Pliers.
- Round pieces of wood.
- Varnish.
- Fine copper wire(optional).

Manos a la obra!
Let's do it!
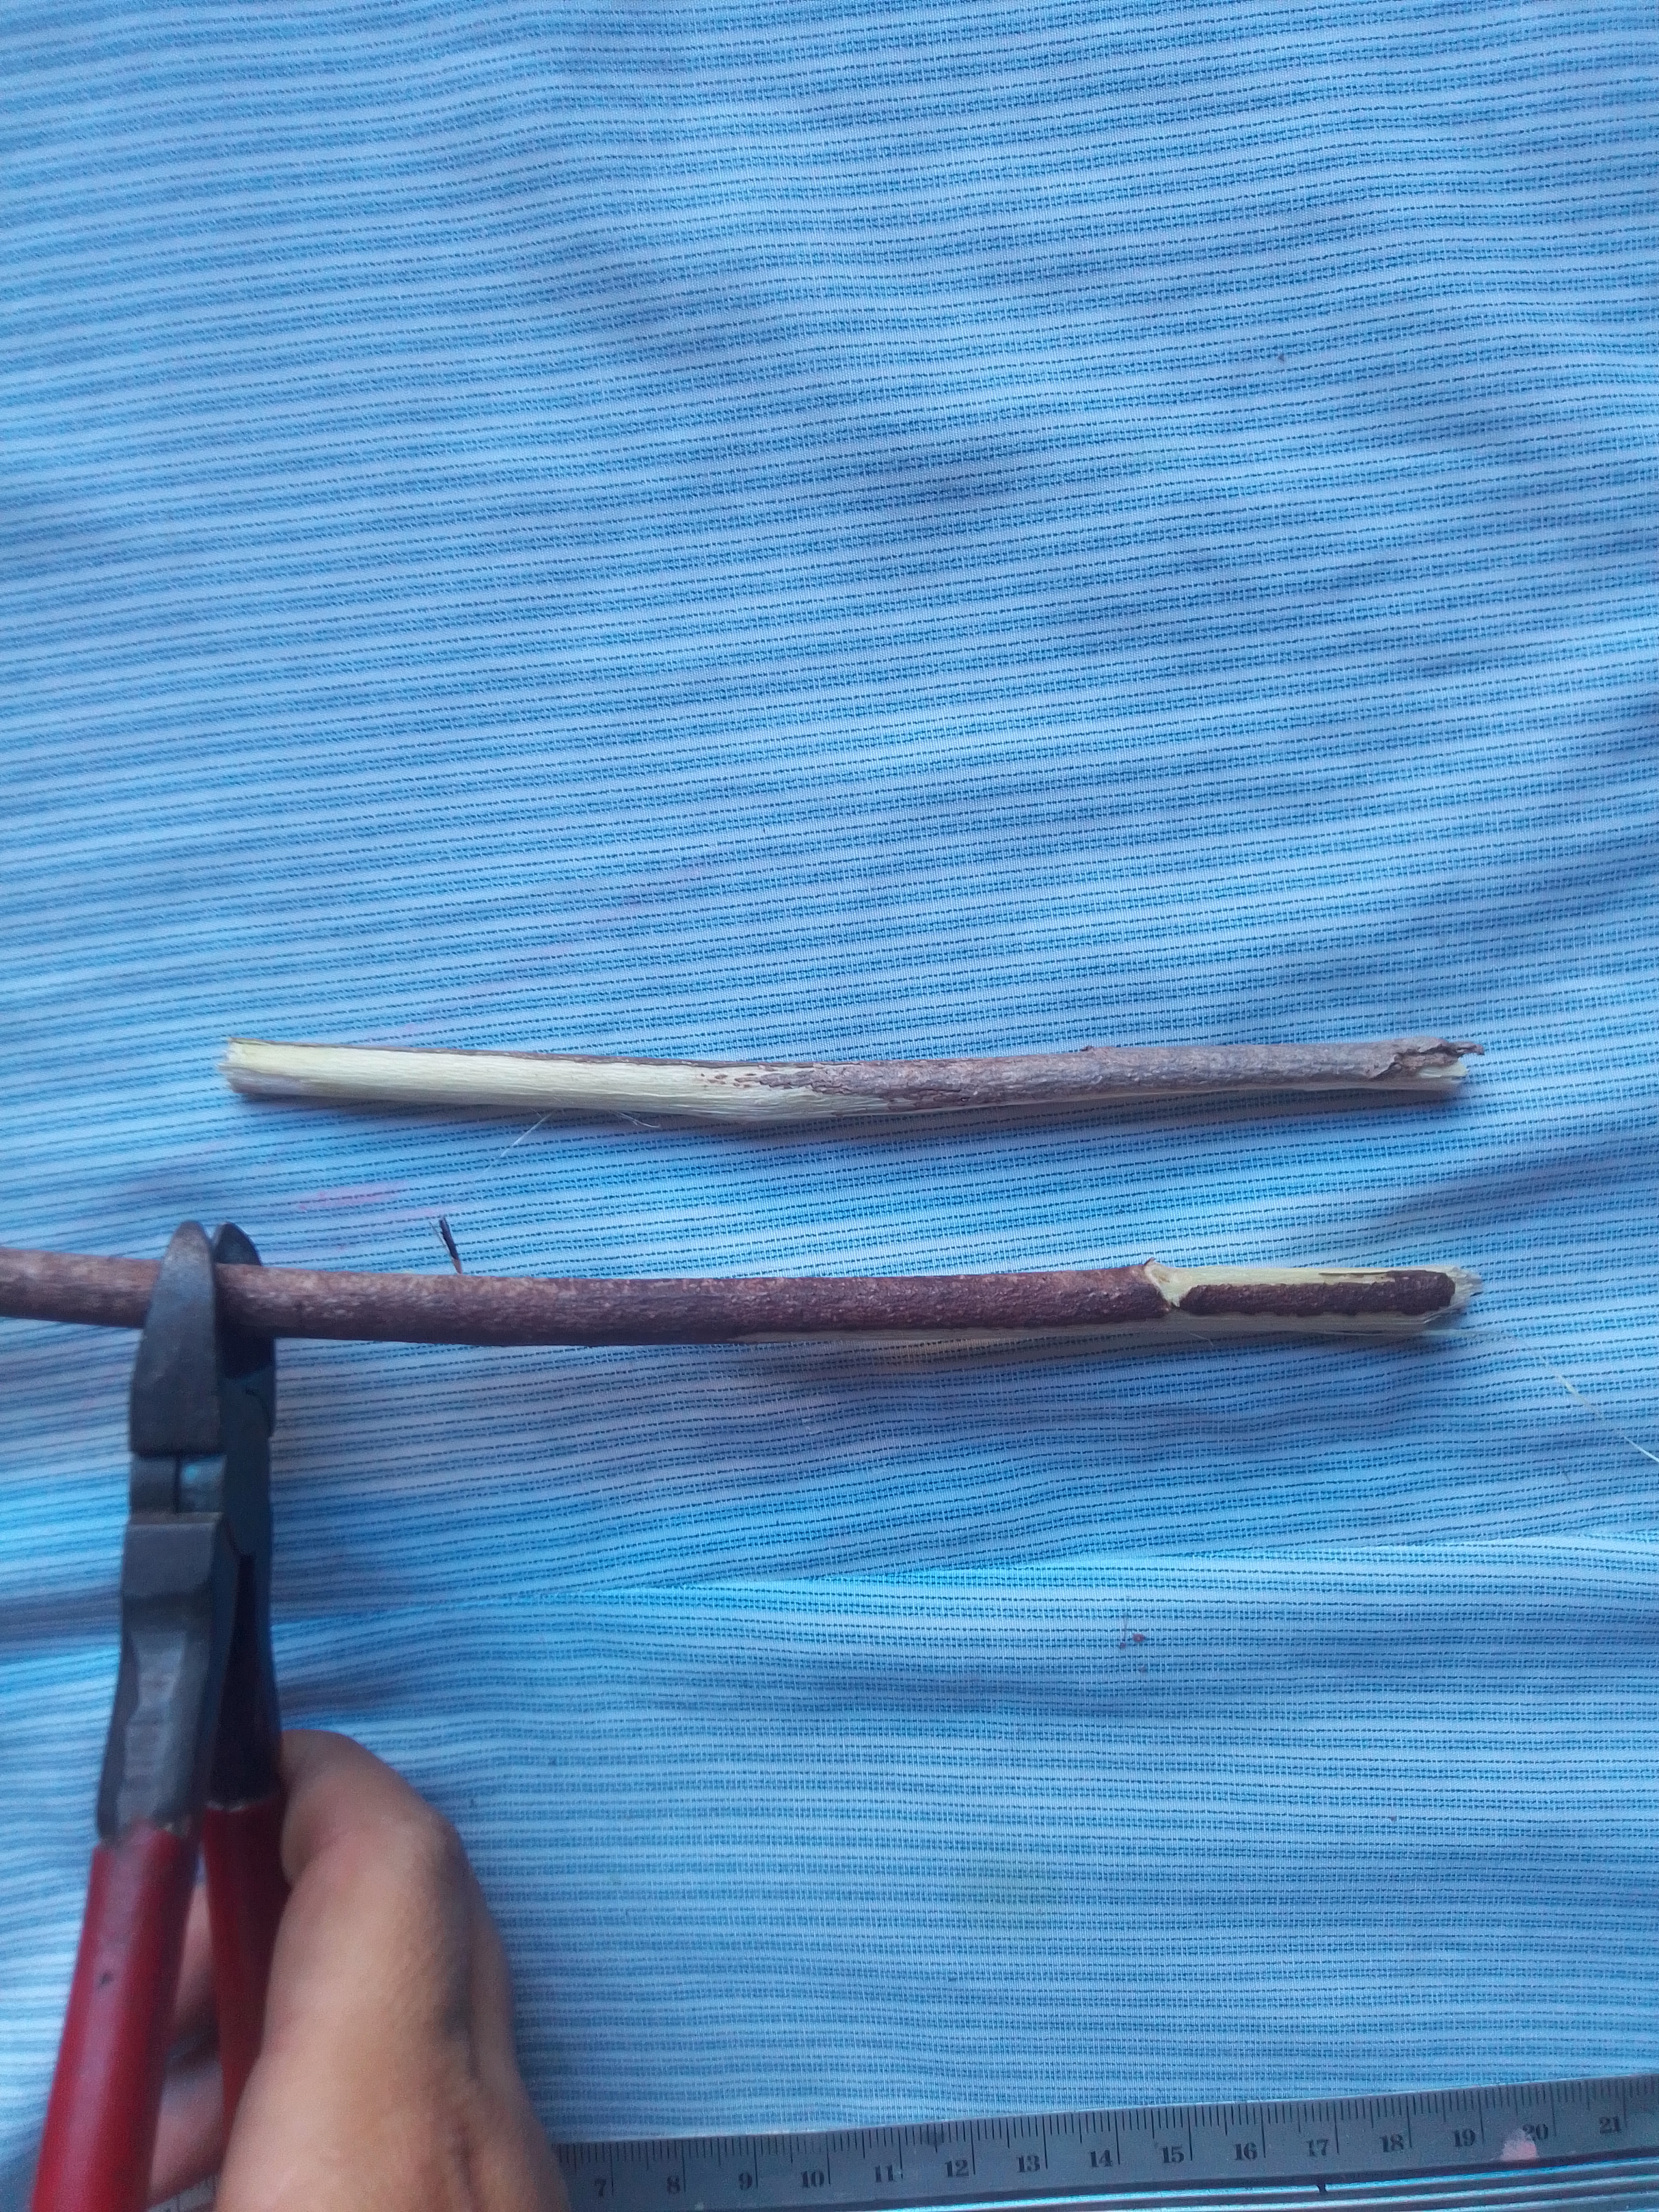
Paso 01
Nuestro primer paso se basará en cortar todas las piezas que conformarán el triciclo, con un tenaza cortamos varias ramas de aproximadamente 13 cm de largo.
Step 01
Our first step will be based on cutting all the pieces that will make up the tricycle, with a pair of pliers we cut several branches approximately 13 cm long.
Paso 02
Luego pegamos cinco ramas con silicón caliente, es necesario que las ramas estén completamente secas de lo contrario el silicón las pegará.
Step 02
Then we stick five branches with hot silicone, it is necessary that the branches are completely dry otherwise the silicone will stick them.

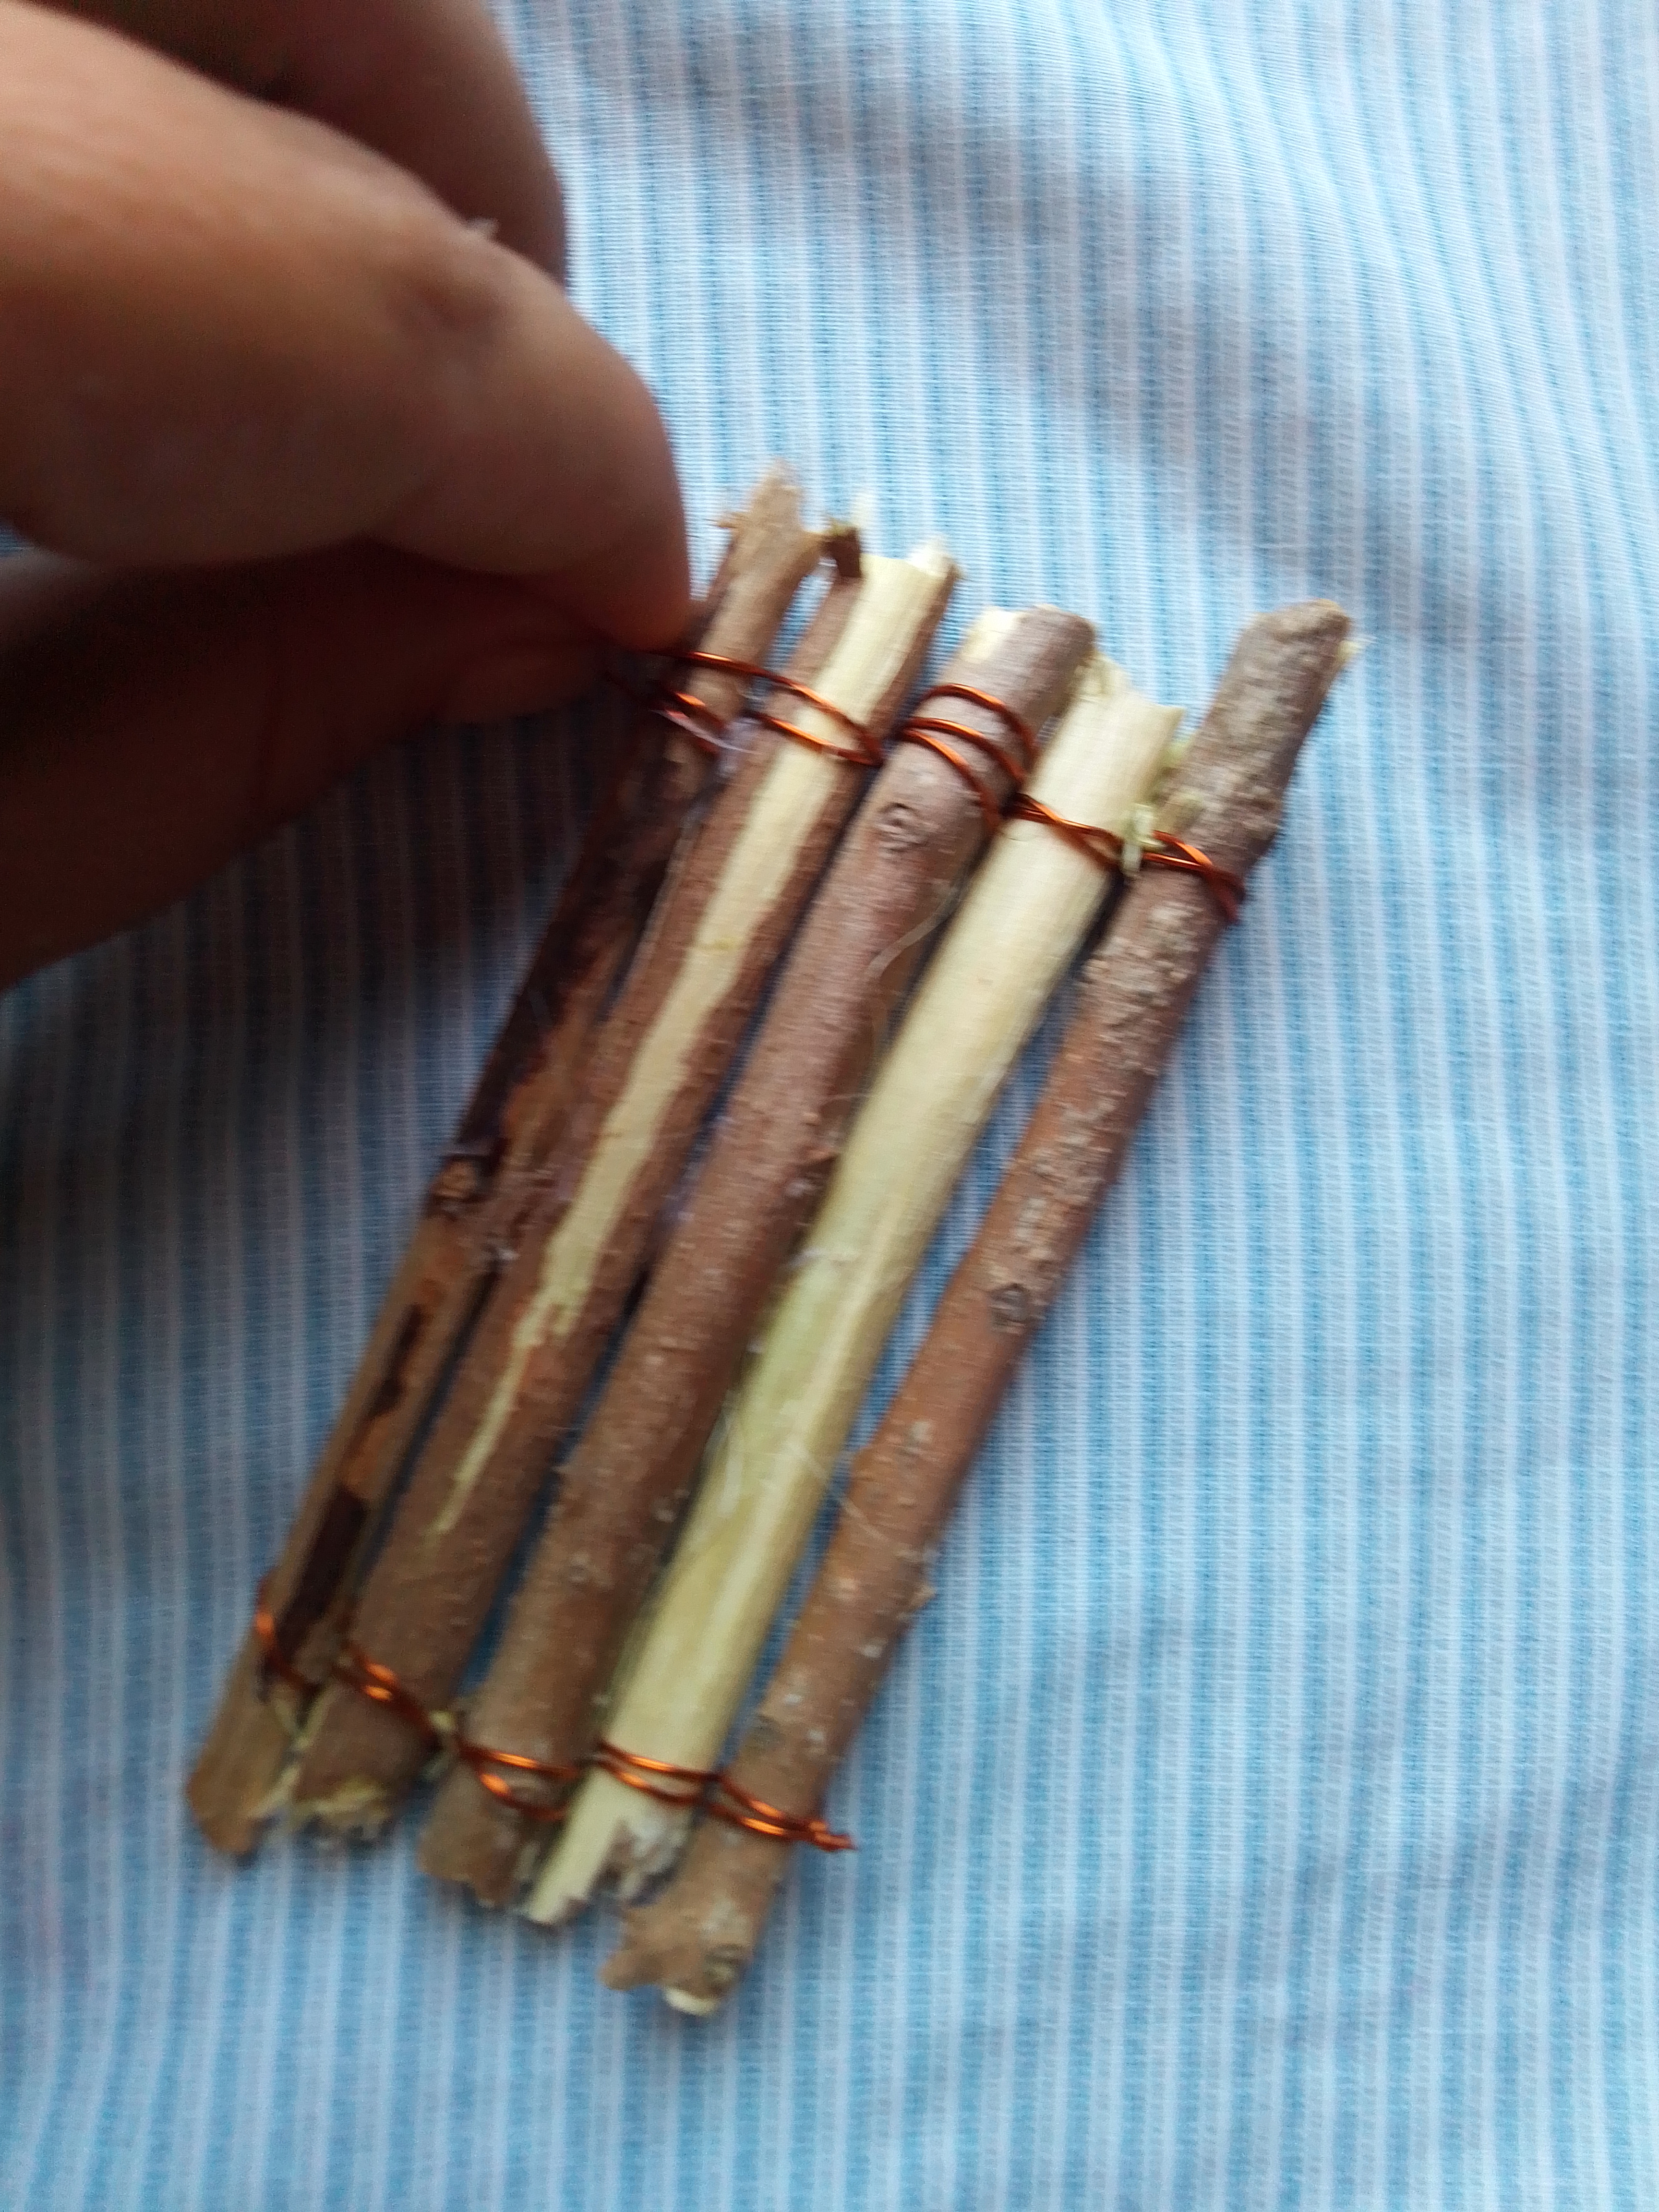
Paso 03
Podemos colocar pegamento de madera si tenemos o podemos unir las cinco ramas con alambre de cobre, esto le dará más firmeza al triciclo.
Step 03
We can put wood glue if we have or we can join the five branches with copper wire, this will make the tricycle more firm.
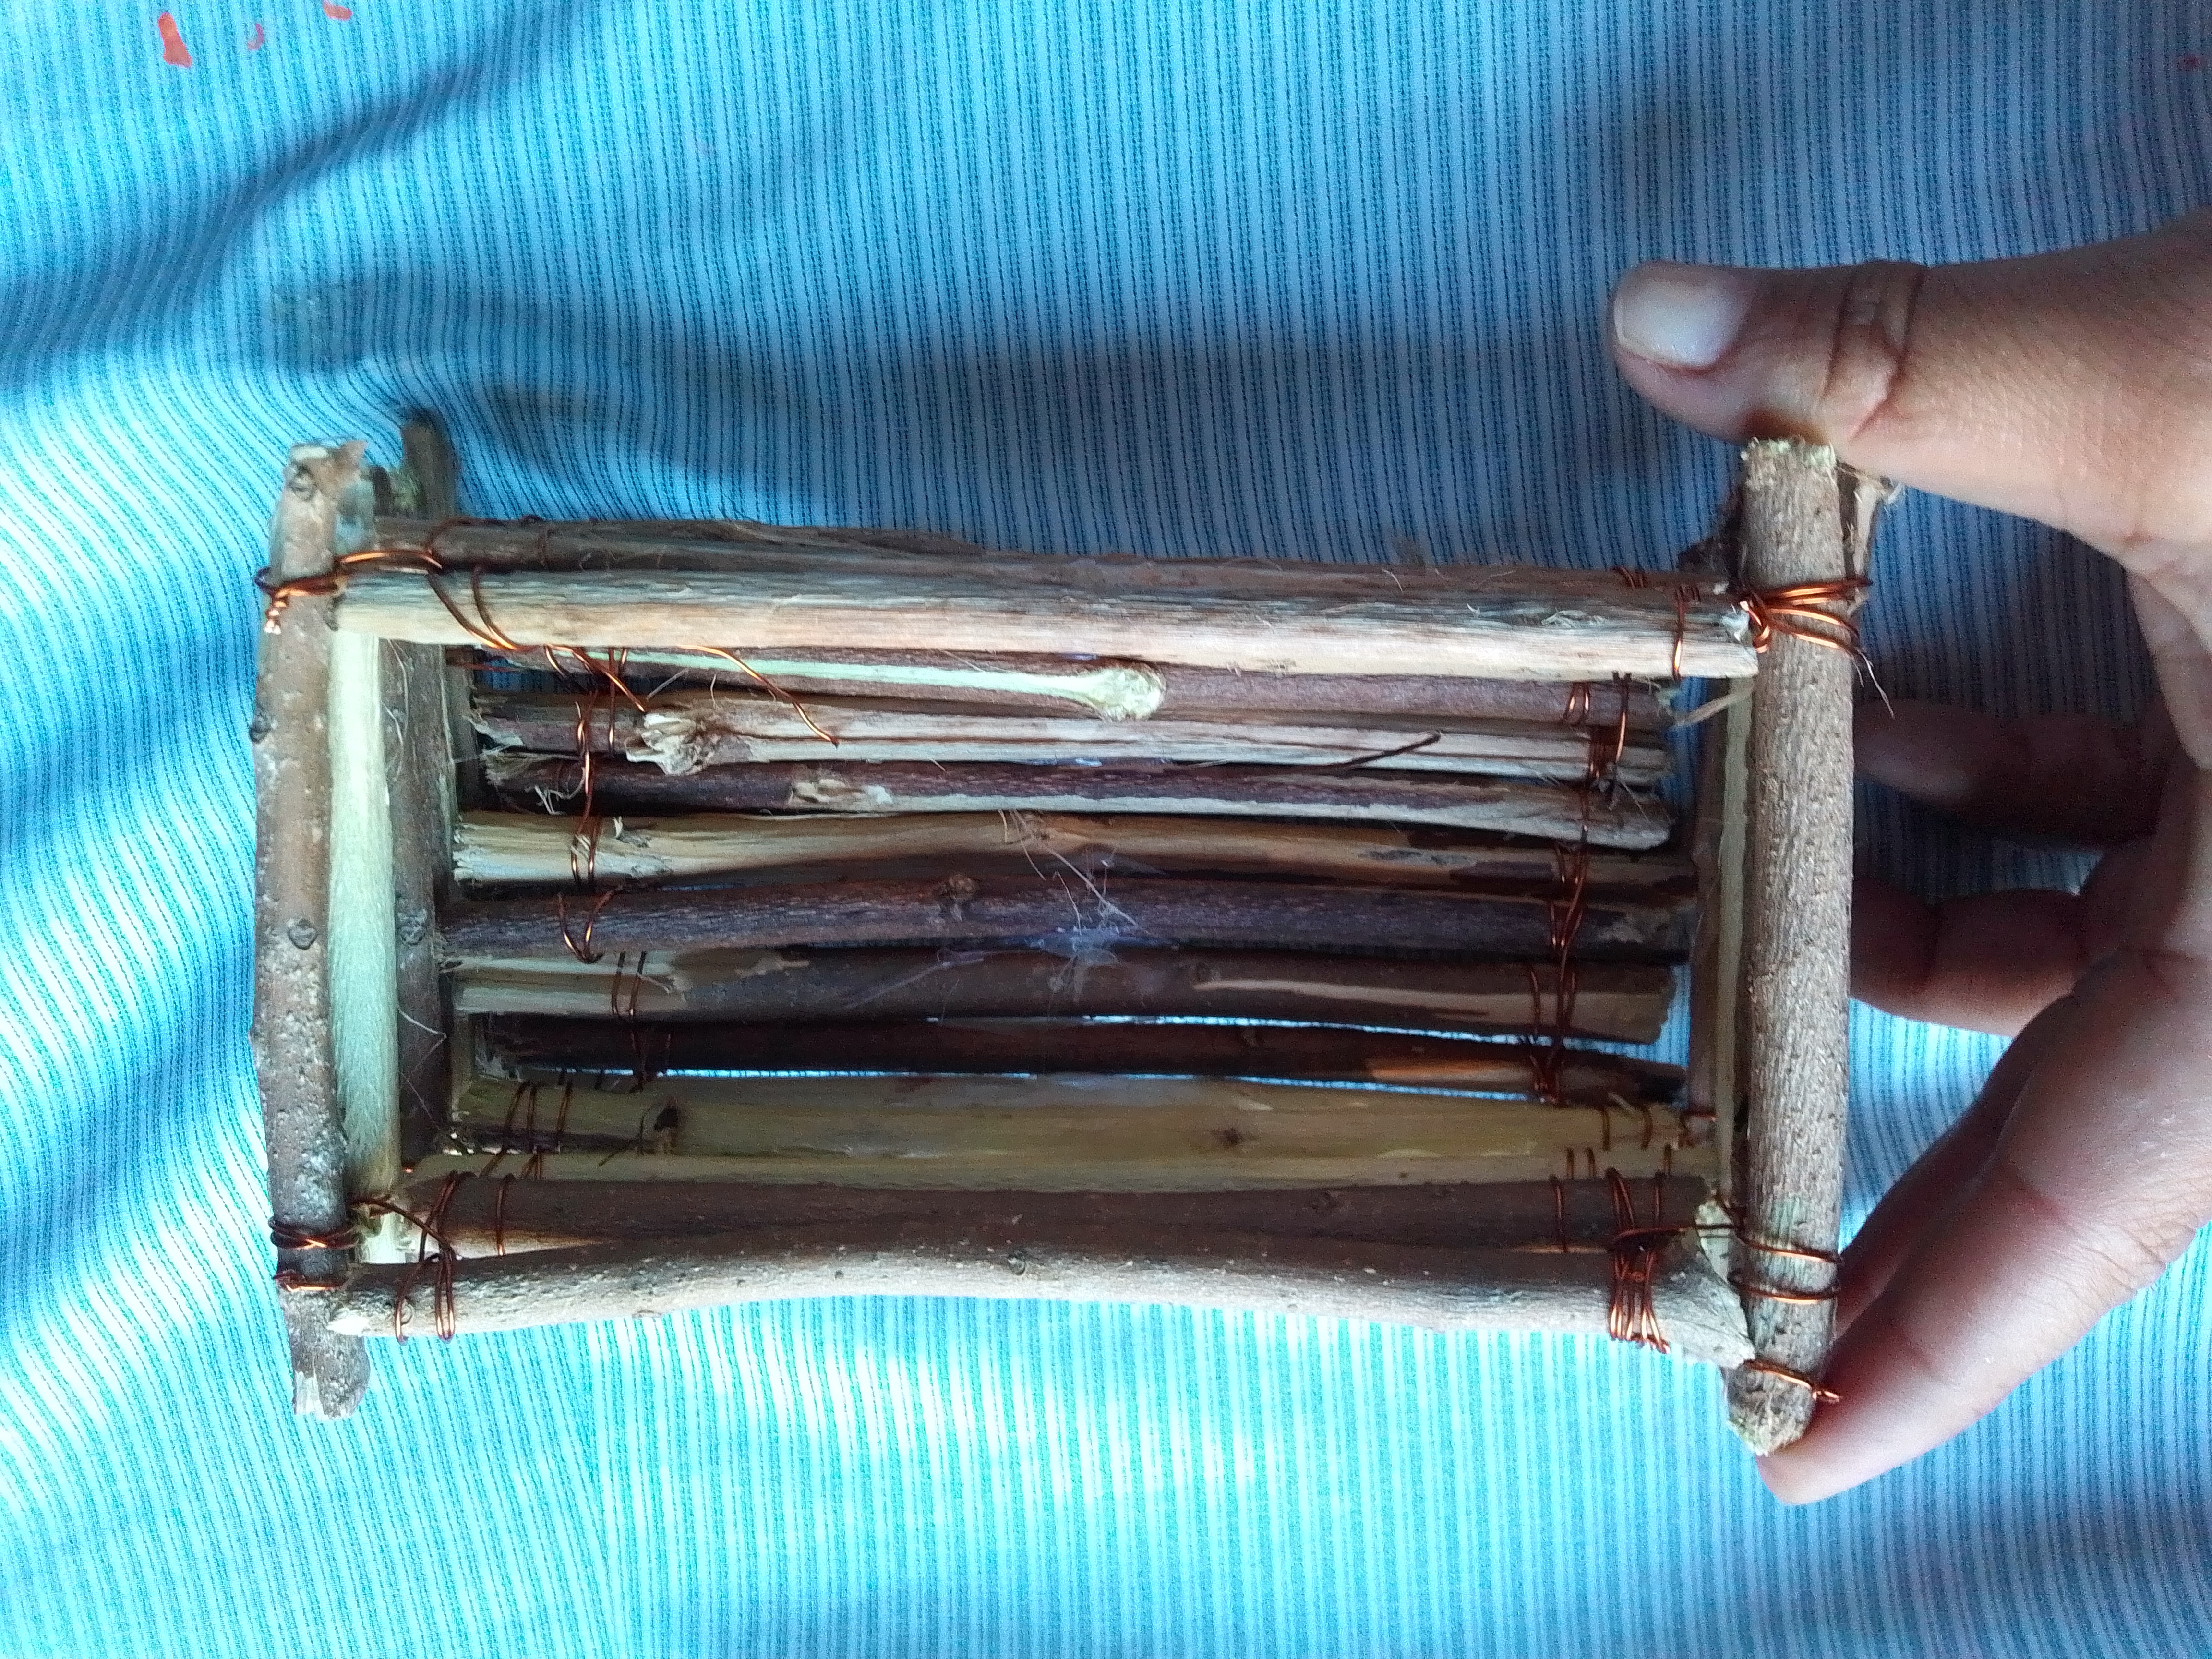
Paso 04
Haremos tres piezas exactamente iguales para los lados y dos más pequeñas para la parte de adelanté y la de atrás, armando así la primera parte del triciclo que se verá como una pequeña canasta rectangular.
Step 04
We'll make three exactly the same pieces for the sides and two smaller ones for the front and back, thus making the first part of the trike that will look like a small rectangular basket.
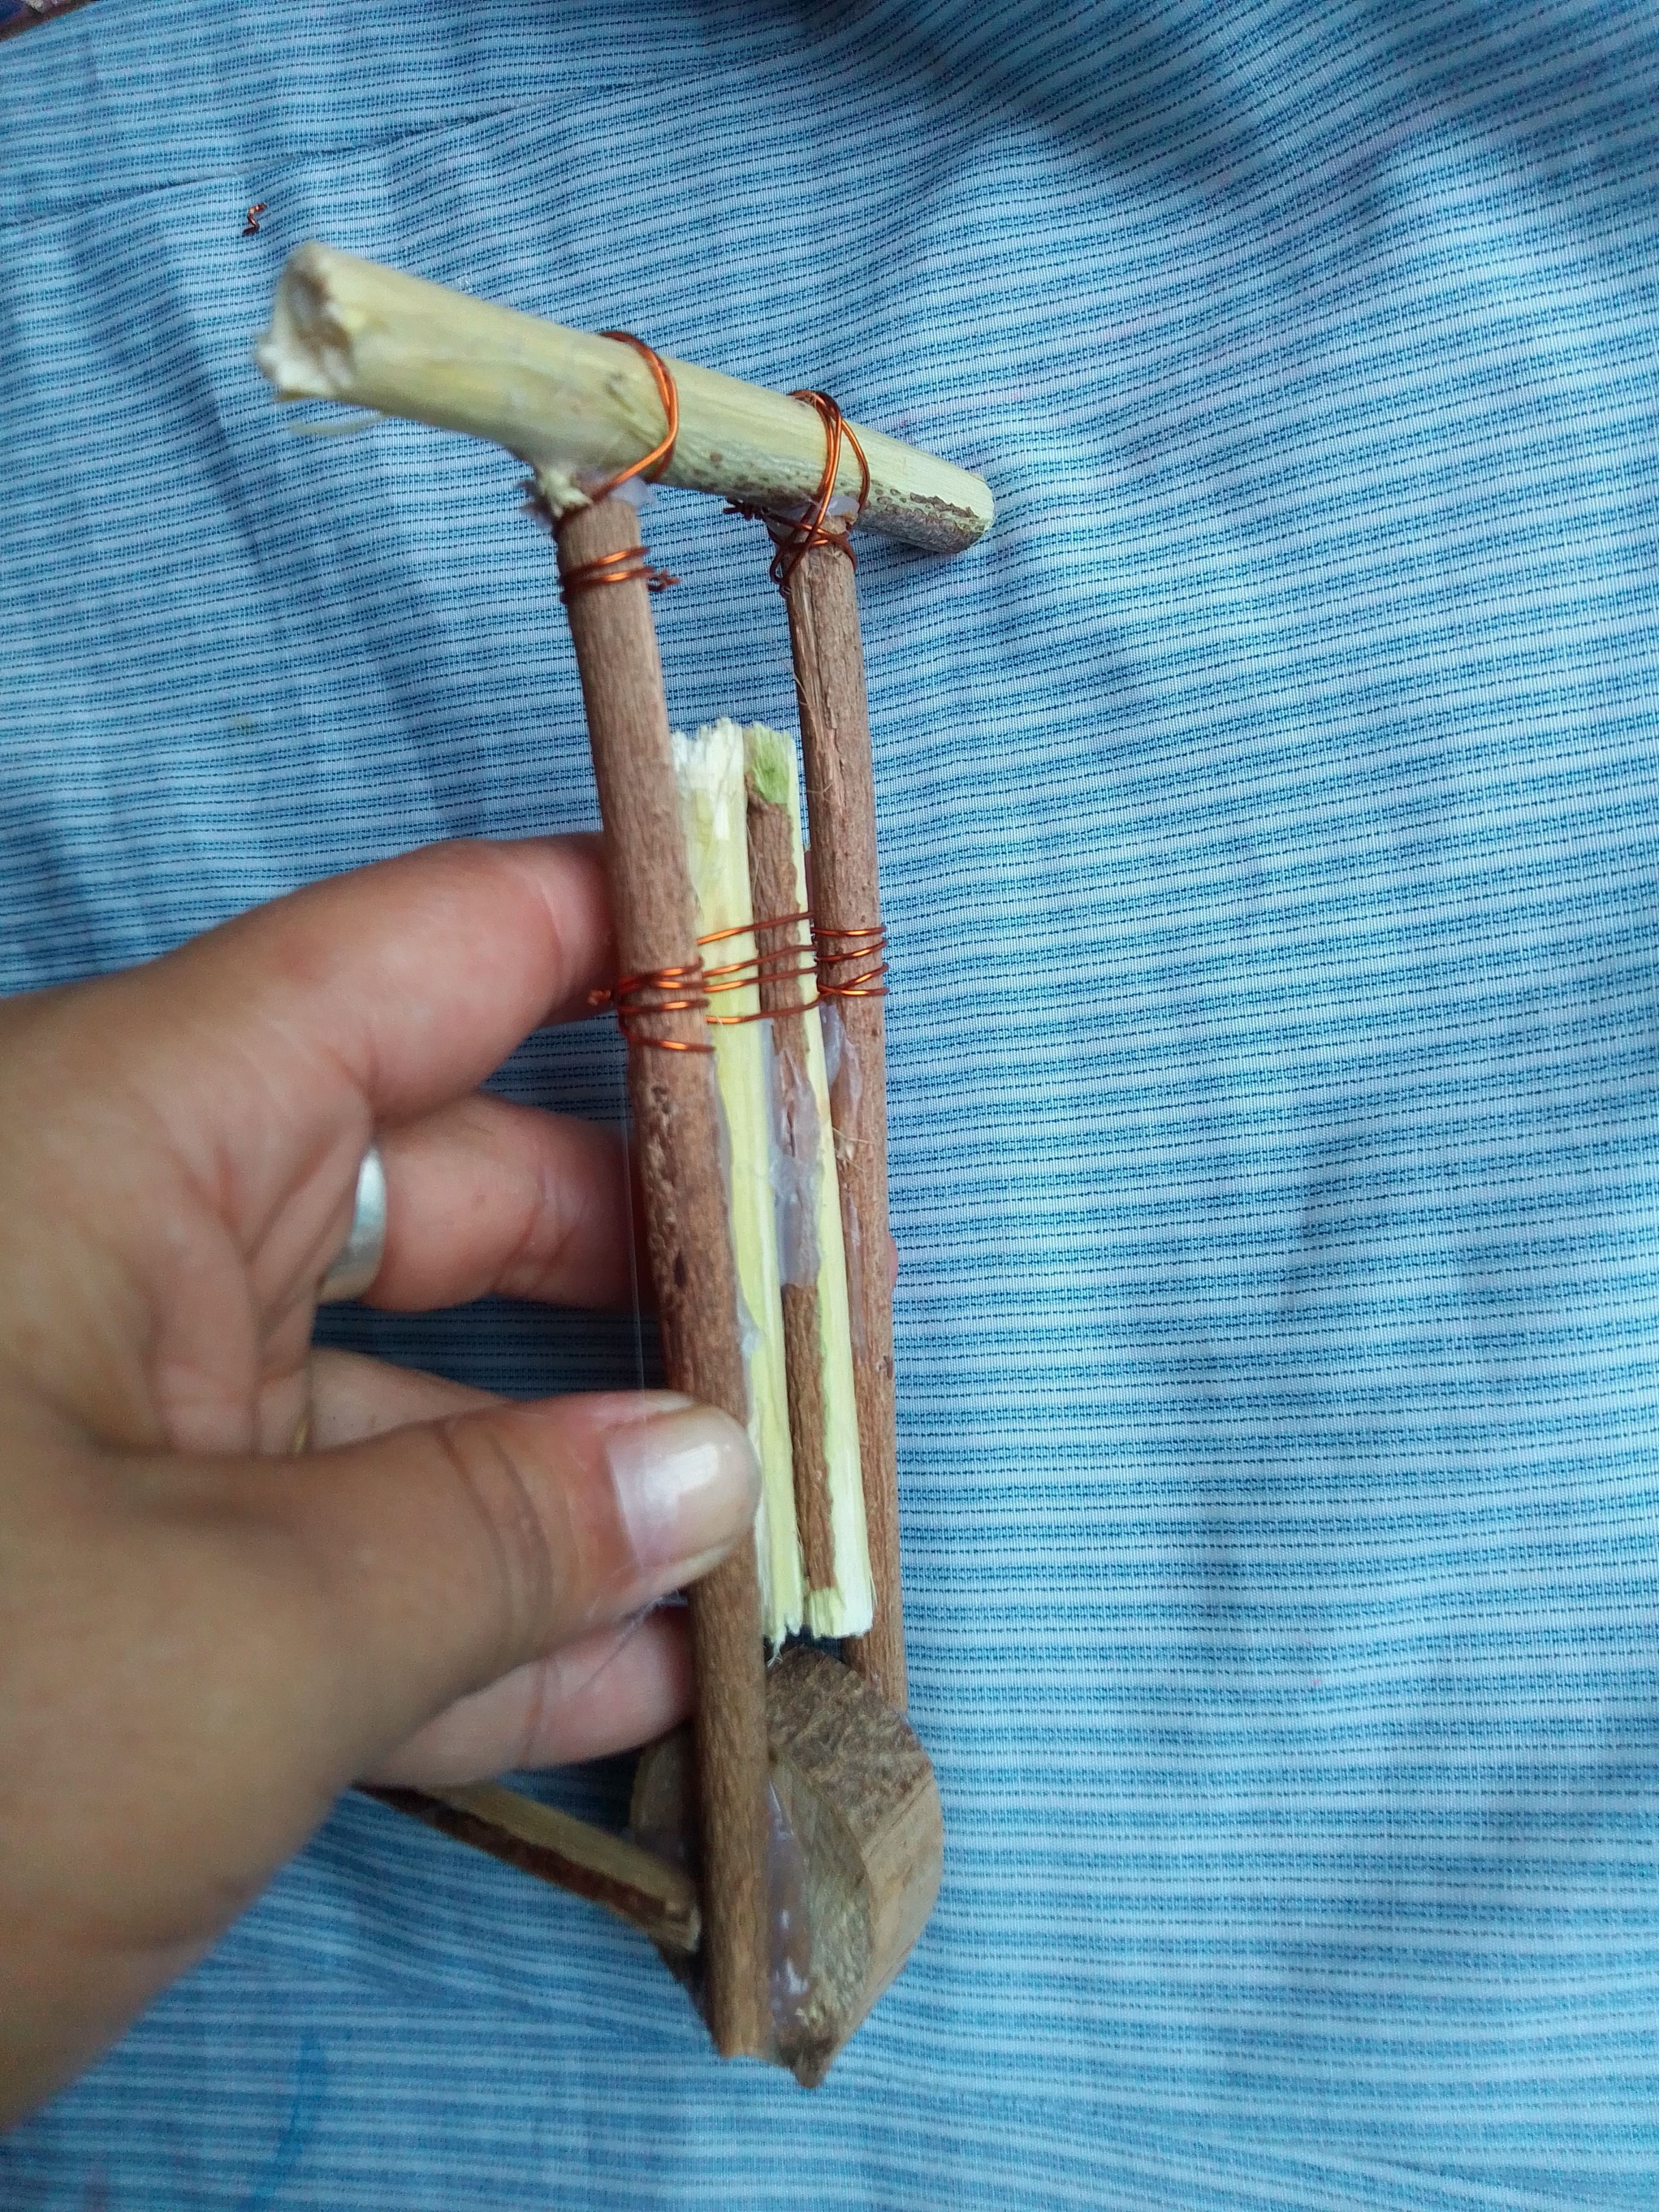
Paso 05
Con dos palillos pequeños en el medio, dos más grandes a los lados y uno pequeño arriba hacemos en manubrio del triciclo tal como lo verán en la siguente imagen.
Step 05
With two small sticks in the middle, two larger ones on the sides and a small one on top, we make the handlebar of the tricycle as you will see in the following image.
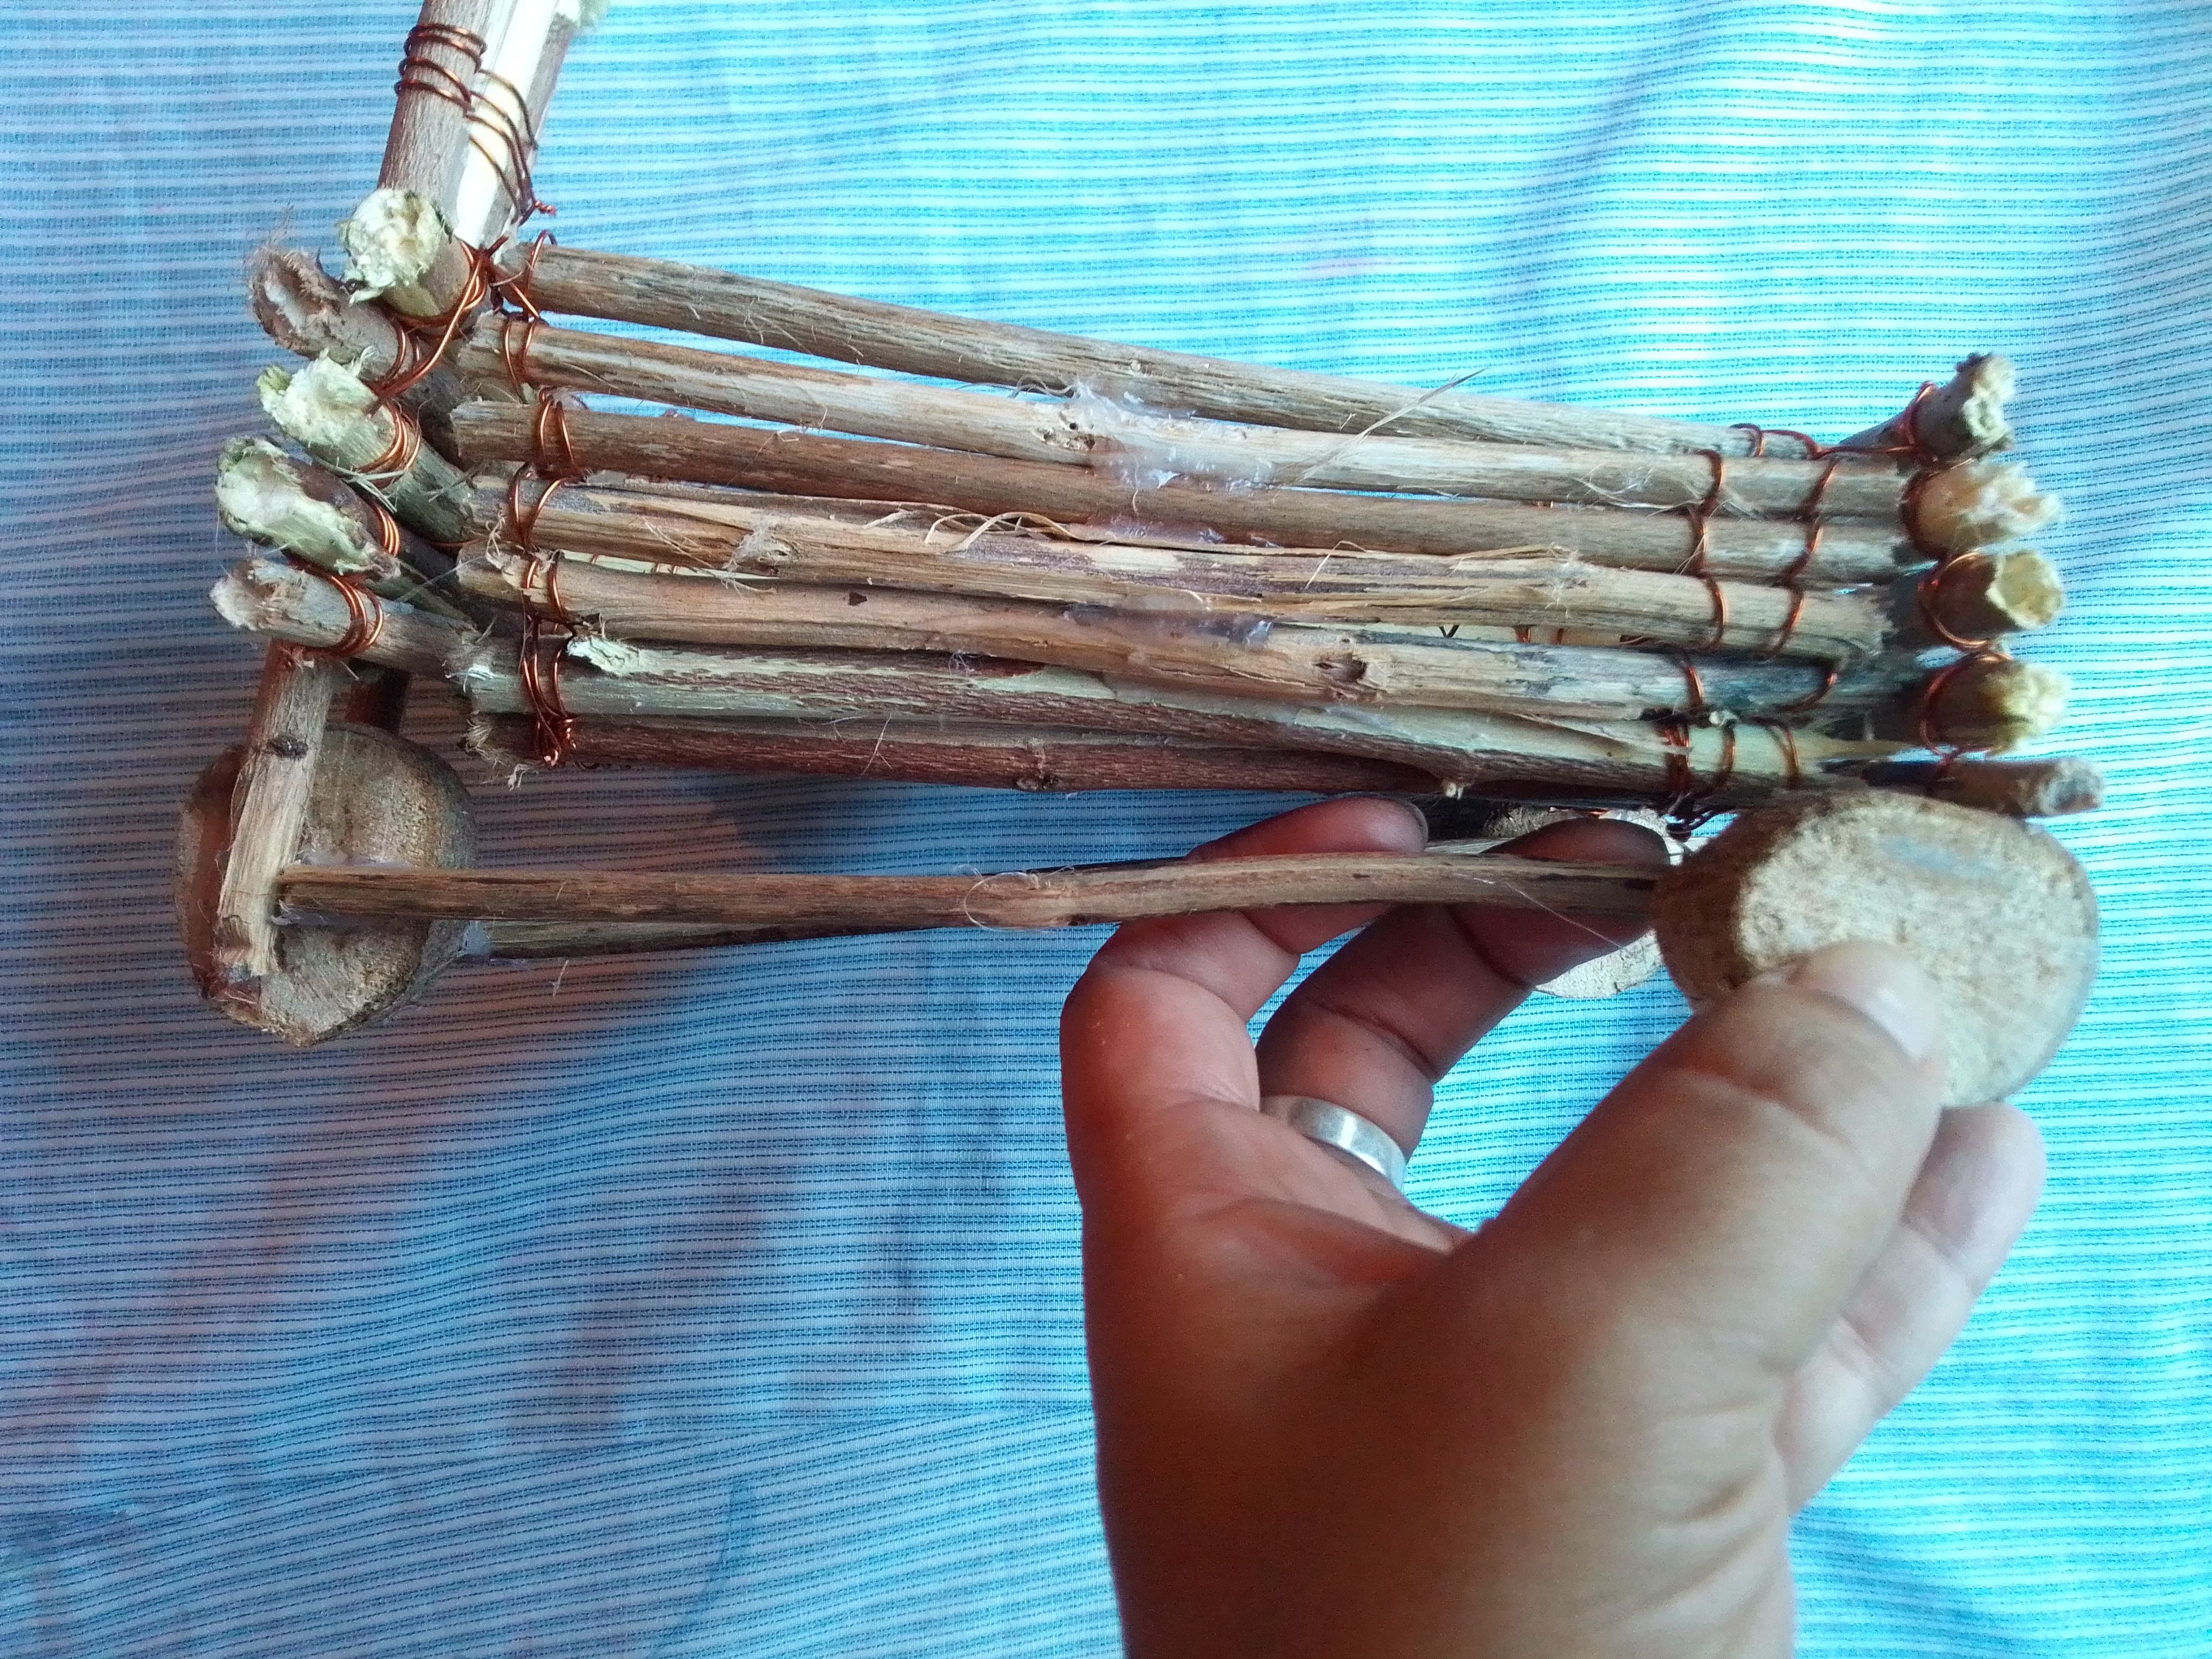
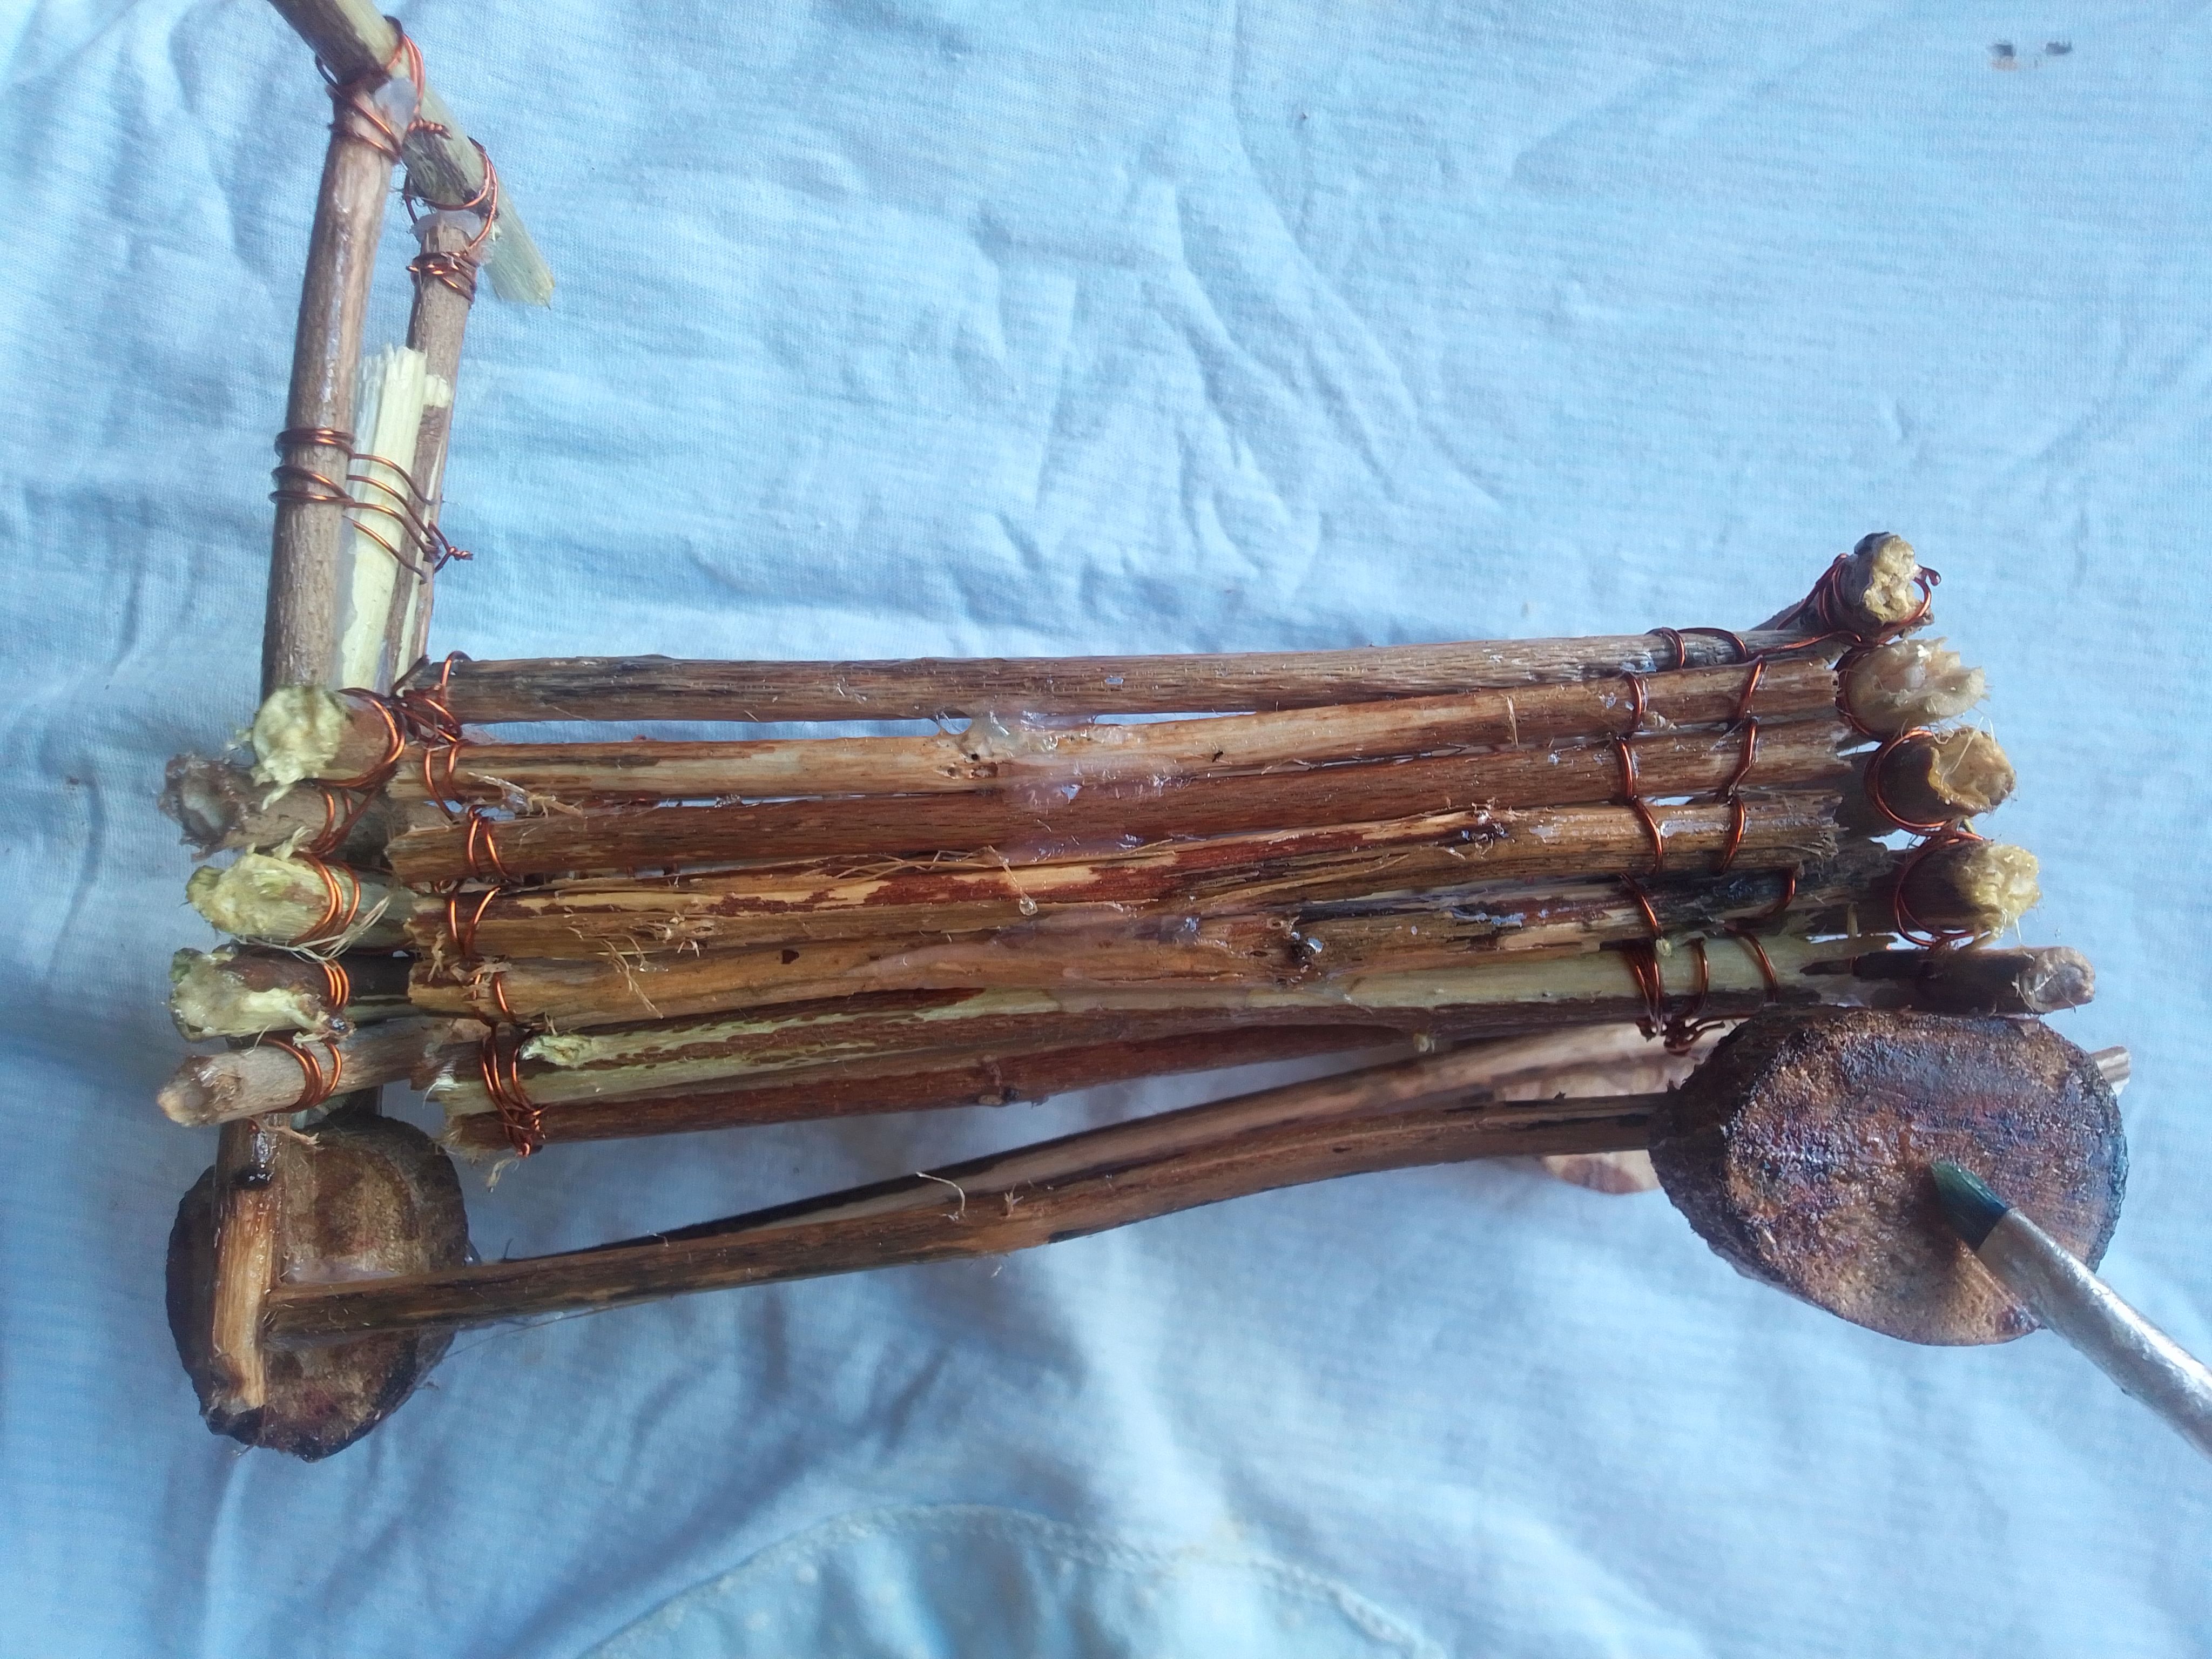
Paso 06
Llegamos al proceso donde debemos unir todas las piezas, y pegamos la canasta al manubrio y luego pegamos los tres trozos redondos de madera como ruedas.
Step 06
We get to the process where we need to put all the pieces together, and we glue the basket to the handlebars and then we glue the three round pieces of wood as wheels.
Paso 07.
Colocamos barniz para darle un efecto brillante y duradero, puedes utilizar brillo de pintura tambien y dejamos secar.
Step 07.
We apply varnish to give it a shiny and lasting effect, you can also use paint gloss and let it dry.
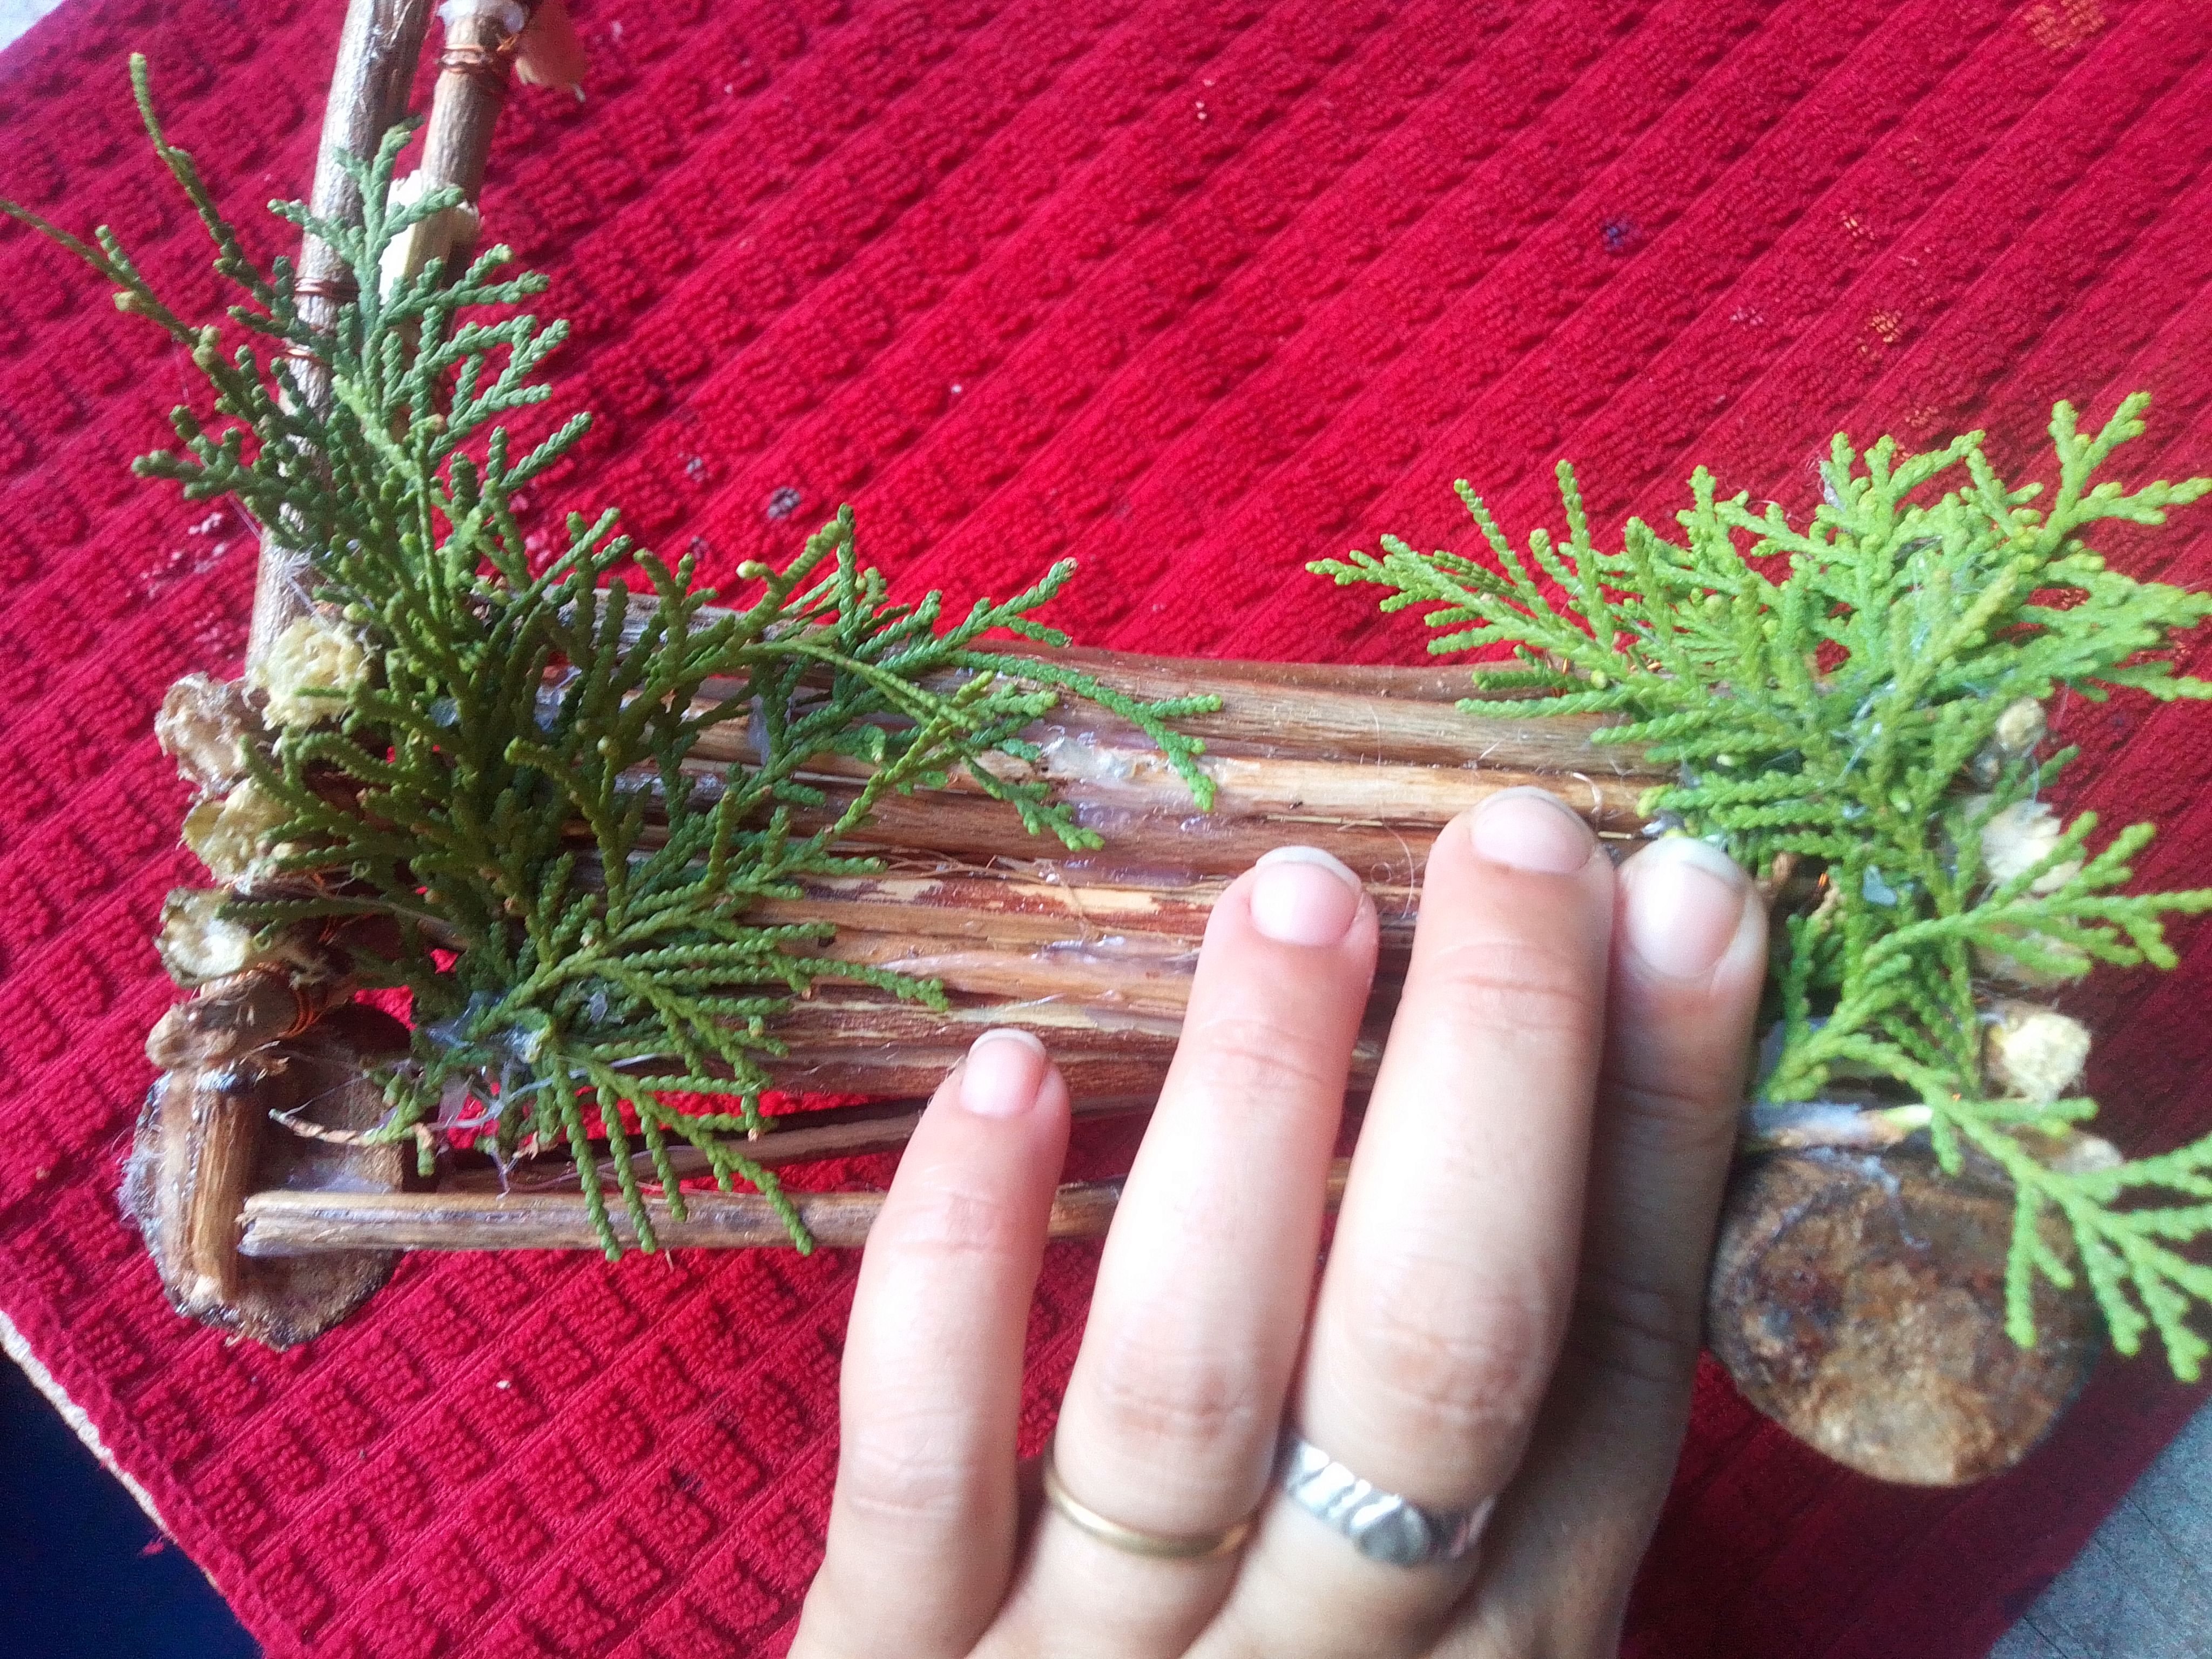
Paso 08.
Para decorar colocamos en los extremos hojas artificiales, yo en realidad no contaba con ellas y coloque estás de pino que también se ven muy bonitas, además tienden a durar mucho pues aunque pierden el color nunca se marchitan.
Step 08.
To decorate we put artificial leaves on the ends, I didn't really have them and put these pine ones that also look very nice, they also tend to last a long time because although they lose color they never wither.
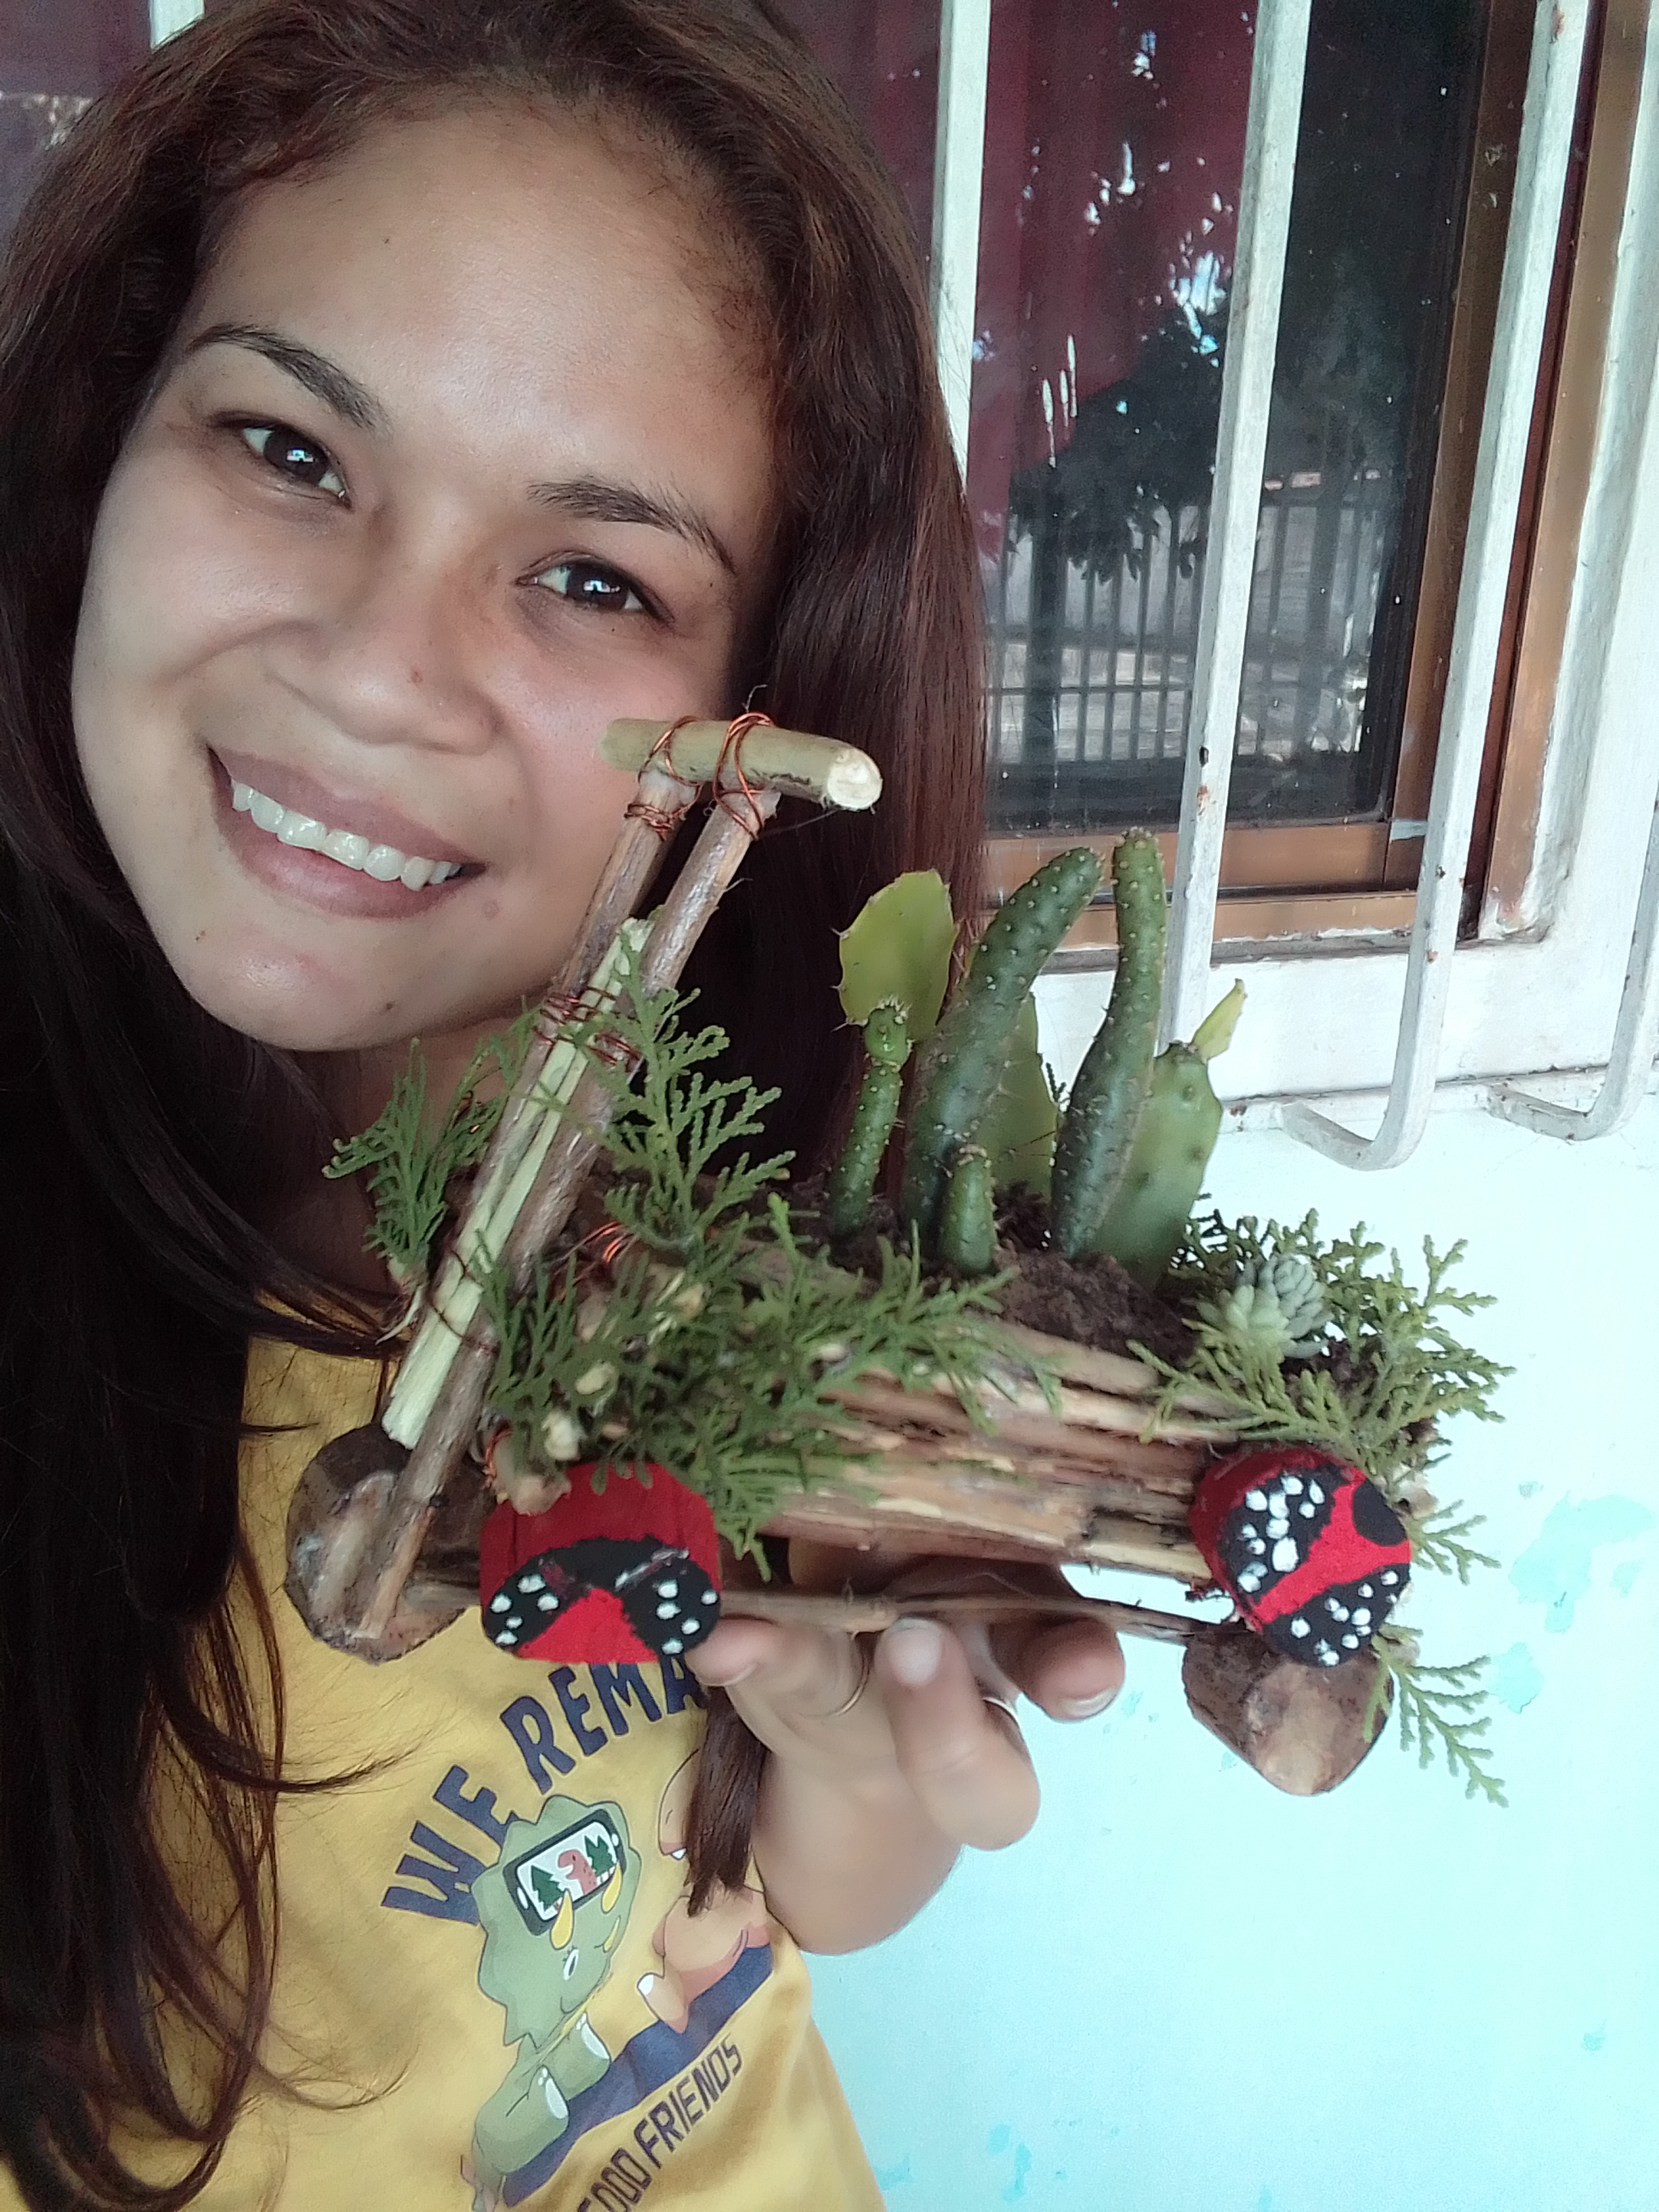
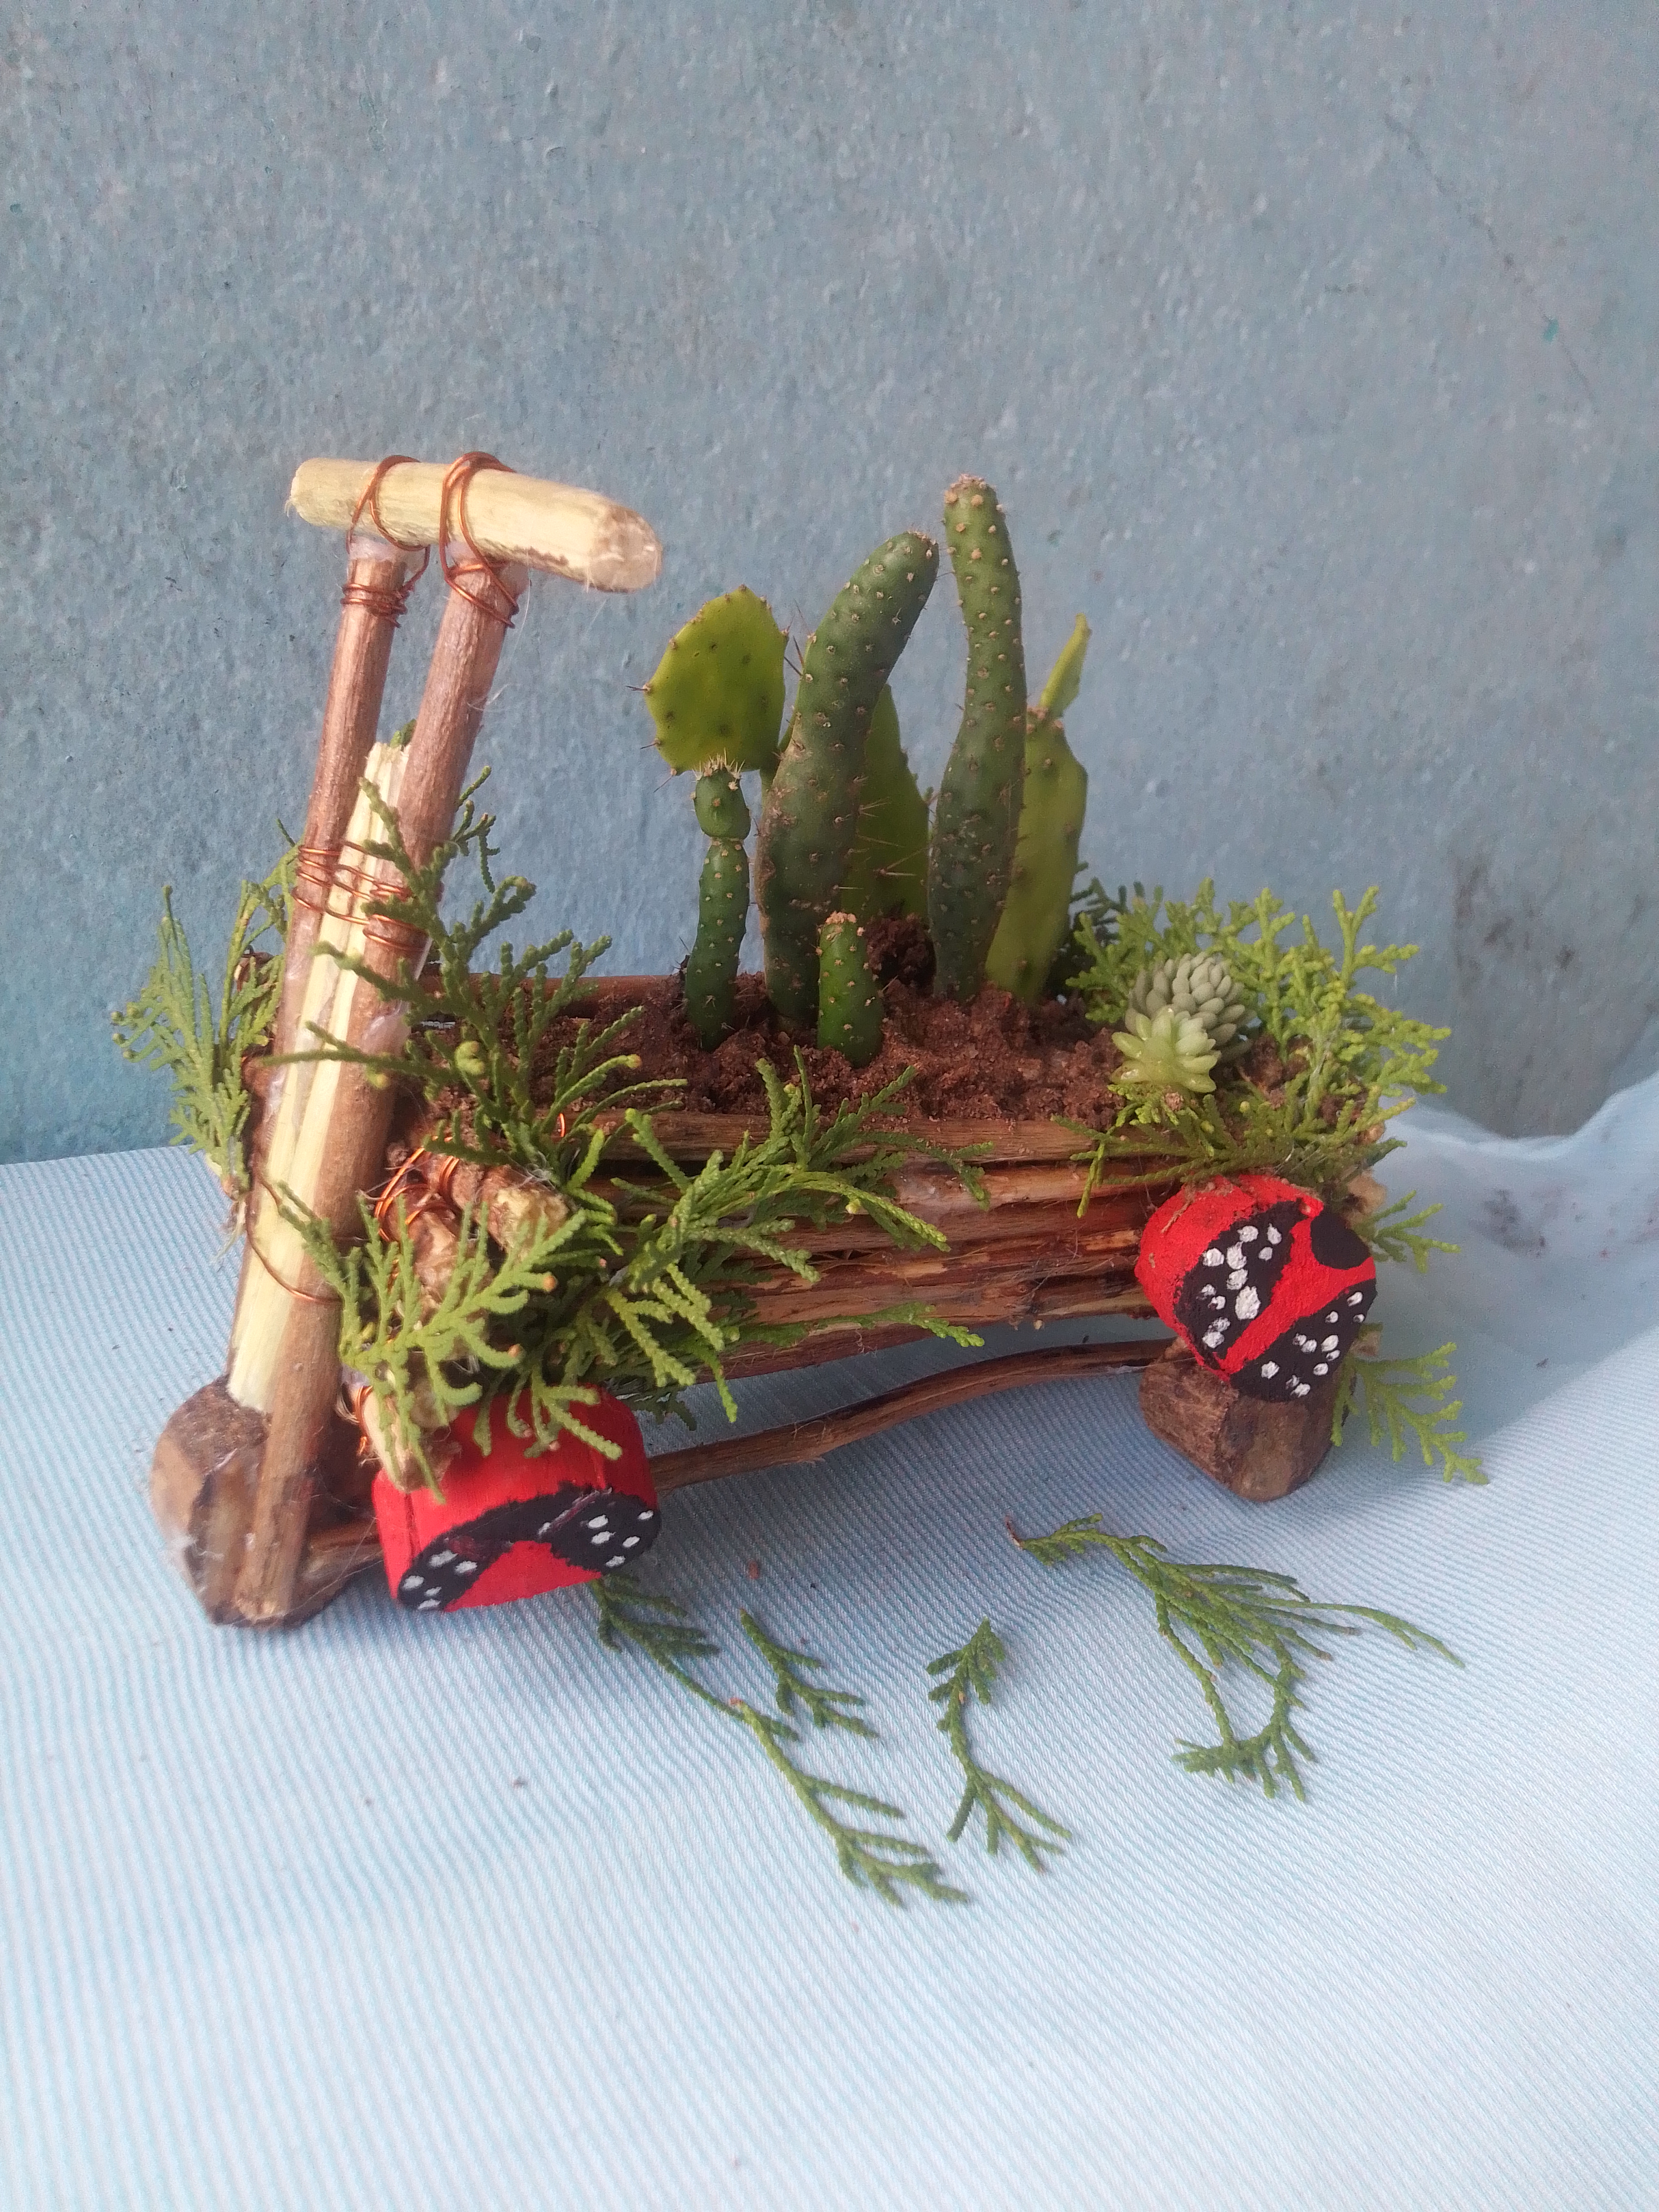
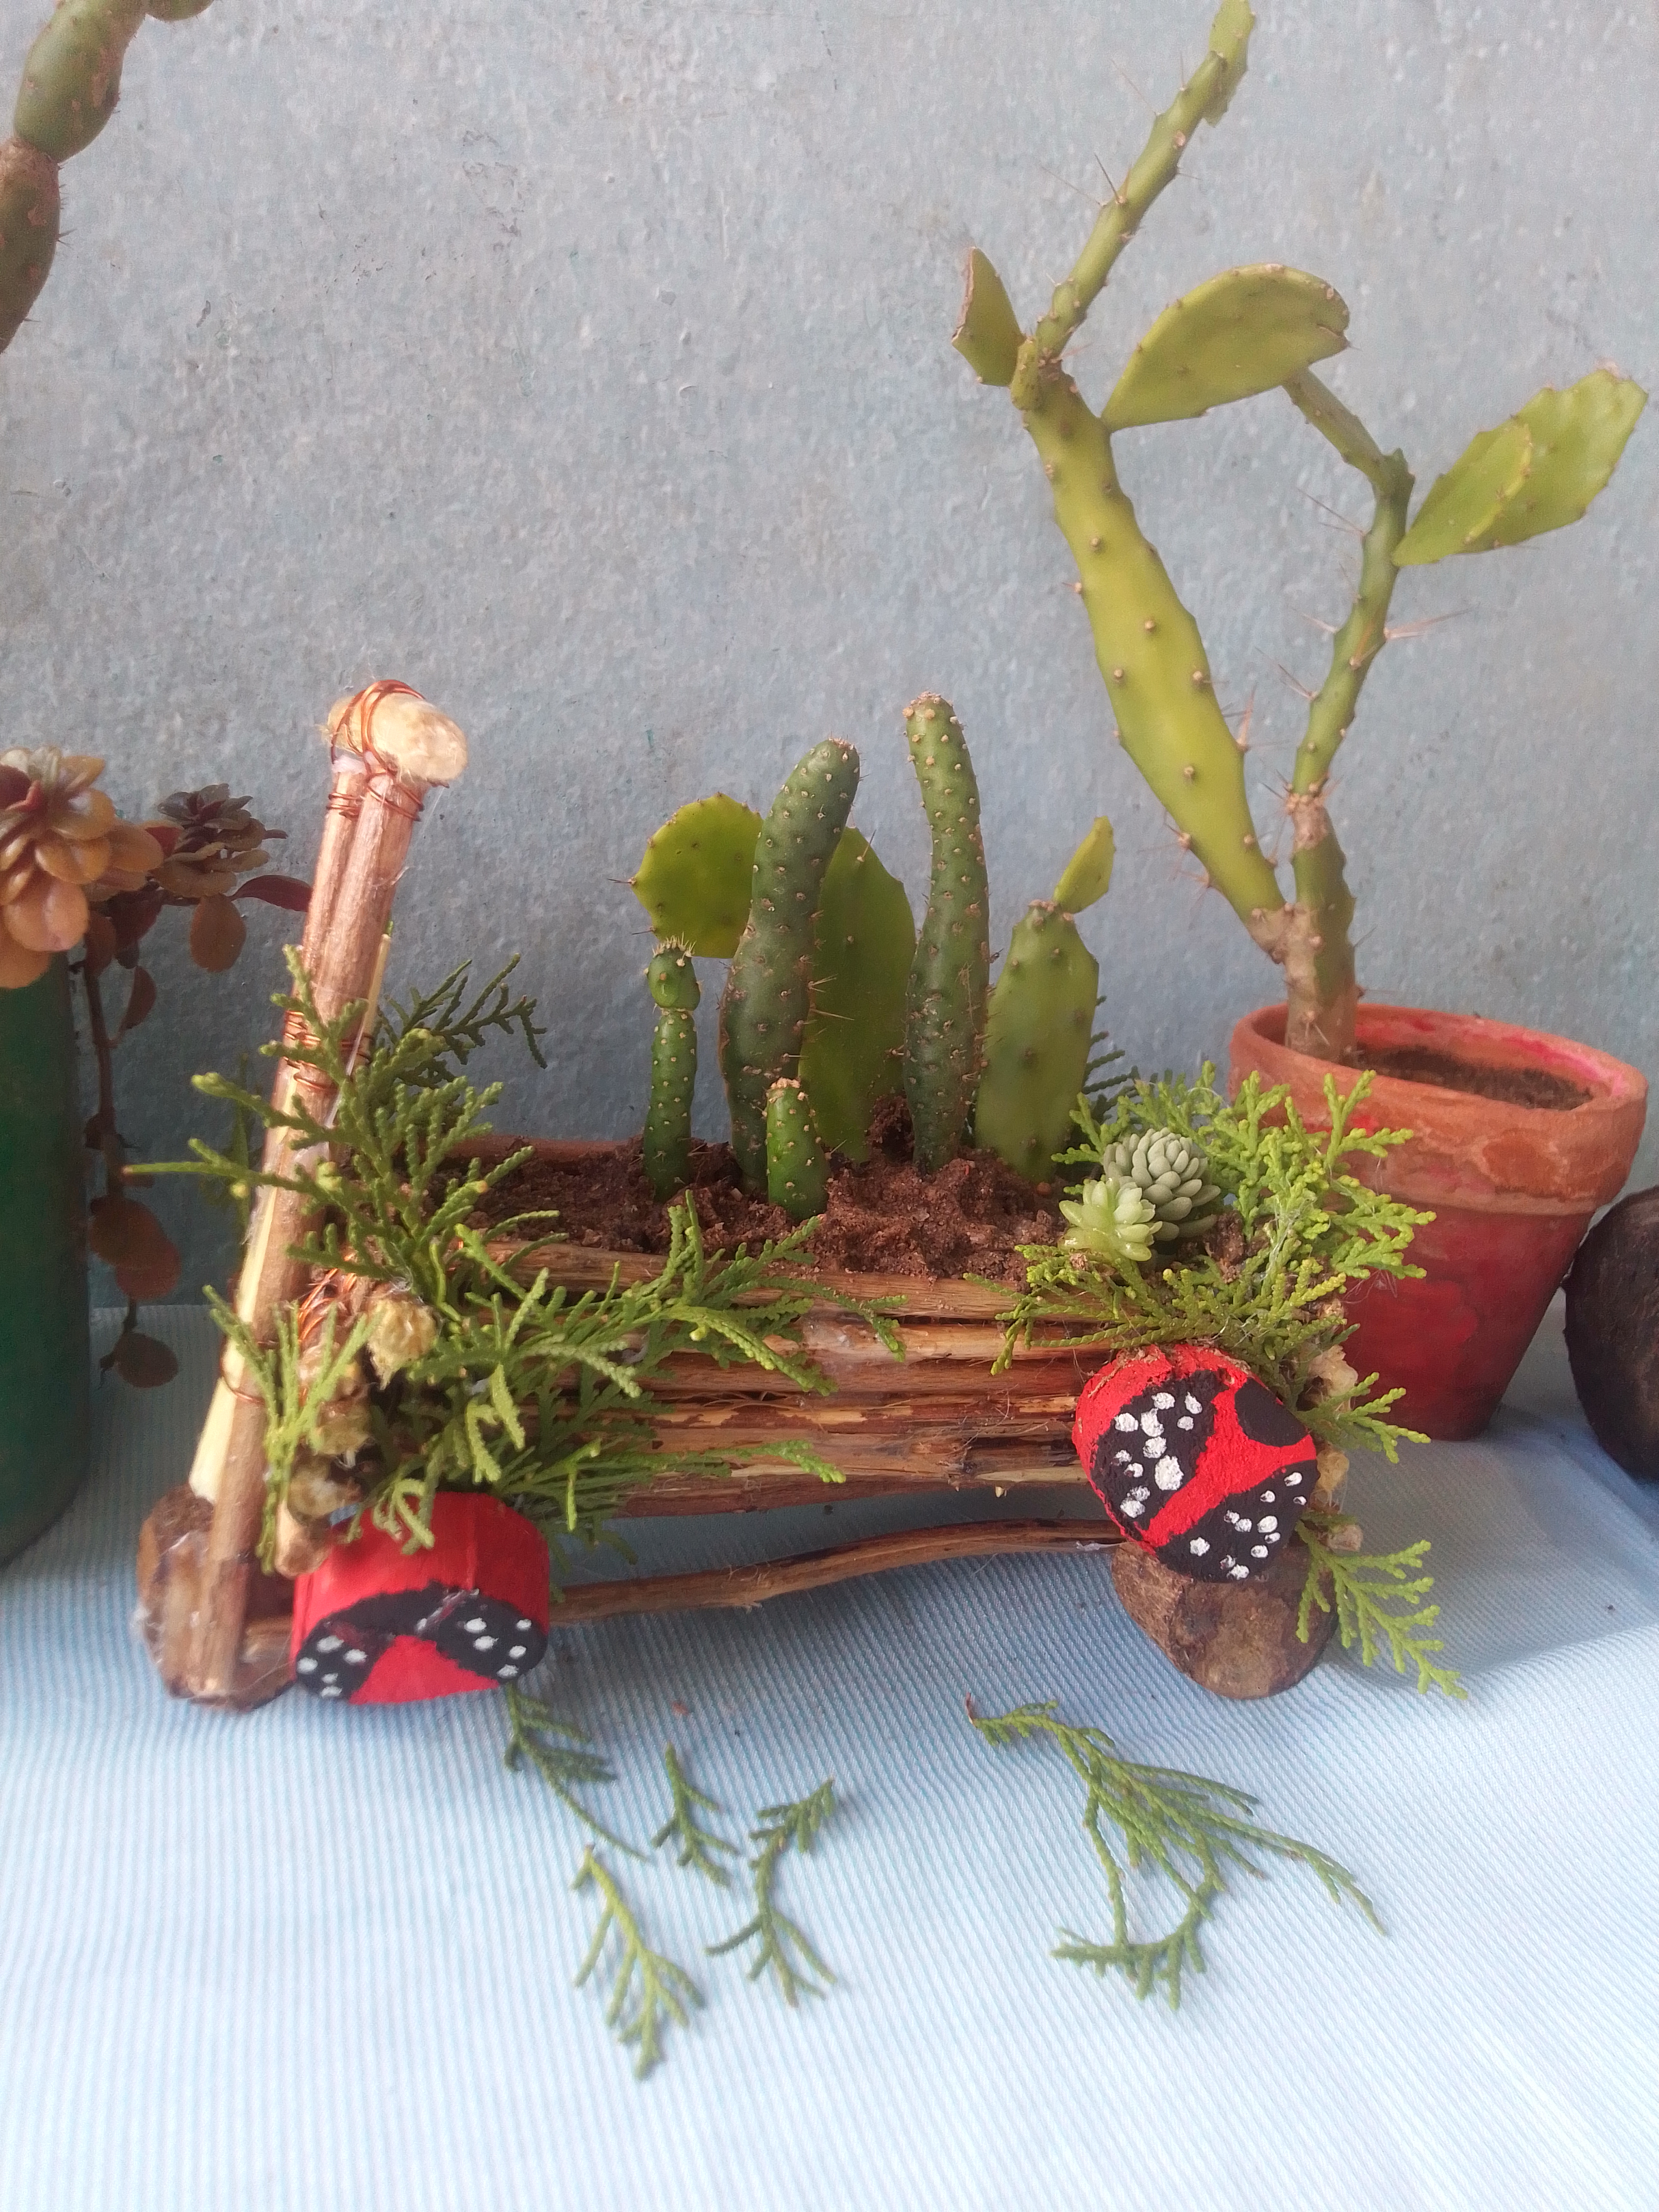
Resultado!
Result!
Amigos creativos, aquí les muestro este gran proyecto. Muy lindo y fácil de hacer. Te invito a que lo pongas en práctica. Para ambientar el triciclo puse un poco de tierra dentro de él y sembré algunos hermosos cactus.
Creative friends, here I show you this great project. Very cute and easy to do. I invite you to put it into practice. To liven up the tricycle I put some soil inside it and planted some beautiful cacti.
Gracias por tu linda visita a mi post!
No olvides comentar y decirme que te parece esta idea, agradezco inmensamente todo el apoyo. Un fuerte abrazo! 🤗 Pasen un excelente día! Nos vemos en el próximo post!
Do not forget to comment and tell me what you think of this idea, I greatly appreciate all the support. A hug! 🤗 Have a great day! See you in the next post!
All the photographs are my own, captured with my Smooth 6.5 cell phone.
Muy bien.sige así
Muchas gracias! Saludos..!
bien resuelta la idea
Gracias me alegro que te guste.
Hermoso triciclo!
Los cactus se ven lindos en el triciclo!
Saludos!
Holaaa...Totalmente de acuerdo contigo. Quedan lindos.! Saludos y bendiciones para ti.. Gracias por comentar