Versión en Español.
Hola mis queridos amigos
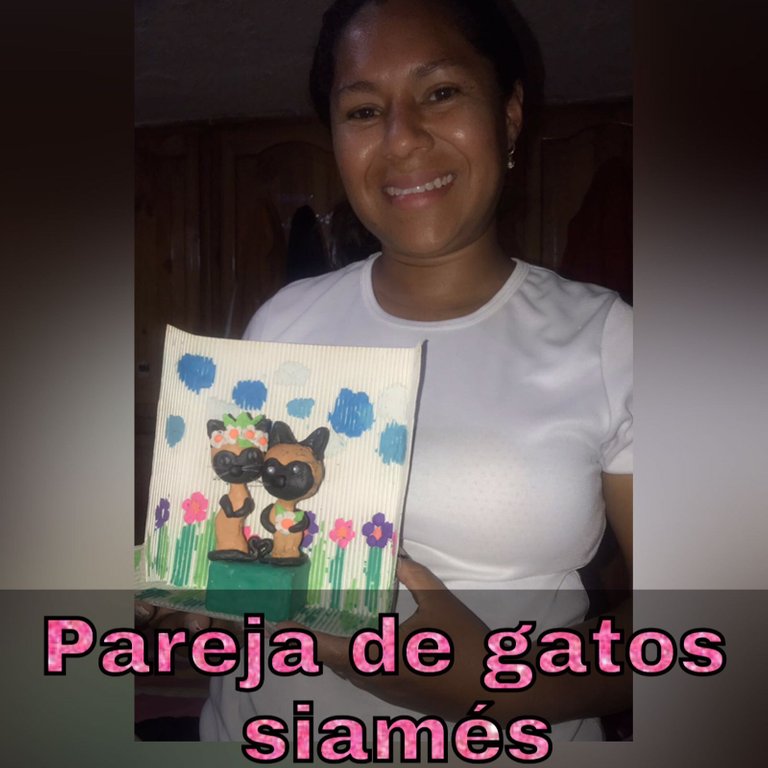
Reciban un cálido saludo y un fuerte abrazo 🤗 deseo que se encuentren muy bien y estén pasando un excelente día junto a sus seres queridos, hoy me encuentro con ustedes mis queridos amigos para mostrarles mi participación en este hermoso concurso de diorama de plastilina, agradezco al modelador @gaboamc2393 por darnos la oportunidad de recordar momentos divertidos de mi infancia con esta maravillosa idea de moldear plastilina, no tengo mucho tipo que trabaje con platilina porque tengo una niña de 8 años y la ayuda con sus deberes de la escuela, para realizar este proyecto me inspire en una pareja de gatos siamés ya que me gustan y me parecen unos gatos muy lindos, desde pequeña he convivido con esos tiernos felinos.
Es grato para mí poder participar y mostrar una de mis habilidades no tan profesionales, agradezco a mi amiga @aracelys1965 por a verme invitado a participar en este lindo concurso de diorama.
Extiendo la invitación a mis amigas @carolina38 y @kathelopez77 para que también se diviertan creando estos lindos animales 🐻🐧🐈
Les invito a que vean de cerca la elaboración de esta hermosa pareja de gatos la cual me divertí haciendo y realmente fue un gran desafío les comparto el paso a paso
MATERIALES
• Plastilina de colores
• Anime
• Palillos de dientes
• Pincel dots
• Cartulina corrugada
• 4 cuencas blancas
• Nilon
• Exacto

MANOS A LA OBRA
PASO 1
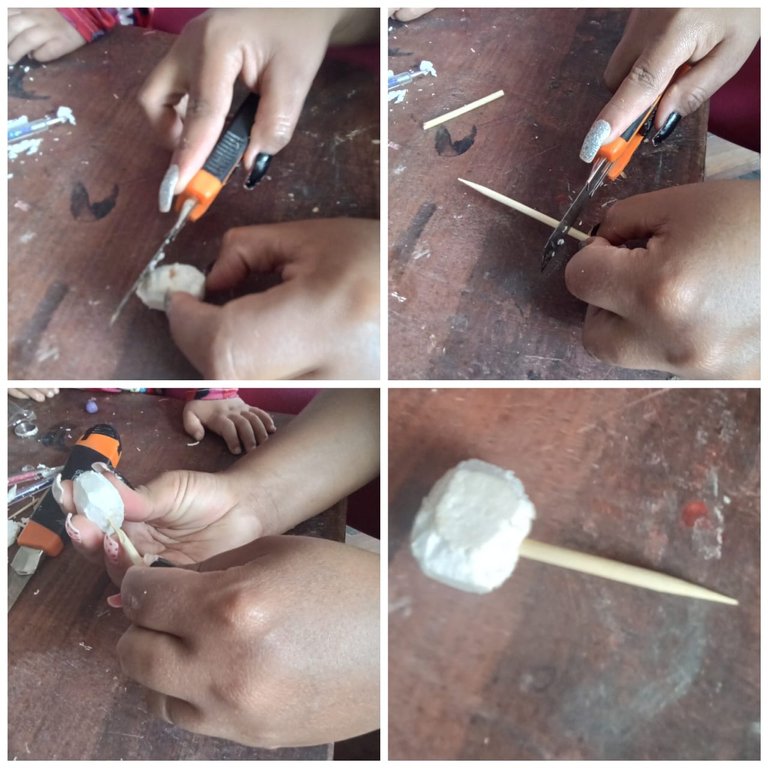
Empezamos cortando el anime con el exacto formando una bolita, cortamos un palillo y tratamos por el medio de la bolita de anime antes hecha
PASO 2
Agarrados un bola de plastilina beis, estiras con ayuda del dots y cubrimos la bola de anime antes echa para hacer la cabeza del gato
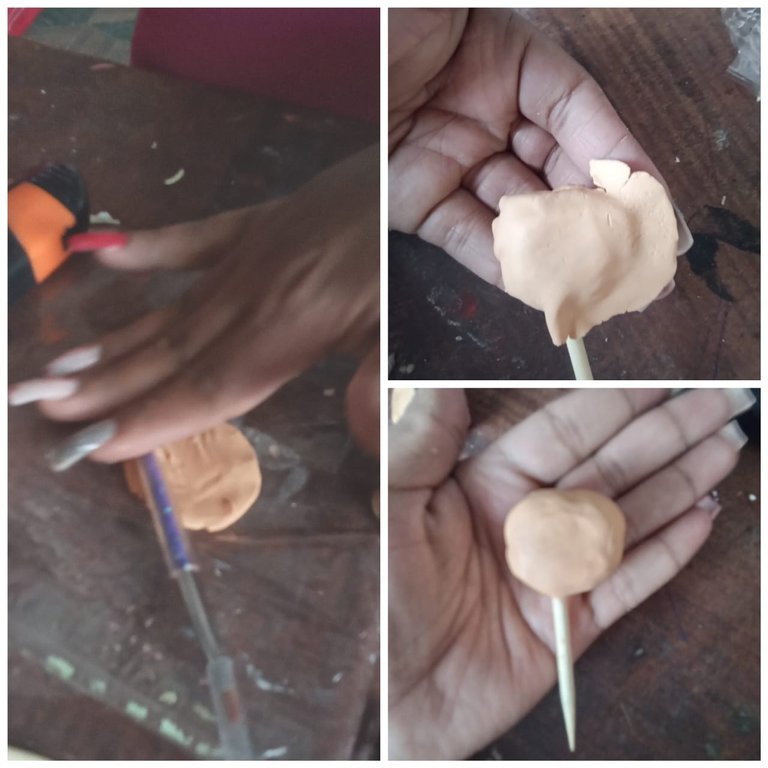
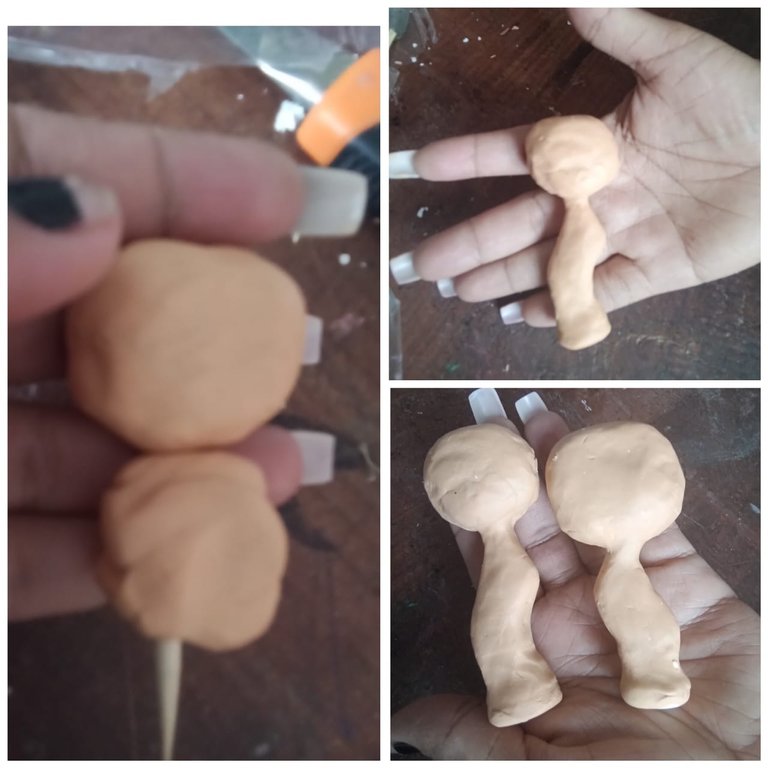
PASO 3
Ahora agarramos un pedazo de plastilina beis, haremos el cuerpo del gato y moldeamos la figura del cuerpo, repetimos el paso uno y dos con el otro gato
PASO 4
Extendemos un trozo de plastilina negra con ayuda de los dedos hasta formar un óvalo para formar el osico y también hacemos las orejas del gatito con la plastilina negra con ayuda del dots y pegamos a la cabeza, repetimos el paso con el otro gatito
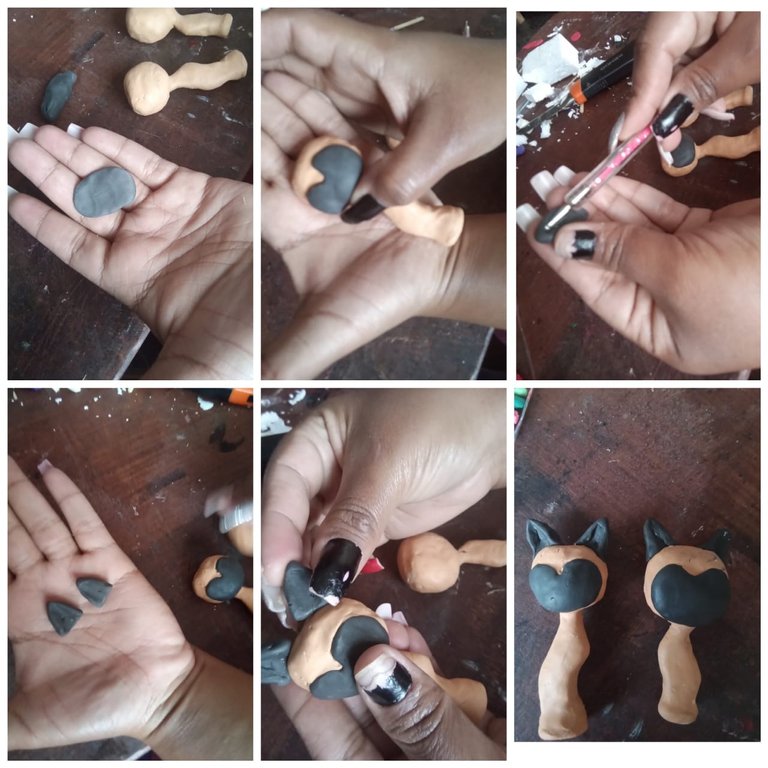
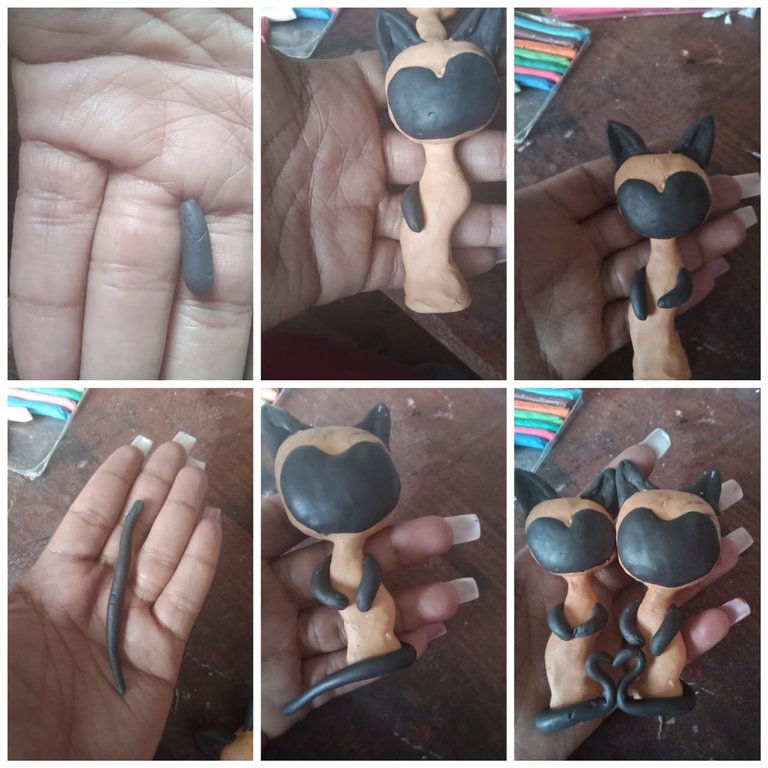
PASO 5
Estiramos un pedazo de plastilina negra hasta formar los brazos del gatito, pegamos al cuerpo y haremos la cola con la plastilina negra estiramos y le damos forma a la cola y repetimos el paso con el otro gatito y formamos un corazón con las dos colas
PASO 6
Cortamos con el exacto el anime y formamos un cuadrado, estiramos la plastilina verde arriba de el anime hasta cubrir todo el anime, pondremos los palillos de dientes en el anime para que queden fijados los gatos
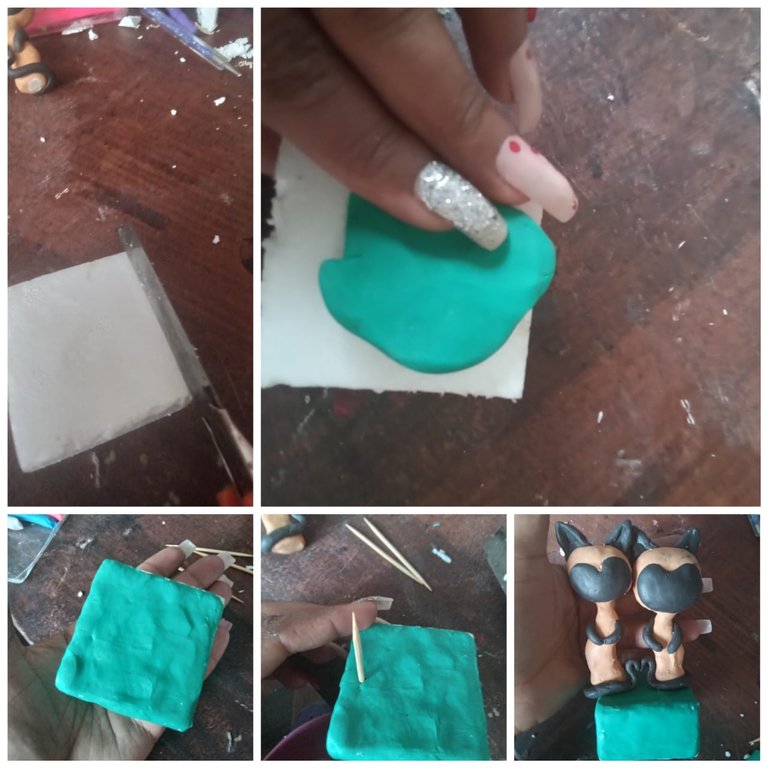
PASO 7
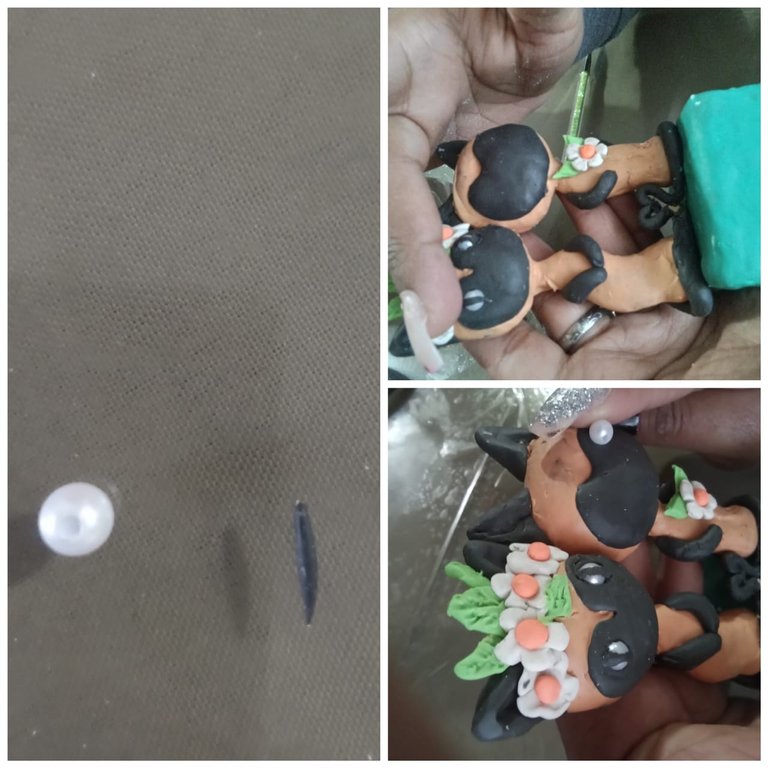
Luego moldeamos una bolita de plastilina blanca aplastamos con los dedos y con ayuda del dots formamos cinco pétalos para hacer la flor y pegamos con ayuda del palillo de altura a la cabeza de la gatita
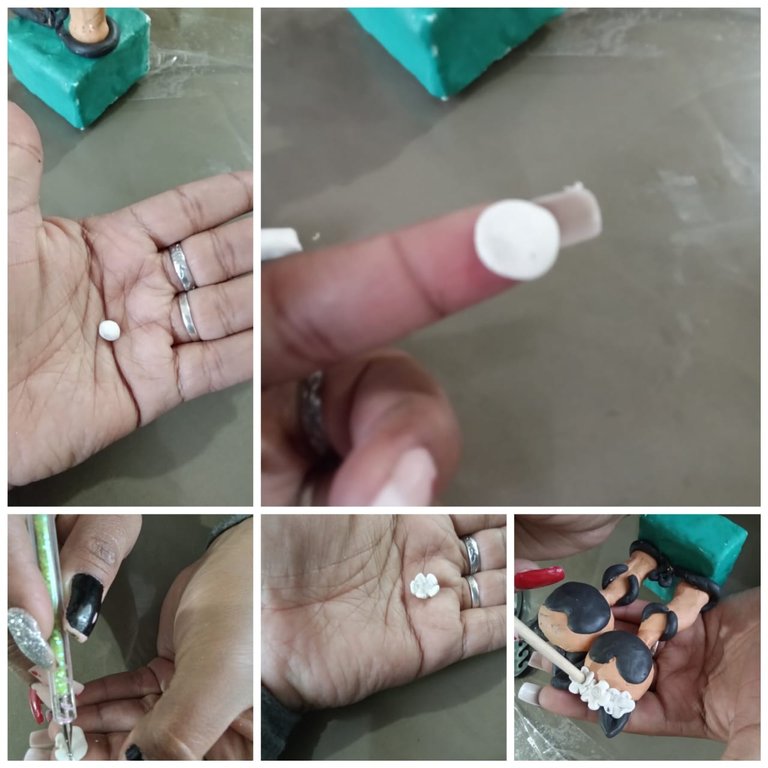
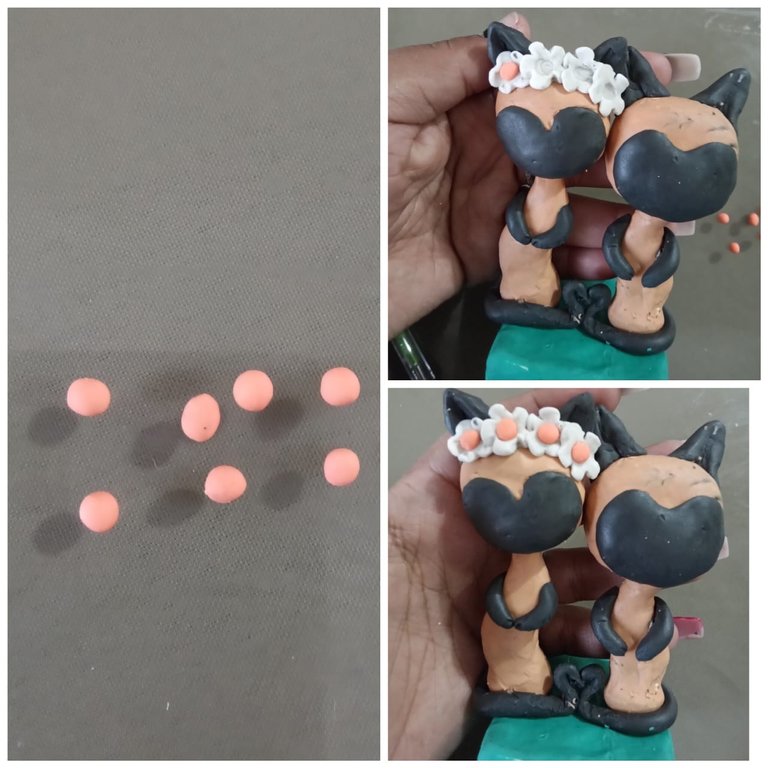
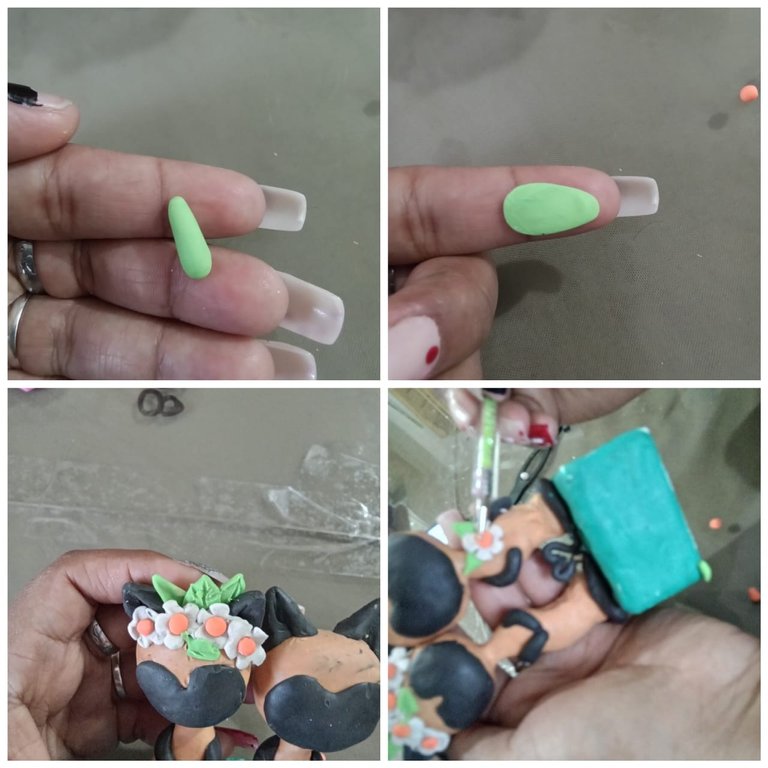
PASO 8
Haremos cinco bolitas con la plastilina naranja y lo colocamos en el centro de cada flor, con la plastilina verde haremos las hojas de las flores, luego pegamos una flor en el pecho del segundo gato
PASO 9
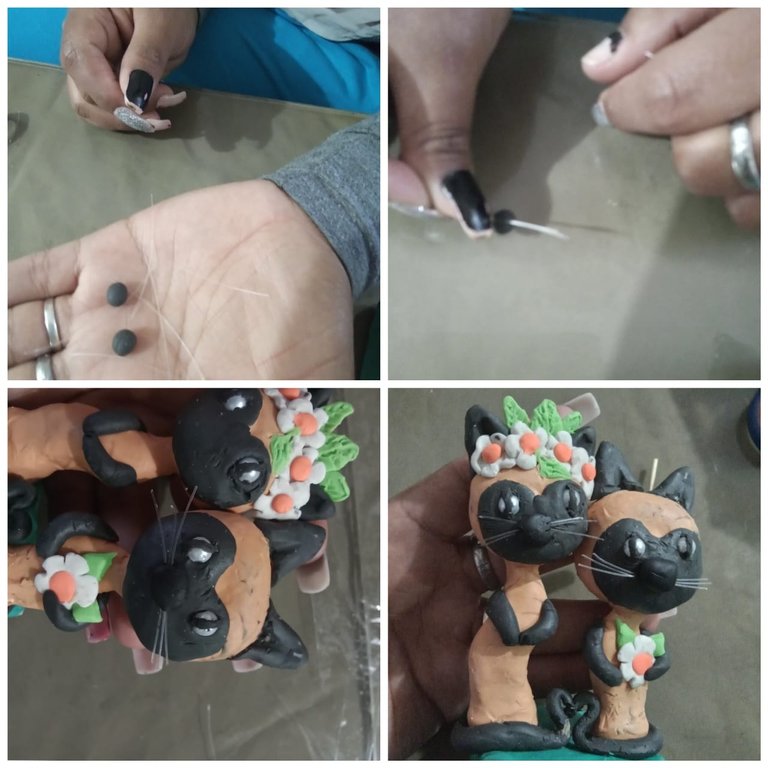
Con la plastilina negra haremos un palito y colocamos la Cuenca en la cara que seran los ojos y el palito de platina lo pondremos en el centro de los ojos y de igual manera repetimos este paso con el otro gato
PASO 10
Cortamos seis pedazos de nilon y haremos dos bolitas de plastilina negra que serán la nariz y la boca de los gatos
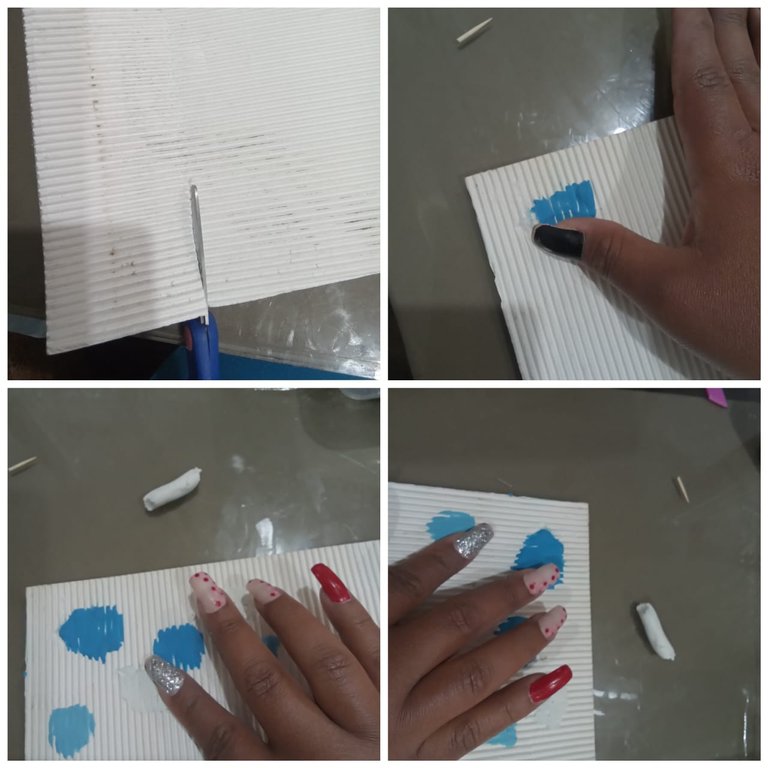
PASO 11
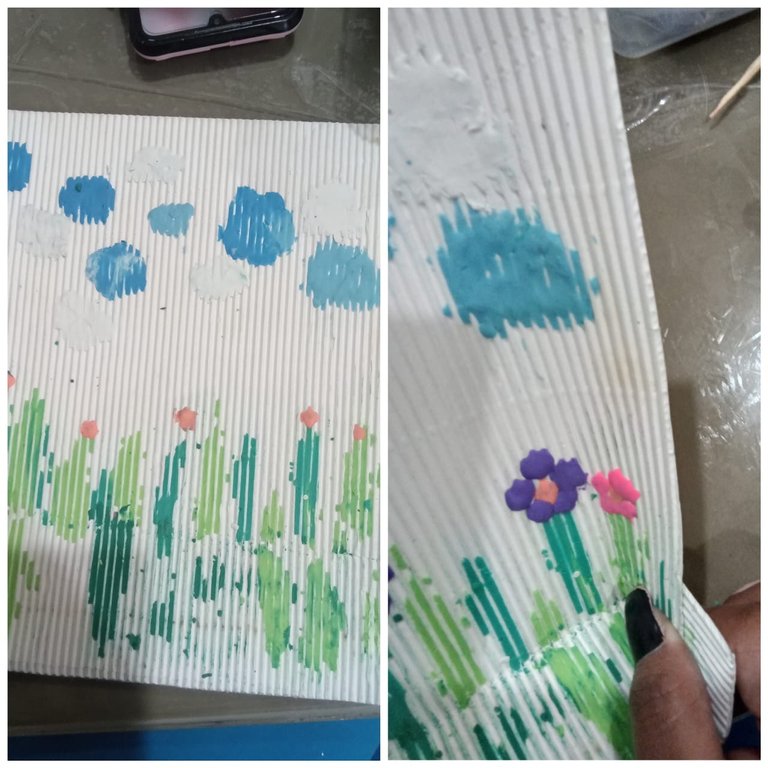
Cortamos la cartulina corrugada haciendo un rectángulo, luego haremos 2 cortes a los lados, luego haremos bolitas con la platilina azul, celeste y blanca, para extender en la parte superior del cartón y formar varias nubes.
PASO 12
Para seguir decorando el paisaje haremos especie de ramas y hierbas con la plastilina verde de 2 tonalidades desde la mitad del cartón hasta abajo cubriendo la más posible.
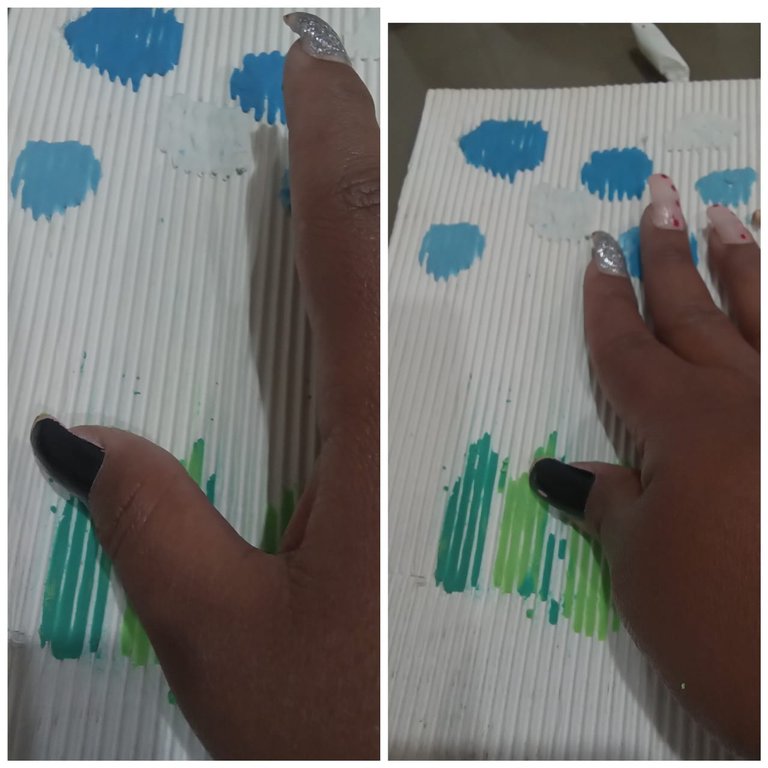
PASO 13
Luego hacemos flores con bolitas de plastilina de color fucsia, morada y anaranjado intercalando los colores para darle armonía a los colores, pegamos las esquinas de abajo del cartón para formar el cuadro del paisaje.
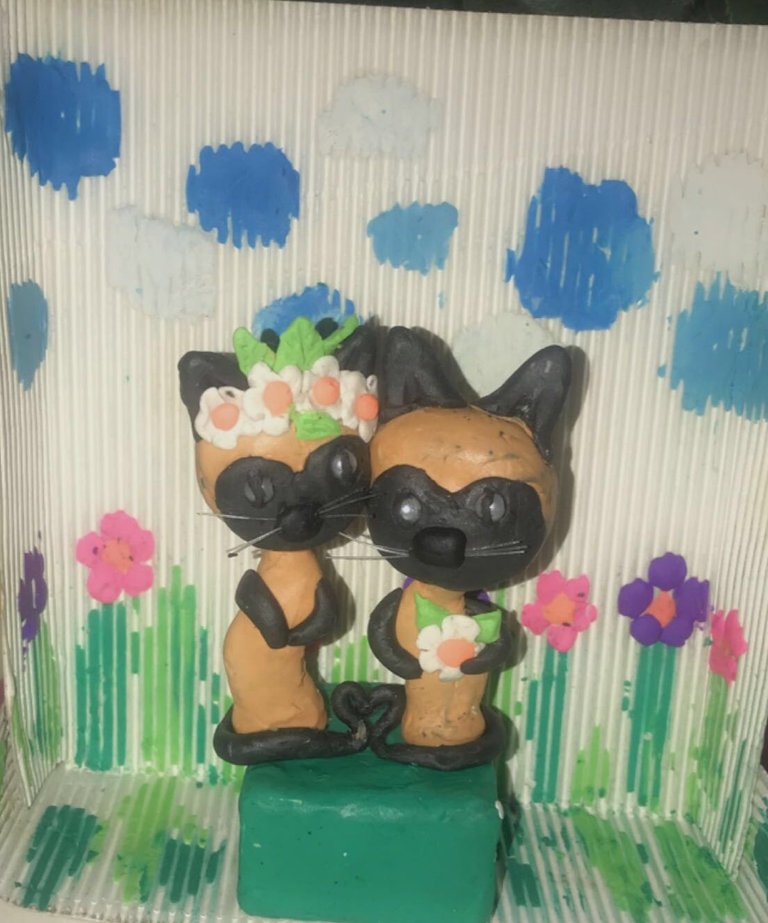
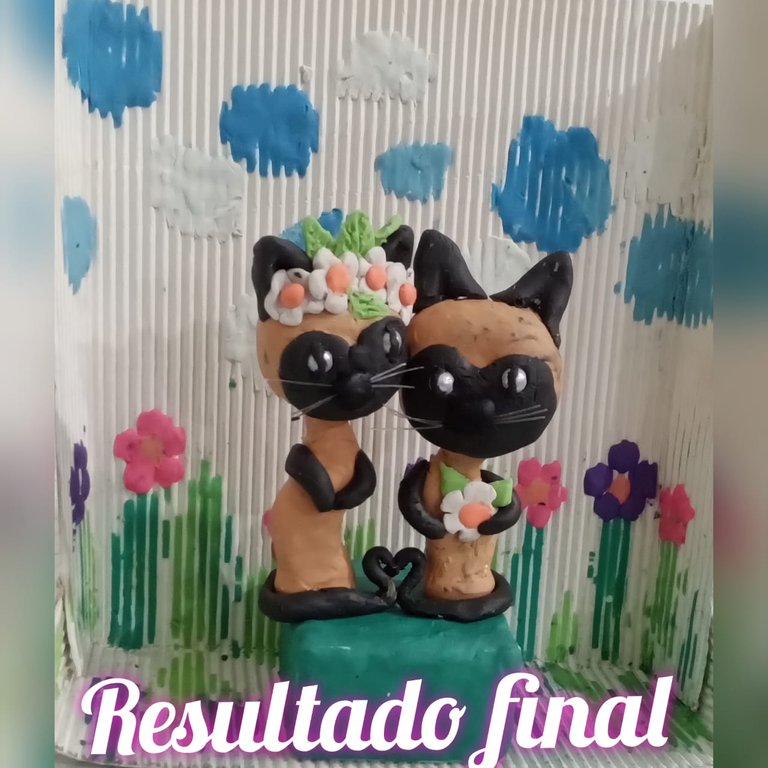
Así nos queda este lindo diorama de plastilina.
Espero les guste y hallan disfrutado todo el proceso de elaboración, me despido de todos hasta otra creatividad mis queridos lectores
Las fotos son de mi autoría, editadas en Incollage y traducido en la página web
www.DeepL.com/Translator
🐈⬛ 🐈⬛ 🐈⬛ 🐈⬛ 🐈⬛ 🐈⬛ 🐈⬛ 🐈⬛ 🐈⬛ 🐈⬛ 🐈⬛ 🐈⬛ 🐈⬛
__________________ 🐈⬛ 🐈⬛ _______________
English Version

Hello my dear friends
Receive a warm greeting and a big hug 🤗 wish you are very well and are having a great day with your loved ones, today I am with you my dear friends to show you my participation in this beautiful plasticine diorama contest, I thank the modeler @gaboamc2393 for giving us the opportunity to remember fun moments of my childhood with this wonderful idea of molding plasticine, I don't have much type that I work with plasticine because I have a girl of 8 years old and I help her with her school homework, to make this project I was inspired by a couple of Siamese cats because I like them and I think they are very cute cats, since I was a little girl I have lived with these cute felines.
It is a pleasure for me to be able to participate and show
one of my not so professional skills, I thank my friend @aracelys1965 for inviting me to participate in this nice diorama contest.
I extend the invitation to my friends @carolina38 and @kathelopez77 to also have fun creating these cute animals 🐻🐧🐈.
I invite you to take a closer look at the elaboration of this beautiful cat couple which I had fun making and it really was a great challenge I share with you the step by step.
MATERIALS
. Colored Plasticine
. Anime
. Toothpicks
. Dots brush
. Corrugated cardboard
. 4 white bowls
. Nylon
. Exact
HANDS TO WORK
STEP 1
We start by cutting the anime with the exact anime making a ball, cut a toothpick and try through the middle of the anime ball before making the ball.
STEP 2
Holding a ball of beige plasticine, stretch it with the help of the dots and cover the anime ball to make the head of the cat.
STEP 3
Now we take a piece of beige plasticine, we make the body of the cat and mold the figure of the body, we repeat step 1 and 2 with the other cat.
STEP 4
We extend a piece of black plasticine with the help of our fingers to form an oval to form the bear and we also make the ears of the kitten with the black plasticine with the help of the dots and we glue them to the head, we repeat the step with the other kitten.
STEP 5
Stretch a piece of black plasticine to form the arms of the kitten, glue to the body and glue with the black plasticine, stretch and shape the tail and repeat the step with the other kitten and form a heart with the two tails.
STEP 6
Cut the anime and form a square, stretch the green plasticine on top of the anime until the whole anime is covered, put the toothpicks in the anime to fix the cats.
STEP 7
Then we mold a little ball of white plasticine we flatten with our fingers and with the help of the dots we form five petals to make the flower and we glue with the help of the toothpick to the head of the kitty.
STEP 8
We make five little balls with the orange plasticine and we place them in the center of each flower, with the green plasticine we will make the leaves of the flowers, then we glue a flower on the chest of the second cat.

STEP 9
With the black plasticine we will make a stick and we place the basin on the face that will make the eyes and the plasticine stick we will place it in the center of the eyes and in the same way we repeat this step with the other cat.
STEP 10
Cut six pieces of nylon and make two little balls of black plasticine that will be the nose and mouth of the cats.
STEP 11
Cut the corrugated cardboard making a rectangle, then we will make 2 cuts on the sides, then we will make small balls with the blue, light blue and white plasticine, to spread on the top of the cardboard and form several clouds.
PASO 12
To continue decorating the landscape, we will make branches and grasses with the green plasticine of 2 shades from the middle of the cardboard to the bottom, covering as much as possible.
PASO 13
Then we make flowers with little balls of plasticine of fuchsia, purple and orange color interspersing the colors to give harmony to the colors, we glue the bottom corners of the cardboard to form the picture of the landscape.
This is how we have this nice plasticine diorama.
I hope you like it and have enjoyed the whole process of elaboration, I say goodbye to all of you until another creativity my dear readers.
The photos are of my authorship, edited in Incollage and translated on the web site
www.DeepL.com/Translator