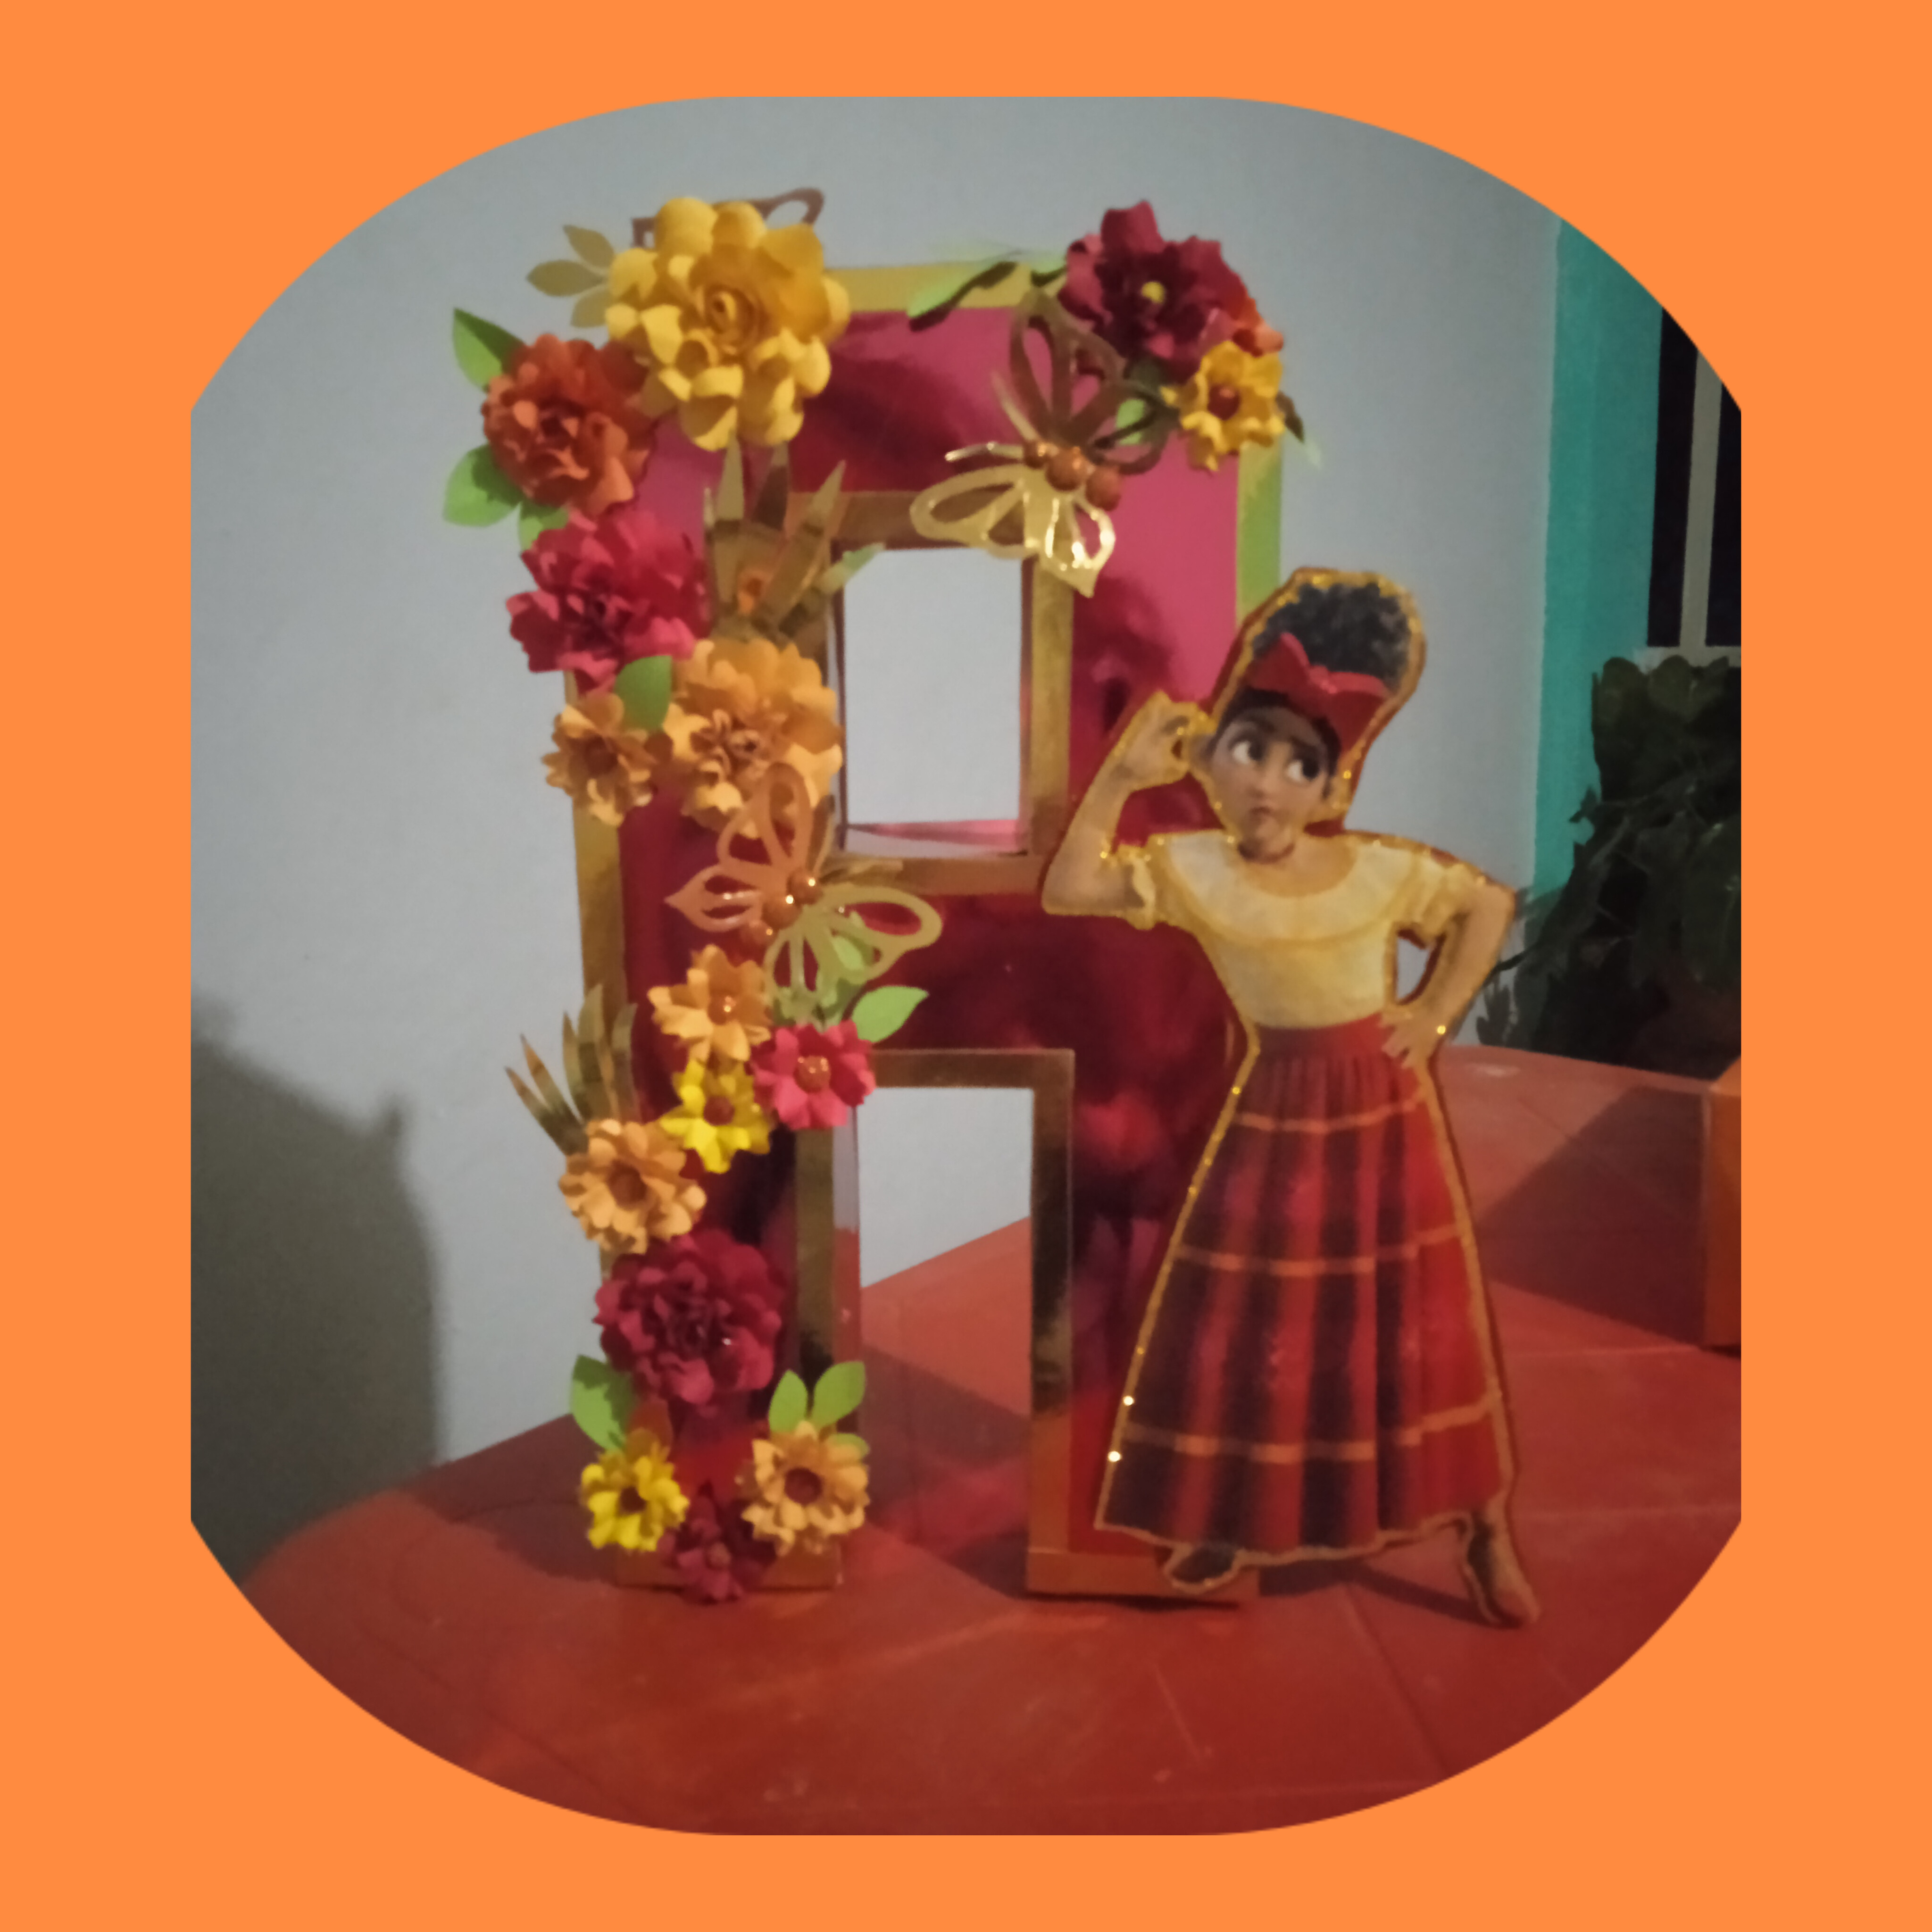
Buenas noches tengan tod@s mis amigos de hive,.. en esta ocasión les voy a tratar de mostrar como hacer una letra entamborada,.. las usan mucho como decoración en los cumpleaños...aquí les haré una letra A , la niña se llama Amada,.. y el aplique es una de las imágenes de la película ENCANTO se llama dolores madrigal...los invito a ver la película para que sepan de que se trata... después les estaré mostrando otras cosas que estoy haciendo con esa misma imagen de modelo..
Good evening to all my hive friends,... on this occasion I am going to try to show you how to make a letter A,... they use them a lot as decoration on birthdays... here I will make you a letter A, the The girl's name is Amada,... and the applique is one of the images from the movie ENCANTO, it's called Dolores Madrigal... I invite you to watch the movie so you know what it's about... later I'll be showing you other things I'm doing. doing with that same model image
MATERIALES
Cartulina de contruccion amarilla roja naranja y verde
Cartulina metalizada roja y dorada.
Imagen impresa.
Tijeras, silicon liquido y caliente .
MATERIALS
Yellow red orange and green construction cardboard
Red and gold metallic cardstock.
Printed image.
Scissors, hot and liquid silicone

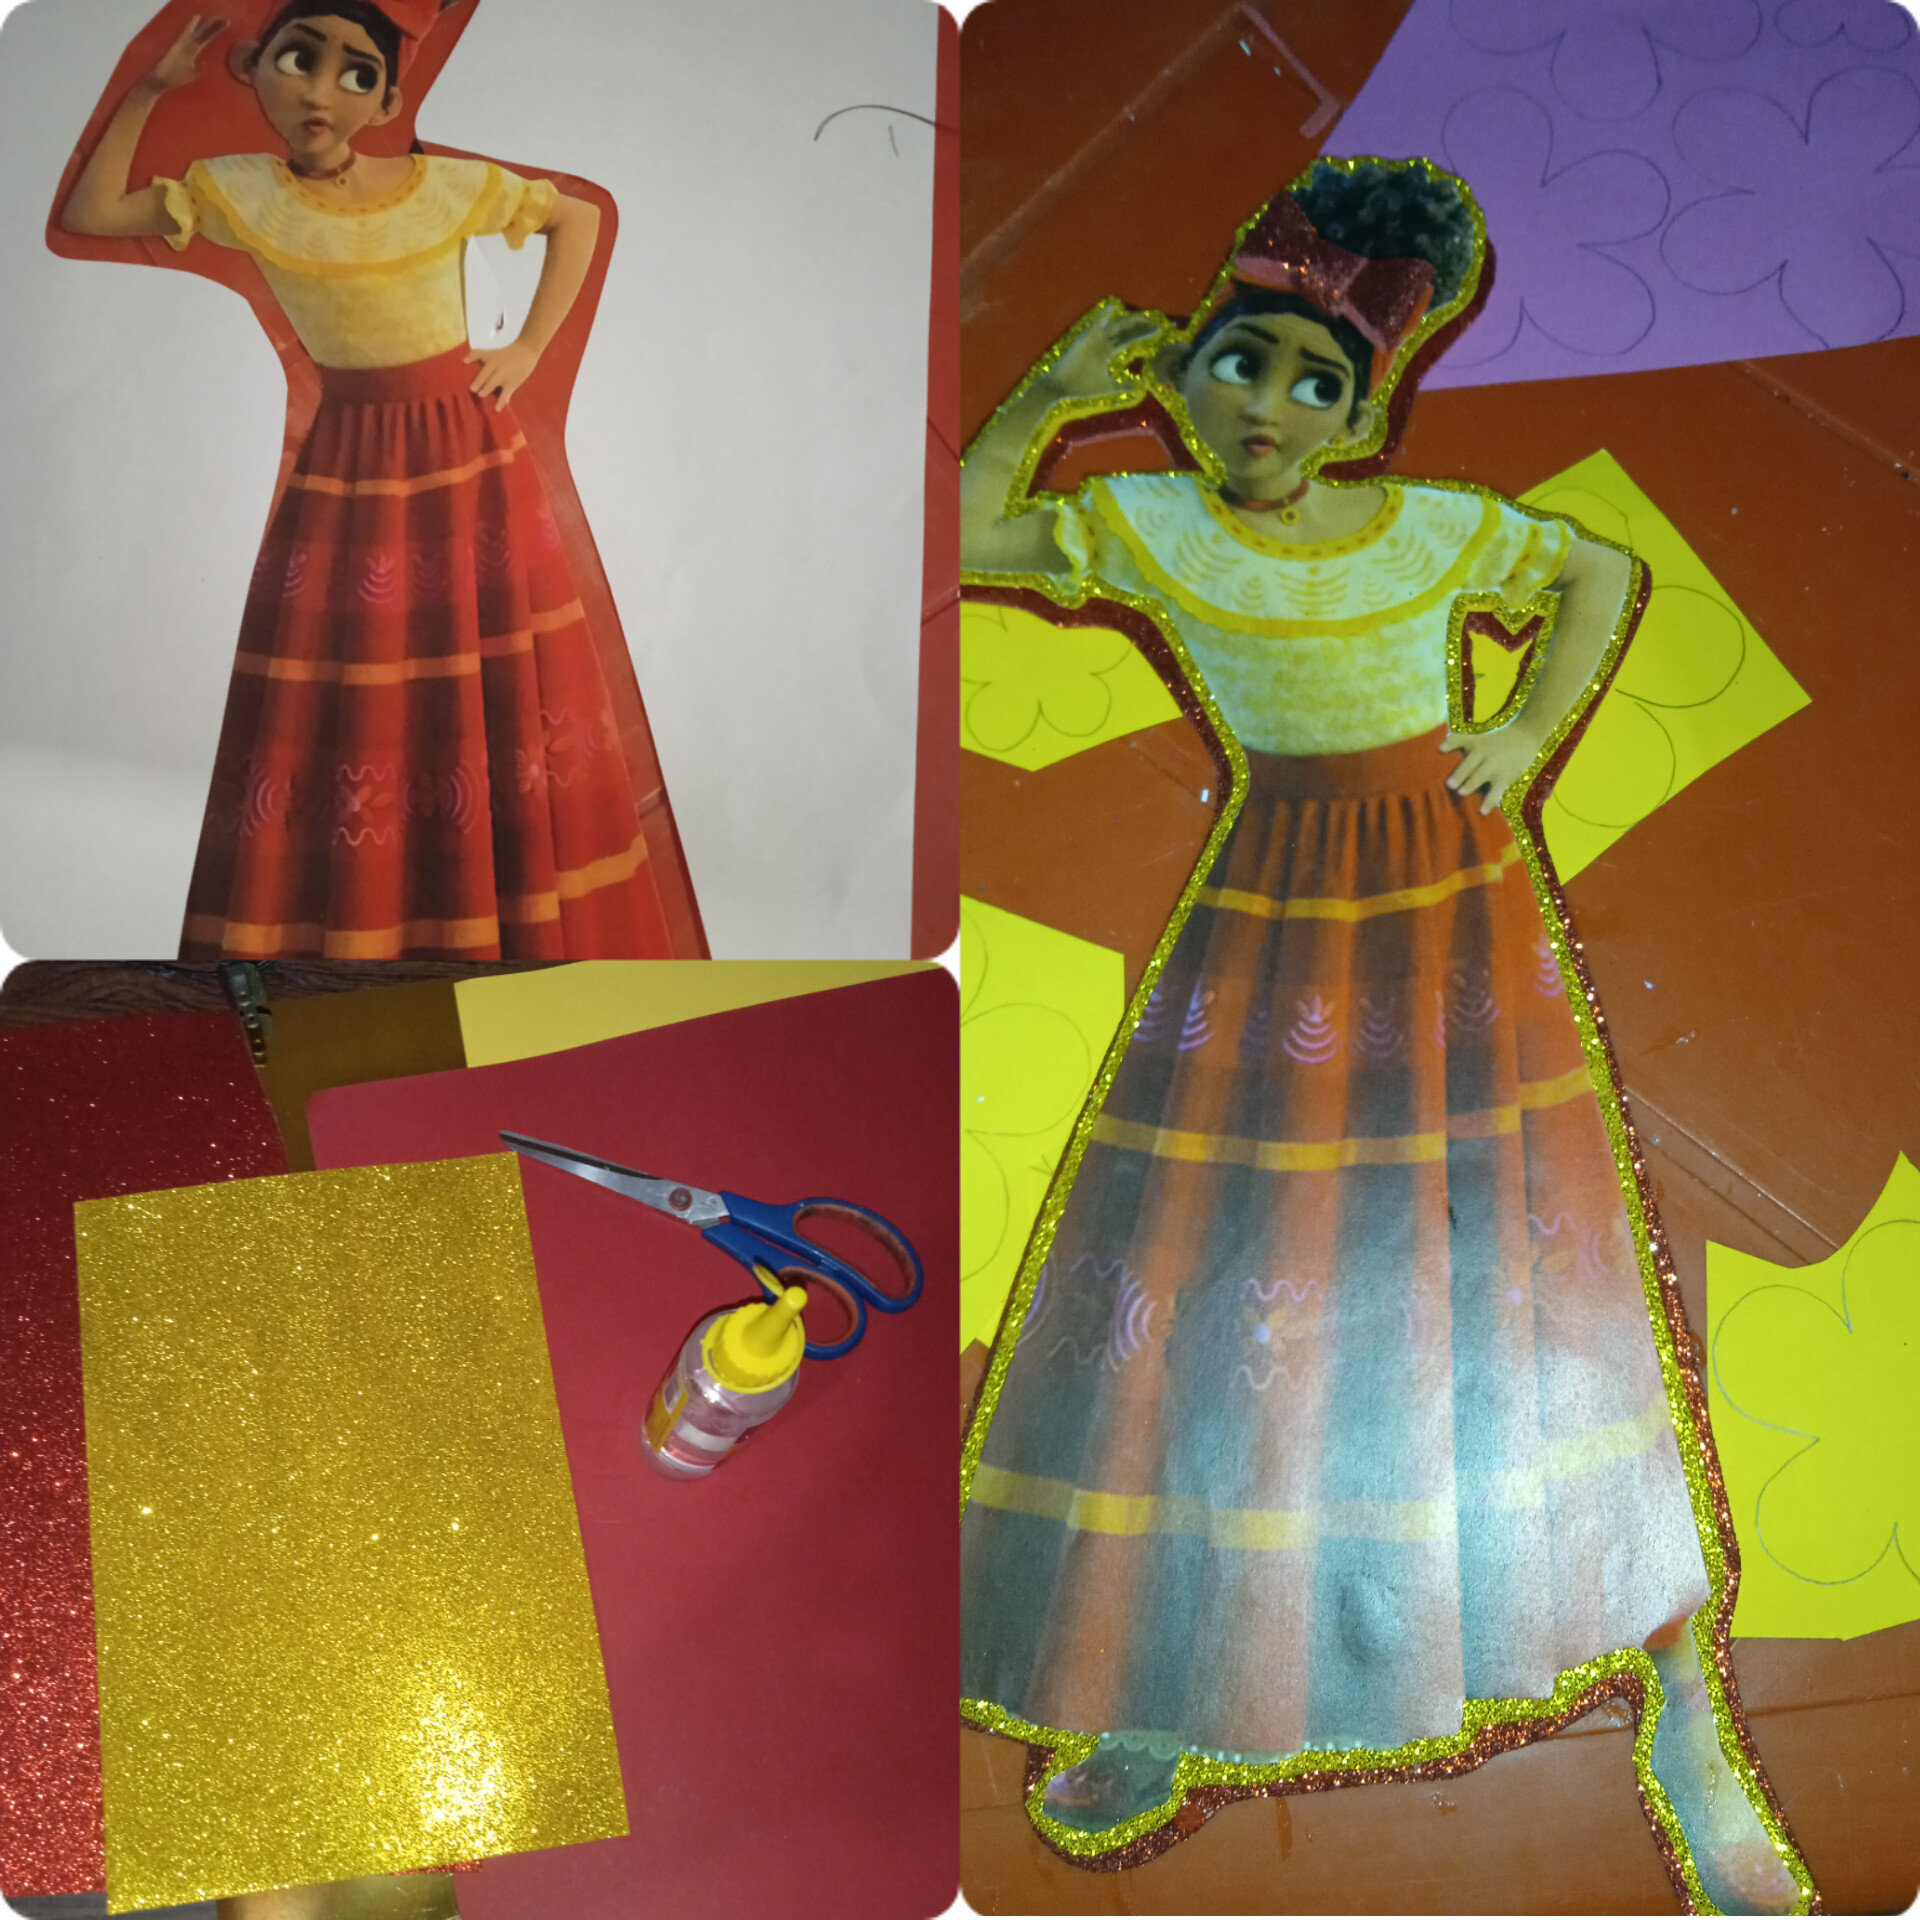
PASO 1.
Tomamos la imagen impresa y la recortamos luego la pegamos sobre el foami escarchado amarillo y luego en el rojo, para darle un poco de brillo...
STEP 1.
We take the printed image and cut it out, then we paste it on the yellow frosted foam and then on the red one, to give it a little shine...
PASO 2.
Ahora bien, ya tenemos la imagen lista, ahora con la ayuda de un patrón ya sacado de la letra, la colocamos en la cartulina roja metalizada por el lado de revés, marcamos y con la ayuda de la tijera repasamos las lineas para no dañar la cartulina al momento de doblar...
STEP 2.
Now, we have the image ready, now with the help of a pattern already taken from the letter, we place it on the metallic red cardboard on the wrong side, we mark and with the help of the scissors we go over the lines so as not to damage the cardboard when folding...
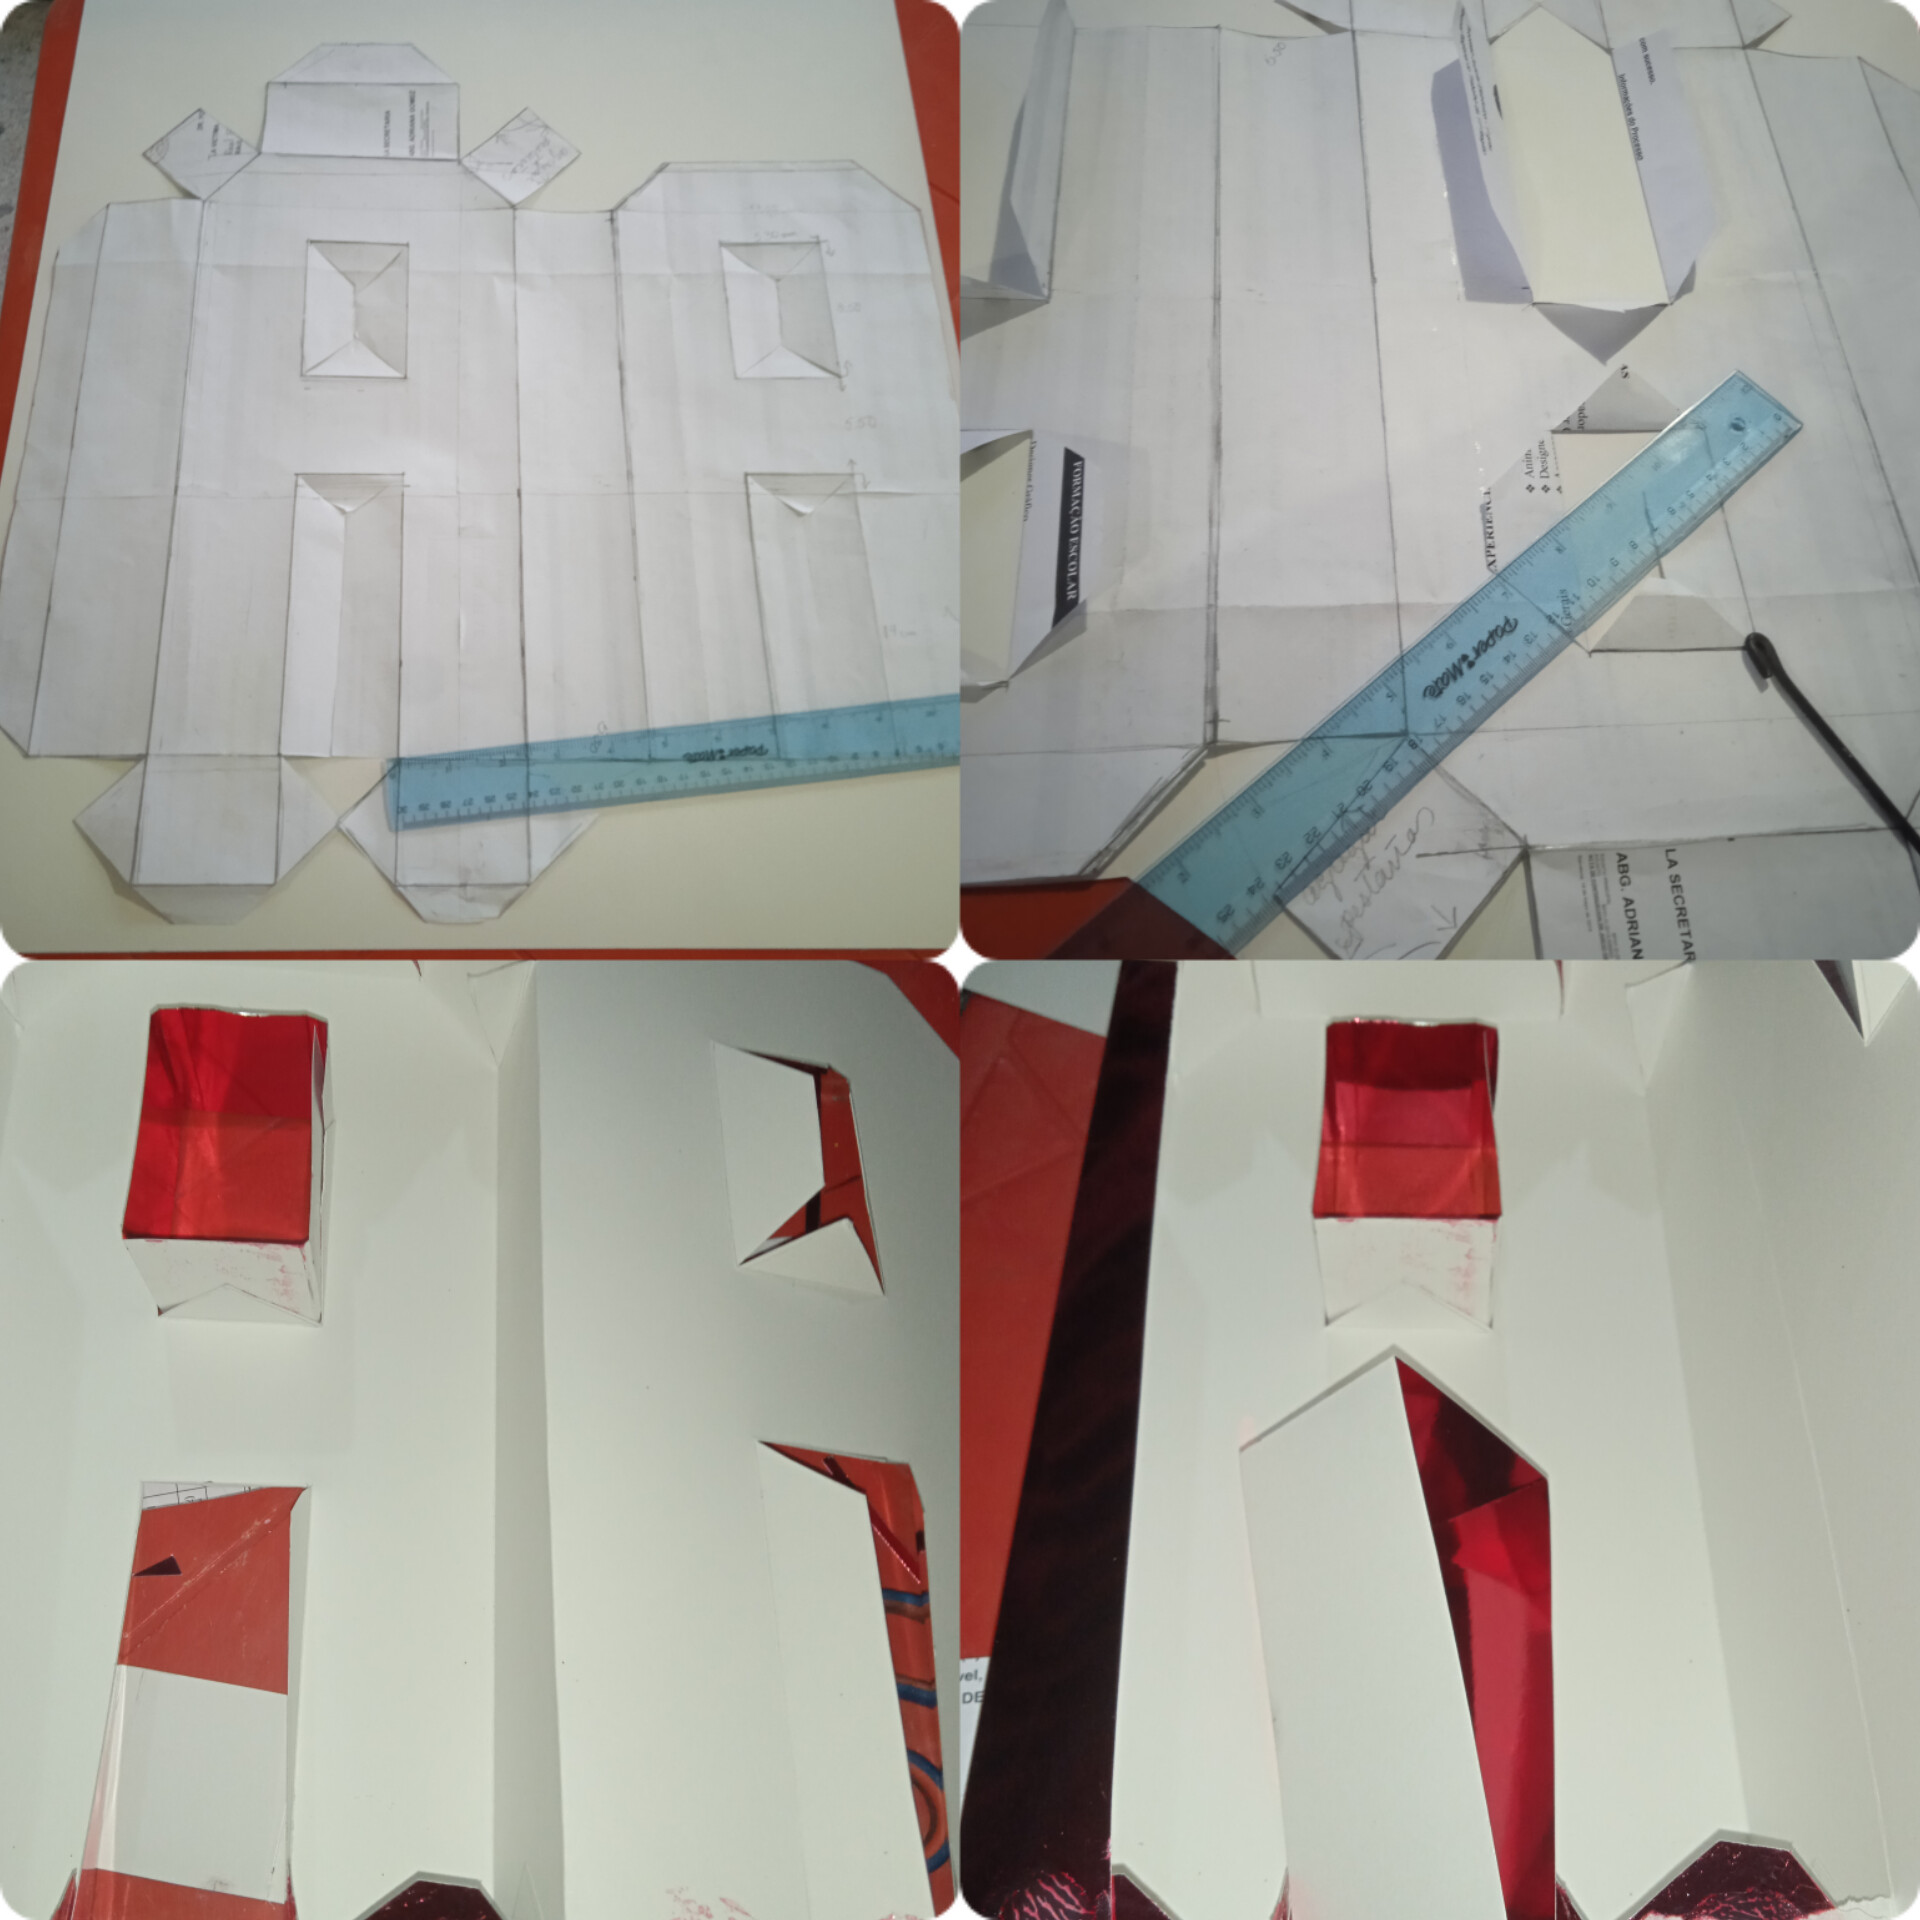
PASO 3.
Ya marcada y cortada procedemos a doblar y a pegar con silicon liquido, poco a poco e ir midiendo para que no quede mal armada y se pueda parar sola.
STEP 3.
Once marked and cut, we proceed to fold and glue with liquid silicone, little by little and measuring so that it is not poorly assembled and can stand on its own.
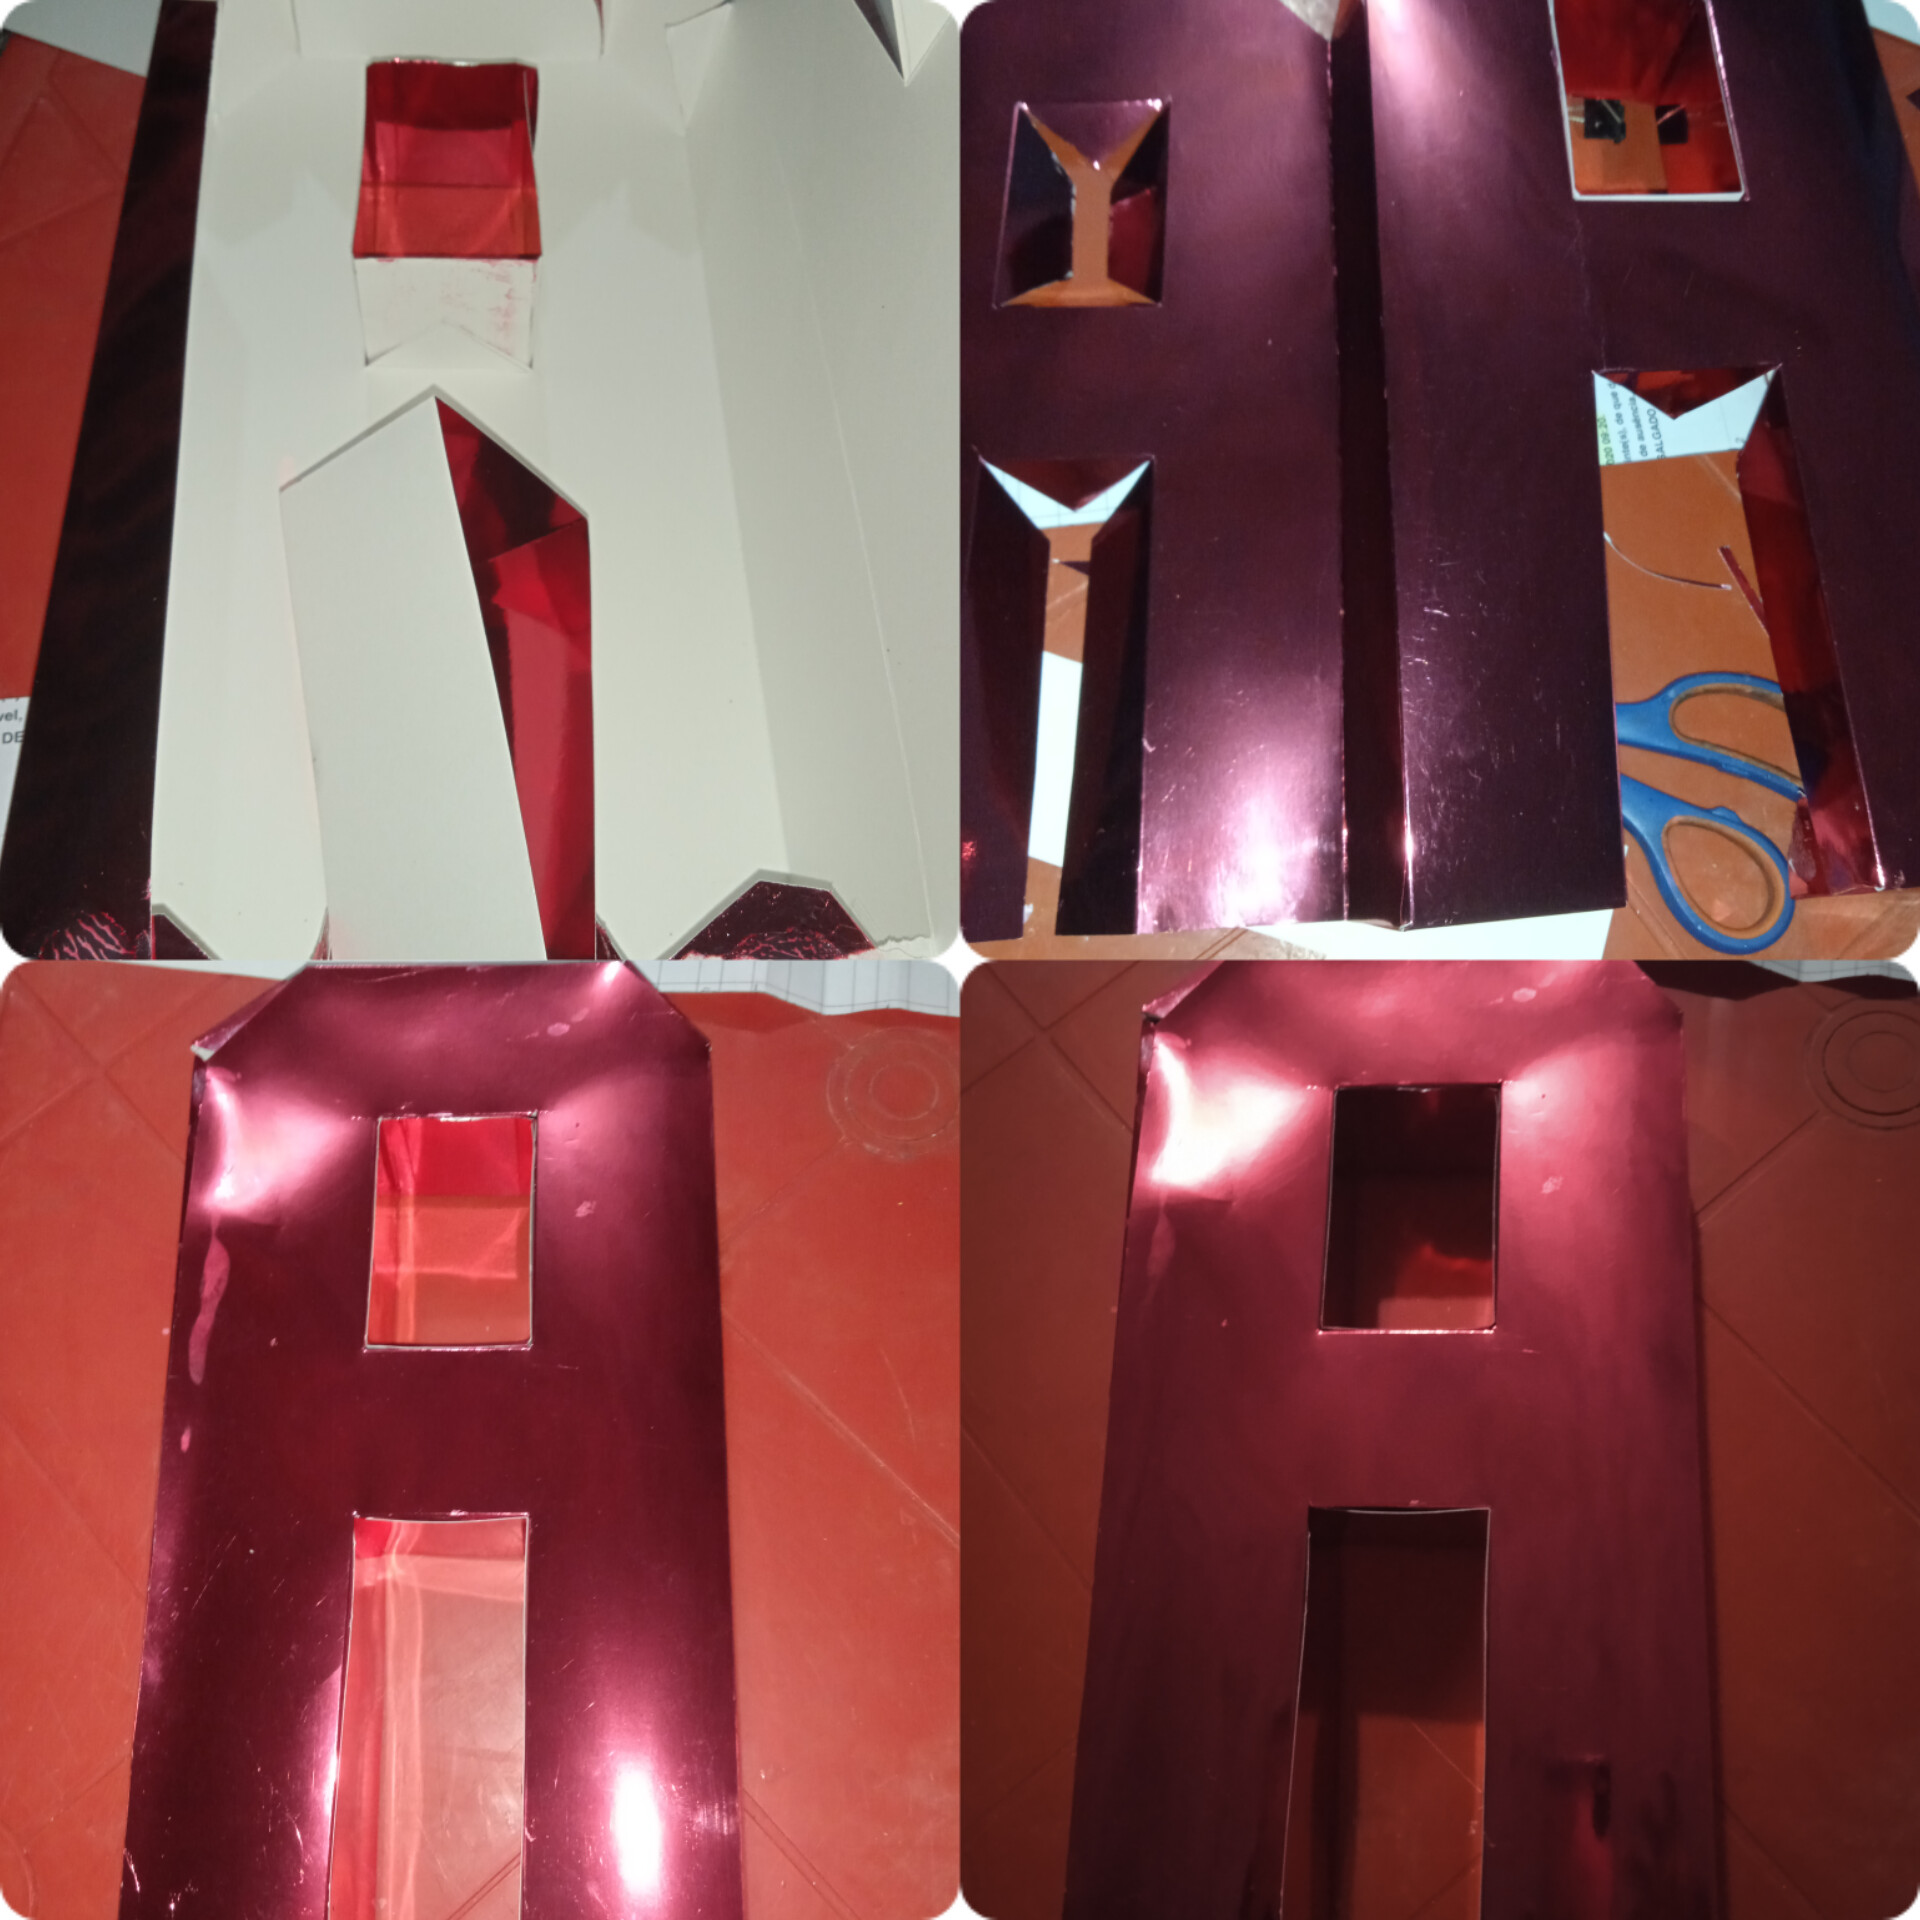
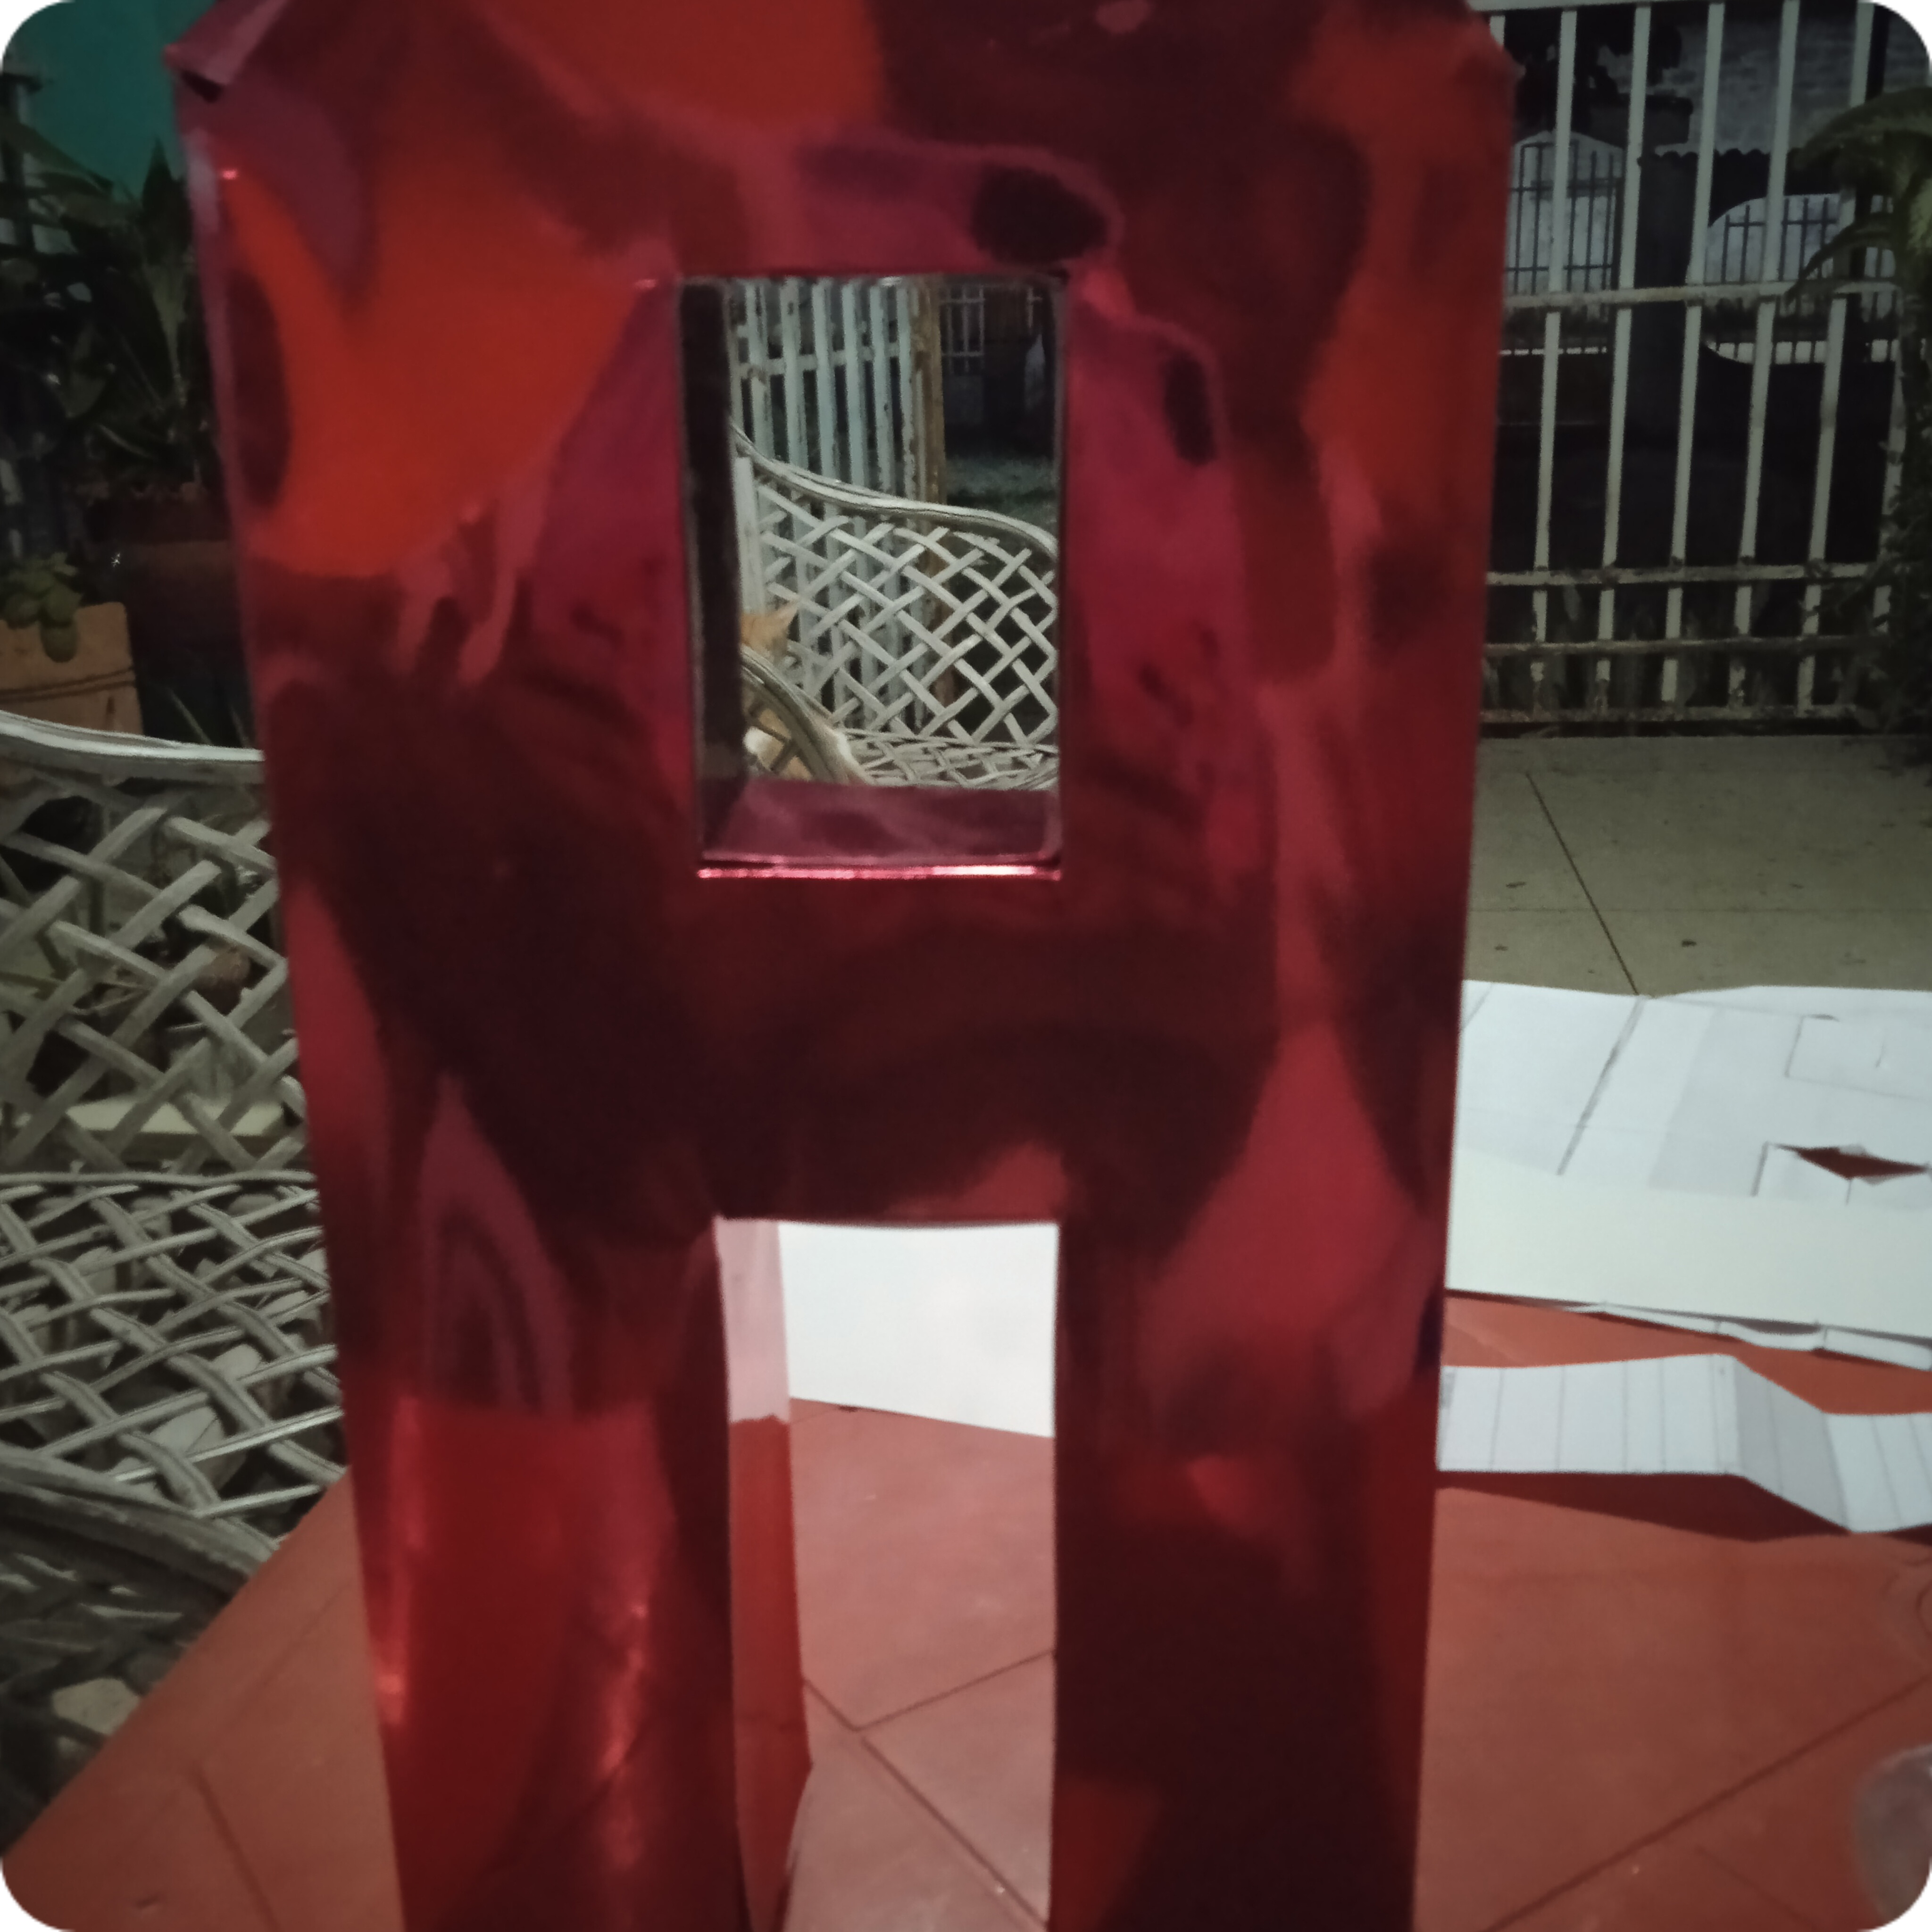
Nos va a quedar algo asi. Esta letra es de unos 35cm aproximadamente..
We are going to have something like this. This letter is approximately 35cm
Ya tenemos la segunda pieza de nuestro trabajo , ahora vamos a hacer flores y mariposas para decorar la letra. Aparte corte unos listones con la cartulina dorada para hacerle unos bordes a la letra...
We already have the second piece of our work, now we are going to make flowers and butterflies to decorate the letter. Separately, cut some ribbons with the gold cardboard to make some edges for the letter.
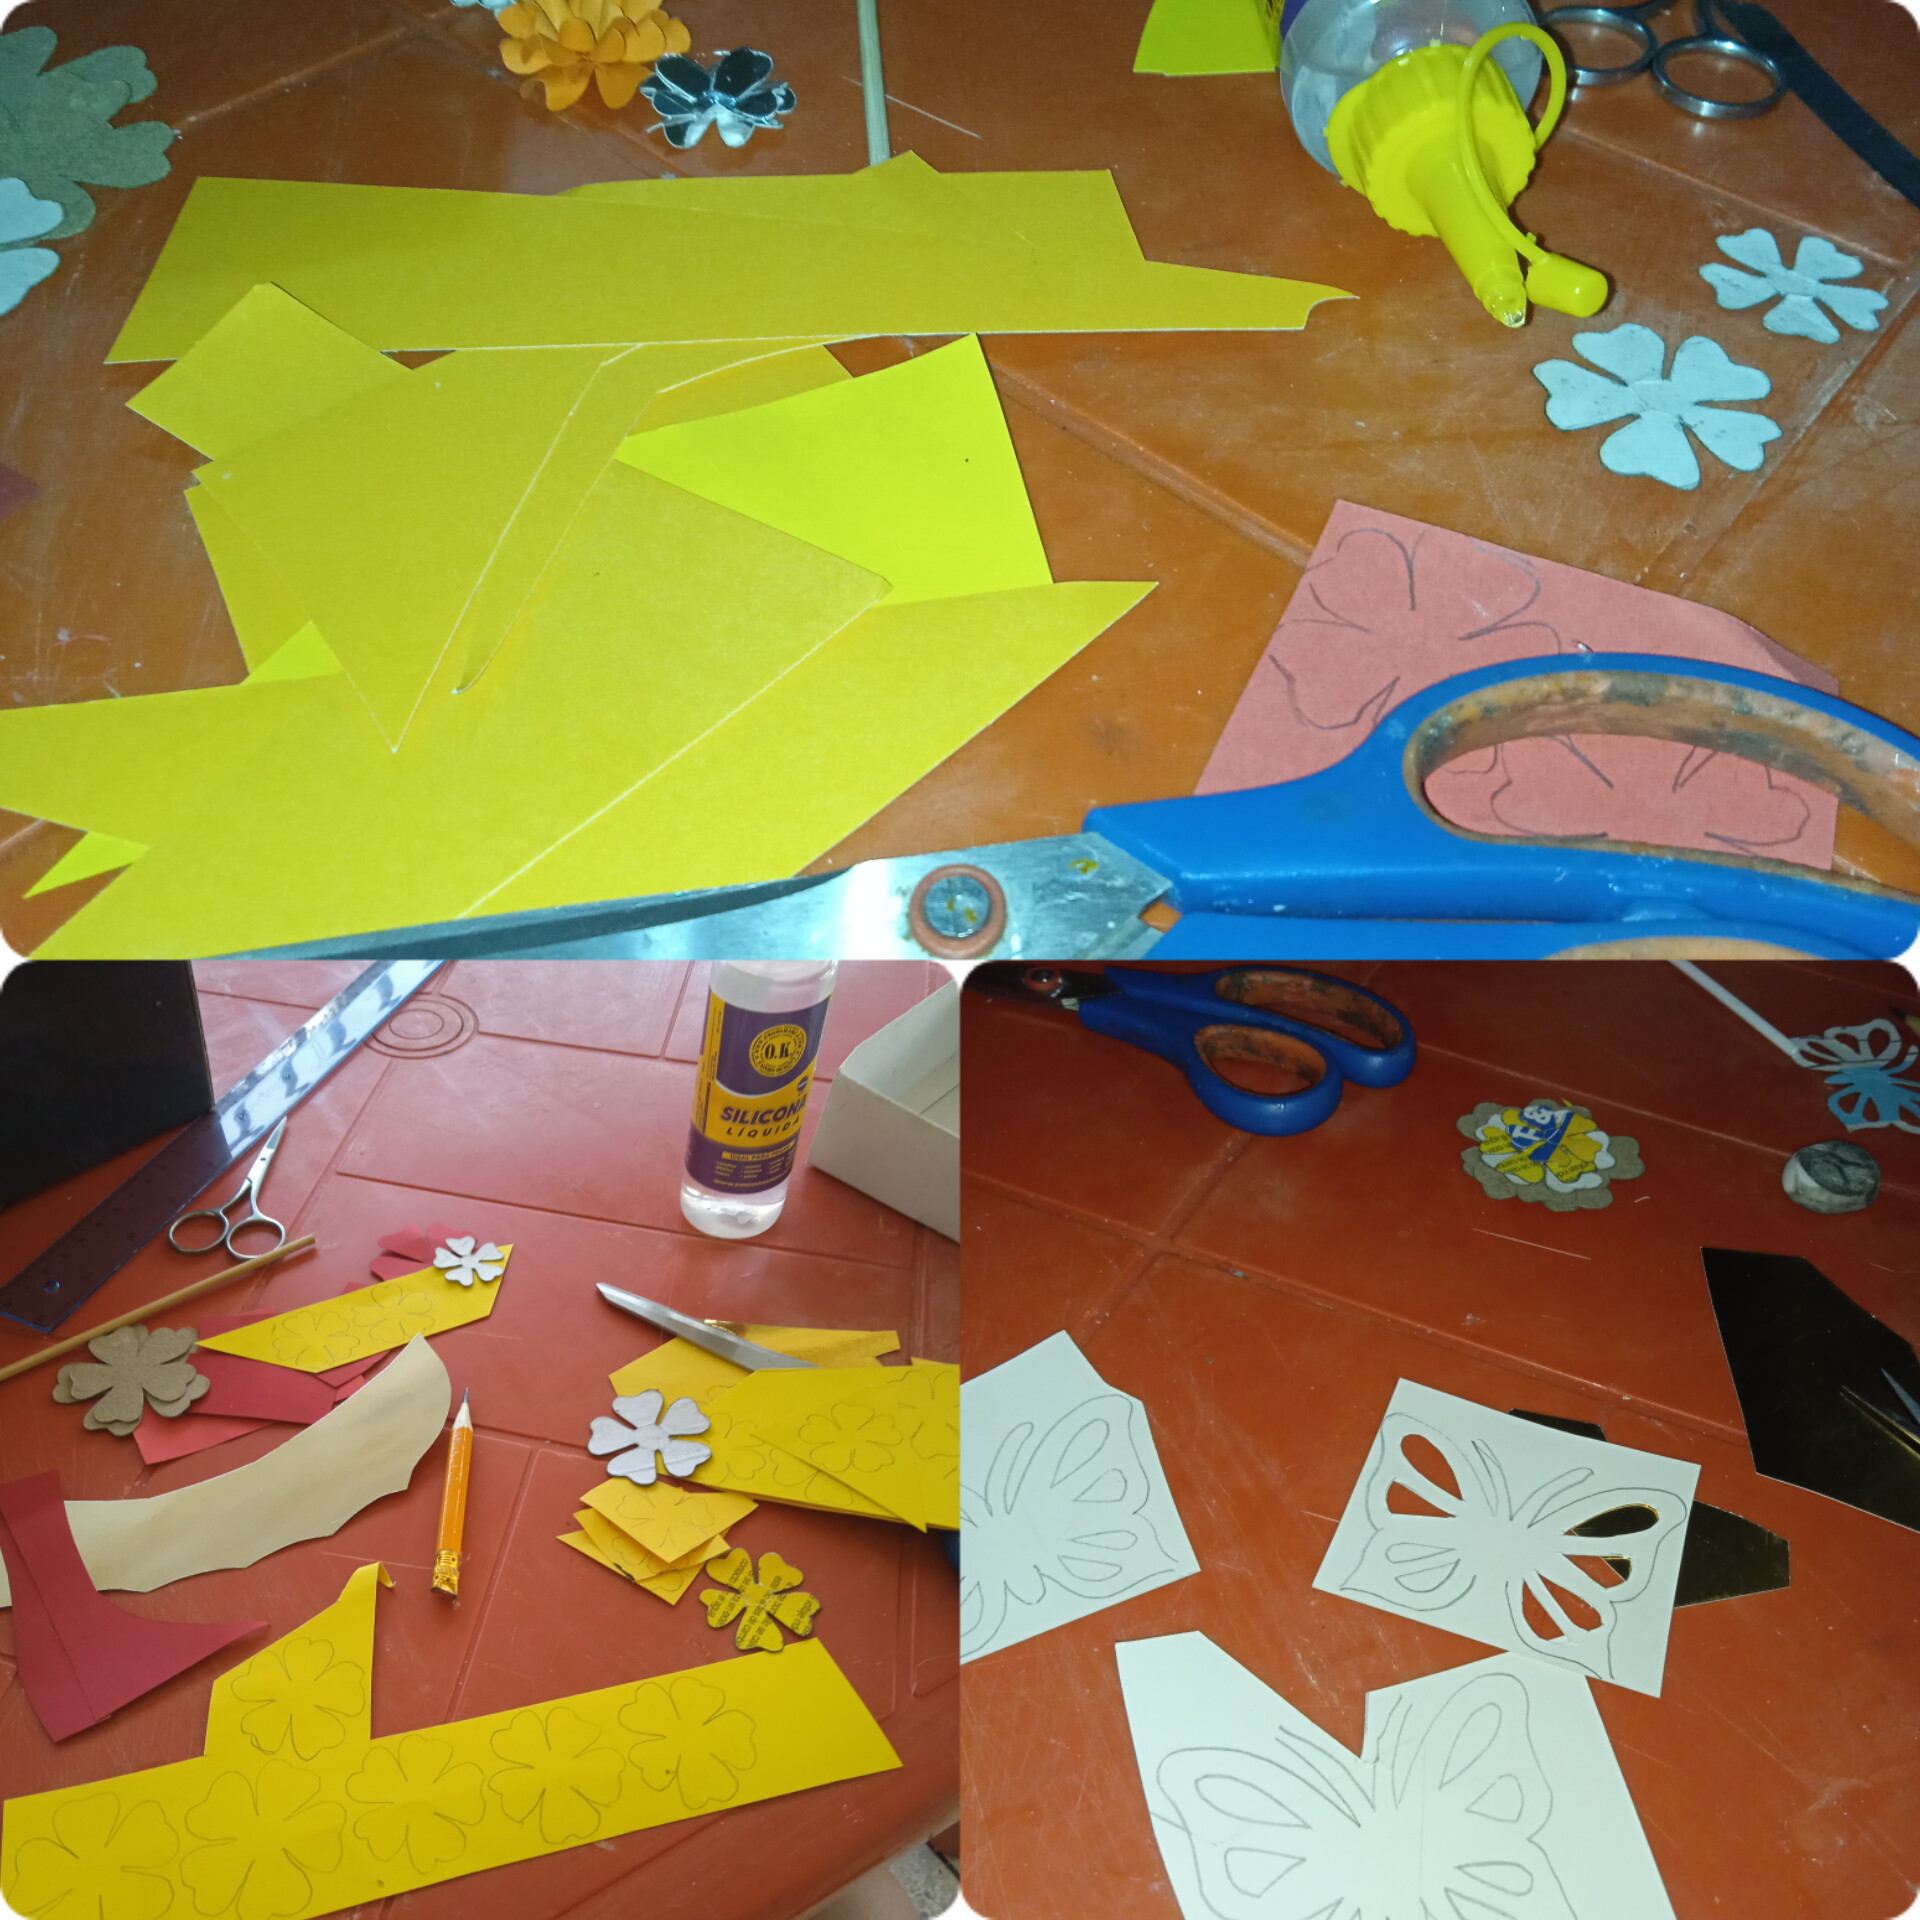
PASO 4.
Ya tenemos flores de cartulina de construcción y algunas metalizadas, mariposas con cartulina metalizada dorada decorada con foami, y las presento para ver como queda el contraste de los colores,...
STEP 4.
We already have construction cardboard flowers and some metallic ones, butterflies with gold metallic cardboard decorated with foam, and I present them to see how the contrast of the colors looks,...
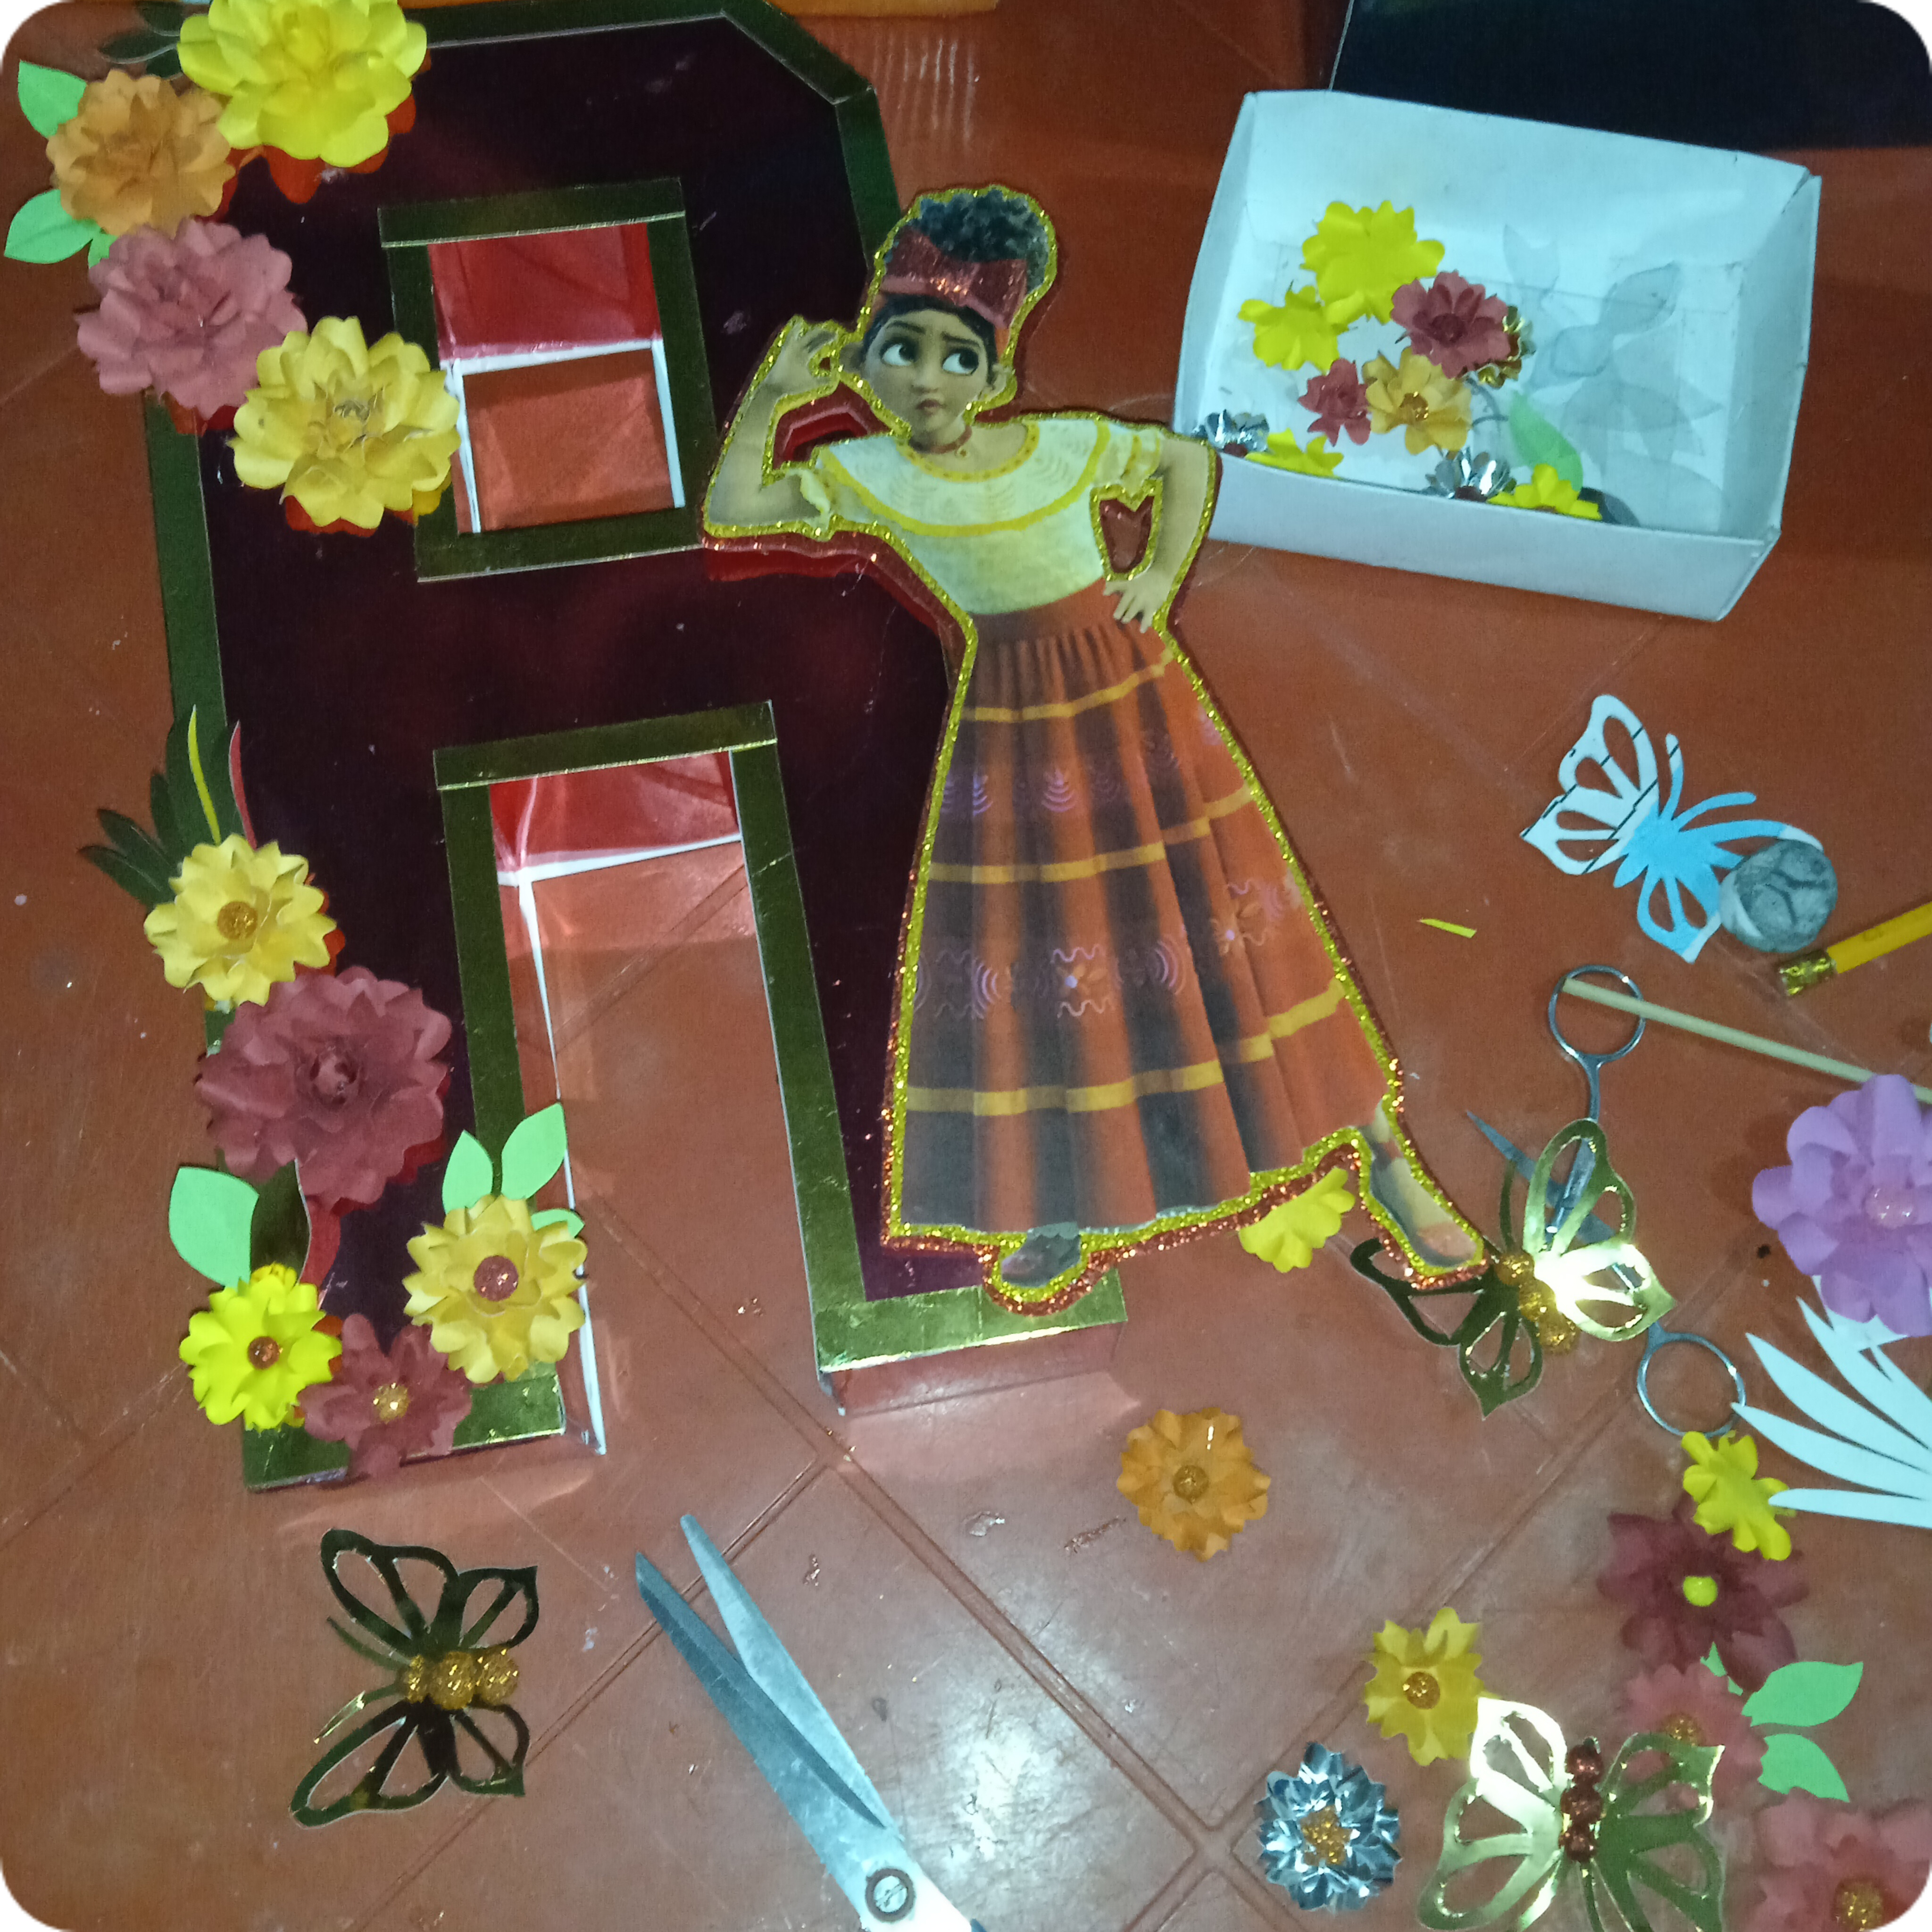
Ahora comenzamos a pegar las flores y la imagen de la muñeca..
Now we start gluing the flowers and the doll image.
y aquí el trabajo terminado, quedo muy bonita , espero haya sido de su agrado, pronto nos volveremos a encontrar con otra manualidad ... me encanta poder mostrar mis trabajos, y que le den la importancia que merece muchas gracias , se les quiere!!!
and here the finished work, it turned out very pretty, I hope you liked it, soon we will meet again with another craft... I love being able to show my work, and that they give it the importance it deserves, thank you very much, I love you! !!
mis fotos fueron tomadas con mi telefono xiaomi Redmi 9A y editadas por inshop
This is such a creative talent you showed us here, the final results looks great.
This post has been selected by the Newbies Initiative team and may possibly receive support from the Hive Learners Community. Kindly click on the banner to visit our community and check out our Discord channel here.
Hermosa decoración, me encanta 👍
Congratulations @rolanjm18! You have completed the following achievement on the Hive blockchain And have been rewarded with New badge(s)
Your next payout target is 250 HP.
The unit is Hive Power equivalent because post and comment rewards can be split into HP and HBD
You can view your badges on your board and compare yourself to others in the Ranking
If you no longer want to receive notifications, reply to this comment with the word
STOPCheck out our last posts: