💕Español💕
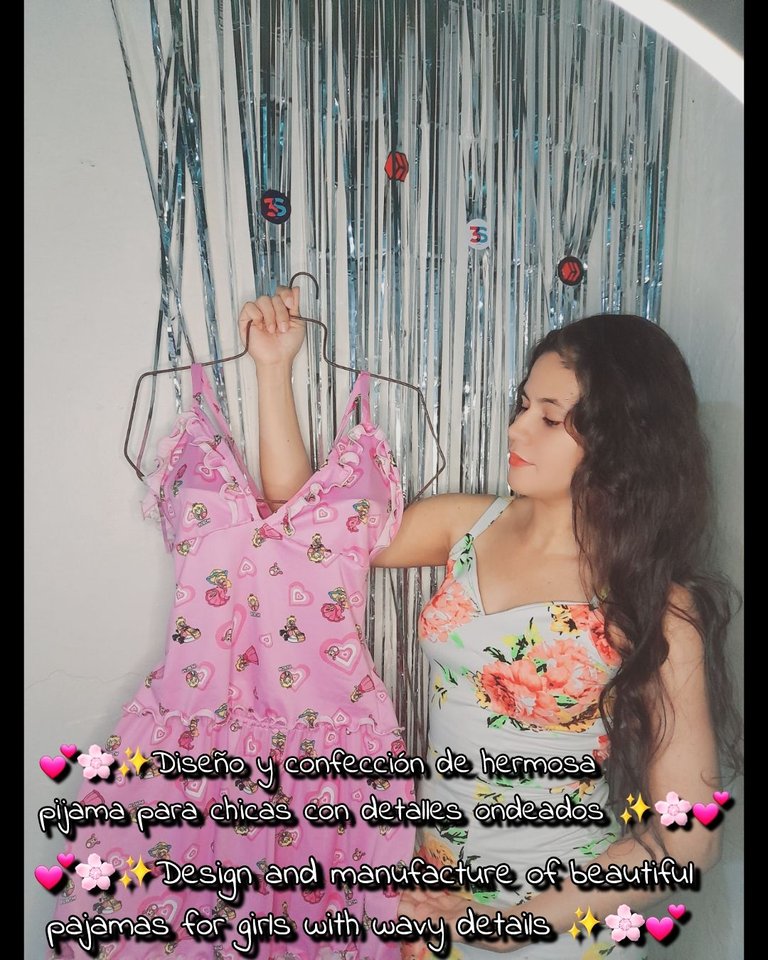
Hola hola mis queridos amigos de Hive espero esten muy bien disfrutando de la noche ✨️🌸 muy bonita noche para todos en esta creativa comunidad de #Diy hoy me complace mucho compartir con ustedes el diseño de una pijama muy bonita y su proceso de confección paso a paso 🤗 los invito a continuar bajando 🤗🤗.
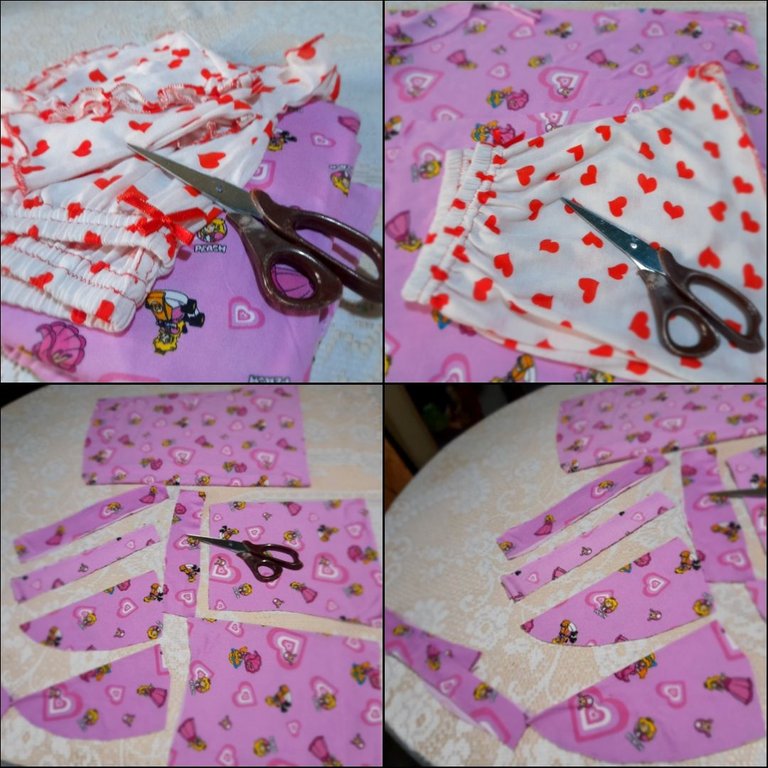
Estos fueron los materiales que use
• Máquina de coser
• Tijera
• Hilo de coser
• Tela
• Prenda de medida
• Elástica
✨️Pasos✨️
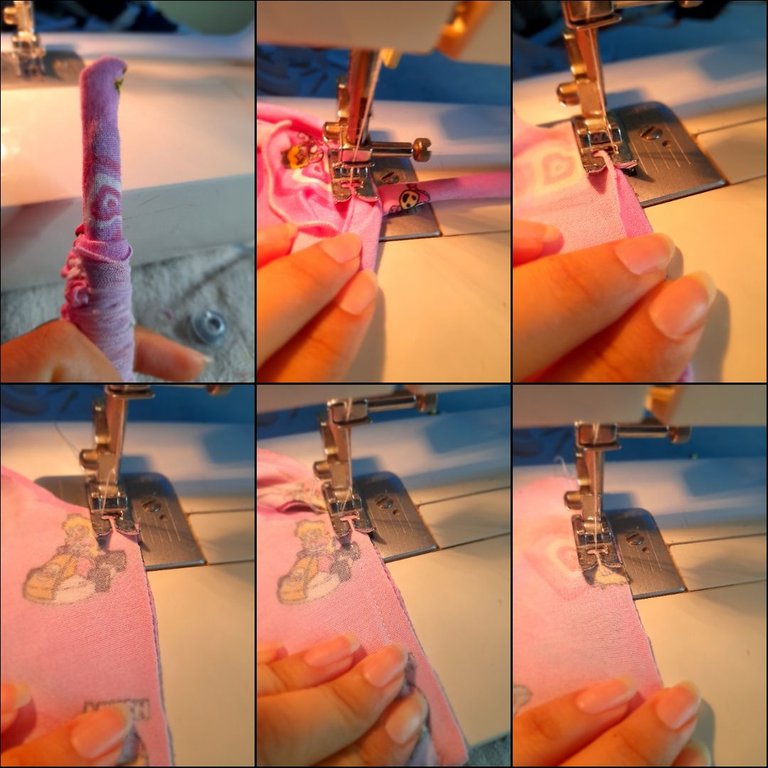
•✨️Voy a iniciar cortando todas las piezas de mi blusa siendo estas una pieza trasera, tres piezas delanteras, orillas de las copas y la orilla ondeada, dos tiros y para la partes inferior dos piezas laterales con su respectiva caída.
•✨️Continúo cosiendo la orilla ondeada con una costura de zigzag y tensión en 1 para luego coser una pinza de 5 cm para brindarle caída y luego así coser las orillas ondeadas a la copa de la blusa, luego voy a coser con la orilla colocandola en el lado reverso para luego doblarlo y coser con costura recta nuevamente y luego así coser las dos copas a la pieza faltante con una costura recta y zigzag.
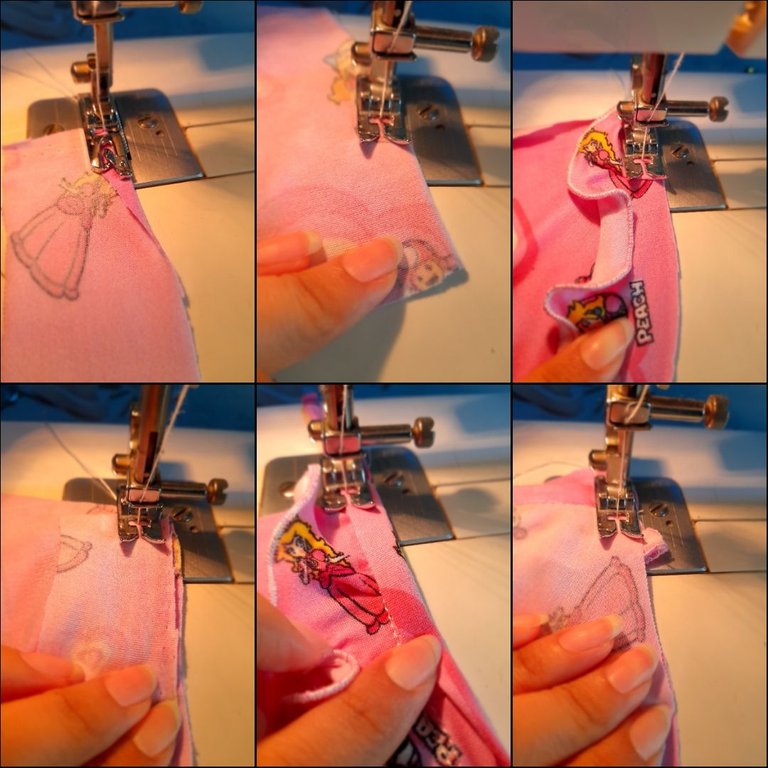
•✨️Luego voy a coser la orilla superior trasera colocandola en el lado derecho de la tela y cosiendo con costura recta y zigzag para luego asegurar con costura de zigzag y luego voy a coser la pieza en ambos extremos con costura recta y zigzag .
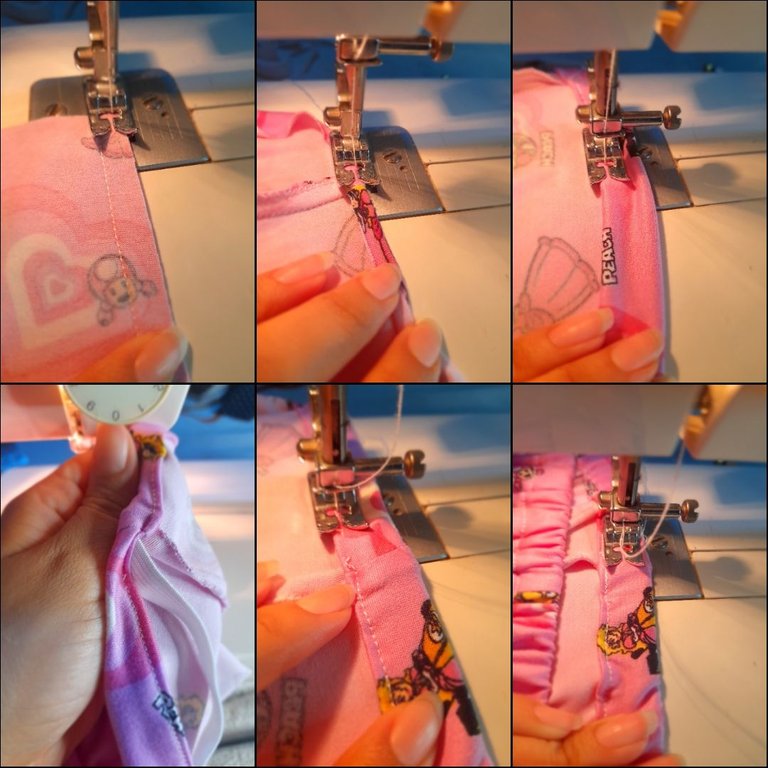
Luego voy a coser los tiros pero primero voy a coser por el lado reverso de la tela con costura recta.
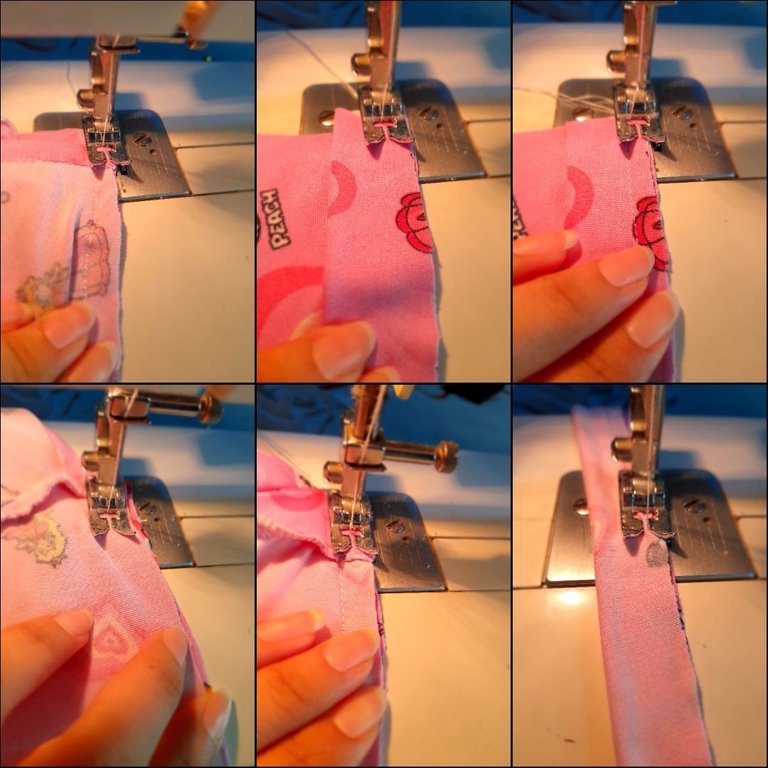
•✨️Voy a voltear los tiros con la ayuda de un palillo y así aseguraré estos con costura recta en la parte frontal y trasera y para culminar voy a coser el ruedo con costura de zigzag y tensión en 1 mientras voy doblando la orilla . Continúo cosiendo la parte inferior o short iniciando por la costura interna con costura recta y zigzag y luego voy a unir ambos laterales con costura recta.
•✨️Voy asegurar con costura de zigzag la parte de ambos laterales y voy a coser el ruedo doblando la tela y cosiendo con costura de zigzag y tensión en 1y sigo cosiendo la parte del contorno de cintura doblando la tela y cosiendo con costura recta y dejando un pequeño espacio para introducir la elástica. Luego aseguraré los extremos de la elástica y cerraré el espacio que había dejado y voy a coser con costura recta por encima para formar más pliegues.
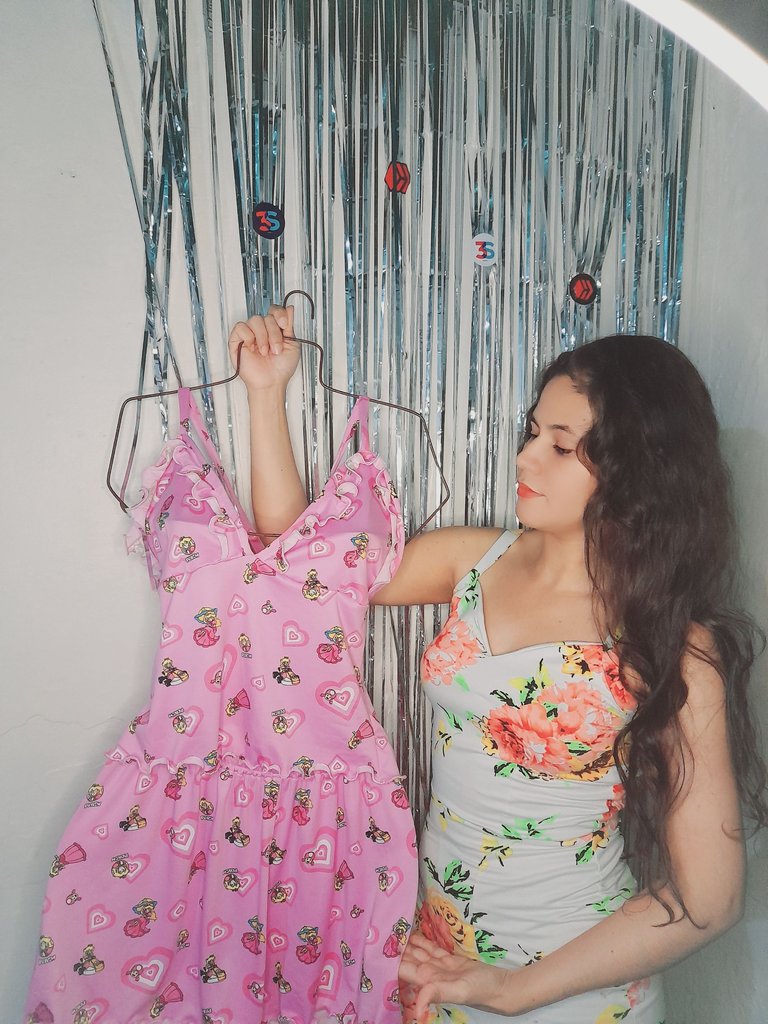
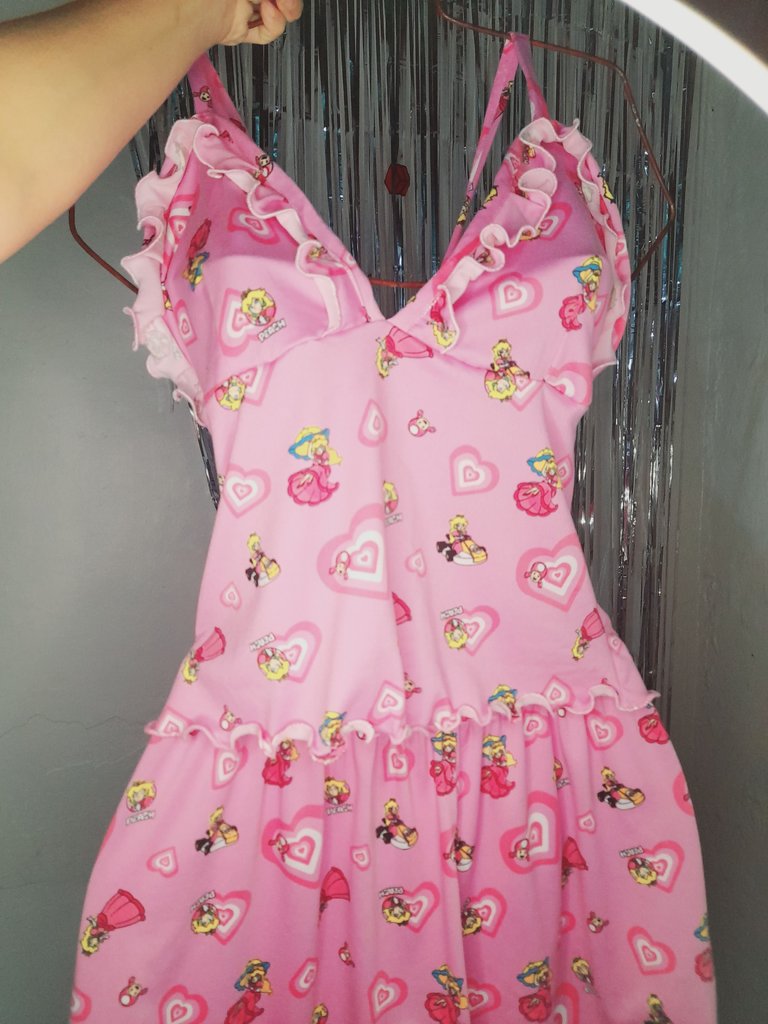
🌸Resultados🌸
Muchas gracias por haber tomado un minuto para leer mi post espero les guste mis amores 💕 un saludo muy especial y linda noche para todos ✨️🤗.
💕English💕
Hello hello my dear friends of Hive I hope you are doing very well enjoying the night ✨️🌸 very nice night for everyone in this creative #Diy community today I am very pleased to share with you the design of a very beautiful pajamas and its step-by-step manufacturing process step 🤗 I invite you to continue going down 🤗🤗.
These were the materials I used
• Sewing machine
• Scissors
• Sewing thread
• Fabric
• Measurement garment
• Elastic
✨️Steps✨️
•✨️I'm going to start by cutting all the pieces of my blouse, these being a back piece, three front pieces, edges of the cups and the wavy edge, two shots and for the bottom two side pieces with their respective fall.
•✨️I continue sewing the wavy edge with a zigzag seam and tension in 1 and then sew a 5 cm dart to give it drape and then sew the wavy edges to the cup of the blouse, then I am going to sew with the edge placing it in the reverse side to then fold it and sew with a straight seam again and then sew the two cups to the missing piece with a straight and zigzag seam.
•✨️Then I am going to sew the upper back edge, placing it on the right side of the fabric and sewing with a straight and zigzag seam and then securing it with a zigzag seam and then I am going to sew the piece at both ends with a straight and zigzag seam. Then I'm going to sew the shots but first I'm going to sew on the wrong side of the fabric with a straight seam.
•✨️I am going to turn the shots with the help of a toothpick and thus I will secure these with a straight seam on the front and back and to finish I am going to sew the hem with a zigzag seam and tension in 1 while I fold the edge. I continue sewing the bottom part or shorts starting from the inside seam with a straight and zigzag seam and then I will join both sides with a straight seam.
•✨️I am going to secure the part of both sides with a zigzag seam and I am going to sew the hem by folding the fabric and sewing with a zigzag seam and tension in 1 and I continue sewing the part of the waist contour by folding the fabric and sewing with a straight seam and leaving a small space to insert the elastic. Then I will secure the ends of the elastic and close the space I had left and I will sew with a straight seam on top to form more folds.
🌸Results🌸
Thank you very much for taking a minute to read my post, I hope you like it, my loves 💕 a very special greeting and a nice night for everyone ✨️🤗.
💁♀️Todas las fotografías son de mi autoría capturadas con mi Samsung Galaxy A12 y editadas en GridArt.
El texto y resumen es totalmente de mi autoría.
Texto traducido en el traductor Google.💁♀️
💁♀️All the photographs are my own, captured with my Samsung Galaxy A12 and edited in GridArt.
The text and summary is entirely my own.
Translated text in Google translator.💁♀️
La tela es bien colorida y el modelo muy bonito. Saludos
Excelente creación. El paso a paso está muy bien estructurado. El color de la tela es genial y se ve muy suave
¡Felicitaciones!
Estás participando para optar a la mención especial que se efectuará el domingo 5 de mayo del 2024 a las 8:00 pm (hora de Venezuela), gracias a la cual el autor del artículo seleccionado recibirá la cantidad de 1 HIVE transferida a su cuenta.
¡También has recibido 1 ENTROKEN! El token del PROYECTO ENTROPÍA impulsado por la plataforma Steem-Engine.
1. Invierte en el PROYECTO ENTROPÍA y recibe ganancias semanalmente. Entra aquí para más información.
2. Contáctanos en Discord: https://discord.gg/hkCjFeb
3. Suscríbete a nuestra COMUNIDAD y apoya al trail de @Entropia y así podrás ganar recompensas de curación de forma automática. Entra aquí para más información sobre nuestro trail.
4. Visita nuestro canal de Youtube.
Atentamente
El equipo de curación del PROYECTO ENTROPÍA