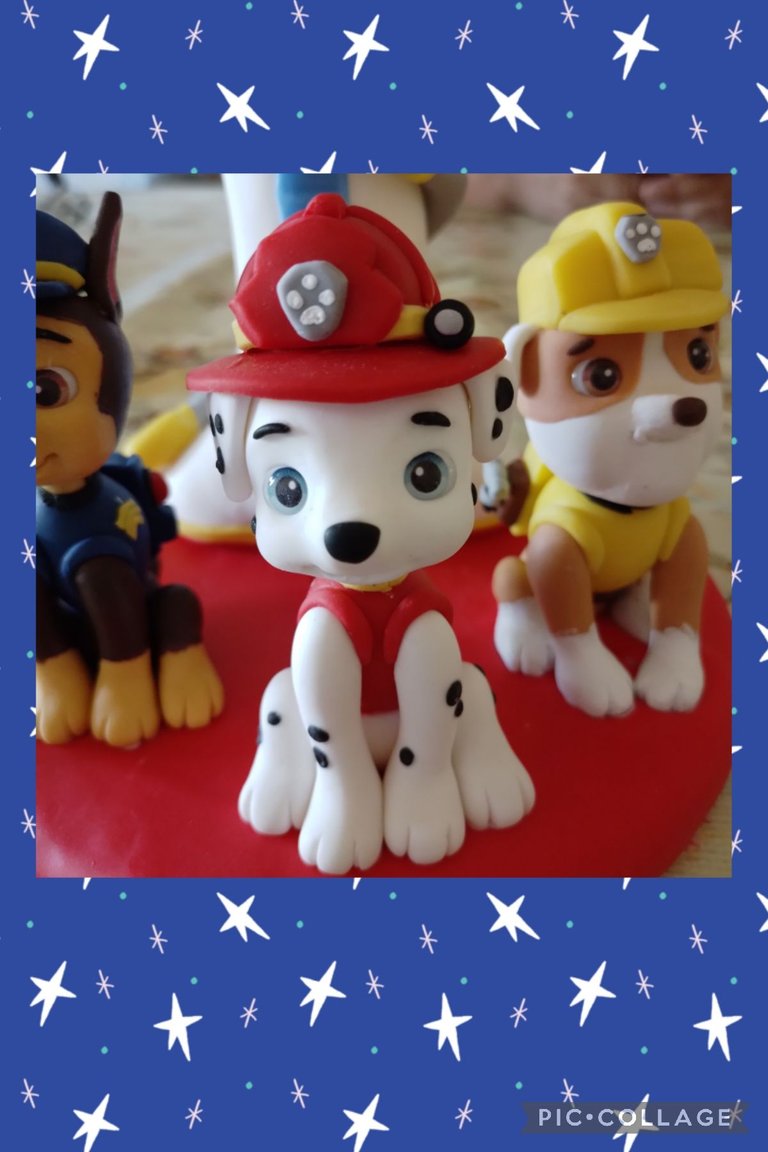
Hello dear friends!!! I hope you had a nice end of the year and an excellent start to this 2023. For my part, I am quite busy with my office work (there are still a few days to go before my vacation 😒) and with some cold porcelain orders. Of course I take the opportunity to take photos of the step by step to be able to share it with you. Today I am going to show you how to make Marshall from Paw Patrol.
Hola queridos amigos!!! Espero hayan tenido un lindo fin de año y un excelente comienzo de este 2023. Por mi parte les cuento que estoy bastante ocupada con mi trabajo de oficina (todavía falta algunos dias para tener vacaciones 😒) y con algunos pedidos de porcelana fria. Por supuesto aprovecho para sacar fotos del paso a paso para poder compartirlo con ustedes. Hoy les voy a mostrar como hacer a Marshall de Paw Patrol.
I made this beautiful work with a video tutorial by Erica Ferrari from her YouTube channel called Erica Ferrari cold porcelain 👇 https://youtube.com/@EricaFerrariPorcelanaFria
Este hermoso trabajo lo hice con un video tutorial de Erica Ferrari de su canal de YouTube que se llama Erica Ferrari porcelana fria 👇https://youtube.com/@EricaFerrariPorcelanaFria
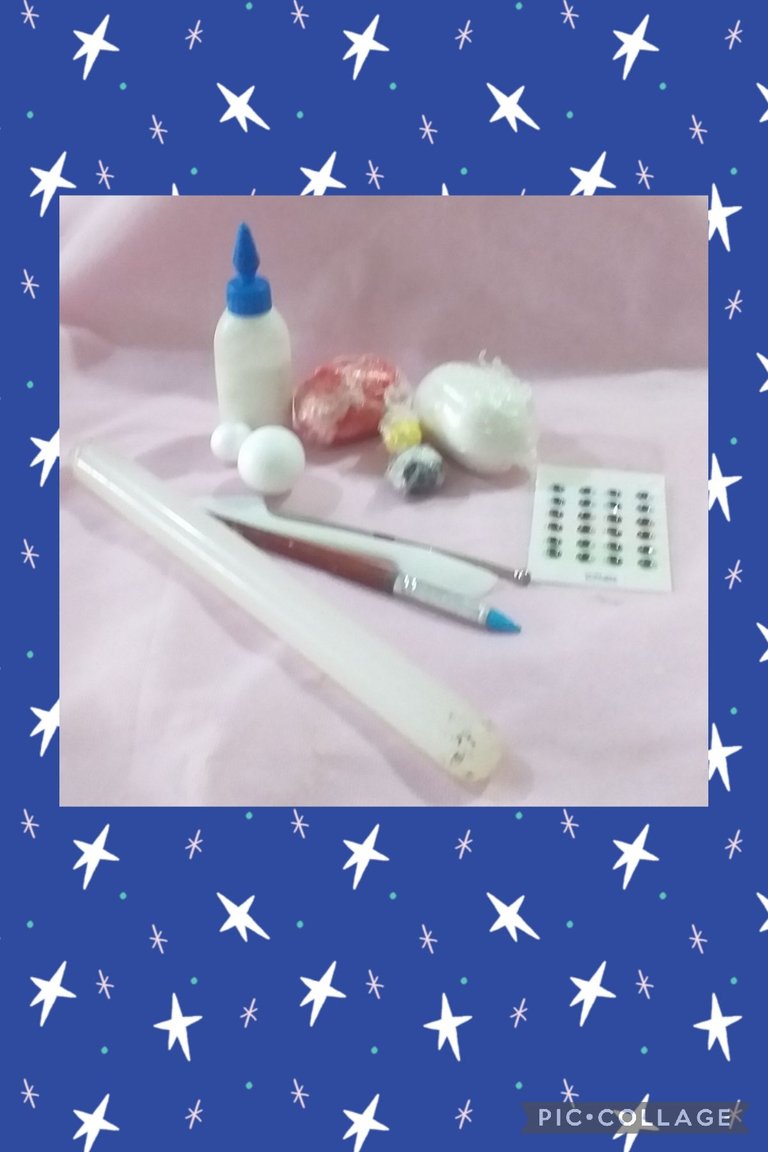
Materials
🐶 cold porcelain
🐶 vinyl glue
🐶 steks
🐶 rolling pin
🐶 styrofoam spheres
🐶 self-adhesive eyes
🐶 cutter
Materiales
🐶 porcelana fria
🐶 cola vinilica
🐶 estecas
🐶 palo de amasar
🐶 esferas de telgopor
🐶 ojos autoadhesivos
🐶 cutter
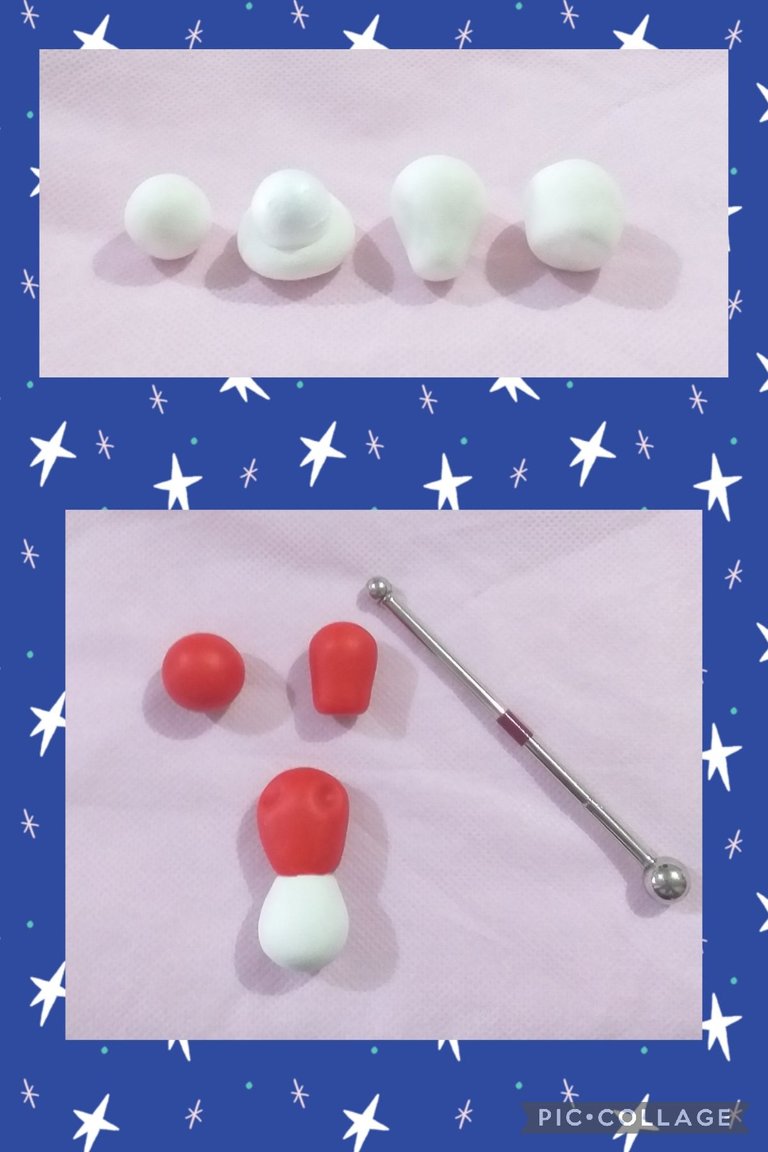
For the body, make a small white cold porcelain ball, insert the smallest Styrofoam sphere, bring the dough upwards until it covers the entire sphere, close, shape a pear and cut the tip, rub with the palm of the hand to erase the cut mark.
Make a small red ball the same size as the sphere we used for the body, give it a pear shape but without a point, glue the pieces on the flat side with vinyl glue.
Para el cuerpo hacer una bolita de porcelana fria color blanco, introducir la esfera de telgopor más pequeña, ir llevando la masa hacia arriba hasta cubrir toda la esfera, cerrar,dar forma de pera y cortar la punta, frotar con la palma de la mano para borrar la marca del corte.
Hacer una bolita color rojo del mismo tamaño de la esfera que utilizamos para el cuerpo, dar forma de pera pero sin punta, pegar con cola vinilica las piezas por el lado plano.
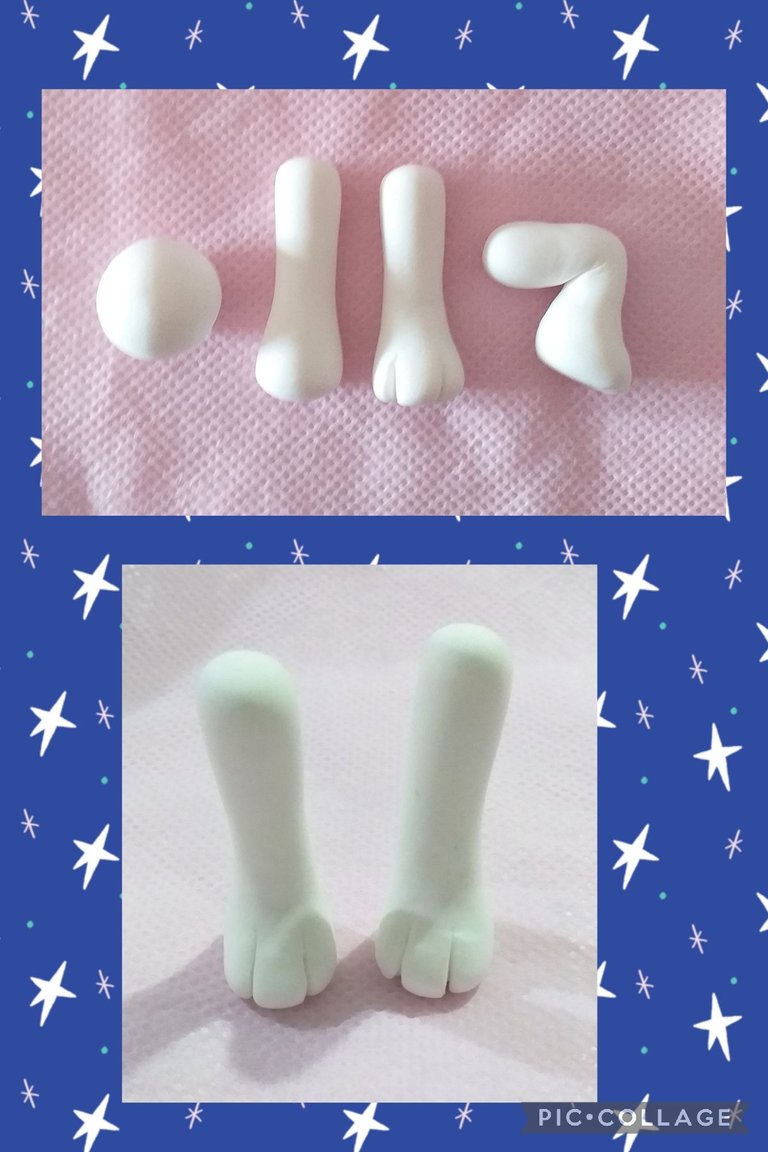
For the hind legs, make two equal balls the size of the sphere we used for the body, stretch, leaving a ball at one end, flatten a little, mark the toes, mark the knee in the middle of the leg and bend.
For the front legs, repeat the process but do not fold.
Para las patas traseras hacer dos bolitas iguales del tamaño de la esfera que usamos para el cuerpo, estirar dejando en un extremo una bolita, aplanar un poco, marcar los dedos, en la mitad de la pierna marcar la rodilla y doblar.
Para las patas delanteras repetir el proceso pero no doblar.
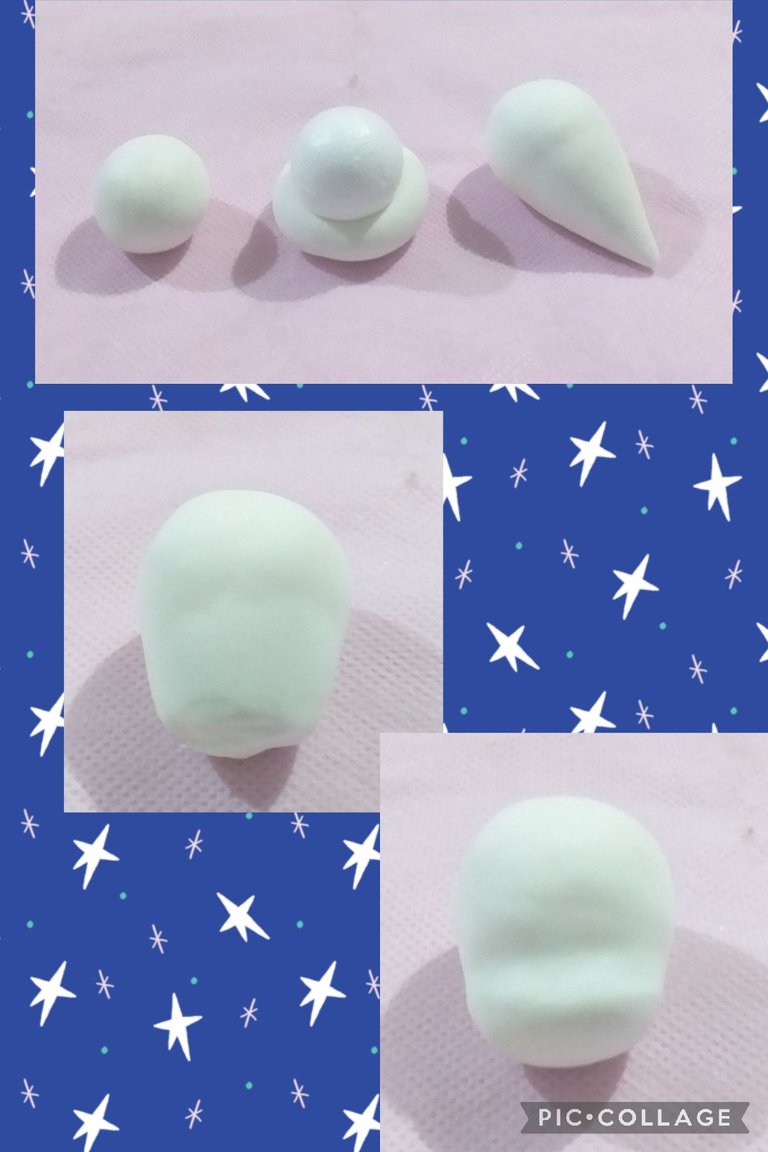
For the head, make a small ball with the same volume as the sphere, insert it, carry the dough upwards until it covers everything, shape it into an elongated teardrop. Remove the tip and rub with the palm of the hand to erase the cut mark.
Mark the separation of the face and forehead.
Para la cabeza, hacer una bolita de igual volumen que la esfera, introducir la misma, ir llevando la masa hacia arriba hasta cubrir todo, dar forma de lágrima alargada. Quitar la punta y frotar con la palma de la mano para borrar la marca del corte.
Marcar la separación de la cara y la frente.
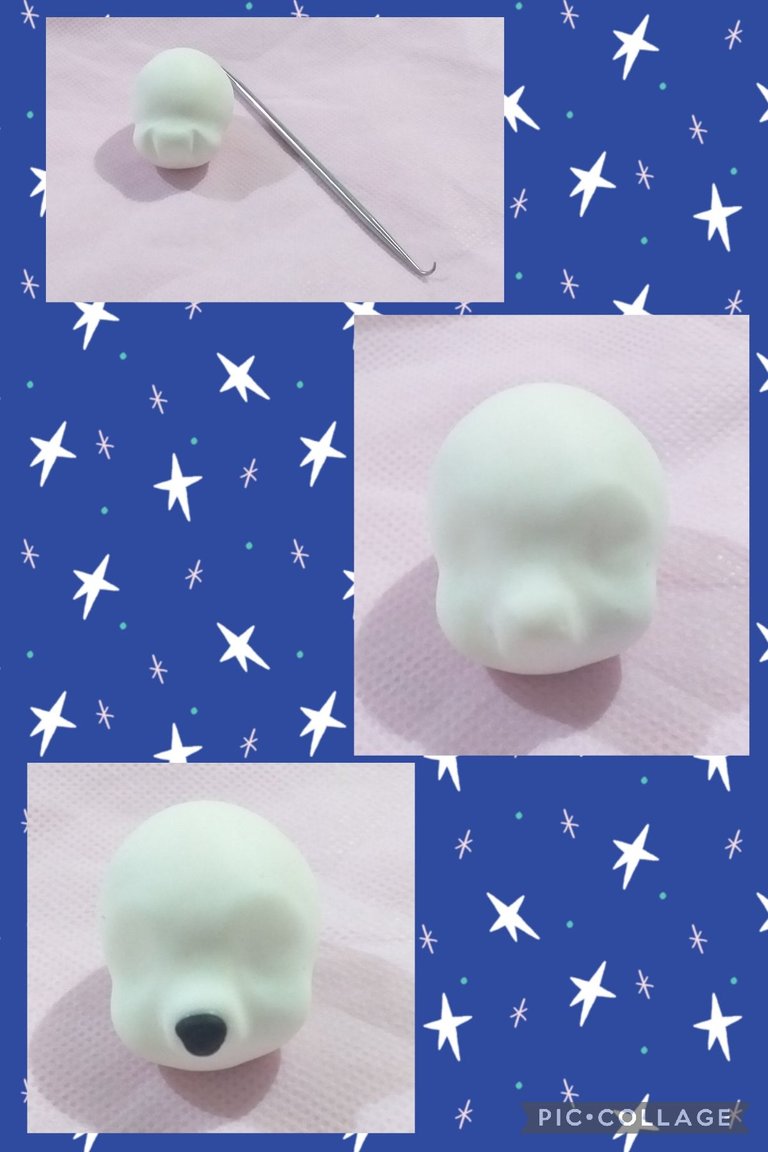
With a round stick, make two straight lines to divide the muzzle, round the central part and the cheeks using your fingers, mark the eye sockets.
Add a triangle for the nose with black dough.
Con una esteca redonda hacer dos líneas rectas para dividir el morro, redondear la parte central y los cachetes utilizando los dedos, marcar las cuencas de los ojos.
Agregar un triangulo para la nariz con masa negra.
Just below the nose mark the mouth.
Add the self-adhesive eyes.
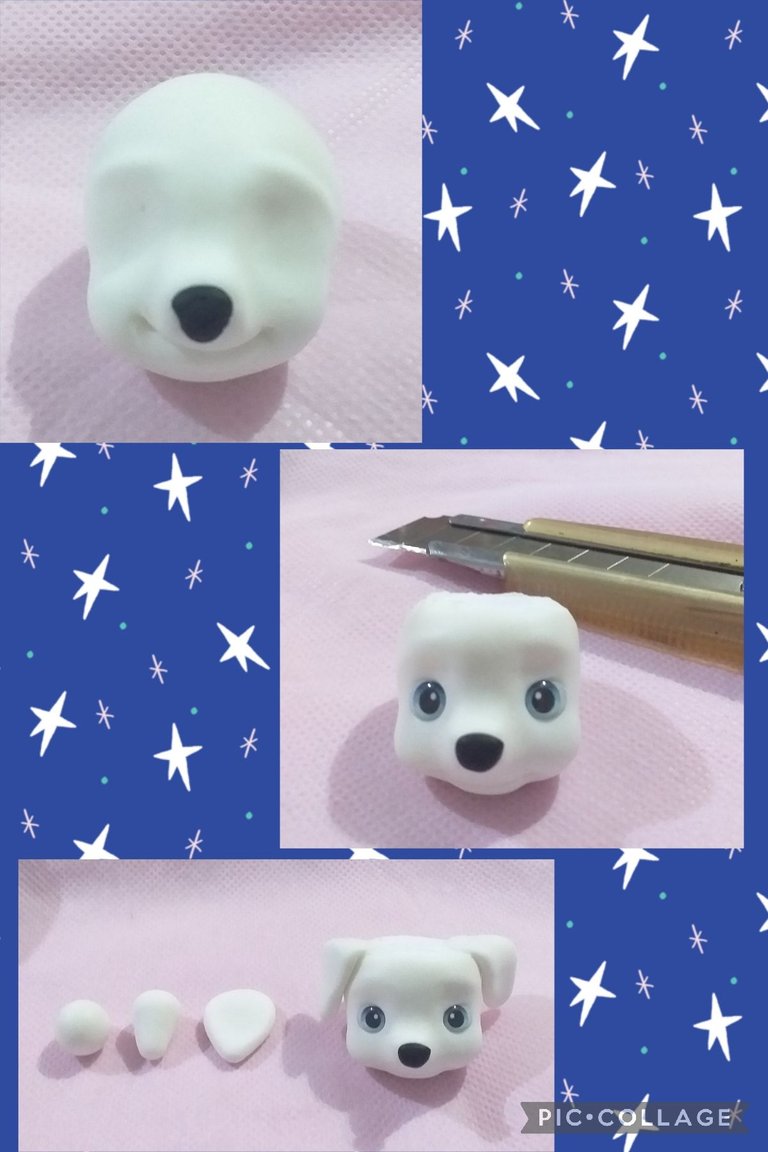
With the cutter cut the upper part of the head (it is so that the helmet fits well).
For the ears, make two equal balls, shape them into a drop and flatten them. Glue to the top of the head by folding a little.
Apenas abajo de la nariz marcar la boca.
Agregar los ojos autoadhesivos.
Con el cutter cortar la parte superior de la cabeza (es para que encastre bien el casco).
Para las orejas hacer dos bolitas iguales, dar forma de gota y aplanar. Pegar en la parte superior de la cabeza doblando un poco.
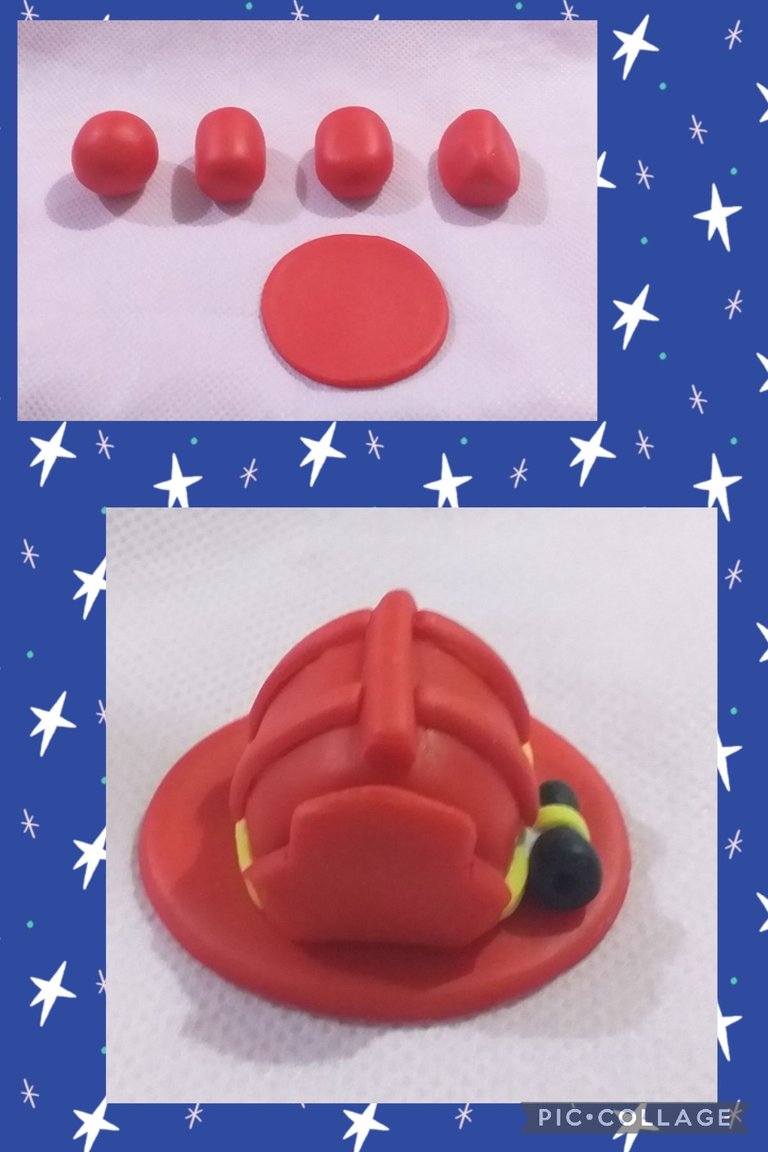
For the helmet, make a ball, shape it into a cylinder, flatten it a little and give it a triangular shape (it is always advisable to work with printed images to see the details well). For the base there are two options, roll out the dough and use a round cutter or make a ball and flatten it.
Glue the two pieces together, cut three strips and glue one lengthwise and two across. Stretch dough and cut drawing the front plate.
Cut a yellow strip and glue at the junction of the base and the shell. Make the lantern with a small black roll, mark the entire diameter of the upper part, hollow out and fill with gray mass to simulate glass.
Para el casco hacer una bolita, dar forma de cilindro, aplanar un poco y dar forma triangular (siempre es recomendable trabajar con imágenes impresas para ver bien los detalles). Para la base hay dos opciones, estirar masa y utilizar un cortante redondo o hacer una bolita y aplanar.
Pegar las dos piezas, cortar tres tiras y pegar una a lo largo y dos a lo ancho. Estirar masa y cortar dibujando la placa del frente.
Cortar una tira amarilla y pegar en la unión de la base y el casco. Hacer la linterna con un pequeño rollo negro, marcar todo el diámetro de la parte superior, ahuecar y rellenar con masa gris para simular el vidrio.
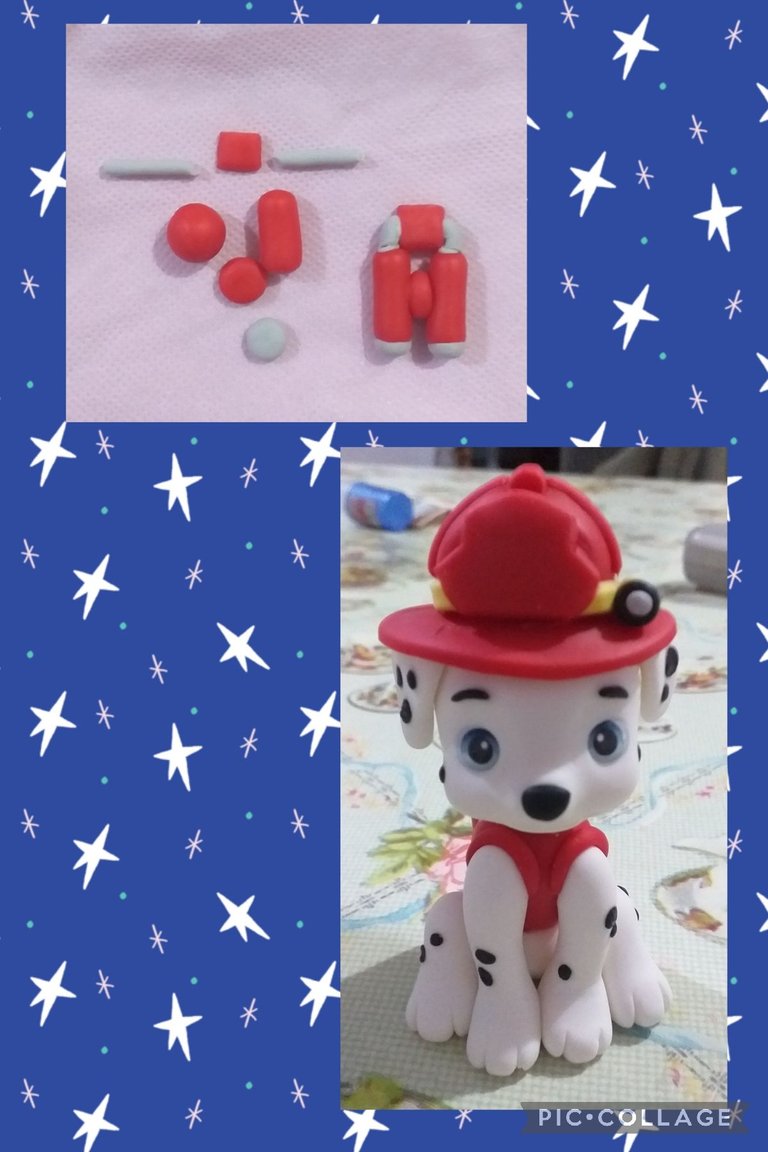
For the backpack I cut a square of red dough, I made two gray rolls, for the central part I made two small balls and gave it a cylinder shape, in the lower part I added two flattened small balls just like between the two cylinders. Join everything with vinyl glue.
Finally, with black mass, make the eyebrows and the spots.
Para la mochila corte un cuadrado de masa roja, hice dos rollos de color gris, para la parte central hice dos bolitas y le di forma de cilindro, en la parte inferior le agregué dos bolitas aplanadas al igual que entre los dos cilindros. Unir todo con cola vinilica.
Por último con masa negra hacer las cejas y las manchas.
Espero que este trabajo les haya gustado ya que es fácil de hacer y es muy popular entre los niños. Saludos. Andrea💜💜💜
~~~ embed:1613862075746615298 twitter metadata:MTQ4NDE5NjQ1NTcxOTkxNTUyN3x8aHR0cHM6Ly90d2l0dGVyLmNvbS8xNDg0MTk2NDU1NzE5OTE1NTI3L3N0YXR1cy8xNjEzODYyMDc1NzQ2NjE1Mjk4fA== ~~~
The rewards earned on this comment will go directly to the people( @dayadam ) sharing the post on Twitter as long as they are registered with @poshtoken. Sign up at https://hiveposh.com.
Que lindo quedo, me gustaría intentar hacer algo con porcelana fría he visto muchos trabajos así y quedan muy hermosos, la felicito amiga
Hola @marlynmont muchas gracias 😊. Siempre hay que intentar,por lo menos probar para ver si te gusta.💜
Te quedo bellísimo, nos regalas un tutorial muy detallado para llevar a cabo la figura. Esto se lo debo pasar a mi hermana ya que mi sobrino es amante de la serie. Felicidades lograste una pieza hermosa y muy prolija. Éxitos @somethingnice. Dios bendiga esas manos creadoras 💕
Hola @dayadam muchas gracias por tus palabras 😊 ojalá que sea del agrado de tu hermana y lo pueda hacer...💜
Hermoso trabajo... ❣️. Me encantaron todos los detalles y los ojitos azules le dieron un toque muy especial también. Nunca ví este dibujo pero sé que es muy famoso entre los chicos, seguramente alguien querrá tener este adorno en su cumpleaños.
Ya faltan poco para tus vacaciones, solo hay que aguantar un poco más. Mientras tanto, gracias por compartir este proyecto. Saludos ❤️.
Hola @lauramica 👋 gracias por tu comentario. Es muy lindo el dibujo, yo vi varios capítulos mientras desayunabamos con mi hijo más chico antes de ir a la a escuela y la verdad que gusta mucho 😊
Si, falta poco para mis vacaciones y aunque solo van a ser dos semanas espero poder hacer varios trabajos y poder compartirlos en la comunidad 💜
Te quedó hermoso...me encantó el casco 😍...
Admiro mucho tu trabajo. Gracias por compartir.
🎆🎇🎉🎊🌧️💐✨🌾🌱🌹🌙🌿🍃🥀⚡🌺☘️🍀🌈🌷⭐🪴🌵🌸🌟💮🌴🌳💫☀️💮☔🌲🌳🌍🌌🌠☄️🏵️🐝🌻🌼🍄🐞🦋💙☕💜🍍🎆🎇🎉🎊🎆🎇🎉🎊🌧️💐✨🌾🌱🌹🌙🌿🍃🥀⚡🌺☘️🍀🌈🌷⭐🪴🌵🌸🌟💮🌴🌳💫☀️💮☔🌲🌳🌍🌌🌠☄️🏵️🐝🌻🌼🍄🐞🦋💙☕💜🍍🎆🎇🎉
!PIZZA
Hola @chacald.dcymt 👋 muchas gracias, es muy lindo ver que aprecian el trabajo💜😊
I gifted $PIZZA slices here:
@chacald.dcymt(1/5) tipped @somethingnice (x1)
Learn more at https://hive.pizza!
Que hermosura! me encantan eso perritos!
Gracias por compartir tan bello trabajo.
Saludos.
Hola @elmundodebetty 👋 muchas gracias 💜
Dear @somethingnice,
Our previous proposal expired end of December and the Hivebuzz project is not funded anymore. May we ask you to review and support our new proposal (https://peakd.com/me/proposals/248)?
Thank you for your help!
Què trabajo tan perfecto!! Me encantaron todos los detalles y la prolijidad! 🌸 estoy segura de que quien haya hecho este pedido va a quedar encantado 😍🌷
Hola @imena 👋 muchas gracias por tu apreciación 😊 si,le encantó por suerte. Más allá de todo siempre es gratificante cuando el cliente queda conforme...💜
Congratulations @somethingnice! You received a personal badge!
You can view your badges on your board and compare yourself to others in the Ranking
Check out our last posts:
Support the HiveBuzz project. Vote for our proposal!