Puedes leerlo aquí, o simplemente desplázate hacia abajo en la página.
Hello friends and Hive DIY community, I hope you are having a lovely day. It's been a while since I last visited. Today, I'm bringing you my latest craft, but first, let me give you a bit of context.
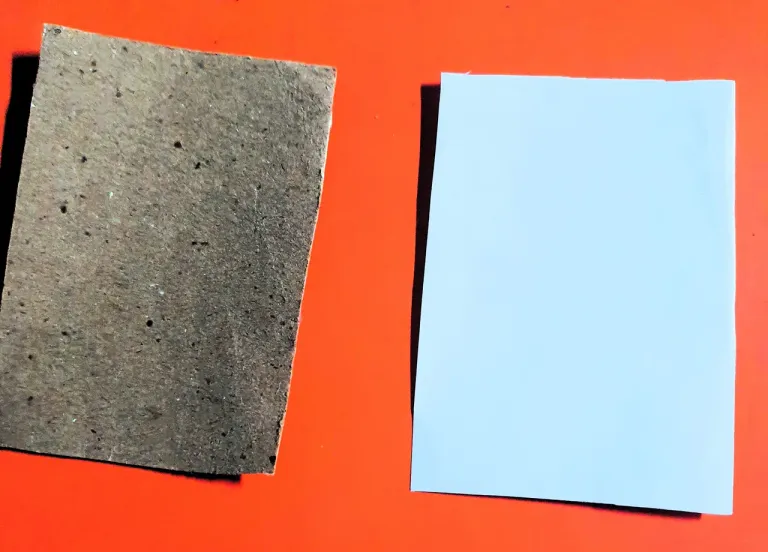
In my country, finding office supplies is extremely difficult and, above all, far beyond my budget as a teacher. For this reason, I have always opted for recycling. If you know me a little, you know that I love to draw, and since I couldn't afford new paper or a new sketchbook (my old sketchbook is about to run out), I decided to create my own using the sheets discarded at my work that had one side written on.
I had some ideas for my sketchbook and some parameters to meet: first, it had to be small enough to carry with me everywhere, look rustic and very personal, and be durable. Additionally, it needed to have around 100 or more sheets and be in a horizontal format, my favorite format. With this in mind, let's get to work!

Materials and Tools:
- Pencil
- Ruler
- Fishing line or string
- Scissors
- A nail
- Electrical tape
- Glue
- Decorating materials
Steps:
- Make the Templates:
- I made two templates, one from a hard material for the covers and one for the sheets. The measurements were: for the covers, 3x4.1 inches, and for the sheets, 2.8x3.9 inches. This makes it small enough to carry everywhere but the right size for drawing.

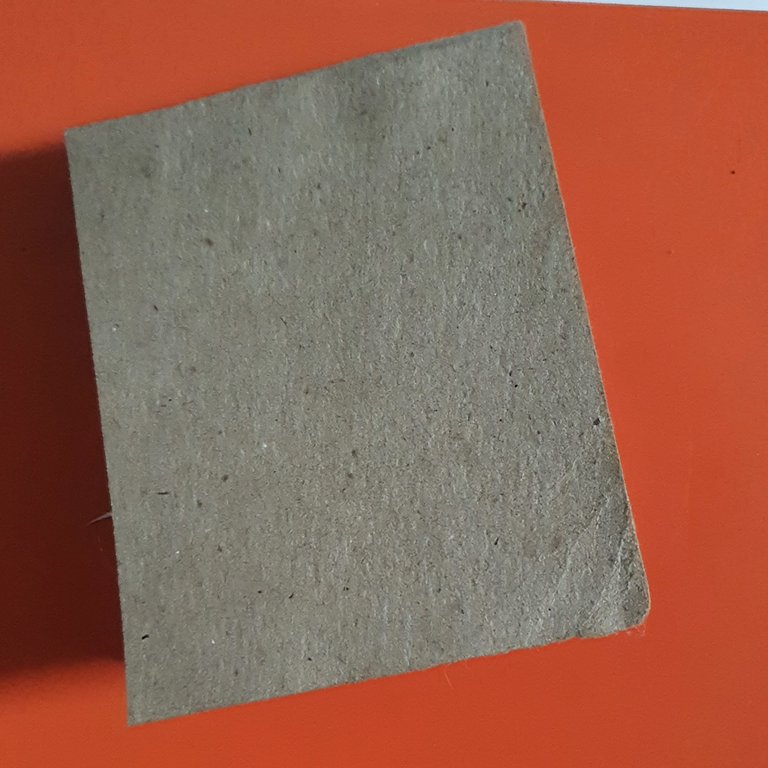
- Cut the Sheets and Covers:
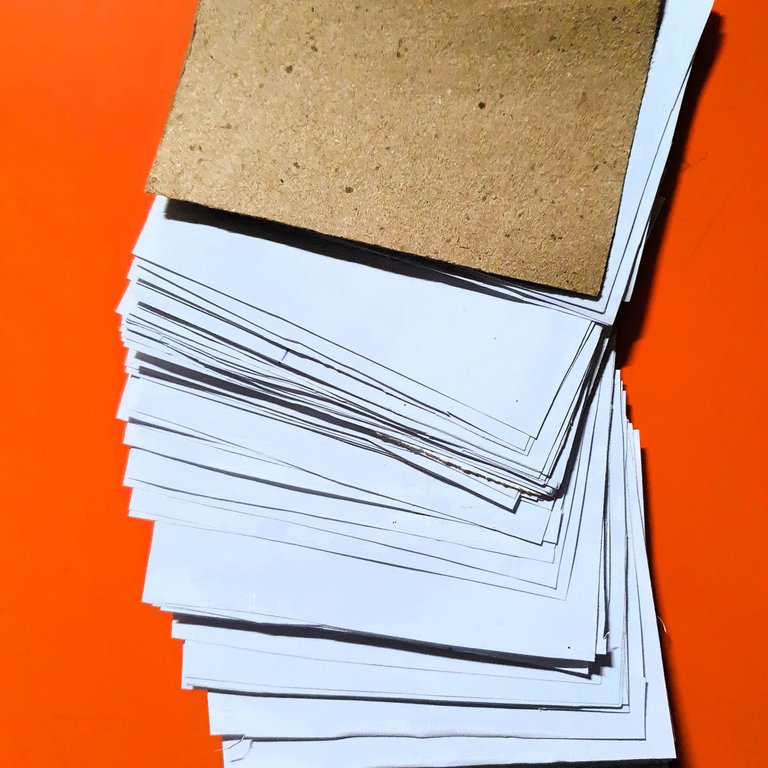
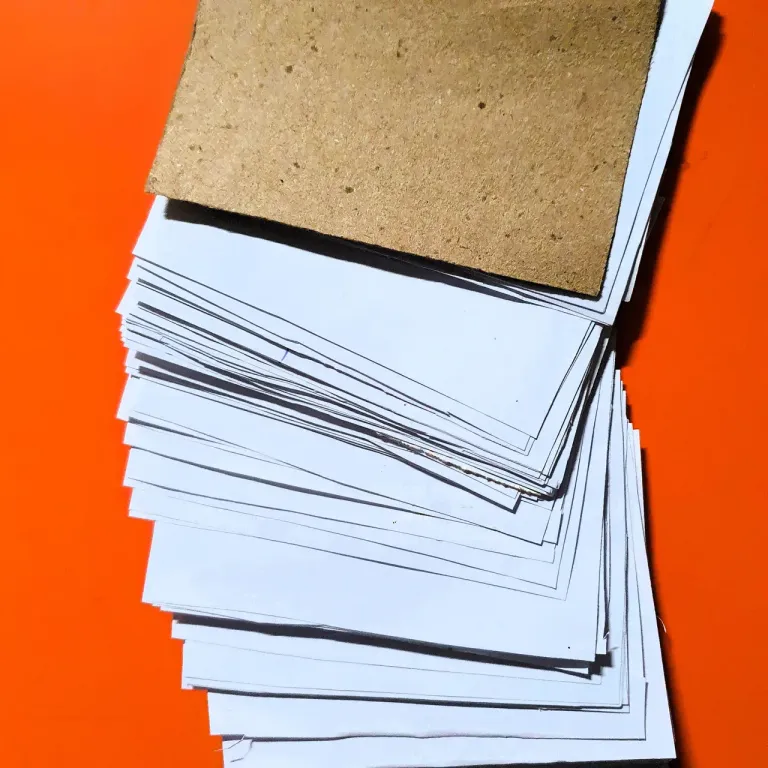
- I cut all the sheets and covers, which were made from recycled materials and used on one side. It was boring, but I trusted the process. I didn’t worry too much about uniformity, and if you have a paper cutter, it will be easy, but in my case, I used scissors. A tip: cut several covers (3 for each side) because they can get damaged when binding.
- Bind the Sheets and Covers:
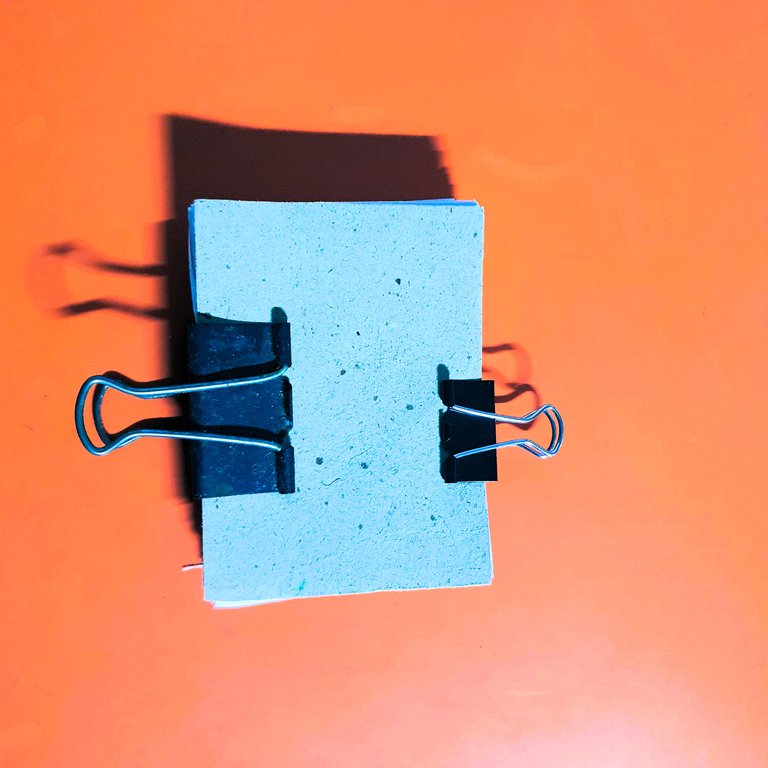
- I placed the 3 covers, the sheets in the middle, and the 3 covers at the end. It’s a good idea to place them little by little and gently tap them on the table to align them. Finally, I simply used two binder clips to hold them together.
- Binding:
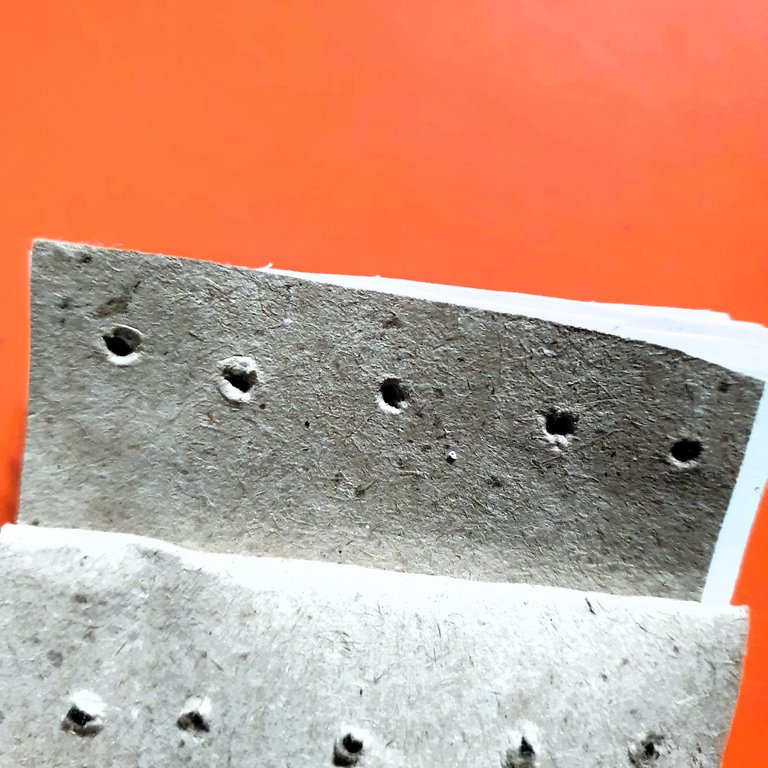
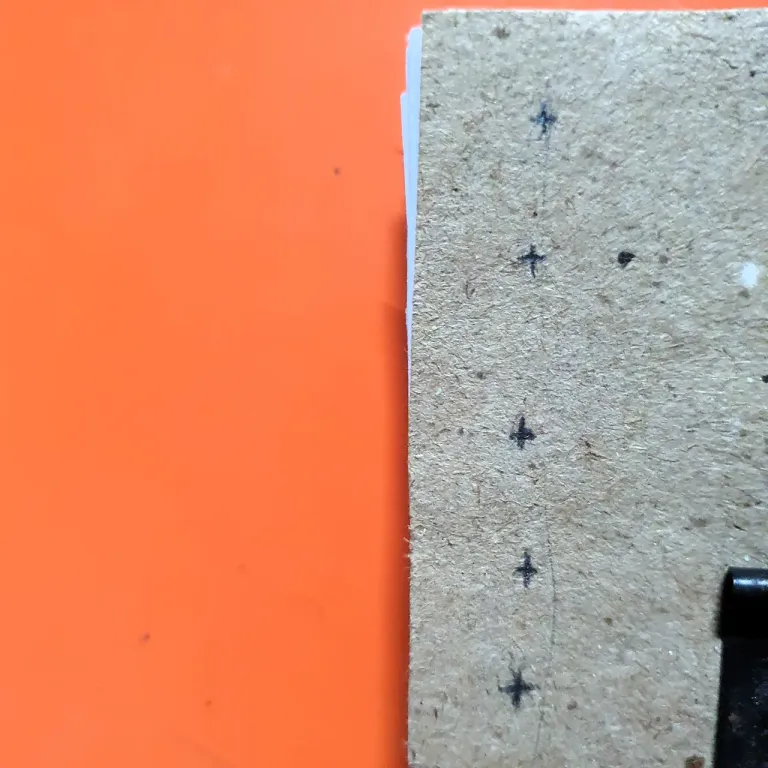
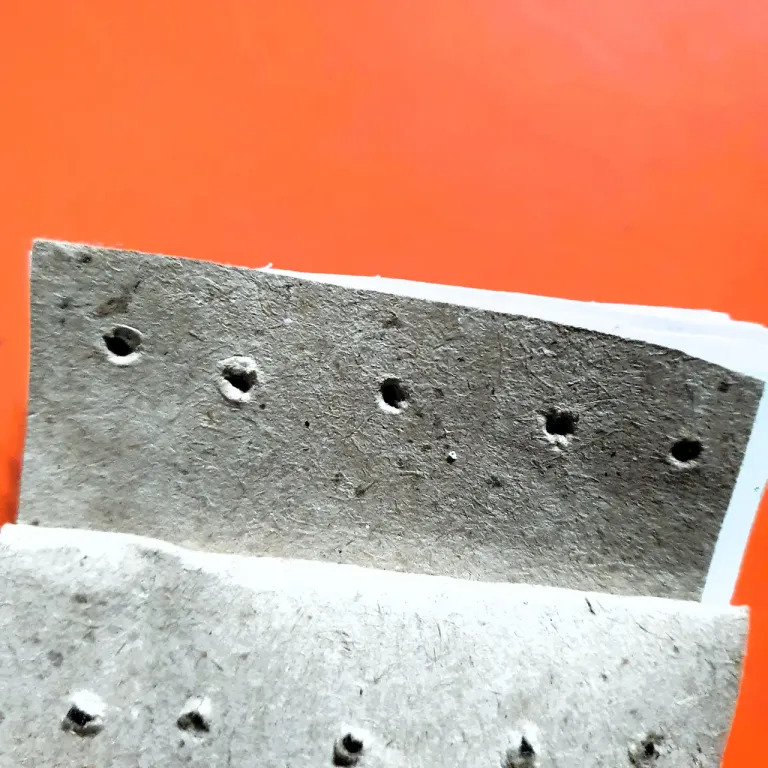
- I chose a traditional Japanese stab binding, which will give it a lot of strength and prevent the sheets from falling out. First, I marked the same distance where I would make the holes, advised 0.4 inches from the edge and with 0.4 inches of separation between each hole.

- Make the Holes:
- This was the hardest part. I used a hammer and a nail because I didn’t have the right tools. It was difficult due to the thickness, but with a lot of work, I managed it.
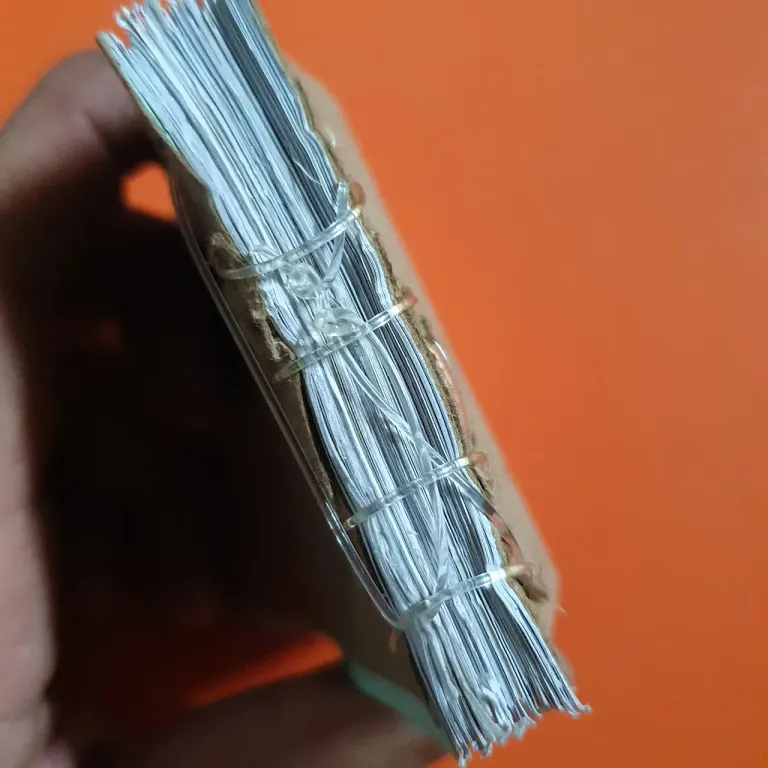
- Sew the Sheets:
- Sewing the sheets is very simple. Just start from the center and work one hole at a time, both around the spine and from hole to hole. If you search on YouTube, you’ll find several videos that explain this type of binding.

- Reinforce the Spine:
- To reinforce the spine, even though it wasn’t necessary, I used a bit of electrical tape.

- Make the Cover:
- I didn’t want the stitches to be visible, so I made a cover with the same material as the covers and glued it with silicone.
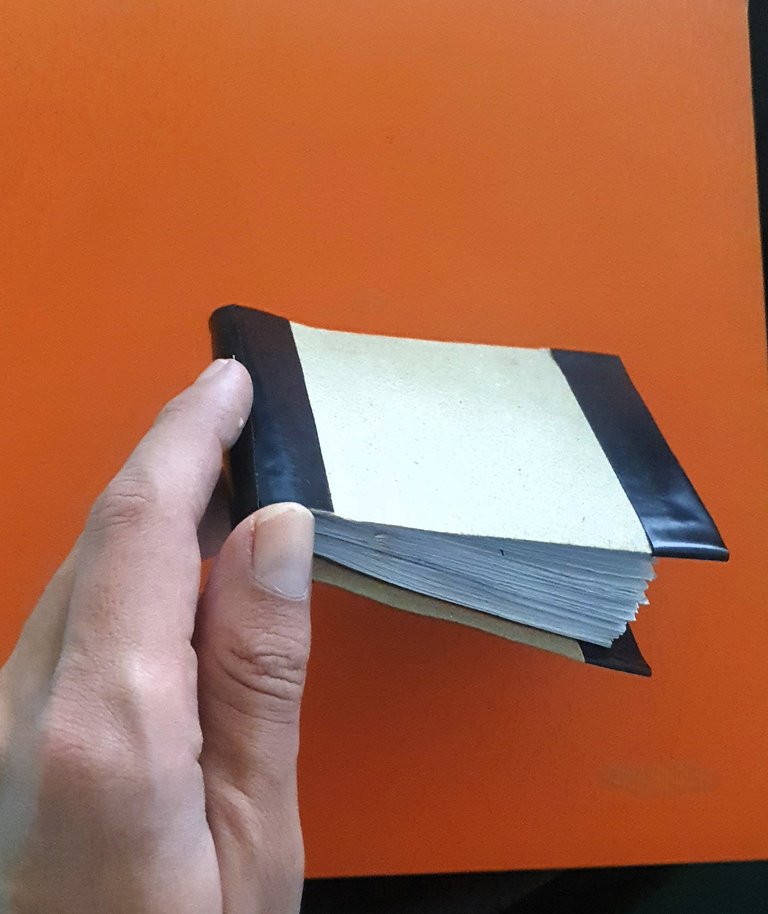
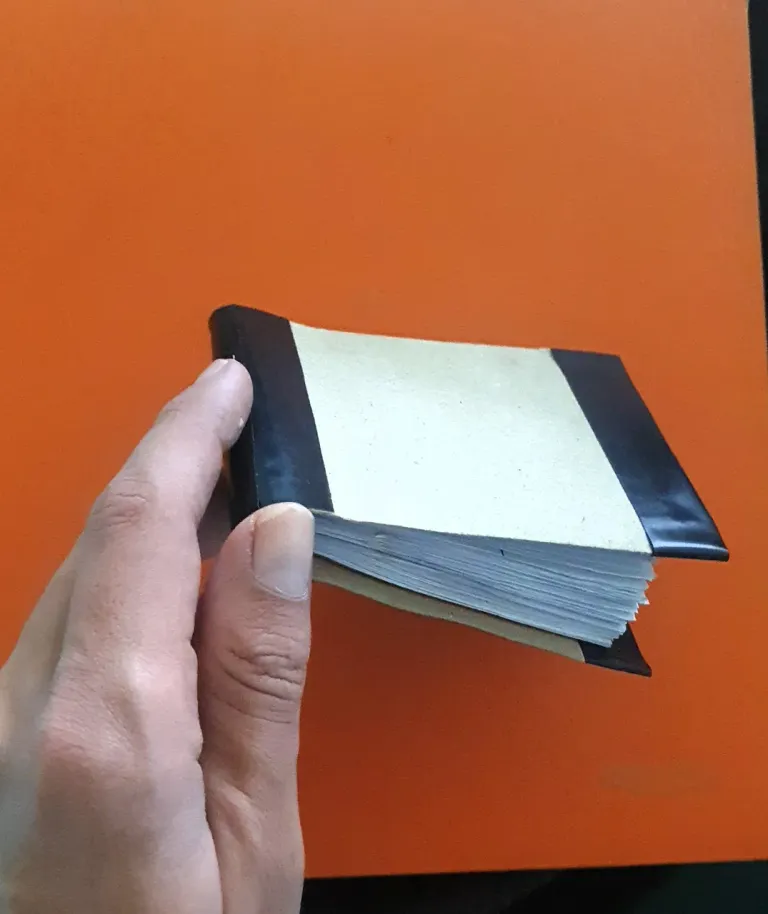
- Reinforce Edges and Spines:
- The next step was to reinforce the edges and spines to make it durable. I chose electrical tape because I wanted it to be black and it’s a very resistant material.
- Decorate:
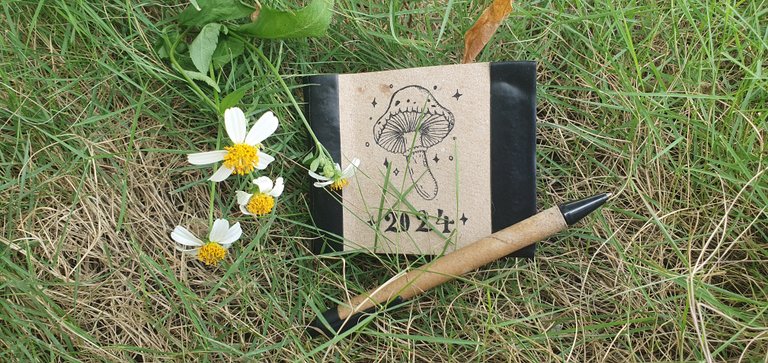
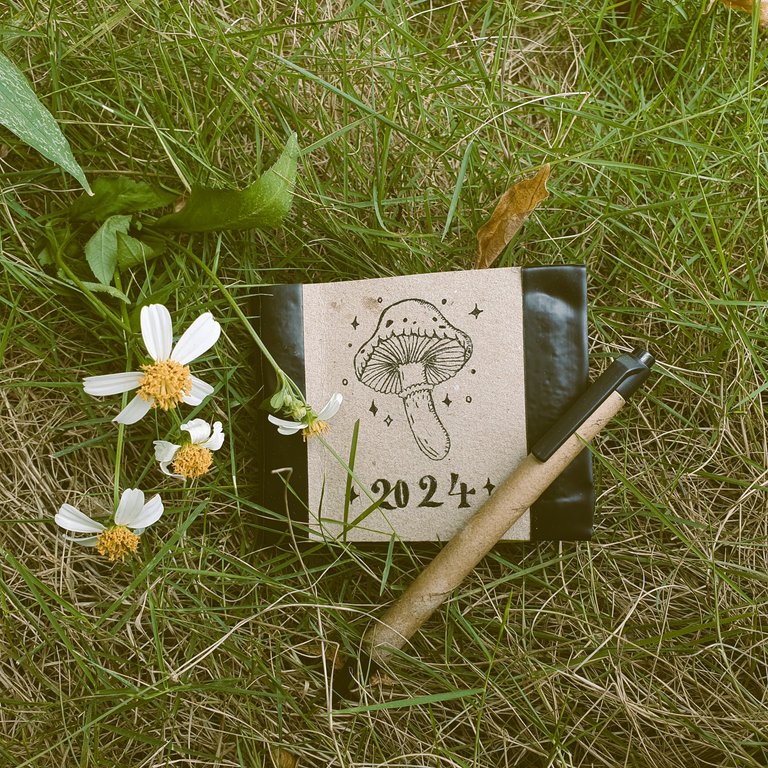
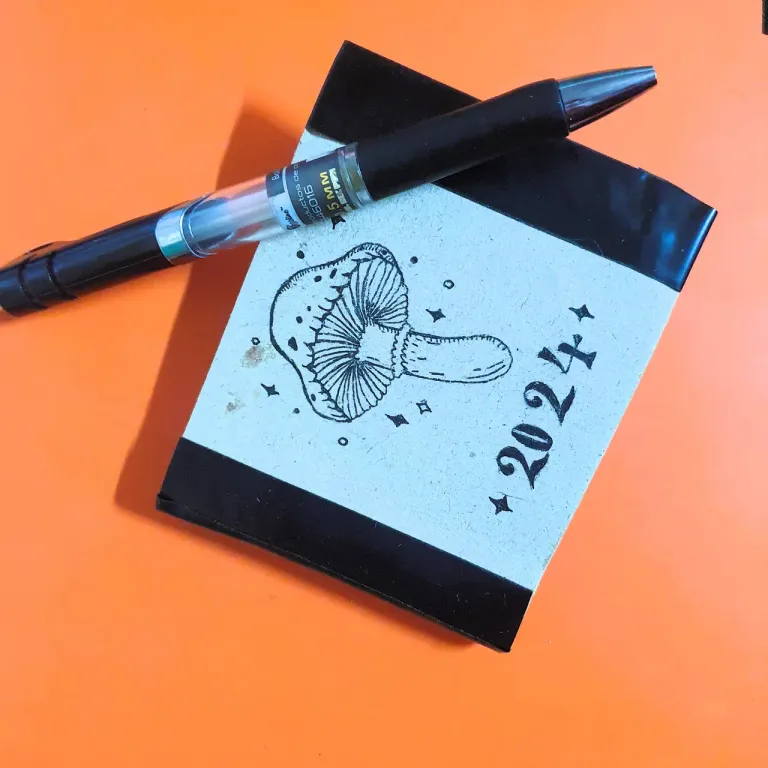
- With everything ready and happy with the result so far, I went on to decorate my new sketchbook. Since the style will be between rustic and natural, I decided to decorate it with a small mushroom and some sparkles.

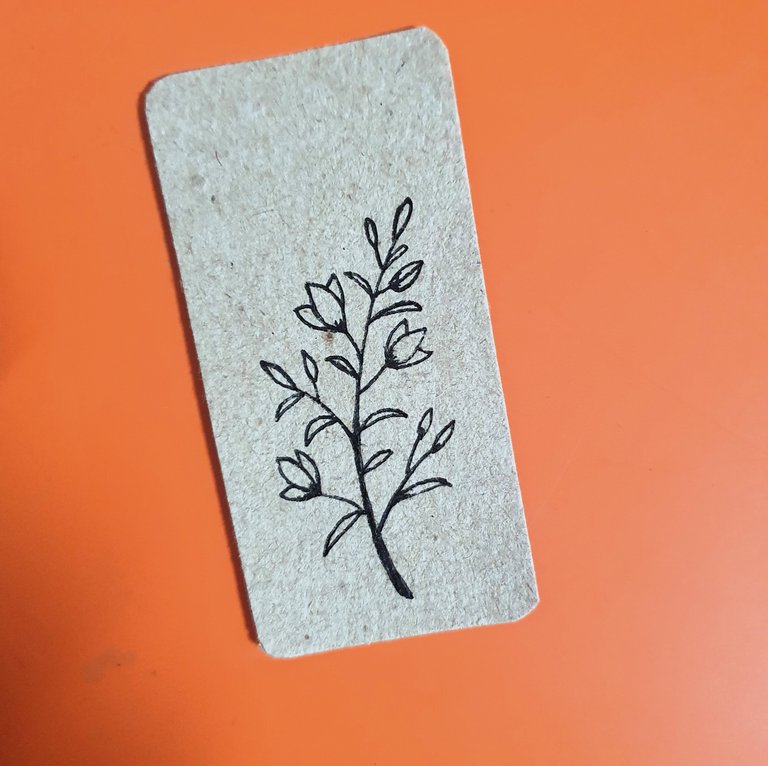
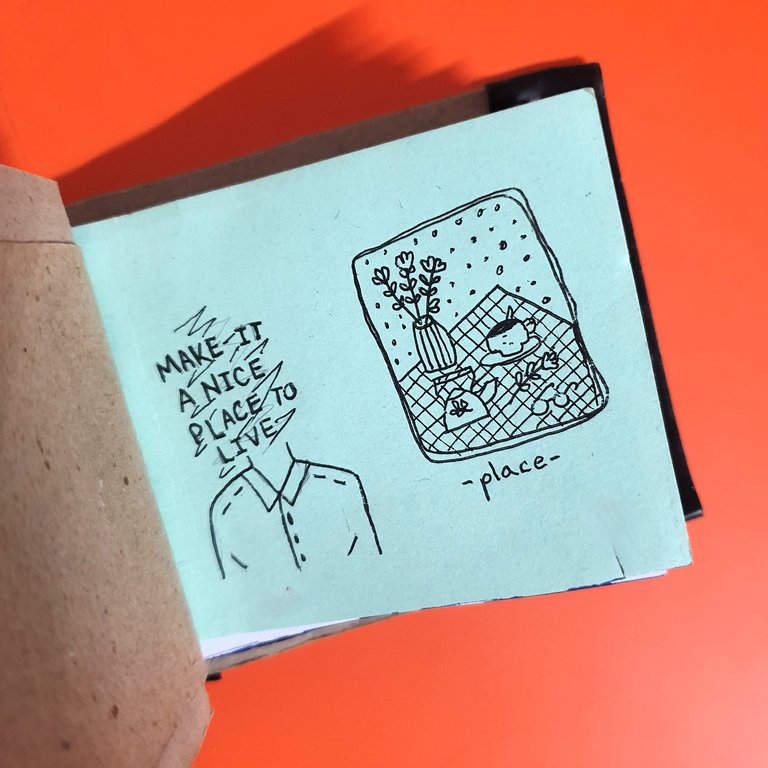
- Create a Bookmark:
- Feeling inspired, I also wanted to create a small floral-themed bookmark and make the first little drawing, which I share with you and hope you like.
It has been a pleasure to share this little project with you. I hope you enjoyed the process as much as I enjoyed creating it and are encouraged to create your own cozy sketchbooks. As I fill it, I will share the pages with you. Warm regards and, as always, my best wishes for success and luck.
I sincerely want to thank you for taking the time to read this article. Your support means a lot to me and motivates me to continue sharing content that can be useful and interesting for you. If you found this article helpful or enjoyed reading it, I would greatly appreciate your feedback. Best wishes.

| I’m Ernesto, a Cuban passionate about art and writing. Always learning, always growing. Excited to share and learn more every day! I write about art, drawing, video games, nature, and review the things I like. My goal is to inspire and connect with others through my creative journey. |
|---|
Sketchbook Rústico y Cozy
Hola amigos y comunidad de Hive DIY, espero estén teniendo un lindo día. Hacía rato que no pasaba por aquí. Hoy les traigo mi última manualidad, pero antes, les pongo un poco en contexto.
En mi país, encontrar material de oficina es extremadamente difícil y, sobre todo, se va muy lejos de mi presupuesto como profesor. Por esta razón, siempre he optado por el reciclaje. Si me conocen un poquito, saben que me encanta dibujar, y como no podía permitirme hojas o un sketchbook nuevo (mi antiguo sketchbook está por finalizar), decidí crear el mío propio usando las hojas que desechaba en mi trabajo y tenían una de las caras escritas.
Tenía algunas ideas para mi sketchbook y algunos parámetros a cumplir: primero, que fuera lo suficientemente pequeño para llevar conmigo a todos lados, que se viera rústico y muy personal, y que fuera resistente. Además, que tuviera alrededor de 100 o más hojas y en formato horizontal, mi formato favorito. Con esto en mi cabeza, ¡manos a la obra!
Materiales y Herramientas:
- Lápiz
- Regla
- Hilo de pesca o cuerda
- Tijeras
- Una puntilla
- Cinta aislante
- Pegamento
- Materiales para decorar
Pasos:
- Hacer las Plantillas:
- Hice dos plantillas, una de material duro para las solapas y otra para las hojas. Las medidas fueron: para las tapas, 7.5x10.5 cm y para las hojas, 7x10 cm. Esto hace que sea lo suficientemente pequeño para llevar a todos lados, pero el tamaño justo para dibujar.
- Recortar las Hojas y Solapas:
- Recorté todas las hojas y solapas, que eran de materiales reciclados y usadas por una de las caras. Fue aburrido pero confié en el proceso. No me preocupé mucho por la regularidad, y si tienes una guillotina, se te hará fácil, pero en mi caso, usé tijeras. Un consejo: recorta varias solapas (3 por cada lado) porque en el momento de encuadernar se pueden dañar.
- Unir las Hojas y Solapas:
- Puse las 3 solapas, las hojas en medio y las 3 solapas del final. Es buena idea ir colocándolas de a poco y dando pequeños golpecitos sobre la mesa para alinearlas. Al final, simplemente utilicé dos pinzas de hojas para sujetarlas.

- Encuadernar:
- Opté por una encuadernación tradicional japonesa con sobrecostura, esto le dará mucha resistencia y evitará que se escapen las hojas. Primero, marqué a la misma distancia donde haría los agujeros, aconsejo a 1 cm del borde y con 1 cm de separación entre cada agujero.
- Crear los Agujeros:
- Esta fue la parte más difícil. Usé un martillo y una puntilla porque no tenía herramientas adecuadas. Fue difícil por el grosor, pero con mucho trabajo lo logré.
- Coser las Hojas:
- Coser las hojas es muy sencillo. Simplemente empiezas desde el centro y un agujero a la vez, tanto alrededor del lomo como de agujero a agujero. Si buscas en YouTube, encontrarás varios videos que explican este tipo de encuadernación.
- Reforzar el Lomo:
- Para reforzar el lomo, aunque no lo necesitaba, utilicé un poco de cinta aislante.
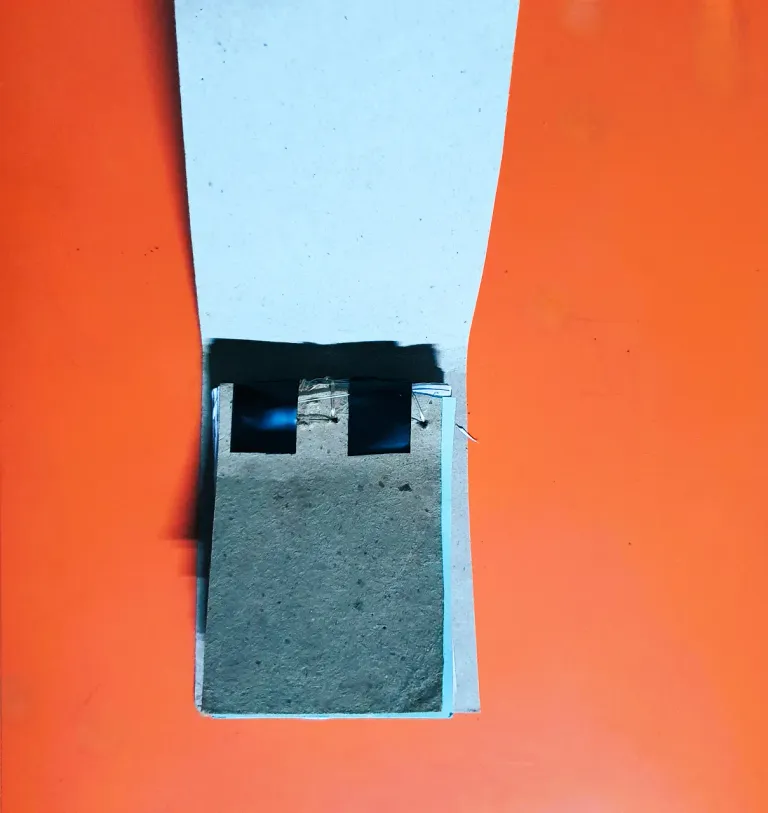
- Hacer la Sobrecubierta:
- No quería que se vieran las costuras, así que hice una sobrecubierta con el mismo material de las tapas, la que pegué con silicona.

- Reforzar Bordes y Lomos:
- El siguiente paso fue reforzar los bordes y lomos para que sea duradero. Opté por cinta aislante porque quería que fuera de color negro y es un material muy resistente.
- Decorar:
- Ya con todo listo y contento por el resultado hasta el momento, pasé a decorar mi nuevo sketchbook. Como el estilo será entre lo rústico y natural, decidí decorarlo con un pequeño hongo y unos destellos.
- Crear un Marcador:
- Como me sentía inspirado, también quise crearle un pequeño marcapáginas con temática floral y realizar el primer dibujito, que les comparto y espero que les guste.


Ha sido un placer compartir este pequeño proyecto contigo. Espero que hayan disfrutado del proceso como yo disfruté creándolo y se animen a crear sus propios sketchbooks cozy. Por mi parte, creo que según vaya llenándolo, iré compartiendo con ustedes las páginas. Un gran saludo y, como siempre, mis mayores deseos de éxitos y suerte.

Quiero agradecerles sinceramente por tomarse el tiempo de leer este artículo. Su apoyo significa mucho para mí y me motiva a seguir compartiendo contenido que pueda ser útil e interesante para ustedes. Si encontraron este artículo útil o disfrutaron leyéndolo, les agradecería enormemente sus comentarios. Éxitos.
| I’m Ernesto, a Cuban passionate about art and writing. Always learning, always growing. Excited to share and learn more every day! I write about art, drawing, video games, nature, and review the things I like. My goal is to inspire and connect with others through my creative journey. |
|---|
Translated with DeepL.com (free version)
I apologize if there are any grammatical errors, English is not my native language, I have tried to be as careful as possible.
I regularly create images on Pixabay, which are free of copyright. Access my gallery by clicking here.
All assets, illustrations, photos and banners have been created by me and are original content, unless otherwise specified.
Images for the "Materials and Tools" subtitle created with Canva.
Este es un ejemplo perfecto de que se puede aprovechar el material para reutilizarlo sin renunciar a una estética bonita. Te quedó una libreta preciosa, me encantan los detalles del marca páginas y la portada. Se nota que tienes una mente muy creativa, lo admiro profundamente y te agradezco que lo compartas con nosotros.
I have picked this post on behalf of the @OurPick project! Check out our Reading Suggestions posts!
Please consider voting for our Liotes HIVE Witness. Thank you!
Muchas gracias palomap3, fue un pequeño proyecto que me dio mucha satisfacción concluir, ahora la parte más difícil; ¡llenarla de pensamientos! Gracias por el apoyo, saludos y lindo día 🍀
This is really a great little sketchbook project, pretty ingenious to use the printer paper from work.
I have two or three homemade sketchbooks and they are so fun.
Can’t wait to see your traditional drawings in it.
From Venezuela, our witness drives decentralization and the adoption of Web3 technology, creating opportunities for the local community and contributing to the global ecosystem. // Desde Venezuela, nuestro testigo impulsa la descentralización y la adopción de la tecnología Web3, generando oportunidades para la comunidad local y contribuyendo al ecosistema global.
Sigue, contacta y se parte del testigo en: // Follow, contact and be part of the witness in:
Congratulations @soyernesto! You have completed the following achievement on the Hive blockchain And have been rewarded with New badge(s)
Your next target is to reach 30000 upvotes.
You can view your badges on your board and compare yourself to others in the Ranking
If you no longer want to receive notifications, reply to this comment with the word
STOP