Hello everyone here at Hive Diy! Happy and blessed start of the week, especially to all those beautiful mothers that make life here at Hive, now late, but sure wish you a Happy Mother's Day! To all those amazing women, I hope you had an amazing time yesterday and that this new week comes loaded with the best for everyone, full of blessings, productivity and the creativity that can't be missing ♡

Felíz y bendecido día lunes, en está oportunidad me encuentro por aquí para traerles una idea rápida, fácil y sobretodo hermosa para regalar a sus madres si aún no han hecho el regalo, porque es tarde, pero seguro, entonces les traigo algo ideal para acompañar su regalo y darle el toque. Porsupuesto no podía dejar pasar esta ocasión sin publicar alguna idea que los inspire, así que llegó hoy porque nunca es tarde, con el tutorial paso a paso de una hermosa tarjeta personalizada para todas esas personas que no les había dado tiempo de preparar algo el día de ayer. La idea es regalar aunque sea un detalle, por lo tanto el regalo puede ser tarde, pero seguro, además el día de las madres es todos los días, a modo de que debemos valorar a cada una de ellas y darles amor a diario, así que sin más preámbulo vamos con el tutorial y sus materiales.
Happy and blessed Monday, this time I am here to bring you a quick, easy and above all beautiful idea to give to your mothers if you have not yet made the gift, because it is late, but sure, then I bring you something ideal to accompany your gift and give the touch. Of course I could not let this occasion pass without publishing some idea to inspire you, so today came because it is never too late, with the step by step tutorial of a beautiful personalized card for all those people who had not given them time to prepare something yesterday. The idea is to give even a detail, so the gift may be late, but safe, plus mothers day is every day, so that we must value each of them and give them love every day, so without further ado let's go with the tutorial and materials.
♡Mother's Day Card♡
<center
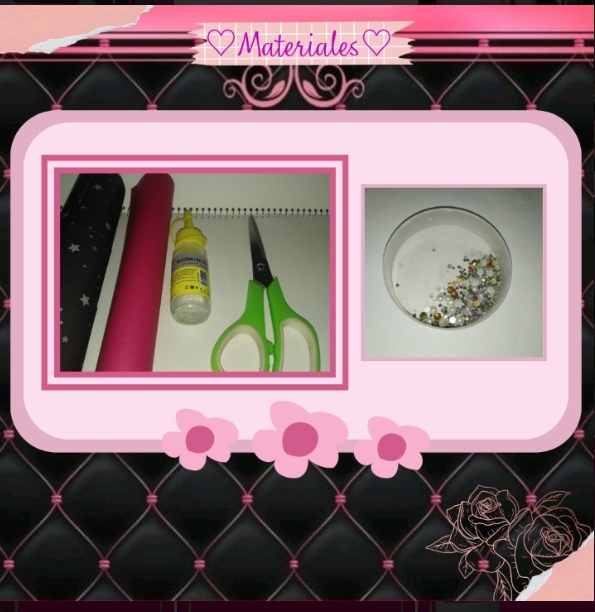
♡Materials♡
- Cartulina unicolor
- Cartulina decorada
- Silicón
- Perlas y piedritas
- Marcadores
- Lápiz
- Tijera
- Regla
- Unicolor cardboard
- Decorated cardboard
- Silicone
- Beads and pebbles
- markers
- Pencil
- Scissors
- Ruler
♡Step-by-step procedure♡.
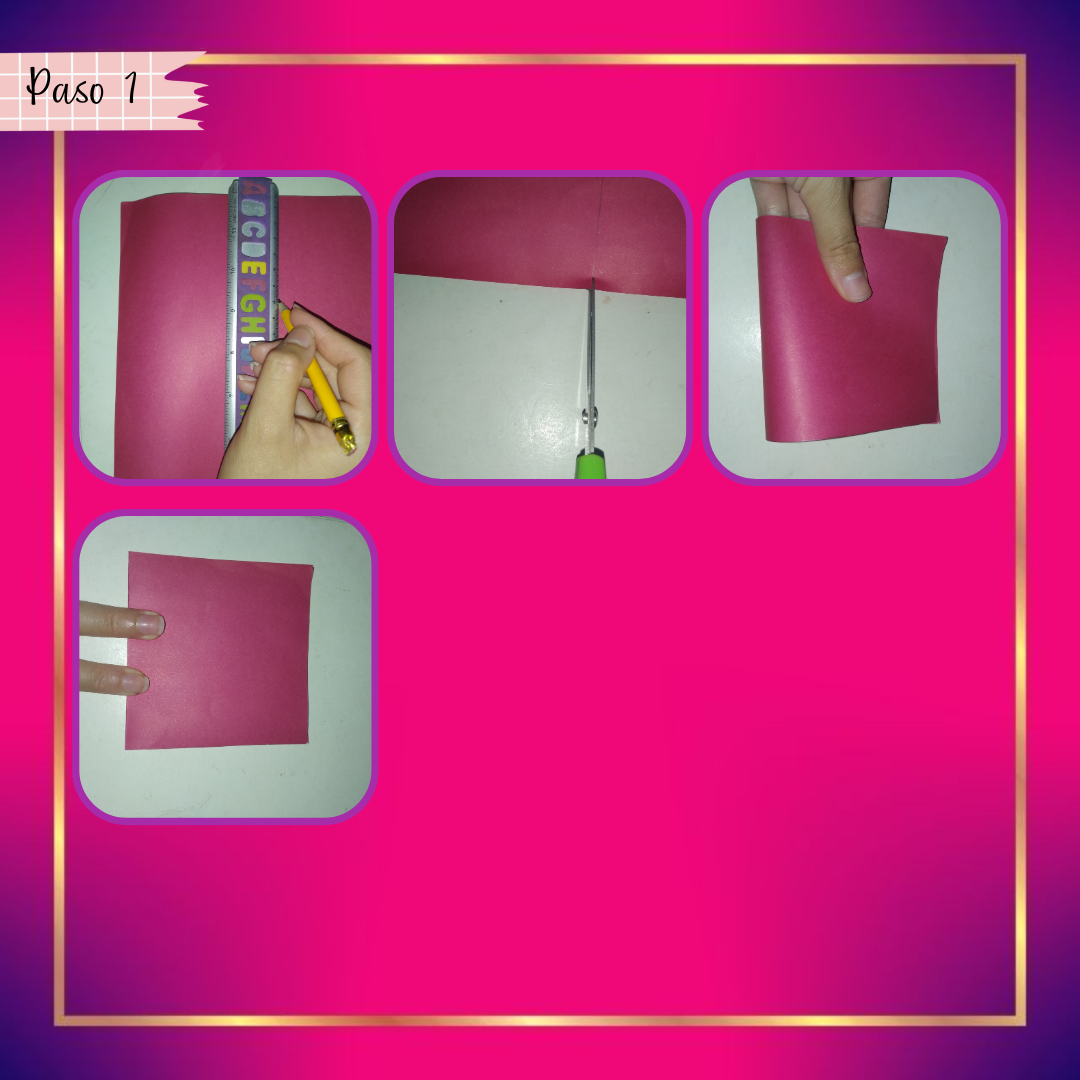
Paso 1:
Step 1:
Vamos a comenzar extendiendo nuestra cartulina, después marcamos dependiendo del tamaño que queremos que sea la tarjeta, yo hice un cuadrado de 10cm de largo x 10cm de ancho, luego con la ayuda de una tijera recorte todo esto cuidadosamente, seguidamente tomé un extremo de está y lo llevé hacia la otra esquina, doblando justo a la mitad del rectángulo y formando un pequeño cuadrado.
Let's start by extending our cardboard, then we mark depending on the size we want the card to be, I made a square of 10cm long x 10cm wide, then with the help of a scissors I cut all this carefully, then I took one end of it and took it to the other corner, folding it right in the middle of the rectangle and forming a small square.
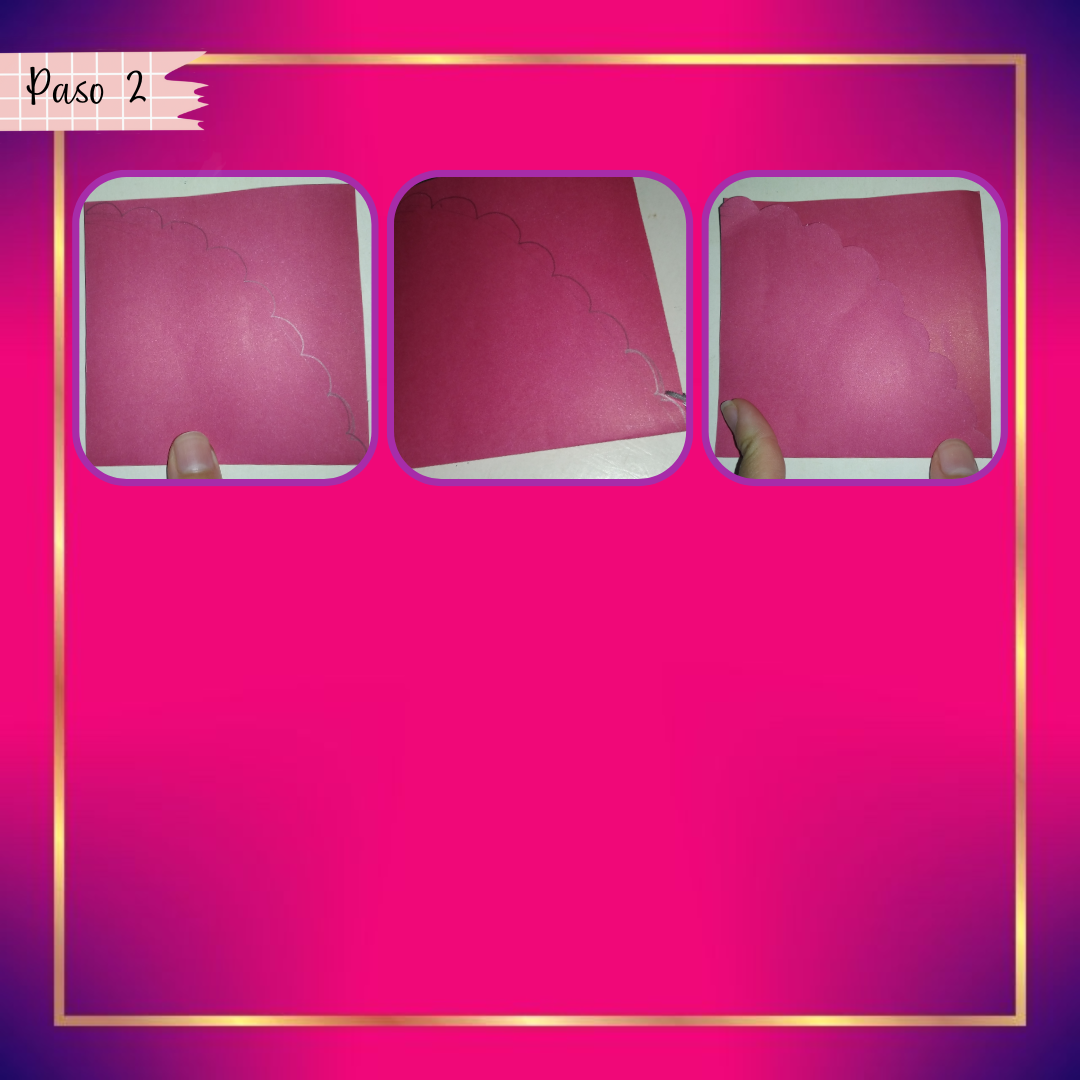
Paso 2:
Step 2:
Ahora vamos a tomar nuestro lápiz y marcando un poco claro vamos a empezar a hacer semi círculos de un extremo a otro como pueden observar en la imágen, solo es question de darle esa forma o otra que gusten, así continuamos recortando con nuestra tijera muy bien, siguiendo la forma que marcamos anteriormente.
Now we are going to take our pencil and marking a little clear we are going to start making half circles from one end to the other as you can see in the image, it is only a question of giving that shape or another that you like, so we continue cutting with our scissors very well, following the shape that we marked previously.
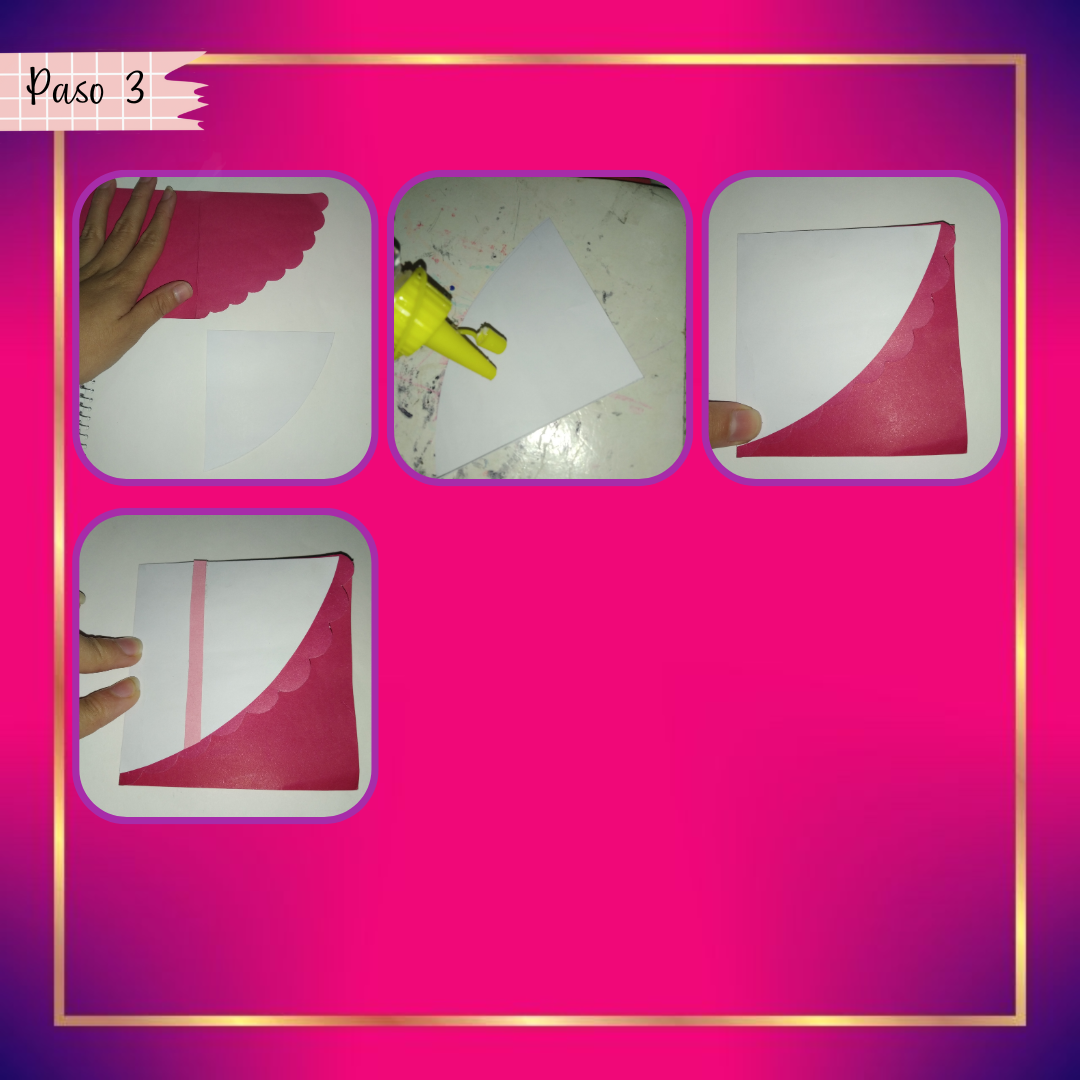
Paso 3:
Step 3:
Para continuar recortaremos en cartulina blanca de preferencia o la que quieran, una figura casi igual a la anterior, solo que con el borde por así decirlo liso y un poco más pequeño de ese borde, aproximadamente un poco menos de un centímetro, ahora tomaremos nuestro silicón y le vamos a agregar en la parte de atrás, esparcimos y la pegaremos en la tarjeta, justo un poco antes de borde derecho, hacemos presión y esperamos a que seque en breve. Luego recortaremos una tira de cartulina rosa de más o menos 0.7cm de ancho, seguido le agregaremos silicón frío y con cuidado la vamos a pegar en el frente de la tarjeta, un poco antes de la mitad.
To continue we will cut in white cardboard preferably or whatever you want, a figure almost like the previous one, only with the edge so to speak smooth and a little smaller than that edge, about a little less than a centimeter, now take our silicone and we will add on the back, spread and paste it on the card, just a little before the right edge, we press and wait for it to dry shortly. Then we will cut a strip of pink cardboard about 0.7cm wide, then we will add cold silicone and carefully glue it on the front of the card, just before the middle.
Paso 4:
Step 4:
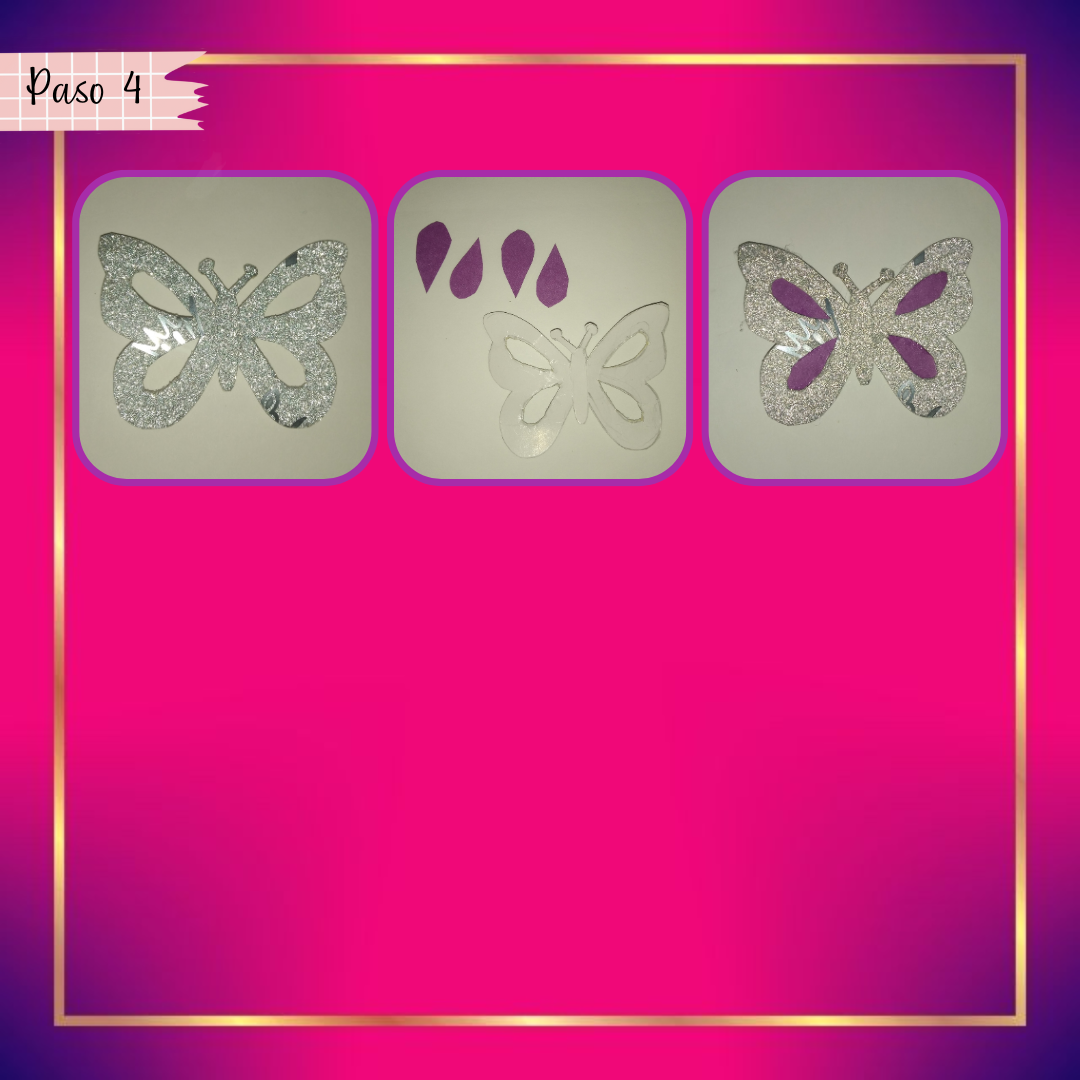
Antes de pasar a la decoración vamos a marcar en cartulina decorada, preferiblemente en un tono plateado o dorado una mariposa como más les guste, yo tenía este modelo sencillo y decidí hacer está misma, la marque y con la ayuda de un exacto recorte cuidadosamente los orificios de adentro de las alas de la mariposa y para el borde de afuera simplemente utilicé una tijera, después recorte 4 formas tipo de una gota de agua alargada (la misma de adentro de las alas) en cartulina unicolor, agregué silicón en el borde de los orificios de la mariposa y les pegue cada una de estás.
Before moving on to the decoration we are going to mark on decorated cardboard, preferably in a silver or gold tone a butterfly as you like, I had this simple model and decided to make this one, I marked it and with the help of an exact cut out carefully the holes inside the wings of the butterfly and for the outside edge I simply used a scissors, then I cut out 4 elongated water drop shapes (the same as the inside of the wings) in unicolor cardboard, added silicone on the edge of the butterfly holes and glued each one of them.
Paso 5:
Step 5:
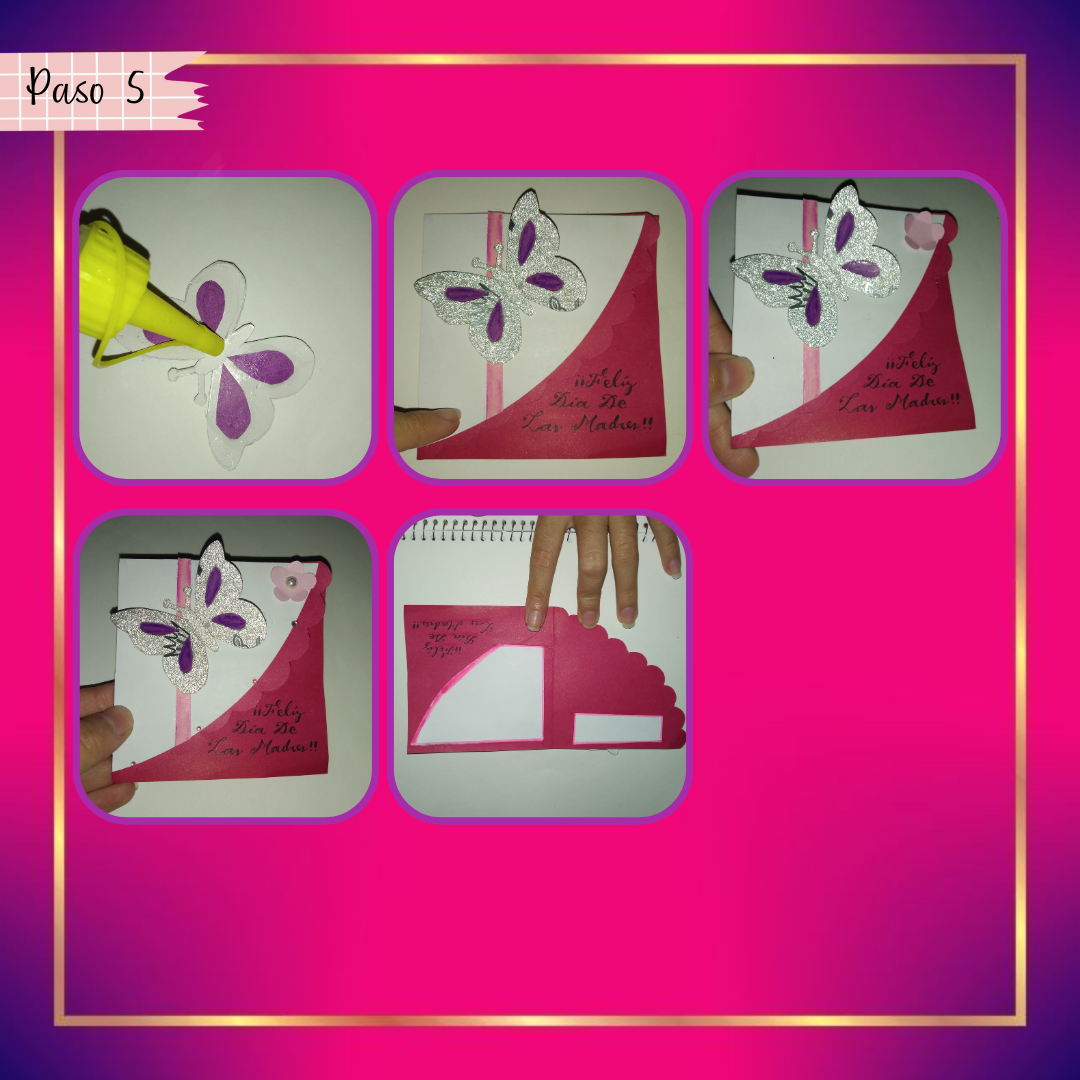
Ahora bien, continuamos con la mejor parte, la decoración, para esto tomaremos la mariposa y agregaremos silicón en la parte del cuerpo de la mariposa, solo un poco para que no se desborde, así la pegaremos en el espacio de la línea como más nos guste, yo la pegue un poco más arriba del centro, abrí un poco sus alas hacía arriba y luego difumine un poco con color la línea rosa. A continuación escribí un lindo mensaje en la parte de adentro que se verá por fuera que dice "Felíz día de las madres", después hice una pequeña flor, la pegué y seguidamente tomé piedritas, pegué una grande en el medio de la flor y cuatro pequeñas alrededor del borde blanco, adentro pegue con silicón dos trozos de papel blanco y les hice un borde con marcador rosa.
Now, we continue with the best part, the decoration, for this we will take the butterfly and add silicone on the body part of the butterfly, just a little so it does not overflow, so we glue it in the space of the line as we like, I glued it a little above the center, I opened a little its wings up and then blurred a little with color the pink line. Then I wrote a nice message on the inside that will be seen from the outside that says "Happy Mother's Day", then I made a small flower, glued it and then I took pebbles, glued a big one in the middle of the flower and four small ones around the white border, inside I glued with silicone two pieces of white paper and I made a border with pink marker.
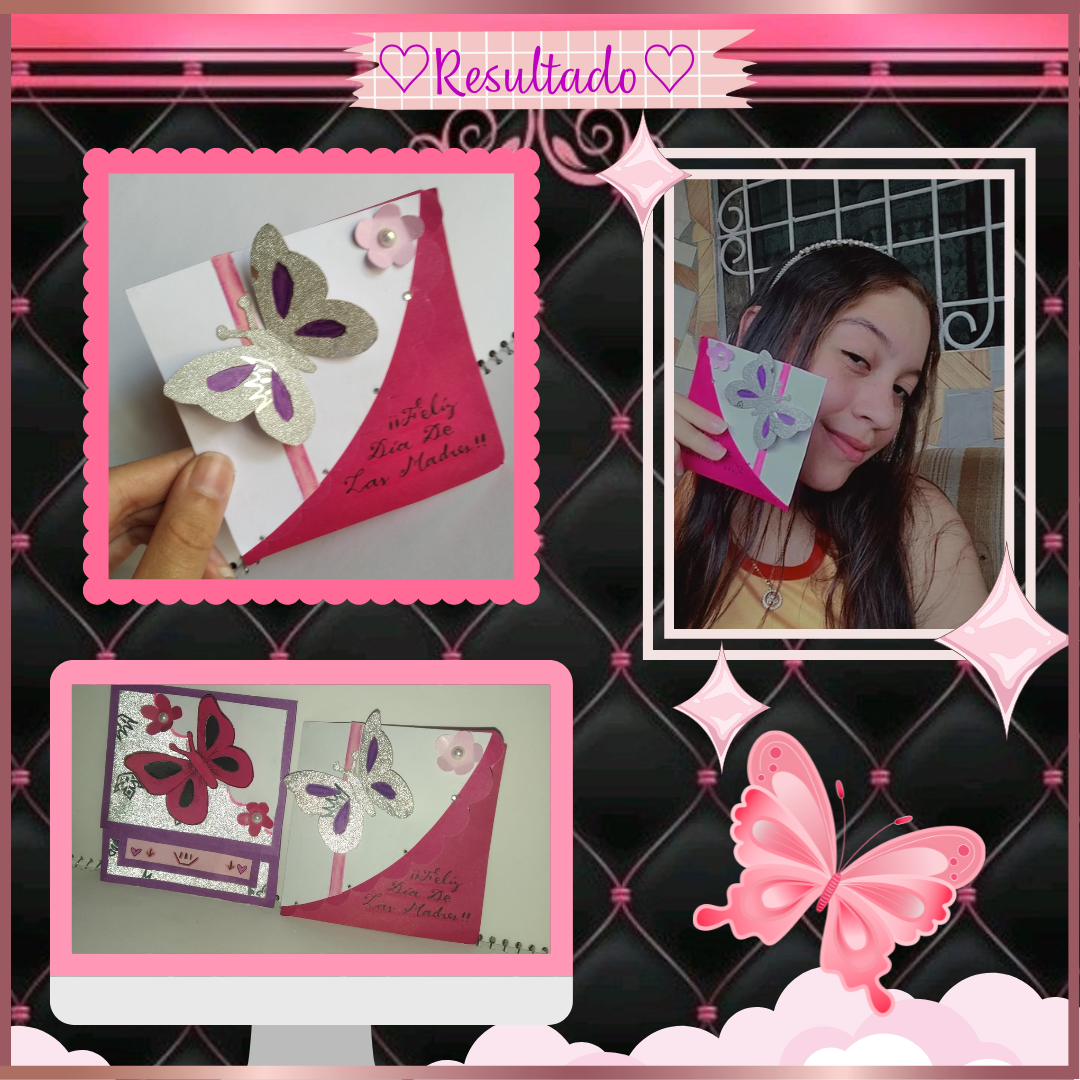
¡Y listo! Así de fácil y rápido tenemos una hermosa tarjeta que podemos regalar en cualquiera ocasión, no solo en el día de las madres porsupuesto, es perfecta para acompañar algún regalo especial, para hacerlo aún más especial y único, como siempre es una idea versátil que pueden adaptar a sus gustos, ya que ustedes eligen el tamaño, el color y la decoración, ya que se los dejó a su disposición, porque simplemente es una idea y el modelo que les dejó.
And that's it! So easy and quick we have a beautiful card that we can give away on any occasion, not only on Mother's Day of course, is perfect to accompany any special gift, to make it even more special and unique, as always is a versatile idea that can be adapted to your tastes, as you choose the size, color and decoration, as it is left to your disposal, because it is simply an idea and the model that left them.
Les agradezco por acompañarme en un nuevo Diy, espero que les gusten estás tarjetas tanto como a mi, están hechas con mucho amor, sobre todo porque llevan mariposas que es algo que me encanta y me alegra la vida JAJSJA.♡
I thank you for joining me in a new Diy, I hope you like these cards as much as I do, they are made with lots of love, especially because they carry butterflies which is something I love and makes my life happy JAJSJA.♡
¡Gracias por leer! Hasta la próxima queridos amigos de Hive.🧡
Thank you for reading! Until next time dear friends of Hive.🧡
Photos of my authorship taken from my Xiaomi Redmi 7 phone, edited in the free version of Canva.
Linda tarjeta muy personalizada para regalar en cualquier ocasión
Esa es la idea, gracias.💗✨
Muy bonita esta tarjeta! 😍 me encanta la idea de acompañar algún regalo con este tipo de manualidades porque son un complemento ideal!! Saludos💐
Así es, es algo personalizado y da un toque especial, gracias por tu comentario.💗