Hello my creative people of Hive Diy! I hope you are all feeling great and have a great morning, afternoon or evening wherever you are, so I wish you all a very productive, creative and happy week. As usual I'm here bringing you a new Diy this week, something simple, but very pretty.♡
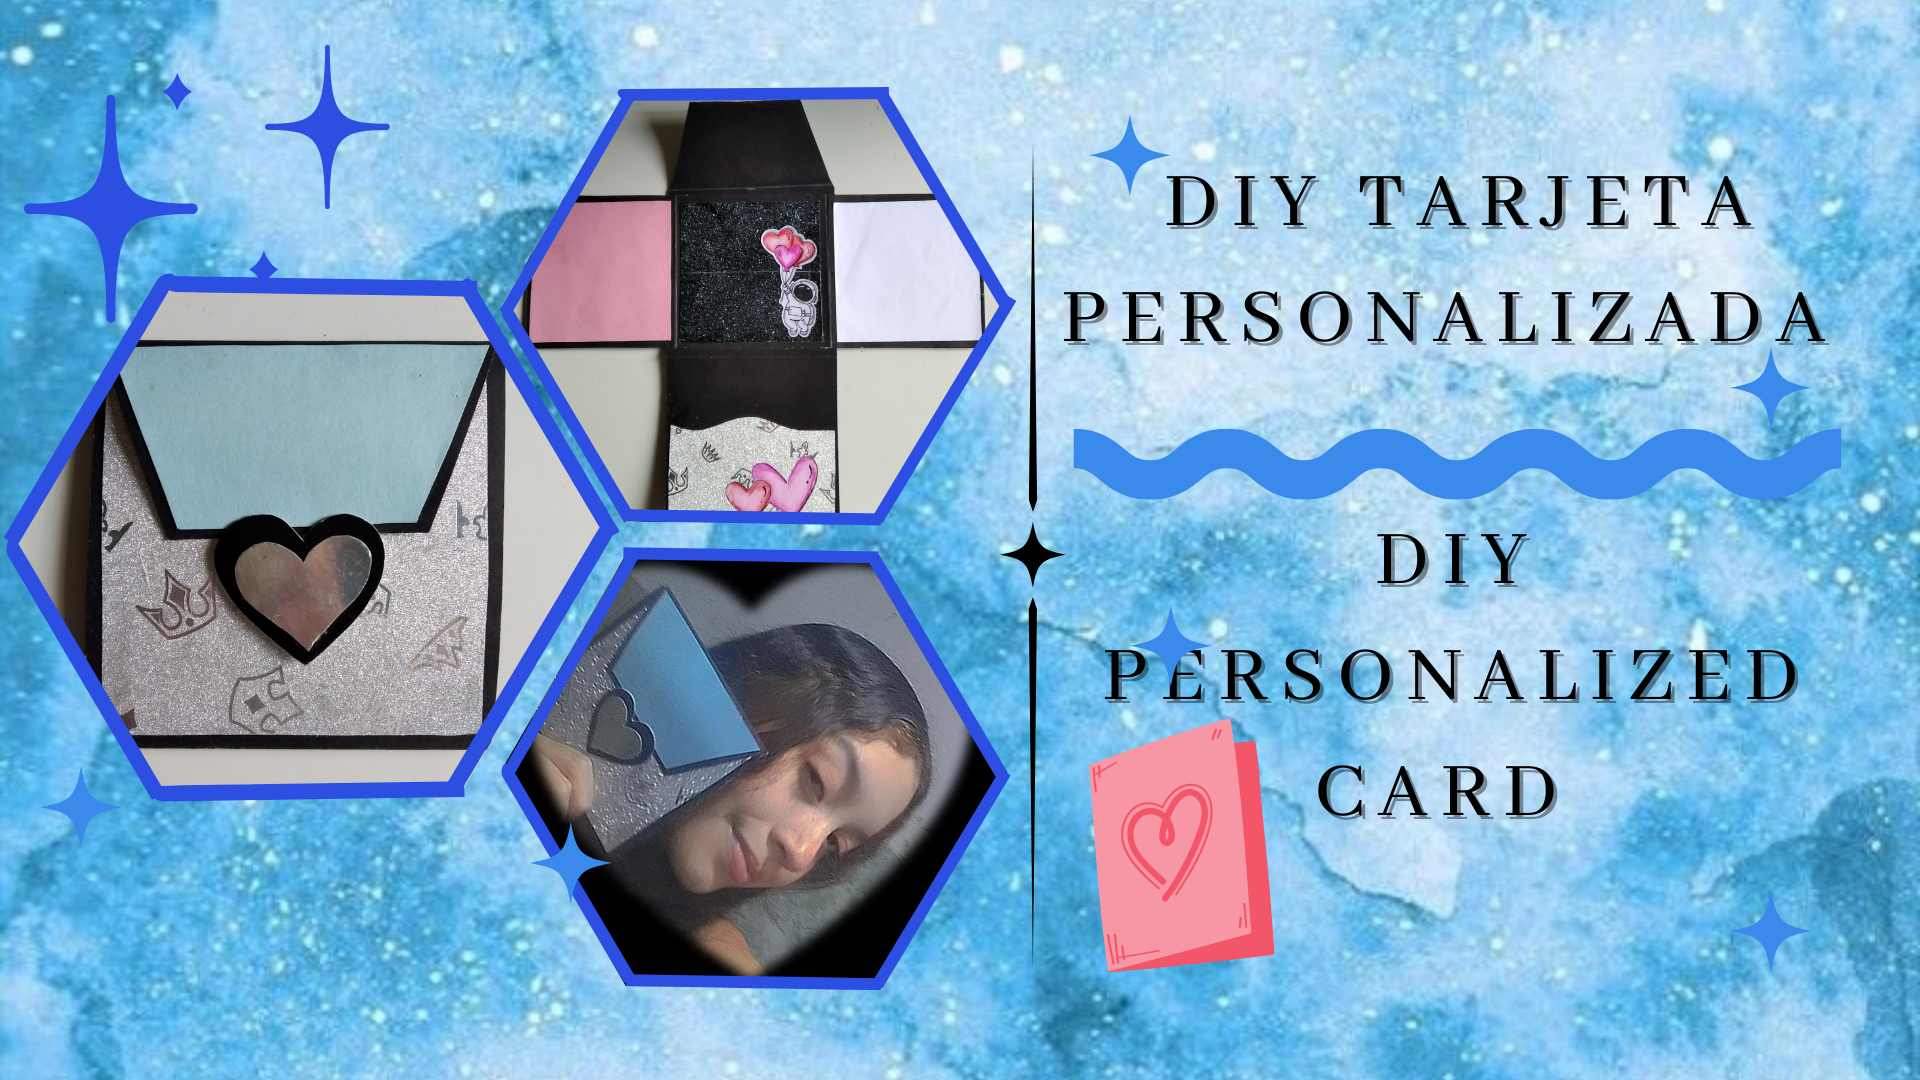
Así, en esta ocasión les traigo un tutorial con su paso a paso bien estructurado, de cómo hacer una tarjeta creativa personalizada para obsequiar, ya que muchas veces queremos acompañar un regalo con una carta o alguna dedicatoria, porque le da un toque único, original y a la vez personal, es especial para regalar a nuestro seres queridos en cualquier ocasión. Lo mejor de todo es que como mencioné anteriormente, es personalizada y la podemos decorar a nuestro gusto, incluso nos podemos guiar por los gustos de la persona a la que se le obsequiará, así que con mucho gusto, a continuación les indico los materiales y luego procedo con el paso a paso.♡
So, this time I bring you a tutorial with its step by step well structured, how to make a custom creative card to give as a gift, because many times we want to accompany a gift with a letter or a dedication, because it gives a unique, original and at the same time personal touch, it is special to give to our loved ones on any occasion. Best of all is that as I mentioned above, it is personalized and we can decorate it to our liking, we can even be guided by the tastes of the person to whom it will be given, so with pleasure, then I indicate the materials and then proceed with the step by step.♡
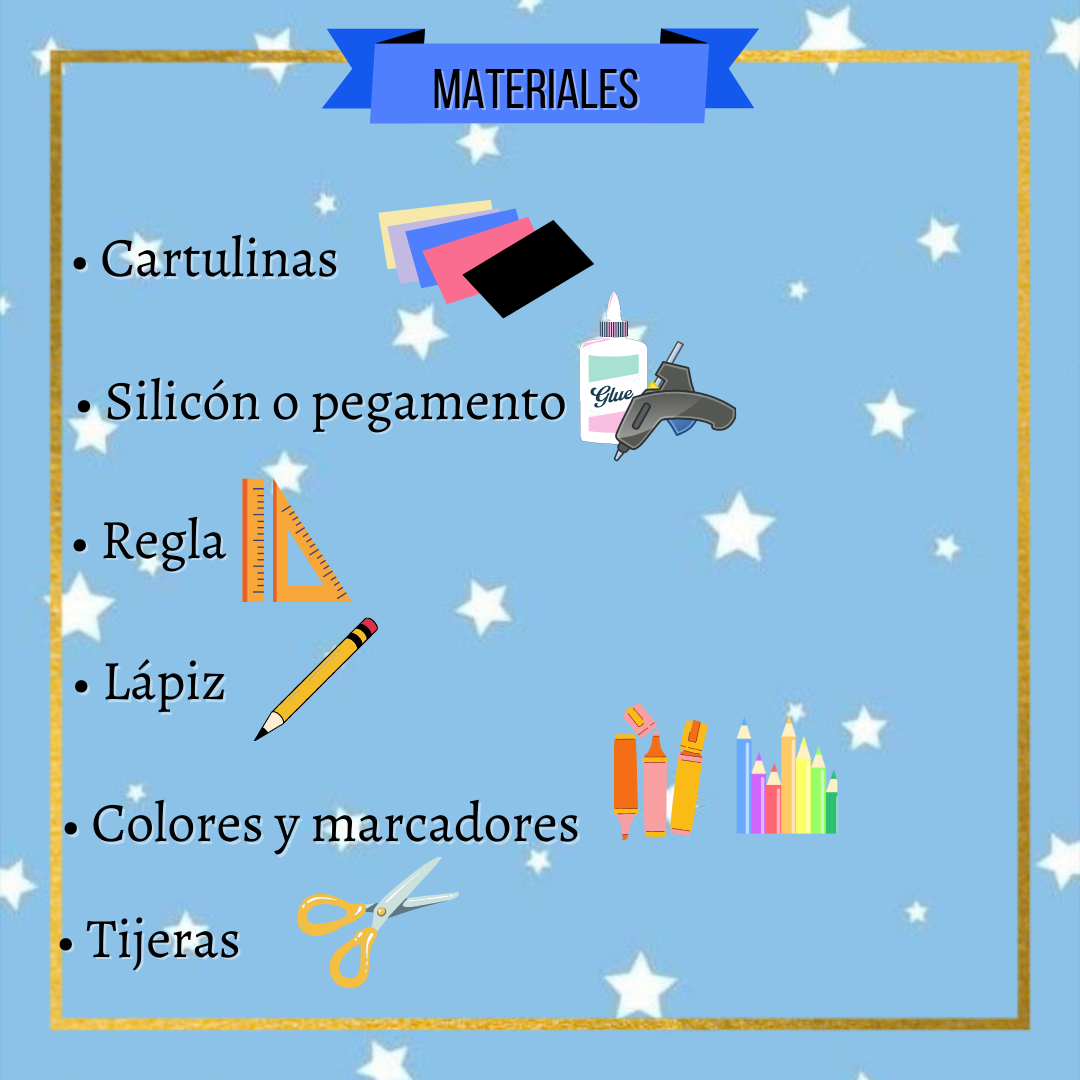
Materials
- Cartulina de color negro
- Cartulina de colores o estampado
- Silicón o pegamento
- Regla
- Lápiz
- Colores y marcadores
- Tijeras
- Black cardboard
- Colored or patterned cardboard
- Silicone or glue
- Ruler
- Pencil
- Colors and markers
- Scissors
♡Step by step♡
Paso 1:
Step 1:
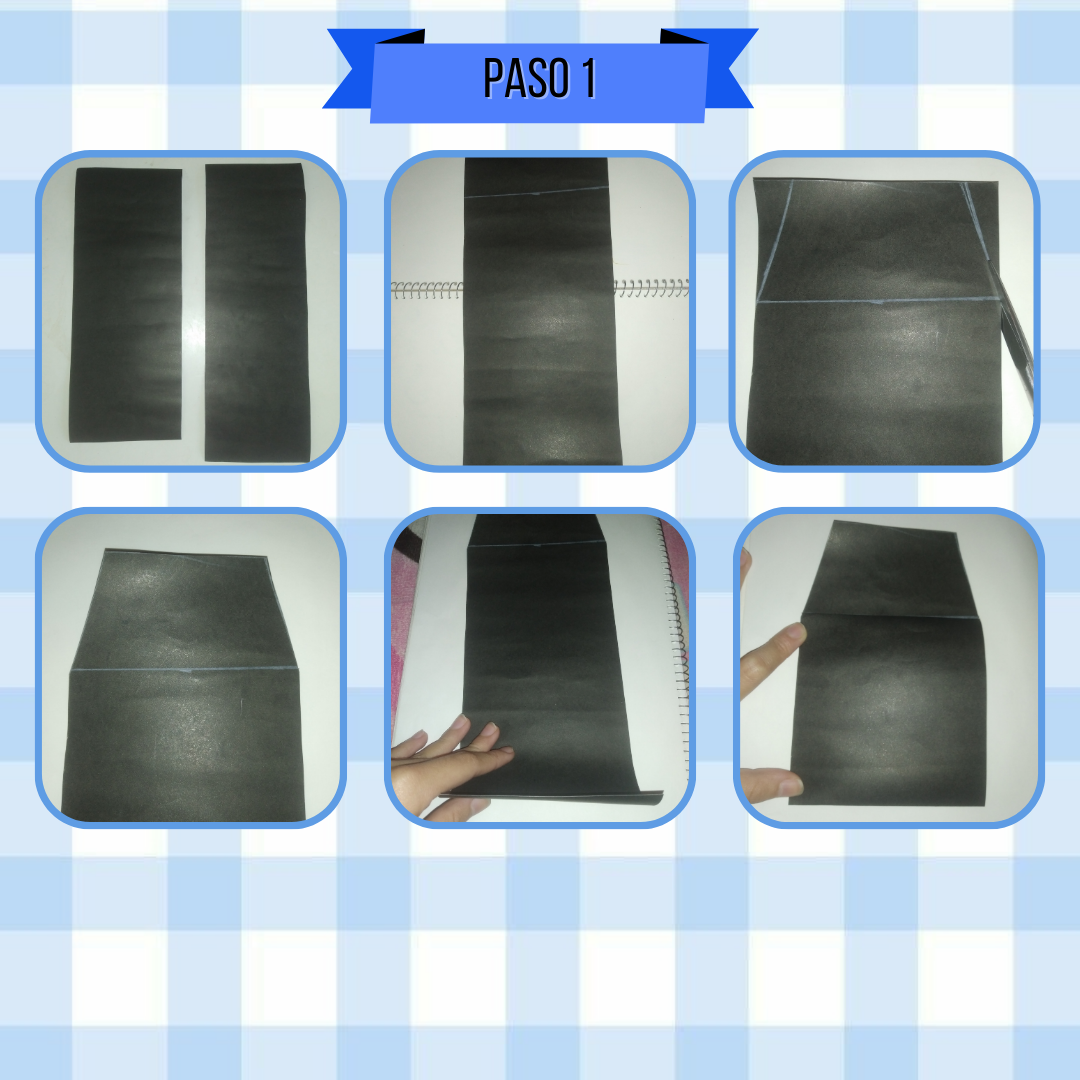
Para empezar tomaremos nuestra cartulina negra que es la parte principal de nuestra tarjeta, vamos a recortar de está, dos rectángulos, uno de 30x12 cm y el otro de 33x11 cm, así tomaremos el rectángulo más corto y en cualquier borde haremos una línea de 6 cm de forma horizontal, la doblaremos justo por esa línea con la ayuda de una regla, así también haremos dos cortes en las esquinas de esta pequeña pieza de manera diagonal, partiendo desde las esquinas, después el resto de está lo divideremos a la mitad doblando nuevamente, como pueden observar en la imagen.
To start we will take our black cardboard which is the main part of our card, we will cut out of it, two rectangles, one of 30x12 cm and the other of 33x11 cm, so we will take the shorter rectangle and on any edge we will make a line of 6 cm horizontally, we will fold it right along that line with the help of a ruler, so we will also make two cuts in the corners of this small piece diagonally, starting from the corners, then the rest of it we will divide it in half by folding again, as you can see in the image.
Paso 2:
Step 2:
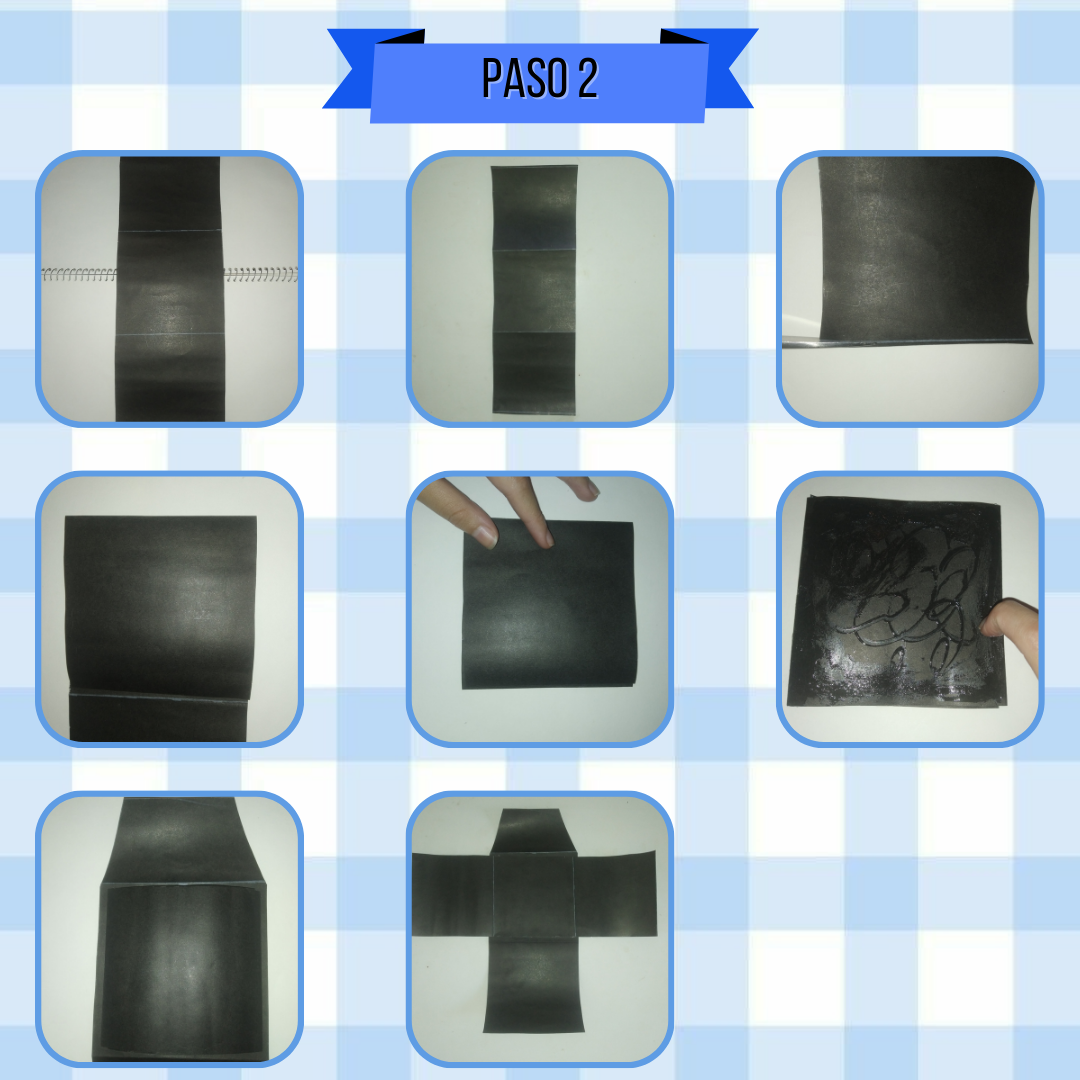
Cómo siguiente paso, tomamos el rectángulo restante (el más largo) y lo divideremos en tres parte iguales de 11 cm cada una, vamos a doblar y proseguimos a cortar una pequeña tira con la tijera (de 0.3 cm aproximadamente) en la parte superior e inferior para que cierre bien, y así, agregamos silicón frío (o pega blanca) en la parte trasera de esta y lo pegamos centrado en el cuadrado que está justo debajo de la parte que recortamos en diagonal, uniendo estás y formando la tarjeta.
As a next step, we take the remaining rectangle (the longest) and divide it into three equal parts of 11 cm each, we will fold and proceed to cut a small strip with the scissors (about 0.3 cm) at the top and bottom to close well, and so, we add cold silicone (or white glue) on the back of it and glue it centered on the square that is just below the part we cut diagonally, joining them and forming the card.
Paso 3:
Step 3:
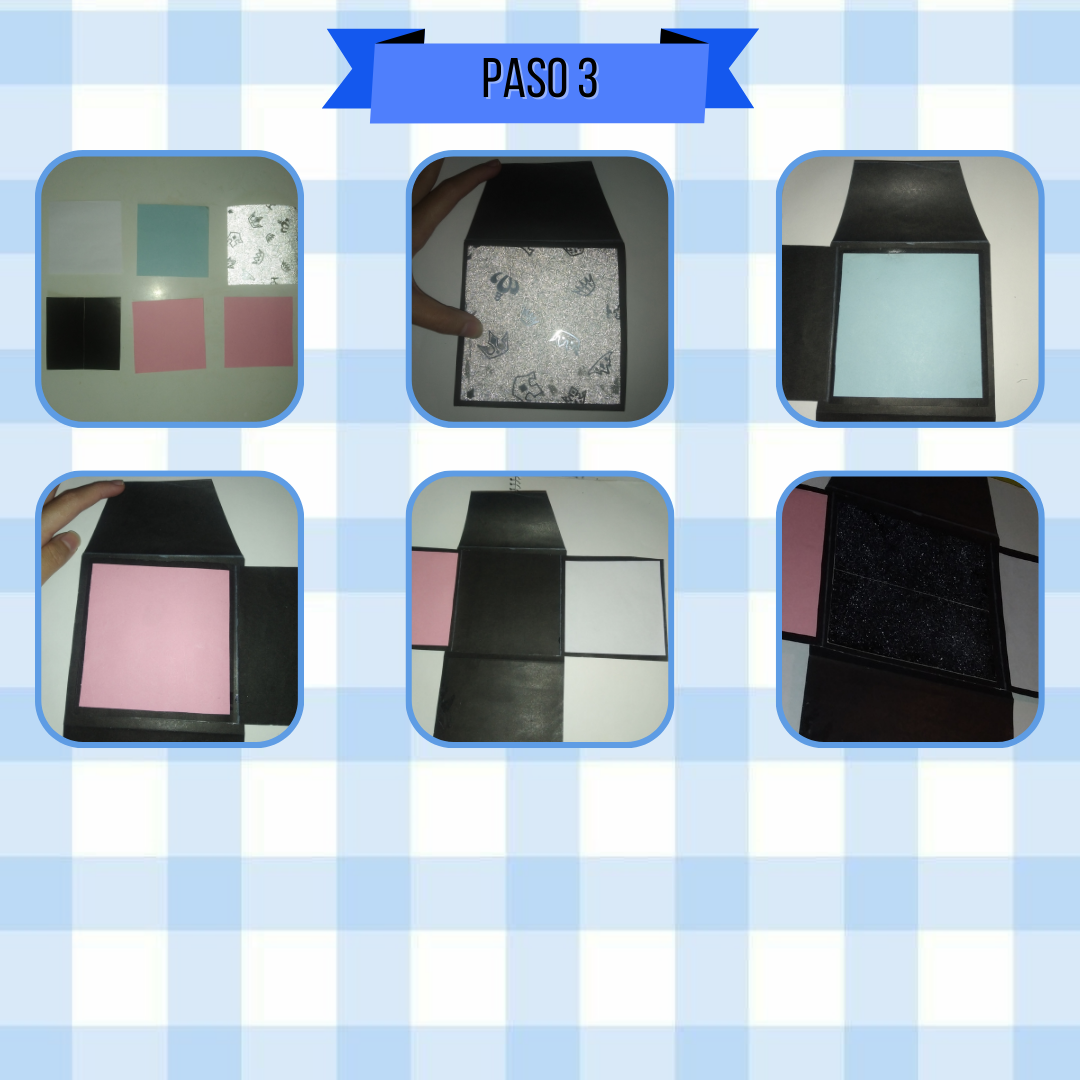
Ahora bien, vamos a cubrir unos espacios por dentro y por fuera, de esta manera, tomaremos nuestras cartulinas estampadas y/o de colores, para así, recortar seis cuadrados, uno de 11cm x 11cm, este de afuera, y los otros 5 de 10 cm x 10 cm que serán los de adentro. Comenzaremos a pegar primero el grande en la parte de afuera con silicón, y después acomodamos los demás adentro como más nos guste en las solapas de los lados, yo pegue una cartulina detrás de cada una, para luego escribir algo también, además en el centro del fondo coloqué un cuadrado negro para poner una frase y decorar, es opcional ponerlo, ya que se puede así mismo.
Now, we are going to cover some spaces inside and outside, in this way, we will take our printed and/or colored cardboard, to cut out six squares, one of 11cm x 11cm, this one on the outside, and the other 5 of 10 cm x 10 cm that will be the inside ones. We will begin to glue first the big one on the outside with silicone, and then we will place the others inside as we like on the flaps of the sides, I glued a cardboard behind each one, to then write something also, also in the center of the bottom I placed a black square to put a phrase and decorate, it is optional to put it, since you can do it yourself.
Paso 4:
Step 4:
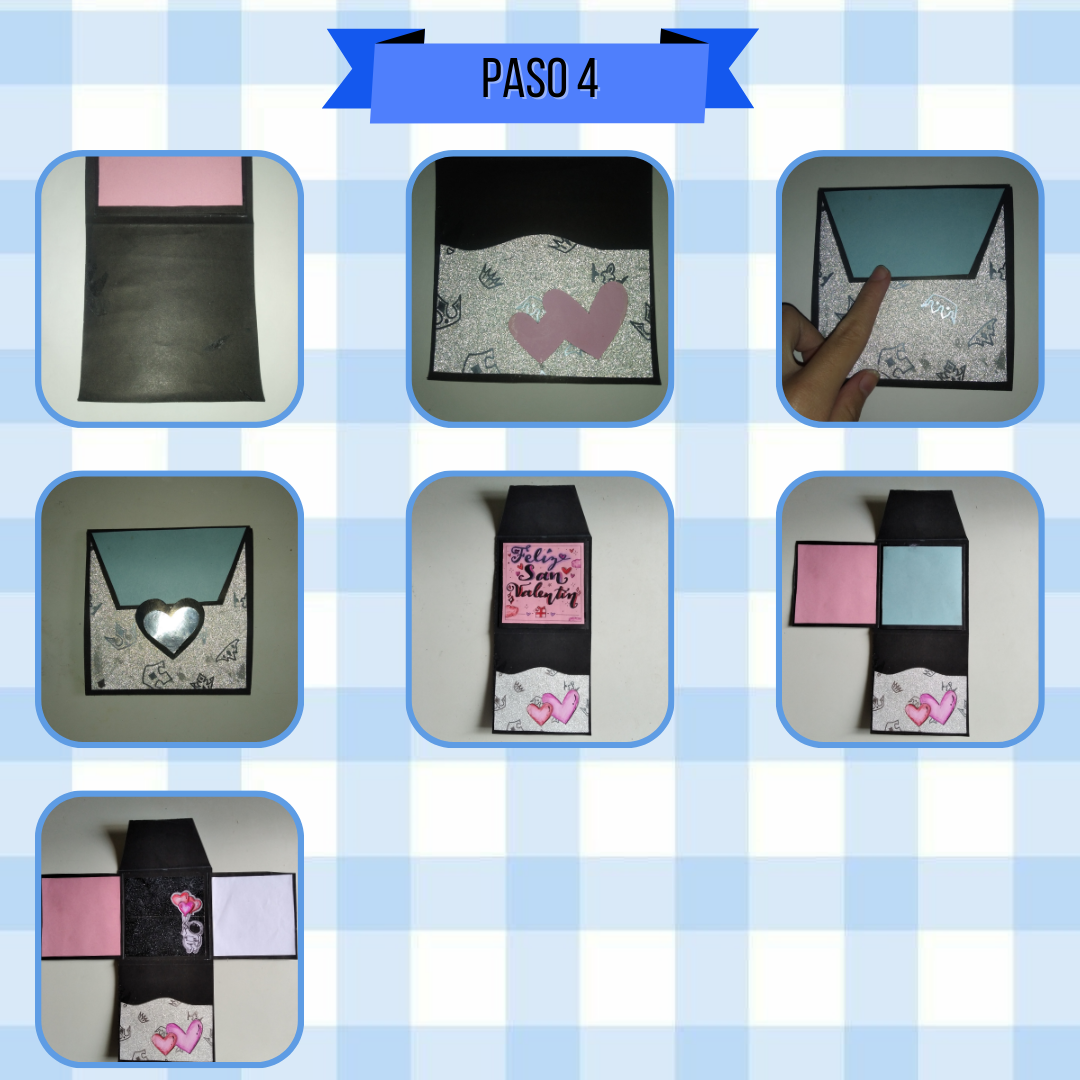
Una vez lista la tarjeta, solo nos queda la mejor parte que es decorar, vamos a terminar con unos toques extra, como colocar un pequeño espacio de sobre en la parte grande al abrir, para así colocar cualquier cosita y después para acomodar la parte de afuera, recorte una figura de cartulina azul un poco más pequeña del espacio que quedaba arriba, así luego, recorte un corazón de color negro, encima le pegue uno de otro color más pequeño y este lo pegue centrado en la tarjeta de la mitad para abajo, dejando un espacio para introducir la solapa de arriba para cerrar la tarjeta. Para culminar agregué en una de la solapas una frase, en este caso fue "Felíz San Valentín" y en las demás agregué dibujos, en el resto pueden agregar dedicatorias bonitas, fotos, entre otros, todo a su elección.
Once the card is ready, we only have the best part which is to decorate, let's finish with a few extra touches, like placing a small envelope space in the large part when opening, to place any little thing and then to accommodate the outside, cut a blue cardboard figure a little smaller than the space that was left above, then cut a black heart, paste a smaller one of another color on top and paste it centered on the card from the middle down, leaving a space to insert the top flap to close the card. To finish I added in one of the flaps a phrase, in this case it was "Happy Valentine's Day" and in the others I added drawings, in the rest you can add beautiful dedications, photos, among others, all at your choice.
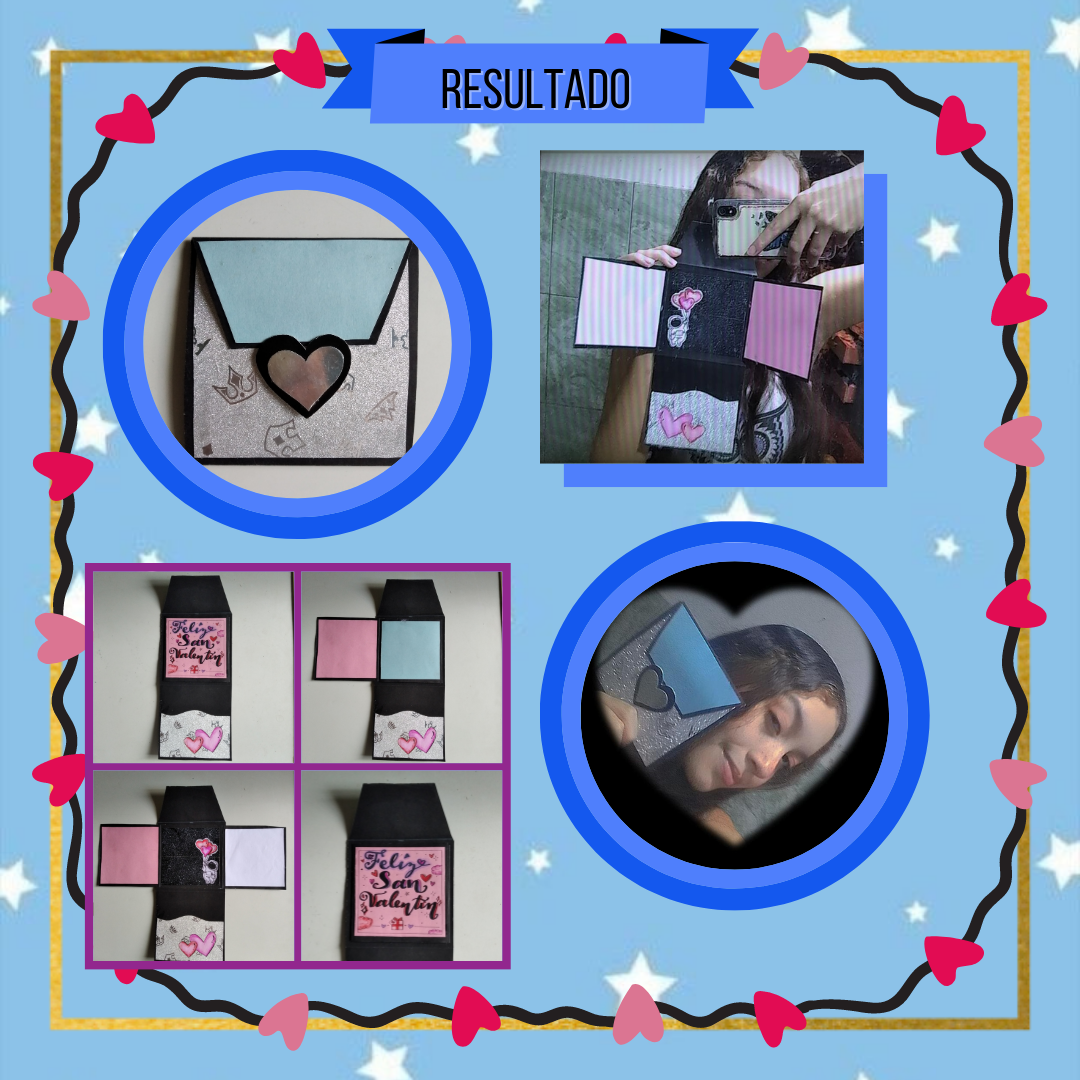
¡Así de fácil y rápido tenemos nuestra tarjeta personalizada para nuestra persona especial! Perfecta para cualquier ocasión, es algo diferente y precioso, verdaderamente me encantó el resultado, incluso ya me la quiero quedar JAJAJS. En este caso la regalaré en San Valentín, pero como mencioné antes, la pueden adaptar para cualquier ocasión, ustedes deciden la temática y todo lo demás, tenemos la creatividad libre para que quede como más no guste.♡
So easy and fast we have our personalized card for our special person! Perfect for any occasion, it is something different and beautiful, I really loved the result, I even want to keep it JAJAJS. In this case I will give it as a Valentine's Day gift, but as I mentioned before, you can adapt it for any occasion, you decide the theme and everything else, we have free creativity to make it as you like.♡
Espero que les haya encantado tanto como a mí, es una tarjeta muy creativa y fácil de hacer, así que no lo piensen dos veces en hacerla, será un regalito único y especial para cualquier persona especial. Les agradezco una vez más por llegar hasta aquí, les deseo un resto de la semana magnífico, nos vemos la próxima vez.♡
I hope you loved it as much as I did, it's a very creative and easy card to make, so don't think twice about making it, it will be a unique and special little gift for any special person. I thank you once again for making it this far, I wish you a great rest of the week, see you next time.♡
¡Gracias por leer!.♡
Thank you for reading!!!♡
Photos of my authorship taken from my Xiaomi Redmi 7 phone, edited in the free version of Canva.
¿Sabes que se me ocurrio? Cuando estaba en el secundario mis amigas compraban tarjetas caras para sus fiestas de XV años, tranquilamente podria hacerse una tarjeta similar a la que muestras en el post, tal vez un poco más formal o el estilo que se desee para ahcer las invitaciones, me gusto mucho.
💙
Holaa, es una buena idea, un toque especial para un día especial, exacto en un color dorado tal vez, algo más detallado y la verdad quedaría muy bonito, sería una invitación única y sencilla.
Gracias, me alegra que te haya gustado, saludos, amigo.🤗💙
Está muy bonito el diseño del a tarjeta. Hace tieeeempo aquí en la comunidad se hizo un concurso de tarjetas para regalo y nos quedamos con publicaciones muy bonitas y creativas. Me hiciste recordar aquellos tiempos jeje...
Muy bonito tu post, gracias por compartirlo con la comunidad.
Muchass graciasss✨, y recuerdo eso, hubo mucha creatividad y belleza, que maravilloso JAJSJA.♡
Te lo agradezco, muchas gracias a ti por tu agradable comentario.💙✨
Saludos @stefania16, te quedó muy linda la tarjeta, los colores hacen un hermoso contraste, gracias por compartir.
Bendiciones!
¡Saludos amigaaa! Muchas gracias, un abrazo.💙
Hola, muy bien explicada el paso a paso. Me agrada porque es útil en cada momento.
¡Hola! Muchas gracias por tu observación, saludos.💙