Hello my wonderful people of HiveDiy! I'm here again as usual, I was a little busy these days and the internet was not fully cooperating, but here I am again, as always, with all the desire to share with you once again.
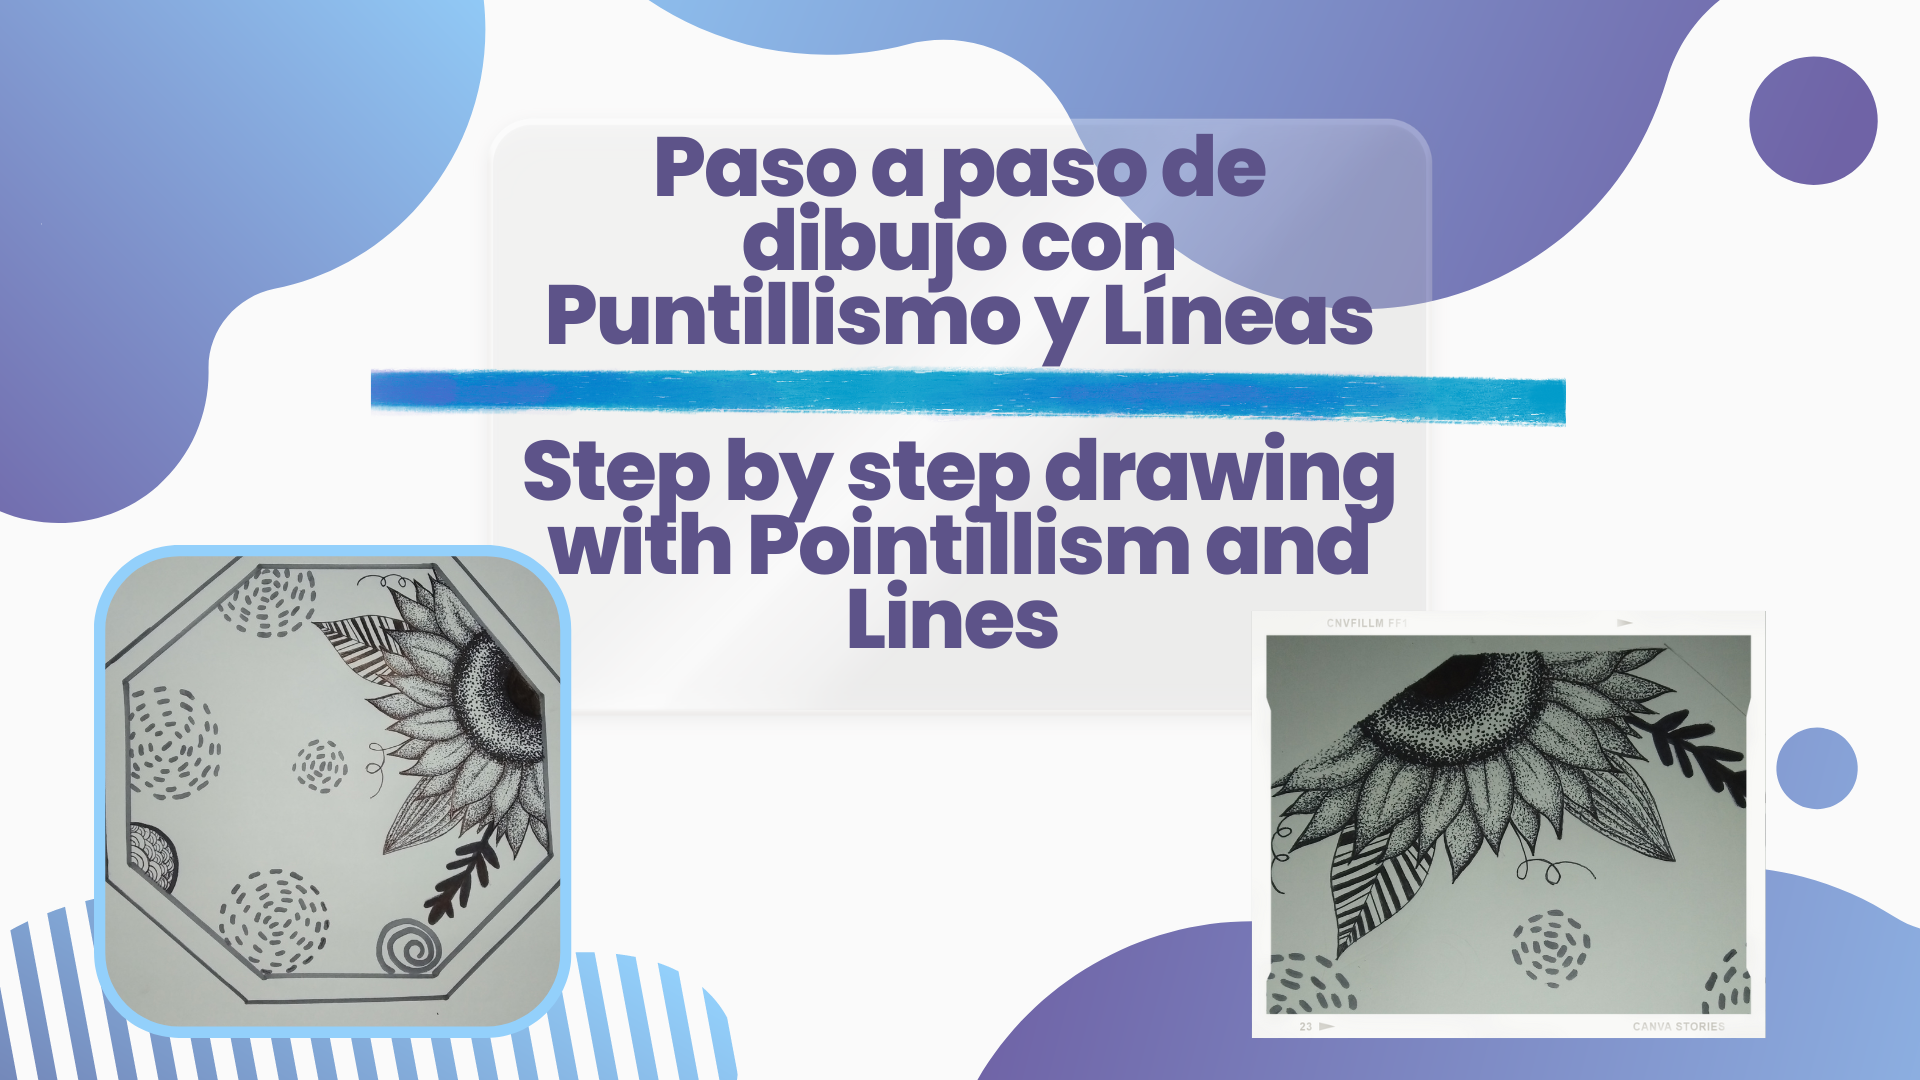
Ahora bien, me interesó compartirles el proceso tipo paso a paso, de cómo realicé una de mis asignaciones para el curso de Diseño Gráfico que estoy viendo en la actualidad para aprender del tema y que me sea de utilidad, ya que estoy de vacaciones y quería aprovechar el tiempo, la actividad era crear un dibujo con puntos o líneas, o de igual forma, ambos, estos solamente en blanco y negro, lamentablemente no se podía utilizar color, que es mi parte favorita de crear, pero aún así me encantó realizar todo y sin duda, disfrute el proceso, saque una buena nota, eso me gusta.
Now, I was interested in sharing with you the step by step process of how I did one of my assignments for the Graphic Design course that I am currently taking to learn about the subject and that is useful for me, since I am on vacation and wanted to take advantage of the time, the activity was to create a drawing with dots or lines, or both, these only in black and white, unfortunately I could not use color, which is my favorite part of creating, but I still loved to do everything and without a doubt, I enjoyed the process, I got a good grade, I like that.
Entonces a continuación les dejo los materiales que utilicé y el paso a paso:
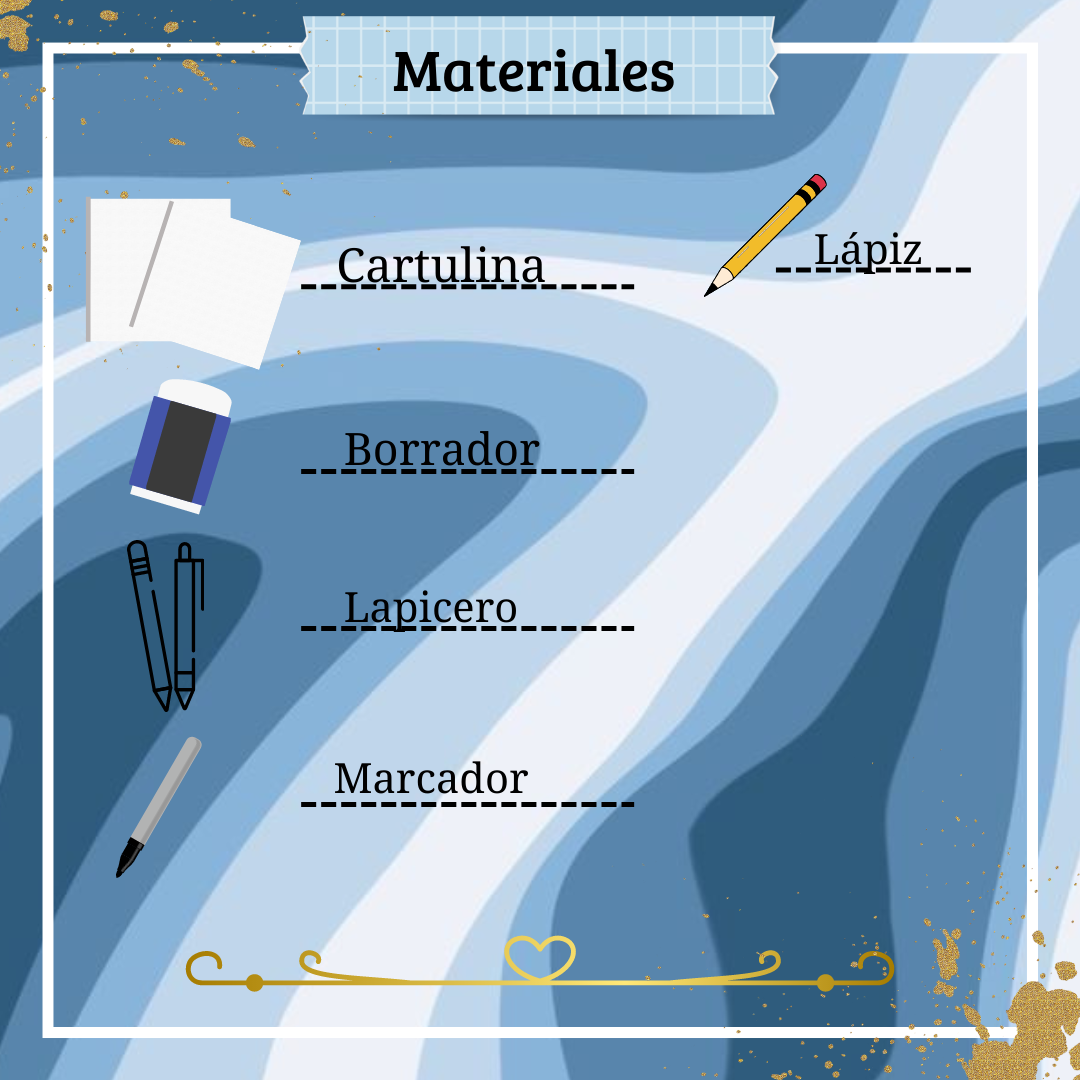
- Cartulina blanca
- Lapicero
- marcador
- borrador
- Lápiz
- White cardboard
- Pencil
- marker
- eraser
- Pencil
So here are the materials I used and the step by step instructions:
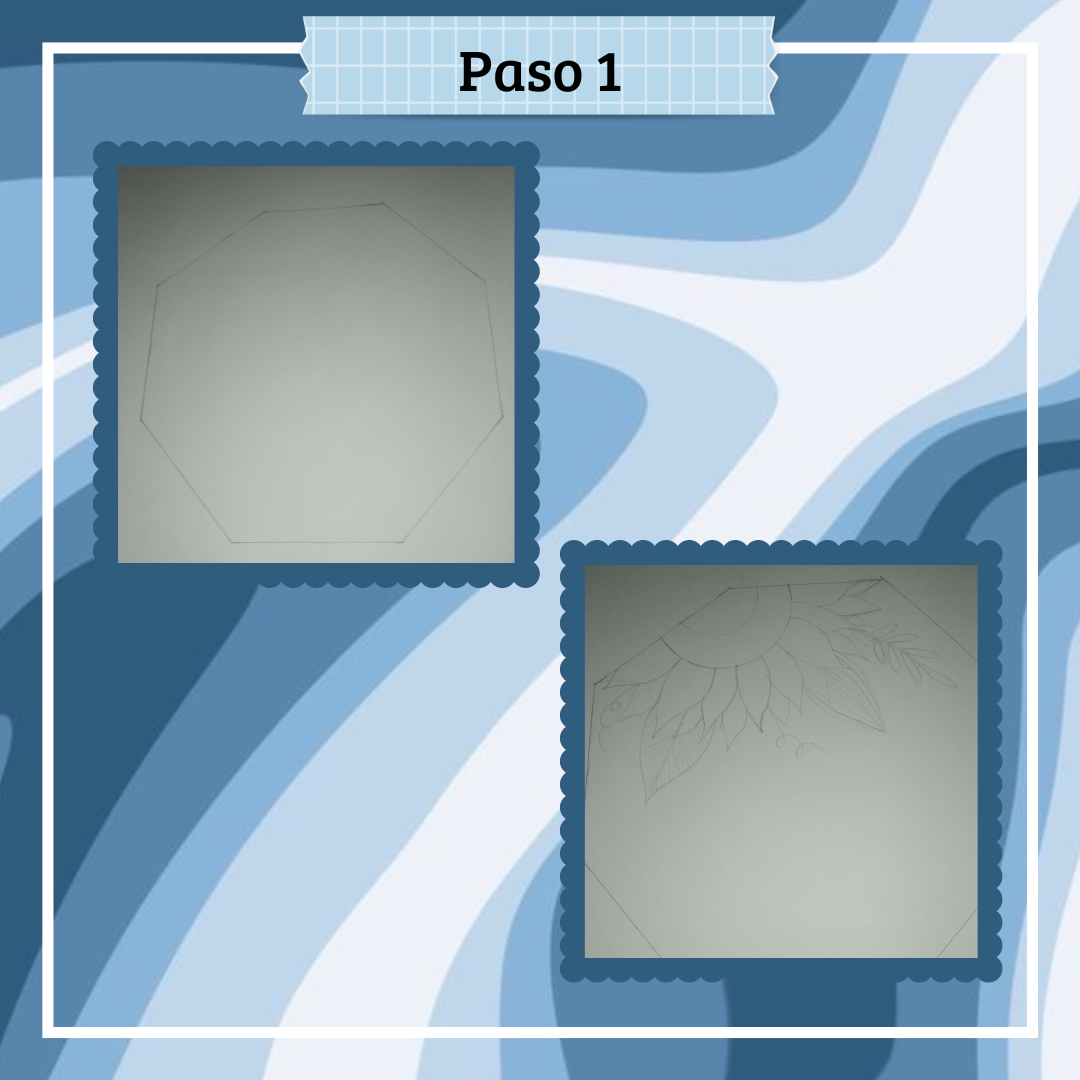
Paso 1:
Step 1:
Primeramente les muestro el boceto inicial que realicé, es básicamente mi guía, a la cuál le realizaré algunos cambios, después recorté la cartulina grande a la medida pedida por el profesor que fue de 30 cm de ancho, por 30 cm de largo (30x30), luego empezé en mi hoja de cartulina a trazar la forma de un octógono cambiando aquí unos aspectos del boceto, continuando seguí a realizar el boceto a lápiz del girasol y sus detalles para proceder a trabajar con el marcador y lapicero, que fueron mis herramientas en esta ocasión.
First I show you the initial sketch I made, it is basically my guide, to which I will make some changes, then I cut the large cardboard to the size requested by the teacher which was 30 cm wide by 30 cm long (30x30), then I started on my cardboard sheet to trace the shape of an octagon changing here some aspects of the sketch, then I continued to make the pencil sketch of the sunflower and its details to proceed to work with the marker and pen, which were my tools on this occasion.
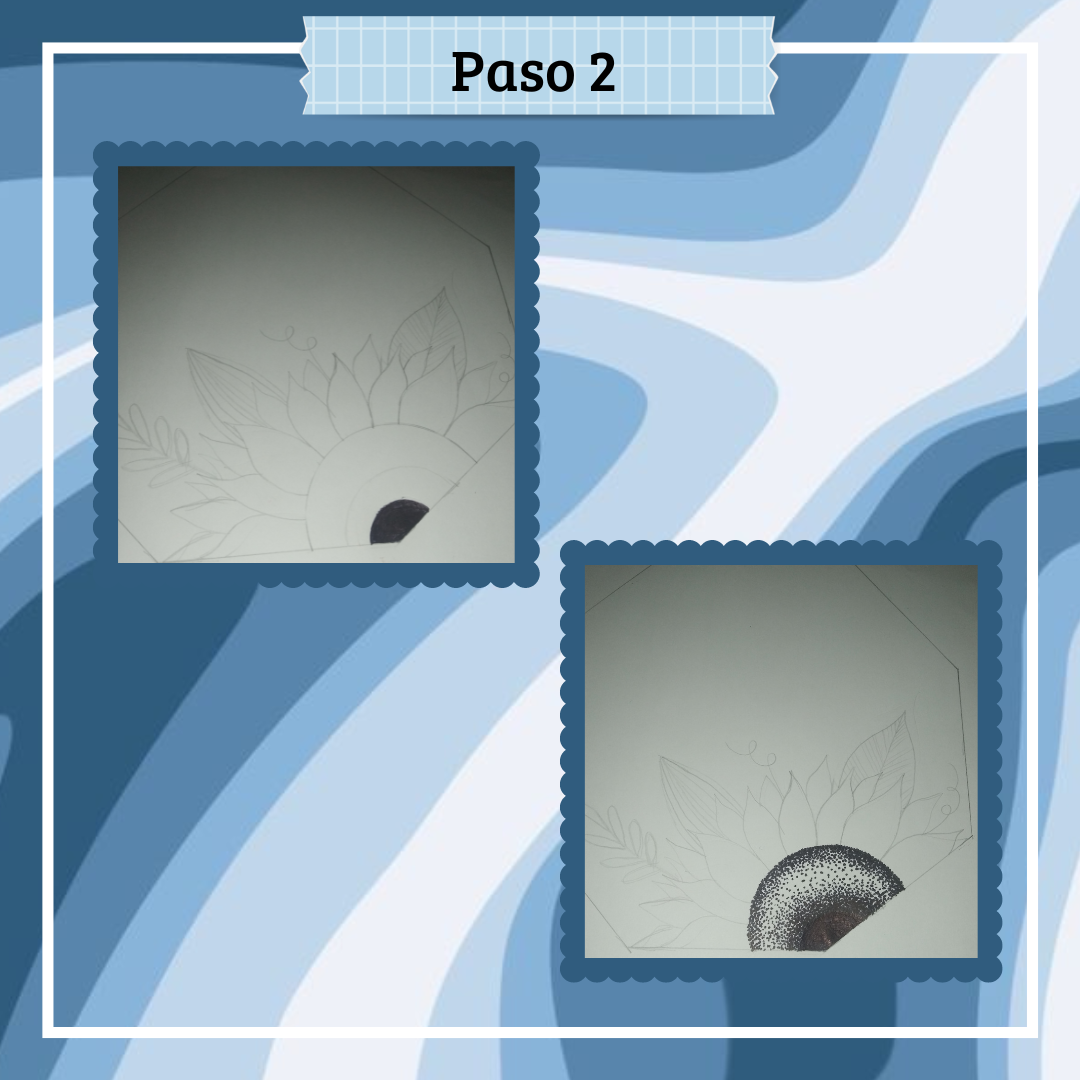
Paso 2:
Step 2:
Teniendo ya mi guía marcada, comencé a rellenar el círculo de la flor, está con lapicero en una sola dirección y luego procedí a realizar la técnica de puntillismo con marcador ya que con lapicero esta parte se complicaba más, así mismo empecé a hacer los puntos más pequeños y pegados, fui esparciendolos poco a poco, logrando que se note la leve difuminación, así hice de abajo hacía el centro, y de igual manera de arriba hacía el centro.
Having already marked my guide, I began to fill in the circle of the flower, it is with pencil in one direction and then proceeded to perform the technique of pointillism with marker as with pencil this part was more complicated, likewise I began to make the points smaller and stuck, I was spreading them little by little, making the slight blurring is noticed, so I did from the bottom to the center, and likewise from top to center
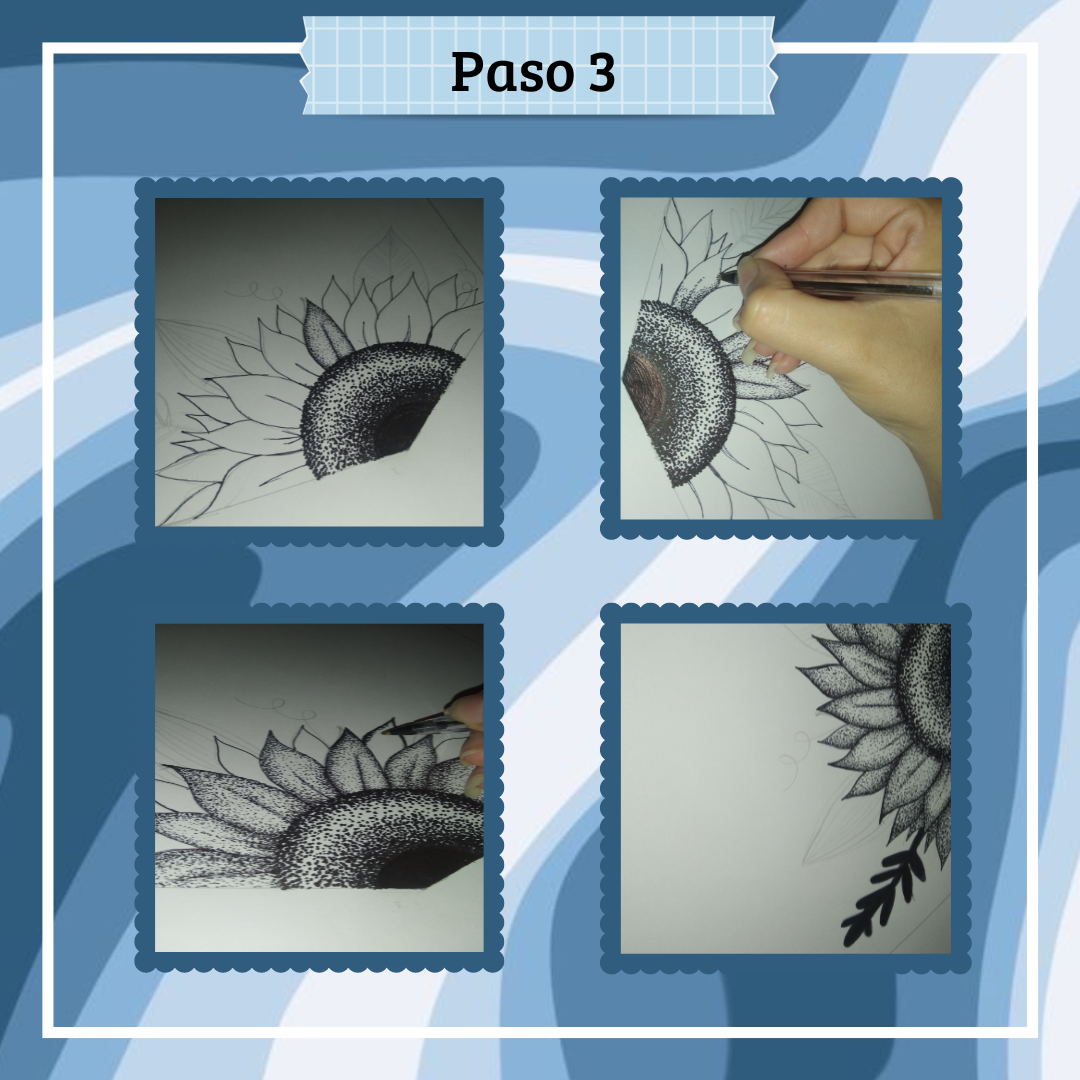
Paso 3:
Step 3:
Enseguida seguí a delinear cada pétalo con el lapicero de tinta negra, a lo que continúe a rellenar pétalo por pétalo utilizando la técnica de puntillismo, de igual manera para crear sombra difuminados, así fui haciendo por cada uno de ellos, tanto los de adelante como los de atrás, y procedí a marcar con marcador la rama de hojas, como pueden observar en la imagen.
Next I continued to outline each petal with the black ink pen, and then I continued to fill in petal by petal using the pointillism technique, in the same way to create blurred shadows, so I did for each one of them, both the front and the back ones, and I proceeded to mark the branch of leaves with marker, as you can see in the image.
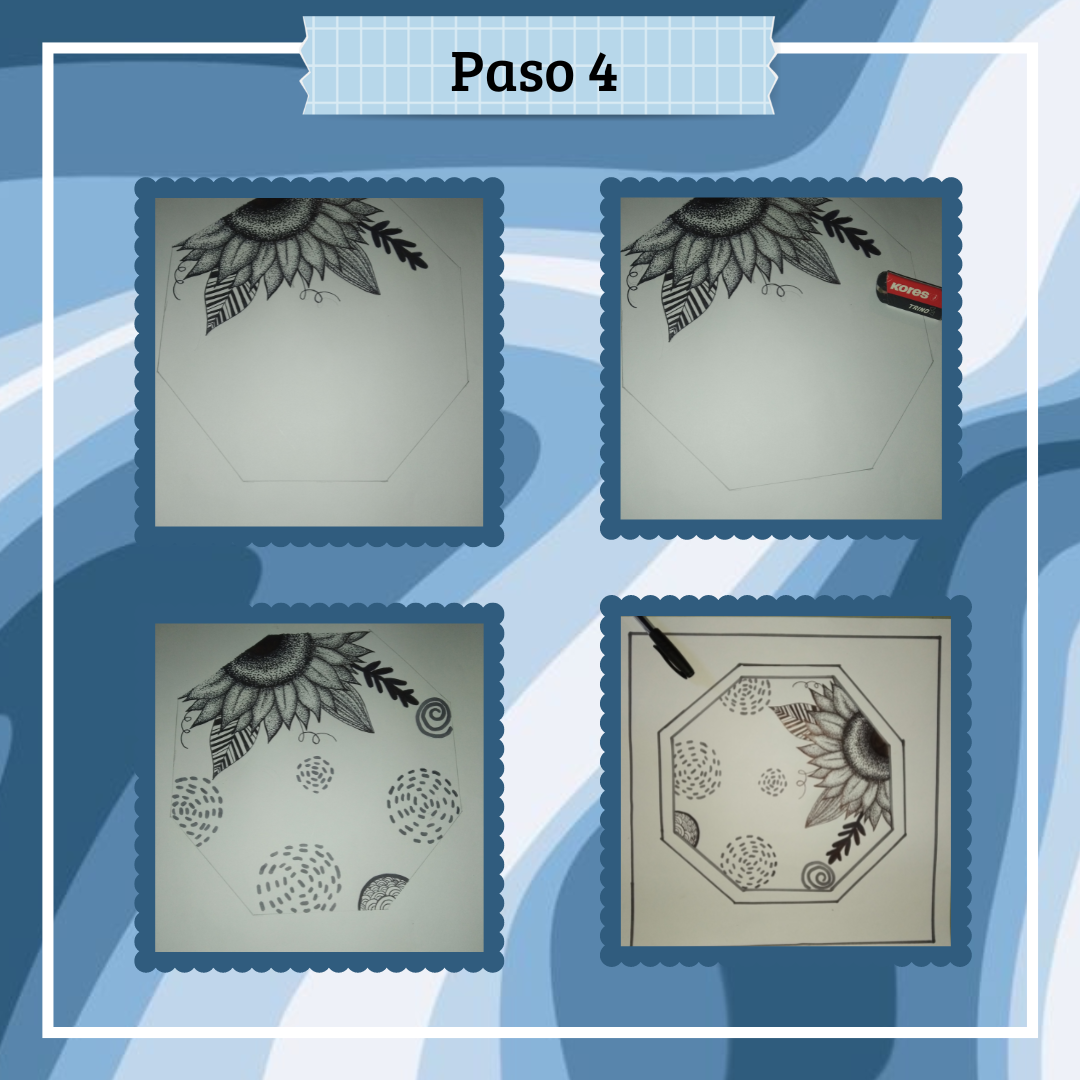
Paso 4:
Step 4:
Cómo último paso para terminar, marque con el lapicero las hojas que faltaban, por otra parte, continúe borrando con el borrador (sí, es negro, esta bonito) el lápiz, para que no quedará rastro de el mismo, y sentía que le faltaba algo, por lo que le agregué unos cuántos detalles, los cuáles fueron una clase de espirales hechos por líneas, formando un círculo, estos con el marcador. Así pues, le pase al borde de la figura nuevamente marcador (le hice doble borde), y por consiguiente termine haciendo un marco al cuadrado de 1.5cm, por todo el borde y así lo terminé.
As a last step to finish, I marked with the pencil the missing leaves, on the other hand, I continued erasing with the eraser (yes, it's black, it's nice) the pencil, so that there will be no trace of it, and I felt that something was missing, so I added a few details, which were a kind of spirals made by lines, forming a circle, these with the marker. So, I put the marker on the edge of the figure again (I made a double border), and therefore I ended up making a 1.5cm square frame, all around the edge and so I finished it.
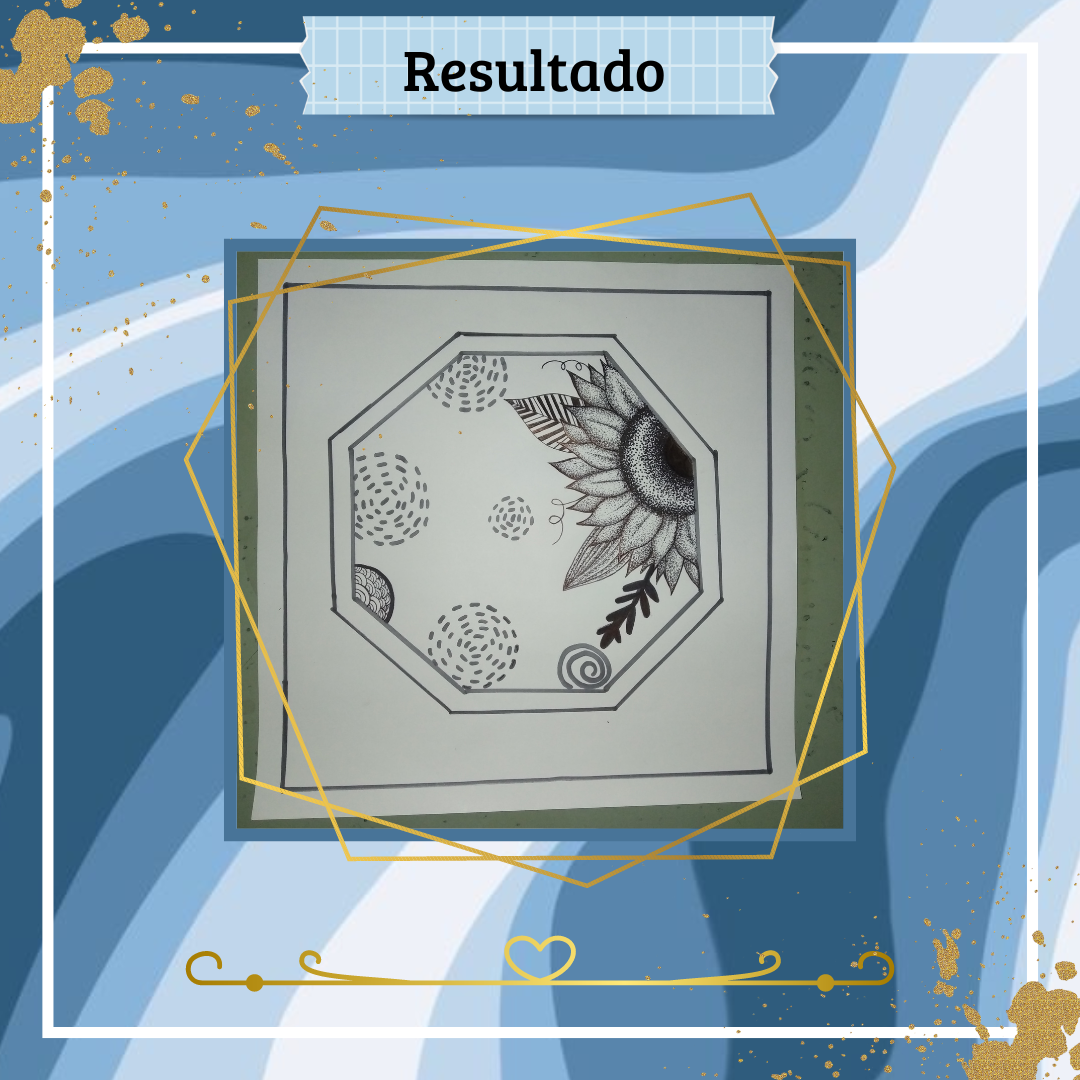
Y listo ¡finalizado el dibujo! Elegí hacer un girasol porque me encantan y quería plasmarlo en esta actividad, no obstante, les debo admitir que fue un poco cansado hacer tantos puntos, ya me dolían un poco los dedos, pero apesar de que se llevó su tiempo, valió la pena. El resultado me encantó definitivamente y vuelvo a repetir, que sin duda, disfrute de este proceso, yo feliz de resultado.♡
And that's it, the drawing is finished! I chose to make a sunflower because I love them and I wanted to capture it in this activity, however, I must admit that it was a little tiring to make so many stitches, my fingers were already a little sore, but even though it took some time, it was worth it. I definitely loved the result and I repeat, I enjoyed the process and I am very happy with the result.
Gracias por acompañarme hasta aquí, les envío un abrazo cargando de mucho amor, cariño y comprensión, los quiero.♡
Thank you for joining me here, I send you a hug full of love, affection and understanding, I love you ♡.
Muchísimas gracias por leer, ¡hasta la próxima! Mis bonitos, byee.♡
Thank you so much for reading, see you next time! My pretties, byee.♡
Desde hace un tiempo ya me uni a Discord, muy buen servidor. Gracias y saludos.💗
Congratulations @stefania16! You have completed the following achievement on the Hive blockchain and have been rewarded with new badge(s):
Your next target is to reach 40 posts.
You can view your badges on your board and compare yourself to others in the Ranking
If you no longer want to receive notifications, reply to this comment with the word
STOPTo support your work, I also upvoted your post!
Check out the last post from @hivebuzz:
Support the HiveBuzz project. Vote for our proposal!
Un trabajo impecable amiga. Gracias por compartir tu técnica
🎆🎇🎉🎊🌧️💐✨🌾🌱🌹🌙🌿🍃🥀⚡🌺☘️🍀🌈🌷⭐🪴🌵🌸🌟💮🌴🌳💫☀️💮☔🌲🌳🌍🌌🌠☄️🏵️🐝🌻🌼🍄🐞🦋💙☕💜🍍🎆🎇🎉🎊
Muchas gracias a ti por tu lindo comentario, saludos, amiga.💗
¡Felicidades! Esta publicación obtuvo upvote y fue compartido por @la-colmena, un proyecto de Curación Manual para la comunidad hispana de Hive que cuenta con el respaldo de @curie.
Si te gusta el trabajo que hacemos, te invitamos a darle tu voto a este comentario y a votar como testigo por Curie.
Si quieres saber más sobre nuestro proyecto, acompáñanos en Discord: La Colmena.
Muchas gracias, porsupuesto estaré encantada de saber más sobre su proyecto, con gusto me unire a Discord, saludos.💗
Es un trabajo de mucha presicion y paciencia, te quedó lindo. 🎉🎉🎉🎉
Así es, lleva su proceso, graciass, un abrazo.💗
Maravilloso tu dibujo amiga te felicito por ese gran talento.
Gracias amiga, un saludo.❣️✨
Hola amiga mía, muy lindo y perfeccionado este dibujo. Que mas, me encanto, toda una profesional del dibujo.
¡Holaa! Muchas gracias, poco a poco mejorando, saludos.💗