Hola amigos de la comunidad #HiveDiy Dios les bendiga. Espero que se encuentren muy bien y que esta semana que inicia sea de gran bendición para todos y cada uno de ustedes. Es un placer y un gusto estar de vuelta por acá en esta gran comunidad, y claro, como siempre con todo el ánimo y con la mejor actitud posible, dispuesto a aprender y claro, a compartir un poco de mis conocimientos con ustedes.
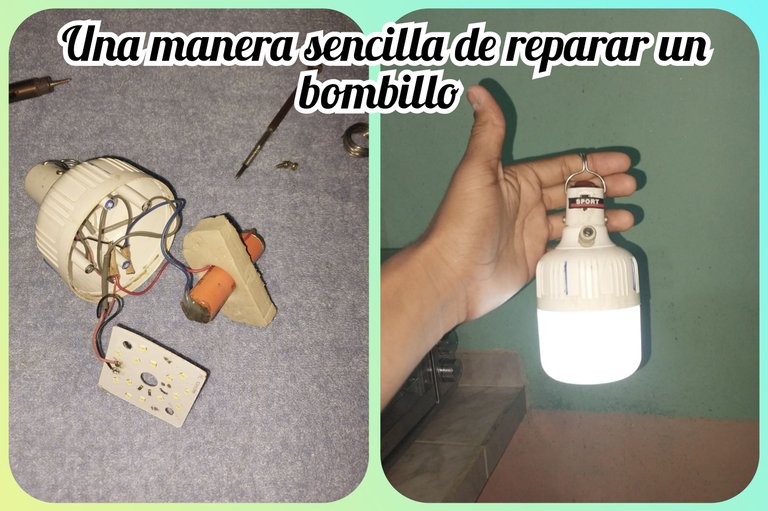
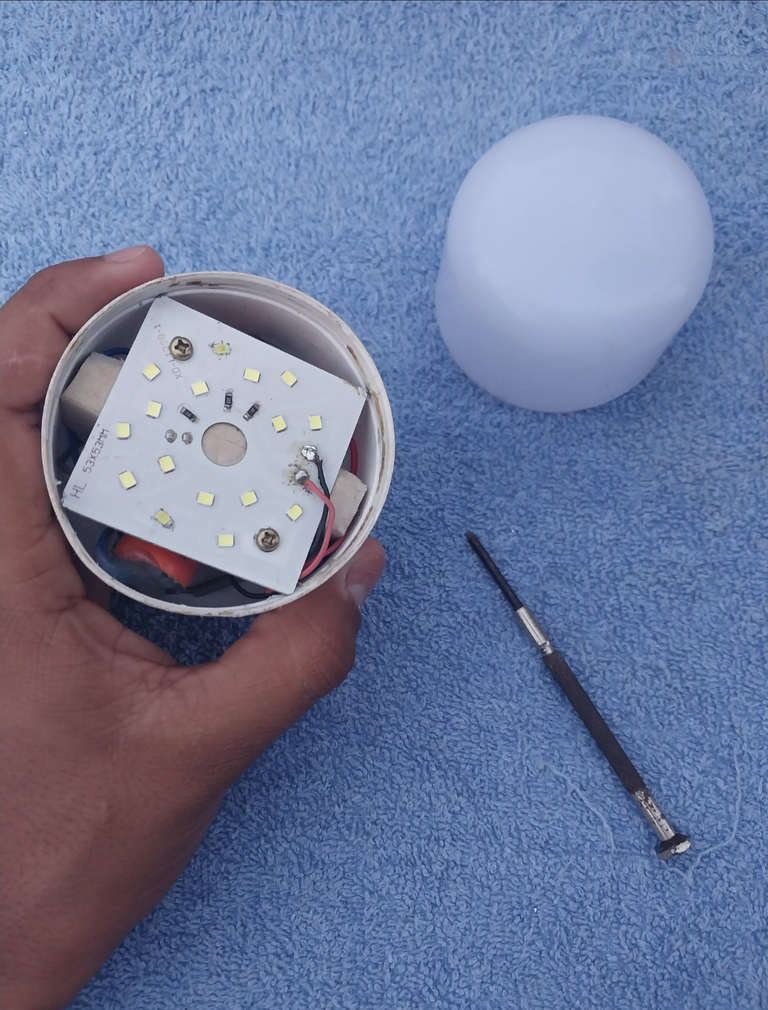
Para esta presentación, les quiero compartir algo bastante sencillo, pero sin duda alguna muy util. Les traigo como reparar un bombillo LED recargable; este mismo bombillo ya había sido reparado anteriormente, yo junto a un amigo le habíamos hecho algunas modificaciones, pero lo cierto es, que meses después empezó a fallar por otra causa y decidimos repararlo.
Hello friends of the #HiveDiy community. God bless you. I hope you are all doing well and that this week that begins is a great blessing for each and every one of you. It is a pleasure and a pleasure to be back here in this great community, and of course, as always with all the encouragement and with the best possible attitude, willing to learn and of course, to share a little of my knowledge with you.
For this presentation, I want to share something quite simple, but without a doubt very useful. I am showing you how to repair a rechargeable LED light bulb; this same bulb had already been repaired previously, I and a friend had made some modifications to it, but the truth is that months later it began to fail for another reason and we decided to repair it.
MATERIALES
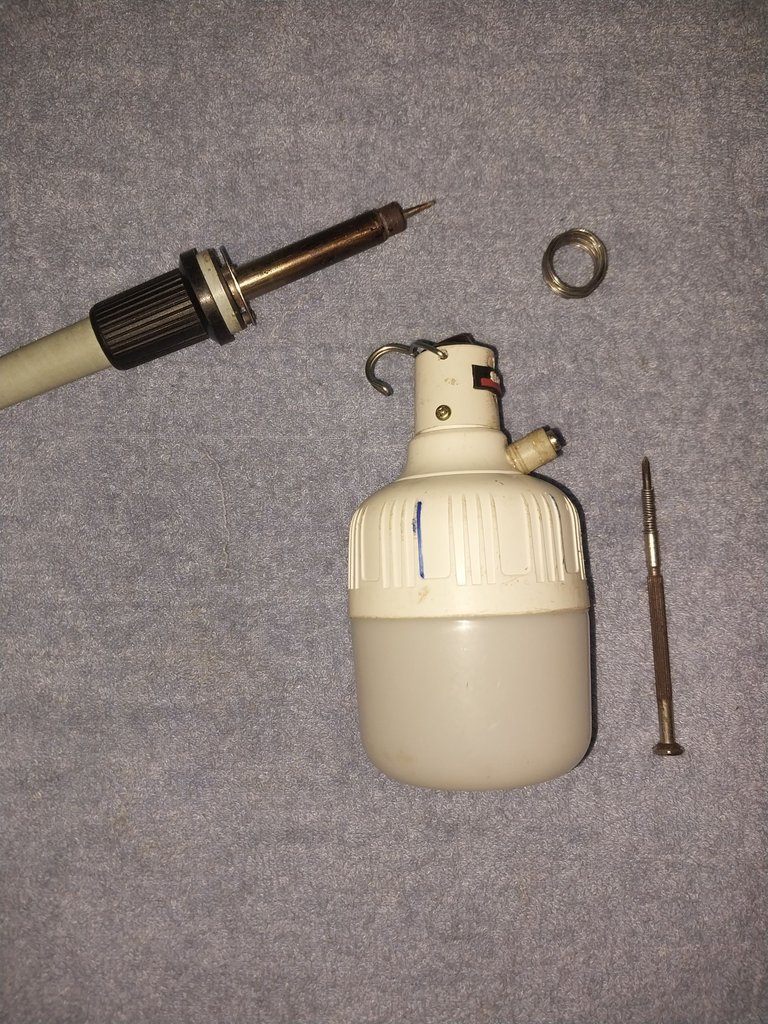
Los materiales utilizados fueron, un cautin, estaño, un destornillador de estría, y claro el bombillo recargable.
MATERIALS
The materials used were a soldering iron, tin, a flat-head screwdriver, and of course the rechargeable light bulb.
PREPARACIÓN
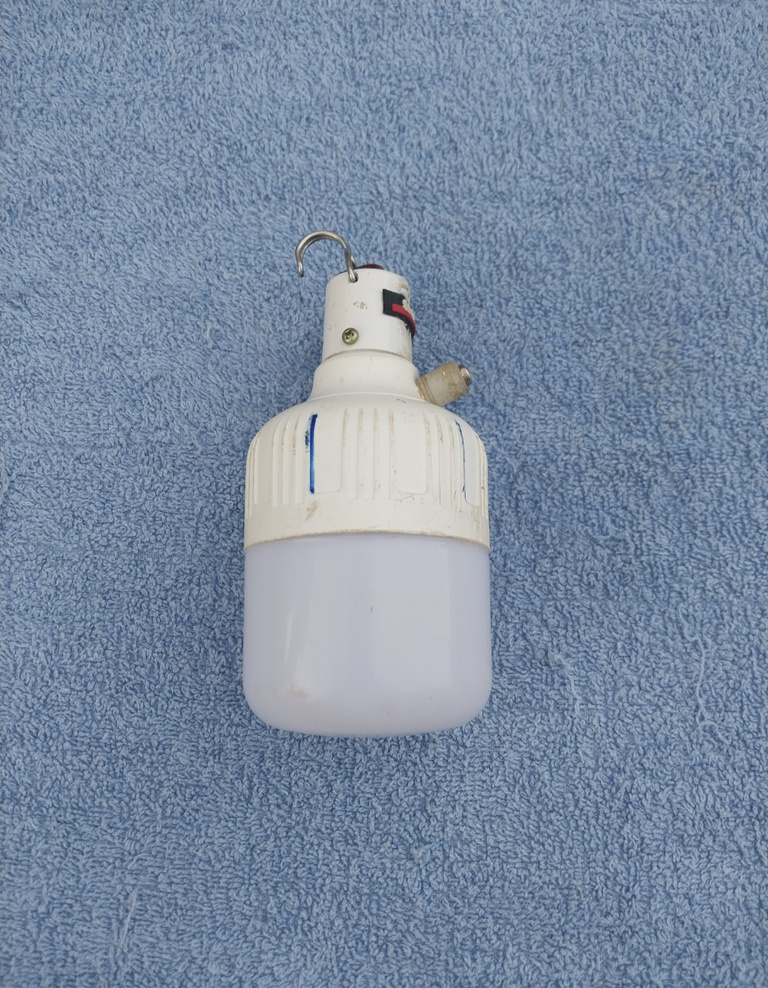
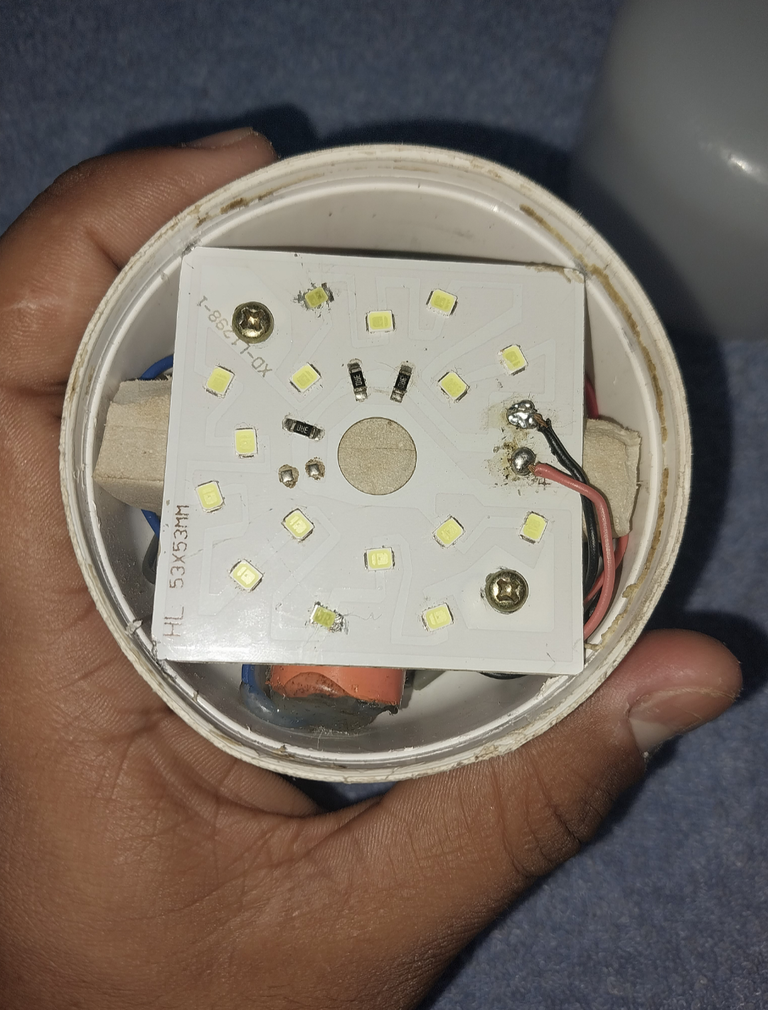
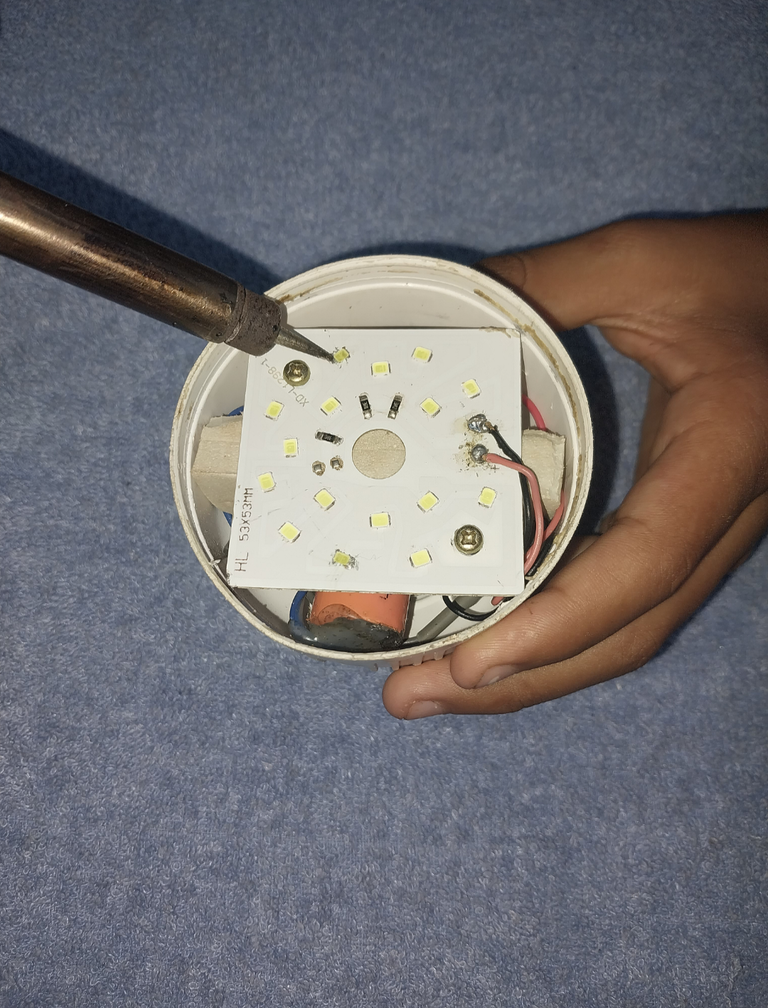
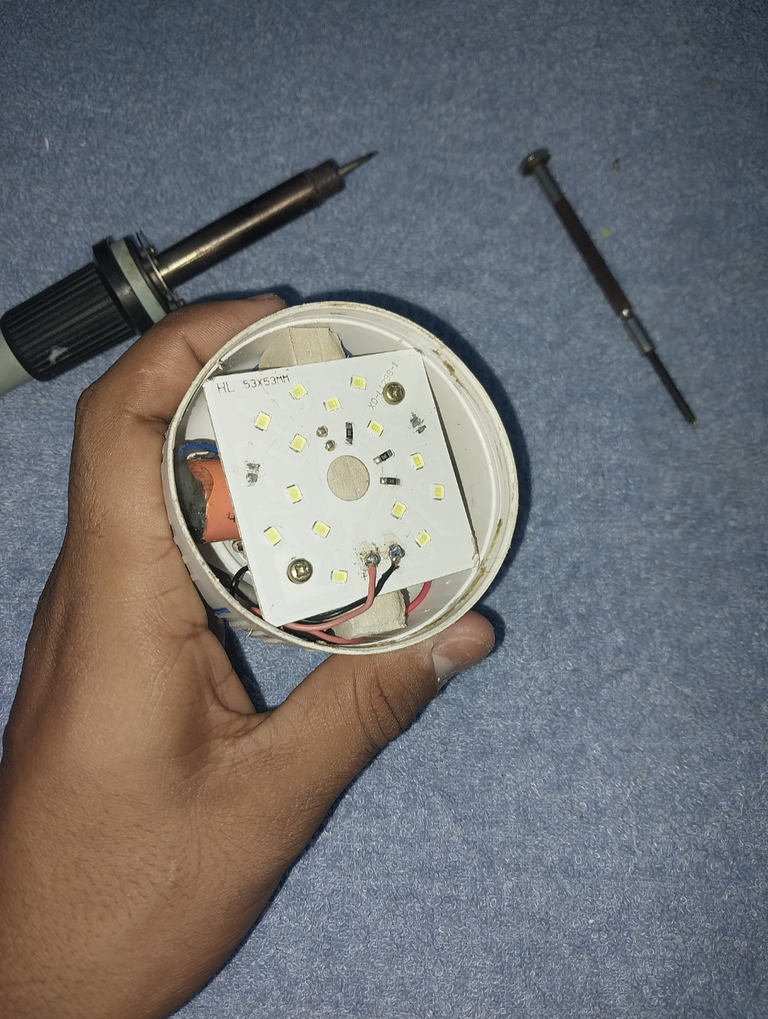
La falla que había empezado a presentar el bombillo era que encendía, solo que alumbraba de forma muy opaca, osea muy mínimo; así que lo primero que hice fue aplicar presión para quitar la tapa del bombillo, al quitarla pude ver inmediatamente los problemas; lo primero fue que 2 de las LED estaban quemadas, así que tome el cautin, y aplique la punta sobre ambas para retirarlas de la placa, porque resulta que si una de las LED está quemada o no funciona, eso afecta todo el circuito y hace que toda la placa falle.
PREPARATION
The fault that the bulb had started to present was that it turned on, but it illuminated in a very dim way, that is to say very minimal; so the first thing I did was apply pressure to remove the cover of the bulb, when removing it I could immediately see the problems; the first thing was that 2 of the LEDs were burned, so I took the soldering iron, and applied the tip on both to remove them from the board, because it turns out that if one of the LEDs is burned or does not work, that affects the entire circuit and causes the entire board to fail.
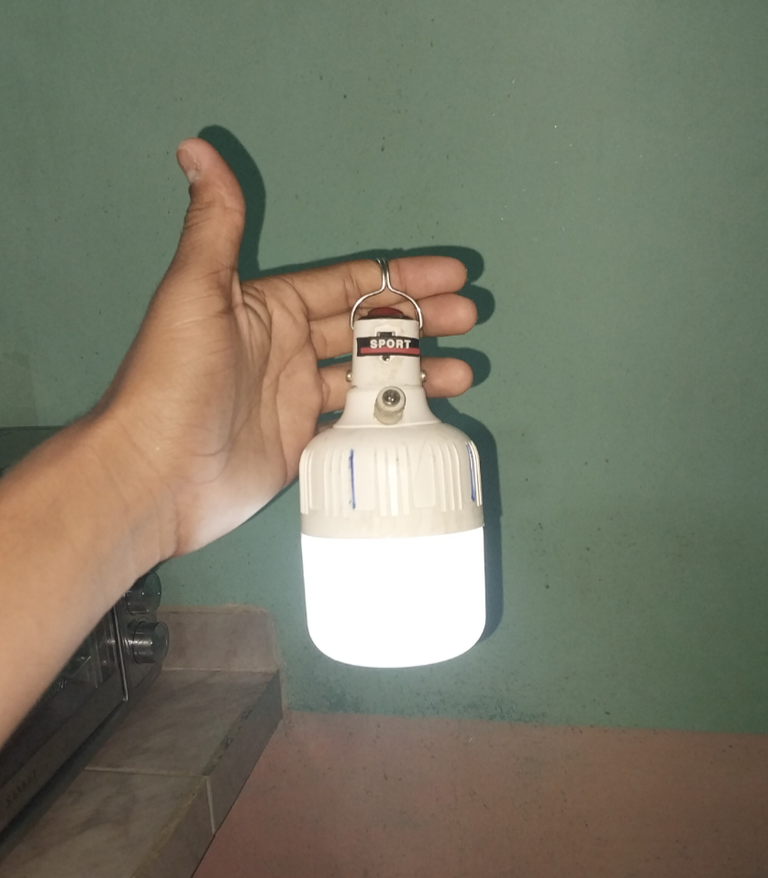
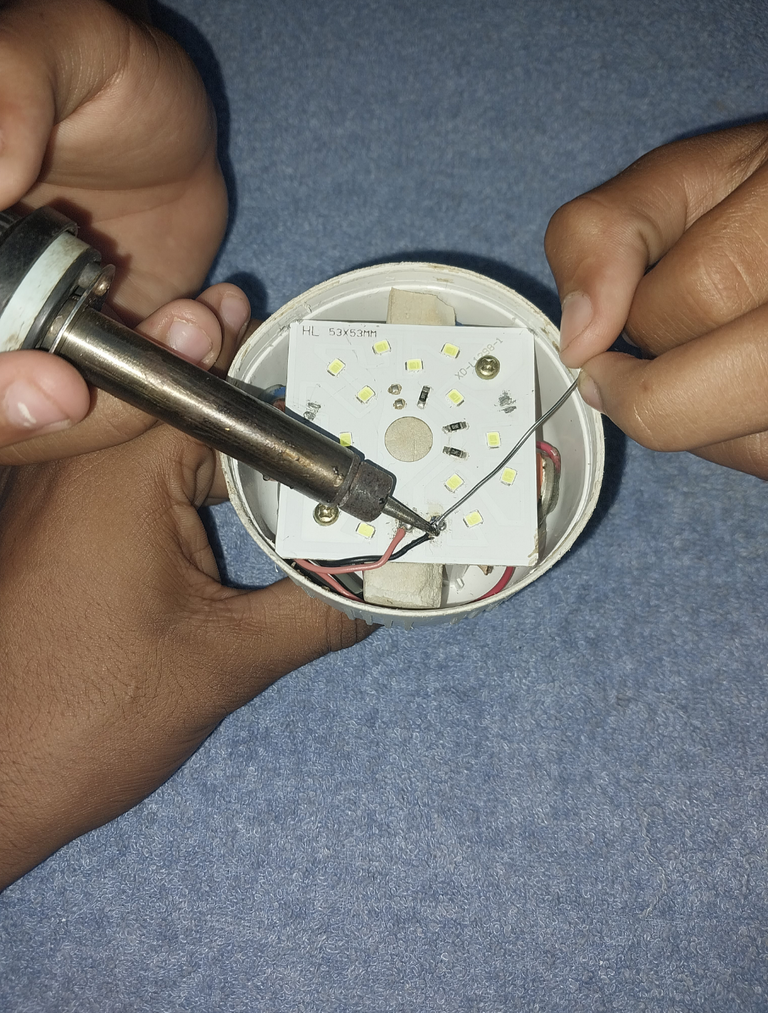
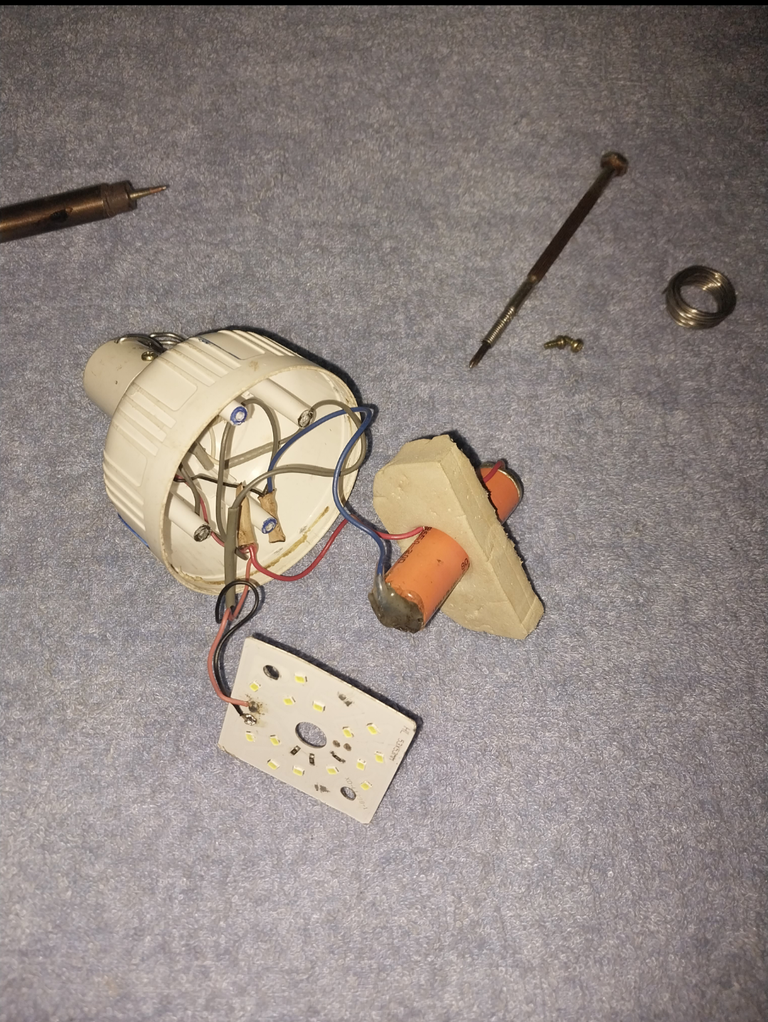
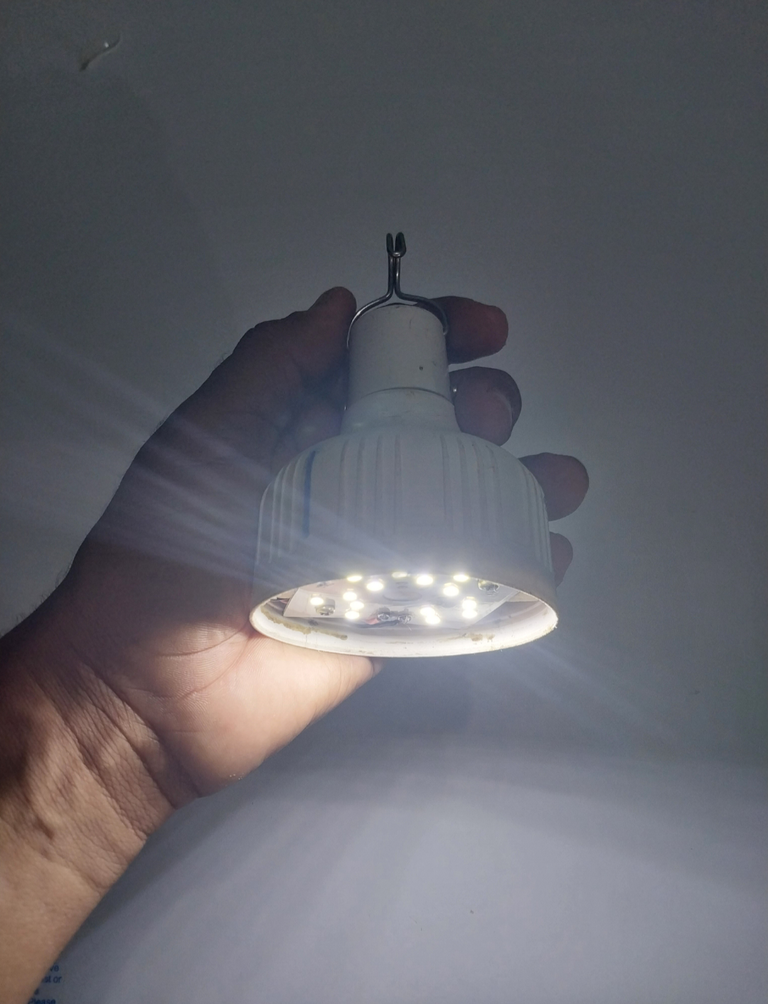
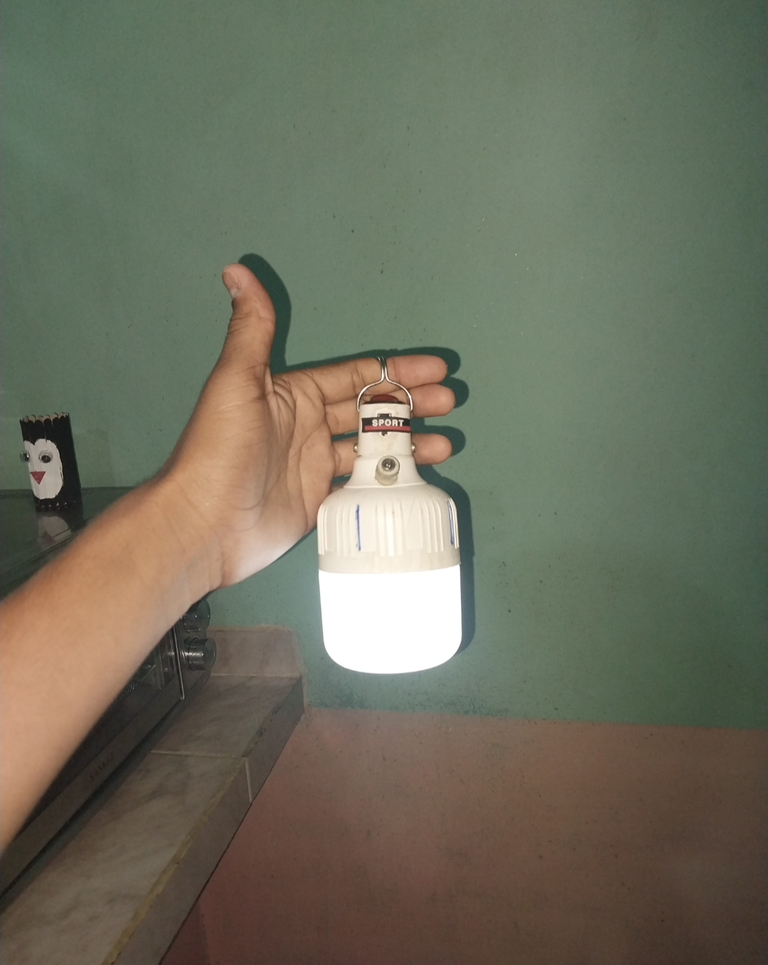
luego, tome el cautin y estaño y aplique un punto de soldadura sobre los cables que están soldados en la placa, ya que estaban algo flojos, y eso también hacía que el bombillo funcionará de forma intermitente, y después con el destornillador quita la placa de la base para verificar que la batería estuviese bien conectada, pero allí todo estaba bien, así que procedí a armar el bombillo y claro a encenderlo, y gracias a Dios quedo excelente.
Then, take the soldering iron and tin and apply a spot of solder on the wires that are soldered to the board, since they were somewhat loose, and that also caused the bulb to work intermittently, and then with the screwdriver remove the base plate to verify that the battery was well connected, but there everything was fine, so I proceeded to assemble the bulb and of course turn it on, and thank God it turned out great.
Y bueno espero que este tutorial les sea de mucha ayuda, y gracias por pasar, Bendiciones, y hasta la próxima.
And well, I hope this tutorial is very helpful, and thanks for stopping by, Blessings, and until next time.

Posted Using InLeo Alpha
Translated with https://www.deepl.com/translator
recuerda que si quitas leds la intensidad sobre los restantes aumenta si no se reemplazan (cosa que es muy difícil ) asi que deberias agregar algo al circuito para reducir la intensidad ,de lo contrario se va a calentar demasiado y durar poco.
En una ocasión traté de agregar un filtro o otra bombilla, ya que había pasado lo mismo y quería tratar de contrarrestar la energía demás, lo cierto es que se me hizo algo gravoso, y decidí dejarlo tal cual sin el filtro... y la verdad es que el bombillo duro mucho tiempo, y sin tantas complicaciones, osea algo práctico y efectivo.
Your tutorial would be helpful to people who often dispose their rechargeable LED lights after it goes bad. Good job friend!
Muchas gracias por el apoyó! Y Así es! Y lo mejor de todo es que es sumamente fácil y sencillo. Saludos y Bendiciones.
Muy bueno!! Gracias por.compartir
Muchas gracias hermano!