✨🍫♥️¡Hola amigos amantes de la creatividad! Espero que hayan pasado un muy buen comienzo de semana.♥️🍫✨
🔸Sin más que añadir, a continuación los dejo con el paso a paso:
✨🍫♥️¡Hello friends who love creativity! I hope you had a very good start to the week.♥️🍫✨
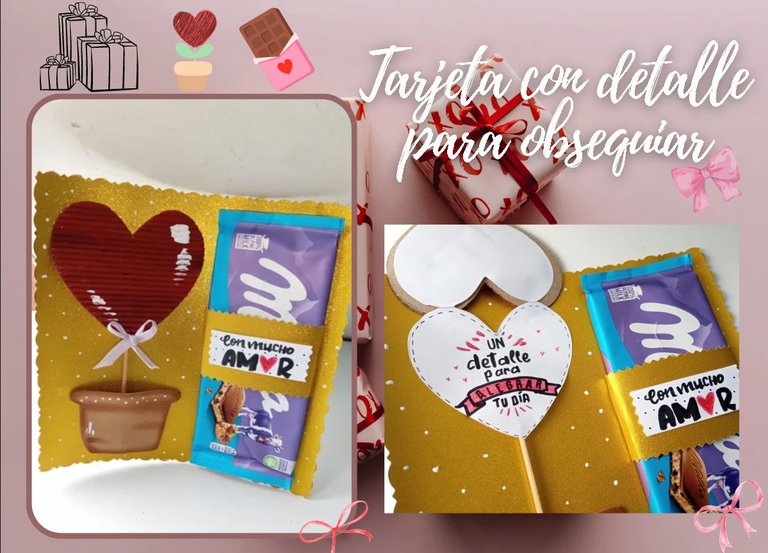
¡Good afternoon friends! I hope you are having a great week. Today I share with you the step by step to make a beautiful card with detail. A few days ago, while I was looking at my networks, many ideas tend to appear to me that serve as inspiration and this one was no exception; Well, a nice idea appeared to me to give a small detail, of course that one was decorated very differently, because I wanted to write the message in the heart and make a different decoration, well, although that was a great idea, I wanted to make the decoration my taste.
On the other hand, I think it is a very nice idea to give a little detail to someone for whom we have a lot of appreciation, it can even be one of those details that are given any day to make a nice smile.
🔸Without more to add, then I leave you with the step by step:
♥️ESPERO QUE TE GUSTE,
¡Empecemos!
♥️I HOPE YOU LIKE IT,
Let's start!

✂️ MATERIALES | ✂️ MATERIALS
- Cartulina escarchada dorada.
- Cartulina corrugada roja.
- Foami marrón.
- Palito de altura.
- Marcadores y pinturas.
- Cinta delgada.
- Chocolate.
- Pegamento.
- Tijeras.
- Regla.
- Lápiz.
- Gold frosted cardstock.
- Red corrugated cardboard.
- Brown foam.
- Tall stick.
- Markers and paints.
- Thin tape.
- Chocolate.
- Glue.
- Scissors.
- Ruler.
- Pencil.
🎁 PROCEDIMIENTO | 🎁 PROCESS
- PASO 1:
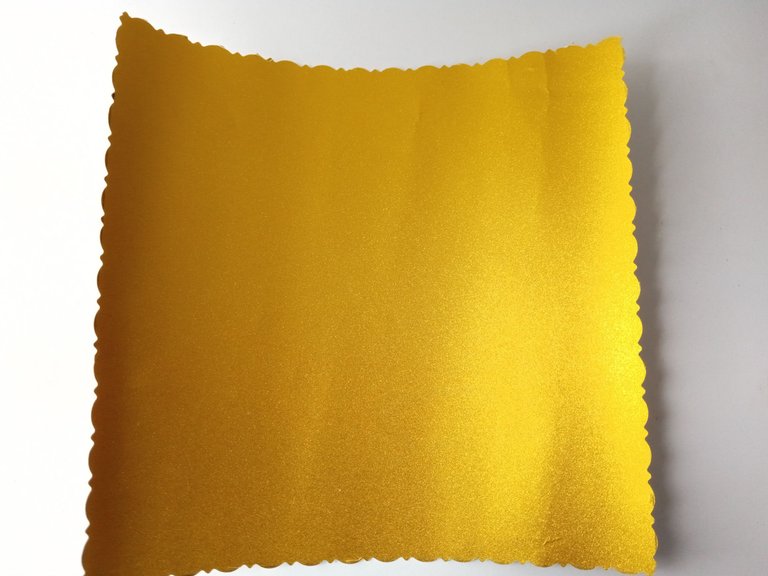
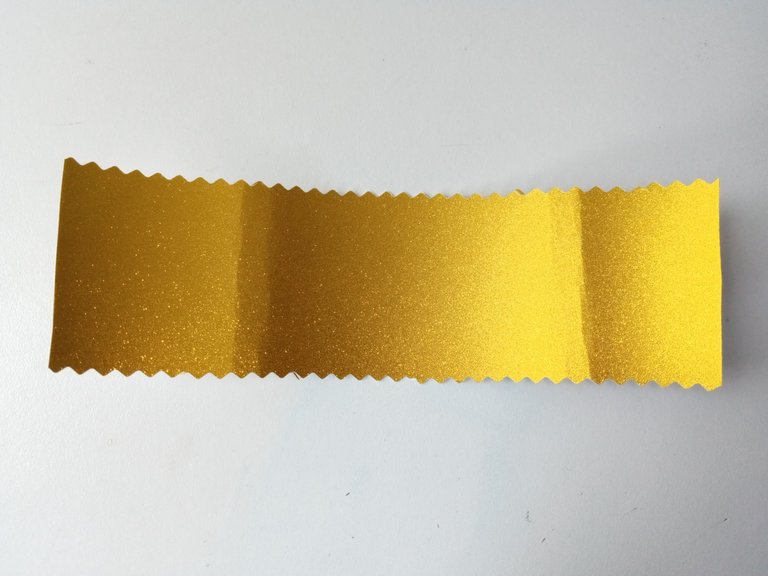
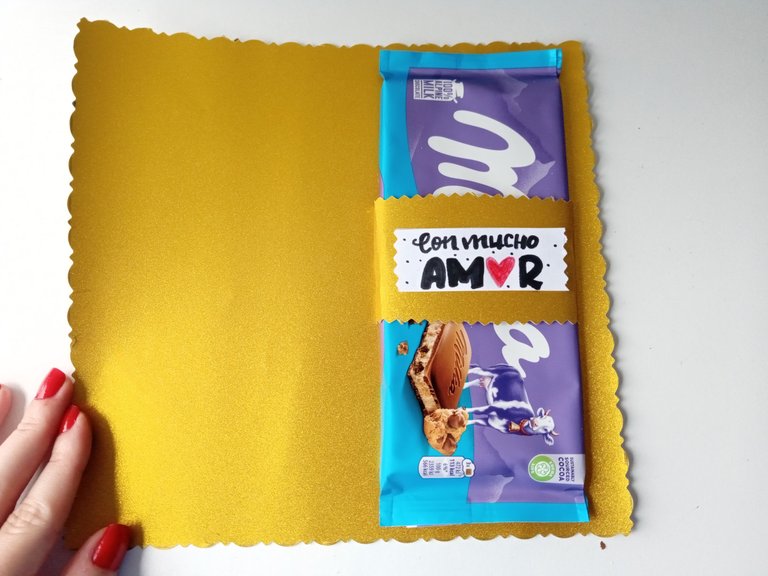
Lo primero que debemos hacer es tomar la mediada de la tarjeta, todo depende del tamaño del chocolate o golosina que vamos a obsequiar y le sumamos un espacio extra para la decoración. En mi caso, tomé la cartulina escarchada dorada y las medidas fueron las siguientes: 22.5 cm x 22 cm. Luego, recorté los bordes de la tarjeta con unas tijeras con diseño. También, recorté una pieza en cartulina escarchada dorada de 17 cm x 5 cm y recorté los bordes con tijeras con diseño. Igualmente, esta pieza es la que va a rodear la parte central del chocolate para poder escribir un mensaje, así que también depende del tamaño del chocolate o golosina que vamos a obsequiar.
- STEP 1:
The first thing we must do is take the size of the card, it all depends on the size of the chocolate or candy that we are going to give as a gift and we add extra space for decoration. In my case, I took the gold frosted cardboard and the measurements were as follows: 22.5 cm x 22 cm. Next, I trimmed the edges of the card with patterned scissors. Also, I cut out a 17cm x 5cm piece of gold frosted cardstock and trimmed the edges with patterned scissors. Likewise, this piece is the one that will surround the central part of the chocolate to be able to write a message, so it also depends on the size of the chocolate or candy that we are going to give as a gift.
- PASO 2:
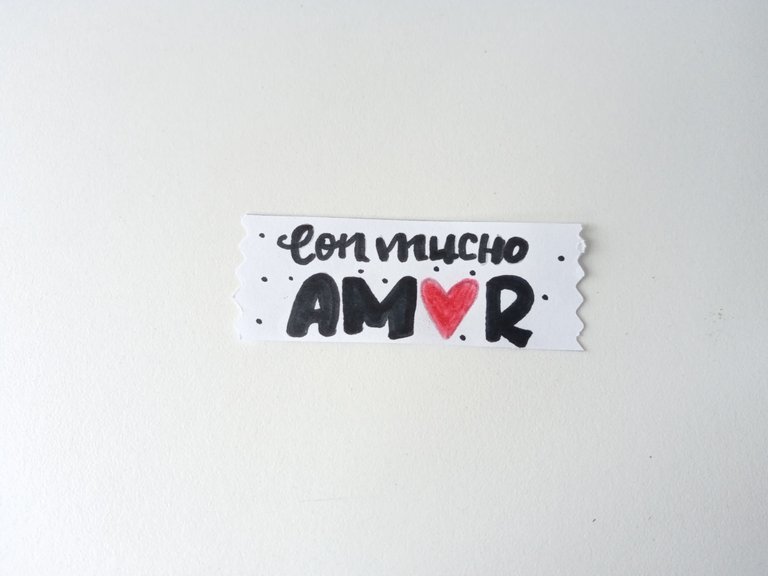
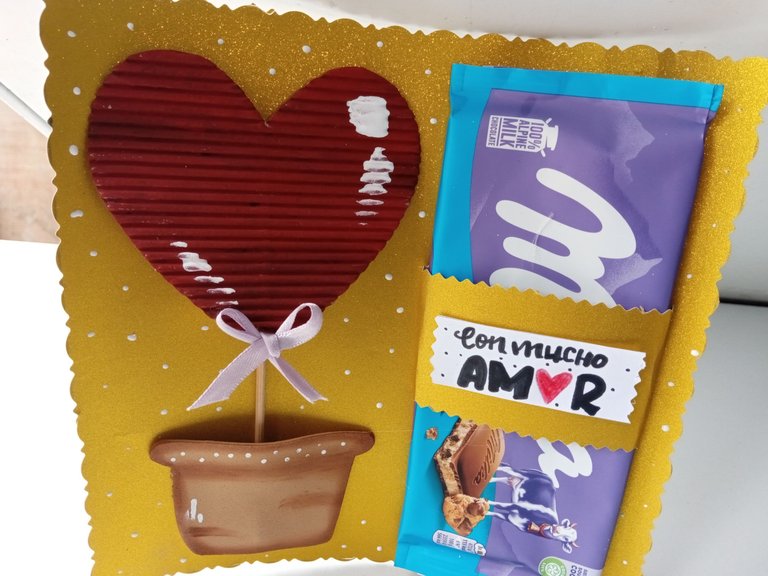
Recorté un rectángulo en hoja blanca de 6 cm x 2.5 cm, escribí un mensaje, remarqué con marcador negro y pegué en medio de la pieza más pequeña de cartulina dorada, la cual pegué al rededor del chocolate. Luego, apliqué pegamento en la parte trasera de la cartulina dorada y pegué en uno de los laterales de la tarjeta de forma vertical.
- STEP 2:
I cut out a rectangle of 6 cm x 2.5 cm white paper, wrote a message, highlighted with a black marker and glued it in the middle of the smallest piece of gold cardboard, which I glued around the chocolate. Then, I applied glue to the back of the gold cardstock and glued it to one of the sides of the card vertically.
- PASO 3:
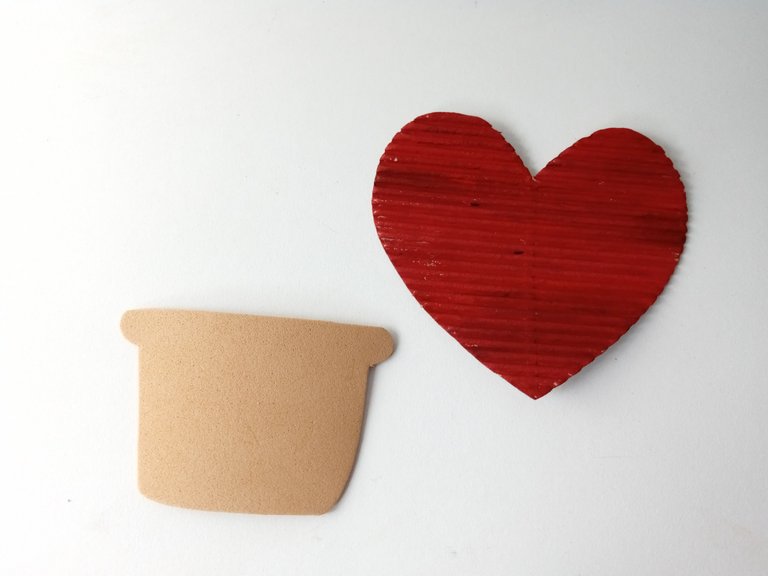
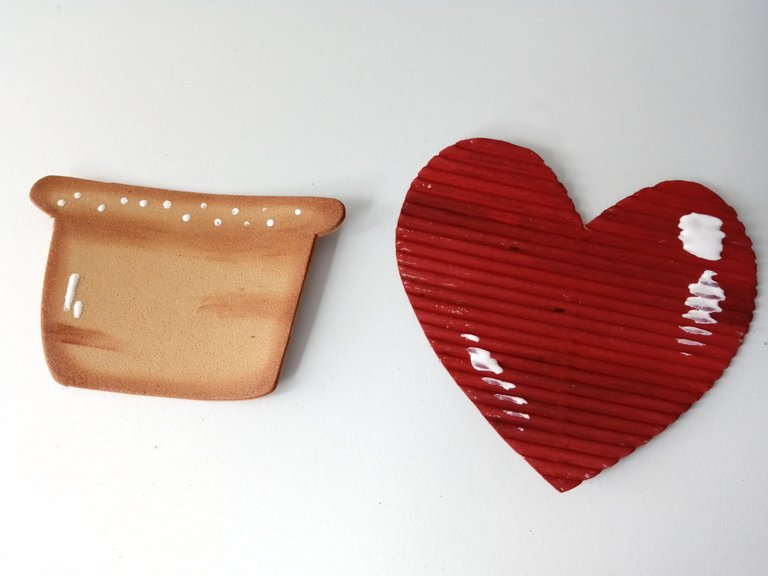
Ahora vamos con la decoración, dibujé un corazón en cartulina corrugada roja de 9.5 cm de ancho. También, dibujé y recorté en foami marrón una maceta. Para darles más detalles, apliqué un poco de pintura marrón a la maceta y dibujé algunos puntos en la parte superior, al igual que al corazón.
- STEP 3:
Now let's get to the decoration, I drew a heart on red corrugated cardboard 9.5 cm wide. Also, I drew and cut out a flower pot in brown foam. To give them more details, I applied some brown paint to the pot and drew some dots on the top, as well as the heart.
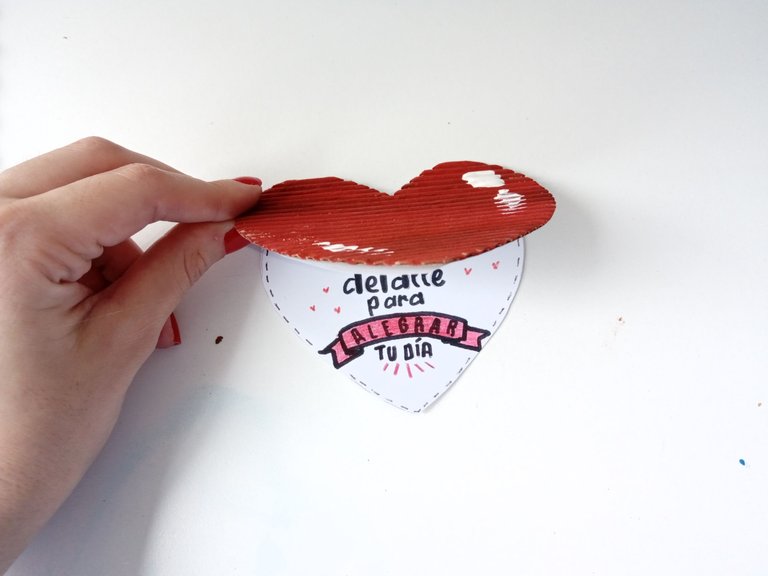
- PASO 4:
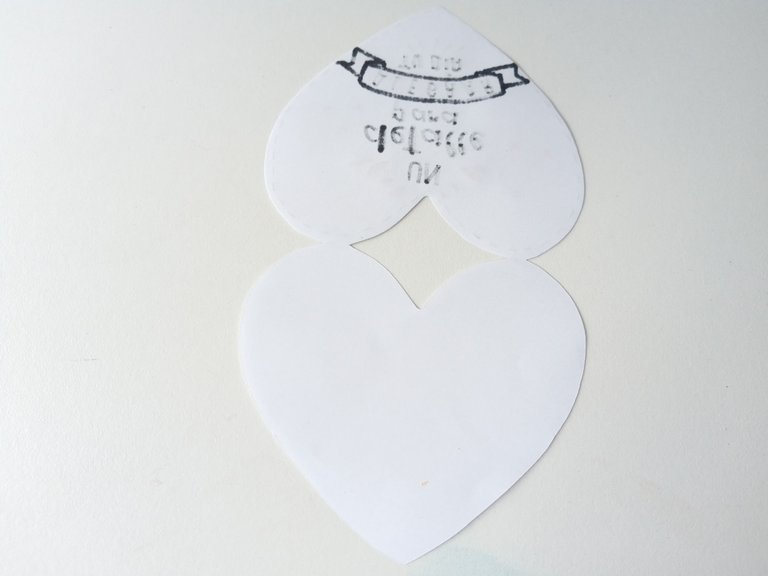
Luego, dibujé un corazón en hoja blanca, 0.5 cm más pequeño que el corazón anterior. Después, doble la hoja a la mitad para así hacer dos corazones y, por último, recorté, menos, los bordes superiores para que se mantenga unido. Escribí un mensaje en uno de los corazones y la otra parte la pegué al corazón corrugado.
- STEP 4:
Then, I drew a heart on white paper, 0.5 cm smaller than the previous heart. Next, I folded the sheet in half to make two hearts and, finally, I trimmed less of the top edges so that it stays together. I wrote a message on one of the hearts and glued the other part to the corrugated heart.
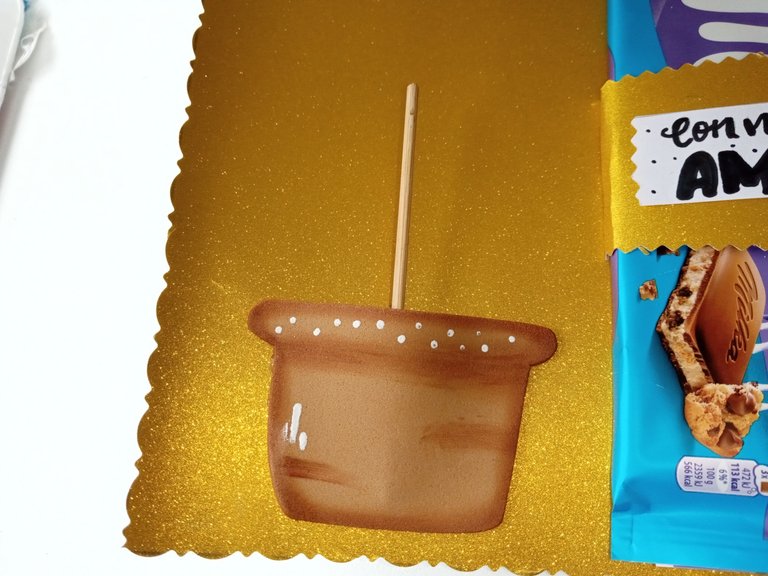
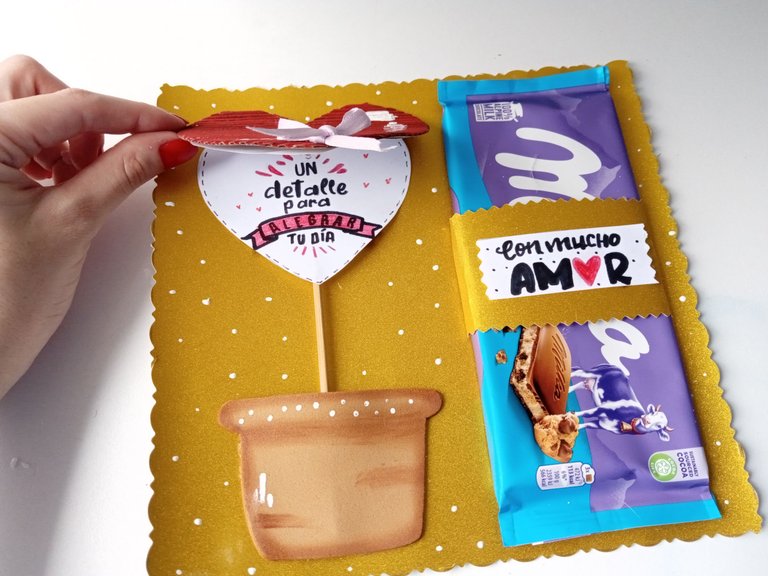
- PASO 5:
Una vez listo, comencé a pegar las piezas de la siguiente manera: la maceta en la parte baja, dejando una abertura en medio para insertar el palito de altura, por último, el corazón con el mensajito, aplicando el pegamento en la hoja y pegando sobre el palito de altura. Después, hice un lazo con cinta delgada, pegué justo en la parte baja del corazón y también, hice puntos blancos por toda la cartulina dorada.
- STEP 5:
Once ready, I began to glue the pieces in the following way: the pot at the bottom, leaving an opening in the middle to insert the tall stick, lastly, the heart with the little message, applying the glue to the leaf and gluing on the height stick. Then, I made a bow with thin ribbon, glued it right at the bottom of the heart and also made white dots all over the gold cardboard.
✨🍫♥️¡And ready!♥️🍫✨ This way you can make a nice and easy gift card to give a nice detail to a loved one. They can let their imagination fly and create the decoration they like the most. I hope you liked the step by step and are encouraged to make it.
❤️Until the next post.
✨RESULTADO: | ✨RESULT:


Todas las fotografías son de mi propiedad.
Separador y Fotos editadas en Canva
All photographs are my property.
Photos edited in Canva
Ami, qué bello,me encantó!!
Me gusta mucho para darle a mis hijos un detallito el día del niño.
Gracias por compartir
Ameeee que belleza de tarjeta ami, te quedó demasiado linda y tierna, cad detalle es perfecto ami, te pasaste con esta tarjeta 😍
Me encanta que le hayas dado tu propio toque amii, te quedo BELLISIMA como todo lo que haces😍😍 amo que el corazoncito tenga el mensaje asi oculto jeje mas lindo
Ojalá yo tuviera esa inspiración Ami jaja. Te quedó hermosa la tarjeta 😍
Mi Eve, tu dices eso pero yo pienso que si te animaras un día a crear cositas, te saldrían hermosas. Te mando un abrazote.💕
Pero que belleza es esto amiga, demasiado hermosa🥰🥰🥰
Muchas gracias mi Yage 🤭💕. Pensando aquí, sería una idea bastante tierna y sencilla por si la quieres agregar a tu emprendimiento 💖
Me gustó mucho tu tarjeta amiga, oye a tomar la idea para regalito del día de las madres de las maestras de mis niñas.
Eso es verdad amiga, es una bonita idea para el día de las madres, estoy segura de que si lo intentan les quedará muy bonita 💕
Me encantan tus tarjetas porque son bellas y motivan a dar cualquier detalle. Ya sea solo una cartita o junto a un dulcito ❤️❤️
Así es mi Albi.🤭 Además es bastante fácil de elaborar y económica 💕. Muchas gracias por el comentario ✨💕
Una tarjeta cargada de amor, te quedo estupenda, un detalle siempre te cambiará el día.
Muchas gracias,amiga! Así es, un pequeño detalle siempre puede alegrar el día. Me alegra mucho que te haya gustado. Saludos ✨💕
Esta tarjeta esta increible amiga, es una linda idea para entregar un chocolate acompañado de un lindo mensaje y una linda presentación, gracias por compartir la idea 😍
Totalmente, es una idea sencilla, pero tierna para endulzar la vida y dejar un lindo mensajito. Gracias por comentar bella! 💕
Que belleza mi Valen, el mensajito escondido me pareció tan hermoso 😍 Super linda y creativa como siempre.
Sí, esa decoración me gustó mucho y me alegra que a ti también te haya gustado Ami 💖. Gracias por pasarte mi Vane ✨💕
Que bonita y creativa, especial para regalar como un pequeño detalle, te quedo muy linda, saludos.
Muchas gracias, amiga! Me alegra que te haya gustado esta linda idea.
Saludos 💕
Amiga de mi corazón, sin duda que esta es una idea que estaré utilizando jaja fácil y hermosa!
¿Como esperar menos de ti? Siempre creas hermosuras 🩷🩷🩷
Ay ! Si quedo bien linda, cierto? Pero bueno... Ya sabes 😞
Tu también haces unas bellezas únicas amiga de mi corazón ❤️❤️
Very amazing 😍😍