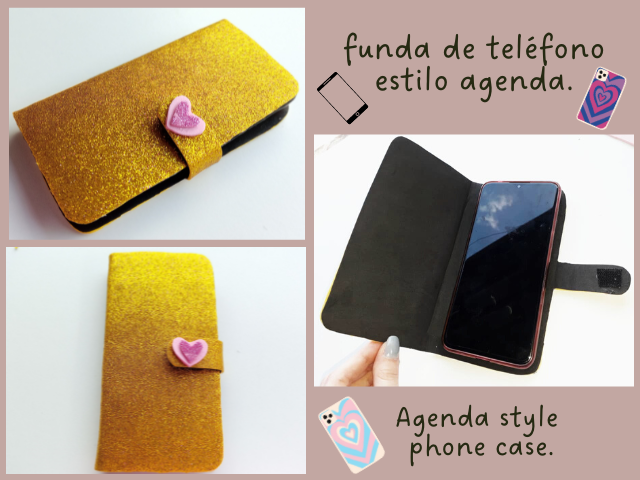
✨💕📱Hola amigos, amantes de la creatividad. Espero que hayan tenido un buen comienzo de semana.📱💕✨
El día de hoy comparto con ustedes el paso a paso para elaborar esta bonita funda o forro tipo agenda. Hace muchos años quería uno de estos forros para el teléfono, me parece ideal a la hora de salir guardar el teléfono ahí y que éste no tenga contacto con otros objetos que llevemos en nuestro bolso y que provoquen un rayón en el teléfono. Aparte protege de otros factores como: golpes, salpicaduras de agua, etc. Me parece una gran forma de proteger nuestro teléfono y aparte; si estamos cansados de nuestro forro, podemos decorarlo como queramos, o la cantidad que queramos, con distintos diseños.
🔸A continuación, los dejo con el paso a paso:
✨💕📱Hello friends, lovers of creativity. I hope you have had a good start of the week.📱💕✨
Today I share with you the step by step to make this cute phonebook style lining. I have wanted one of these phone book covers for many years, I find it ideal when we go out to the street to keep the phone there and not have contact with other objects that we carry in the bag, and that cause a scratch on the phone. It also protects from other factors such as: shocks, water splashes, etc. It seems to me a great way to protect it and also; if we get tired of our lining, we can decorate it as we want, or the ones we want, with different designs.
🔸Here I leave you with the step by step:
♥️ESPERO QUE TE GUSTE,
¡Empecemos!
♥️I HOPE YOU LIKE IT,
Let's start!

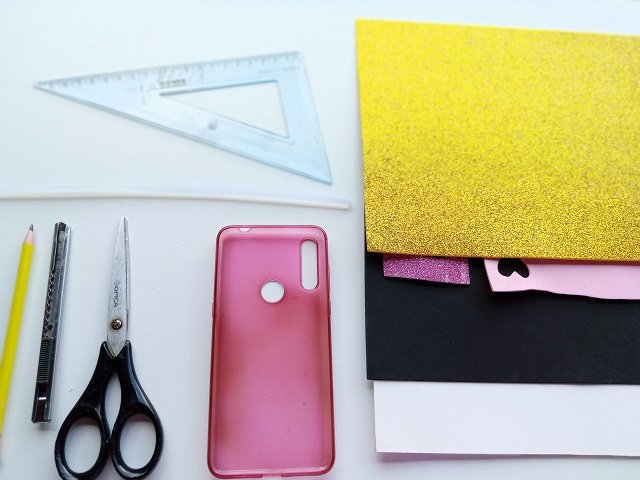
✨ MATERIALES | ✨ MATERIALS
- Foami escarchado dorado.
- Foami escarchado rosado.
- Foami liso negro.
- Foami liso rosado.
- Cartulina escolar blanca.
- Cierre mágico.
- Silicon caliente.
- Forro.
- Tijera.
- Exacto.
- Regla.
- Lápiz.
- Gold frosty foami.
- Pink frosty foami.
- Fiami smooth black.
- foami pink foam.
- White school cardboard.
- Magic closure.
- hot silicon.
- Cover.
- Scissors.
- exact
- Rule.
- Pencil.
💕 PROCEDIMIENTO | 💕 PROCESS
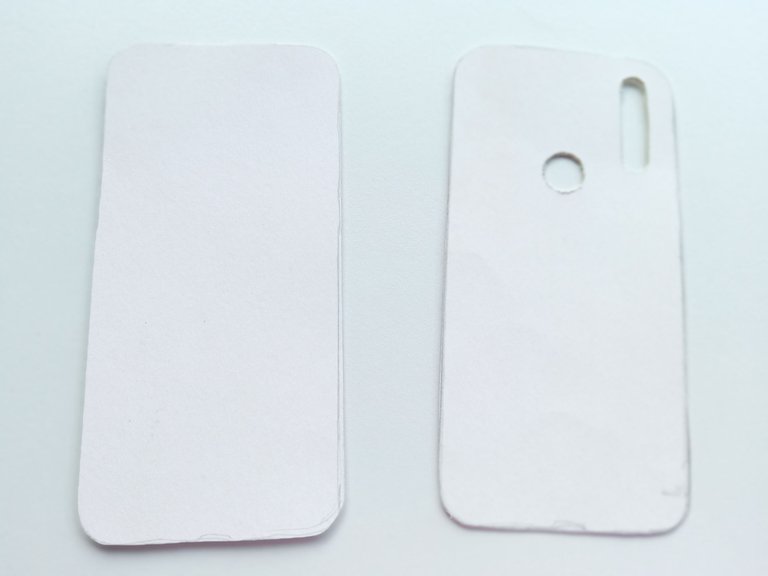
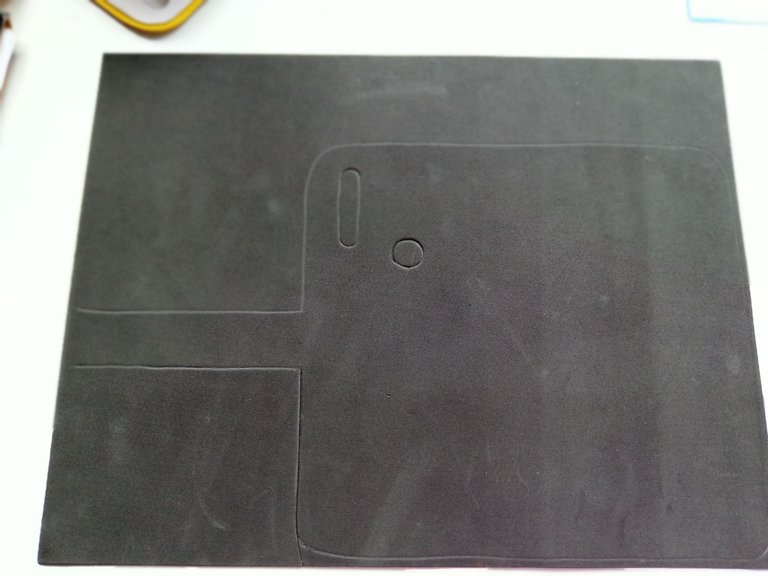
- PASO 1:
Comenzamos trazando el patrón del forro que vamos a utilizar en la cartulina escolar blanca, una con las partes de la cámara y la huella y la otra sin estos detalles. Luego, cortamos con ayuda de un exacto la parte de la cámara y con las tijeras el resto.
- STEP 1:
We start by tracing the pattern of the lining we are going to use on the white school cardboard, one with the parts of the camera and the print and the other without these details. Then, we cut with the help of an exacto the camera part and with the scissors the rest.

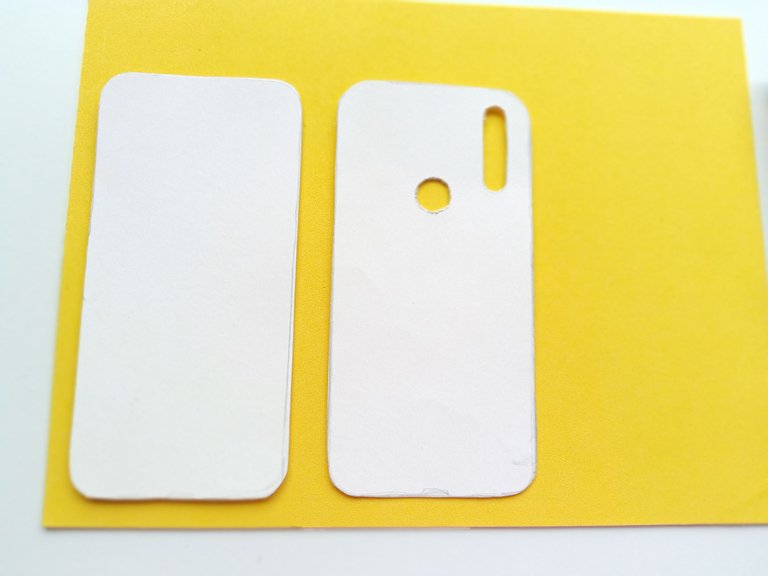
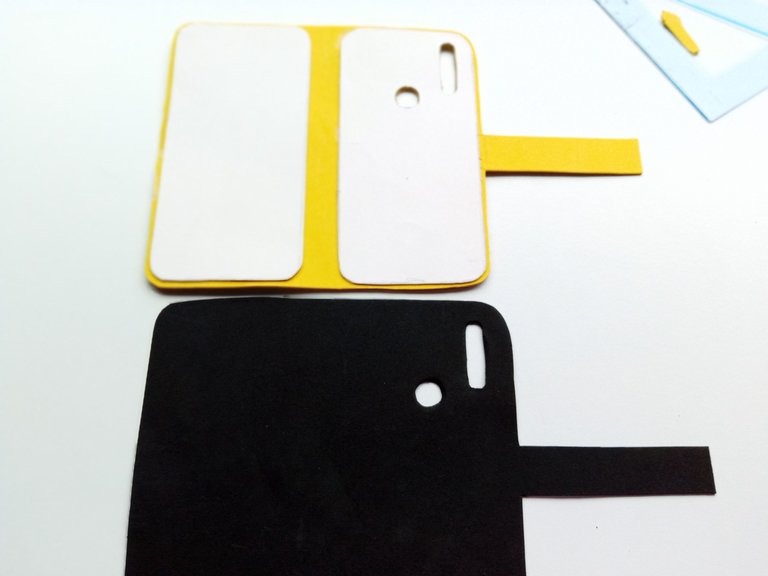
- PASO 2:
Colocamos el patrón previamente recortado en la parte trasera del foami escarchado dorado, tal y como va a quedar nuestro teléfono. Dejamos un espacio de ½ cm en los bordes y en medio de los patrones un espacio de 1 cm aproximadamente, pegar con silicón caliente, recortar dejando un poco de espacio en los bordes y también, juntamente recortar una tira de 1.5 cm en el mismo patrón, esta será la correa de nuestro forro.
🔸A continuación, les muestro las fotos por si quedan dudas:
- STEP 2:
We place the previously cut out pattern on the back of the gold frosted foami, just as our phone is going to be. Leave a space of ½ cm on the edges and in the middle of the patterns a space of about 1 cm, glue with hot silicone, cut leaving a little space at the edges and also, together cut a strip of 1.5 cm in the same pattern, this will be the strap of our lining.
🔸Next, I show you the photos in case you have any doubts:

- PASO 3:
Colocamos todo el patrón sobre el foami negro liso, trazar con un lápiz, recortar y pegar uno sobre el otro con silicón caliente, primero pegar los patrones de cartón, luego los bordes para tener un mejor acabado y así evitar que se vean separaciones.
- STEP 3:
Place the entire pattern on the smooth black foami, trace with a pencil, cut out and glue one on top of the other with hot silicone, first glue the cardboard patterns, then the edges to have a better finish and thus avoid separations.

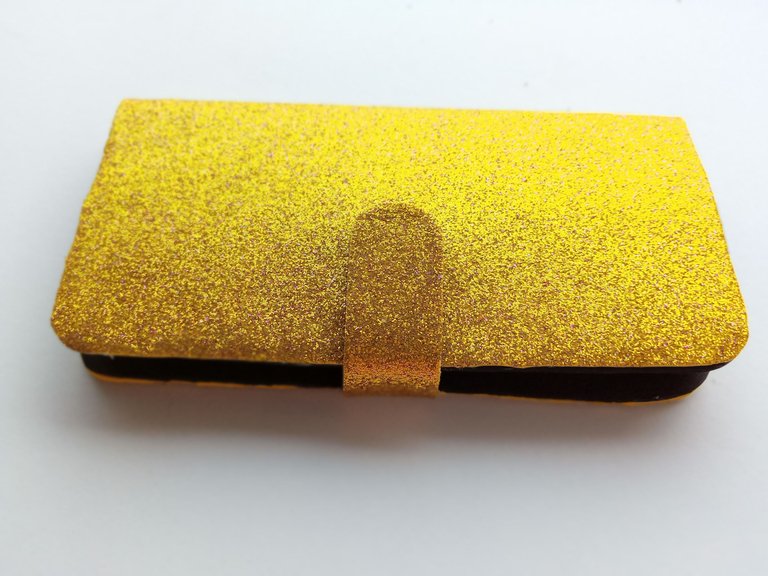
- PASO 4:
Una vez que nuestra base está lista, seguimos pegando con un poco de silicona nuestro forro, añadimos un poco de pegamento en la base, esperamos unos segundos y pegamos el forro para evitar que se derrita. A continuación, cortamos el extremo de la correa en forma ovalada.
- STEP 4:
Once our base is ready, we continue gluing with a little silicone our lining, add a little glue on the base, wait a few seconds and glue the lining to prevent it from melting. Then, cut the end of the strap in an oval shape.
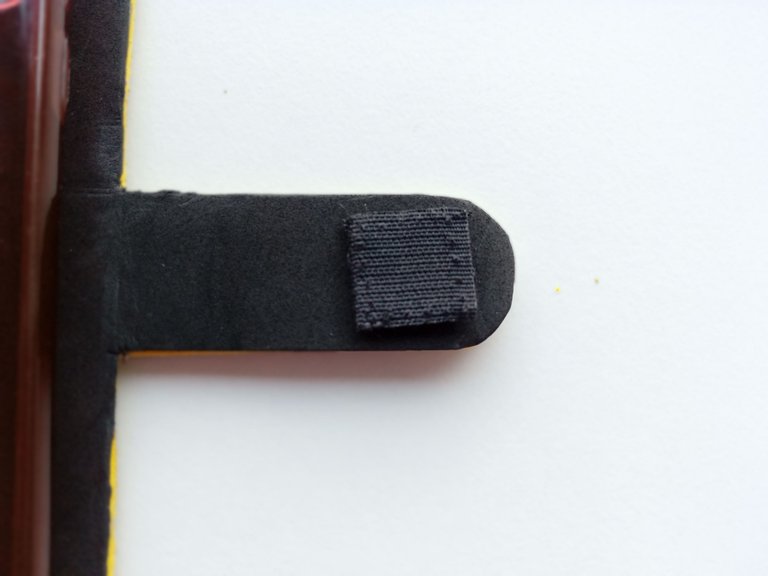
- PASO 5:
Agregar un poco de pegamento en la correa y pegar el cierre mágico, luego agregar silicón caliente sobre el cierre mágico, cerrar y pegar en la parte delantera del lado del foami escarchado dorado.
- STEP 5:
Add a little glue on the strap and glue the magic clasp, then add hot silicone on the magic clasp, close and glue on the front side of the gold frosty foami side.
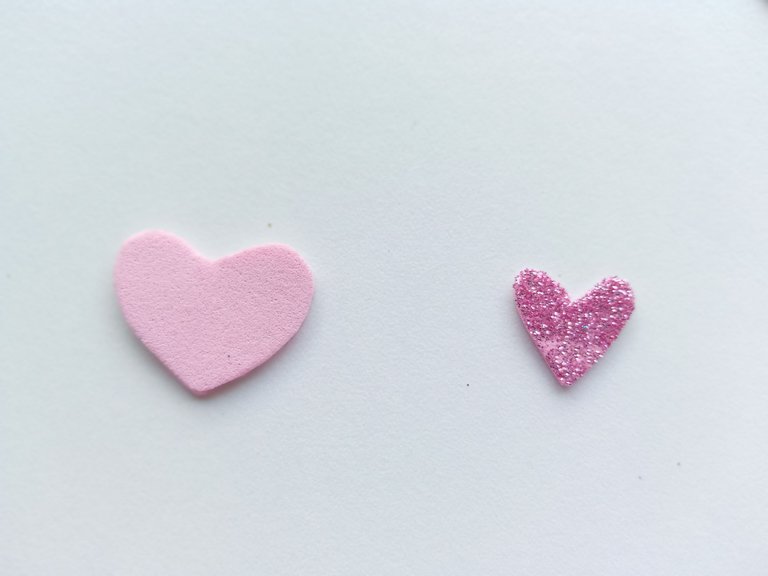
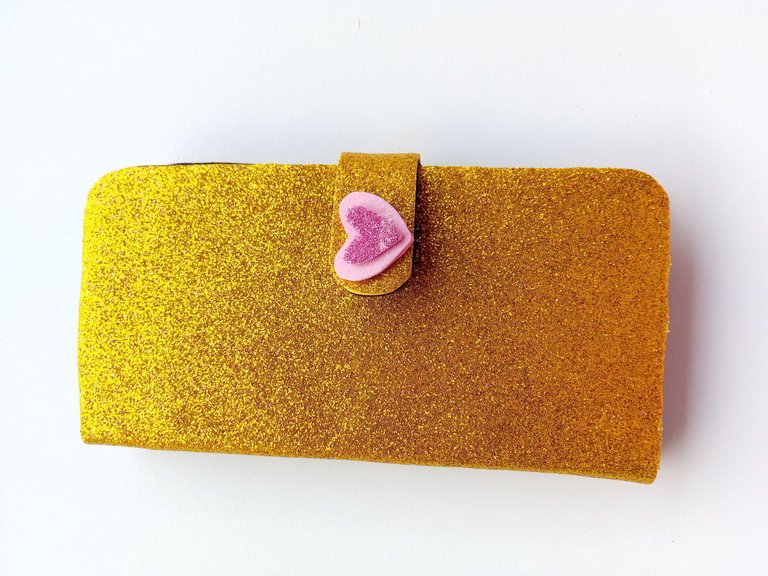
- PASO 6:
Para decorar quise hacer algo sencillo, simplemente dibujé dos corazones, uno en el foami rosa liso y otro más pequeño en el foami dorado escarchado, pegué uno encima del otro y los pegué en el borde de la correa.
- STEP 6:
To decorate I wanted to do something simple, I simply drew two hearts, one on the pink plain foami and a smaller one on the gold frosted foami, glued one on top of the other and glued them on the edge of the strap.

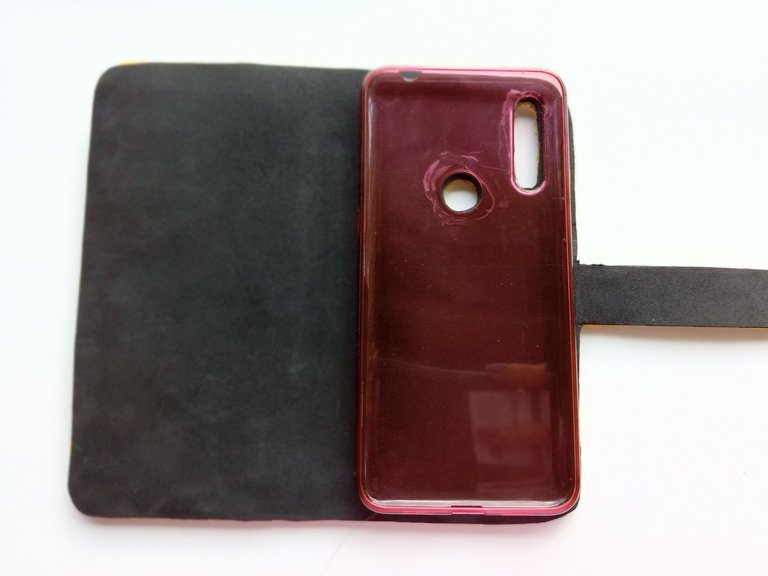
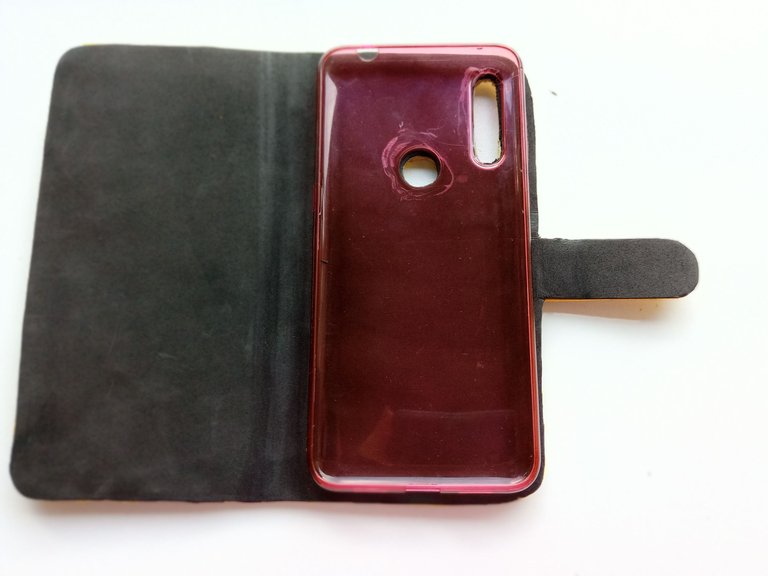
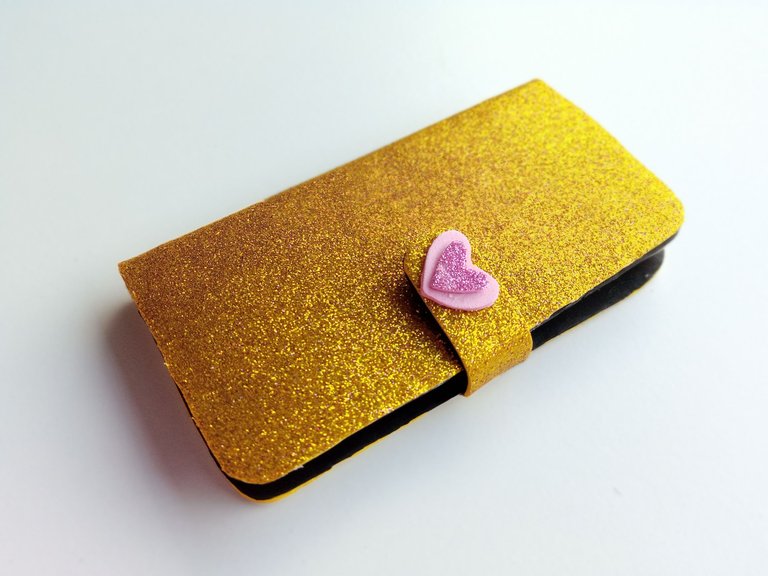
✨💕📱¡Y listo!📱💕✨ habremos terminado este lindo y sencillo forro tipo agenda. Espero se animen a hacerlo, disfruten elaborándolo y decorándolo como más les guste. Será muy útil para proteger el teléfono de arañazos o líquidos. También es un regalo muy bonito para un amigo o familiar. Espero que les haya gustado. Nos vemos en el próximo post.
✨💕📱¡And ready!📱💕✨ we have finished this nice and simple planner style lining. I hope you enjoy making it and decorating it as you like. It will be very useful to protect it from scratches or liquids. It is also a very nice gift to give to a friend or relative. I hope you liked it. See you in the next post.


Todas las fotografías son de mi propiedad.
Separador y Fotos editadas en Canva
All photographs are my property.
Photos edited in Canva
Pero que idea tan brillante de hacer un forro para teléfonos, tengo que hacer uno para el mío, gracias por la idea.
Hola amiga.✨💕 muchas gracias por tu comentario. Te lo Super recomiendo, la verdad que se me es muy útil desde que lo hice ✨🤭
Saludos✨👋🏻
The rewards earned on this comment will go directly to the people sharing the post on Twitter as long as they are registered with @poshtoken. Sign up at https://hiveposh.com.
Que bonito te quedó🥰 me encanta para proteger el cel por completo en la cartera donde suele rayarse mucho la pantalla jeje
Hola amiga ! ✨💕 Muchas gracias por leer y comentar mi post.
Así es , súper bueno para proteger el celu en la cartera, me paso en algunas ocasiones tener rayas en la pantalla por eso.
Muchas gracias linda. Saludos✨💕
Me encanta que se puede crear este forro en el color que más nos guste, es simple y elegante, excelente tutorial.
Hola amigas ✨😊 un placer tenerte por acá.
Muchas gracias por tu comentario, así es, aparte podemos hacernos varios con diferentes diseños, si así lo queremos.
Saludos ☺️💕
Te quedó muy lindo y se ve super fácil de hacer , me encantó como quedó ♥️
Hola amiga! Muchas gracias por leer y comentar.✨🌼
Es verdad, son muy pocos materiales , bastante económico y súper fácil. además, podemos hacerlo con el diseño que más nos guste.
Saludos amiga ✨😊
Me gustó mucho y no se necesitan muchos materiales para elaborarlo✨
Thank you for sharing this amazing post on HIVE!
Your content got selected by our fellow curator @rezoanulvibes & you just received a little thank you via an upvote from our non-profit curation initiative!
You will be featured in one of our recurring curation compilations and on our pinterest boards! Both are aiming to offer you a stage to widen your audience within and outside of the DIY scene of hive.
Join the official DIYHub community on HIVE and show us more of your amazing work and feel free to connect with us and other DIYers via our discord server: https://discord.gg/mY5uCfQ !
If you want to support our goal to motivate other DIY/art/music/homesteading/... creators just delegate to us and earn 100% of your curation rewards!
Stay creative & hive on!
Muchas gracias mis amigos de @diyhub @rezoanulvibes por el apoyo.
Saludos ☺️💕
You're very welcome!
Have a great day! :)
Nice day to you too.✨☺️
Hola Valen! Que bonito te ha quedado.
Hola amiga 😊 muchas gracias por tus palabras ☺️💕
Me encanta, yo quiero hacer uno para el mío, los forros están muy caros, jajaja y viendo el material que usaste, lo tengo, que bien amiga, gracias por compartirlo, saludos.
Hola amiga 🤭
Jaja entonces te lo súper recomiendo y si no tienes el forro pues puedes hacerlo sin forro, igualmente queda bien protegido
quedó muy bonito, a parte de que se ve super práctico!
Muchas gracias por comentar. ✨☺️
Así es, la verdad que es muy útil para evitar rayones en el celular.
Saludos. 👋🏻☺️