✨🐰🍬¡Hola amigos amantes de la creatividad! Espero que hayan pasado un muy buen comienzo de semana.🍬🐰✨
🔸Sin más que añadir, a continuación los dejo con el paso a paso:
✨🐰🍬¡Hello friends who love creativity! I hope you had a very good start to the week.🍬🐰✨
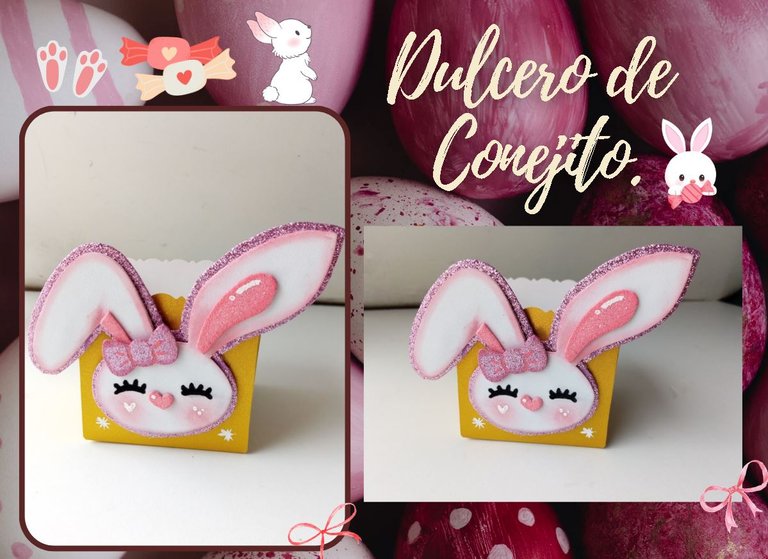
Good afternoon friends. I hope you are having a great week. Today I share with you the step by step to make a beautiful rabbit candy. I had been thinking for a while about making a nice and easy candy box for Easter, but at first I didn't have anything very clear, what I knew was that it would be a candy box so they could give some candy to their children and then I thought about the bunny design.
I think it turned out very cute and is easy to adapt to the desired colors, simply changing the pink tones that I used, for blue, yellow, green or the colors and materials you want, since you can also use a soda bottle to recycle and save money.
🔸Without more to add, then I leave you with the step by step:
♥️ESPERO QUE TE GUSTE,
¡Empecemos!
♥️I HOPE YOU LIKE IT,
Let's start!

✂️ MATERIALES | ✂️ MATERIALS
- Cartulina escarchada dorada.
- Foami blanco.
- Foami escarchado rosa
- Foami escarchado morado.
- Pinturas y marcadores.
- Pegamento.
- Hoja blanca.
- Regla.
- Tijeras.
- Lápiz.
- Gold frosted cardstock.
- White foam.
- Pink frosty foam
- Purple frosty foam.
- Paints and markers.
- Glue.
- White sheet.
- Ruler.
- Scissors.
- Pencil.
🐰 PROCEDIMIENTO | 🐰 PROCESS
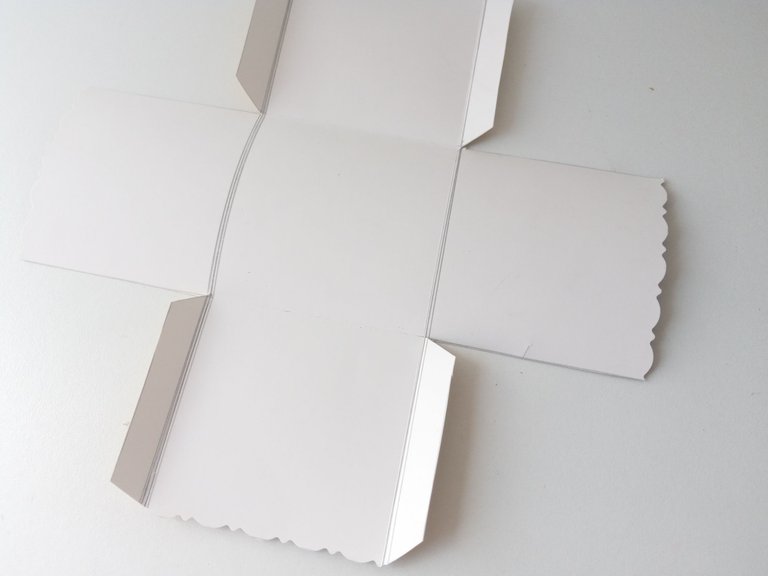
- PASO 1:
Lo primero que hice fue trazar las medidas de la caja en la cartulina escarchada dorada. En este caso quise elaborar una pequeña caja muy sencilla y las medidas fueron las siguientes: para la base 8 cm x 7 cm, para las paredes 8 cm x 7.5 cm y los pliegues de 1 cm. Una vez lista, recorté y le hice un diseño con las tijeras en la parte superior de todas las paredes. Doblamos las paredes y pegamos hasta formar la caja.
- STEP 1:
The first thing I did was trace the measurements of the box on the gold frosted cardstock. In this case I wanted to make a very simple small box and the measurements were as follows: for the base 8 cm x 7 cm, for the walls 8 cm x 7.5 cm and the folds 1 cm. Once ready, I cut out and made a design with the scissors on the top of all the walls. We fold the walls and glue until we form the box.
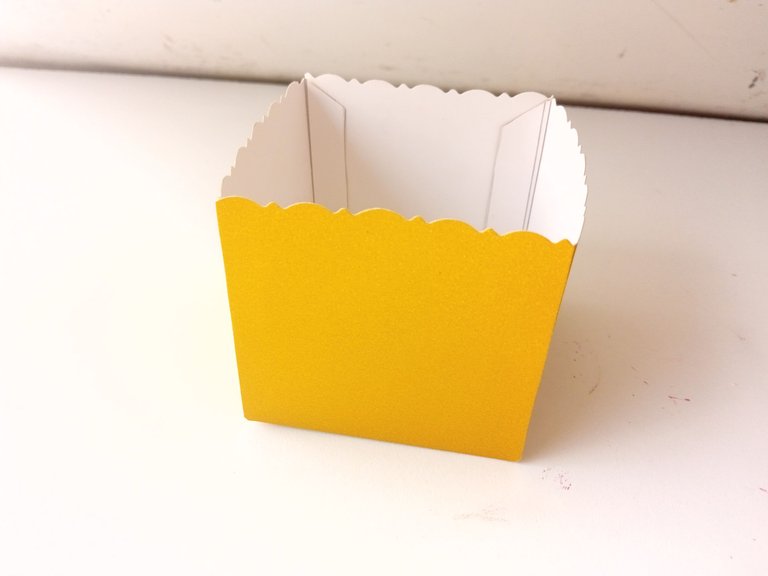
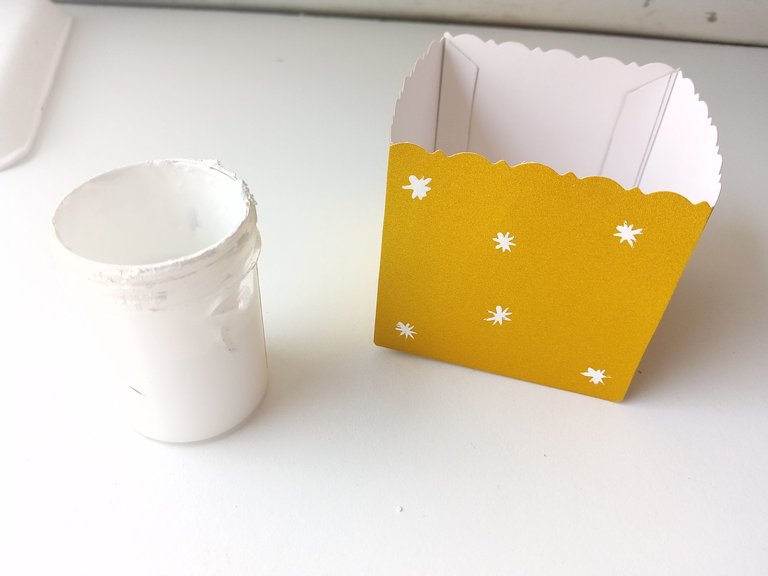
- PASO 2:
Para que la caja tuviera una apariencia más bonita y resaltara un poco más, decidí tomar un poco de pintura blanca con un pincel delgadito y dibujar por todas las paredes estrellitas simples. Luego, dejé secar y mientras, continué con el siguiente paso.
- STEP 2:
To make the box look prettier and stand out a little more, I decided to take some white paint with a thin brush and draw simple stars all over the walls of the box. Then, I let it dry and meanwhile, I continued with the next step.
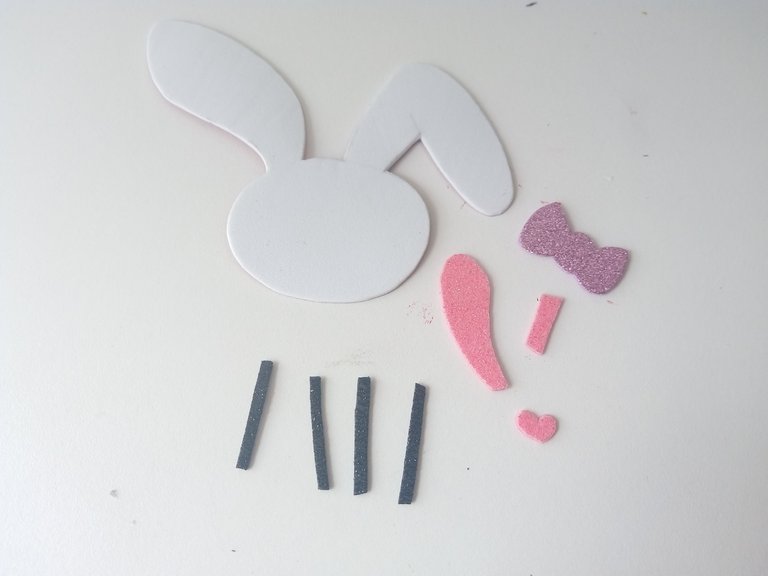
- PASO 3:
Ahora sí, en una hoja blanca dibujé el patrón del conejito y luego transferí cada una de las piezas al color correspondiente de foami de la siguiente manera: la cabeza en foami blanco, la parte interna de las orejas y nariz en foami escarchado rosa y el lazo en foami escarchado morado. También le hice los bigotes en foami escarchado negro, pero al final no los utilicé, pues no me gustaba ese resultado.
- STEP 3:
Now, on a white sheet I drew the bunny pattern and then transferred each of the pieces to the corresponding color of foam as follows: the head in white foam, the inner part of the ears and nose in frosty pink foam, and the purple frosty foam bow. I also made his mustaches in black frosted foam, but in the end I didn't use them, because I didn't like that result.
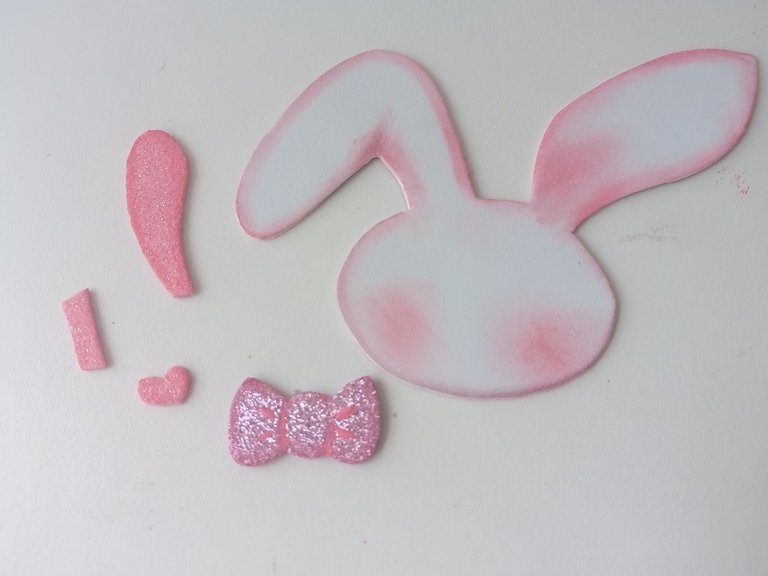
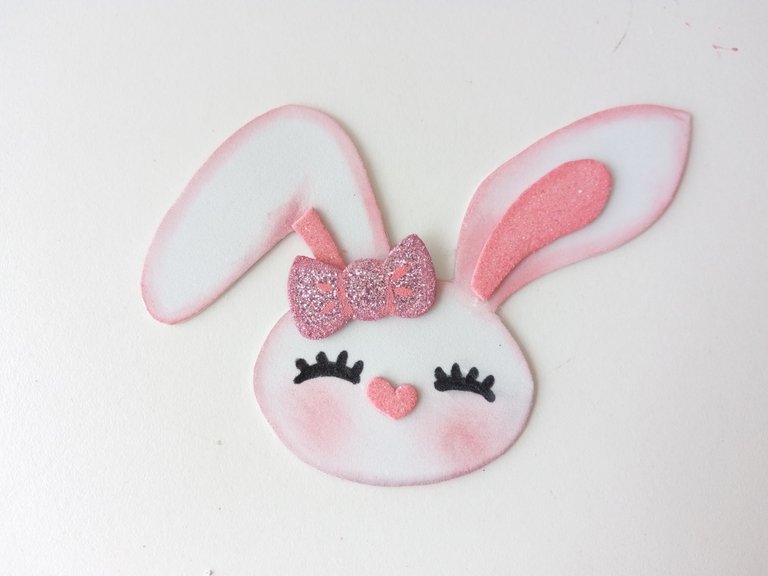
- PASO 4:
Una vez recortadas todas las piezas, tomé un poco de pintura rosada con un pañito y comencé a pasar por los bordes, difuminando cada trazo. Repetí el proceso con todas las piezas y también le pinté las mejillas con el mismo tono. Luego, pegué todas las piezas en su lugar, hasta formar el conejo y con un marcador negro, dibujé los ojos.
- STEP 4:
Once all the pieces were cut out, I took some pink paint with a cloth and began to go around the edges, blending each stroke. I repeated the process with all the pieces and also painted the cheeks with the same tone. Then, I glued all the pieces in place until the rabbit was formed and with a black marker, I drew the eyes.
- PASO 5:
Para realzar más algunas zonas, pinté los puntos de luz en la nariz, mejillas y orejas. Dejé secar, pegué la figura al foami morado escarchado y recorté dejando un borde de 0.5 cm del mismo foami. Por último, pegué en medio de una de las paredes de la caja.
- STEP 5:
To highlight some areas more, I painted the highlights on the nose, cheeks and ears. I let it dry, glued the figure to the frosty purple foam and cut it out, leaving a 0.5 cm edge of the same foam. Lastly, I glued in the middle of one of the walls of the box.

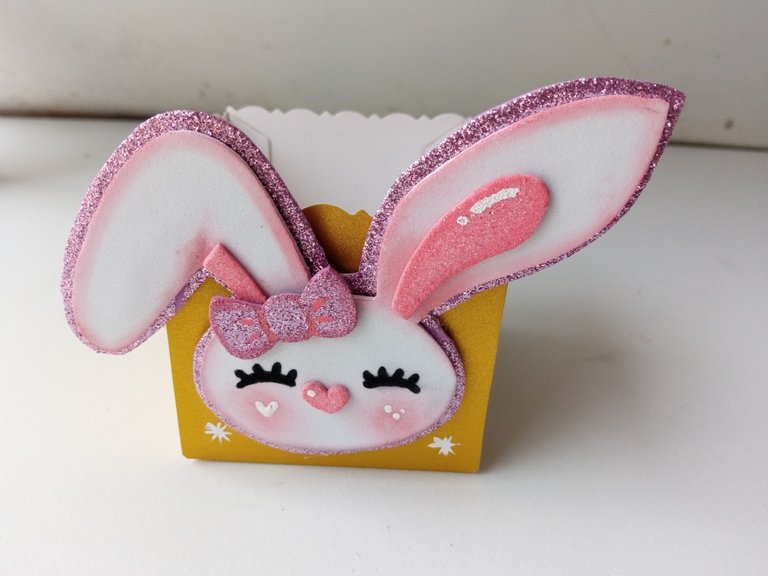
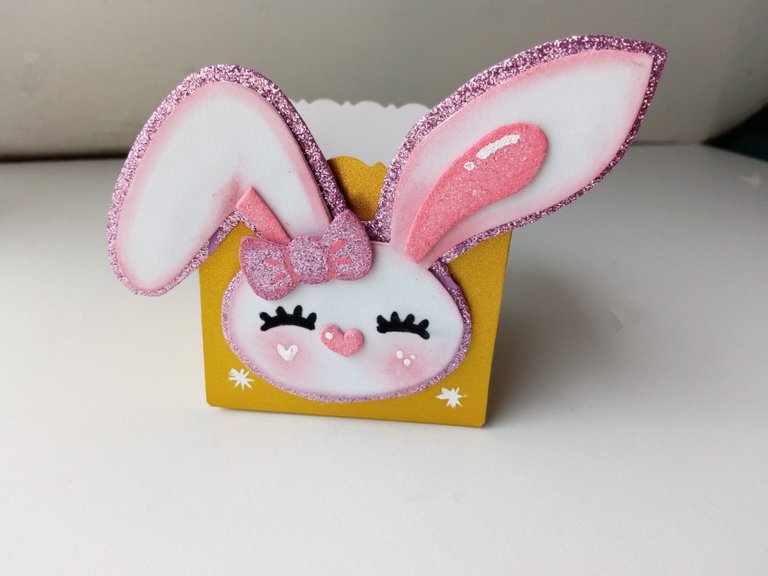
✨🐰🍬¡And ready!🍬🐰✨In a very simple way, you can make a nice idea to make a candy box, not only for Easter Day, it can be for any occasion and as I said at the beginning, you don't have to use these same materials, you can use plastic cups or with plastic bottles you can make a very easy and economical candy dish. I hope you liked the step by step and are encouraged to make it.
❤️Until the next post.
✨RESULTADO: | ✨RESULT:


Todas las fotografías son de mi propiedad.
Separador y Fotos editadas en Canva
All photographs are my property.
Photos edited in Canva
a bunny candy for Easter sounds like a treat. Nice work.
Many thanks friends ! I appreciate your words.✨✨
Que bonito el dulcero esa es la magia que puedes hacer con el foami
Quedó re lindo, de verdad que si. Tienes un don para darle vida al foami. Tienes mucho talento con esas manualidades, no creo que me quedé igual, Jejeje.
Está precioso. 🤗
Poco a poco, de tanta práctica uno va mejorando amiga , pero aún me falta mejorar un montón. Agradezco mucho tus palabras bella!
Saludos y bendiciones 💕
Ami yo solo quiero saber una cosa. Que haces luego con tantas bellezas??? Jeje este te quedo hermosisimooo😍
Ay amiga, a veces las regalo a mis primitos con algún dulce, algunas las guardo y no se a quien darselas y los colgantes o decoraciones de cocina, se las queda mi mamá jaja
Amii pero este dulcero está bellísimo 🥰 La forma de la cajita está preciosa y el conejito ni se diga, está muy tierno y con esos colores se ve muy cuchi, me encantó esta idea ami ❤️
Que cuchituraaaaa 😍😍😍
Muchas gracias Ely! 🤭
Quedó super tierno, mi valen. La combinación de colores y formas está perfect!! 😍😍😍
Que ternurita amiga, quede enamorada de los colores que usaste🥰
Gracias mi Yage bella!!💕
Congratulations, your post has been upvoted by @dsc-r2cornell, which is the curating account for @R2cornell's Discord Community.
Enhorabuena, su "post" ha sido "up-voted" por @dsc-r2cornell, que es la "cuenta curating" de la Comunidad de la Discordia de @R2cornell.
Pero es que mi amiga siempre haciendo unas bellezas, yo feliz de recibir ese dulcero 🥹💞💞💞
Te quiero amiga, te quedo demasiado lindo!
Tan bella amiga!!! Me alegra que te haya gustado y yo encantada de regalartelo 🥺💕
That's a really cute bunny, I love it!
Thank you so much!!! I'm very glad you liked it 💕
Congratulations @valenpba! You have completed the following achievement on the Hive blockchain And have been rewarded with New badge(s)
Your next target is to reach 7750 replies.
You can view your badges on your board and compare yourself to others in the Ranking
If you no longer want to receive notifications, reply to this comment with the word
STOPCheck out our last posts:
Amiga ese dulcero te quedo muy cuchi! Me encantan todas tus creaciones! 🤗
Demasiado precioso 😍 Me encantaron esas pestañas todas coquetas, te quedó demasiado hermoso mi Valen 💕