✨👒🗃¡Hola amigos amantes de la creatividad! Espero que hayan pasado un muy buen comienzo de semana.🗃👒✨
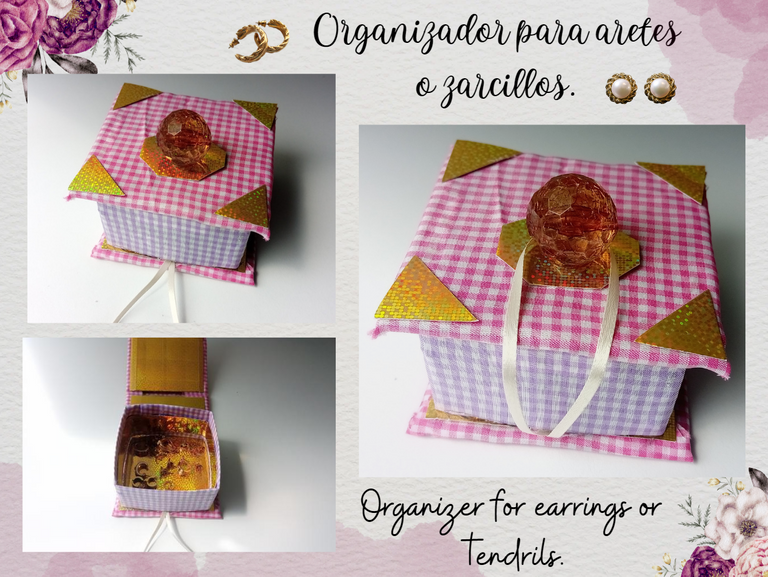
Espero que tu semana esté llena de muchas alegrías. En esta oportunidad les vengo a compartir un lindo organizador de aretes. Esta me parece una excelente idea para organizarlos y no tenerlos regados o para evitar rayones. Estoy segura de que a muchas les viene bien esta idea, porque hace un tiempo hice uno parecido, pero estaba dividido en dos compartimentos y era ovalado, como me gusta tanto quise traer una idea parecida, con un diseño diferente y mucho más pequeño. Por otro lado, estoy tratando de combinar colores que no suelo usar tan seguido, esta vez la elección de colores no fue mi favorita, pero igual es una idea increíble y lo bueno de esto es que puedes utilizar los colores de tu preferencia. Asimismo, cabe señalar que los materiales utilizados son en su mayoría materiales reciclados, como cartón, retazos de tela y retazos de cartulina.
🔸Sin más que añadir, a continuación los dejo con el paso a paso:
✨🐔🍳¡Hello friends who love creativity! I hope you had a very good start to the week.🍳🐔✨
I hope your week is filled with many joys. This time I come to share a nice earring organizer. This seems to me an excellent idea to organize them and not have them scattered or to avoid scratches. I am sure that this idea is good for many of you, because a while ago I made a similar one, but it was divided into two compartments and it was oval, as I like it so much I wanted to bring a similar idea, with a different and much smaller design. On the other hand, I'm trying to combine colors that I don't use so often, this time the choice of colors was not my favorite, but it's still an amazing idea and the good thing about it is that you can use the colors of your choice. Also, it should be noted that the materials used are mostly recycled materials, such as cardboard, fabric scraps and cardboard scraps.
🔸Without more to add, then I leave you with the step by step:
♥️ESPERO QUE TE GUSTE,
¡Empecemos!
♥️I HOPE YOU LIKE IT,
Let's start!

✂️ MATERIALES | ✂️ MATERIALS
- Cartón.
- Caja pequeña.
- Cartulina dorada.
- Retazos de tela.
- Perla plástica grande.
- Cinta delgada.
- Silicona caliente.
- Tijera.
- Regla.
- Lápiz.
- Carton box.
- small box.
- golden cardboard
- Pieces of cloth.
- Large plastic pearl.
- thin tape.
- Hot silicone.
- Scissors.
- Rule.
- Pencil.

👒 PROCEDIMIENTO | 👒 PROCESS
- PASO 1:
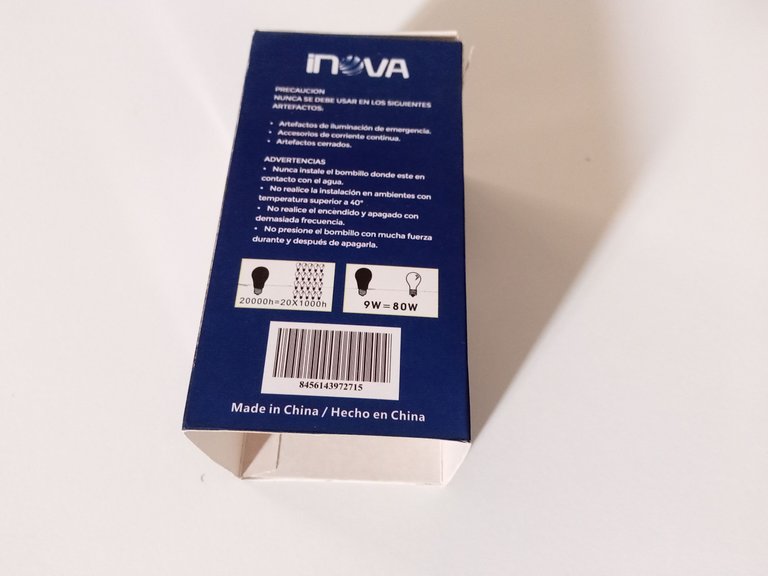
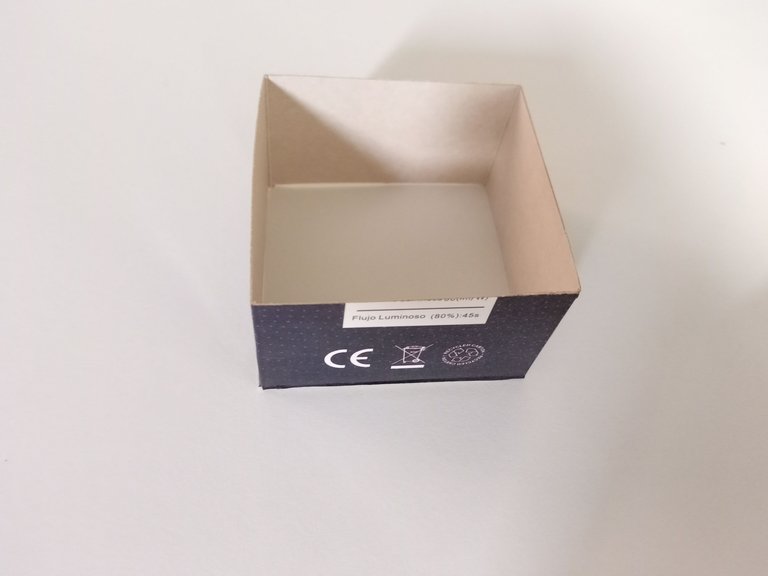
Para la caja pequeña puedes usar una caja de bombillos, ya que es muy larga y necesitamos una caja pequeña, vamos a empezar cortando la tapa y trazar una línea horizontal de 4 cm de largo y cortar, en mi caso la caja que utilice es de 7 cm de ancho.
- STEP 1:
For the small box you can use a light bulb box, since it is very long and we need a small box, we are going to start by cutting the lid and draw a horizontal line 4 cm long and cut, in my case the box to be used is 7cm wide.
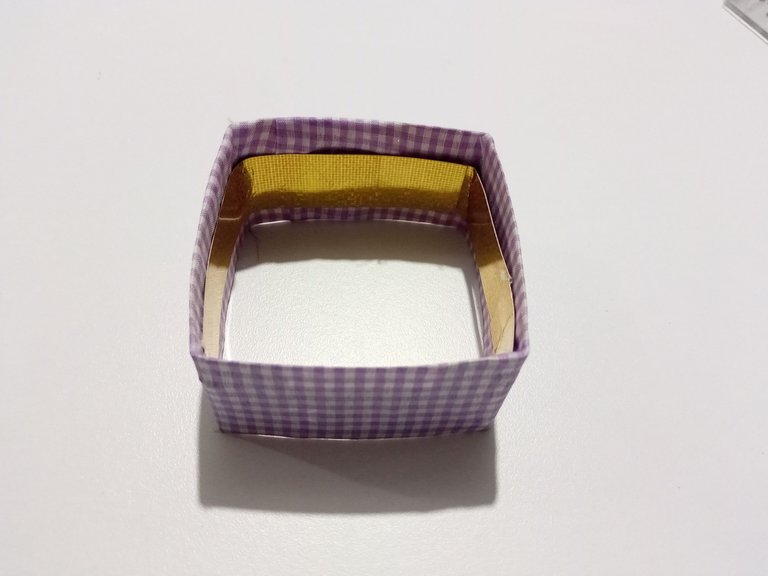
- PASO 2:
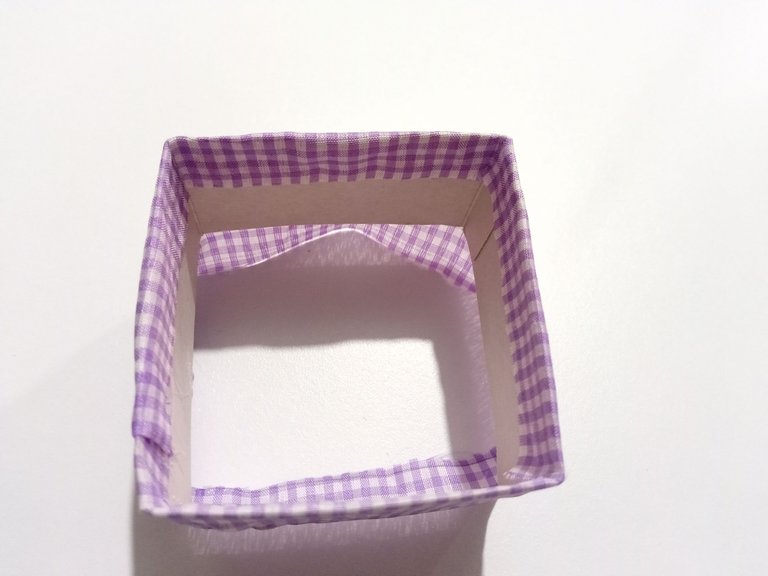
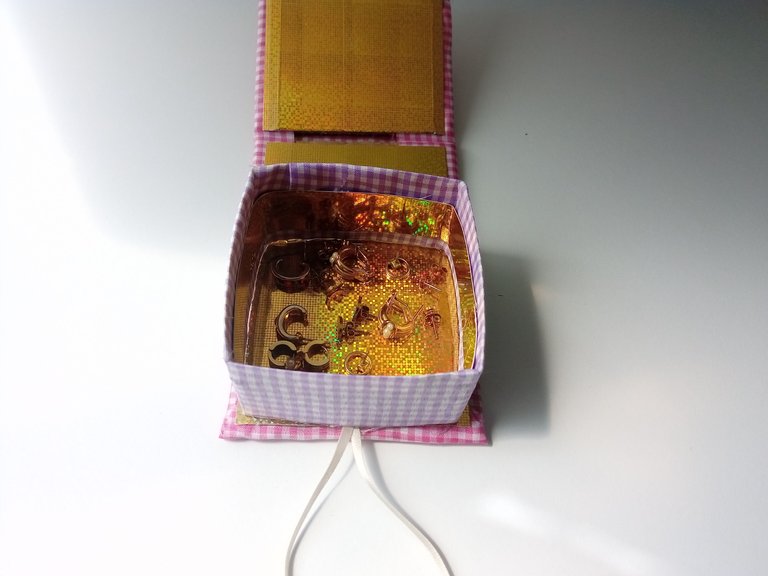
Una vez hecho esto, cortar un trozo de tela de 32 cm x 6 cm, pegar alrededor de la caja dejando 1 cm de tela libre en la parte superior e inferior, luego corte las cuatro esquinas de la tela restante y péguela en el interior de la caja, repita el mismo proceso en la otra tela sobrante. Para que el interior de la caja quede más prolijo, corta una tira de cartulina dorada de 28 cm y pégala en el interior de la caja.
- STEP 2:
Once this is done, cut a 32cm x 6cm piece of fabric, glue it around the box leaving 1cm of fabric free at the top and bottom, then cut the four corners of the remaining fabric and glue it to the inside of the box. the box, repeat the same process on the other excess fabric. To make the inside of the box more tidy, cut a 28 cm strip of gold cardboard and glue it on the inside.

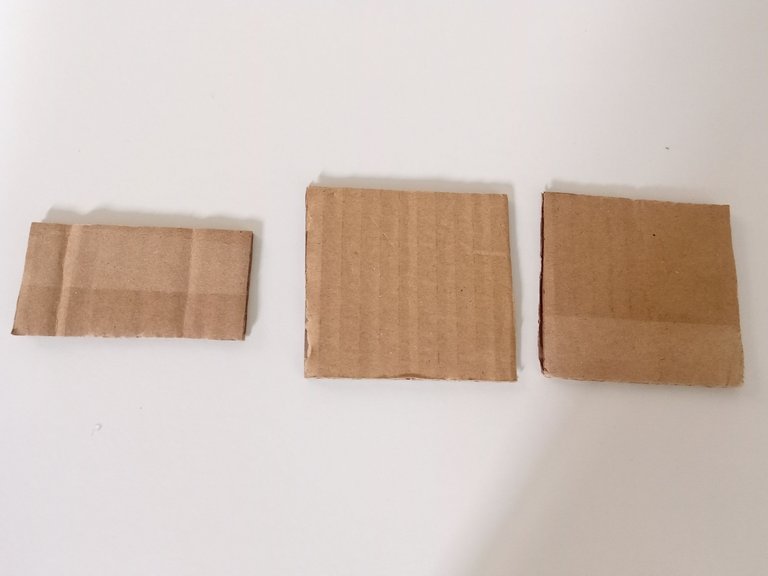
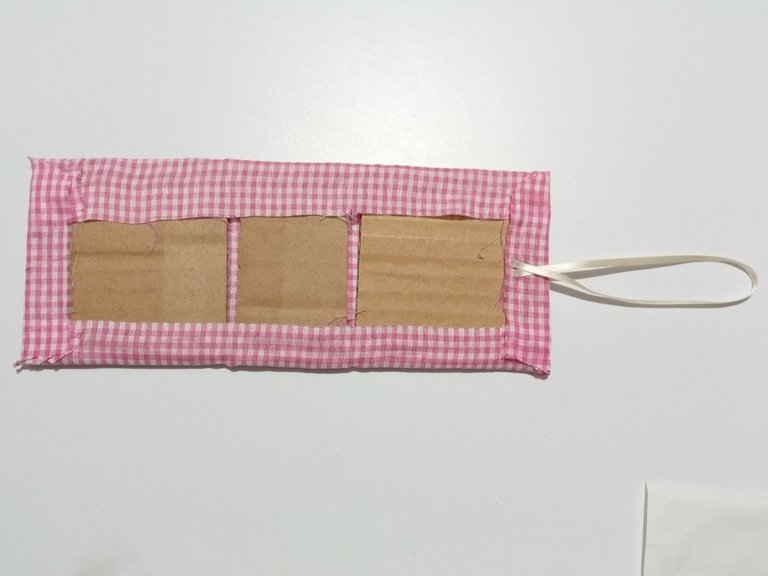
- PASO 3:
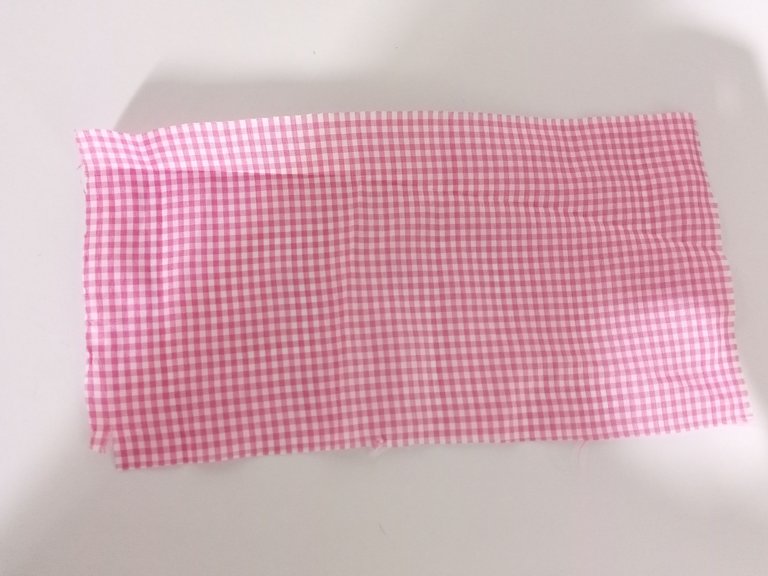
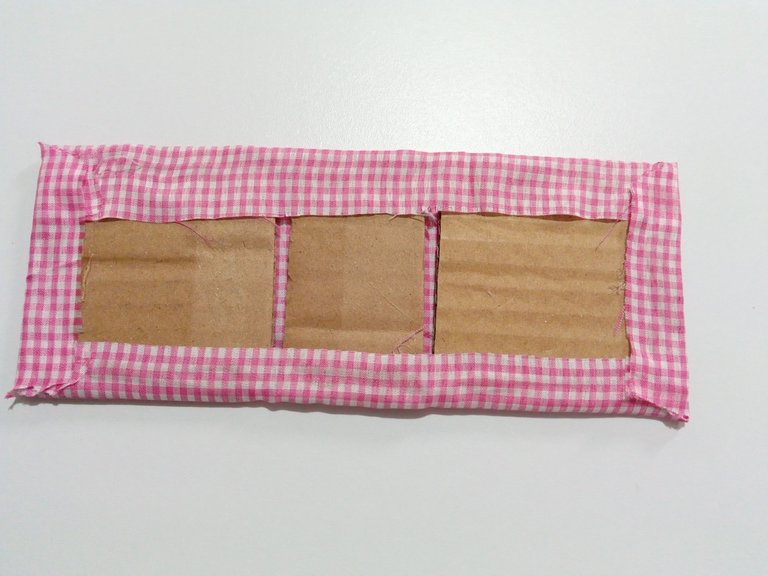
Después de esto, vamos a trazar y cortar 3 piezas de cartón grueso. 2 piezas de 8.5cm x 8.5cm, es decir; 1,5 cm más que el ancho de nuestra caja y 1 pieza de 8.5 cm x 4.5 cm, es decir; 0.5 cm más largo que la caja. Luego, cortar un rectángulo de tela de 35 cm x 11 cm, pegar las 3 piezas juntas dejando 2 cm en cada borde y 0.5 cm entre cada pieza y pegar los bordes en la parte superior.
- STEP 3:
After this, we are going to trace and cut 3 pieces of thick cardboard. 2 pieces of 8.5cm x 8.5cm, that is; 1.5 cm more than the width of our box and 1 piece of 8.5 cm x 4.5 cm, that is; 0.5cm longer than the box. Then, cut out a 35 cm x 11 cm rectangle of fabric, glue the 3 pieces together leaving 2 cm on each edge and 0.5 cm between each piece and glue the edges on top.
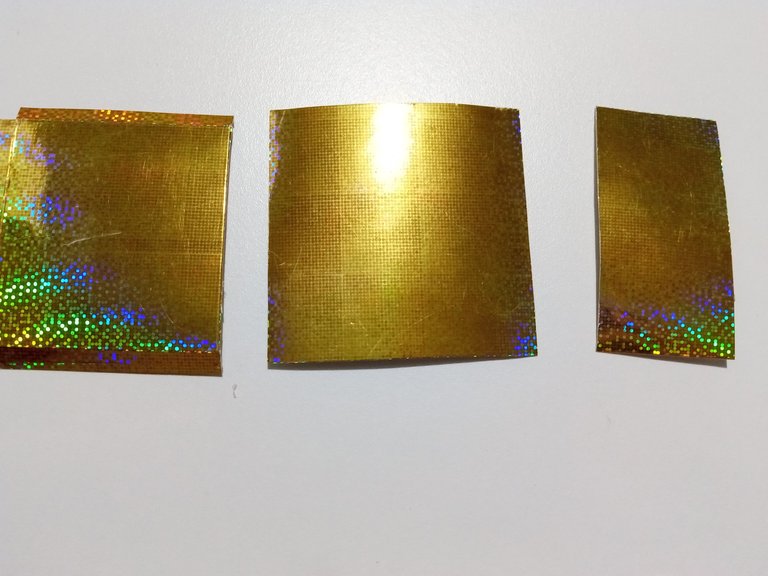
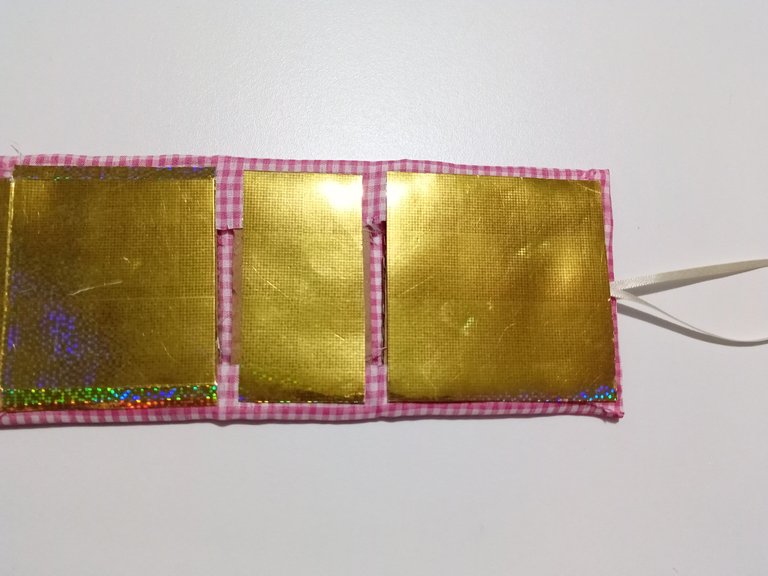
- PASO 4:
Corta un trozo de cinta de 20 cm, dóblalo por la mitad y pégalo en el medio de uno de los lados, esa será la base de nuestro organizador. Por otro lado, para tapar el cartón vamos a cortar 2 piezas de cartulina dorada de 7.5cm x 7.5cm. 1 pieza de 7.5cm x 4.5cm y pegarlo directamente sobre el cartón.
- STEP 4:
Cut a 20 cm piece of tape, fold it in half and glue it in the middle of one of the sides, which will be the base of our organizer. On the other hand, to line the cardboard we are going to cut 2 pieces of golden cardboard of 7.5cm x 7.5cm and 1 piece of 7.5cm x 4.5cm and paste it directly on the cardboard.
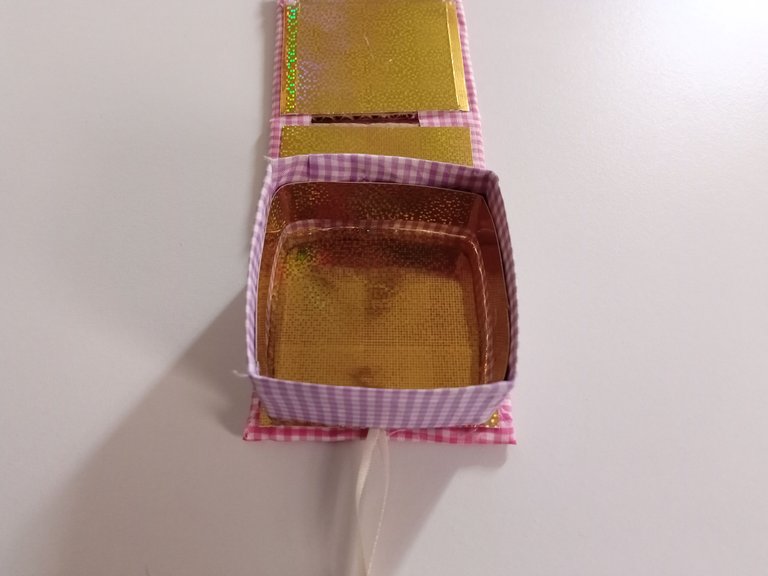
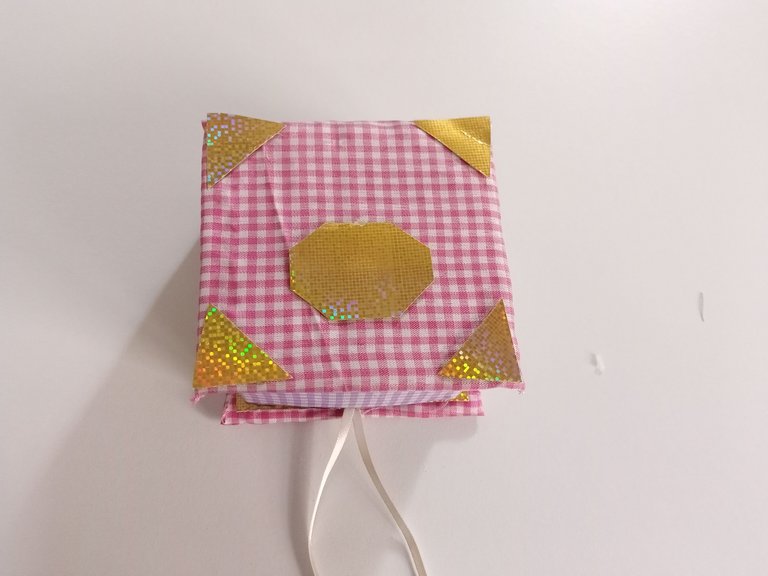
- PASO 5:
Finalmente, pegamos la caja en el cuadrado donde previamente pegamos la cinta. Para decorar la tapa, corté unos triángulos en cartulina dorada que pegué a los lados de la tapa, también un cuadrado al que le quité las puntas del medio y encima, pegué la perla de plástico para cerrar con la cinta nuestro organizador.
- STEP 5:
Finally, we glue the box in the square where we previously glued the tape. To decorate the lid, I cut some triangles in gold cardboard that I glued to the sides of the lid and a square that I removed the points in the middle and on it, the plastic pearl to close our organizer with the tape.

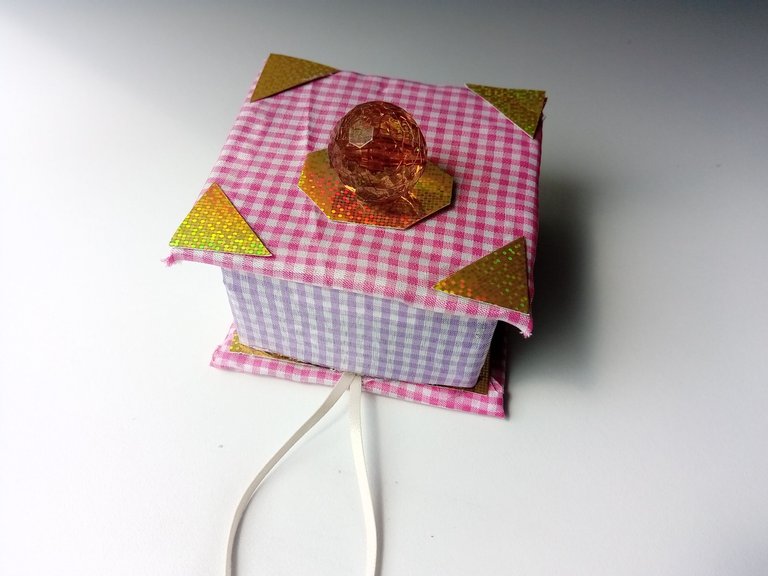
✨👒🗃¡Y listo!🗃👒✨ Así es como podemos hacer un bonito organizador de aretes, también puedes colocar algo acolchado en la superficie de la caja para evitar aún más los rayones. También puedes hacer una cajita súper pequeña para regalar aretes a una persona especial. Espero que les haya gustado el paso a paso y se animen a elaborarlo.
❤️Hasta la próxima publicación.
✨👒🗃¡And ready!🗃👒✨ This is how we can make a nice earring organizer, you can also place some padding on the surface of the box to further prevent scratches. You can also make a super small box to give earrings to a special person. I hope you liked the step by step and are encouraged to elaborate it.
❤️Until the next post.
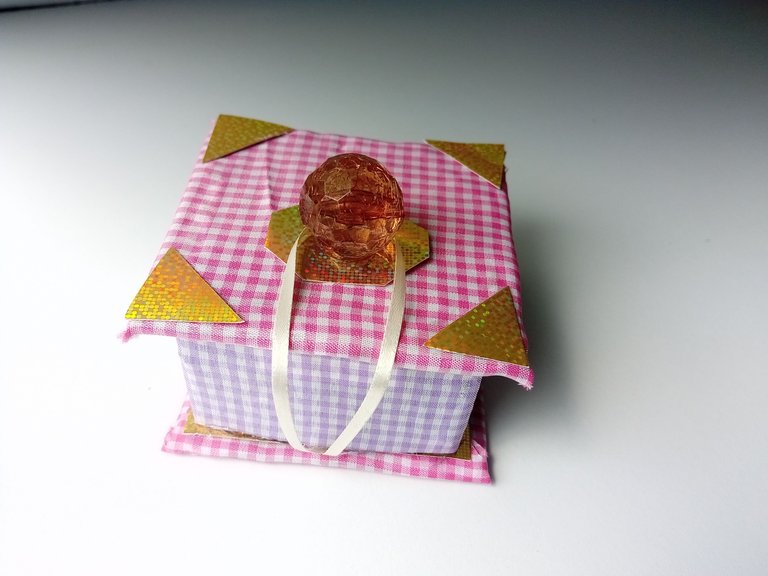
✨RESULTADO: | ✨RESULT:


Todas las fotografías son de mi propiedad.
Separador y Fotos editadas en Canva
All photographs are my property.
Photos edited in Canva
~~~ embed:1618034878574133248 twitter metadata:MTUyODQ3MjI5Mjg2NjYyOTYzN3x8aHR0cHM6Ly90d2l0dGVyLmNvbS8xNTI4NDcyMjkyODY2NjI5NjM3L3N0YXR1cy8xNjE4MDM0ODc4NTc0MTMzMjQ4fA== ~~~
~~~ embed:1618091180457349127 twitter metadata:MTQyMjQxMzkxNTI3NTgxMjg2NHx8aHR0cHM6Ly90d2l0dGVyLmNvbS8xNDIyNDEzOTE1Mjc1ODEyODY0L3N0YXR1cy8xNjE4MDkxMTgwNDU3MzQ5MTI3fA== ~~~
The rewards earned on this comment will go directly to the people( @valenpba, @bluevibes, @sugarelys, @mariajcastro28, @visualblock ) sharing the post on Twitter as long as they are registered with @poshtoken. Sign up at https://hiveposh.com.
Está muy Cuchi, está súper lindo. Qué precioso!!
Muchas gracias bella, me alegra que te haya gustado. 🤭✨
Thank you for sharing this post on HIVE!
Your content got selected by our fellow curator priyanarc & you just received a little thank you upvote from us for your great work! Your post will be featured in one of our recurring compilations which are aiming to offer you a stage to widen your audience within the DIY scene of Hive. Stay creative & HIVE ON!
Please vote for our hive witness <3
Thank you very much for the support friends, super grateful. ✨❤️ nice afternoon.
Que lindo amiga, y lo mejor con materiales muy fácil de hacer.
Saludos🫶🏻💕
Hola bella! Muchas gracias, me alegra que te haya gustado.
Así es , son materiales bastante accesibles. Saludos ✨❤️
Amiga esto si te quedo bello💗
Muy práctico de hacer y lo mejor con materiales reciclados ✨
Me gustó mucho los colores que utizaste, necesito uno de estos, seguro tomaré esto como inspiración!
Gracias por compartir mi Bella💗💗
Amiga bella!!
Así es, lo elaboré con materiales bastante accesibles y que todos podemos llegar a tener en casa.
Me alegra muchísimo que te haya gustado mi Aliz, yo encantada de que te sirva de inspección para hacer algo precioso.
Un fuerte abrazo amiga! ✨💗💗
💗💗💗
Que curiosita jaja, me encantó mi Vale! Se ve demasiado pequeñita y hermosa 💖 Lo mejor de todo es que es bastante practica para guardar los accesorios. Gracias por compartir 🌸
Jaja muchas gracias mi Vane! 💗 Bueno, la verdad es del tamaño justo para la cantidad de zarcillos que tengo 🤭. Hace tiempo hice uno un poco más grande con dos compartimentos, como me quedó muy grande decidí hacer uno más pequeño. 🙈
Así es amiga, muy práctico para tener todo organizardo.
Gracias por pasarte bella! 💗
Te quedó muy bonita. Y es super útil. Gracias por el tutorial ❤️
Hola amiga!
Sí, es súper práctico para tener todos los zarcillos organizado, muy útil.
Gracias por pasarte.✨💗
Hermoso mi valen, siempre he sido fan de tus manualidades, esta idea se ve super fácil, práctica y ecológica. Definitivamente me encantó.
Gracias por compartir @valenpba 😊
Hola mi vale!
Que bonitas palabras amiga, aprecio mucho lo que dices , de corazón.
Te la recomiendo amiga, si necesitas un cofre para tus accesorios, este está super práctico y obviamente con materiales bastante accesibles.
Muchas gracias amiga . Un fuerte abrazo.✨🌼
Has sido curado por @visualblock / You've been curated by @visualblock
Bienvenidas delegaciones / Delegations welcome
Encuentra nuestra comunidad aquí / Find our community here
Trail de Curación / Curation Trail
Muchas gracias por el apoyo amigos! Linda tarde.❣️✨
Que belleza amiga, yo necesito algo así porque tengo los Zarcillos todos desordenados pero con un organizador como este estoy segura que nunca más perderé uno y los tendré todos en el mismo lugar, esta bello amiga, gran trabajo 💕
Muchas gracias preciosa! Pues encantada de que te sirva de inspiración esta idea, seguro te quedaría algo mucho más bello.
Así es , bastante práctico, decidí hacerlo más pequeño porque hace un tiempo hice uno de dos compartimentos y me sobraba mucho espacio jaja
Muchas gracias por pasarte amiga. ✨💗
Amiga qué bello! Me encantó! Necesito uno para mis zarcillos. Soy muy organizada y no me gusta tener mis aretes regados. Gracias por compartir!
Muchas gracias amiga! Pues te lo recomiendo , es muy buena idea para no tenerlos regados y que puedan sufrir rayones.
Gracias por pasarte bella.❣️✨
Me encanta esta idea para organizar nuestras prendas, me gusta que sea todo reciclado porque así se contribuye al medio ambiente y se le da una segunda oportunidad a estos materiales.
Esta super chévere! Gracias por compartir!💛
De verdad que super recomendado , así contribuimos con el medio ambiente , nos ahorramos en gastar en materiales y son materiales bastante accesibles.
Muchas gracias por pasarte y comentar bella! ✨🌼
Sencillito y super práctico.
Yo solía tener muchos cofrecitos para guardar mis cositas, que lamentablemente tuve que dejar cuando emigré, así que toca empezar a hacerme nuevos y esta idea me viene genial
Que lindo felicidades me gustó tu post...
Muy lindo este trabajo, me encantó tu delicadeza.