✨🌷✉️¡Hola amigos amantes de la creatividad! Espero que hayan pasado un muy buen comienzo de semana.✉️🌷✨
🔸Sin más que añadir, a continuación los dejo con el paso a paso:
✨🌷✉️¡Hello friends who love creativity! I hope you had a very good start to the week.✉️🌷✨
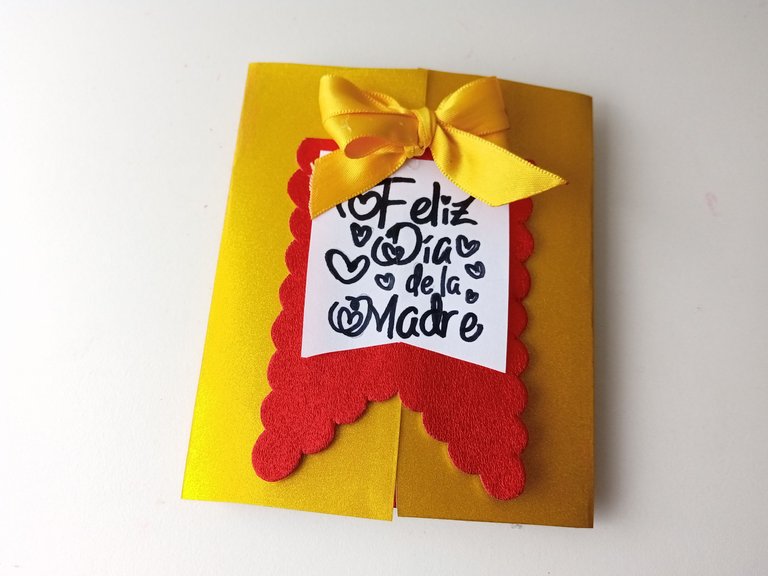
¡Good afternoon friends! I hope you are having a great week. For my part, I am quite tired, mentally exhausted, but thank God everything is going to improve, little by little. Today I share with you the step by step to make a beautiful card with flowers for Mother's Day. I have wanted to make a card decorated with flowers for a long time, lately I like how the cards look quite simple and elegant on the outside, but on the inside a nice detail, gift or decoration.
As you know, I love flowers, so, of course, I was very happy to make this beautiful detail for those who want to recreate this beautiful idea for their mommies.
🔸Without more to add, then I leave you with the step by step:

♥️ESPERO QUE TE GUSTE,
¡Empecemos!
♥️I HOPE YOU LIKE IT,
Let's start!

✂️ MATERIALES | ✂️ MATERIALS
- Cartulina escarchada dorada.
- Foami metalizado rojo.
- Foami escarchado rosa y verde.
- Foami verde.
- Pinturas y marcadores.
- Hoja blanca.
- Pegamento.
- Lápiz.
- Lazo.
- Regla.
- Tijeras.
- Gold frosted cardstock.
- Red metallic foam.
- Pink and green frosty foam.
- Green foam.
- Paints and markers.
- White sheet.
- Glue.
- Pencil.
- Ribbon.
- Ruler.
- Scissors.
🌷 PROCEDIMIENTO | 🌷 PROCESS
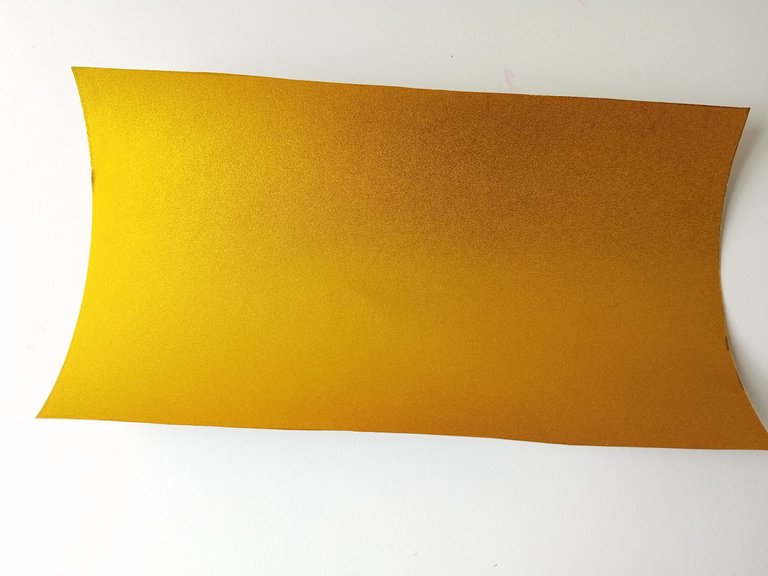
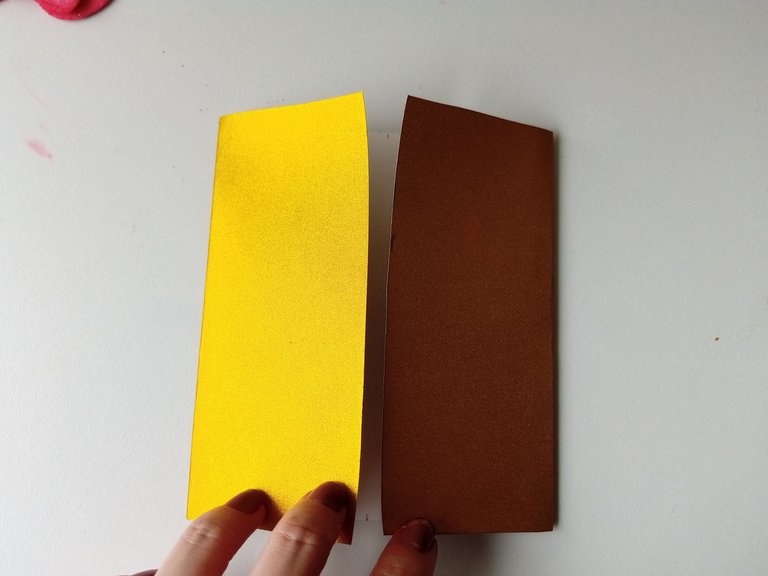
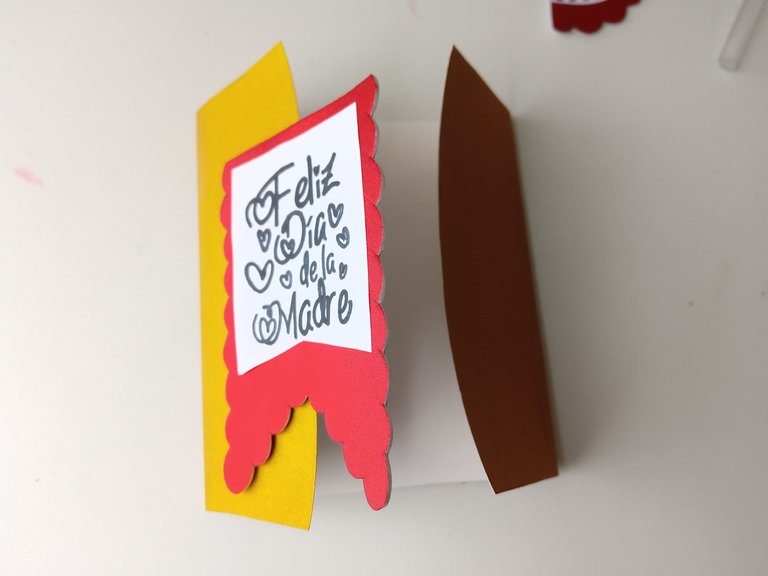
- PASO 1:
Lo primero que hice fue tomar la cartulina escarchada dorada y trazar las medidas para el tamaño que quería mi tarjeta, las cuales fueron: 22 cm de ancho x 12.5 cm de largo. Quise hacerla más o menos pequeña para que se viera mucho más tierna. Al tener trazadas las medidas, recorté y doblé ambos laterales hacia el centro, para que la tarjeta se abriera en medio.
- STEP 1:
The first thing I did was take the gold frosted cardstock and trace the measurements for the size I wanted my card, which were: 22 cm wide x 12.5 cm long. I wanted to make it more or less small so that it looked much more tender. Once I had the measurements mapped out, I cut out and folded both sides towards the center, so that the card opened in the middle.
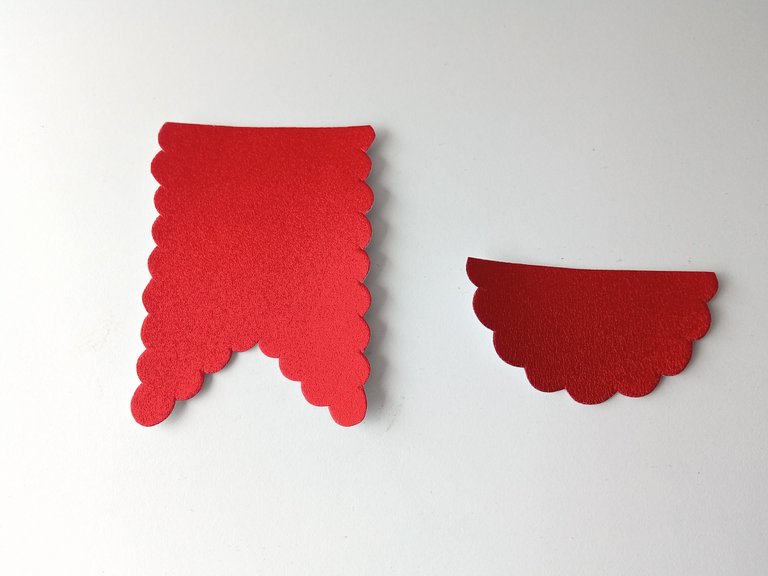
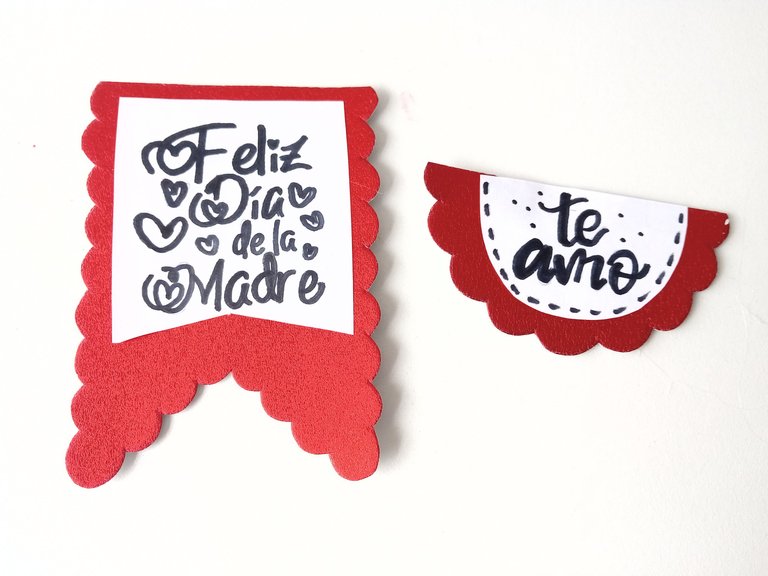
- PASO 2:
Luego, recorté un rectángulo de 9 cm x 7 cm, al cual le di forma rectangular en uno de los bordes, recorté con bordes ondulados y repetí el mismo proceso, pero esta vez recorté medio círculo de 8 cm x 4 cm. Una vez listas estas piezas, escribí un mensaje en dos trozos de hoja, recortados con la misma forma, pero más pequeño que las piezas anteriores.
- STEP 2:
Then, I cut out a 9 cm x 7 cm rectangle, which I gave a rectangular shape on one of the edges, cut out wavy edges and repeated the same process, but this time I cut out a half circle of 8 cm x 4 cm. Once these pieces were ready, I wrote a message on two pieces of paper, cut out in the same shape, but smaller than the previous pieces.
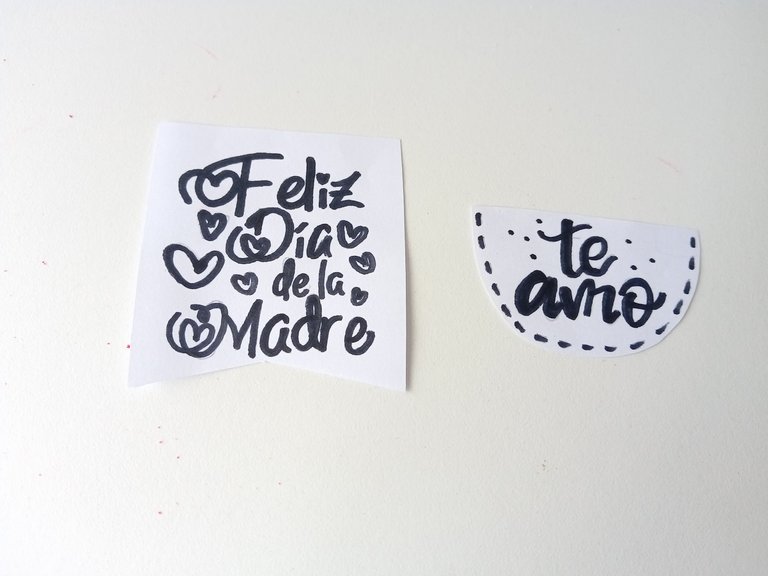
- PASO 3:
Pegué el mensaje en las piezas correspondientes, tomé la pieza más grande y pegué en el borde de una de las tapas de la tarjeta para que podamos cerrar y abrir con facilidad.
- STEP 3:
I glued the message on the corresponding pieces, I took the largest piece and glued it to the edge of one of the card covers so we can close and open it easily.
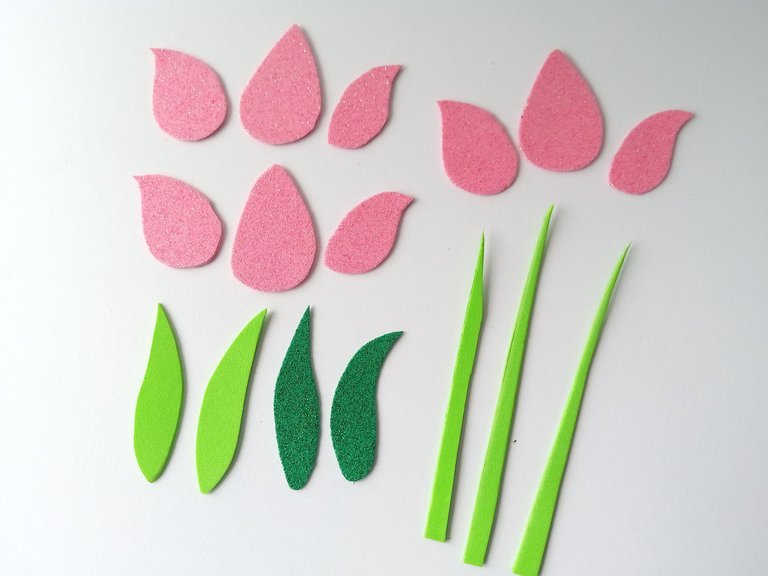
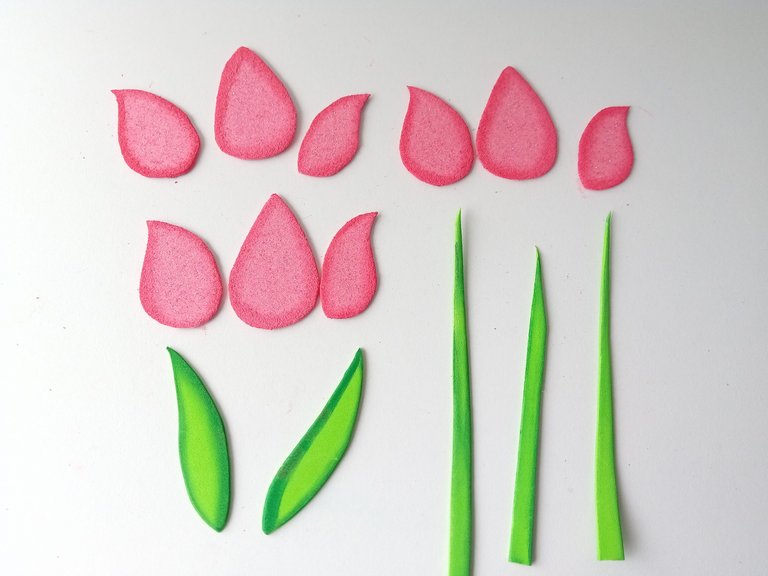
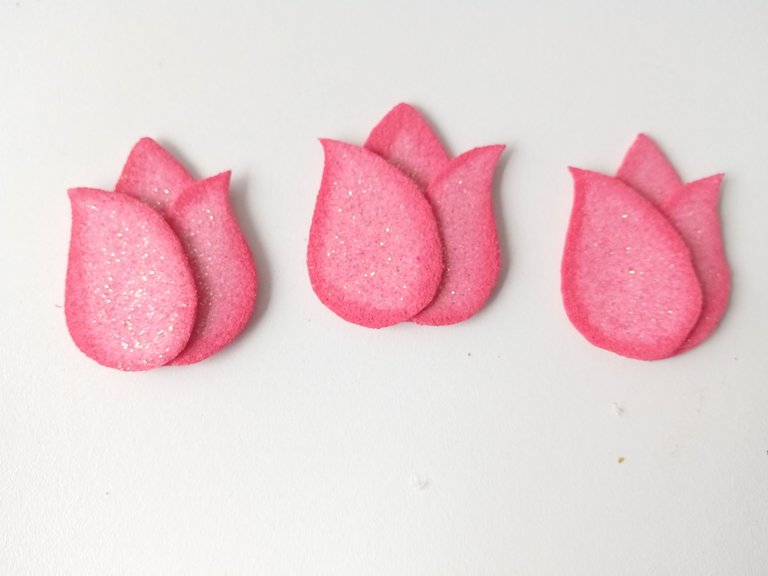
- PASO 4:
Ahora vamos con la decoración, para esto busqué un dibujo de tulipán e hice mis patrones en una hoja blanca para luego transferir cada pieza al color correspondiente de foami, de la siguiente manera: los pétalos en foami escarchado rosa, 2 hojas en foami escarchado verde, el tallo y algunas hojas en foami verde de un tono distinto que el anterior. Al tener recortadas todas las piezas, tomé un tono más oscuro de pintura para cada una de las piezas y lo pasé frotando un pañito en el borde de las mismas.
- STEP 4:
Now let's go with the decoration, for this I looked for a tulip drawing and made my patterns on a white sheet and then transferred each piece to the corresponding color of foam, as follows: the petals in pink frosted foam, 2 leaves in frosted foam green, the stem and some leaves in green foam of a different tone than the previous one. Having cut out all the pieces, I took a darker tone of paint for each of the pieces and rubbed a cloth on the edge of them.
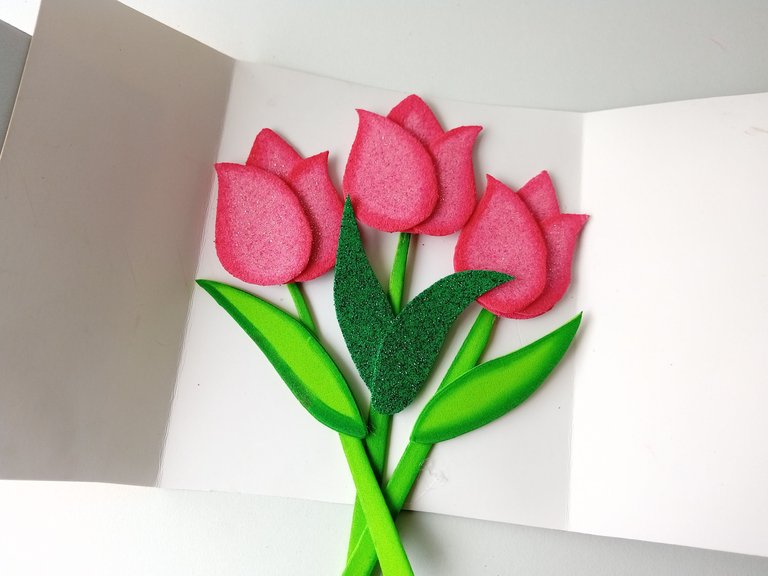
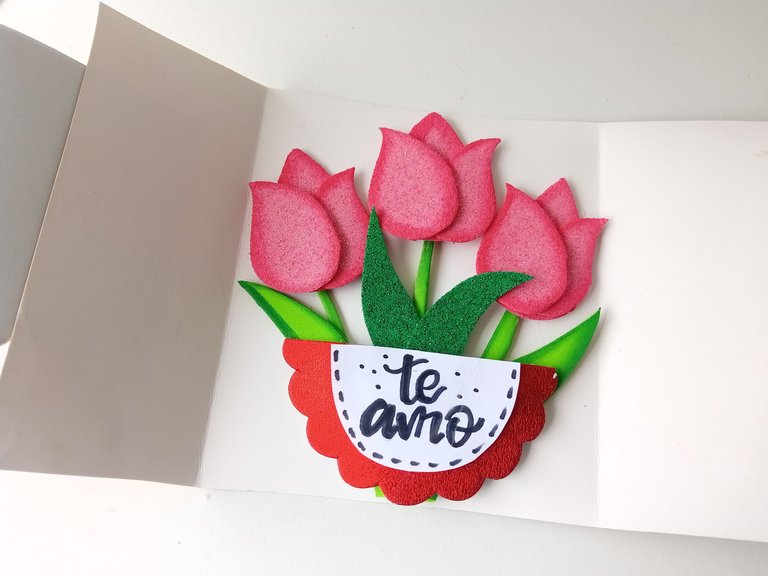
- PASO 5:
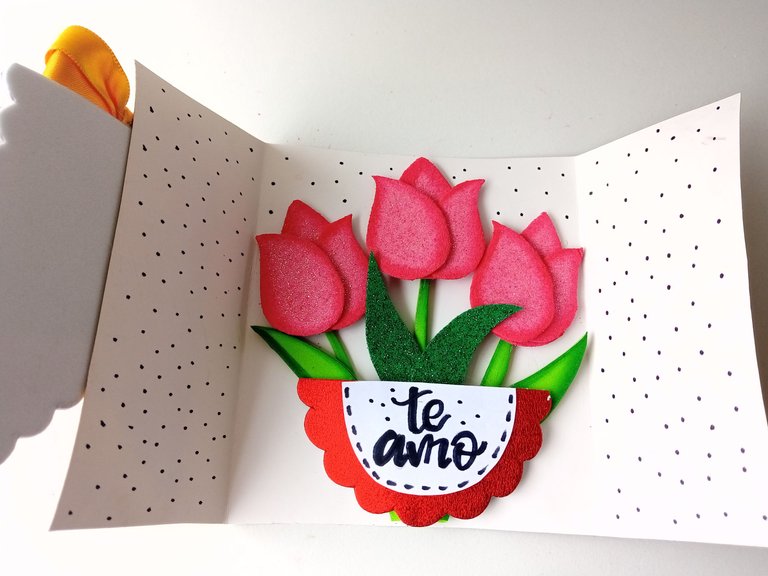
Al estar listas, comencé a pegar los tulipanes y pegué a los tallos. Las ordené a mi gusto en medio de la parte interior de la tarjeta, pegué las hojas, dejando en medio las escarchadas y, para finalizar, recorté el excedente de los tallos y justo en esta zona, pagué la pieza circular con mensaje que elaboramos en uno de los pasos anteriores.
- STEP 5:
When they were ready, I started gluing the tulips and glued them to the stems. I arranged them to my liking in the middle of the inside of the card, I glued the leaves, leaving the frosted ones in the middle and, to finish, I cut out the excess of the stems and right in this area, I placed the circular piece with a message that we made in one of the previous steps.
- PASO 6:
Por último, tomé un marcador negro e hice puntos desordenados por toda la parte interna de la tarjeta, tomé un lazo que había elaborado anteriormente y pegué sobre el mensaje de la portada.
- STEP 6:
Lastly, I took a black marker and made messy dots all over the inside of the card, took a bow I had made earlier and glued it over the message on the cover.
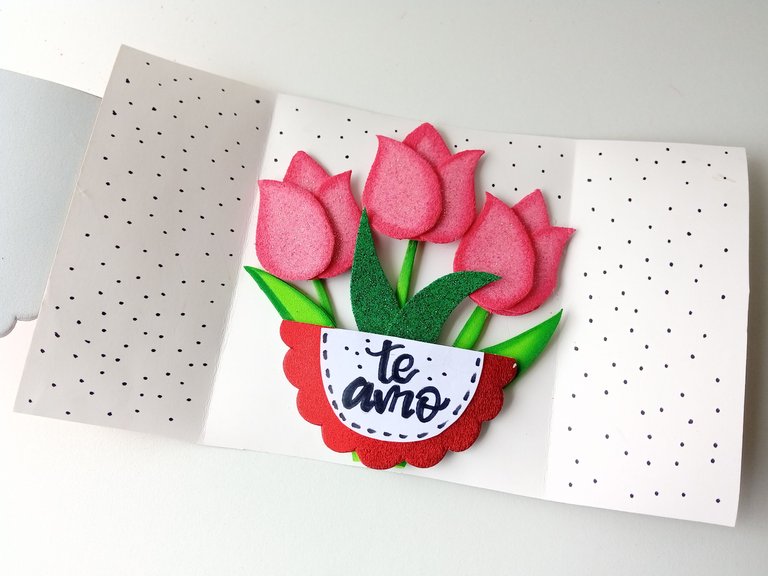
✨🌷✉️¡And ready!✉️🌷✨ This way you can make a beautiful card for Mother's Day to accompany a nice gift or special detail. I must say that I was fascinated with the result. I hope you liked the step by step and are encouraged to make it.
❤️Until the next post.
✨RESULTADO: | ✨RESULT:


Todas las fotografías son de mi propiedad.
Separador y Fotos editadas en Canva
All photographs are my property.
Photos edited in Canva
Dios mío no puedo con tanta belleza 😍 Esa tarjeta te quedó{o preciosísima ami ❤️ La amé por completo, desde las flores, hasta la forma de la tarjeta en si, te botaste con esta manualidad mi Valen 🥰
Ay!! Gracias amiga bella. Siempre me dejas unos comentarios más lindos mi Mary . De verdad que muchas gracias por tu apoyo siempre💗
Que trabajazo!! Los tulipanes me parecen una ternura❤️ es un regalo perfecto para el día de las madres, te felicito!
Muchas gracias amiga !! Me alegra mucho que así lo veas, quería un resultado tierno y elegante a la vez. Saludos ✨💗
Wow, súper linda. Me encanta como se ven los tulipanes. De verdad que si. Siempre te he comentado que tienes mucha creatividad y detallas muy bien las figuras resaltantes de tus trabajos. Ésta tarjeta está más que especial y sencilla de realizar.
Muchas gracias , amiga! Que bella, de verdad que agradezco mucho tus comentarios. ✨💗 Saludos bella!
Que hermosa tarjeta! Se ve demasiado delicada, valen. Amé los tulipanes 😍😍
Quedó hermosa! Se la voy a enviar a Paweł para que se ponga creativo porque este año quiero mi primer regalo del día de las madres 😍
Que linda tarjeta @valenpba, es un hermoso detalle para el día de las madres y se ve sencilla de hacer, gracias por compartir. 🌻🌸
Saludos!
Muchas gracias @belkyscabrera ! Así es, se ve bastante tierna y elegante, pero la verdad que es bastante sencilla. Me alegra mucho que te haya gustado 💕
Demasiado linda amiga, me encantaron los tulipanes se ven muy cuchi🥰
Muchas gracias amiga bella!! 😘
Te quedó hermosa mi Valen, ese detalle de los tulipanes me encantó 😍😍 Me parece super romántica y perfecta para el día de las madres 🩷✨
Super creativa y hermosa, me gusto mucho el diseño y los colores vibrantes, gracias por compartir.❤️
Muchas gracias bella! Me alegra mucho que te haya gustado.✨💗
That's a beautiful card and I'm sure the receiver would appreciate all the effort and thought behind it.
Nice job:)
Thank you so much ! I really appreciate your nice comment. Greetings ✨
La creación está muy prolija, los colores vibrantes se ven llamativo y con un excelente acabado
Muchas gracias!! Me alegra mucho que así lo veas, pues era la idea 🤭. Muchas gracias por comentar.✨
Pero que cosa tan preciosaaaaaa🩷
Me encanta esta tarjeta amiga, te quedo muy fabulosa ✨🌷🌷🌷
Amiga, que linda idea, te quedo espectacular.
Que bueno que nos estés dando estas ideas con antelación.
Muchas gracias Ami!! Claro, así pueden tener más ideas para ese bello día.💗
¡¡¡Buen trabajo!!! Gracias por publicar tu excelente contenido en Hive Diy, qué idea tan asombrosa para regalar a nuestras hermosas madres, quiero hacer unos así para regalárselo a la mía, gracias a la idea.
Tu comunidad artesana ahora es testigo

Muchas gracias por apoyar mi contenido amigos! Feliz de que esta idea haya sido de su agrado.💗
Este detalle me parece bastante ideal para el día de las madres, me encantan los colores, te quedo preciosa amiga! 😍