Hello creative friends of #hivediy, a pleasure to greet you on this great Sunday, today I bring you a very nice new design, so I want to share a tutorial where I explain step by step How to make these earrings, you can't miss this tutorial, I did it with the wire technique, here I will explain how to make it.
I will try to be as explicit as possible so that it is easy for them, the best thing is that you will use few things, so without further ado, here are the steps to follow. This time we will use the following materials
MATERIALES
- alambre calibre 20.
- Pinza plana.
- pinza punta redonda.
- objeto cilíndrico
MATERIALS
- 20 gauge wire.
- Flat clamp.
- Round nose pliers.
- cylindrical object
PASO A PASO
STEP BY STEP
1 . The first thing we will do is take the cylindrical object that I married an eyeshadow brush, in this we will turn the wire around 5 times.

2 . Then we will extract the cylindrical object and with the help of the round nose pliers we will make a ring at each end,We will press the rings so that it remains as follows.

3 . Now we will try to join the rings of the tips in the upper part, which implies that the rings become a u-shape.

4 . With the same 20 gauge wire, make the piece in the shape of a tile.

5 . Now I will make the piece that will join both pieces, with the help of the round nose pliers make two rings in a row as I show you below.

6 . It should stay like this!

7 . Finally we proceed to join the pieces.

Pretty easy right? I know you thought it was more complicated but now you see that it is not! I hope you liked this little tutorial, and you are encouraged to try it, because they are easy to do and they will look great on you.
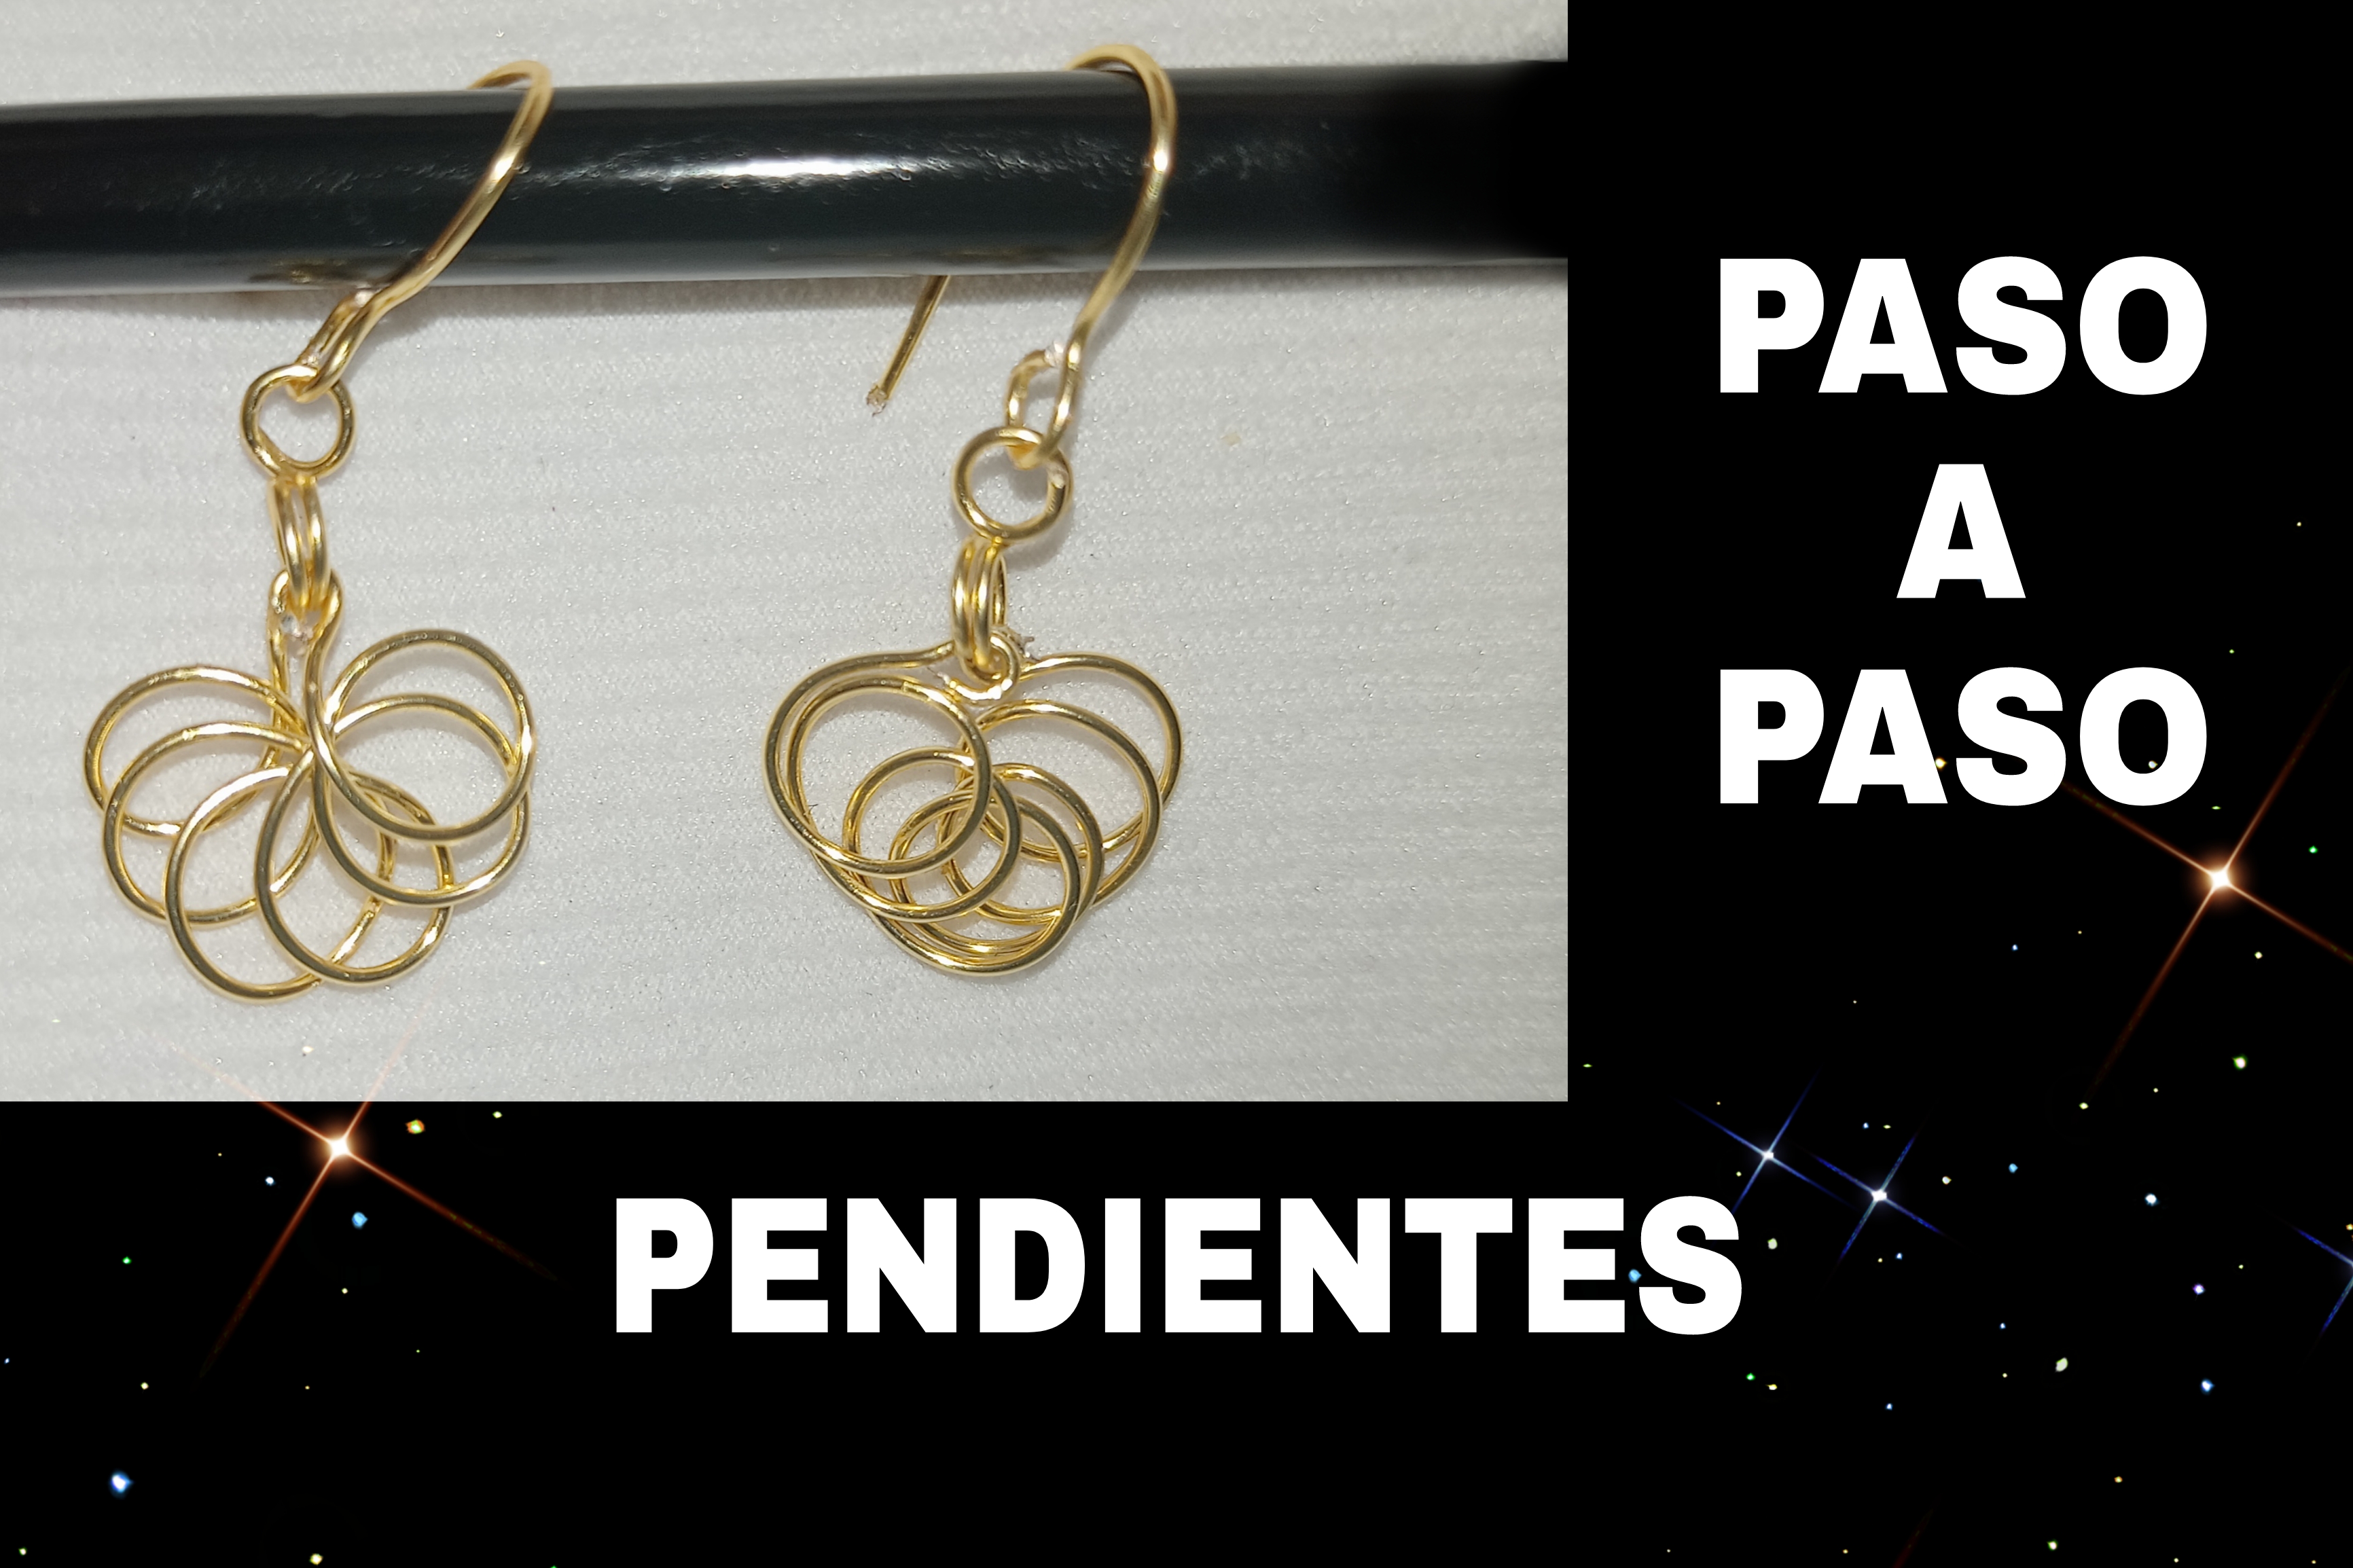
RESULTADO FINAL
FINAL SCORE

REMEMBER THAT YOU CAN GIVE IT YOUR PERSONAL TOUCH.
Happy to share with you friends of #hivediy one more of my projects, I hope you liked it! It was made with love and dedication😊
You can find more tutorials like this on my blog, And if you liked the result on my blog you can get a small photo session! it will be until a next opportunity!
Fotografías propias tomadas con mi REALME 7i
Contenido 100% exclusivo
Own photos taken with my REALME 7i
100% exclusive content
Contenido 100% exclusivo
Own photos taken with my REALME 7i
100% exclusive content
--
Thank you for sharing this post on HIVE!
Your content got selected by our fellow curator semarekha & you just received a little thank you upvote from us for your great work! Your post will be featured in one of our recurring compilations which are aiming to offer you a stage to widen your audience within the DIY scene of Hive. Stay creative & HIVE ON!
Please vote for our hive witness <3
Muy práctico y fácil de realizar estos zarcillos.
Que lindos me encanto el diseño, la felicito amiga este tipo de prendas requieren paciencia e imaginación, gracias por compartir, saludos 🤗
Congratulations @venusl19! You have completed the following achievement on the Hive blockchain And have been rewarded with New badge(s)
Your next target is to reach 700 replies.
You can view your badges on your board and compare yourself to others in the Ranking
If you no longer want to receive notifications, reply to this comment with the word
STOPCheck out our last posts:
Support the HiveBuzz project. Vote for our proposal!
dios bendiga tus manos son muy bellos
Amén, gracias por su visita!😊
De verdad son muy sencillos de hacer, y lo explicaste de la mejor manera, te han quedado hermosos 💕