🎃🍁 ¡Hola, amigos de esta increíble comunidad! Espero que estén pasando un excelente día.
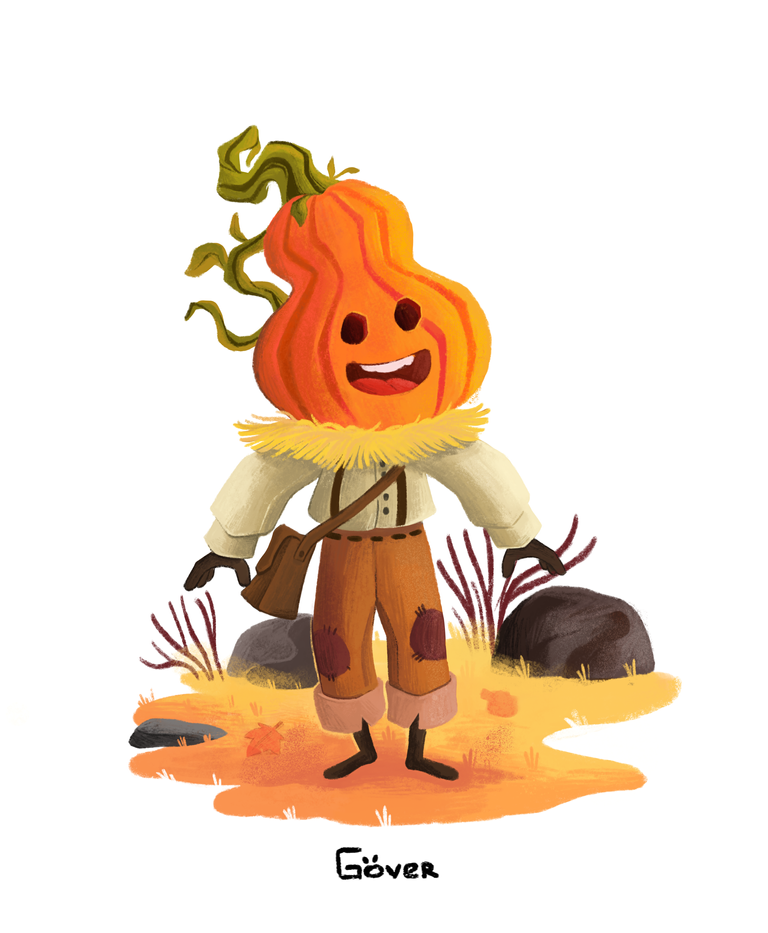
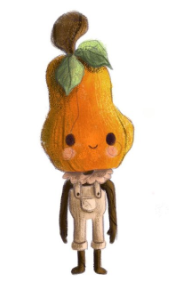
Hoy quiero compartir con ustedes esta ilustración de un personaje muy especial para mí. Este personaje dio inicio a mis ilustraciones en Photoshop y esa ilustración fue el punto de partida de todo el camino que llevo recorrido hasta ahora.
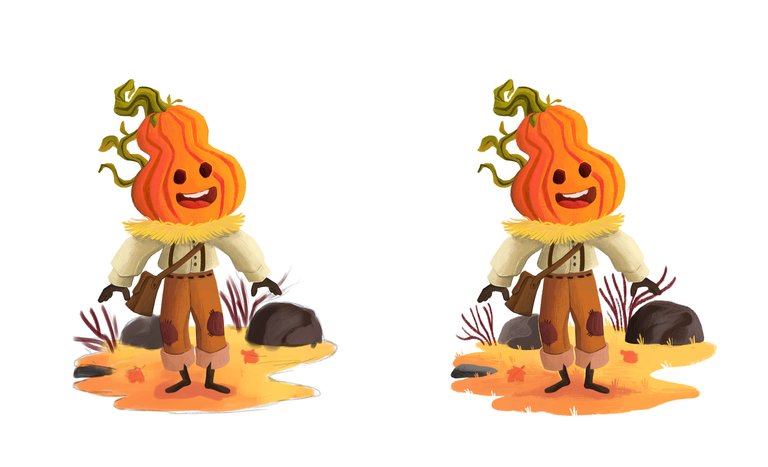
Sin embargo, hoy he decidido rehacer esa versión antigua y darle un poco de aire fresco con un nuevo diseño. Esta versión nueva la utilizaré para crear una ilustración completa, la cual irá a mi portafolio.
Sin más nada que decir, pasemos al paso a paso.
- 🎃🍁 Hello, friends of this amazing community! I hope you are having a great day.
- Today I want to share with you this illustration of a very special character for me. This character started my illustrations in Photoshop and that illustration was the starting point of all the way I've come so far.
- However, today I have decided to redo that old version and give it some fresh air with a new design. This new version will be used to create a complete illustration, which will go into my portfolio.
- Without further ado, let's move on to the step by step.
🍁 PROCESO | PROCESS 🍁
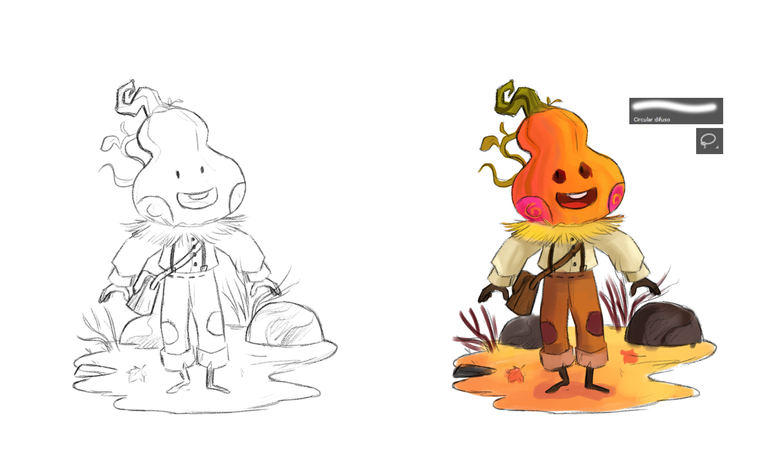
Bueno, lo primero que hice fue hacer el boceto del personaje. En este caso hice muchos cambios, tanto en el diseño del personaje en sí y también en la vestimenta. Lo primero que hice fue agrandar su cabeza de calabaza, dándole una forma más armoniosa y bonita, así que la hice un poco más ancha. Después le hice una vestimenta muy antigua, le coloqué una camisa formal y unos pantalones viejos con tirantes, también le agregué un poco de heno saliendo del cuello porque ese era el detalle que tenía el original, aunque en el original no lo hice de una buena manera jaja, como detalle extra añadí un bolsito pequeño, pensé que le quedaría genial. Por último, le hice un pequeño suelo para complementar el dibujo. El suelo no tiene muchas flores porque es una escena otoñal y, pues en esa época no hay muchas flores, por eso agregué un par de rocas y arbustos secos.
Después de hacer el boceto procedí a aplicar los colores base del dibujo, para ello me ayudé de la herramienta lazo en Photoshop para contornear todo el personaje, una vez que estaba seleccionado el personaje, con un pincel difuso empecé pintarlo, está vez no utilicé los colores originales del personaje, así que me dejé llevar un poco. En la cabeza utilicé colores naranjas y verdes porque es una calabaza jaja, y para el cuerpo y la vestimenta utilicé varios tonos de color marrón. Para colorear el suelo solo creé una capa nueva debajo del personaje y empecé a colorear el suelo. Aquí también utilicé colores naranjas para el césped y unos tonos de grises y marrones rojizos para las rocas y arbustos secos.
- Well, the first thing I did was to make the sketch of the character. In this case I made a lot of changes, both in the design of the character itself and also in the clothing. The first thing I did was to enlarge his pumpkin head, giving it a more harmonious and beautiful shape, so I made it a little wider. Then I made him a very old dress, I put a formal shirt and some old pants with suspenders, I also added some hay coming out of the neck because that was the detail that the original had, although in the original I didn't do it in a good way haha, as a strange detail I added a small bag, I thought it would look great. Finally, I made a small floor to complement the drawing. The ground doesn't have many flowers because it's an autumn scene and, well, in that season there aren't many flowers, that's why I added a couple of rocks and dry bushes.
- After making the sketch I proceeded to apply the base colors of the drawing, for this I used the lasso tool in Photoshop to outline the whole character, once the character was selected, with a diffuse brush I started to paint it, this time I didn't use the original colors of the character, so I let myself go a little. For the head I used orange and green colors because it is a pumpkin haha, and for the body and clothes I used various shades of brown. To color the ground I just created a new layer under the character and started coloring the ground. Here I also used orange colors for the grass and some shades of gray and reddish browns for the dry rocks and bushes.
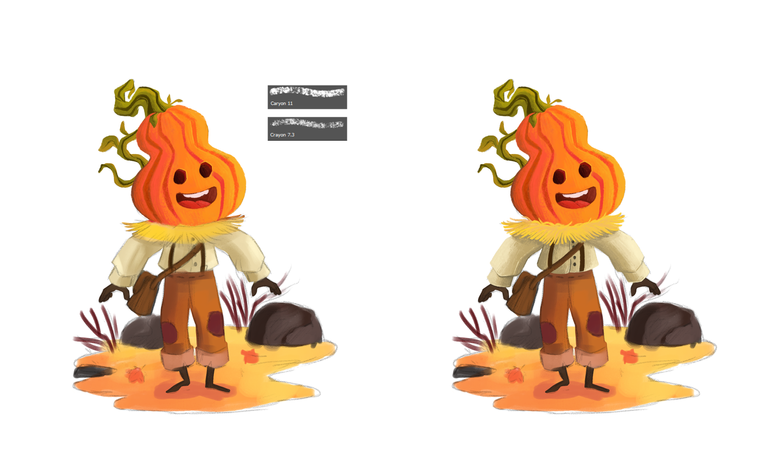
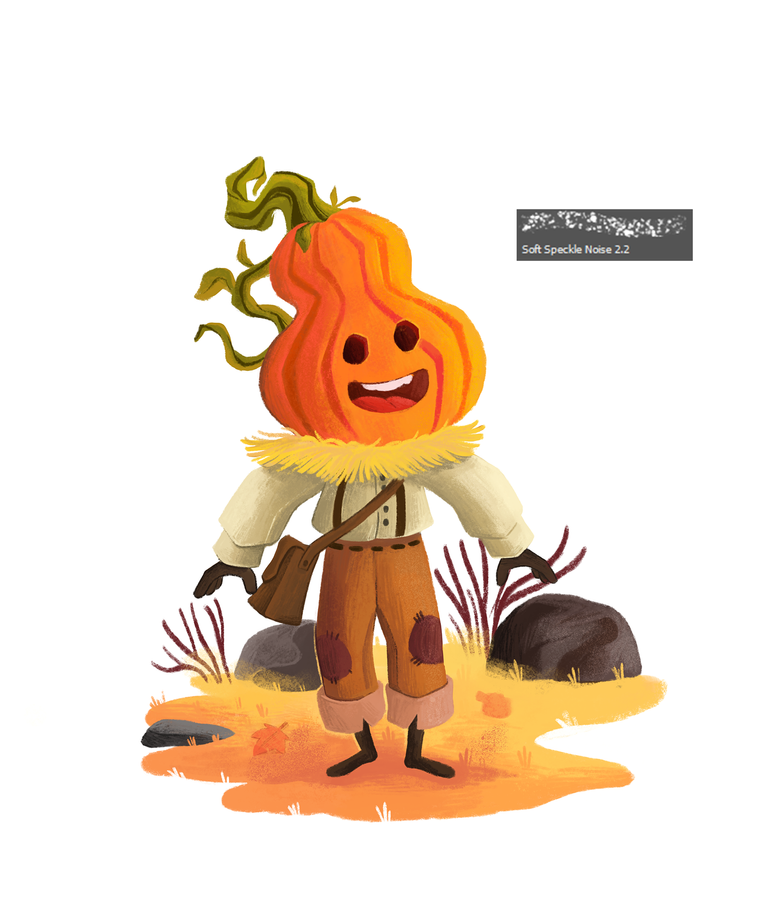
Llegó la hora de empezar a detallar el personaje, para ello utilicé dos pinceles: el primero lo utilicé para realizar una capa base y el segundo lo utilicé para terminar de detallar lo que había pintado anteriormente. Estos pinceles los utilicé para colorear todo el dibujo. Bueno, primero empecé por la cabeza del personaje, coloreando con colores naranjas, algunos tirándose rojos y otros a marrones, después coloreé los ojos y la boca, como ambos estaban huecos los coloreé con un color oscuro, y para finalizar coloreé el tallo con varios tonos de verde y le añadí pequeñas hojas.
Después de colorear la cabeza del personaje, procedí a colorear la parte superior del cuerpo, coloreando las manos, la camisa y el collar de heno. Para colorear la camisa utilicé varios tonos de marrones tirando a grises, utilizando bien las sombras y detallando zonas específicas. También le añadí botones a la camisa para darle más realismo y, por último, coloreé los tirantes del pantalón, porque estaban en esa zona.
- It was time to start detailing the character, for this I used two brushes: the first one I used to make a base layer and the second one I used to finish detailing what I had painted previously. I used these brushes to color the whole drawing. Well, first I started with the head of the character, coloring with orange colors, some turning red and others to brown, then I colored the eyes and mouth, as both were hollow I colored them with a dark color, and finally I colored the stem with various shades of green and added small leaves.
- After coloring the head of the character, I proceeded to color the upper part of the body, coloring the hands, the shirt and the hay collar. To color the shirt I used various shades of brown to gray, using the shadows well and detailing specific areas. I also added buttons to the shirt to give it more realism and, finally, I colored the suspenders of the pants, because they were in that area.
Después del paso anterior, empecé a colorear la parte inferior del cuerpo. Para ello empecé a colorear el bolso del personaje, utilizando varios tonos de marrón, después terminé de colorear el pantalón y los pies del personaje, para colorear el pantalón garabateé bastante, quise que se viera un coloreado rústico porque me encanta que mis dibujos se vean así, también coloreé los pequeños parches que tiene en la parte de las rodillas y le añadí un detallito de costura para que se viera mejor.
Una vez terminado el personaje, terminé de colorear el suelo. Para ello empecé por el césped, aquí fui mezclando los tonos de naranja para que se viera un poco uniforme, obviamente lo hice garabateando bastante, después coloreé las rocas y los arbustos. En este punto el dibujo estaba completo, pero decidí agregarle más detalle al dibujo, así que utilicé un pincel de textura y lo pasé por el césped, las rocas y por algunas partes del personaje. No se nota mucho, pero le da un poco más de textura a toda la ilustración.
- After the previous step, I started coloring the lower part of the body. To do this I started coloring the bag of the character, using various shades of brown, then I finished coloring the pants and feet of the character, to color the pants I scribbled a lot, I wanted it to look a rustic coloring because I love my drawings to look like that, I also colored the small patches that has in the part of the knees and added a little detail of stitching to make it look better.
- Once the character was finished, I finished coloring the ground. To do this I started with the grass, here I was mixing the shades of orange to make it look a little uniform, obviously I did it by doodling a lot, then I colored the rocks and bushes. At this point the drawing was complete, but I decided to add more detail to the drawing, so I used a texture brush and ran it over the grass, rocks and some parts of the character. It's not very noticeable, but it gives a little more texture to the whole illustration.
🎃🍁 ¡Y listo amigos! Espero que les haya gustado el dibujo, fue muy divertido hacerlo, puesto que es un personaje especial para mí.
¡Un saludo! Y nos vemos en el próximo post.
- 🎃🍁 And that's it folks! I hope you liked the drawing, it was a lot of fun to do it, since he is a special character for me.
- Best regards! And see you in the next post.
Instagram:@artbygover

Separador y Fotos editadas en Canva
Photos edited in Canva
Que genial te quedo muy limpio el trabajo, hermoso 😍 espero algún día lograr crear así 😭
Muchas gracias!! 😊 Me tomo más de un año poder dibujar así jaja, rodó es cuestión de práctica y constancia, se que tú también lograrás dibujar así o mejor.
Me encanta lo tierno que se ve, y los colores tan suaves son sencillamente hermosos ✨
!DIY
Muchas gracias!! 😊 Siempre trato de que mis personajes se vean tiernos y muy bien pintados. Que bueno que te gustó el dibujo. Saludos!
You can query your personal balance by
!DIYSTATSBello trabajo, y un personaje muy cute. 😊
Muchas gracias 😊 me alegra que te haya gustado!
This is so pretty!!
Muchas gracias!! 😊