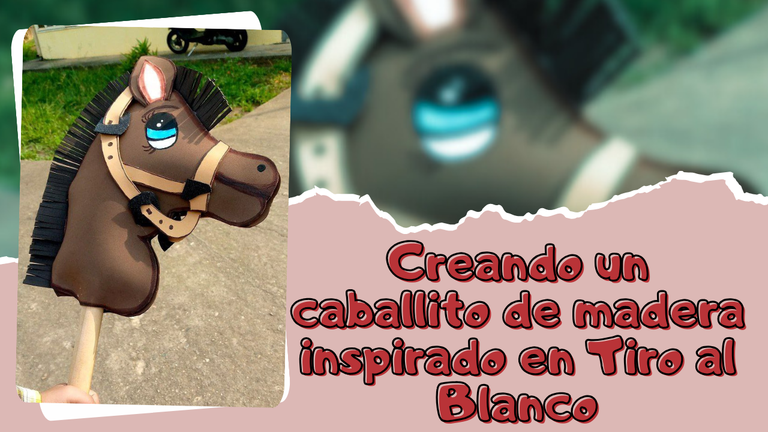
¡Bienvenidos amigos creativos!👩🎨
Está semana ha sido muy productiva y llena de retos nuevos, y en ellos entra mi primera vez creando un caballo de madera, aunque específicamente solo utilice foami y un palo de escoba. Está idea surge puesto que mi sobrino tenía una actividad en el colegio y en la cual necesitaba llevar un caballo, al cual mi sobrino decidió llamar “Tiro al blanco” y por mi parte realizar lo más parecido que pudiese (siendo este caballo que sale en la película de Toy Story), sin más a que hacer referencia…
Welcome creative friends!👩🎨
🙋♀️ Hello beautiful and creative people! I send you cordial greetings, I hope you are having super nice days, wishing for you to continue having an amazing weekend.
This week has been very productive and full of new challenges, and in them comes my first time creating a wooden horse, although specifically I only used foami and a broomstick. This idea arises because my nephew had an activity at school and in which he needed to bring a horse, which my nephew decided to call “Target shooting” and for my part to make as close as I could (being this horse that appears in the Toy Story movie), without further reference ...
¡Llegó la hora de crear! / It's time to create!✨❤️.
|
|---|
¿Cuál es el proceso?/ What is the process?⬇️
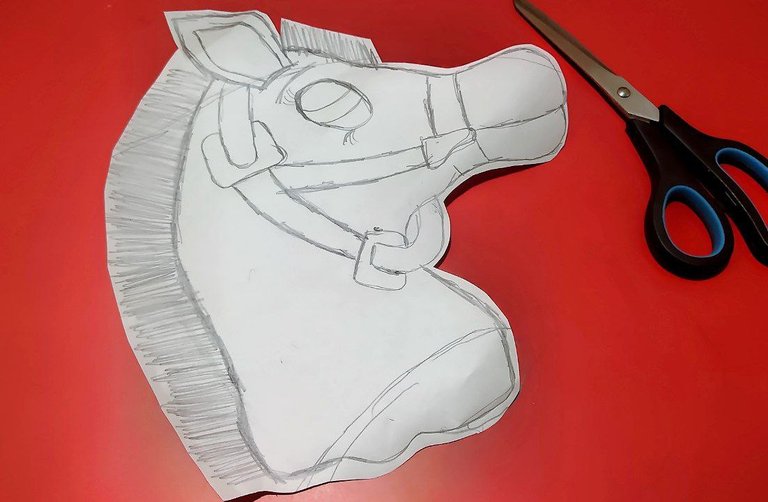
🐴 Paso 1 / Step1
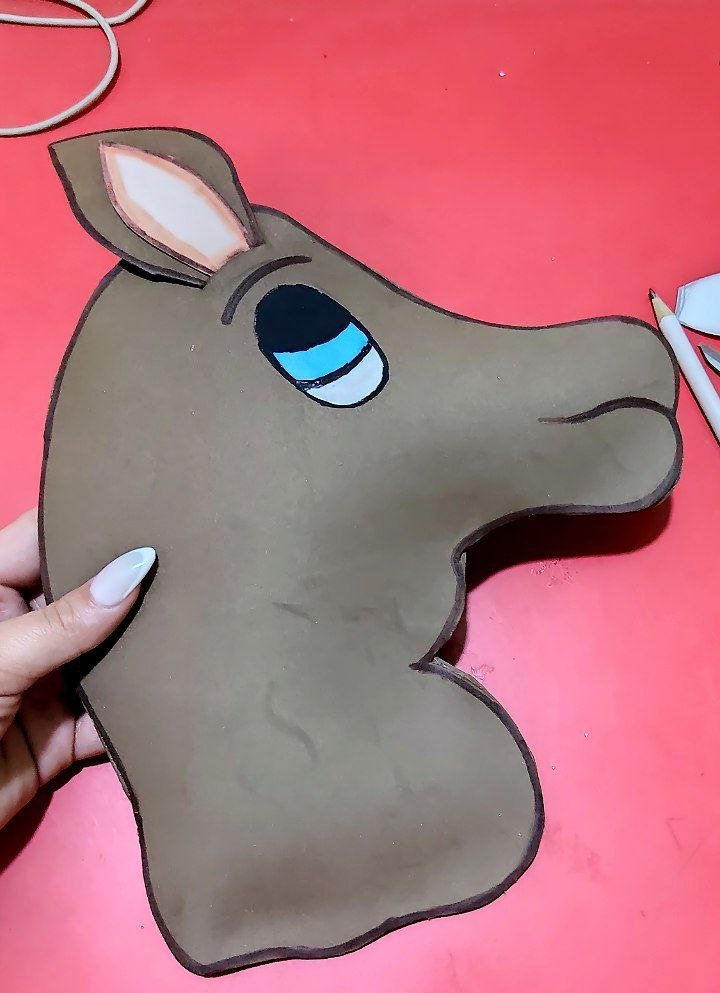
Lo primero que hice fue realizar el molde de la cara del caballo de Tiro al blanco y accesorios que el mismo iba a llevar solo dibuje la parte de la cara ya que como es un caballo de madera el resto sería con un palo de escoba.
The first thing I did was to make the mold of the face of the target horse and accessories that it was going to wear, I only drew the part of the face because as it is a wooden horse the rest would be with a broomstick.
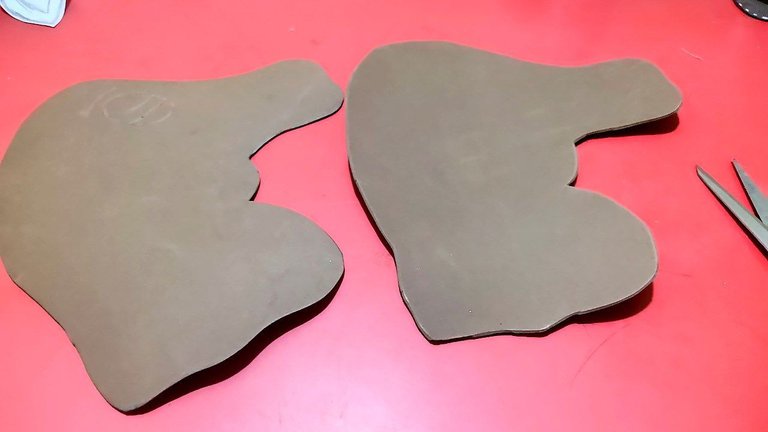
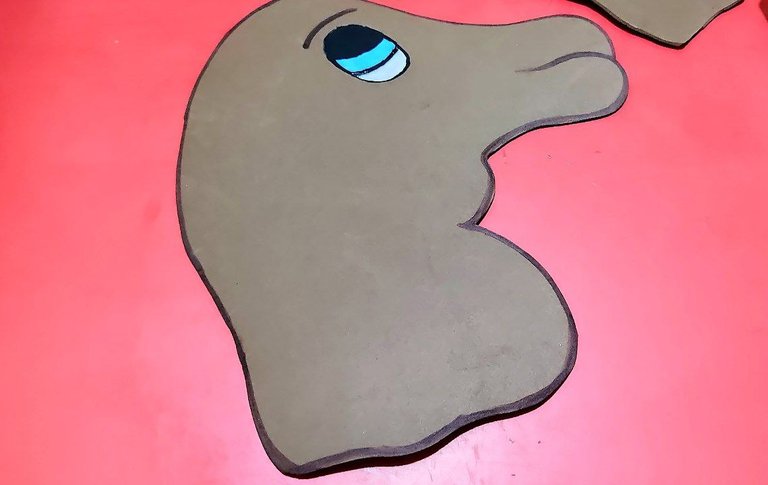
🐴 Paso 2 / Step 2
Posteriormente en foami marrón transferí la cara del caballo haciendo dos de ellas exactamente iguales, con marcador marrón remarque alrededor del borde y con pintura al frío blanca, negra y azul pinte el ojo del caballo.
Then in brown foami I transferred the horse's face making two of them exactly the same, with brown marker I marked around the edge and with white, black and blue cold paint I painted the horse's eye.

 |  |
|---|
🐴 Paso 3 / Step 3
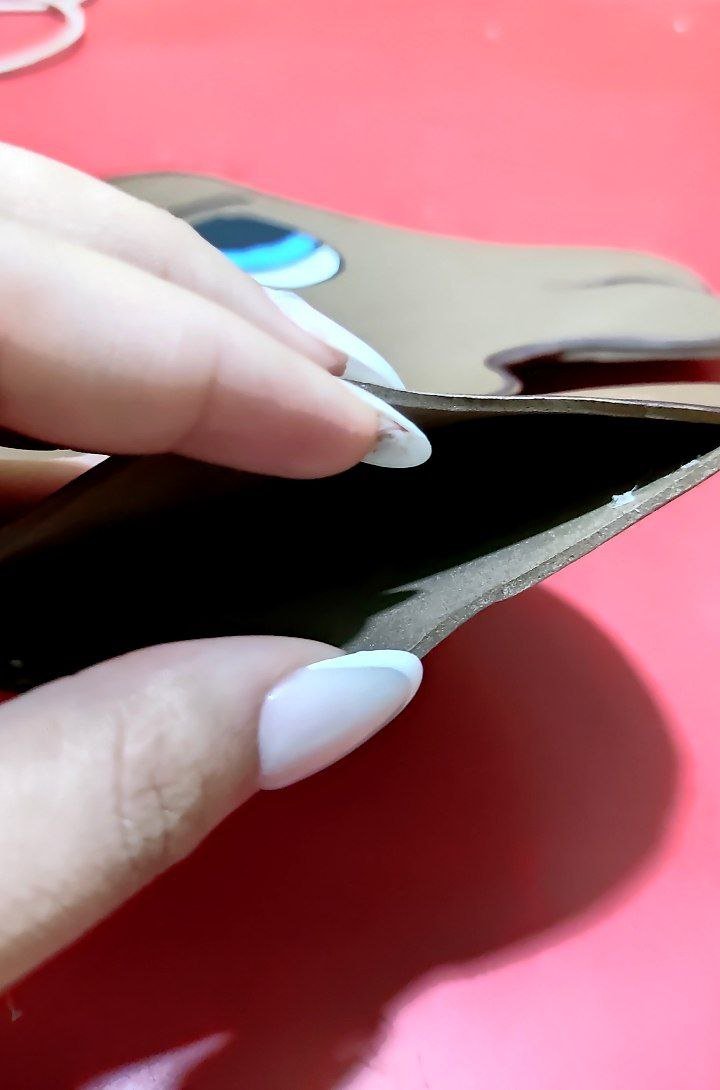
Dejé secar muy bien el ojo para luego pegar ambas caras del caballo, pero sin pegar la parte superior del mismo (la abertura debe quedar como se ve en las siguientes imágenes)
I let the eye dry very well and then glue both sides of the horse, but without gluing the upper part of it (the opening should be as shown in the following images).
 |  |
|---|
🐴 Paso 4 / Step 4
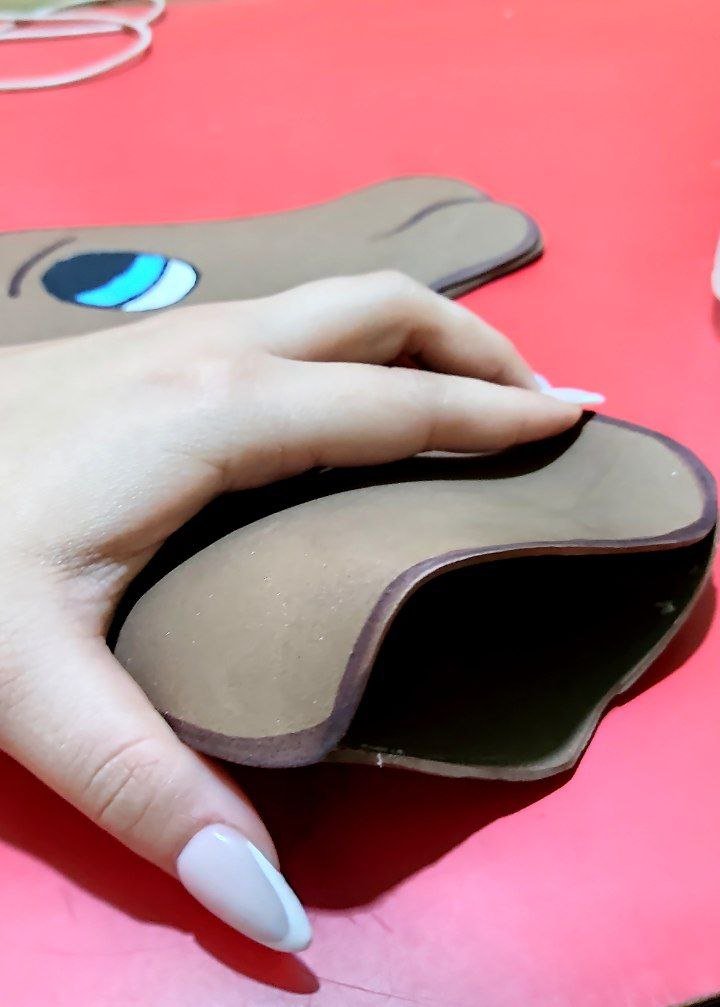
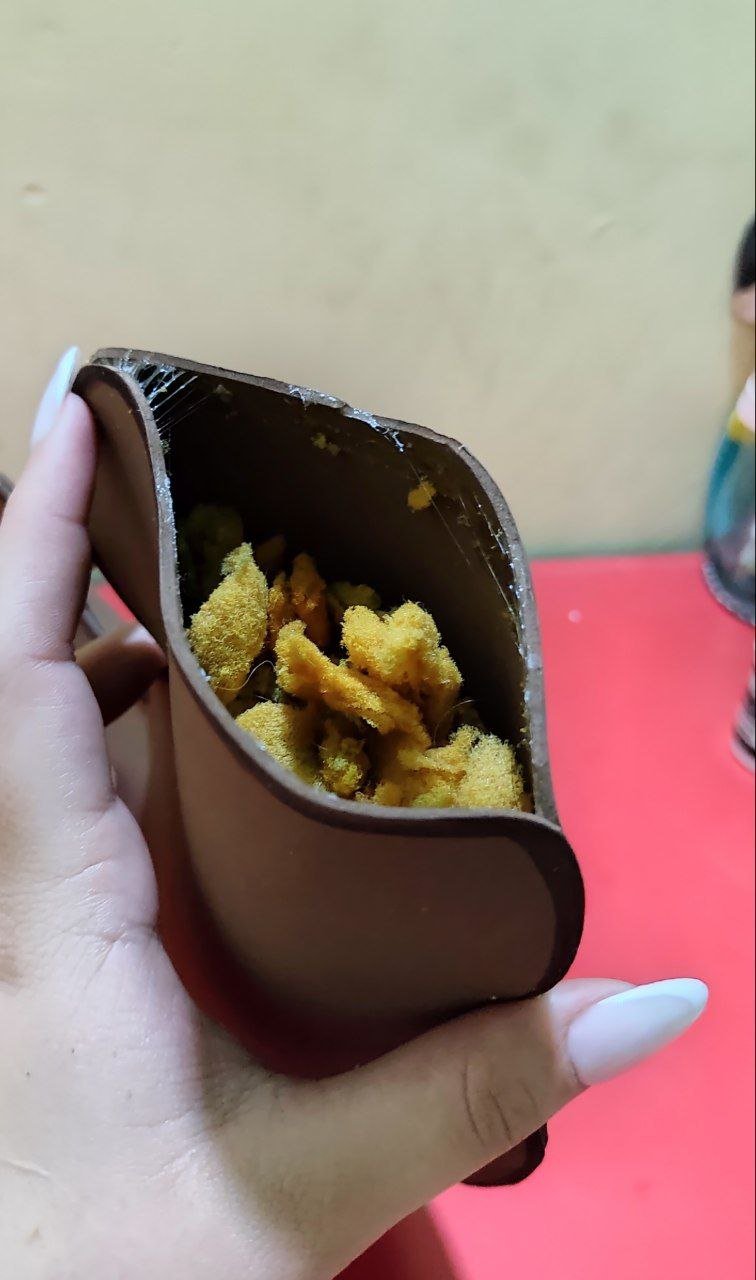
Esa abertura que deje es para agregar relleno al caballo, en mi caso agregué el relleno de una almohada vieja que tenía sin usar, seguidamente con silicón pegue la parte superior para que el relleno no se saliera, solo dejé un pequeño espacio en el centro para allí insertar el palo de escoba.
That opening I left is to add stuffing to the horse, in my case I added the stuffing from an old pillow I had unused, then with silicone I glued the top so that the stuffing would not come out, I only left a small space in the center to insert the broomstick.
🐴 Paso 5 / Step 5
Por otro lado inserte la oreja de igual forma en foami marrón y agregando una forma más pequeña en color piel, haciendo el respectivo delineado con marcadores en los bordes. Para insertar la oreja arriba de la ceja y con ayuda de un bisturí realice una pequeña abertura y dentro de ella agregué la oreja.
On the other hand, insert the ear in the same way in brown foami and add a smaller shape in skin color, making the respective outline with markers on the edges. To insert the ear above the eyebrow and with the help of a scalpel make a small opening and inside it I added the ear.
 |  |
|---|
🐴 Paso 6 / Step 6
Seguidamente realice la correa del caballo usando foami liso color beige con detalles negro en foami escarchado.
Next, make the horse's leash using plain beige foami with black details in frosted foami.
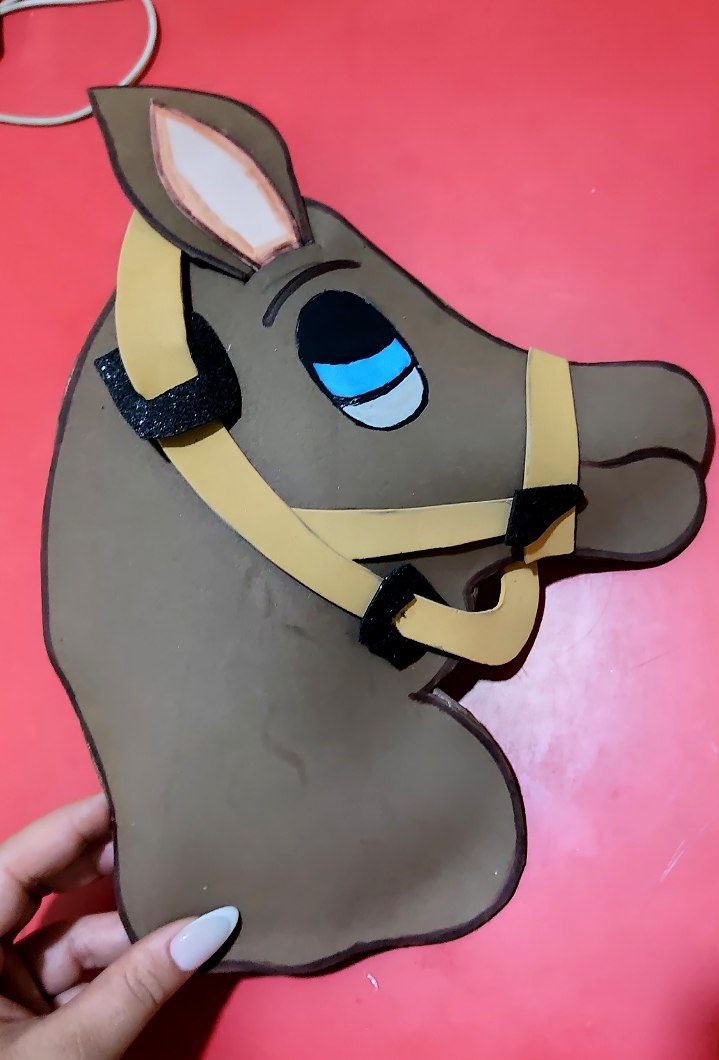
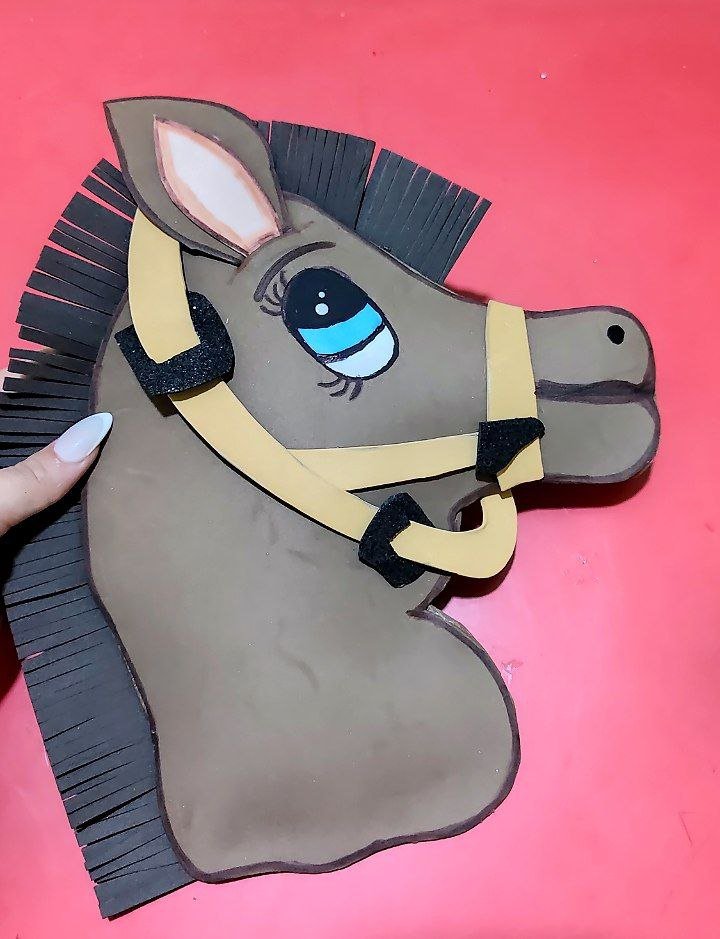
🐴 Paso 7 / Step 7
En una tonalidad de marrón más oscuro al utilizado anteriormente realice el pelo del caballo, para ello use una tira gruesa de foami y recorte muchas tiras en forma fina una del lado de la otra y pegue alrededor del caballo agregué luz a los ojos con pintura al frío blanca y con negro marque el borde del ojo y pestañas.
In a darker shade of brown than the one used before I made the horse's hair, for this I used a thick strip of foami and cut many strips in a thin way one next to the other and glued around the horse, I added light to the eyes with white cold paint and with black I marked the edge of the eye and eyelashes.
🐴 Paso 8 / Step 8
Después agregué el palo de escoba en el espacio del centro que había dejado fijando con silicón y sellando los espacios para que el relleno no se salga
Then I added the broomstick in the space in the center that I had left, fixing it with silicone and sealing the spaces so that the filling would not come out.
 |  |  |
|---|
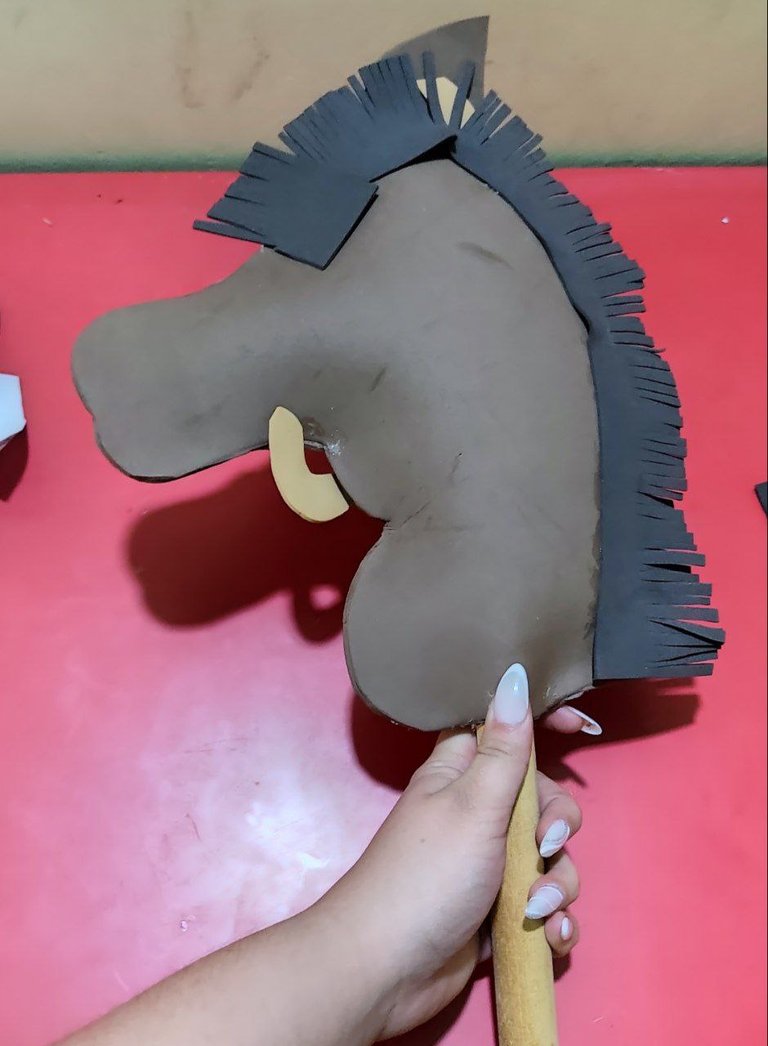
🐴 Paso 9 / Step 9
Y por alguna razón en mi mente paso que el caballo estaba listo y resulta que por la parte de atrás parecía todo menos caballo y buscando opiniones debía hacer lo mismo de la parte de al frente y así se expresará mucho mejor el caballo. Como opción más fácil para mí realice otro patrón con la misma cara y pegue sobre el caballo realizado le agregué los mismos detalles que ya había hecho anteriormente y de esta forma ya si parecía a Tiro al blanco.
And for some reason in my mind it happened that the horse was ready and it turned out that the back part looked like anything but a horse and looking for opinions I should do the same in the front part and that way the horse would express itself much better. As an easier option for me I made another pattern with the same face and pasted over the horse I added the same details that I had done before and this way it looked like a Bullseye.
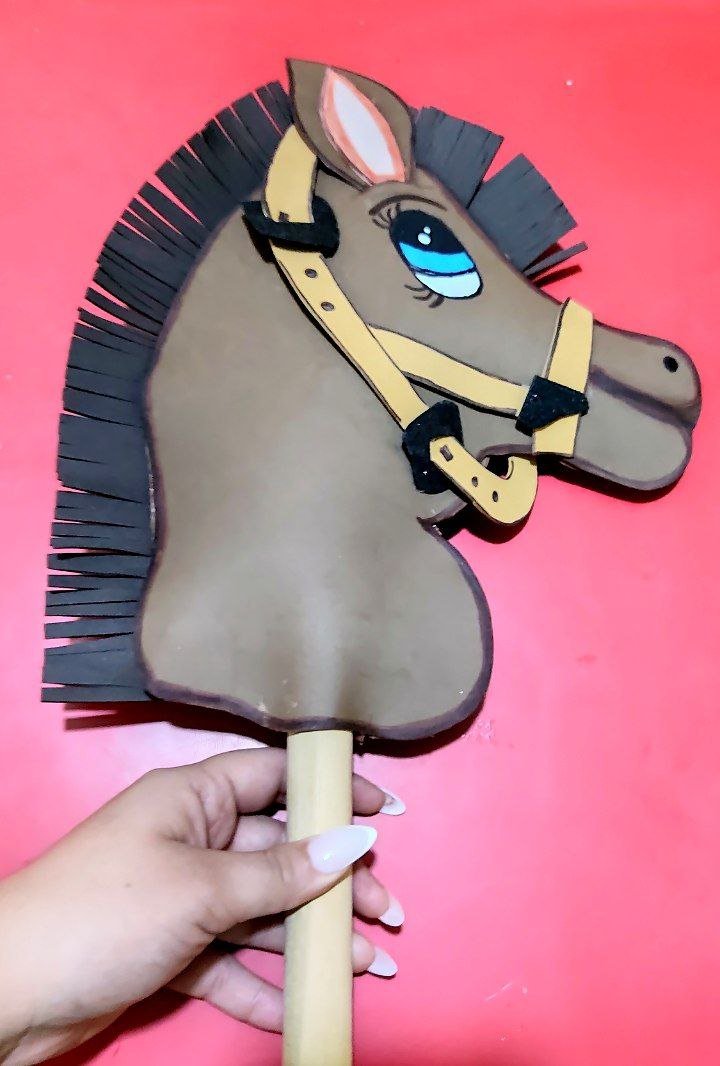
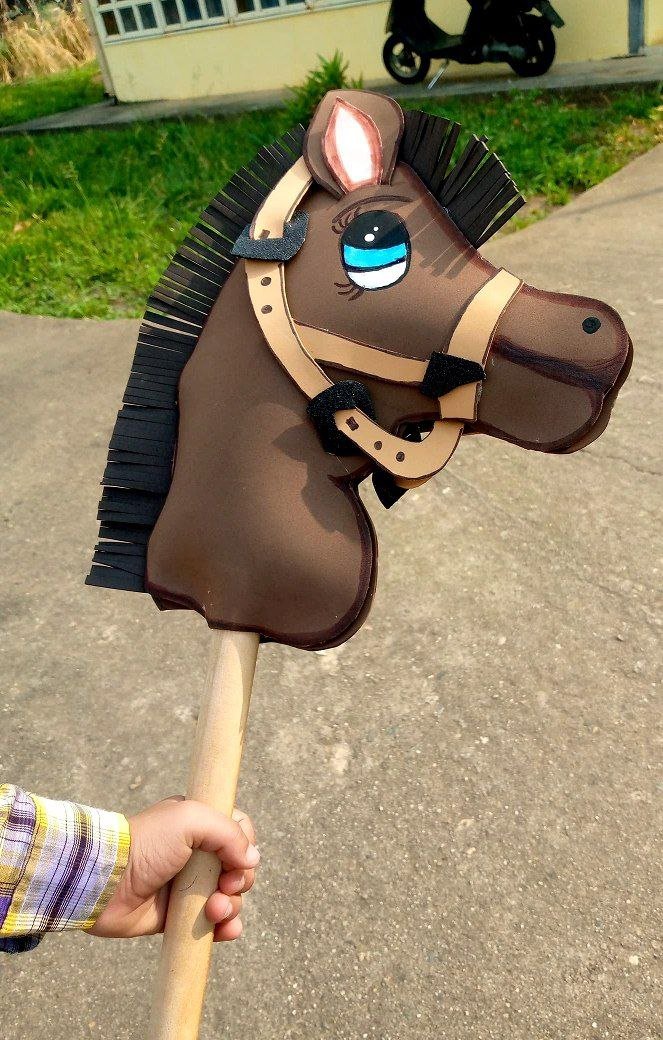
Creación finalizada / Creation completed⬇️
¡Y de esta forma obtuve un caballito de madera usando foami!
Nos vemos en una nueva creación✨❤️👩🎨
And to make my first horse I was delighted, and not to mention my nephew, the best thing is that it was an economic option and my nephew enjoyed the activity to the maximum, besides playing the days with him. It is an economical way to solve the desires of our little ones in terms of having a wooden horse. And this is how I got a wooden horse using foami!
I hope you liked it as much as I did.
See you in a new creation✨❤️👩🎨
Mil gracias por leerme una vez
Nos vemos en una próxima publicación.
Muchas bendiciones y abrazos digitales🤗
Thank you very much for reading me once
See you in an upcoming post.
Many blessings and digital hugs🤗
👩🏼💻 Edición: Inshot y Canva / Edition: Inshot and Canva
✨ Traducción: DeepL.com / Translation: DeepL.com

Posted Using INLEO
Que lindo amiga, siempre hay una primera vez, además fue un bonito resultado. Ahorita están pidiendo de todo a los niños en el colegio, jejeje, menos mal que tiene tu sobrino a la tía creativa 🤭🤭🤭
Muchas gracias amiga❤️, síii a mí sobrino le han pedido de todo y nos ponen a correr a veces😂
Que linda idea Ami!! Me encantó , te quedó súper lindo 💕
Gracias ami bella❤️
Muy buen trabajo 👏🏻👏🏻👏🏻👏🏻
Gracias❤️✨
A ti