Versión Español
Hice un cuadro para me desayunador con un marco de cartón, loneta, pintura y servilletas decoradas... Te muestro el proceso.
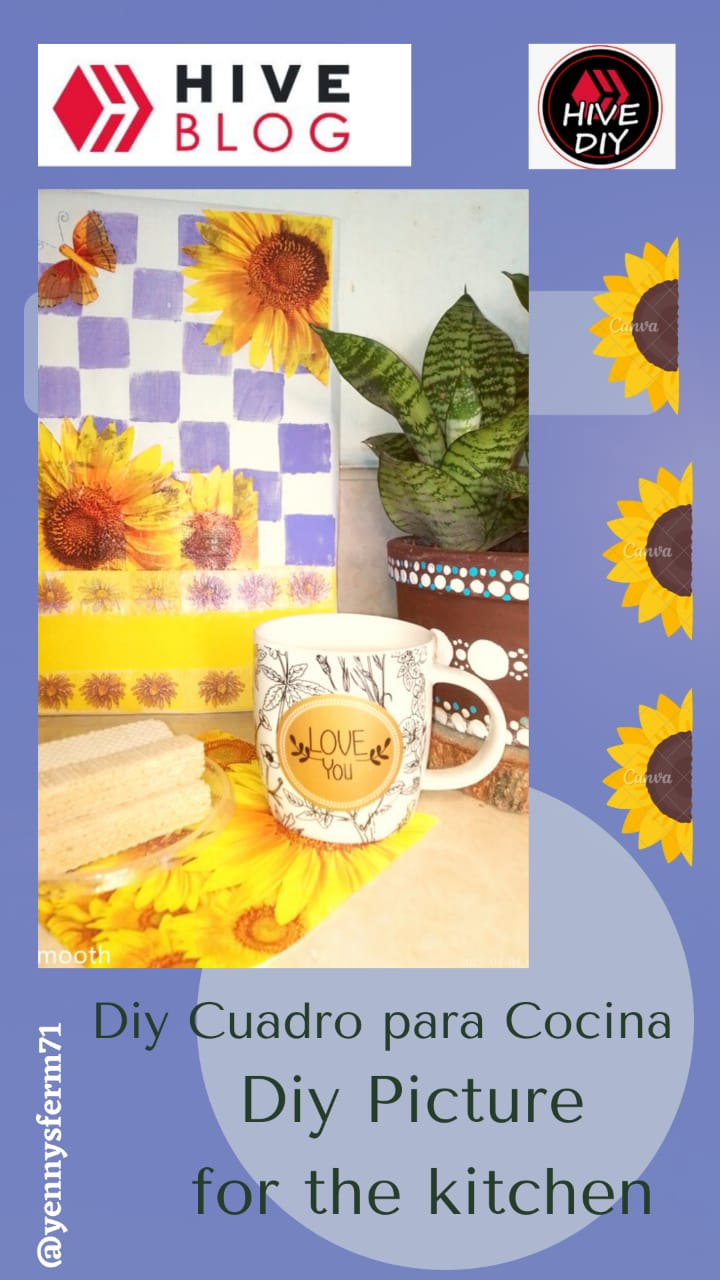
Hola a toda la hermosa Comunidad Hive Diy, el día de hoy me animé a realizar un cuadro para usarlo en un desayunador o mesón donde acostumbramos a poner nuestro café en la mañana y el desayuno rápido, quería inspirarme en unas servilletas de girasoles y mariposas que tengo y no había usado antes. Como bastidor utilicé una tapa de una caja de cartón, y como base para el cuadro usé loneta de color blanco. Me encantó porque quedó un diseño fresco que invita a tomarme un café en las mañanas y comenzar el día positivamente.
Uno de los recursos que utilicé para hacer mi cuadro, fue un Sello Personalizado de Foami y Cartón Reciclado, y en éste enlace vas directo a la Publicación donde les compartí como hice varios en su oportunidad y aún los guardo, ya que me decidí a coleccionarlos y guardarlos como otra herramienta para crear mis manualidades o Diy.
Los invito a ver el paso a paso de este proceso, y deseo que les guste e igualmente los inspire a crear algo con los materiales que dispongan, no importa si son exactos o no, o si son los perfectamente adecuados o no, lo importante es crear y hacer que nuestra imaginación se ejercite y se active cada día con cada pequeño proyecto que realizamos.
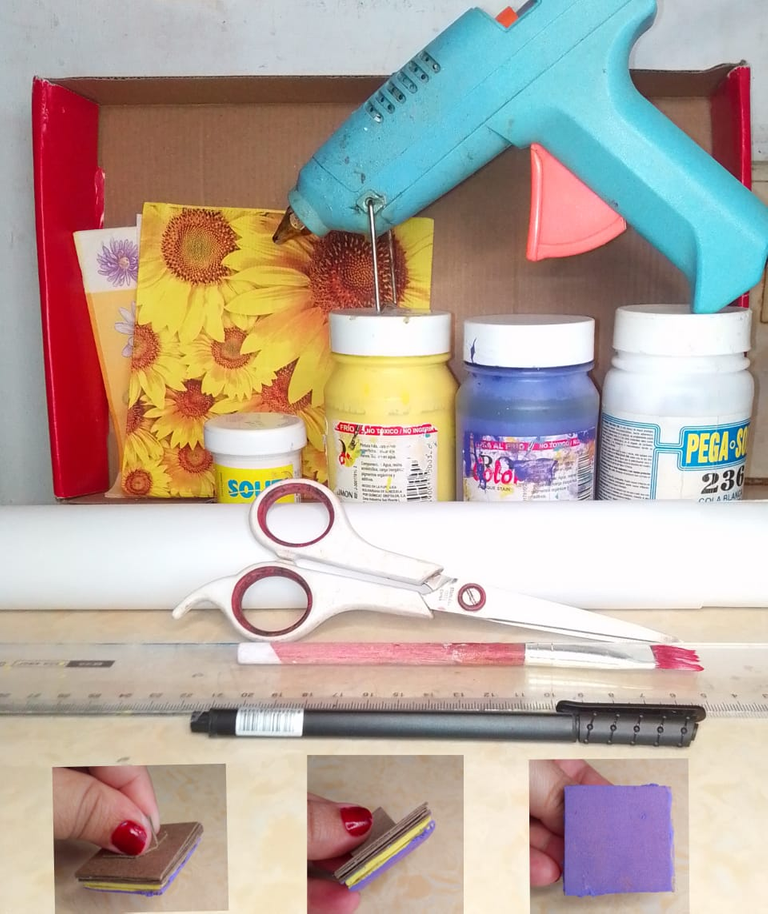
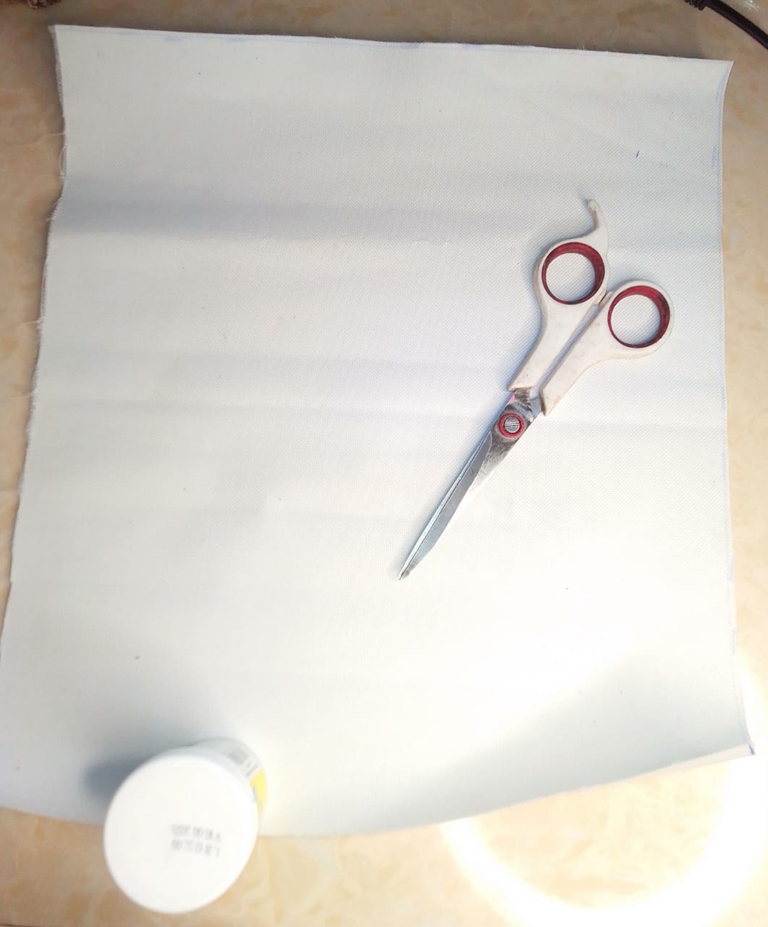
Los Materiales
- Cartón reciclado.
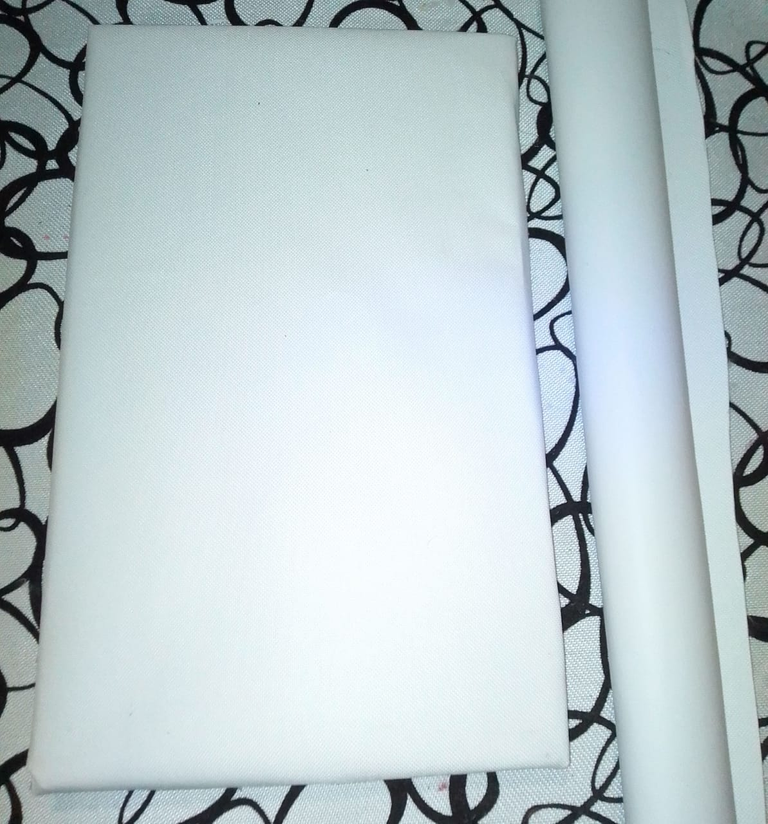
- Loneta de color blanco.
- Pinturas al frio.
- Pega blanca.
- Servilletas decoradas.
- Pistola de Silicón caliente.
- Sello de Foami y cartón.
- Tijera - Marcador - Regla.
El Paso a Paso
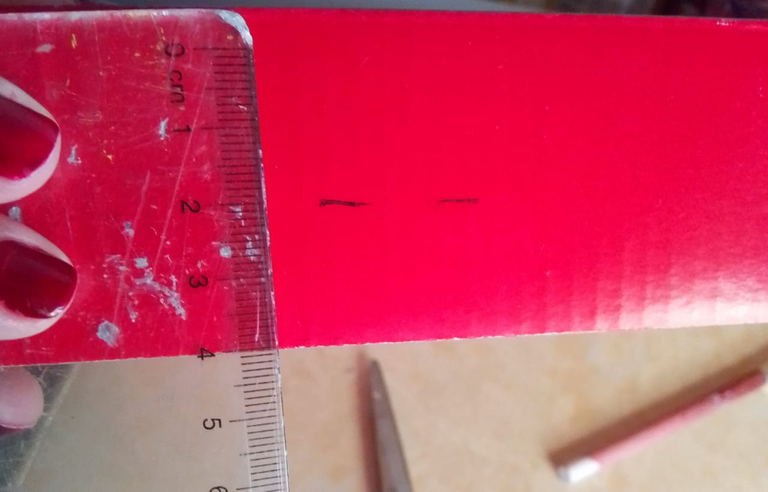
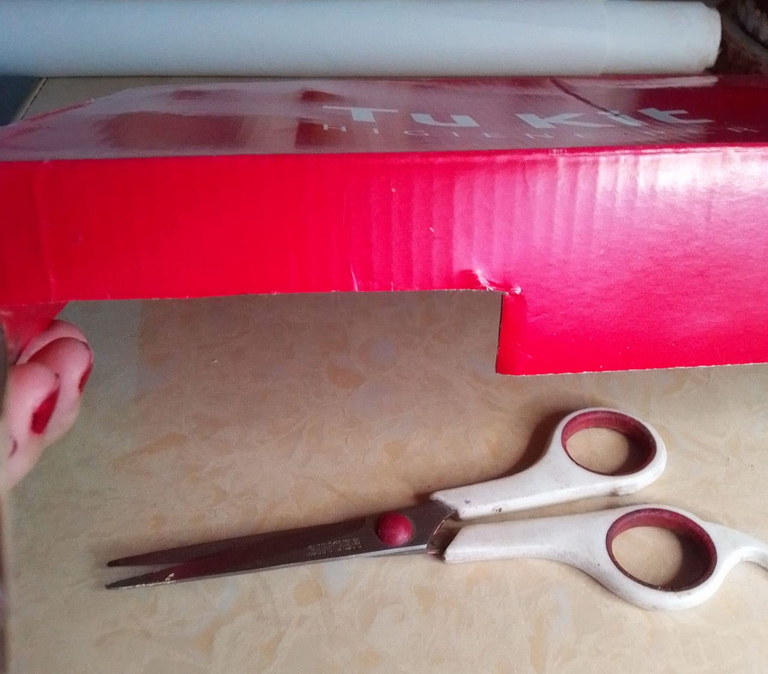
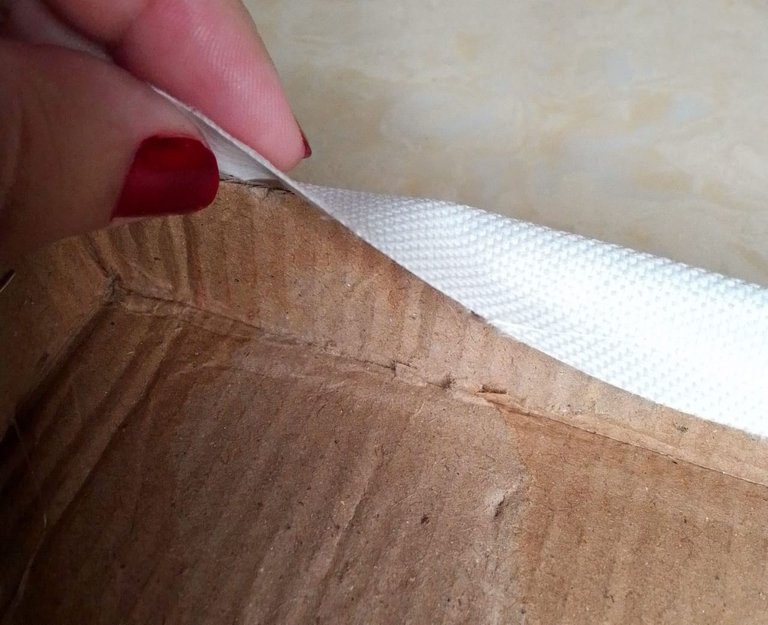
Paso 1: Tome una tapa de una caja de cartón y le bajé el borde a la medida de 2,5cms ya que era muy gruesa. El tamaño de esta tapa es de 37cms por 22cms y me pareció un buen tamaño, de manera que lo dejé así.
Paso 2: Corté la loneta blanca de manera que quedara un excedente para doblarlo por todo el borde de la tapa de la caja de cartón y pudiera doblar hacia adentro, entonces la corté con las medidas de 46cms por 30cms.
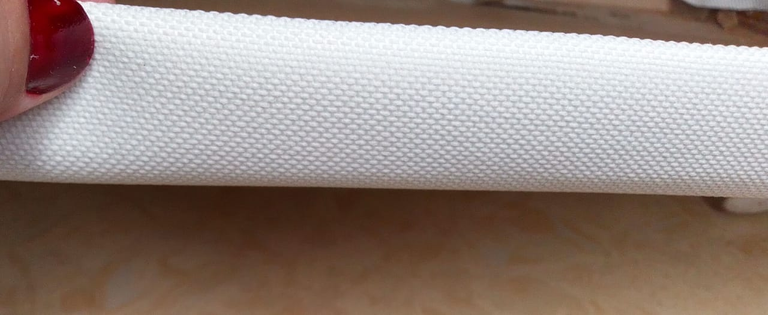
Paso 3: Con la pistola de silicón caliente pegué la loneta a la base de cartón, procurando estirarla bien para que no quedara ninguna arruga en su superficie y que quedaran bordes y esquinas lo más prolijas posible.
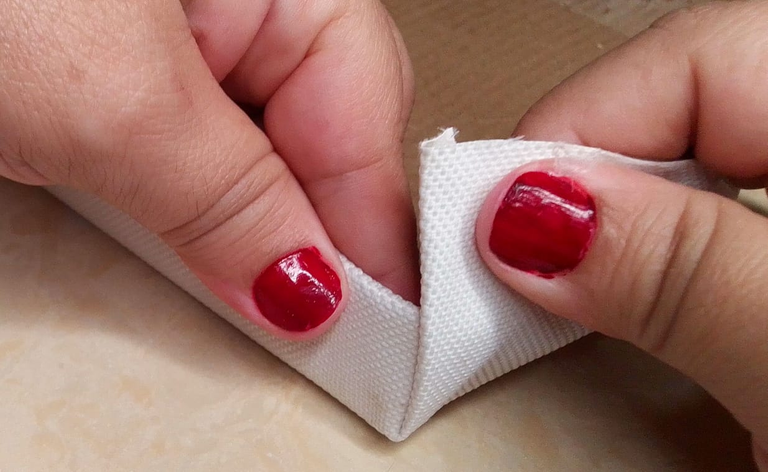
Ya el cuadro queda de esta forma:
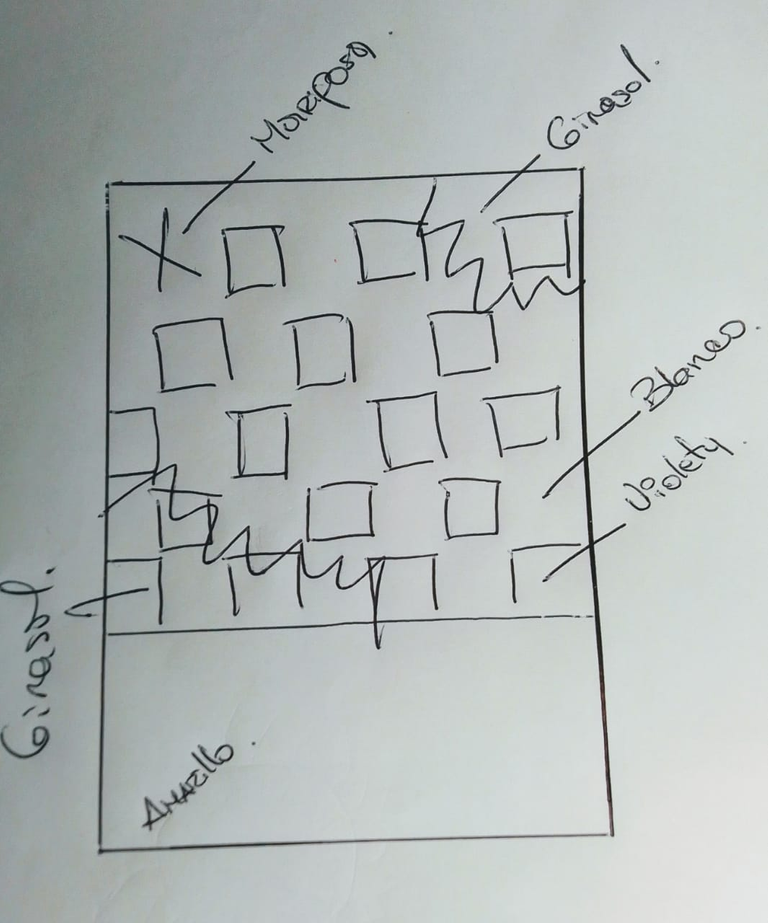
Paso 4: En una hoja dibujé el diseño que planeaba realizar, ya tenía definido que utilizaría unas servilletas decoradas con girasoles, así que pensé en utilizar una combinación de colores blanco, amarillo y el morado.
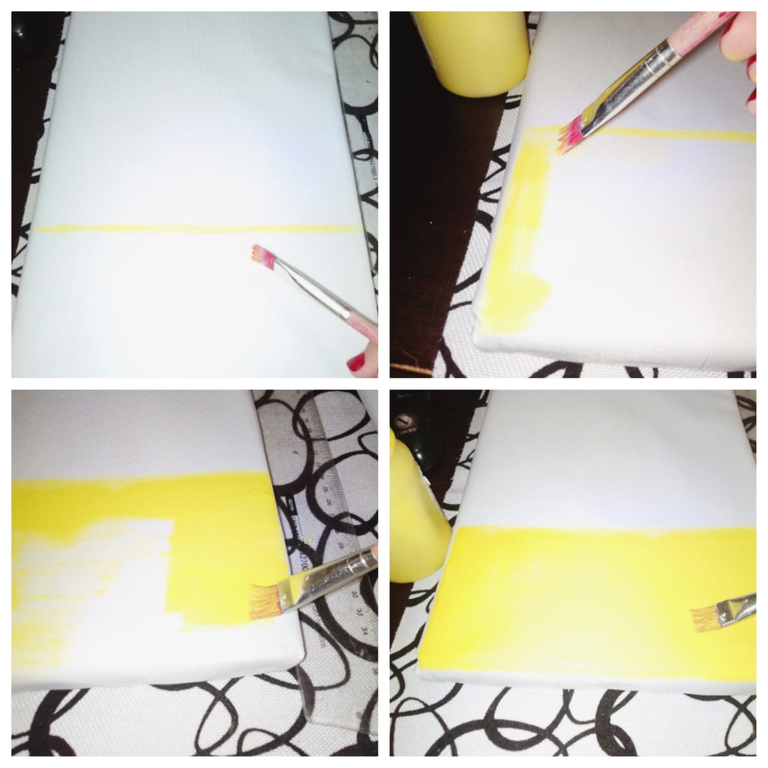
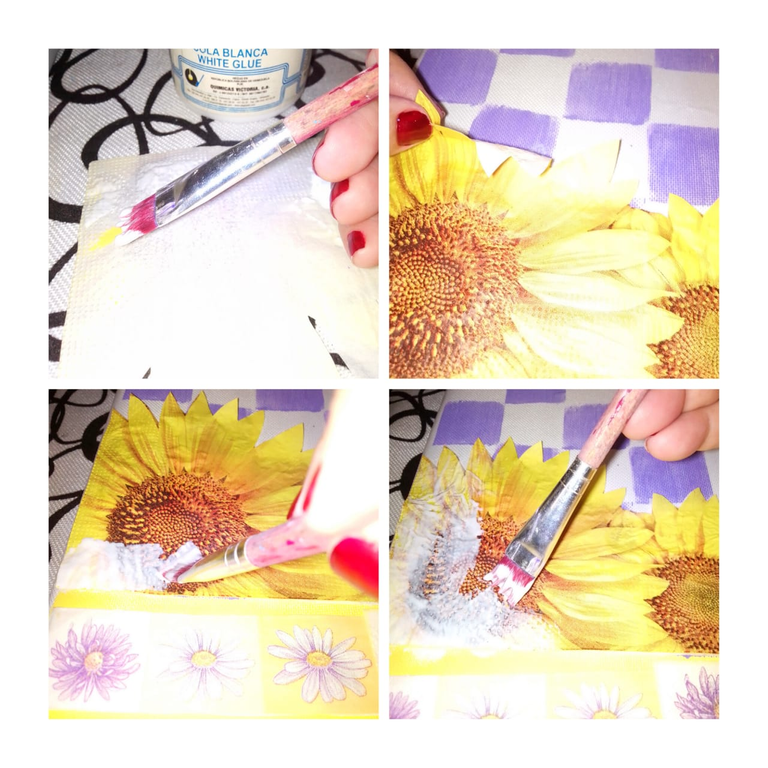
Paso 5: Siguiendo el diseño planeado, comencé a pintar primero una franja amarilla en la parte inferior.
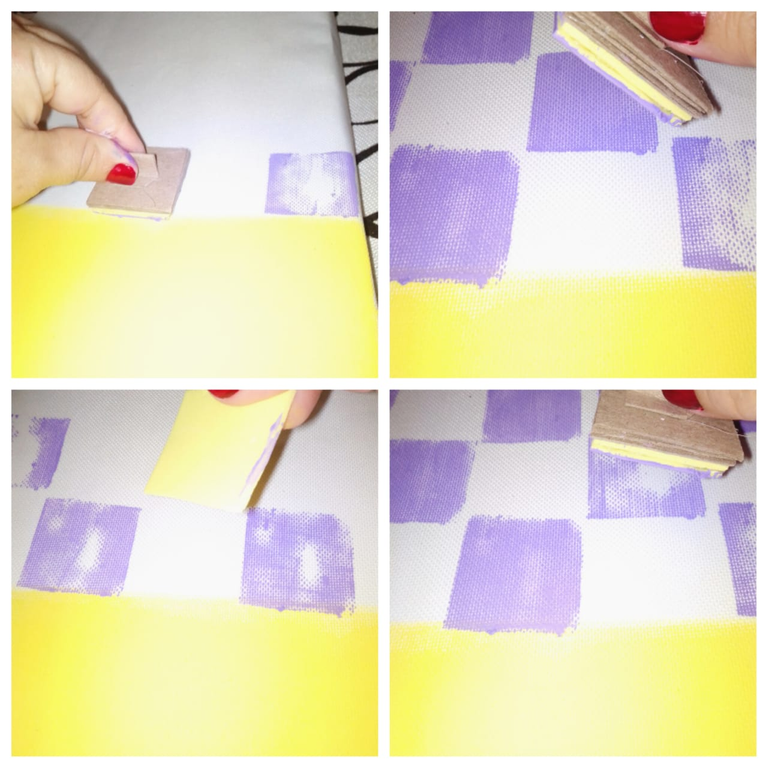
Paso 6: En el resto del cuadro pinté un diseño como de tablero de ajedrez utilizando el color violeta y mi sello de foami.
Paso 7: La servilleta decorada tiene el papel donde está estampado el diseño y otro en color blanco, ambos estás juntos pero no están pegados, así que se pueden separar con facilidad.
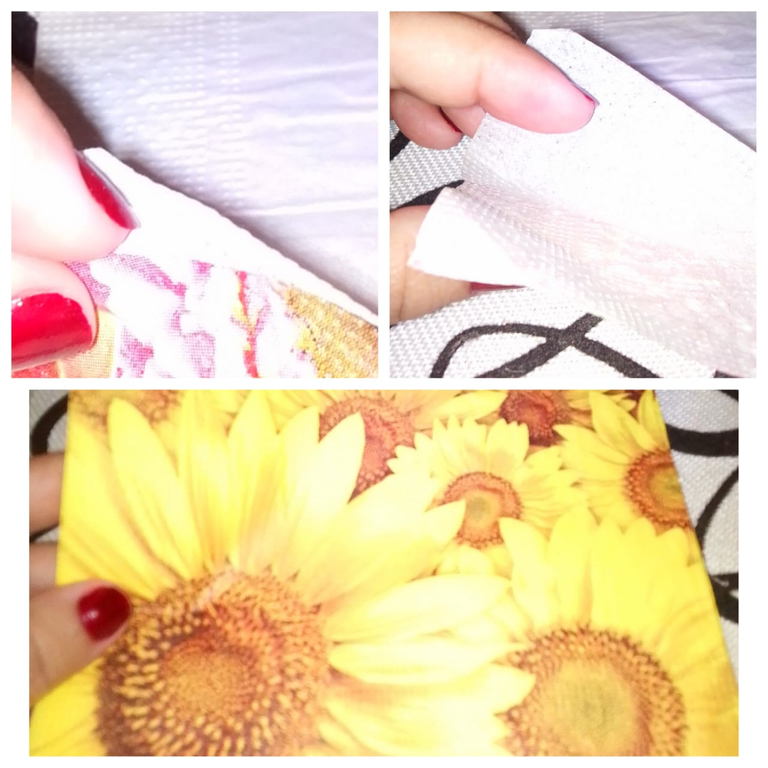
Recorté el diseño de los girasoles que iba a utilizar y de la mariposa.
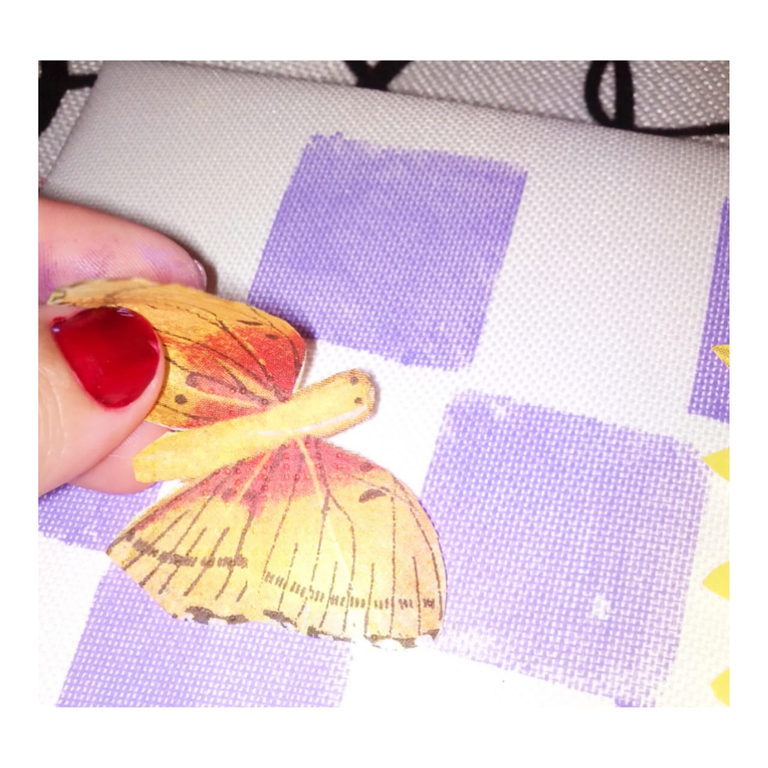
Paso 8: Con pega blanca pegué los recortes al cuadro, y también coloqué pega arriba de los mismos, esto con la finalidad de que quedara como una especie de plastificado que proteja la servilleta que es muy delicada.
Adicionalmente, con un marcador dibujé las antenas de la mariposa.
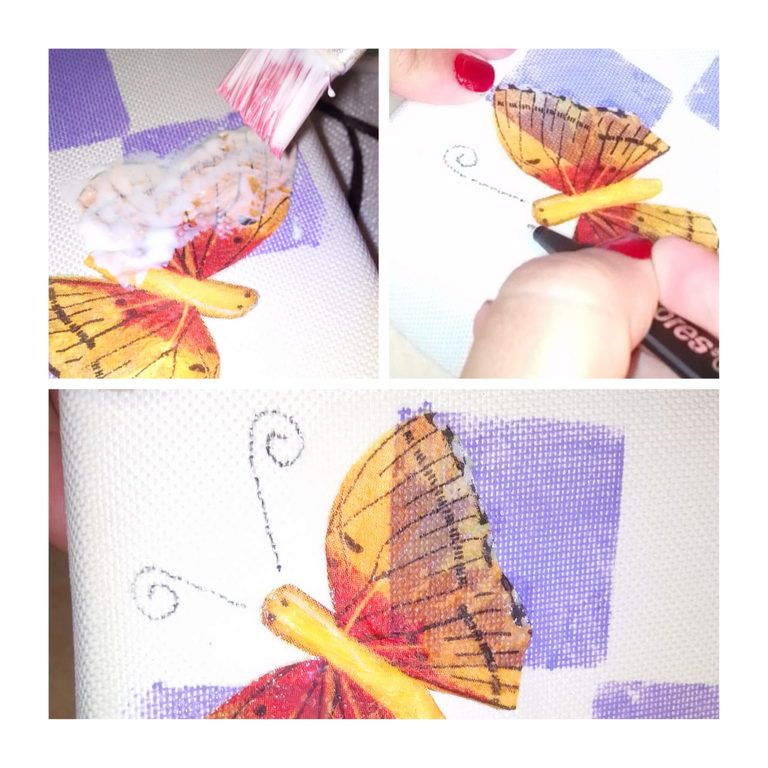
Ahora solo queda dejar secar toda la pieza. El cuadro debe verse así ya que coloqué pega blanca, pero al secarse bien, la pega transparenta totalmente. Yo hice todo el proceso anoche y lo deje secar hasta la mañana, que comencé a armar la Publicación.
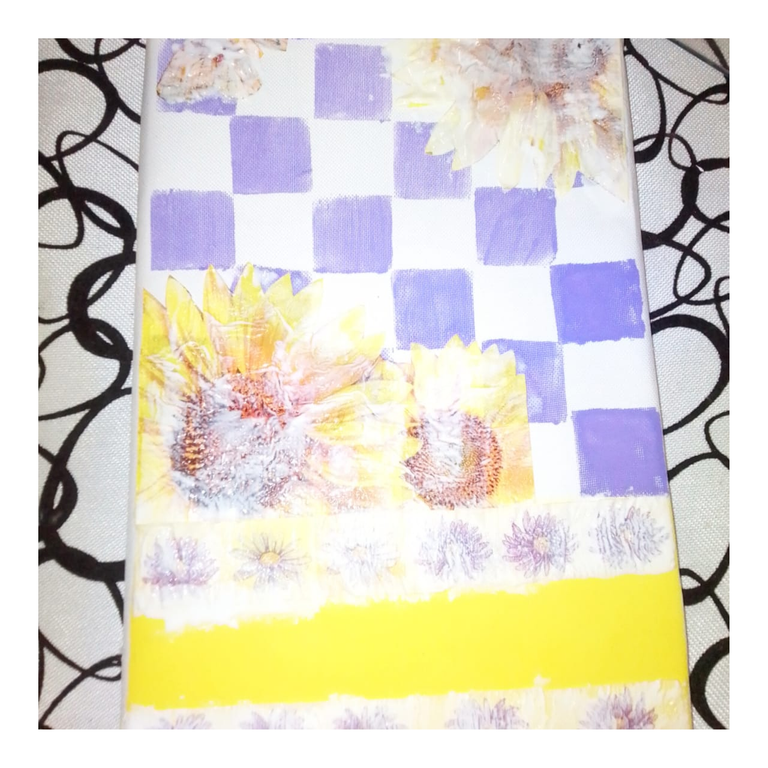
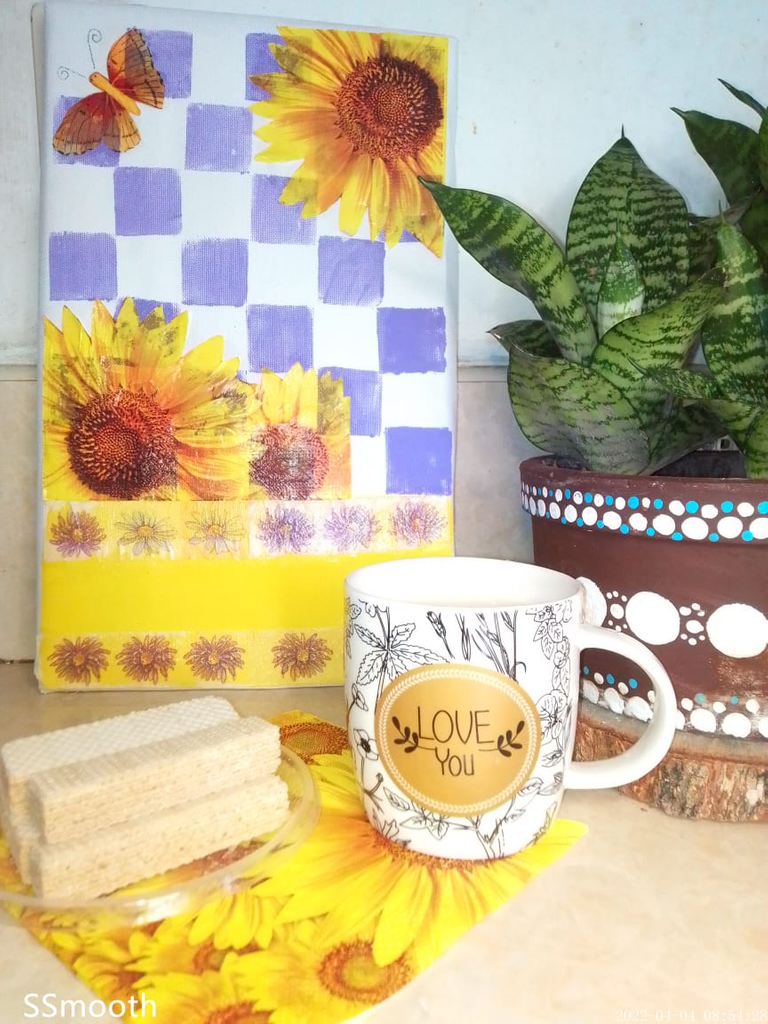
Ya hoy, tengo el cuadro listo, como pueden ver efectivamente transparentó la pega y ahora se aprecia bien el diseño de la servilleta, al tiempo que la protege.
Me gusto mucho, deseo que a uds también les agrade... y nos vemos en la próxima publicación.
Las fotos las tomé con mi teléfono SSmoth 6.5 y las edité en la App InShot
Utilicé el Traductor Google y son de mi propiedad @yennysferm71. Por favor no las utilices sin mi Autorización.
También edité con https://www.canva.com/
Mi redes sociales:
Discord: YennysYaneth#0189
Twitter: @yennysferm
Instagram: @yennysyaneth
English Version
I made a painting for my breakfast table with a cardboard frame, canvas, paint and decorated napkins... I'll show you the process.
Hello to all the beautiful Community Hive Diy, today I decided to make a painting to use in a breakfast bar or inn where we usually put our coffee in the morning and the quick breakfast, I wanted to be inspired by some sunflower and butterfly napkins that I have and had not used before. As a frame I used a lid from a cardboard box, and as a base for the painting I used white canvas. I loved it because it was a fresh design that invites me to have a coffee in the morning and start the day positively.
One of the resources I used to make my painting was a Personalized Foami and Cardboard Seal, and in this link you go directly to the Publication where I shared how I made several at the time and still I keep, since I decided to collect them and save them as another tool to create my crafts or Diy.
I invite you to see the step by step of this process, and I hope you like it and also inspire you to create something with the materials you have, it does not matter if they are exact or not, or if they are perfectly adequate or not, the important thing is create and make our imagination exercise and activate every day with every little project we do.
The materials
- Recycled carton.
- White canvas.
- Cold paints.
- White glue.
- Decorated napkins.
- Hot glue gun.
- Foami seal and cardboard.
- Scissors - Marker - Ruler.
The Step by Step
Step 1: I took a lid from a cardboard box and lowered the edge to the size of 2.5cms as it was very thick. The size of this lid is 37cms by 22cms and it seemed like a good size so I left it at that.
Step 2: I cut the white canvas so that there was a surplus to fold it around the edge of the lid of the cardboard box and could fold inwards, then I cut it with the measurements of 46cms by 30cms .
Step 3: With the hot glue gun I glued the canvas to the cardboard base, trying to stretch it well so that there were no wrinkles on its surface and that the edges and corners were as neat as possible.
Now the table looks like this:
Step 4: On a piece of paper I drew the design that I planned to make, I already had defined that I would use some napkins decorated with sunflowers, so I thought of using a combination of white, yellow and purple colors.
Step 5: Following the planned design, I started by first painting a yellow stripe on the bottom.
Step 6: On the rest of the painting I painted a checkerboard-like design using purple and my foam stamp.
Step 7: The decorated napkin has the paper where the design is printed and another one in white, both are together but they are not glued, so they can be easily separated.
I cut out the design of the sunflowers that I was going to use and the butterfly.
Step 8: With white glue I glued the cutouts to the box, and I also placed glue on top of them, this with the purpose of making it look like a kind of plastic coating that protects the napkin, which is very delicate.
Additionally, with a marker I drew the butterfly's antennae.
Now all that remains is to let the entire piece dry. The painting should look like this since I put white glue, but when it dries well, the glue is completely transparent. I did the whole process last night and let it dry until morning, when I started putting together the Publication.
Already today, I have the painting ready, as you can see, the paste was effectively transparent and now the design of the napkin is well appreciated, while protecting it.
I liked it a lot, I hope you like it too... and see you in the next publication.
I took the photos with my SSmoth 6.5 phone and edited them in the InShot
I used Google Translate App and they are my property @yennysferm71. Please do not use them without my Authorization. I also edited with https://www.canva.com/
My social networks:
Discord: YennysYaneth#0189
Twitter: @yennysferm Instagram: @yennysyaneth
Yay! 🤗
Your content has been boosted with Ecency Points
Use Ecency daily to boost your growth on platform!
Support Ecency
Vote for new Proposal
Delegate HP and earn more, by @yennysferm71.
The rewards earned on this comment will go directly to the person sharing the post on Twitter as long as they are registered with @poshtoken. Sign up at https://hiveposh.com.
Muy bonito tu cuadro🤗
Congratulations @yennysferm71! You have completed the following achievement on the Hive blockchain and have been rewarded with new badge(s):
Your next target is to reach 4750 upvotes.
You can view your badges on your board and compare yourself to others in the Ranking
If you no longer want to receive notifications, reply to this comment with the word
STOPCheck out the last post from @hivebuzz:
Support the HiveBuzz project. Vote for our proposal!