
¿Mis Proyectos Preferidos? Los proyectos que llamo "Utilitarios" porque me gusta resolver situaciones usando la creatividad y mis propias manos. No necesariamente una situación de emergencia o un problema per se, a veces es mejorar algo que no está mal, pero que puede ser más lindo o más funcional para nuestro día día.
Tal es el caso del proyecto Diy de hoy, mi llavero actual ya estaba bastante deteriorado y debía hacerme otro, pero quería aportarle las siguiente características:
- Fácil de encontrar entro de la cartera o bolso
- Posibilidad de colgar fuera de la cartera o bolso
- Posibilidad de colgar de la hebilla del pantalón
- Fácil de llevar en la mano
- Que las llaves estén protegidas y no se tropiecen con nada
- Fácil de confeccionar
Y si el proyecto me permite tener la excusa de usar los Broches Plásticos... ¡ Mucho mejor!
ENGLISH VERSION
My Favorite Projects? The projects I call "Utilitarian" because I like to solve situations using creativity and my own hands. Not necessarily an emergency situation or a problem per se, sometimes it is improving something that is not bad, but that can be prettier or more functional for our daily life.
Such is the case of today's Diy project, my current keychain was already quite damaged and I had to make another one, but I wanted to provide it with the following characteristics:
Easy to find inside your purse or bag
Ability to hang outside your purse or bag
Possibility of hanging from the trouser buckle
Easy to carry in hand
That the keys are protected and do not trip over anything
Easy to make
And if the project allows me to have the excuse of using the Plastic Brooches... Much better!
Estos Broches Plásticos con su Alicate fue un Kit que compré el año pasado con mis Recompensas de Hive, y me costó en ese momento 20$ me ha sido de mucha utilidad para mis proyectos, me parece siempre una buena Inversión las compras de materiales, herramientas e insumos para mis trabajos. Aunque debo confesar que me siento como niña con juguete nuevo cuando tengo la oportunidad de usarlos, realmente puedes llevar a cabo cualquier proyecto que los incluya, sustituyéndolos por botones, tiras y otros recursos.
A la hora de crear lo más importante es tu creatividad, así que vamos con este sencillo proyecto.
ENGLISH VERSION
These Plastic Brooches with their Pliers were a Kit that I bought last year with my Hive Rewards, and it cost me $20 at that time. They have been very useful for my projects, I always find purchasing materials and tools a good investment. and supplies for my work. Although I must confess that I feel like a child with a new toy when I have the opportunity to use them, you can really carry out any project that includes them, replacing them with buttons, strips and other resources.
When creating, the most important thing is your creativity, so let's go with this simple project.

- Máquina de coser
- Loneta o cualquier otro material
- Tijera
- Broches plásticos, alicate y punzón
- Sewing machine
- Canvas or any other material
- Scissors
- Plastic snaps, pliers and punch


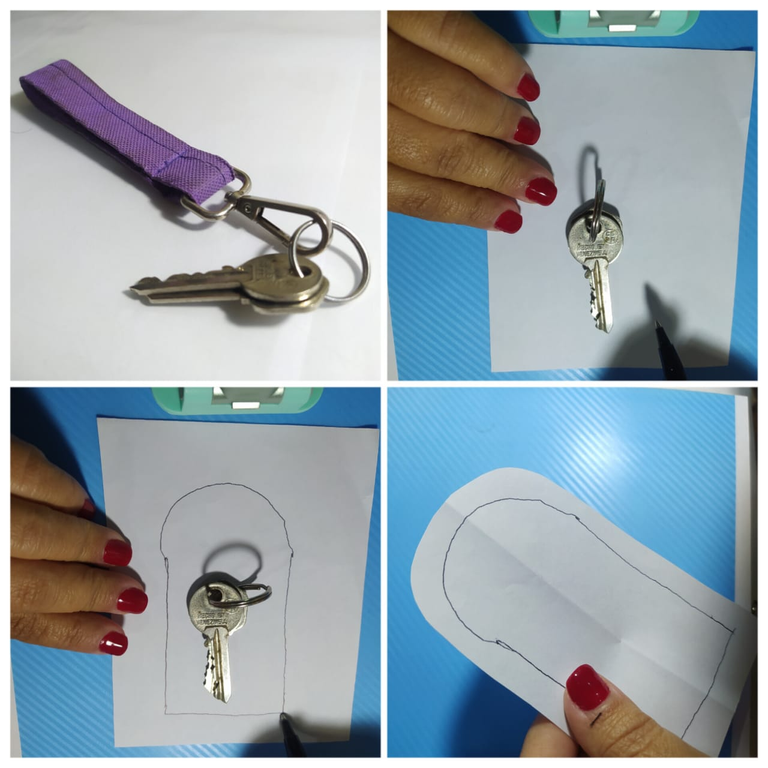
Aquí pueden ver mi llavero actual, bueno ya es el viejo, solo saqué las llaves que tenía en él, con su aro y en un papelito dibujé la forma que quería, redondeada arriba y recta en los otros lados. Luego, recorté esta pieza considerando un margen de costura bastante cómodo. Esta será mi plantilla y como ven no tiene medidas, la hice a mano alzada y a mi gusto, lo que necesitaba era que las llaves puedan quedar dentro del llavero fácilmente.
ENGLISH VERSION
Here you can see my current keychain, well it's the old one, I just took out the keys that I had on it, with its ring and on a piece of paper I drew the shape I wanted, rounded on top and straight on the other sides. I then cut this piece out to a fairly comfortable seam allowance. This will be my template and as you can see it has no measurements, I made it freehand and to my liking, what I needed was for the keys to fit easily inside the keychain.
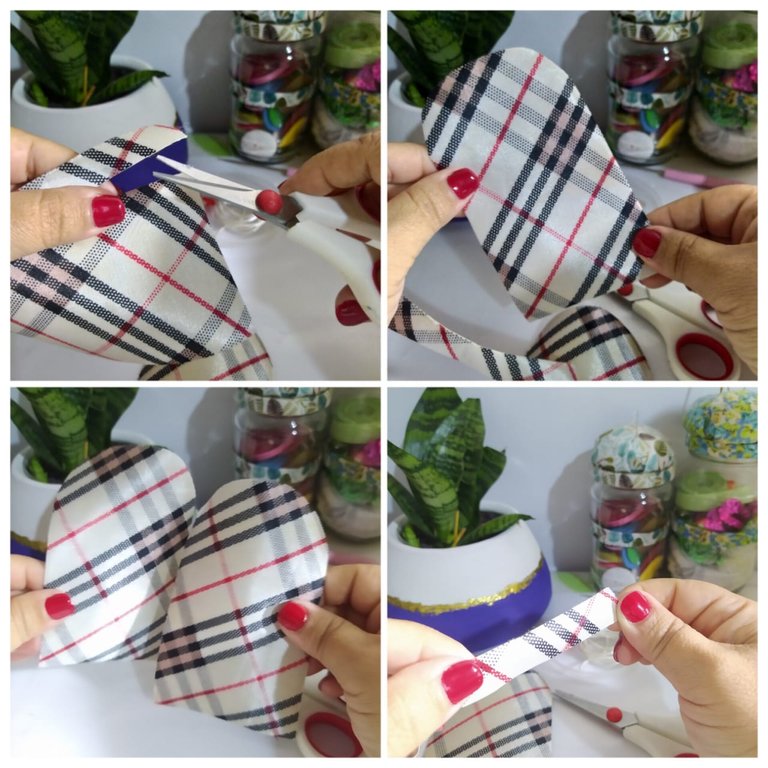
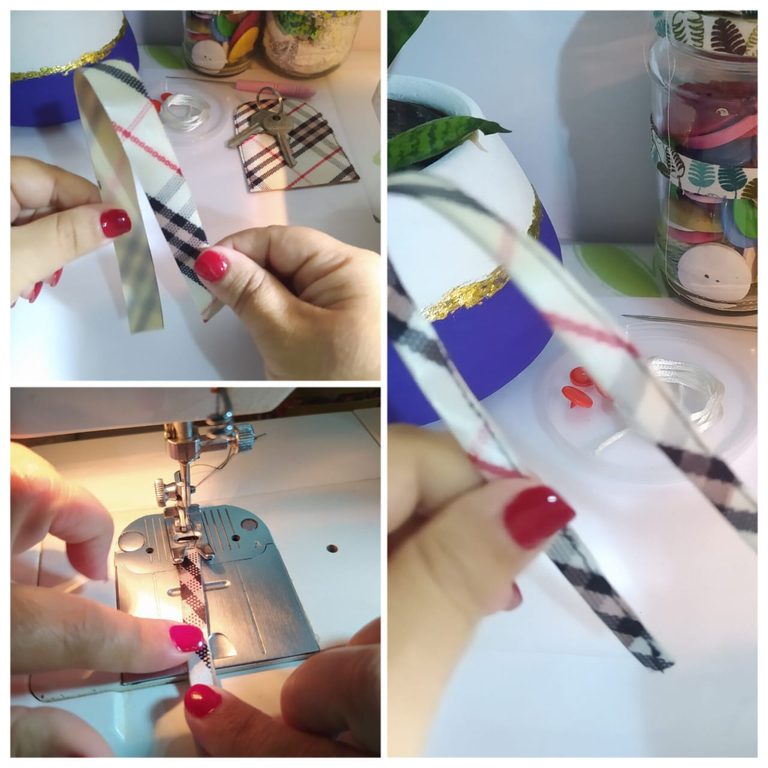
Con la plantilla que saqué, trasladé el diseño a la loneta que iba a utilizar, corté dos piezas iguales. Y también una tira de 1,5 cms de ancho por 27 cms de largo.
ENGLISH VERSION
With the template I took out, I transferred the design to the canvas I was going to use, I cut two equal pieces. And also a strip 1.5 cm wide by 27 cm long.
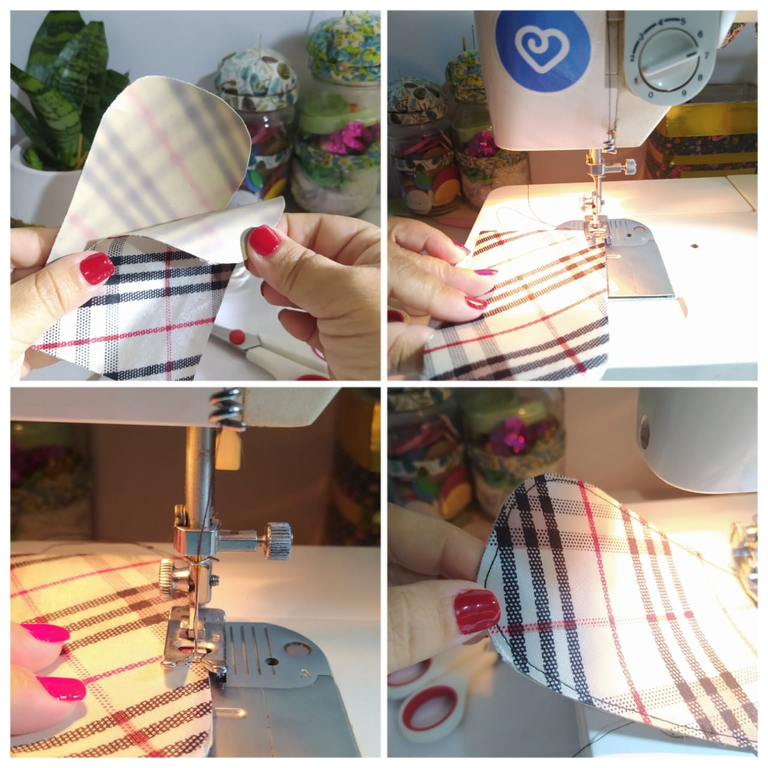
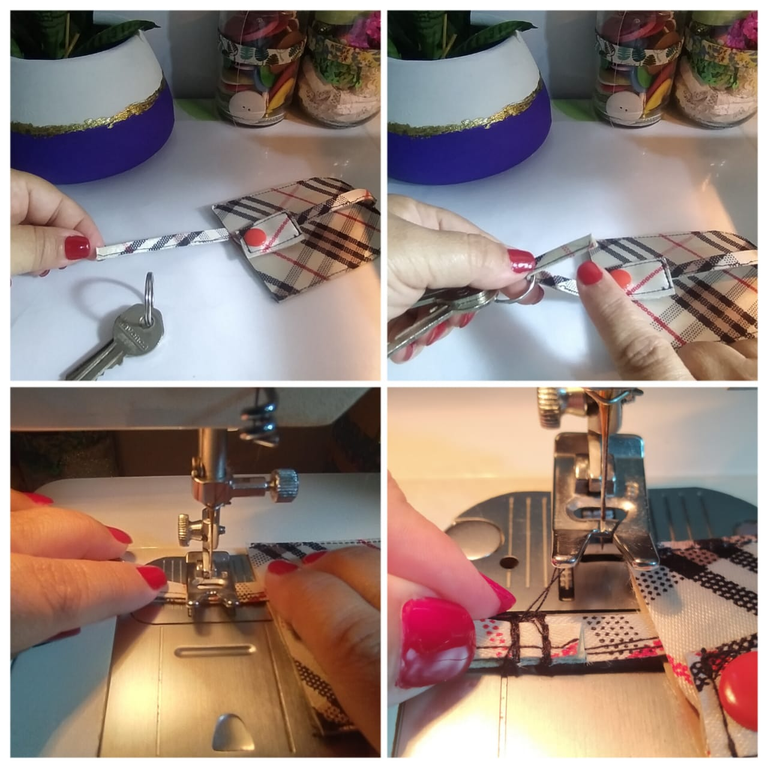
Coloqué ambas piezas de la loneta, enfrentando sus lados internos para realizar a máquina una costura bien pegada al borde, dejando sin coser la parte de abajo que sería por donde entran y salen las llaves.
Importante rematar al comenzar y finalizar la pieza.
ENGLISH VERSION
I placed both pieces of canvas, facing their inner sides to make a machine seam that was well attached to the edge, leaving the bottom part unsewn, which would be where the keys enter and exit.
It is important to finish off when starting and finishing the piece.
La tira solo la doblé por su ancho, y pasé una costura. El ancho de 1,5 cms es suficiente para la tira, y se cose muy cómodo.
ENGLISH VERSION
I just folded the strip along its width, and passed a seam. The width of 1.5 cm is enough for the strip, and it is very comfortable to sew.
Con alguno de los retazos que quedaron, corté una pieza de 2cms por 4cms , la doblé y ubiqué un extremo de la tira en él, pasando doble costura para asegurar bien.
ENGLISH VERSION
With some of the scraps that were left, I cut a 2cm by 4cm piece, folded it and placed one end of the strip on it, double sewing to secure it well.
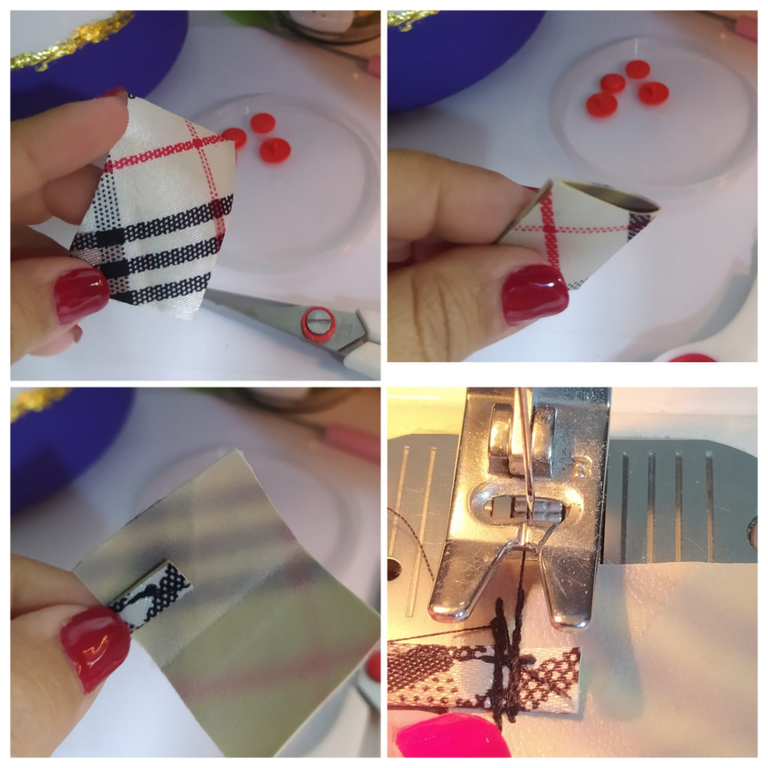
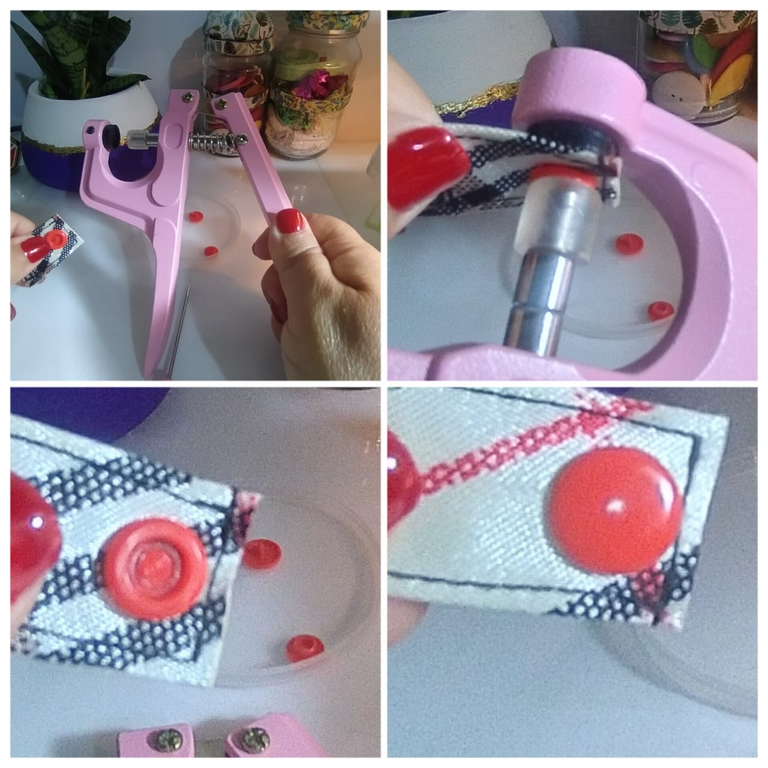
Esta pieza la cierro ahora con costura por todo su alrededor. Y en el borde contrario a la tira, perforo con el punzón ya que voy a ubicar ahí el broche plástico.
ENGLISH VERSION
I now close this piece with sewing all around it. And on the opposite edge of the strip, I drill with the punch since I am going to place the plastic clasp there.
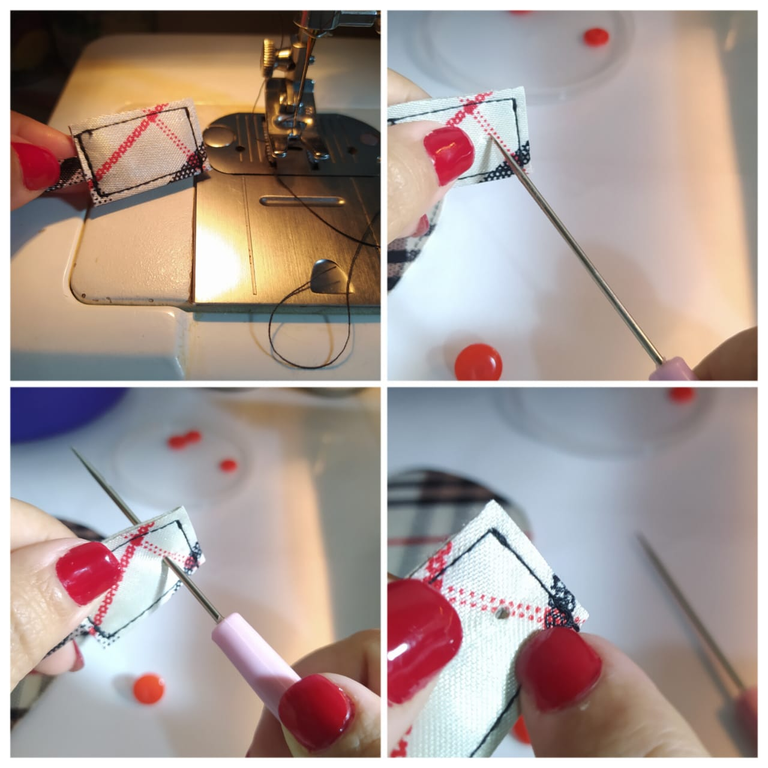
El broche plástico son dos piezas, una con una punta que hago salir hasta el otro lado, y luego coloco la otra pieza en la punta.
ENGLISH VERSION
The plastic clasp is two pieces, one with a tip that I make extend to the other side, and then I place the other piece on the tip.
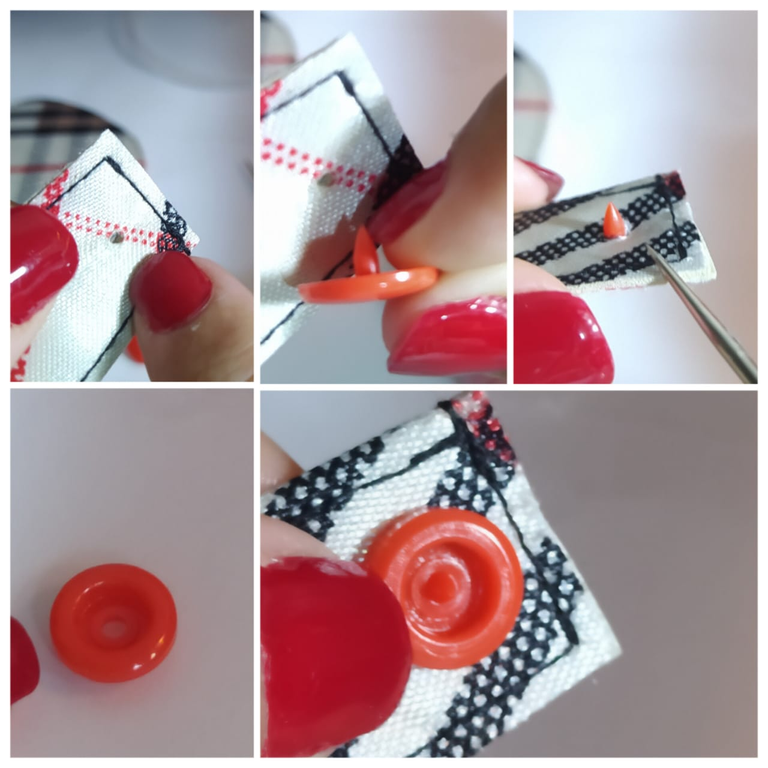
Presiono con el alicate de presión, y como verás lo que este alicate hace es aplanar la punta, de manera que quede bien sellado y sea ahora una sola pieza.
ENGLISH VERSION
I press with the pressure pliers, and as you will see what this pliers does is flatten the tip, so that it is well sealed and is now one piece.
Esta pieza que acabo de realizar va a cerrar en el bolsito que hice primero. Lo ubico en el borde para determinar donde voy a colocar el otro broche para completar esta mecánica de cerrar con el broche.
Abro con el punzón, esto sería en un solo lado del bolsito. Y realizo el mismo procedimiento para colocar el broche plástico, tal como señalé anteriormente.
ENGLISH VERSION
This piece that I just made is going to close in the little bag that I made first. I place it on the edge to determine where I am going to place the other clasp to complete this closing mechanic with the clasp.
I open with the punch, this would be on only one side of the bag. And I carry out the same procedure to place the plastic clasp, as I indicated previously.
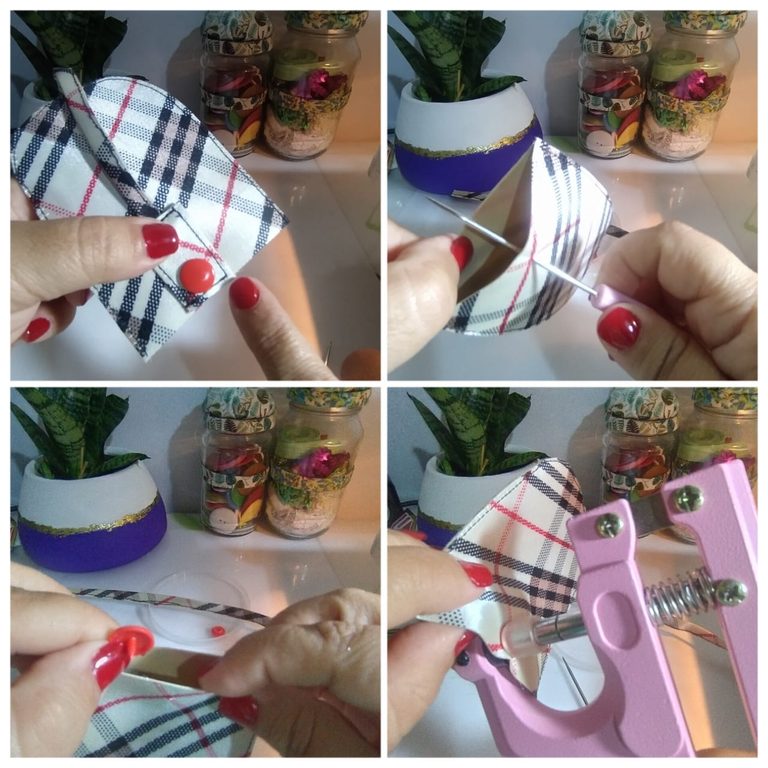
El otro extremo de la tira va a entrar por la parte superior del bolsito, esa que tiene forma curva, entonces determino el ancho que necesitaré cortar para que pase la tira, y con la máquina de coser, realizo unas costuras pequeñas a los lados del corte que hice, para que no se abra con el uso continuo.
ENGLISH VERSION
The other end of the strip is going to enter through the top of the bag, the one that has a curved shape, then I determine the width that I will need to cut so that the strip goes through, and with the sewing machine, I make some small seams on the sides of the cut that I made, so that it does not open with continuous use.
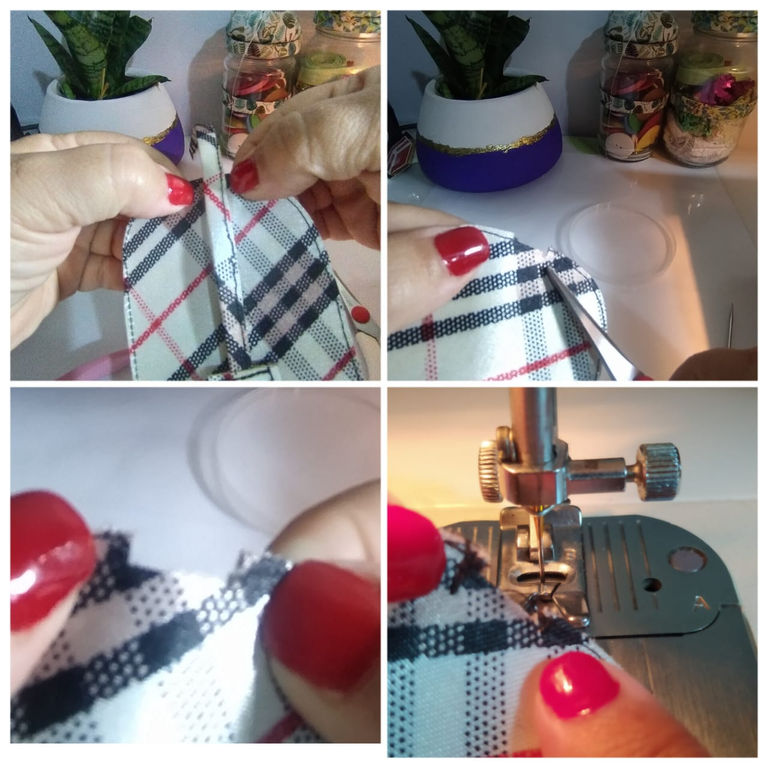
Queda de esta forma, y ahora introduzco la tira por esa entrada, con lo cual va ahora a salir por la parte inferior del bolsito.
ENGLISH VERSION
It remains this way, and now I introduce the strip through that entrance, so it will now come out from the bottom of the bag.
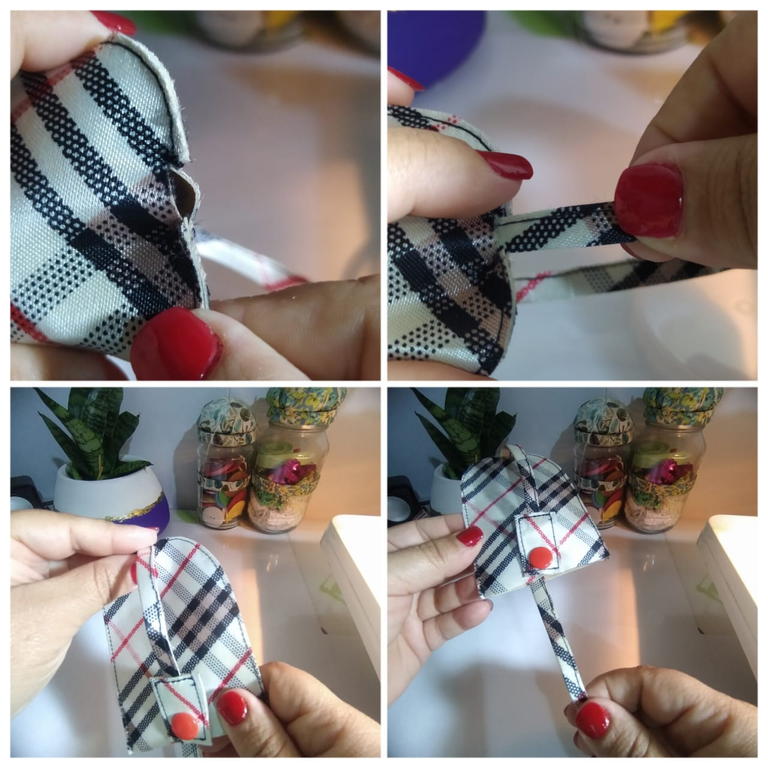
Solo falta un paso que es introducir el aro de las llaves a la tira y coser a máquina para que quede bien sujeto y fijo.
ENGLISH VERSION
There is only one step left, which is to insert the key ring into the strap and sew by machine so that it is well held and fixed.
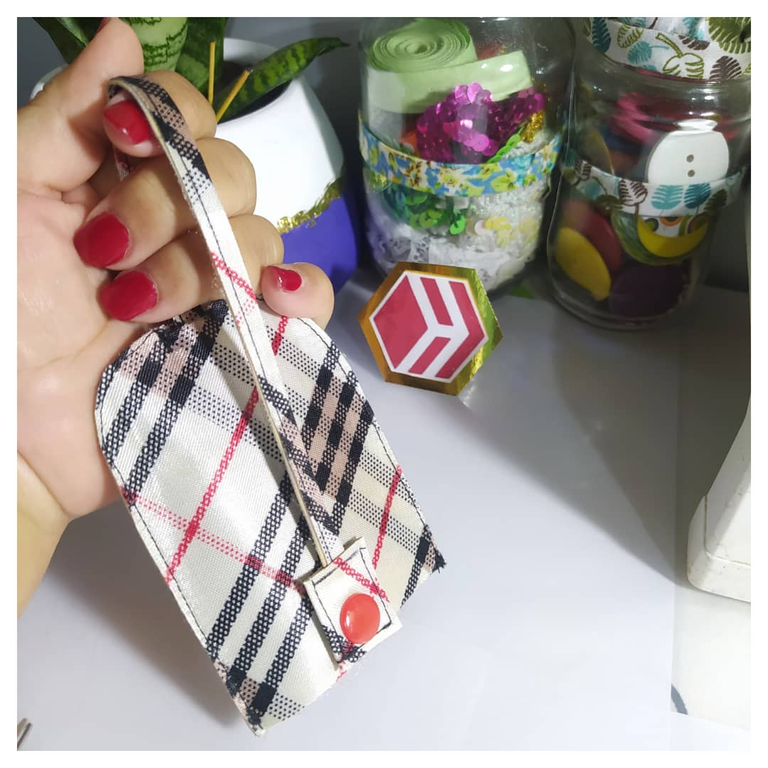
Listo este llavero, fue realmente muy fácil de realizar, como vez puedo tomarlo con la mano y puedo llevarlo así mismo, como una pulsera, muy cómodo. También puedo abrirlo y colgarlo de la hebilla de mi pantalón.
ENGLISH VERSION
This keychain is ready, it was really very easy to make, as you can see I can take it in my hand and I can wear it as well, like a bracelet, very comfortable. I can also open it and hang it on my pants buckle.
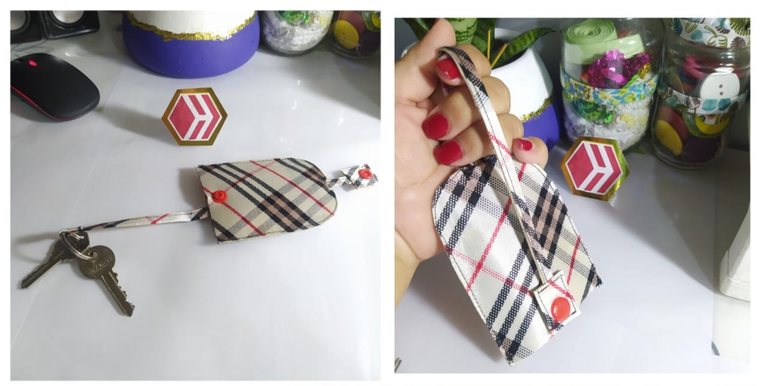
Igualmente, puedo abrirlo y colgarlo del bolso en su parte exterior o interior, donde sea.
ENGLISH VERSION
Likewise, I can open it and hang it from the bag on the outside or inside, wherever.

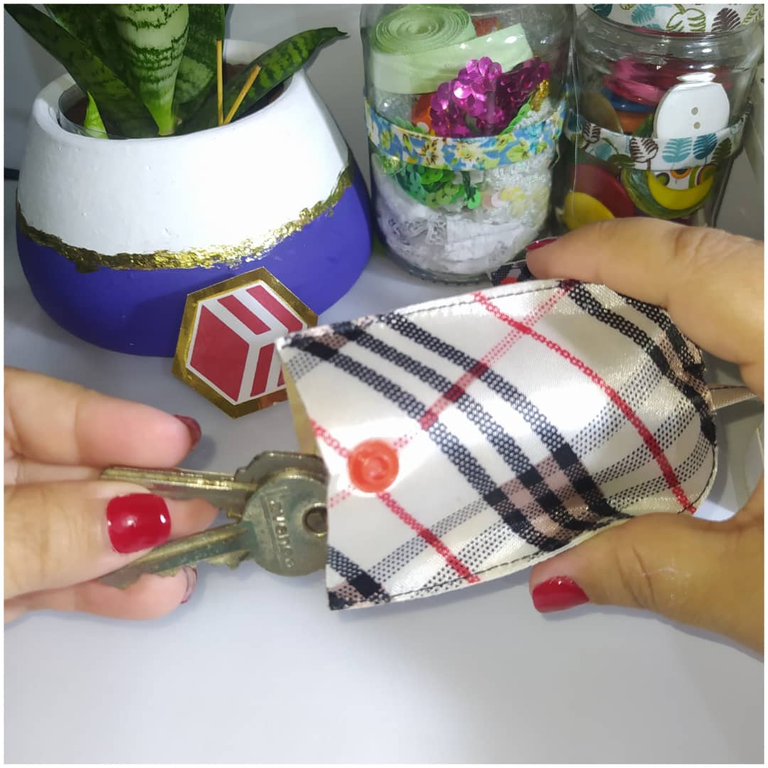
Este llavero se desabrocha fácilmente, y podemos llevarlo donde queramos. Las llaves van a están bien resguardadas, evitando que se enganchen con cualquier cosa en nuestra cartera o bolso.
ENGLISH VERSION
This keychain unclasps easily, and we can take it wherever we want. The keys will be well protected, preventing them from getting caught on anything in our wallet or bag.
Deseo que te haya gustado este proyecto, y te invito cordialmente a mi próxima publicación
ENGLISH VERSION
I hope you liked this project, and I cordially invite you to my next publication
Las fotos las tomé con mi teléfono Redmi Note 8
Apps que utilicé:
Canva para la Portada
Inshot para los Collage
Utilicé el Traductor Deepl
Mi redes sociales:
Discord: YennysYaneth#0189
Twitter: @yennysferm
Instagram: @yennysyaneth

---------- ❤️❤️❤️❤️ ----------
I took the photos with my Redmi Note 8 phone
Apps I used:
Canva for the Cover
Inshot for the Collage
I used Google Translate
My social networks:
Discord: YennysYaneth#0189
Twitter: @yennysferm
Instagram: @yennysyaneth
@yennysferm71
https://leofinance.io/threads/view/hive-130560/re-leothreads-pfbeoatx
Muy prectico y sencillo de realizar. Me gustó mucho ☺️👍🏼
!DIY
!VSC
@chacald.dcymt has sent VSC to @yennysferm71
This post was rewarded with 0.1 VSC to support your work.
Join our photography communityVisual Shots
Check here to view or trade VSC Tokens
Be part of our Curation Trail
@chacald.dcymt ha enviado VSC a @yennysferm71
Éste post fue recompensado con 0.1 VSC para apoyar tu trabajo.
Únete a nuestra comunidad de fotografía Visual Shots
Consulte aquí para ver o intercambiar VSC Tokens
Se parte de nuestro Trail de Curación
You can query your personal balance by
!DIYSTATSYay! 🤗
Your content has been boosted with Ecency Points, by @hive-130560.
Use Ecency daily to boost your growth on platform!
Support Ecency
Vote for new Proposal
Delegate HP and earn more
Pues si que es útil, sobre todo a los que siempre dejamos las llaves regadas 😅
Gracias por compartir