Coloring has always been an activity not only taught at school from a young age, but also an important activity in my home, along with drawing. Ever since my children were little, I told them that "all" homework and assignments should be accompanied by a drawing, even if they weren't asked for one at school. And I also always bought them coloring books as rewards, which they quickly devoured.
These coloring books are a new format currently in use, and are used as souvenirs, for birthdays, as support material for children's exhibitions, as gifts, etc. They have tons of uses, and we can make this coloring book with just a sheet of paper, Canva, and a printer. Let me show you:
Colorear siempre ha sido una actividad no solo de esas que se realizan en el colegio desde pequeños, en mi casa siempre ha sido una actividad importante junto a dibujar. Desde que mis hijos estaban pequeños les decía que "todas" las tareas y asignaciones debían ir acompañadas de un dibujo, aunque no se los hayan pedido en el colegio. Y también siempre les compraba libros de colorear como premio, los cuales devoraban en poco tiempo.
Estos libritos para Colorear son un nuevo formato que se está usando actualmente, y se usan como sourvenir, para cumpleaños, como material de apoyo para exposiciones de niños y niñas, como obsequio, etc. Tiene un montón de utilidades, y podemos hacer este Librito para Colorear con solo una hoja, el programa Canva y una impresora. Te enseño:

- Canva App (I used the Pro version).
- Printer.
- A letter-sized sheet of white paper.
- Scissors.
- A dish towel (anything, really).
- Canva App (yo utilicé versión Pro).
- Impresora.
- Una hoja blanca tamaño carta.
- Tijera.
- Un repasador (cualquier cosa realmente).

As I mentioned, I used Canva Pro, but it's not mandatory. You can use the free version, just be careful to choose free elements.
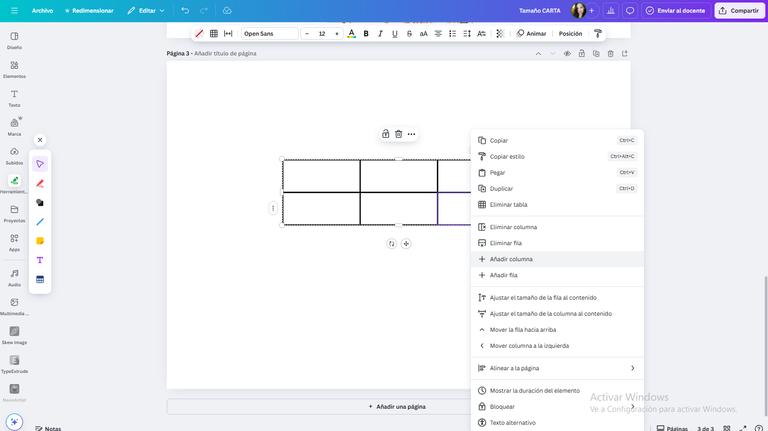
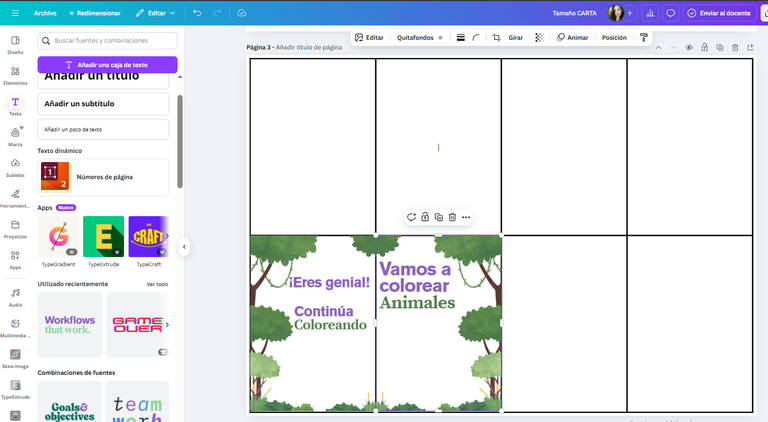
I chose "Create a Design" in Letter size, landscape format. You can use portrait, but I felt more comfortable using landscape. I inserted a "Table" with 4 columns and 2 rows, leaving a little space around the edges of the sheet. This will make everything much easier.
Como les mencioné, yo utilicé Canva en su versión Pro, pero realmente no es imperativo, puedes utilizar la versión gratuita, solo prestando atención a elegir elementos gratis.
Elegí "Crear un Diseño" en tamaño Carta, formato horizontal. Puedes usar vertical, pero yo me sentí más cómoda en horizontal. Inserté una "Tabla" con 4 columnas y 2 filas, y dejando un poco de separación por todo el alrededor de la hoja, esto facilitará todo realmente.
 |  |  |
|---|
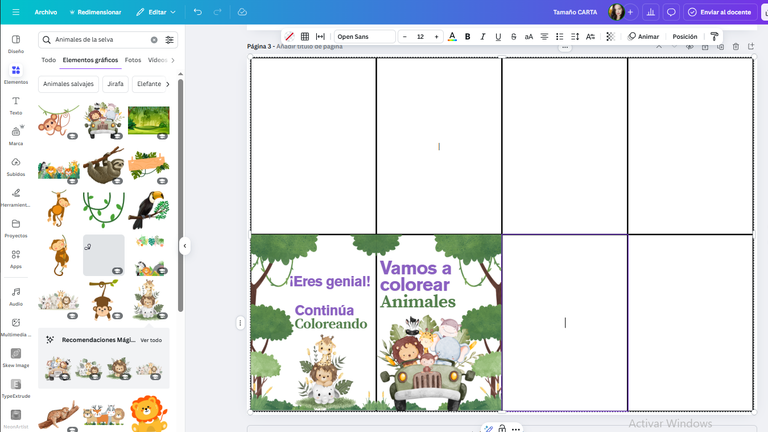
The front and back covers of the coloring book will be in the boxes below. I used certain framing elements with drawings of trees around them, and I added a title for the front cover and a motivational message for the back cover. I also included some colored drawings for both boxes, as you can see below:
En lo cuadros que te indico debajo, quedarán la Portada y Contraportada del Librito de Colorear. Entonces, utilicé ciertos elementos para enmarcar con dibujos de árboles alrededor, y coloqué un Título para la portada y un mensaje motivador para la contraportada, también unos dibujos con color para ambos cuadros, como puedes apreciar a continuación:
 |  |  |
|---|
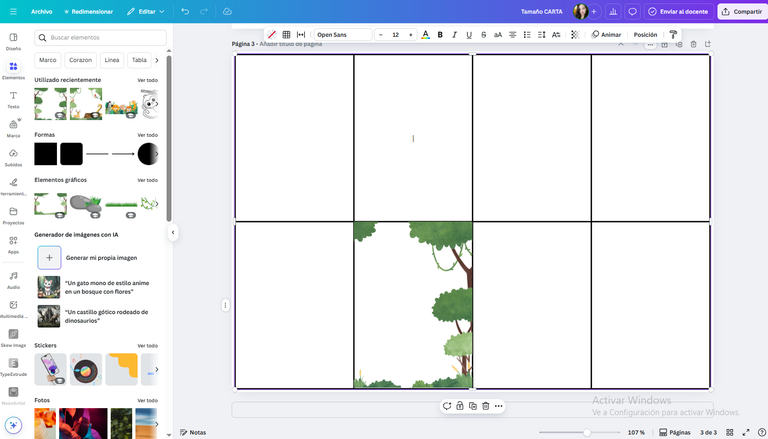
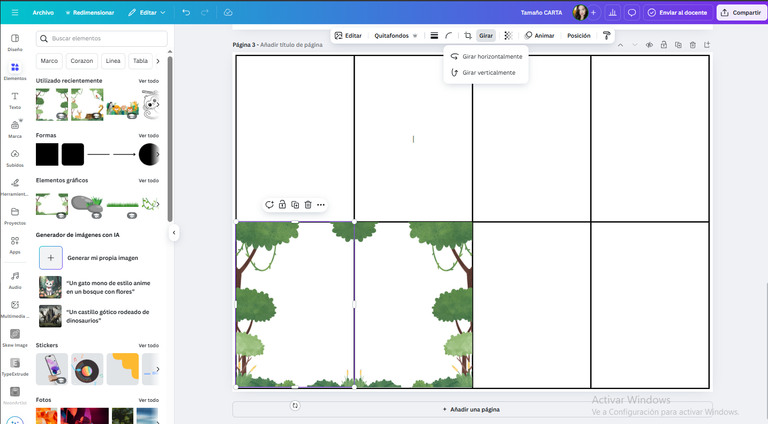
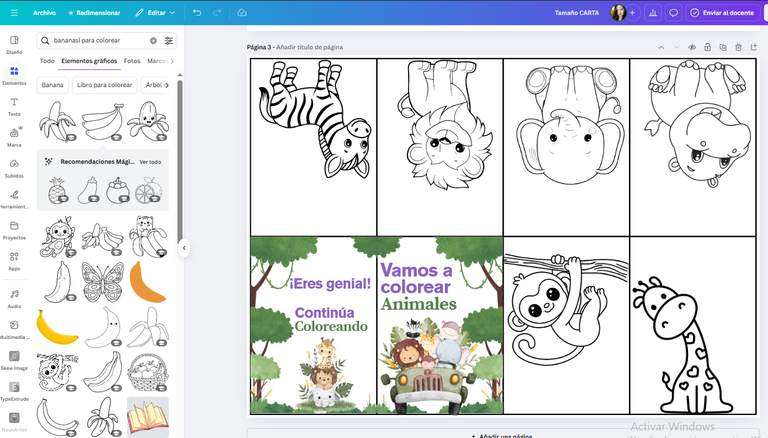
Pay attention to the orientation: the ones below are upright, and the ones above should be upside down. So, in "Elements," I selected "Animals to Color" and chose some that matched the ones I placed on the front and back covers.
For the ones above, it's just a matter of rotating the image I chose. At the end of this post, I'll leave you the links for each animal, in case they're useful.
Fíjate en la orientación, los de abajo quedan derechos, y en los cuadros de arriba deben quedar de cabeza. Así que en "Elementos" solicité "Animales para Colorear" y escogí algunos que debían coincidir con los que coloqué en portada y contraportada.
Para los de arriba es solo cuestión de girar la imagen que elegí. Al final de esta publicación te dejo los enlaces de cada animalito, por si te son de utilidad.
 |  |  |
|---|
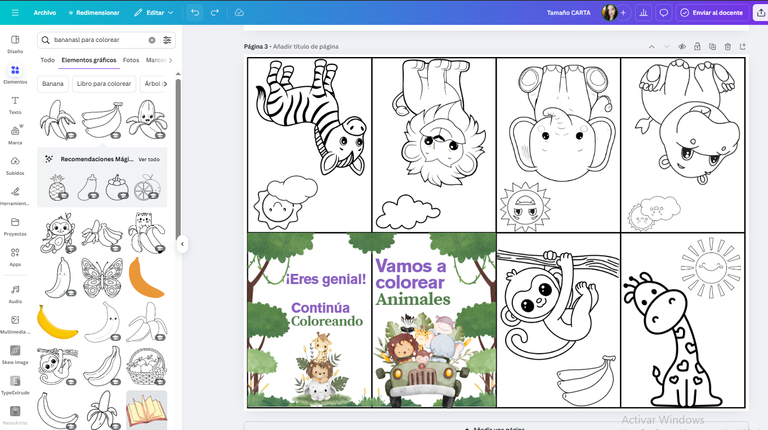
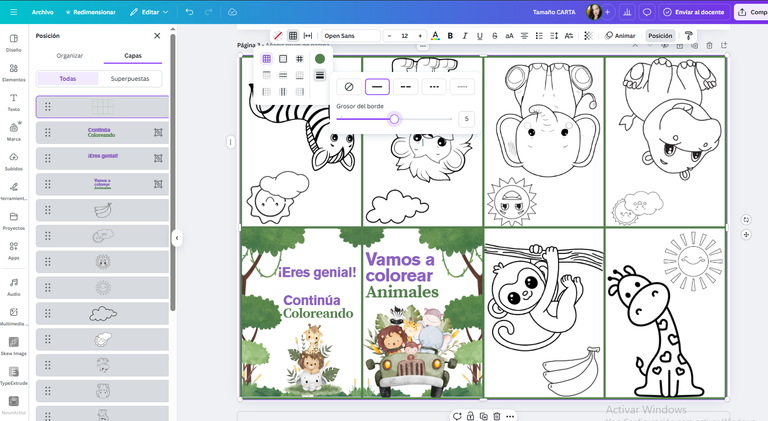
I set the border of the board to a green color to match the overall concept. I also added some elements like the sun and clouds to each frame, all according to each person's personal taste.
Al borde de la tabla le configuré un color verde para hacer combinación con todo el concepto. También agregué algunos elementos como sol y nubes en cada cuadro, todo de acuerdo al gusto personal de cada uno.
 |  |
|---|
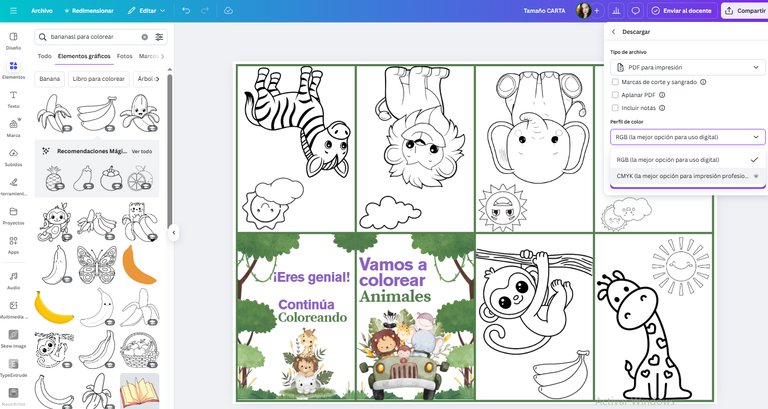
This information I'm about to give you is truly a GREAT INFORMATION, and it took me a while to learn how to use the correct settings.
You must download this Coloring Book design in PDF format FOR PRINTING. Below, two options will appear. You must choose CMYK (BEST OPTION FOR PROFESSIONAL PRINTING). Be careful to select it because the first option is RGB by default. Choose the second, which is CMYK. Then, print it, being careful to choose the "letter" paper size, and you can even choose "fit on page" to ensure your design is perfectly square.
Este dato que te voy a dar, realmente es un DATAZO y fue después de un tiempo que pude aprender a usar la configuración correcta.
Debes descargar este diseño de Librito para Colorear en formato PDF PARA IMPRIMIR , y más abaja se te van a abrir dos opciones, debes elegir CMYK (MEJOR OPCION PARA IMPRESIÓN PROFESIONAL), fíjate bien de elegirla porque está predeterminada la primera opción que es RGB, elige la segunda que es CMYK. Después, la imprimes teniendo el cuidado de elegir el tamaño de la hoja "carta" y puedes incluso pedir "encajar en página" para garantizar que tu diseño quede bien cuadrado.
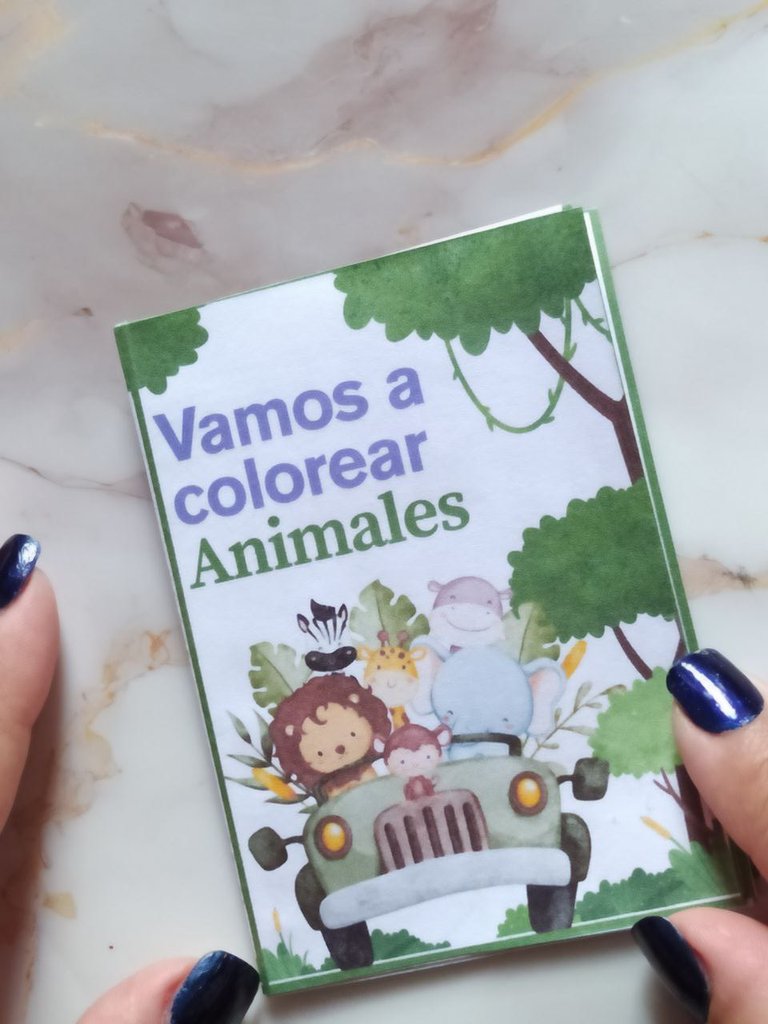
In this video from the 3Speak platform, I'm showing you how to cut and assemble this Coloring Book.
You can customize it to your liking, or create a special theme. It's wonderful because each drawing will be on a separate part of the page, meaning there won't be another drawing behind it. This is ideal so that if the marker or color bleeds through, it won't damage the back.
En video de la plataforma 3Speak, te estoy dejando la forma de cortar y armar este Librito para Colorear.
Puedes personalizarlo a tu gusto, hacerlo con alguna temática especial, es maravilloso porque cada dibujo va a quedar en una parte de la hoja, es decir que no va a tener otro dibujo detrás, lo cual es ideal para que si es el caso que se traspasa el marcador o color, pues no se dañe la parte de atrás.
I cordially invite you to watch the video, and I hope you enjoy it and make your own. You're currently using it and getting a lot of demand for it, especially for use in party favors for children's parties.
Te invito cordialmente a ver el video, y deseo que te guste mucho y puedas realizar el tuyo, actualmente lo estás utilizando y demandando mucho sobre todo para incluirlo en cotillones para fiestas infantiles.
Below are the links to the drawings I used in this Jungle Animals design:
Jungle Animals Cover
Jungle Animals back cover
Mono
Giraffe
Zebra
León
Elephant
Hippopotamus
A continuación los enlaces a los dibujos que utilicé en este diseño de Animales de la Selva:
Animalitos Portada
Animalitos contraportada
Mono
Jirafa
Cebra
León
Elefante
Hipopótamo

I took the photos with my phone Redmi Note 8
Apps I used:
Canva Pro for Cover, Collage and Banners
Capcut for Video Editing
Music Pixabay
I used Deepl Translator
My social networks:
Discord: YennysYaneth#0189
Twitter: @yennysferm
Instagram: @yennysyaneth
Las fotos las tomé con mi teléfono Redmi Note 8
Apps que utilicé:
Canva Pro para la Portada, Collage y Banners
Capcut para la Edición de video
Música Pixabay
Utilicé el Traductor Deepl
Mi redes sociales:
Discord: YennysYaneth#0189
Twitter: @yennysferm
Instagram: @yennysyaneth
▶️ 3Speak
Qué lindo!!! me encantan las cosas mini, cuanta creatividad!
Me alegra que te haya gustado, lo hice con mucha dedicación y amor.
It's a great idea to do with the little ones in the house. Thank you for leaving us with such a magnificent idea along with the creative process.
selected by @dayadam
Thanks for your kind words and appreciation @diyhub, I'm glad you liked it.
Amiga, esta es una genial idea para llevarla a cabo para los más pequeño de la casa, nos regalas un paso a paso bastante fácil de seguir.
Bello tu post, como todos tus trabajos 💖
!discovery 30
Gracias por tu apoyo amiga @dayadam me alegra que te haya gustado.
This post was shared and voted inside the discord by the curators team of discovery-it
Join our Community and follow our Curation Trail
Discovery-it is also a Witness, vote for us here
Delegate to us for passive income. Check our 80% fee-back Program
Very grateful for your support.
This post has been manually curated by @bhattg from Indiaunited community. Join us on our Discord Server.
Do you know that you can earn a passive income by delegating to @indiaunited. We share more than 100 % of the curation rewards with the delegators in the form of IUC tokens. HP delegators and IUC token holders also get upto 20% additional vote weight.
Here are some handy links for delegations: 100HP, 250HP, 500HP, 1000HP.
100% of the rewards from this comment goes to the curator for their manual curation efforts. Please encourage the curator @bhattg by upvoting this comment and support the community by voting the posts made by @indiaunited.
Very grateful for your support.
Que lindo trabajo @yennysferm71, me encantó la idea de que sea mini, lo hace muy atractivo.
Saludos!
Gracias amiga @belkyscabrera, me alegra mucho que te haya gustado.
It's really impressive how a sheet of paper would be use t to create such a wonderful book .
It's really beautiful
Está genial ! Y es una idea excelente para hacerla talvez para regalar para una fiestecita infantil o para una actividad con los niños
Magnífica idea que nos compartes paso a paso. Tengo dos peques en casa que van a amar esto. Tengo que seguir tus instrucciones e intentar
This looks lovely and very unique, I love the final outcome and it's indeed really creative. Nicely done and good job
Simplemente bello me encanto.