Hello Hive Diy!
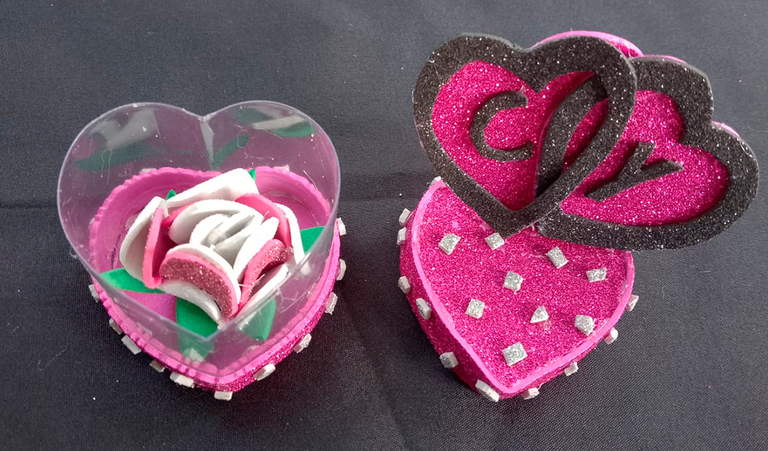
I present to you my little new project and it is a little heart box, and many people know how to make them, but others don't, so I wanted to learn, make them until I achieved it and the best of all is that I was inspired by the decoration thinking of my husband @ casilokodesing because I wanted to give her something nice made with my own hands, so to start I placed two hearts together with the initials of our pseudonyms.
Since I learned, now I want to share with you how I made it so that you can also create these beautiful and delicate things made with a plastic soda bottle, which is very easy to find, and foam.
You can not only decorate these boxes with hearts, but also with foam flowers and all the ideas you have that inspire you and activate the spark of creativity in you. For me, this is not just any little box; It is a gift full of meaning, a way to transmit affection and appreciation; She has another detail inside, it is a rose, a symbol that is loaded with love for him.
One of the ways that drives you to create what you want is the love with which you do everything, since it is the engine that makes your dreams come true.

Materials

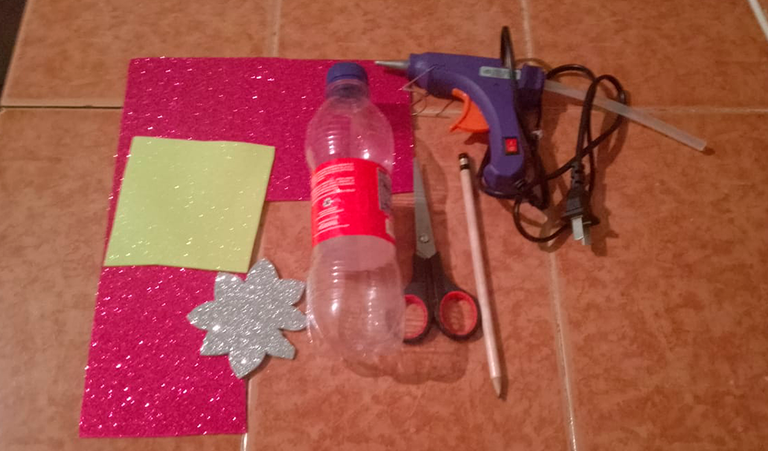
Silicone gun
Silicone
400ml soft drink bottle
Scissors
Pencil
Fuchsia frosted foam
Silver frosted foam
Black scratched foam
Step by step
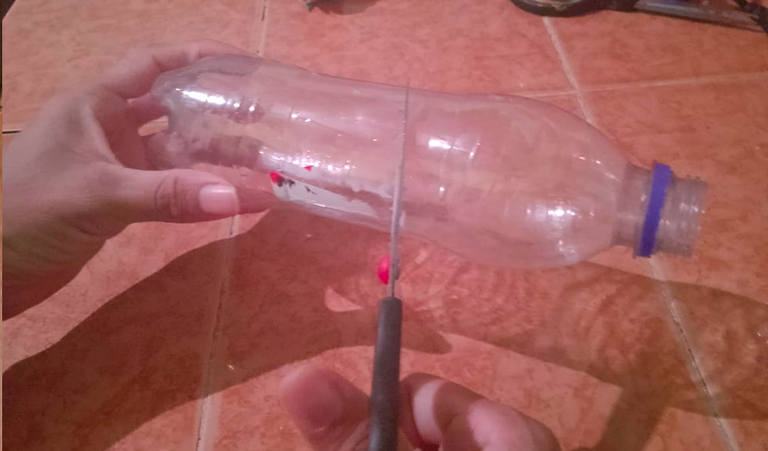
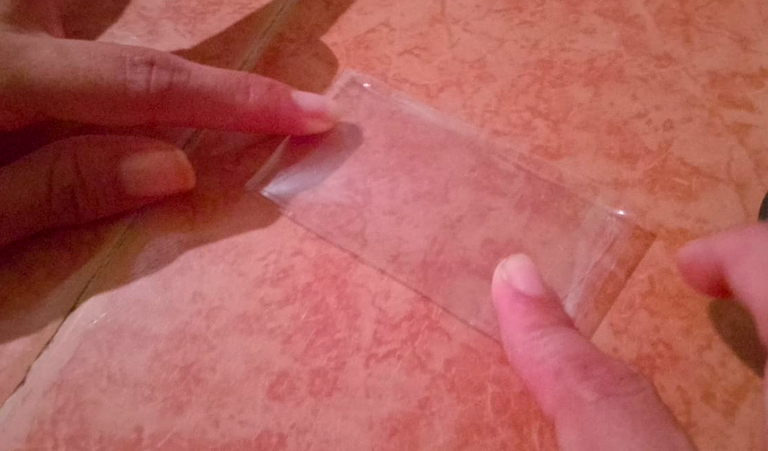
Passed 1: We take a 400ml plastic soda bottle, and cut the smooth part of the bottle that measures approximately 4 and a half cm.
Passed 2:Using a little pressure we begin to bend the bottle and mark both edges well.
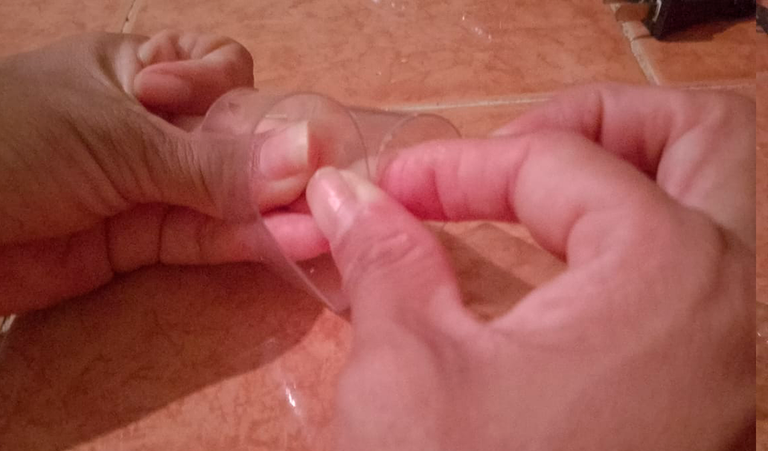
Passed 3:To give it shape, we take one of the edges and place it inwards so that we begin to form the heart.
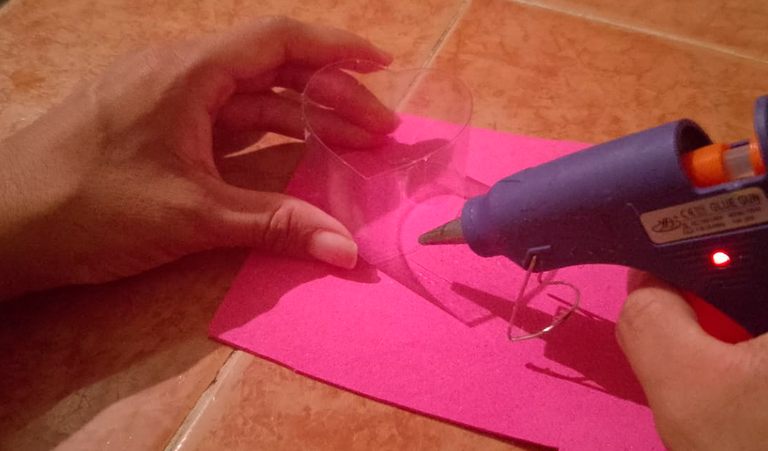
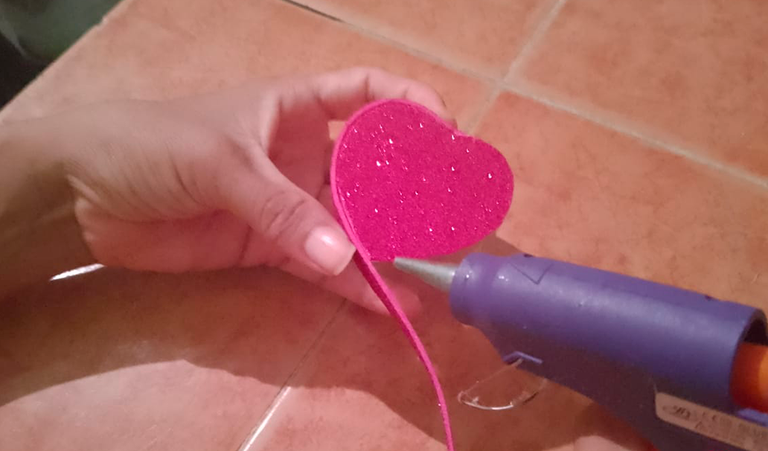
Passed 4:Now we place the heart against the frosted foam and glue, then we cut out the foam and leave the fuchsia heart glued to the transparent plastic.
Passed 5:Now we cut a ribbon 1 and a half cm wide and 18 cm long. We cut with shaping scissors.
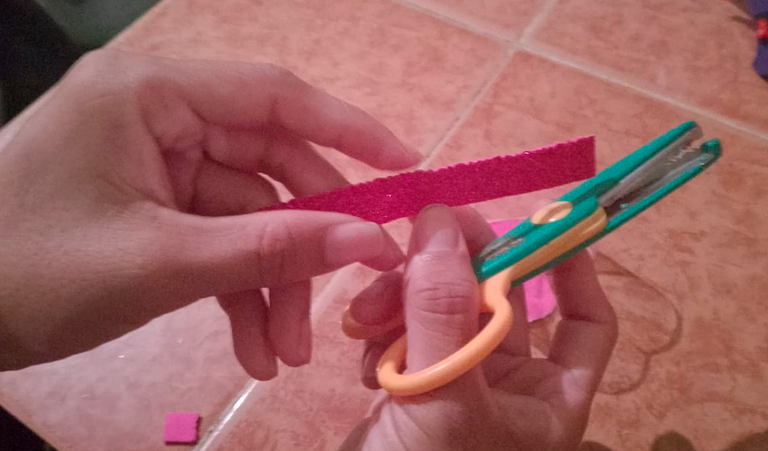
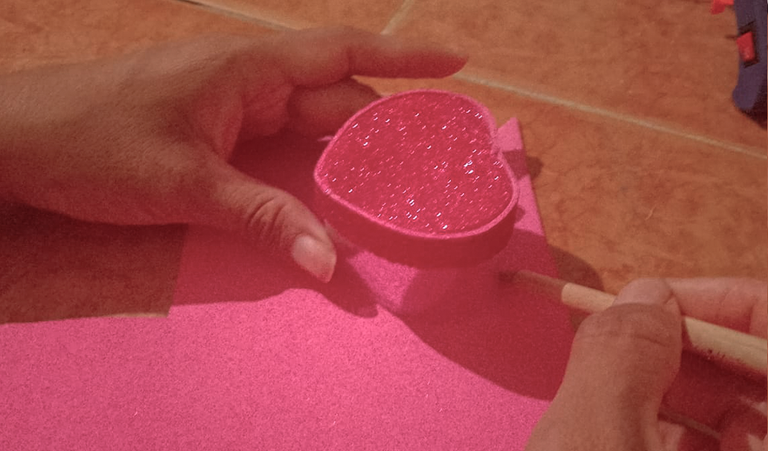
Passed 6:Now we stick this tape around the base, as seen in the image:
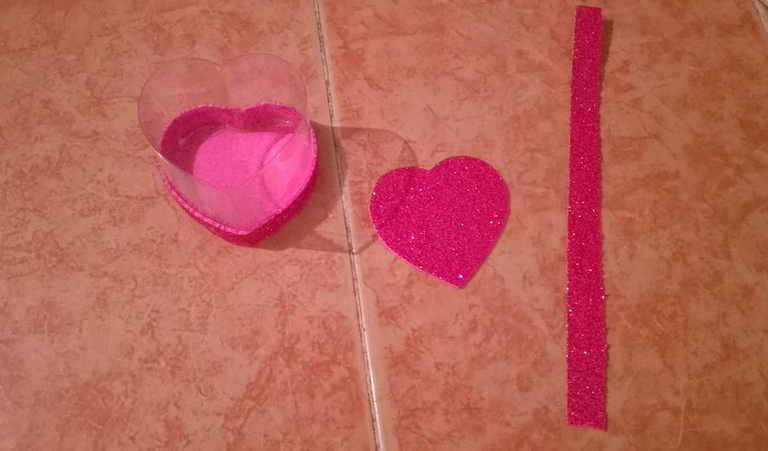
Passed 7:Once the previous step is finished, we mark the outline with the other part of the heart and cut, and take out three hearts. One that is for the cover and the other two for decoration.
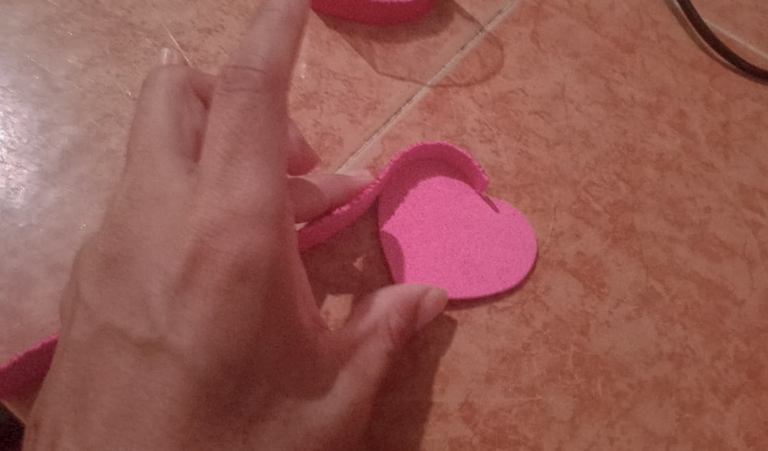
Passed 8:We cut a ribbon in the same way 1 and a half cm wide and 18cm long and glue one of the cut out hearts to the outline, forming the lid of the box.
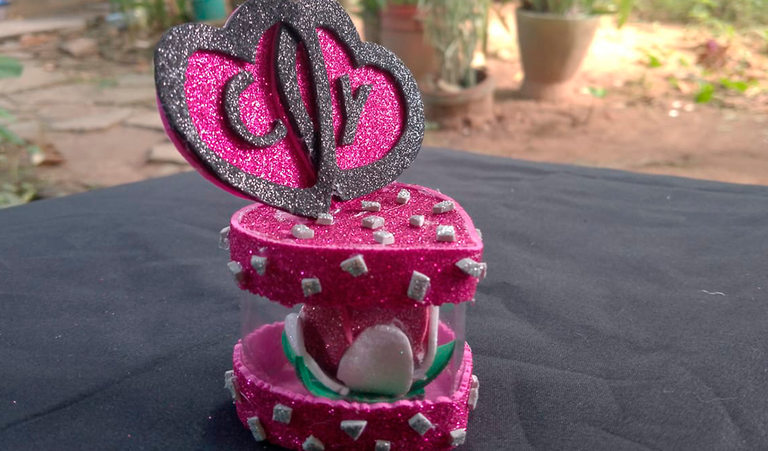
Passed 9:And voila, we had the heart box in a simple way.
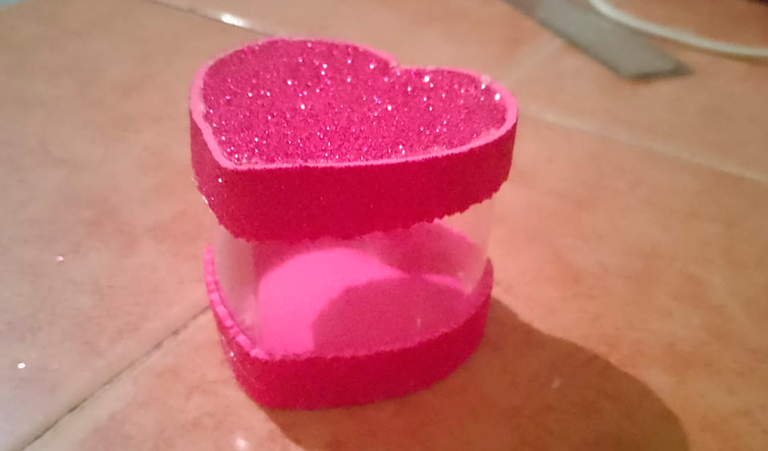
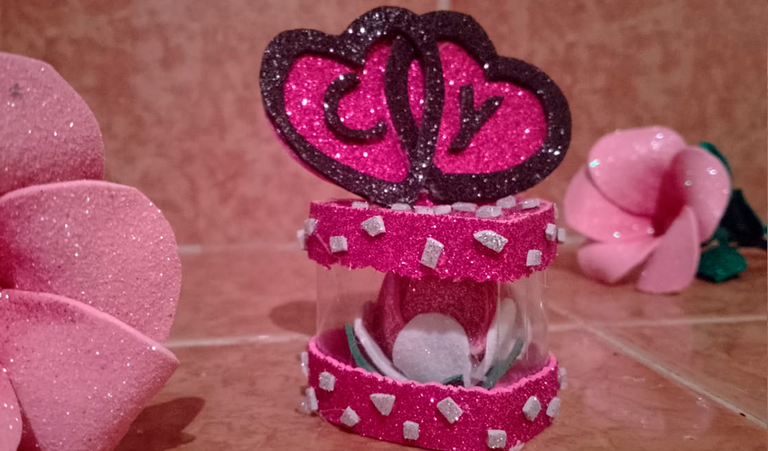
Ready! Now let's decorate with what we have on hand and activate our creativity. In my case, I placed two large hearts to place the initials of the pseudonyms in each of them, my husband's and mine. Then inside the box I placed a rose.

In addition, I cut the silver frosted foam into small pieces and glued little jumps on the fuchsia foam, except in the part of the hearts where the initials are and so they looked like little stones. Finally I placed a frosty black foam frame to highlight the black letters and look how it turned out.
In this way my friends, this was the project for this opportunity, I hope to soon share more for you.
💖Until next time Hivers!💖
ESP
Crea tu propia cajitas corazón un detalle inolvidable
¡Hola Hive Diy!
Les presento mi pequeño nuevo proyecto y es una cajita corazón, y es que muchas personas las saben hacer, pero otras no, entonces quise aprender, hacerlas hasta que lo logré y lo mejor de todo es que en la decoración me inspiré pensando mi esposito @casilokodesing porque quería regalarle algo bonito hecho con mis propias manos, entonces para comenzar coloqué dos corazones juntos con las iniciales de nuestros seudónimos.
Ya que aprendí, ahora quiero compartirles como la elaboré para que también puedas crear estas cositas tan bonitas y delicaditas hechas con botella plástica de refresco, que es muy fácil de encontrar y foami.
Estas cajitas no solo puedes decorarlas con corazones también con flores de foami y todas aquellas ideas que tengas, te inspire y que ponga activa la chispa de la creatividad en ti. Para mí, esta no es una cajita cualquiera; es un regalo lleno de significado, una forma de transmitir cariño, aprecio; ella en su interior tiene otro detalle, es una rosa, un símbolo que está cargado de amor para él.
Una de las maneras que te impulsa a crear lo desees es el amor con el que haces cada cosa, ya que es el motor que hacen ver tus sueños hechos realidad.
Materiales
Pistola de silicón
Silicón
Botella de refresco de 400ml
Tijera
Lápiz
Foami escarchado fucsia
Foami escarchado plateado
Foami escrachado negro
Paso a paso
Paso 1: Tomamos una botella plástica de refresco de 400ml , y cortamos la parte lisa de la botella que mide 4cm y medio aproximadamente.
Paso2:Haciendo un poquito de presión comenzamos a doblar la botella y marcamos bien los dos filos.
Paso 3:Para ir dándole forma, tomamos unos de los filos y lo colocamos hacia dentro de manera que comencemos a formar el corazón.
Paso 4:Ahora colocamos el corazón contra del foami escarchado y pegamos, luego recortamos el foami y dejamos el corazón fucsia pegado al plástico transparente.
Paso 5:Ahora cortamos una cinta de 1cm y medio de ancho y 18 cm de largo. Cortamos con una tijera moldeadora.
Paso 6:Ahora esta cinta la pegamos alrededor de la base, así como se ve en la imagen:
Paso 7:Una vez terminado el paso anterior, marcamos el contorno con la otra parte del corazón y cortamos, y sacamos tres corazones. Uno que es de la tapa y los otros dos para decoración.
Paso 8:Cortamos una cinta de igual manera 1cm y medio de ancho con 18cm de largo y pegamos al contorno uno de los corazones recortados formando la tapa de la cajita.
Paso 9:Y listo, nos quedó la cajita corazón de manera sencilla.
¡Listo! Ahora decoremos con lo que tengamos a mano y activemos nuestra creatividad. En mi caso, le coloqué dos corazones grandes para colocarle en cada uno de ellos las iniciales de los seudónimos, el de mi esposo y el mio. Luego en el interior de la cajita le coloqué una rosa.
Además, corté el foami escarchado plateado en pequeños trocitos y le pegué saltaditos en el foami fucsia, menos en la parte de los corazones donde están las iniciales y así quedaron como que fueran piedritas. Finalmente le coloqué un marco de foami, color negro escarchado para resaltar las letras negras y mira como me quedó.
De este modo mis amigos, este era el proyecto de esta oportunidad, espero pronto volver a compartir más para ustedes.
💖¡Hasta una próxima oportunidad Hivers!💖
Wow this look beautiful, you did a great Job. Gonna trying it one one also
Excellent friend. I know they will look nice on you. Thank you!
Has sido votado por
PROYECTO ENLACE
'Conectando Ideas y Comunidades'
PROYECTO ENLACE es un proyecto de curación de habla hispana enfocado en recompensar contenido de calidad y apoyar autores en su proceso de crecimiento en HIVE.
Creemos y apostamos por el futuro de esta gran plataforma, y estamos muy emocionados de poder hacerla crecer junto a esta comunidad. Así que te invitamos a publicar en nuestra COMUNIDAD y estar atento a todas las actividades que tenemos preparadas y que estaremos publicando en breve.
¿QUIERES AUTOMATIZAR TUS GANANCIAS DE CURACIÓN? SE PARTE DEL PROYECTO ENLACE APOYANDO A NUESTRO TRAIL EN HIVE.VOTE INGRESA AQUÍ PARA CONOCER LOS DETALLES.
¿QUIERES INVERTIR ENLACE? DESCUBRE COMO HACERLO Y GENERAR INGRESOS DE FORMA SEMANAL MEDIANTE TU DELEGACIÓN DE HP AQUÍ TE EXPLICAMOS COMO.
Te invitamos a participar en nuestro servidor de Discord: https://discord.gg/3S9y7BbWfS
Atentamente
EQUIPO ENLACE 2024
Nice of you to share your skills with the community, this is one beautiful box and the fact that it was made with so much love and care shows how much of a loving person you are. Well done.
It was very beautiful and decorative, an excellent detail to give to the person you love ❤️ I loved the detail of the flower inside it.
Thank you! Oh how nice that you liked it. Yes, it is a very nice detail and also easy to make and they do turn out pretty.
!discovery 35
Amiga que hermoso detalle quedó. Gracias por compartir. Bendiciones 😘.
¡Amén gracias amiga!
Un trabajo muy bonito y es increíble que uses ese tipo de material reciclado y de esa manera conseguir un gran adorno, además esta perfecto para un regalo muy llamativo.
¡Gracias Amiga! así es, podemos reusar algunos materiales y convertirlos en lindos detalles.
Te ha quedado muy asombrosa tu manualidad, ideal para regalarlo a un ser querido en un día especial.
Escrito por lionsaturbix / Written by lionsaturbix
¡¡¡Buen trabajo!!! Gracias por publicar tu excelente contenido en Hive Diy.
Hola @yohadice, que linda cajita, un gran detalle para obsequiar y una excelente idea para reciclar las botellas de plástico.
Saludos!
¡Hola amiga gracias! Me alegra que te haya gustado.
Congratulations @yohadice! You have completed the following achievement on the Hive blockchain And have been rewarded with New badge(s)
Your next target is to reach 45000 upvotes.
You can view your badges on your board and compare yourself to others in the Ranking
If you no longer want to receive notifications, reply to this comment with the word
STOP