¡Hola hermosa comunidad DiY!
En esta oportunidad me provocó crear un sobre para enviar una palabra especial a un ser querido a un familiar o amigo, entonces me pregunté ¿a quién se lo entregaría? Y de tantas personas especiales que me rodea aún no había tomado una decisión y comencé a preparar todo.
Cada uno de mis creaciones que elaboro para esta comunidad es para mi nuevo, es mi primera vez, de tantas cosas que mis ojos han visto, finalmente llegó a un objetivo o a una meta de acuerdo a lo que deseo elaborar.
Entonces comencé hacer un sobre y dicho sobre tendría un bonito detalle que son las rosas, me entusiasmé mucho, entonces comencé a buscar material reciclaje para lograr lo que tenía en mente, pensando también en ustedes y dar ideas para regalar a esa persona especial de una manera personalizada.
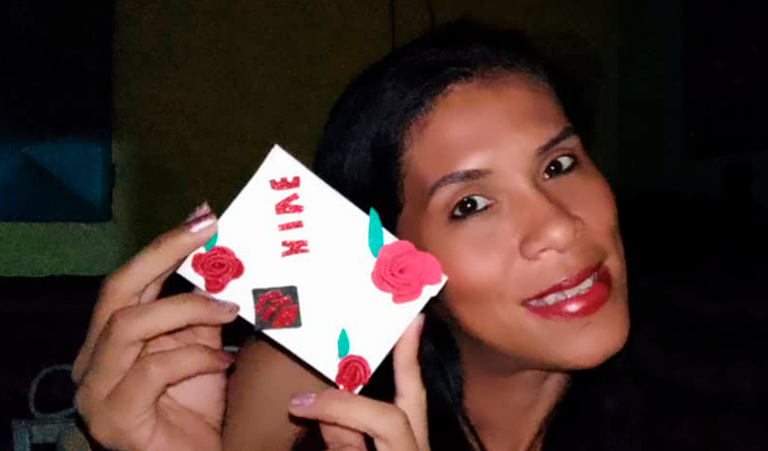
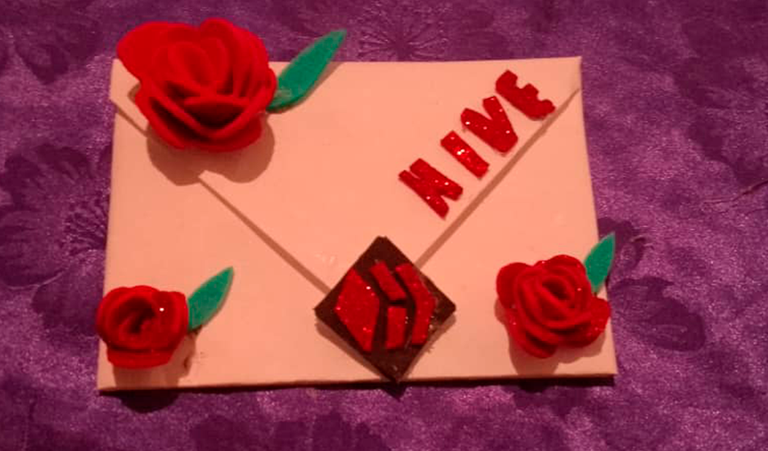
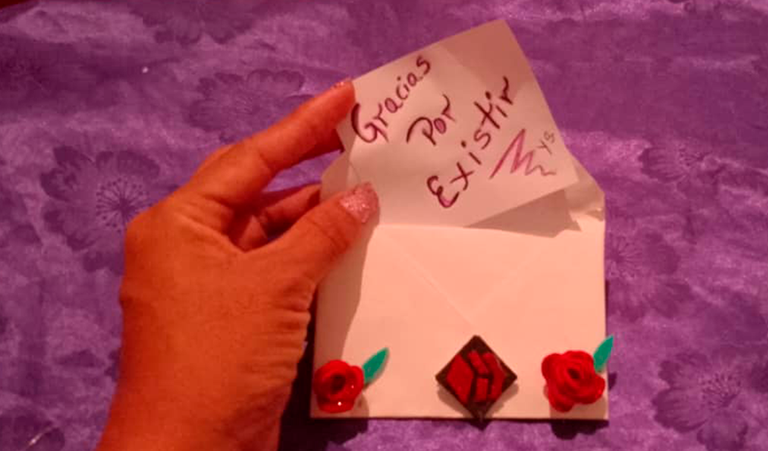
Al empezar hacer el sobre me llegó la brillante idea que este sobre lo haría para Hive, esta bonita plataforma que le ha cambiado la vida a muchas personas y el mensaje que vino a mi mente es decirle “Gracias por Existir”, esta idea me llenó de ilusión hasta que lo logré, aun que lo puedo dárselo a alguien personalmente sé que llegará a través de estas imágenes.
De esta manera voy a comenzar a mostrarles los materiales que utilicé para la elaboración del sobre.

Materiales a utilizar

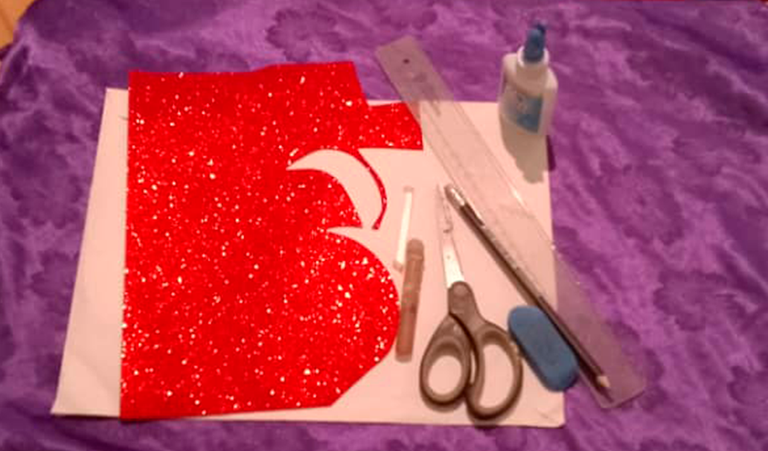
Hoja en blanco (si el sobre lo deseas blanco)
Silicón en barra
Pega
Foami rojo para rosas y letras
Foami verde y negro (para detalles en este caso)
Regla
Lápiz
Tijera
Ahora el paso a paso del sobre
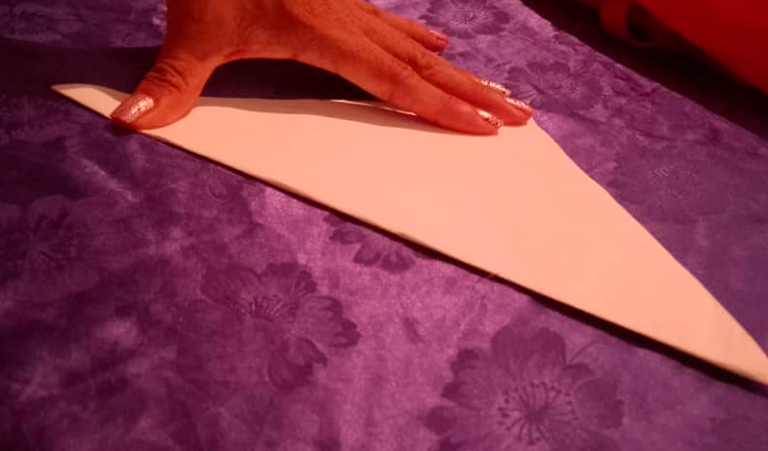
Paso 1: Recortamos un pliego de papel de 20 cm cuadrado, puedes usar unas medidas con más cantidad de centímetros cuadrado para que el sobre sea grande a tu necesidad.

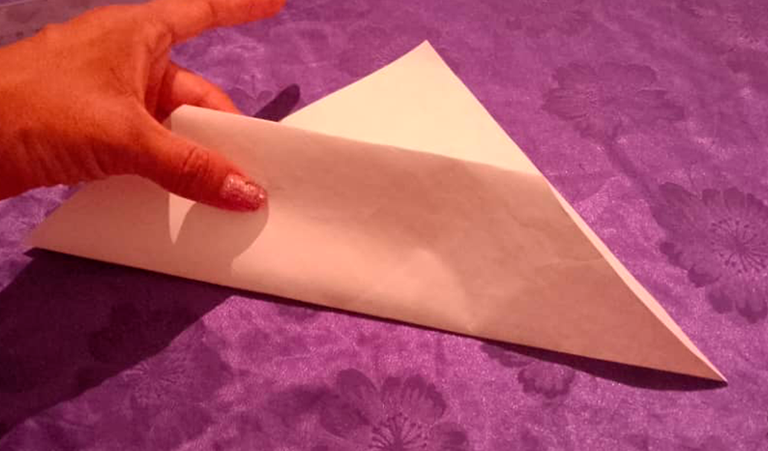
Paso 2:Hacemos el dobles por la mitad de manera diagonal.
Paso 3:Luego al tenerlo por la mitad, volvemos a doblar desde una punta hasta la mitad.
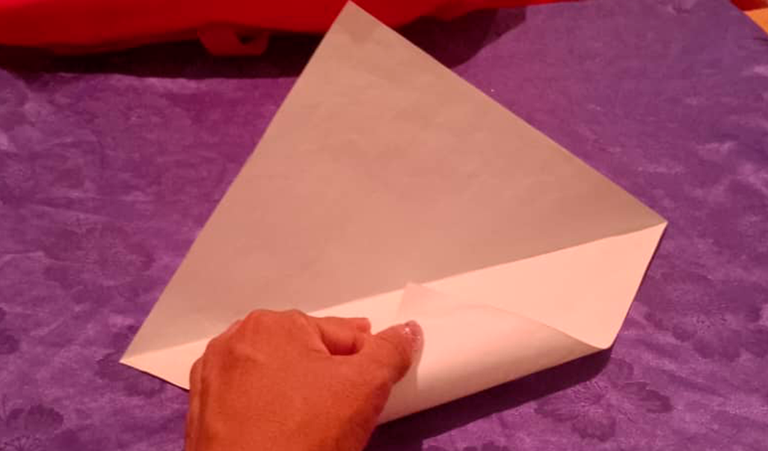
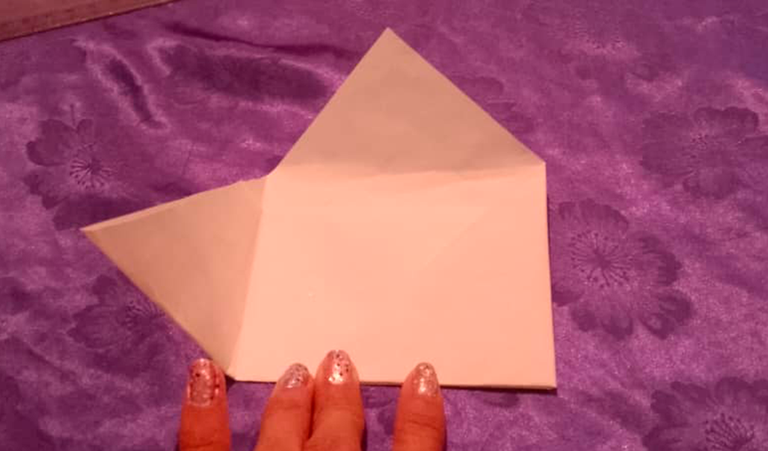
Paso 4:Doblamos otra vez hacia la mitad.
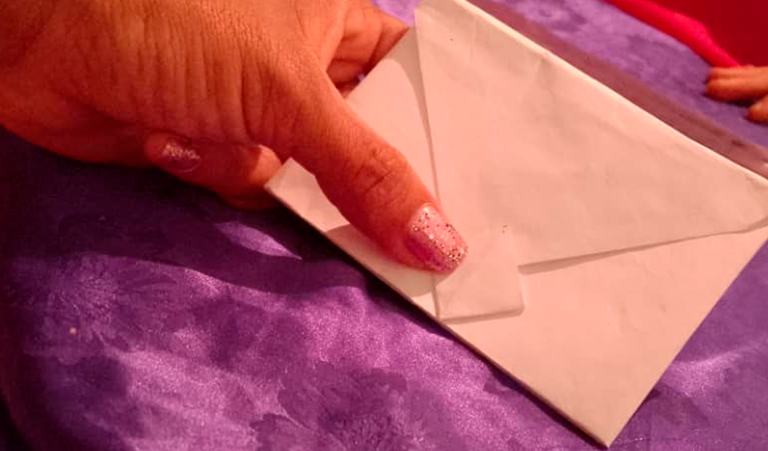
Paso 5:Doblamos desde un lado a otro, por ambas partes como se ve en la imagen y vamos aplicando un poquito de pega para reforzarla.
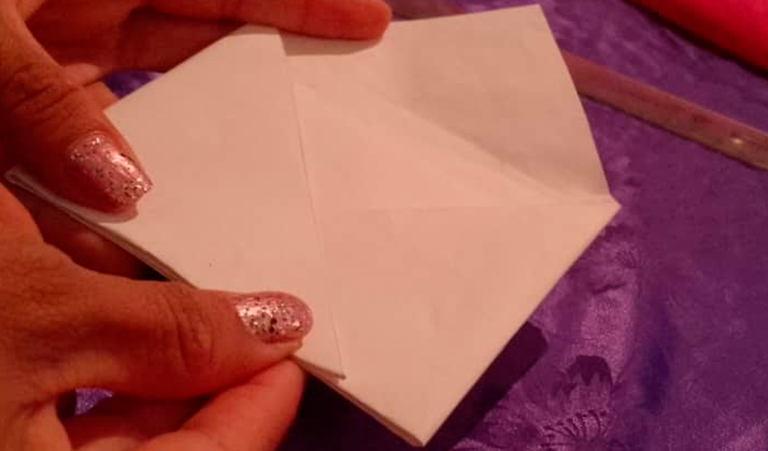
Paso 6:En una de las puntas que me queda, el cual podemos ver en la imagen, le abrimos de esta manera y nos quedaría, así como especie de un rombo, a esta parte le aplicamos pega en la parte de atrás.
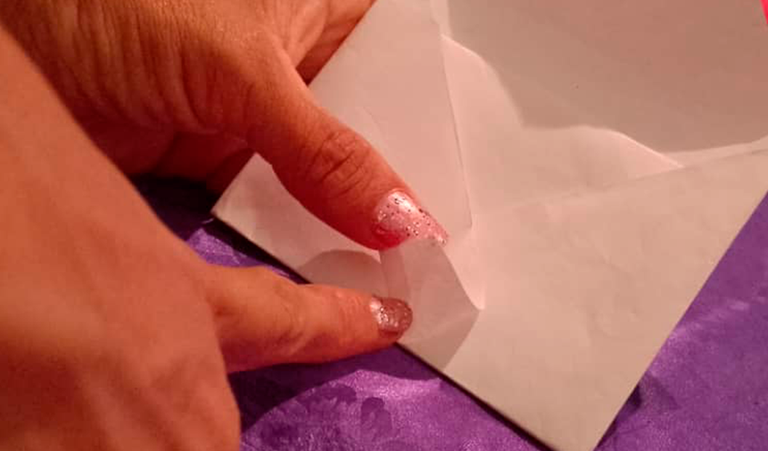
Paso 7:Para culminar esta primera parte cerramos nuestra cartita y así nos queda.
Paso a paso para crear las rosas de decoración
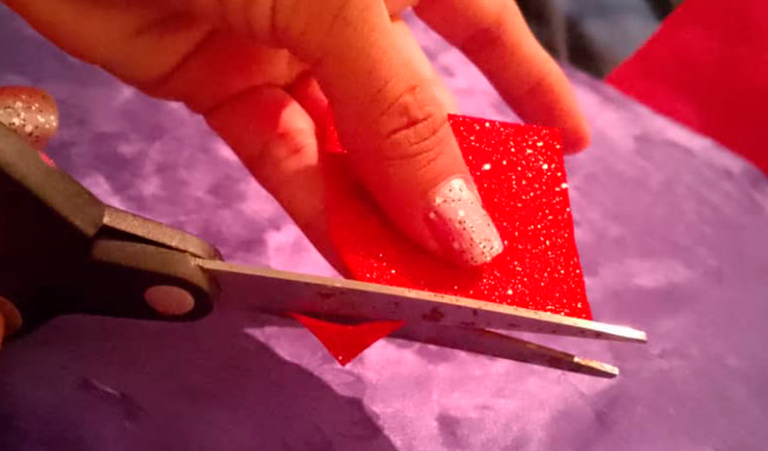
Paso 1: Recortamos cuadrado de 5cm en foami, otro de 8 com y otro de 4cm.
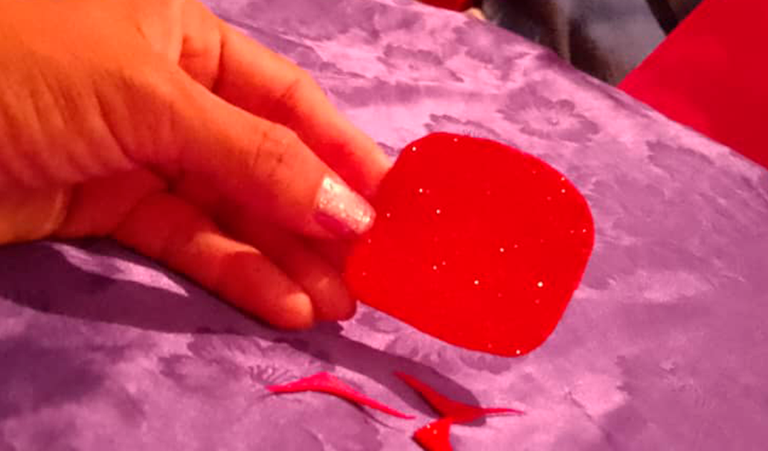
Paso 2:Comenzamos a redondear las puntas a cada uno de los cuadritos, de esta forma.
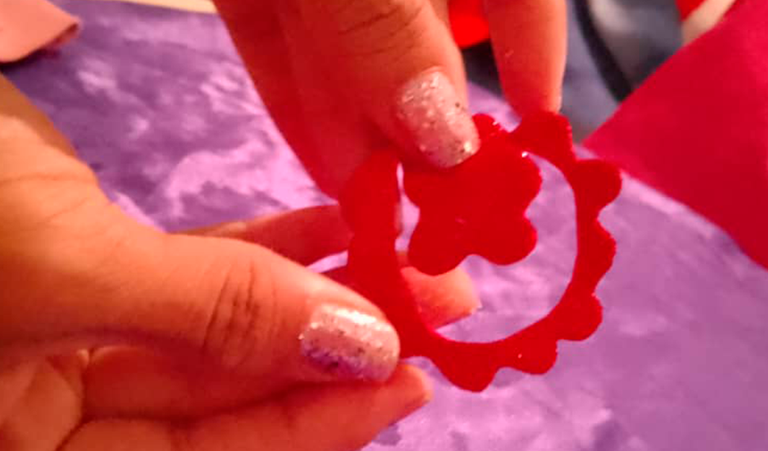
Paso 3:Luego cortamos de manera de hacer espiral con cada uno de los cuadritos.
Paso 4:A los espirales vamos dándole una formita de pétalos, un pétalo al lado del otros, no importa que no te queden exactamente de iguales tamaño, pero si trata de hacerlo.
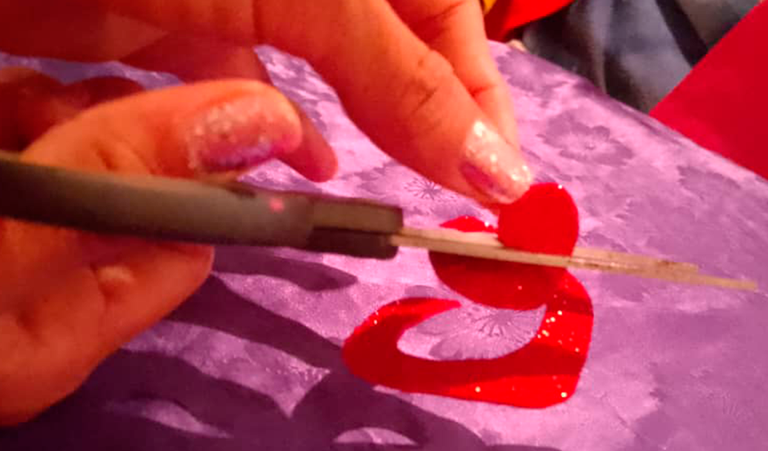
Paso 5:Comenzamos a enrollar y a la vez pegando con silicón hasta llegar al final de la rosa así:
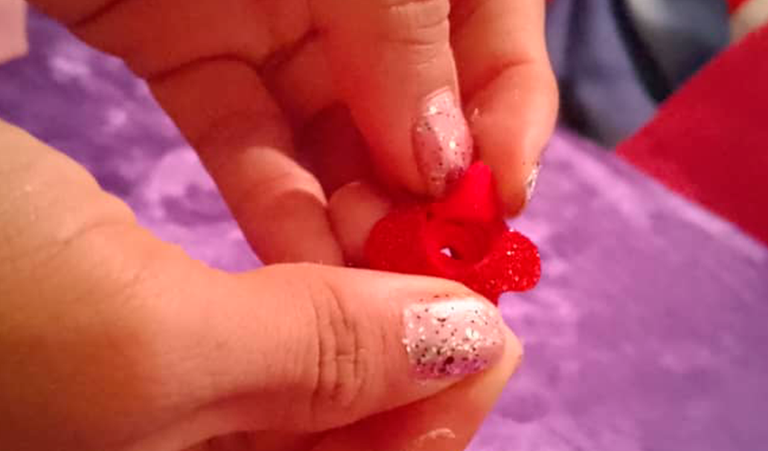
Paso 6:Al final pegamos el centro de la flor y así, al voltear nos queda nuestra rosa.
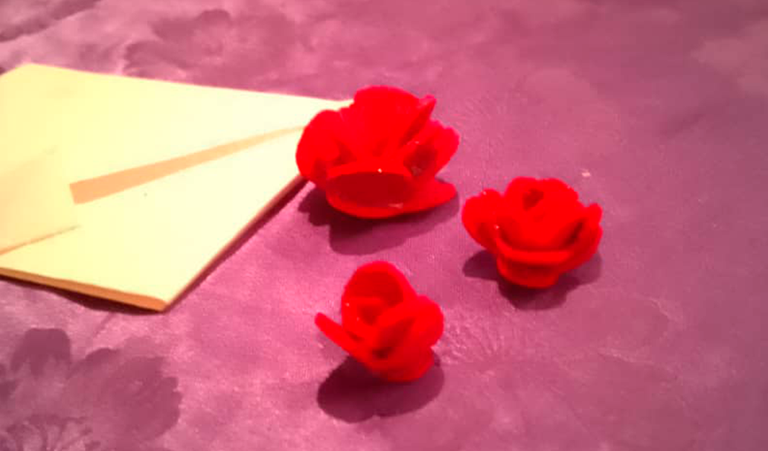
Luego ya debes saber a quién deseas regalárselos y recorta su nombre en foami en la parte que nos quedó como rombo, puedes aprovechar ese espacio para colocar puede ser un corazón, una carita feliz, entre otros. En mi caso yo decidí elaborarlo par Hive y corté foami para colocar su logo y así hacerlo identificado.
Bien mi querida comunidad muchas gracias por estar ahí y por permitirme colocar este post, a todos seguiré buscando el tiempo para escribirles y traer otras ideas para compartir.
💖¡Hasta una próxima oportunidad mis Hivers!💖

ingles
Hello DiY community!
This time it prompted me to create an envelope to send a special word to a loved one, a family member or friend, so I asked myself, who would I give it to? And of so many special people around me, I still hadn't made up my mind and started preparing everything.
Each of my creations that I make for this community is new to me, it is my first time, of so many things that my eyes have seen, I finally reached an objective or a goal according to what I want to elaborate.
Then I started to make an envelope and said envelope would have a nice detail that are the roses, I got very excited, then I began to look for recycled material to achieve what I had in mind, also thinking of you and give ideas to give to that special person in a personalized way.
When I started making the envelope I got the brilliant idea that this envelope would do it for Hive, this beautiful platform that has changed the lives of many people and the message that came to my mind is to say "Thank you for existing", this idea filled me with illusion until I achieved it, although I can give it to someone personally I know that it will come through these images.
In this way I'm going to start showing you the materials that I used for the elaboration of the envelope.
Materials to be used
Blank sheet of paper (if you want the envelope white)
Silicone bar
Sticks
Red Foami for Roses and Lettering
Green and black foami (for details in this case)
Rule
Pencil
Scissors
Step-by-step to make the envelope
First step: We cut a sheet of paper of 20 cm square, you can use measurements with more square centimeters so that the envelope is large to your need.
Second step: Doubles in half diagonally.
Third step: Then, when we have it in half, we fold it again from one end to the middle.
Step four: Fold in half again.
Fifth stepFold from one side to the other, on both sides as seen in the image and apply a little glue to reinforce it.
Sixth step: In one of the points that I have left, which we can see in the image, we open it in this way and it would fit, as well as a kind of rhombus, to this part we apply glue on the back./div>
Seventh step: To finish this first part, we close our letter and that's how it looks.
Step by step to create the roses
Step one: Cut out a 5cm square in foam, another 8cm and a 4cm square
Step Two: We start rounding the ends to each of the squares, like this.
Step Three: Then cut in a spiral with each of the squares
Step four: We give the spirals a little shape of petals, one petal next to the other, it doesn't matter if they are not exactly the same size, but try to do it.
Step five: We start rolling and gluing with silicone until we reach the end of the rose like this:
Step six: at the end we glue the center of the flower and so, when we turn we have our rose.
Then you should know who you want to give them to and cut out their name in foam in the part that was like a diamond, you can take advantage of that space to place it can be a heart, a happy face, among others. In my case, I decided to make it for Hive and cut foam to place its logo and thus make it identified.
Well my dear community thank you very much for being there and for allowing me to post this post, I will continue to find the time to write to you and bring you other ideas to share.
💖See you next time my Hivers!💖
😘😘😘😘😍Que lindo. Muchas gracias
This is so cute, and it's a shame that people cannot be bothered to be this creative anymore.
Nice job 👏
PS. I see that you have not been so active, so I hope that this year you'll be able to find balance, as it would be great to see more of you around:)
Hello @millycf1976! I'm glad you liked it, I'm very happy and your comment excites me and inspires me to continue. Thank you so much, I appreciate your words so much. Already this year I'm getting active again. Thank you
😍