❤️❤️❤️❤️❤️✨️❤️❤️❤️❤️❤️✨️❤️❤️❤️❤️❤️

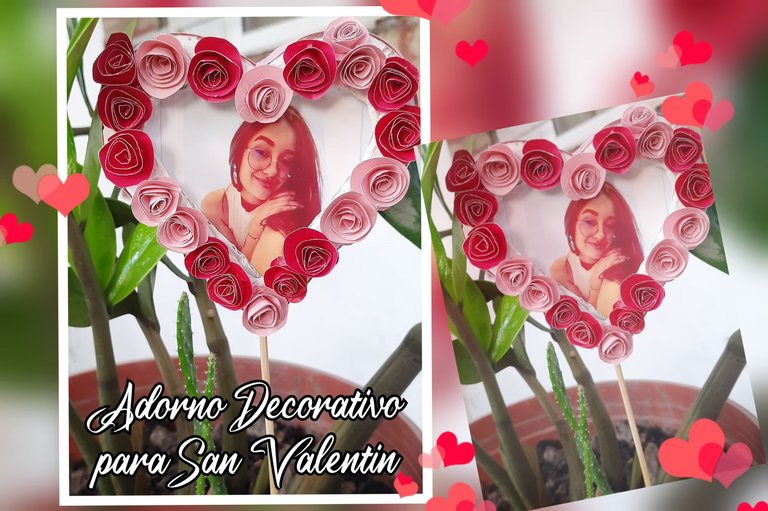
Un saludo, querida comunidad de creativos, un gusto estar con ustedes personas talentosas, se acerca el dia de los enamorados, la epoca del amor y la amistad, para demostrar afecto, sin duda tenía que hacer alguna manualidad alusiva a esta época.
Al sentarme en mi rincón creativo sabía que quería hacer un pequeño portaretrato lo que no sabía era cómo hacerlo, así que si era algo para celebrar el día del amor y la amistad debía llevar un corazón ❤️ si porque si, y claro los colores que elegiría aún no estaba convencida, así que primero probé con colores varios pero esto me pareció que era más alusivo a carnaval, y luego opte por rosa, fucsia y rojo, aunque estos últimos no se diferencian mucho en la hoja.
Por ello hoy les he traído un lindo adorno Decorativo para obsequiar en esta época del año, algo que me encanta de esta manualidad es que es sencilla y la podemos realizar con los pequeños de la casa, pero siempre teniendo mucho cuidado.
Sin más les invito a ver este pequeño tutorial, fácil y práctico, para obsequiar en esta época del año, manos a la obra mis queridos creativos.

Greetings, dear creative community, a pleasure to be with you talented people, the day of lovers, the time of love and friendship, to show affection, no doubt I had to make a craft alluding to this time.
Sitting in my creative corner I knew I wanted to make a small picture frame what I did not know was how to do it, so if it was something to celebrate the day of love and friendship should take a heart ❤️ if because if, and of course the colors I would choose was not yet convinced, so first I tried several colors but this seemed to me that it was more allusive to carnival, and then opt for pink, fuchsia and red, although the latter do not differ much in the sheet.
So today I have brought you a nice decorative ornament to give away this time of year, something I love about this craft is that it is simple and can be done with the little ones of the house, but always being very careful.
Without further ado, I invite you to watch this small tutorial, easy and practical, to give as a gift this time of year, let's get to work my dear creatives.
❤️❤️❤️❤️❤️✨️❤️❤️❤️❤️❤️✨️❤️❤️❤️❤️❤️
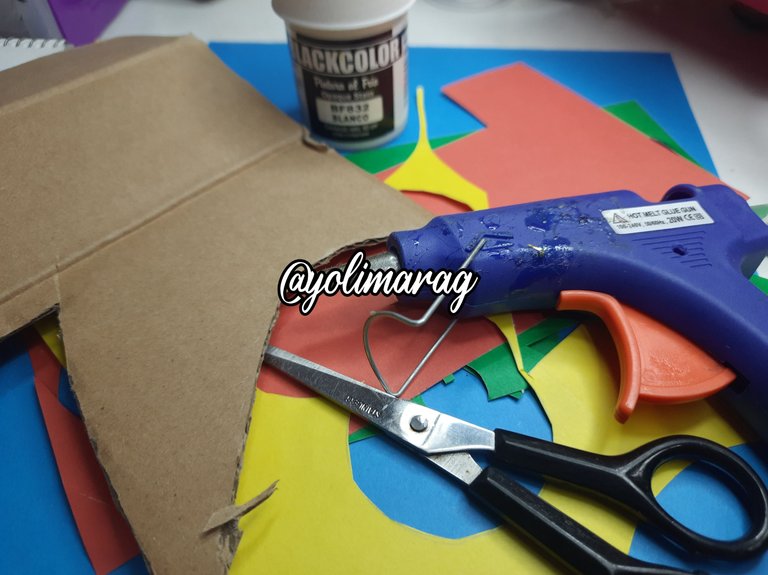
Materiales:
🌟 Silicón Caliente
🌟 Tijera, lapiz
🌟 Cartulinas fucsia, rosada y roja
🌟 Pintura al frío Blanca
🌟 Tirro
🌟 Palito de altura
Materials:
🌟 Hot Silicone
🌟 Scissors, pencil
🌟 Fuchsia, pink and red cardboard.
🌟 White cold paint
🌟 Tyrus
🌟 Height stick
❤️❤️❤️❤️❤️✨️❤️❤️❤️❤️❤️✨️❤️❤️❤️❤️❤️
Paso a Paso / Step by Step
❤️❤️❤️❤️❤️✨️❤️❤️❤️❤️❤️✨️❤️❤️❤️❤️❤️
 |  |
|---|
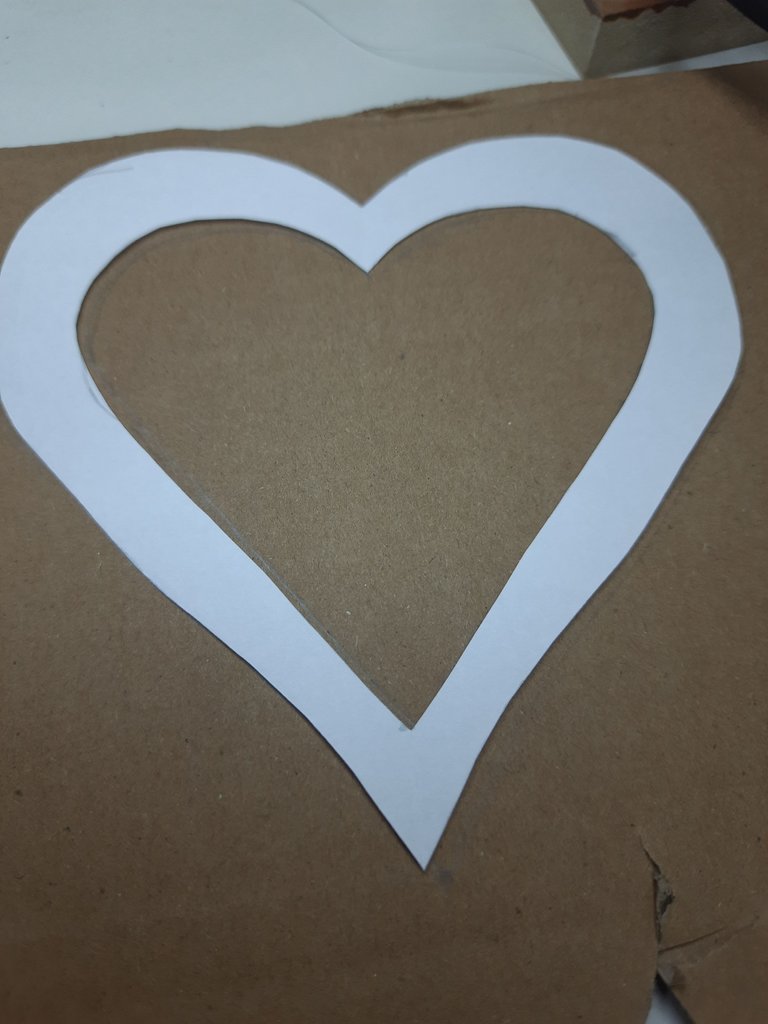
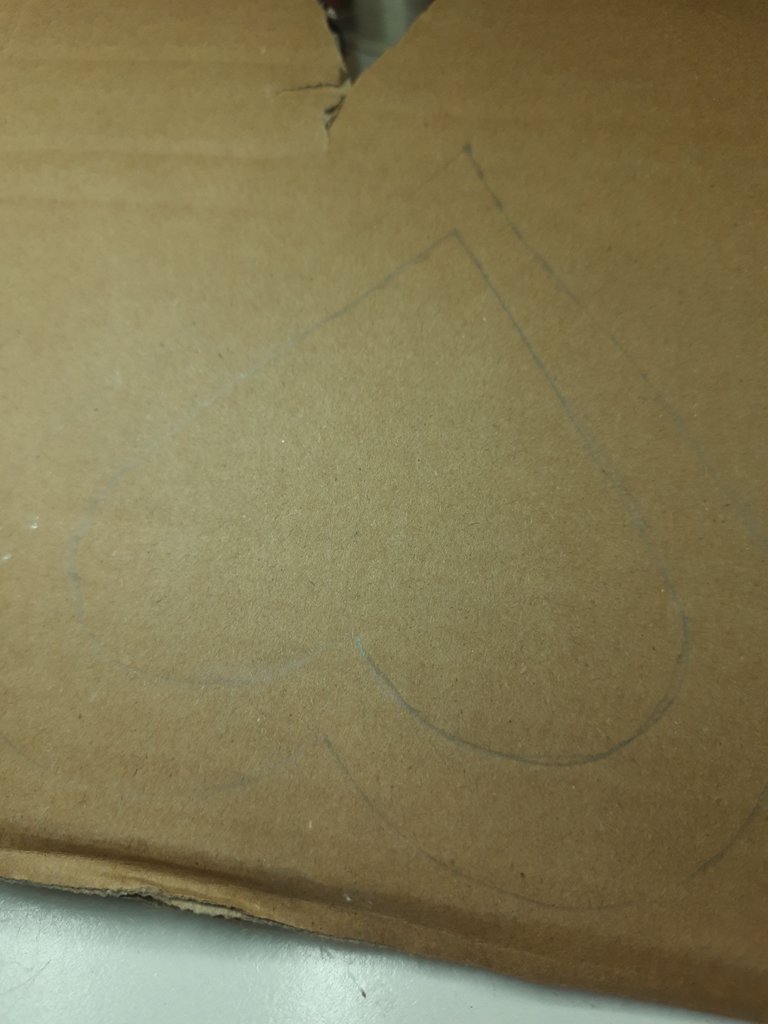
Lo primero que haremos será tomar nuestro molde de corazón hueco y vamos a traspasar esta figura a nuestro cartón la dibujamos.
The first thing we will do is to take our hollow heart mold and we will transfer this figure to our cardboard and draw it.
❤️❤️❤️❤️❤️✨️❤️❤️❤️❤️❤️✨️❤️❤️❤️❤️❤️
 |  |
|---|
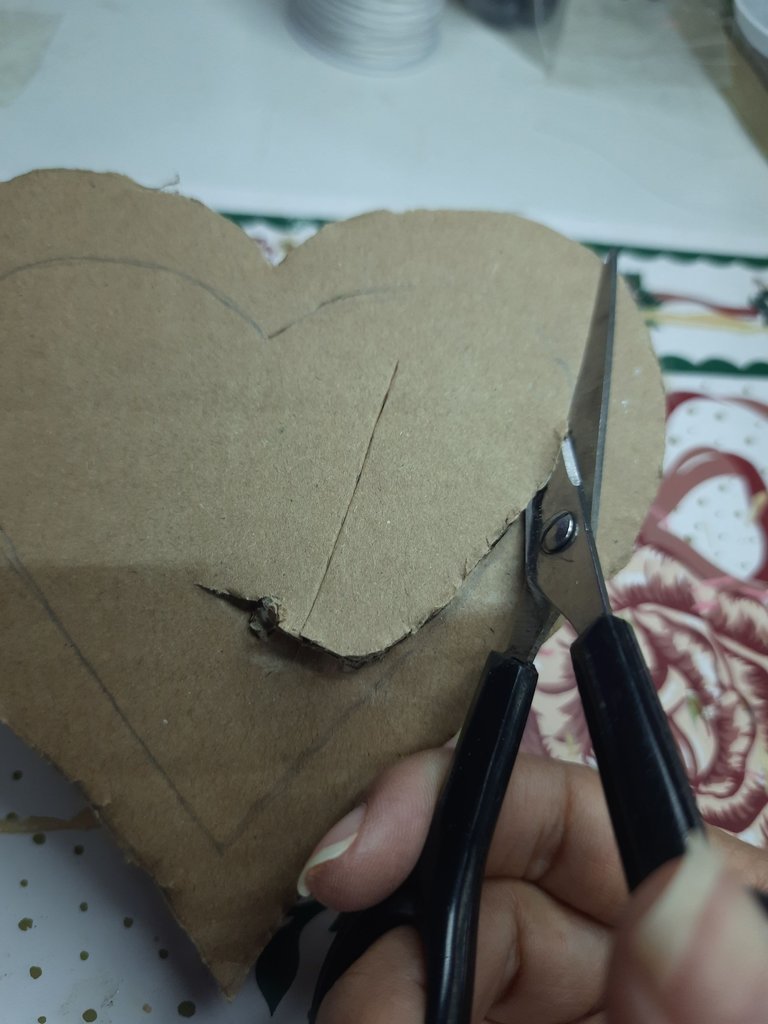
Recortamos la parte del centro para dejarlo hueco y luego vamos a forrar nuestro corazón con un poco de tape o terror para que no hacerlo más duro.
We cut out the center part to leave it hollow and then we will line our heart with a bit of tape or terror so as not to make it harder.
❤️❤️❤️❤️❤️✨️❤️❤️❤️❤️❤️✨️❤️❤️❤️❤️❤️
 |  | |
|---|
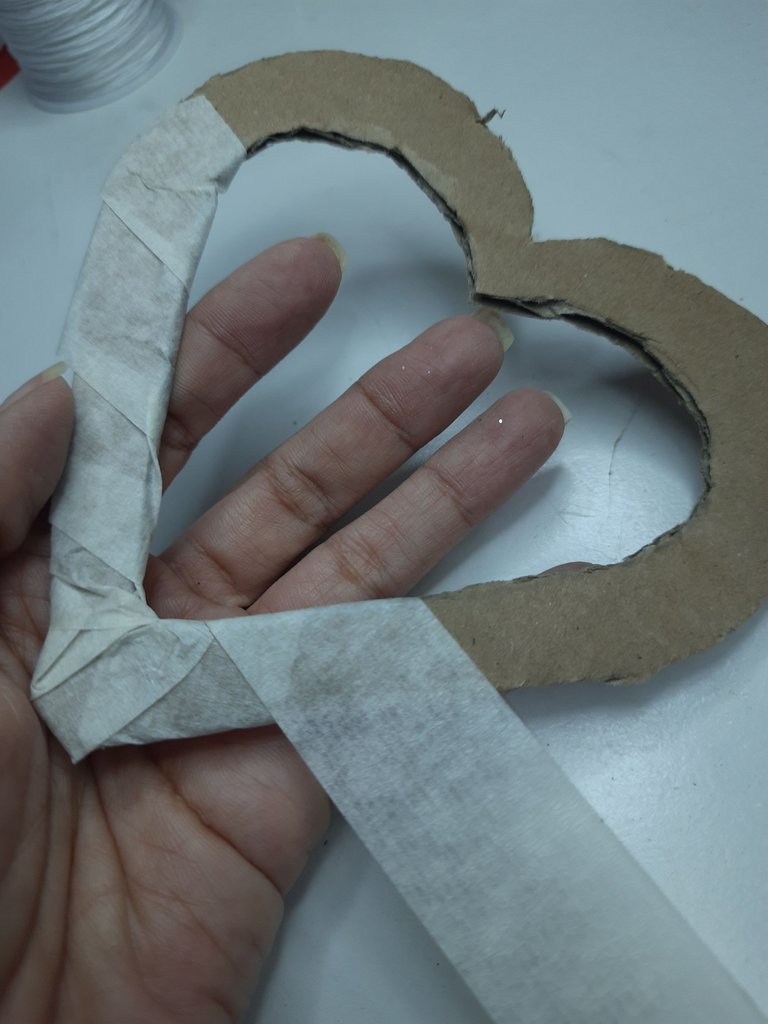
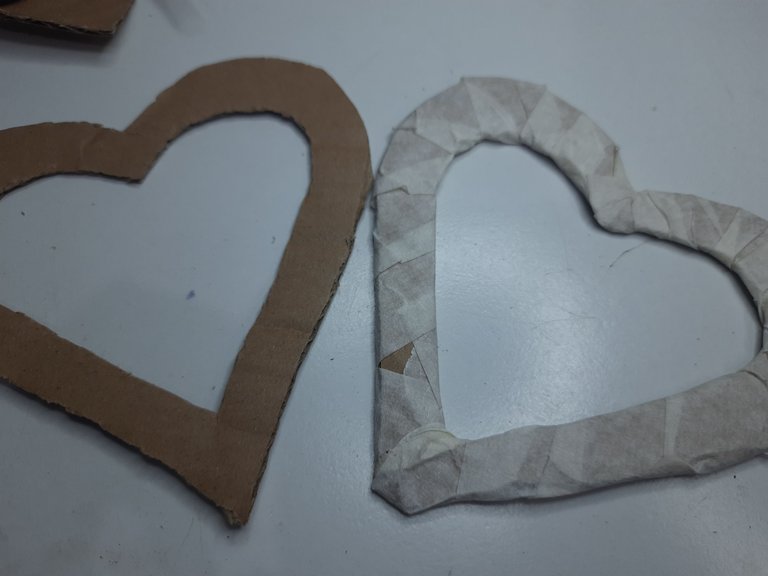
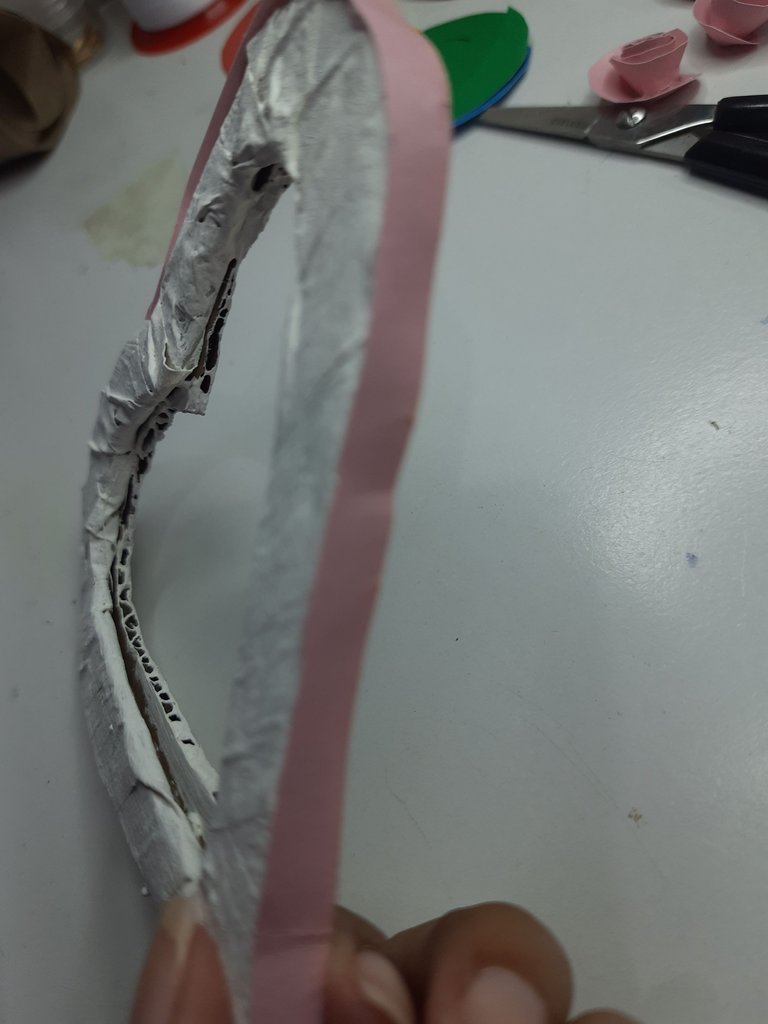
Vamos a hacer dos piezas, pero una sola es la que vamos a forrar con tirro, al tener la pieza forrada vamos a pegar con silicón caliente en la punta de abajo de nuestro corazón el palito de altura.
We are going to make two pieces, but only one is the one that we are going to cover with the tirro, once the piece is covered we are going to glue with hot silicone at the bottom of our heart the height stick.
❤️❤️❤️❤️❤️✨️❤️❤️❤️❤️❤️✨️❤️❤️❤️❤️❤️
 |  |
|---|
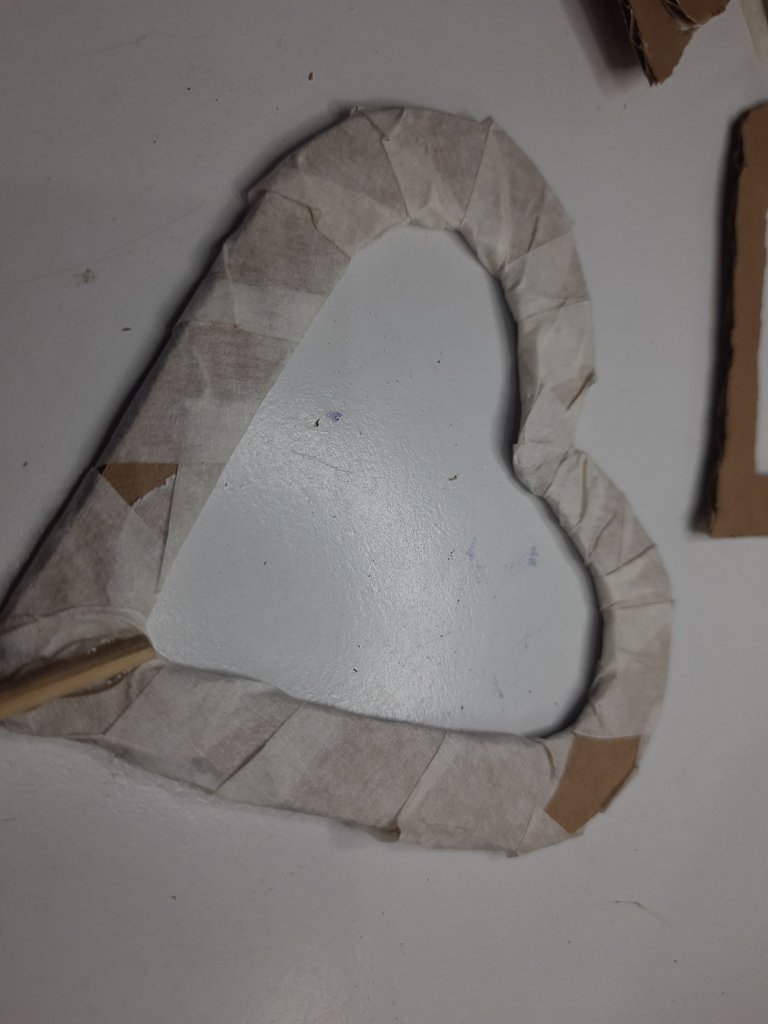
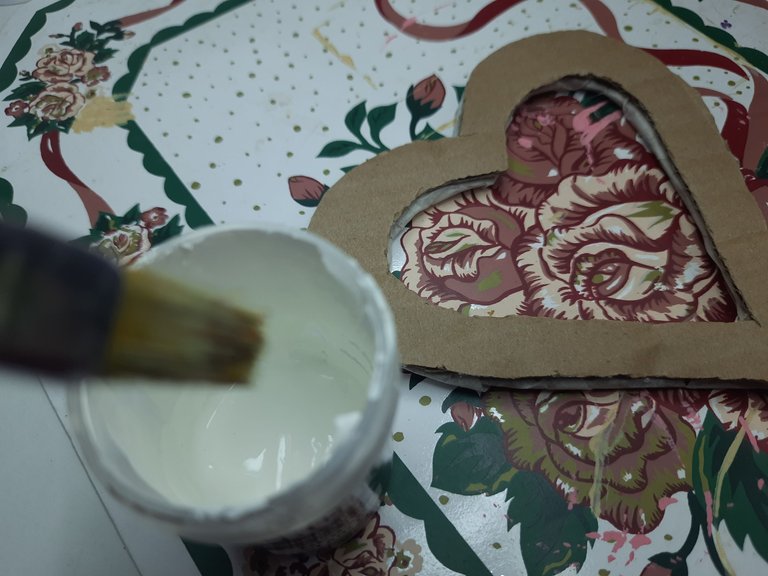
Ahora pegamos la próxima tapa encima donde pusimos el palito de altura y vamos a pintar toda nuestra pieza con nuestra pintura al frío en blanco y esperamos que seque, al tenerla lista por el borde pasaremos una tira de medio cm según el grosor del cartón.
Now we glue the next lid on top where we put the height stick and we will paint our whole piece with our cold paint in white and wait for it to dry, when we have it ready we will pass a strip of half a cm along the edge according to the thickness of the caton.
❤️❤️❤️❤️❤️✨️❤️❤️❤️❤️❤️✨️❤️❤️❤️❤️❤️
 |  |  |  |
|---|
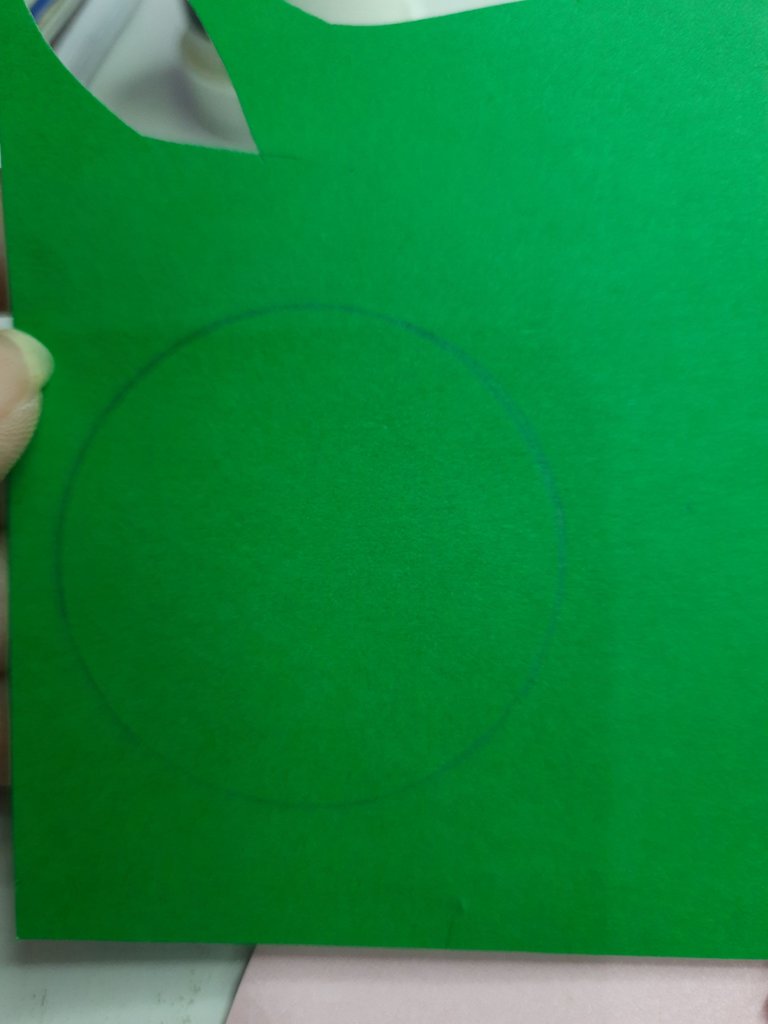
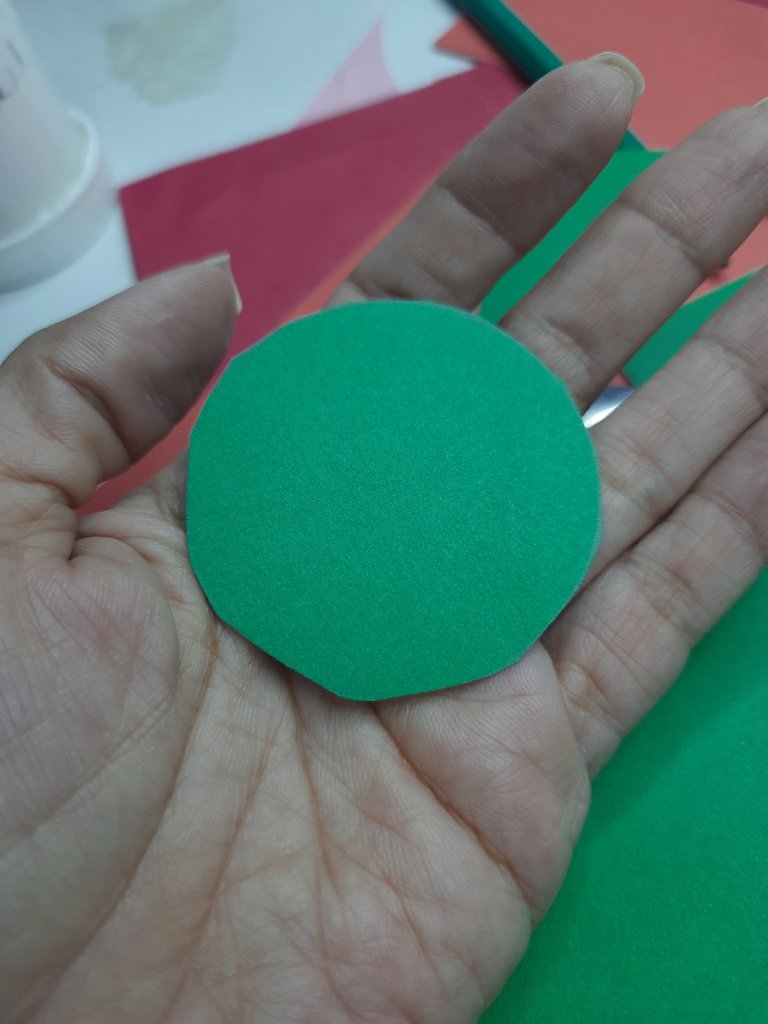
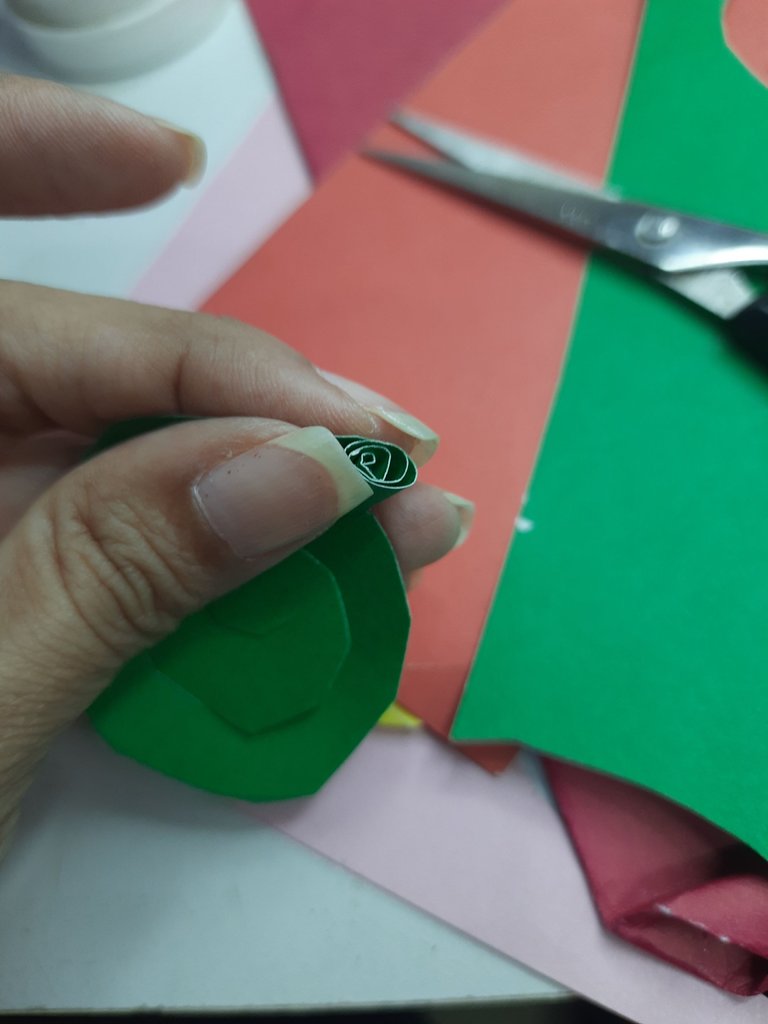
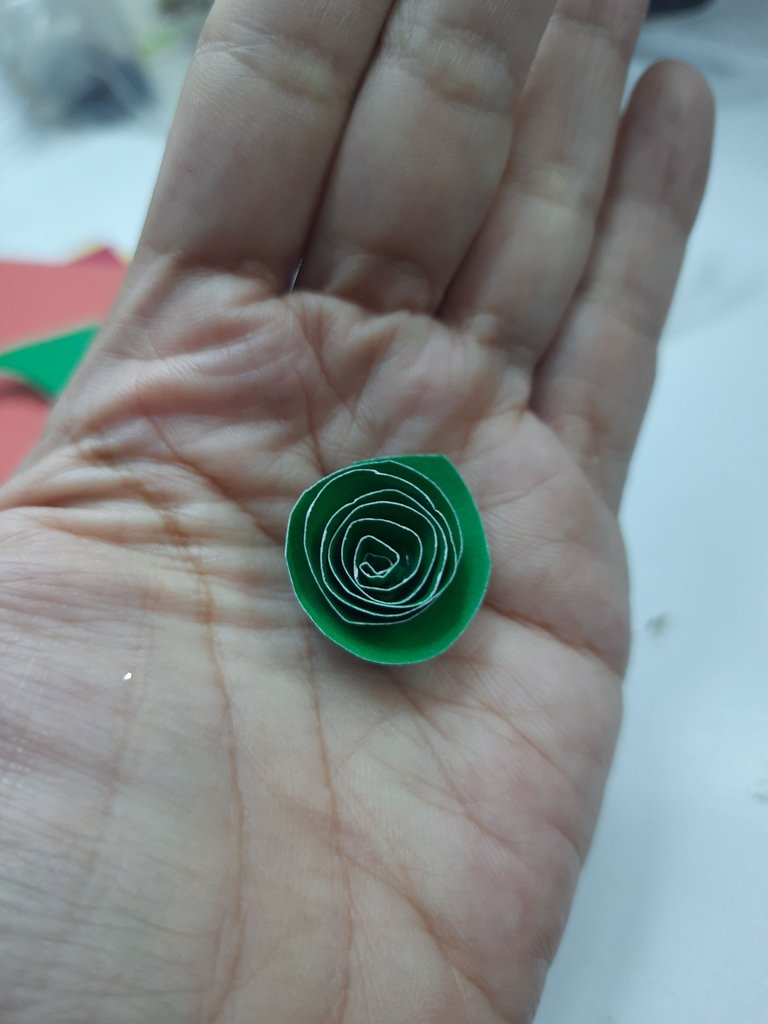
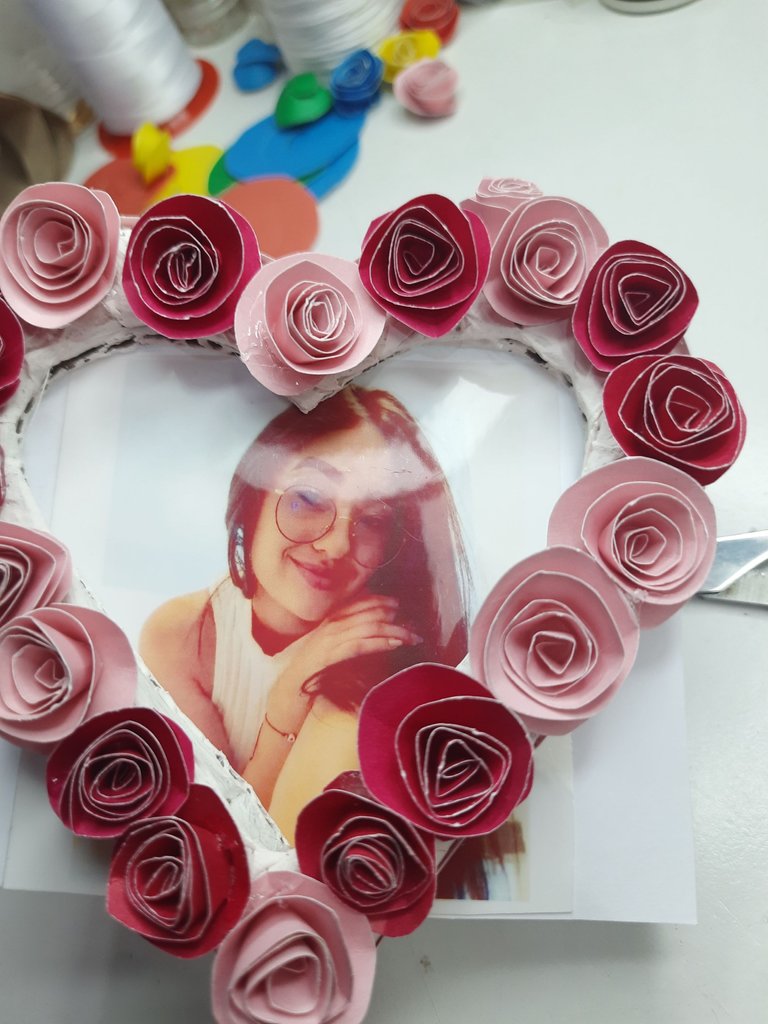
Vamos a hacer unas pequeñas flores, para esto vamos a dibujar en nuestra cartulina un pequeño círculo, el cual recortaremos y luego vamos a recortar por la parte de adentro en forma de espiral y vamos a ir enrollando para formar nuestra flor.
We are going to make small flowers, for this we are going to draw a small circle on our cardboard, which we will cut out and then we are going to cut out the inside in a spiral shape and we are going to roll it up to form our flower.
❤️❤️❤️❤️❤️✨️❤️❤️❤️❤️❤️✨️❤️❤️❤️❤️❤️
 |  |  |  |
|---|
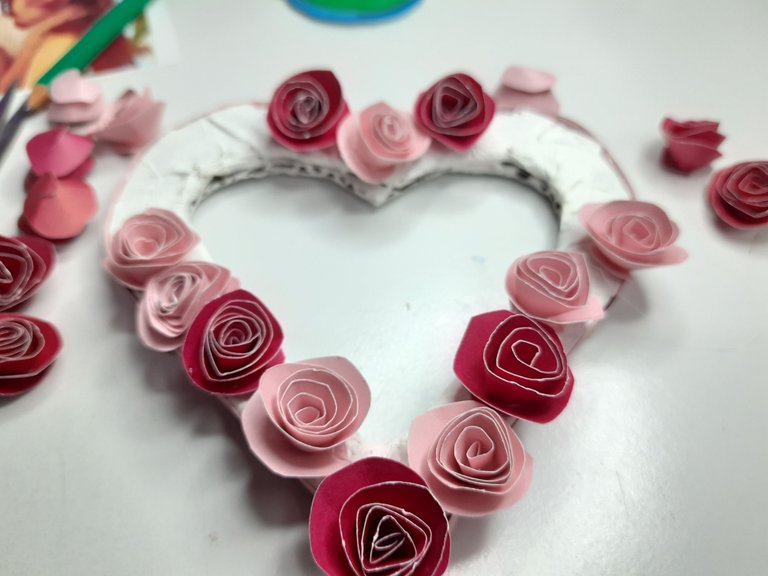
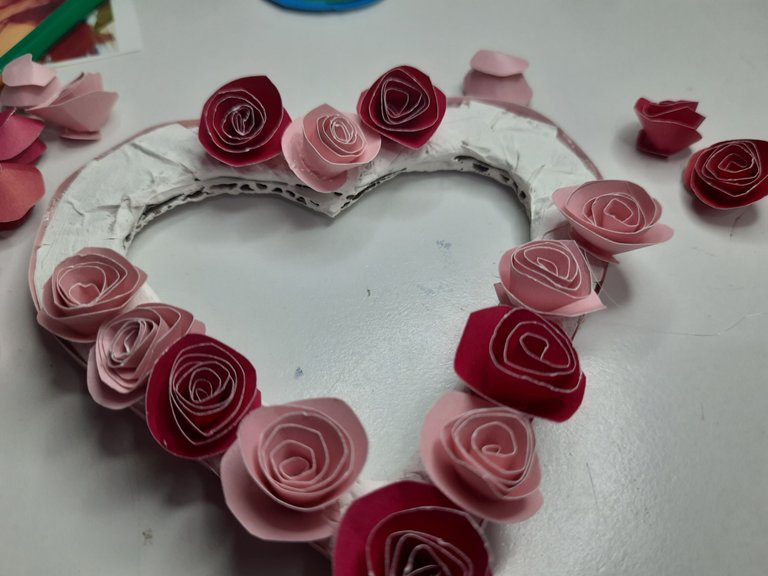
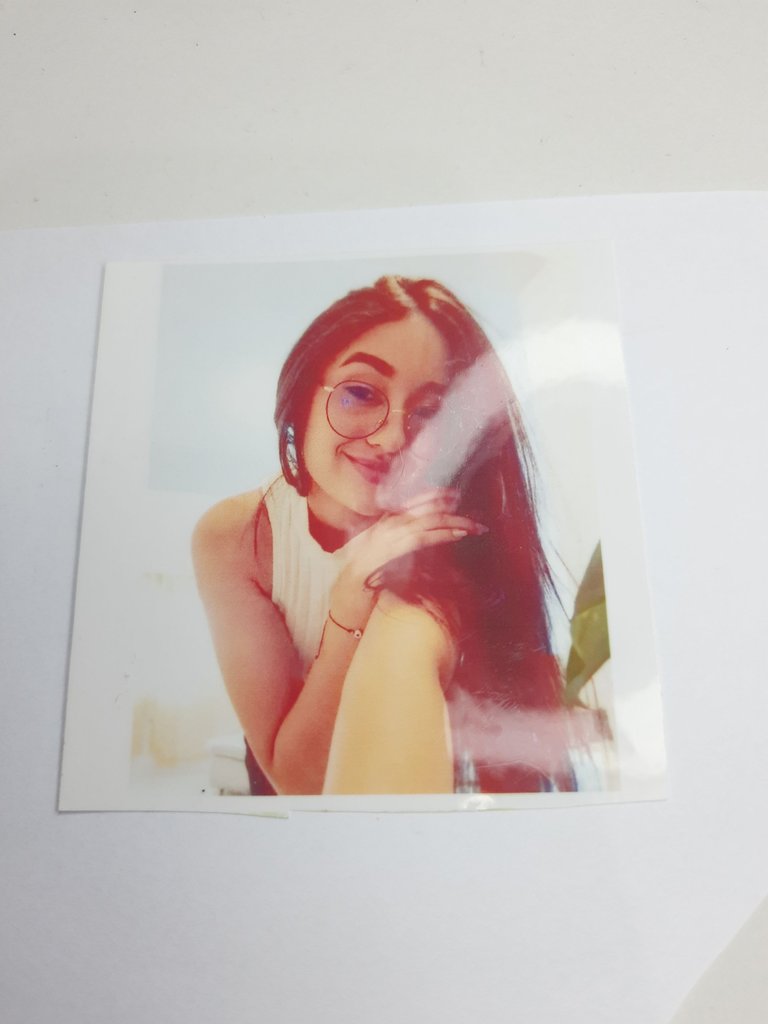
Al tener nuestras flores listas procederemos a pegarla alrededor de nuestro corazón qué será la parte delantera, y por la parte trasera vamos a pegar nuestra foto dependiendo si es pequeña o grande vamos a ayudarnos de un pequeño papel blanco para que no se vea por fuera así que encuadre mi foto, recorte los excedentes y la pegué.
When we have our flowers ready we will proceed to paste it around our heart which will be the front, and on the back we will paste our photo depending if it is small or large we will help us with a small white paper so that it does not show on the outside so I framed my photo, cut the excess and glued it.
❤️❤️❤️❤️❤️✨️❤️❤️❤️❤️❤️✨️❤️❤️❤️❤️❤️
Resultado
❤️❤️❤️❤️❤️✨️❤️❤️❤️❤️❤️✨️❤️❤️❤️❤️❤️
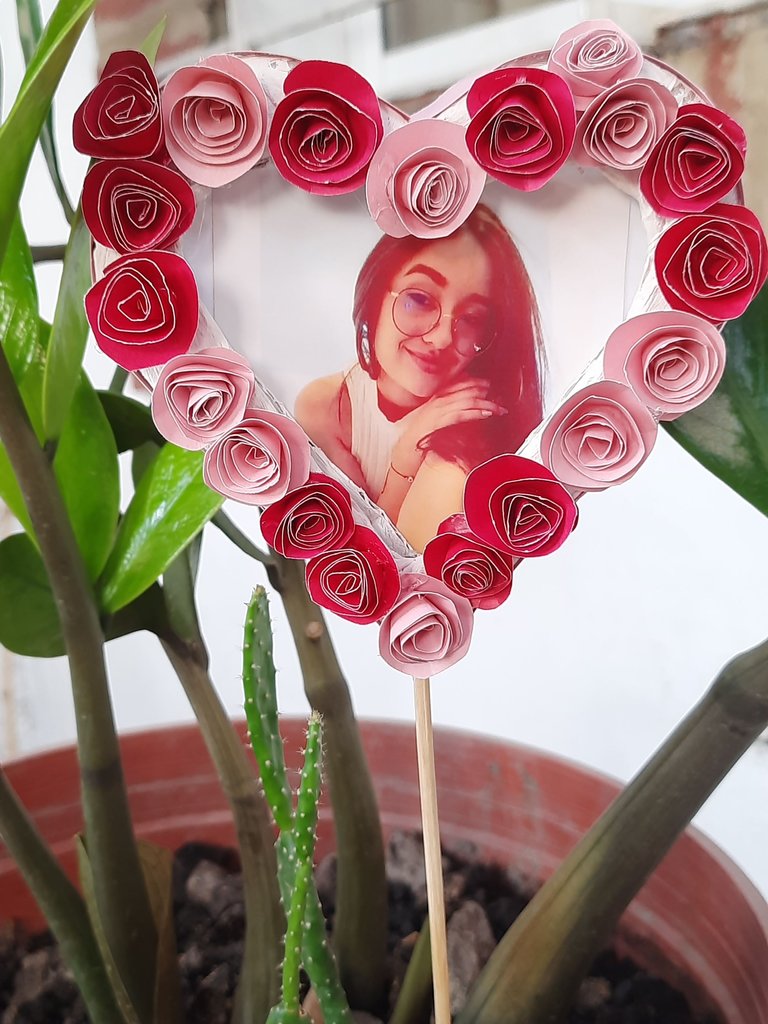
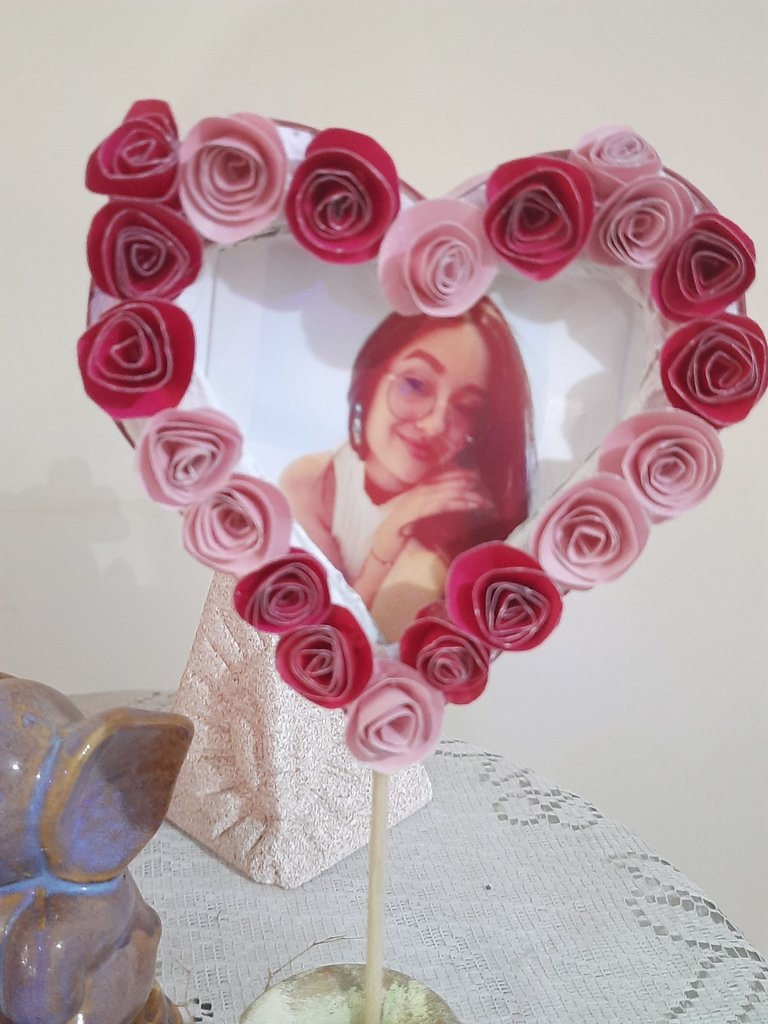
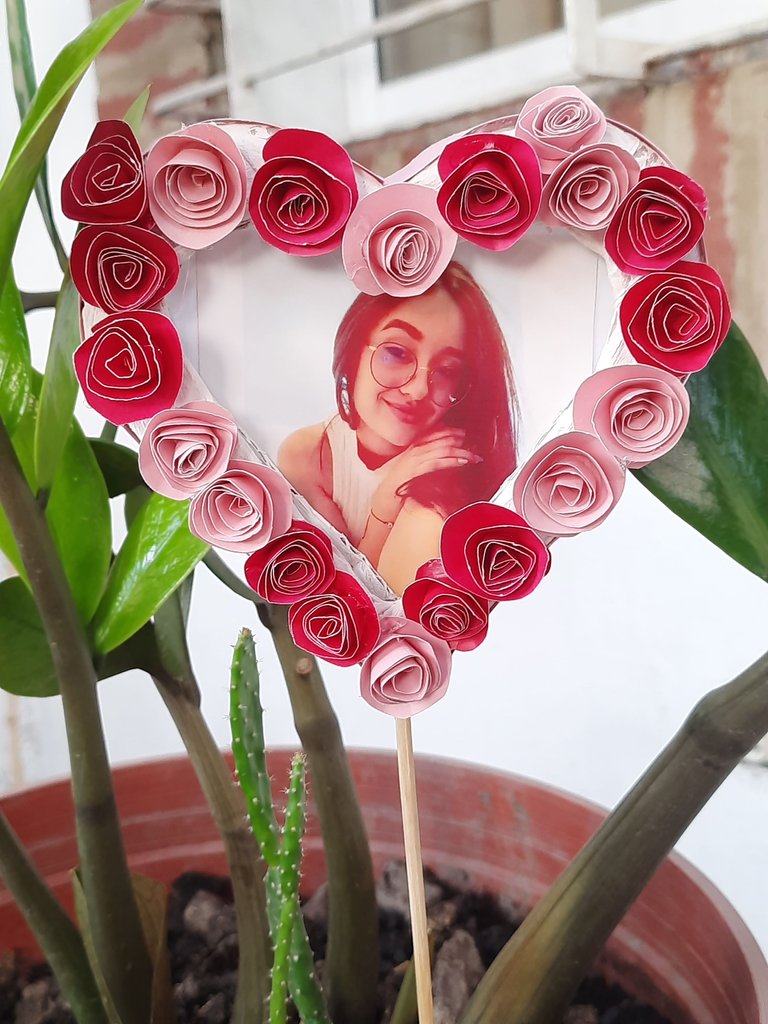
Y así ha quedado el resultado de este práctico y lindo detalle para san valentin,espero que fuera de su agrado, un resultado sencillamente maravilloso 👏,gracias por ser parte de mi blog, bendiciones 😘.
And so has been the result of this practical and nice detail for valentine,I hope it was to your liking, a simply wonderful result 👏,thank you for being part of my blog, blessings 😘.
Fotos principal editada con Canva.
Separadores Link
Fotos de mi Autoría derechos reservados
Cámara: Samsung M31
Traducido con www.DeepL.com/Translator (versión gratuita)
Photos edited with Canva
Separators Link
Photos by me Author's rights reserved
Camera: Samsung M31
Translated with www.DeepL.com/Translator (free version)


Es un detalle hermoso😍, feliz comienzo de semana 🌹🌷🪷🌻🌸🌺💮🥀🌼🏵️💐☘️
Gracias amiga 🤗
Hola amiga! Está muy pero muy bello 😍 y el paso a paso super detallado, maravilloso! Saludos 😊
Gracias amiga bella 😘
Una excelente idea para los que buscan que hacer para San Valentín.
Si amiga y es sencilla, y queda muy bonito de hecho se puede colocar en los vasos con dulces y queda super mejor, gracias por pasar.
Thank you so much for the wonderful gift card. And by following some nice steps you've done your job. Which looks great on people. May God always bless you with all abilities. A fun love gift for loved ones.
Oh amen thank you for your good wishes, I'm so glad you like it 💕 😊.
you are allwas most Wellcome friend
https://reddit.com/r/blogs/comments/1aoy5j4/esping_decorative_ornament_for_valentines_day/
The rewards earned on this comment will go directly to the people( @yolimarag ) sharing the post on Reddit as long as they are registered with @poshtoken. Sign up at https://hiveposh.com.
Que lindo, un precioso detalle y los colores estan bien elegidos, no se aprecia el fucsia en la foto, es verdad, pero aun asi se ve precioso jaja ❤️ me encanto y queda muy decorativo.
Gracias, si en realidad los colores no se ve diferencia jeje, pero queda muy tierno, gracias por rus lindas palabras 😊 🤗
Hermosa idea!!
Gracias mi bella 😘
great work thanks a lot for shairng.
Thanks ❤️
!giphy wow
@sagarkothari88 vote 15%
Via Tenor
| Hive Curators Community | Support Witness | Follow Curation Trail |
Keep Up the good work on Hive ♦️
Thanks ❤️
It is gratifying to observe how you manage to combine creativity and love in this craft, providing a special way to commemorate Valentine's Day.
Muchas gracias , me alegra que te guste y me inspiran tus palabras 🤗 gracias
Te quedó muy bello, el día d elos enamorados es un día especial para ponerse creativos. Gracias por compartirnos esta hermosa decoración.
Si eso es cierto uno se pone creativo 😉
. Muy lindo detalle para el día del amor y la amistad. Te felicito.
Gracias amiga me alegro mucho que te guste 😊
Gracias por el apoyo ❤️