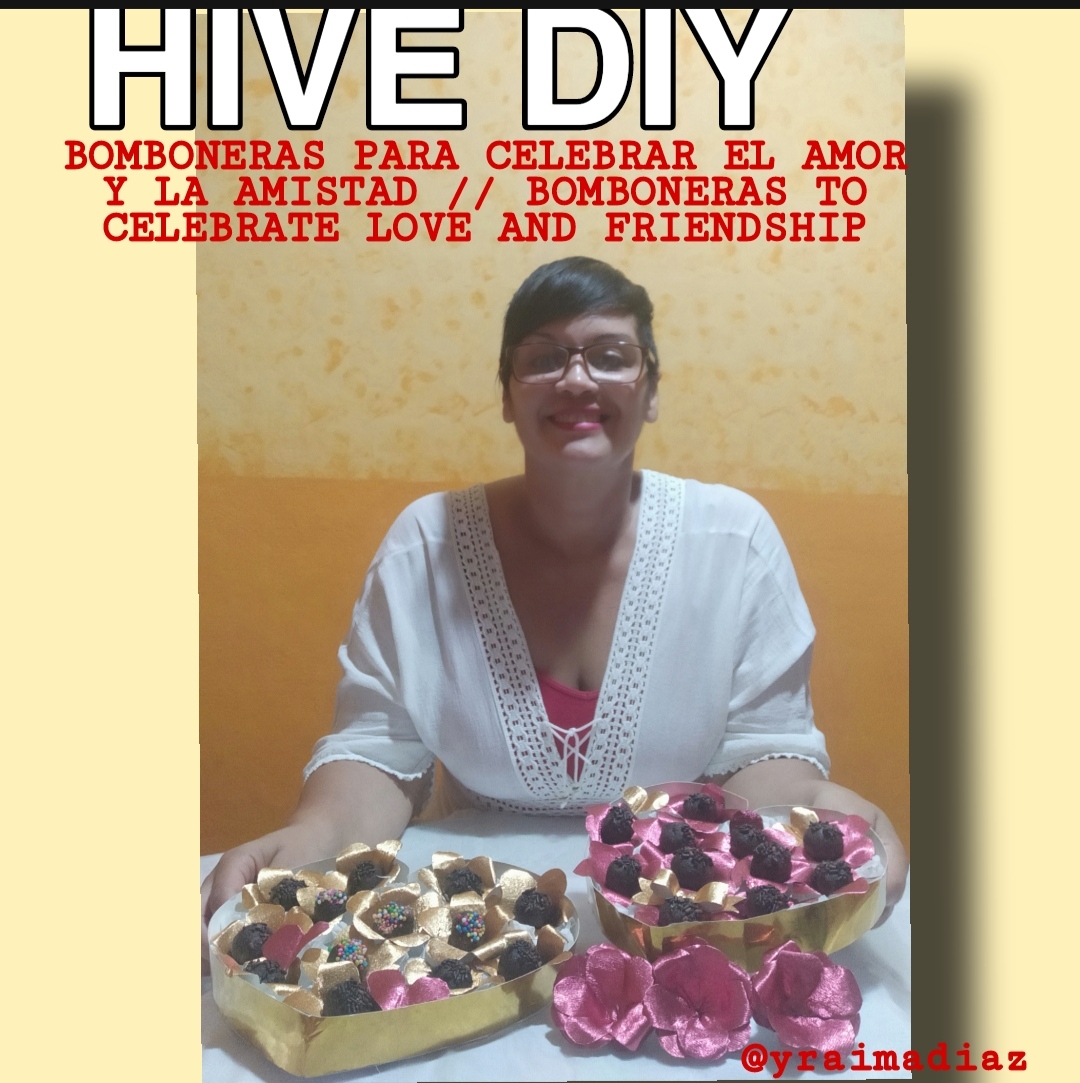
Saludos mi querida familia de esta hermosa comunidad de Hive DIY,deseándoles que todos se encuentren bien, y muy feliz de volver a traerles está hermosa manualidad para celebrar el amor y la amistad.
Greetings my dear family of this beautiful Hive DIY community, wishing you all well, and very happy to bring you back this beautiful craft to celebrate love and friendship.
Ahora paso a decirles los materiales que utilice y el paso a paso.
I will now tell you the materials I used and the step-by-step instructions.
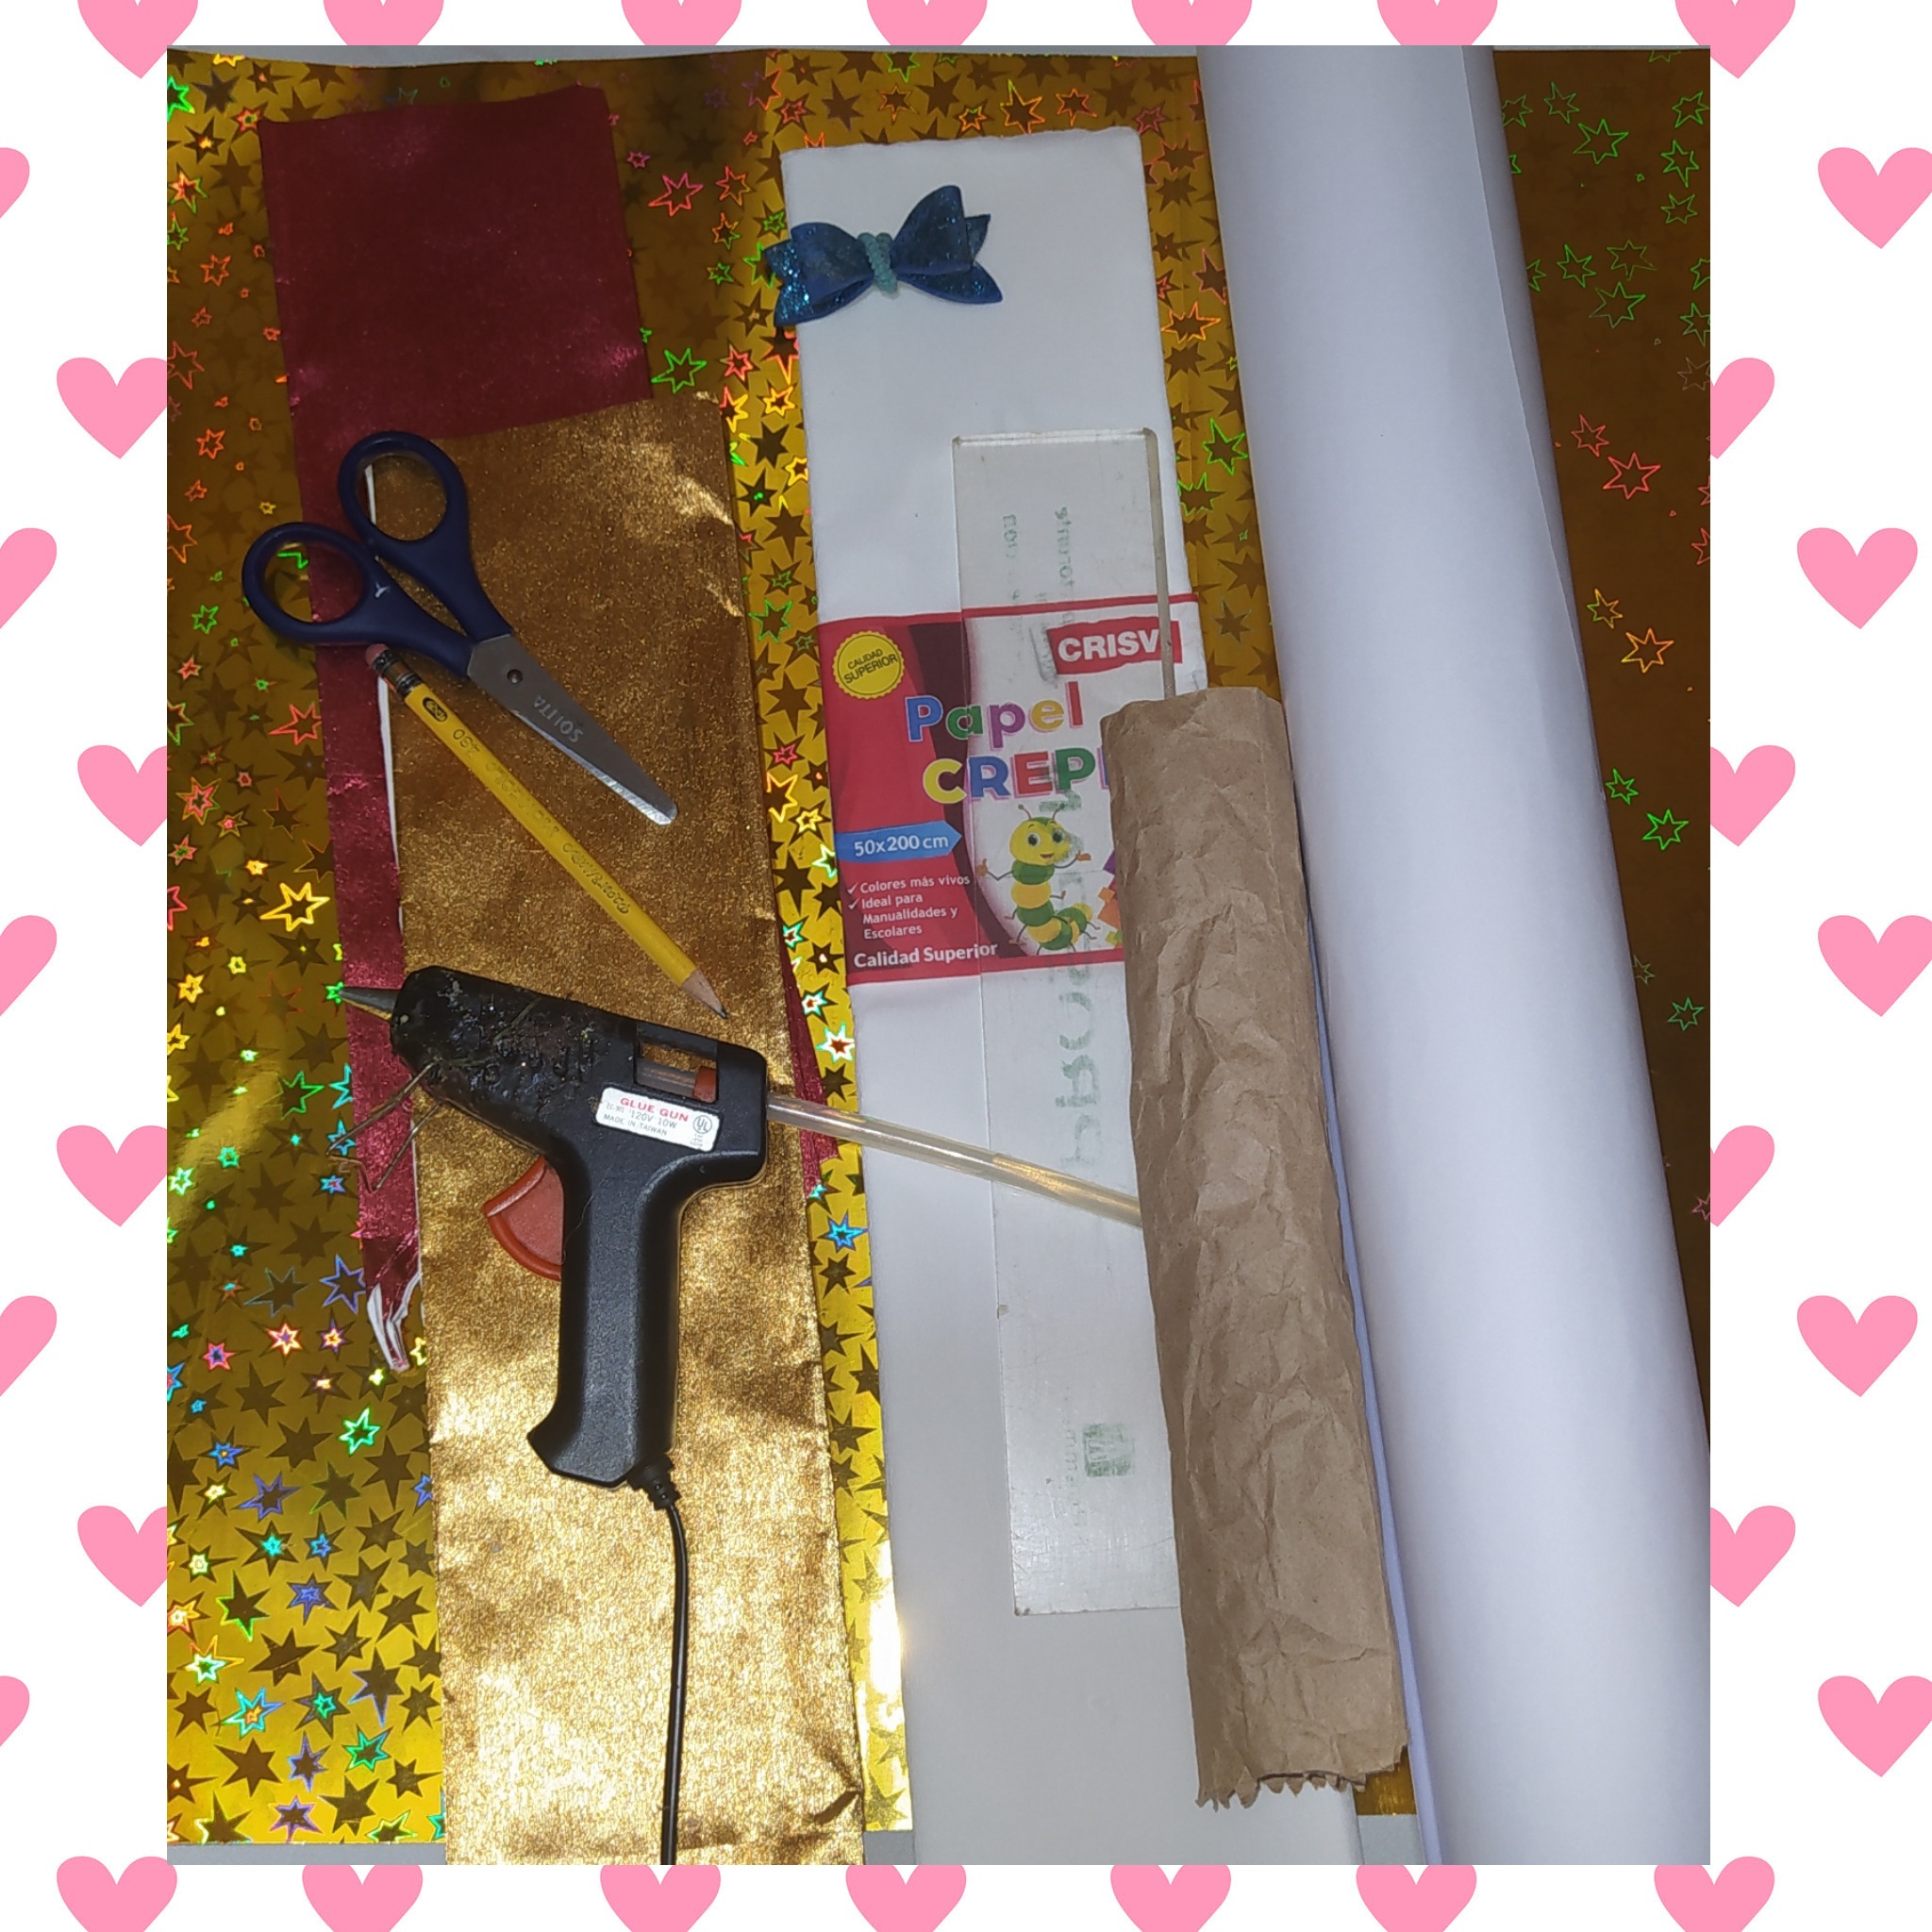
MATERIALES
- Cartulina blanca
- Cartulina dorada de estrellas
- Papel crepé blanco
- Papel crepé metalizado dorado
- Papel crepé metalizado rojo
- Papel de bolsa (para molde)
- Barra de silicón
- Pistola de silicón
- Tijera
- Lápiz
- Regla
- Lazo viejo (para sacar el molde)
MATERIALS
- White cardboard
- Gold star cardboard
- White crepe paper
- Gold metallic crepe paper
- Red metallic crepe paper
- Paper bag paper (for mold)
- Silicone stick
- Silicone gun
- Scissors
- Pencil
- Ruler
- Old ribbon (to take out the mold)
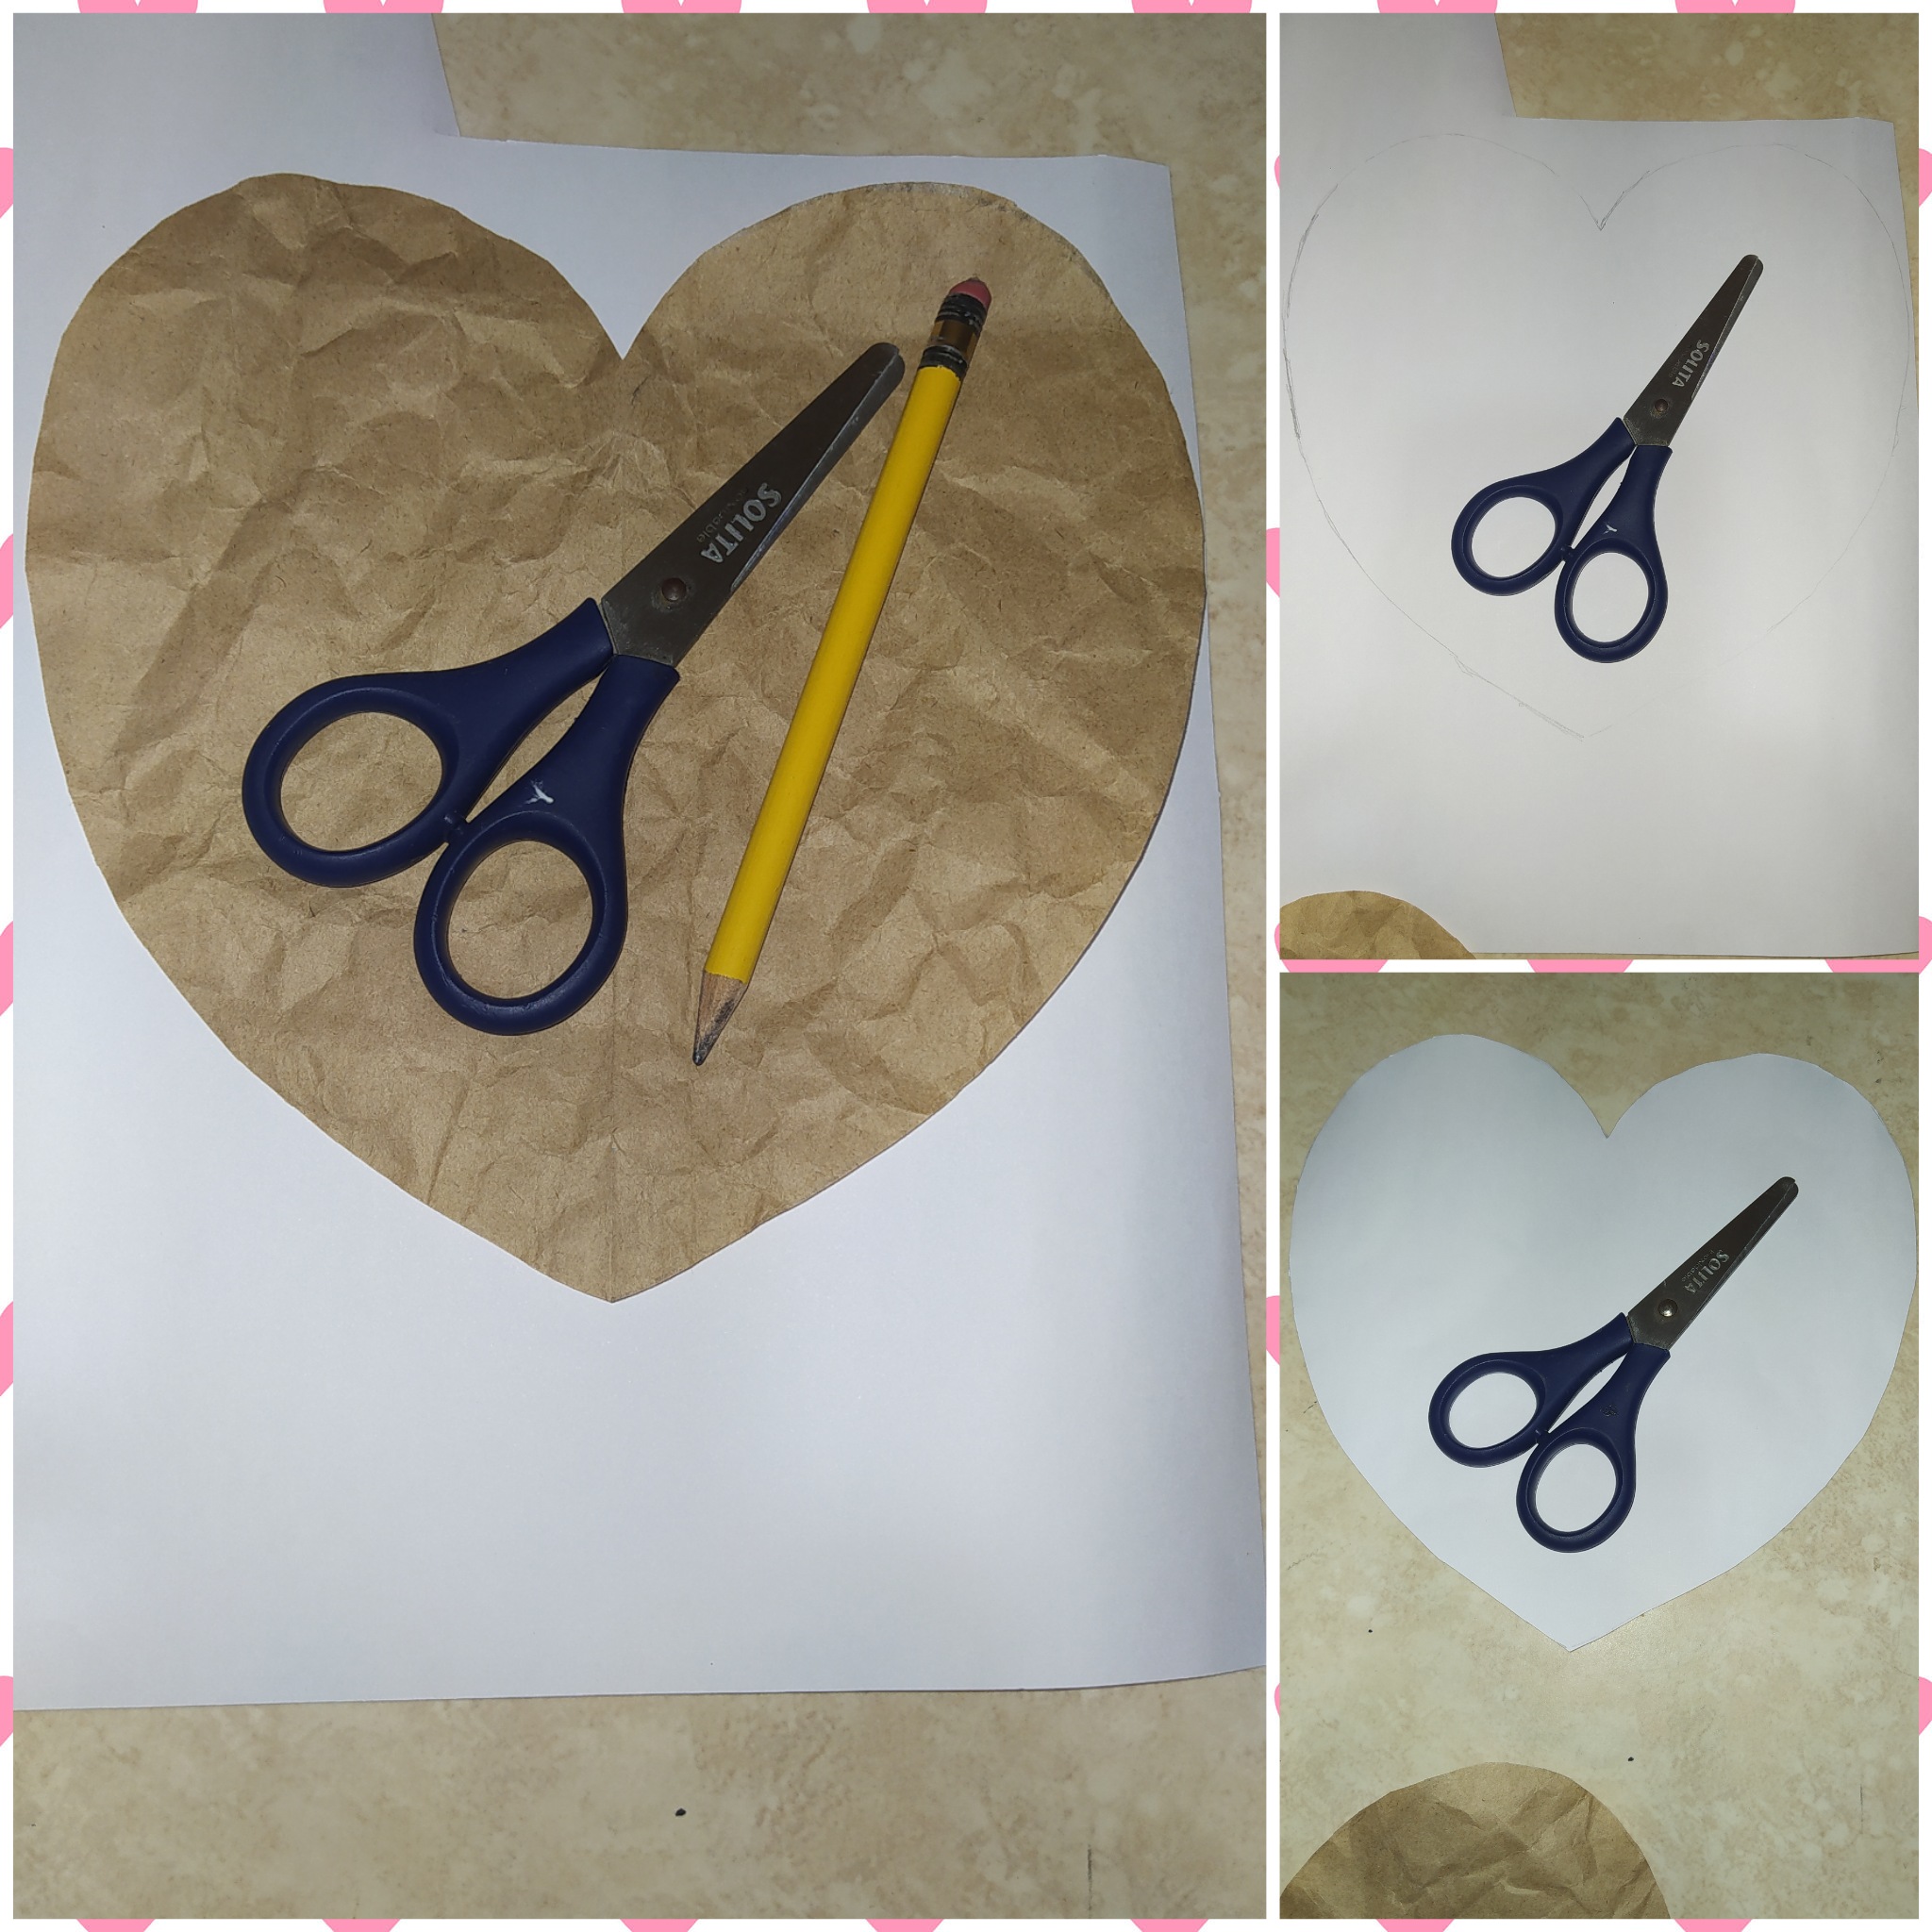
Ahora les muestro la forma como lo realicé
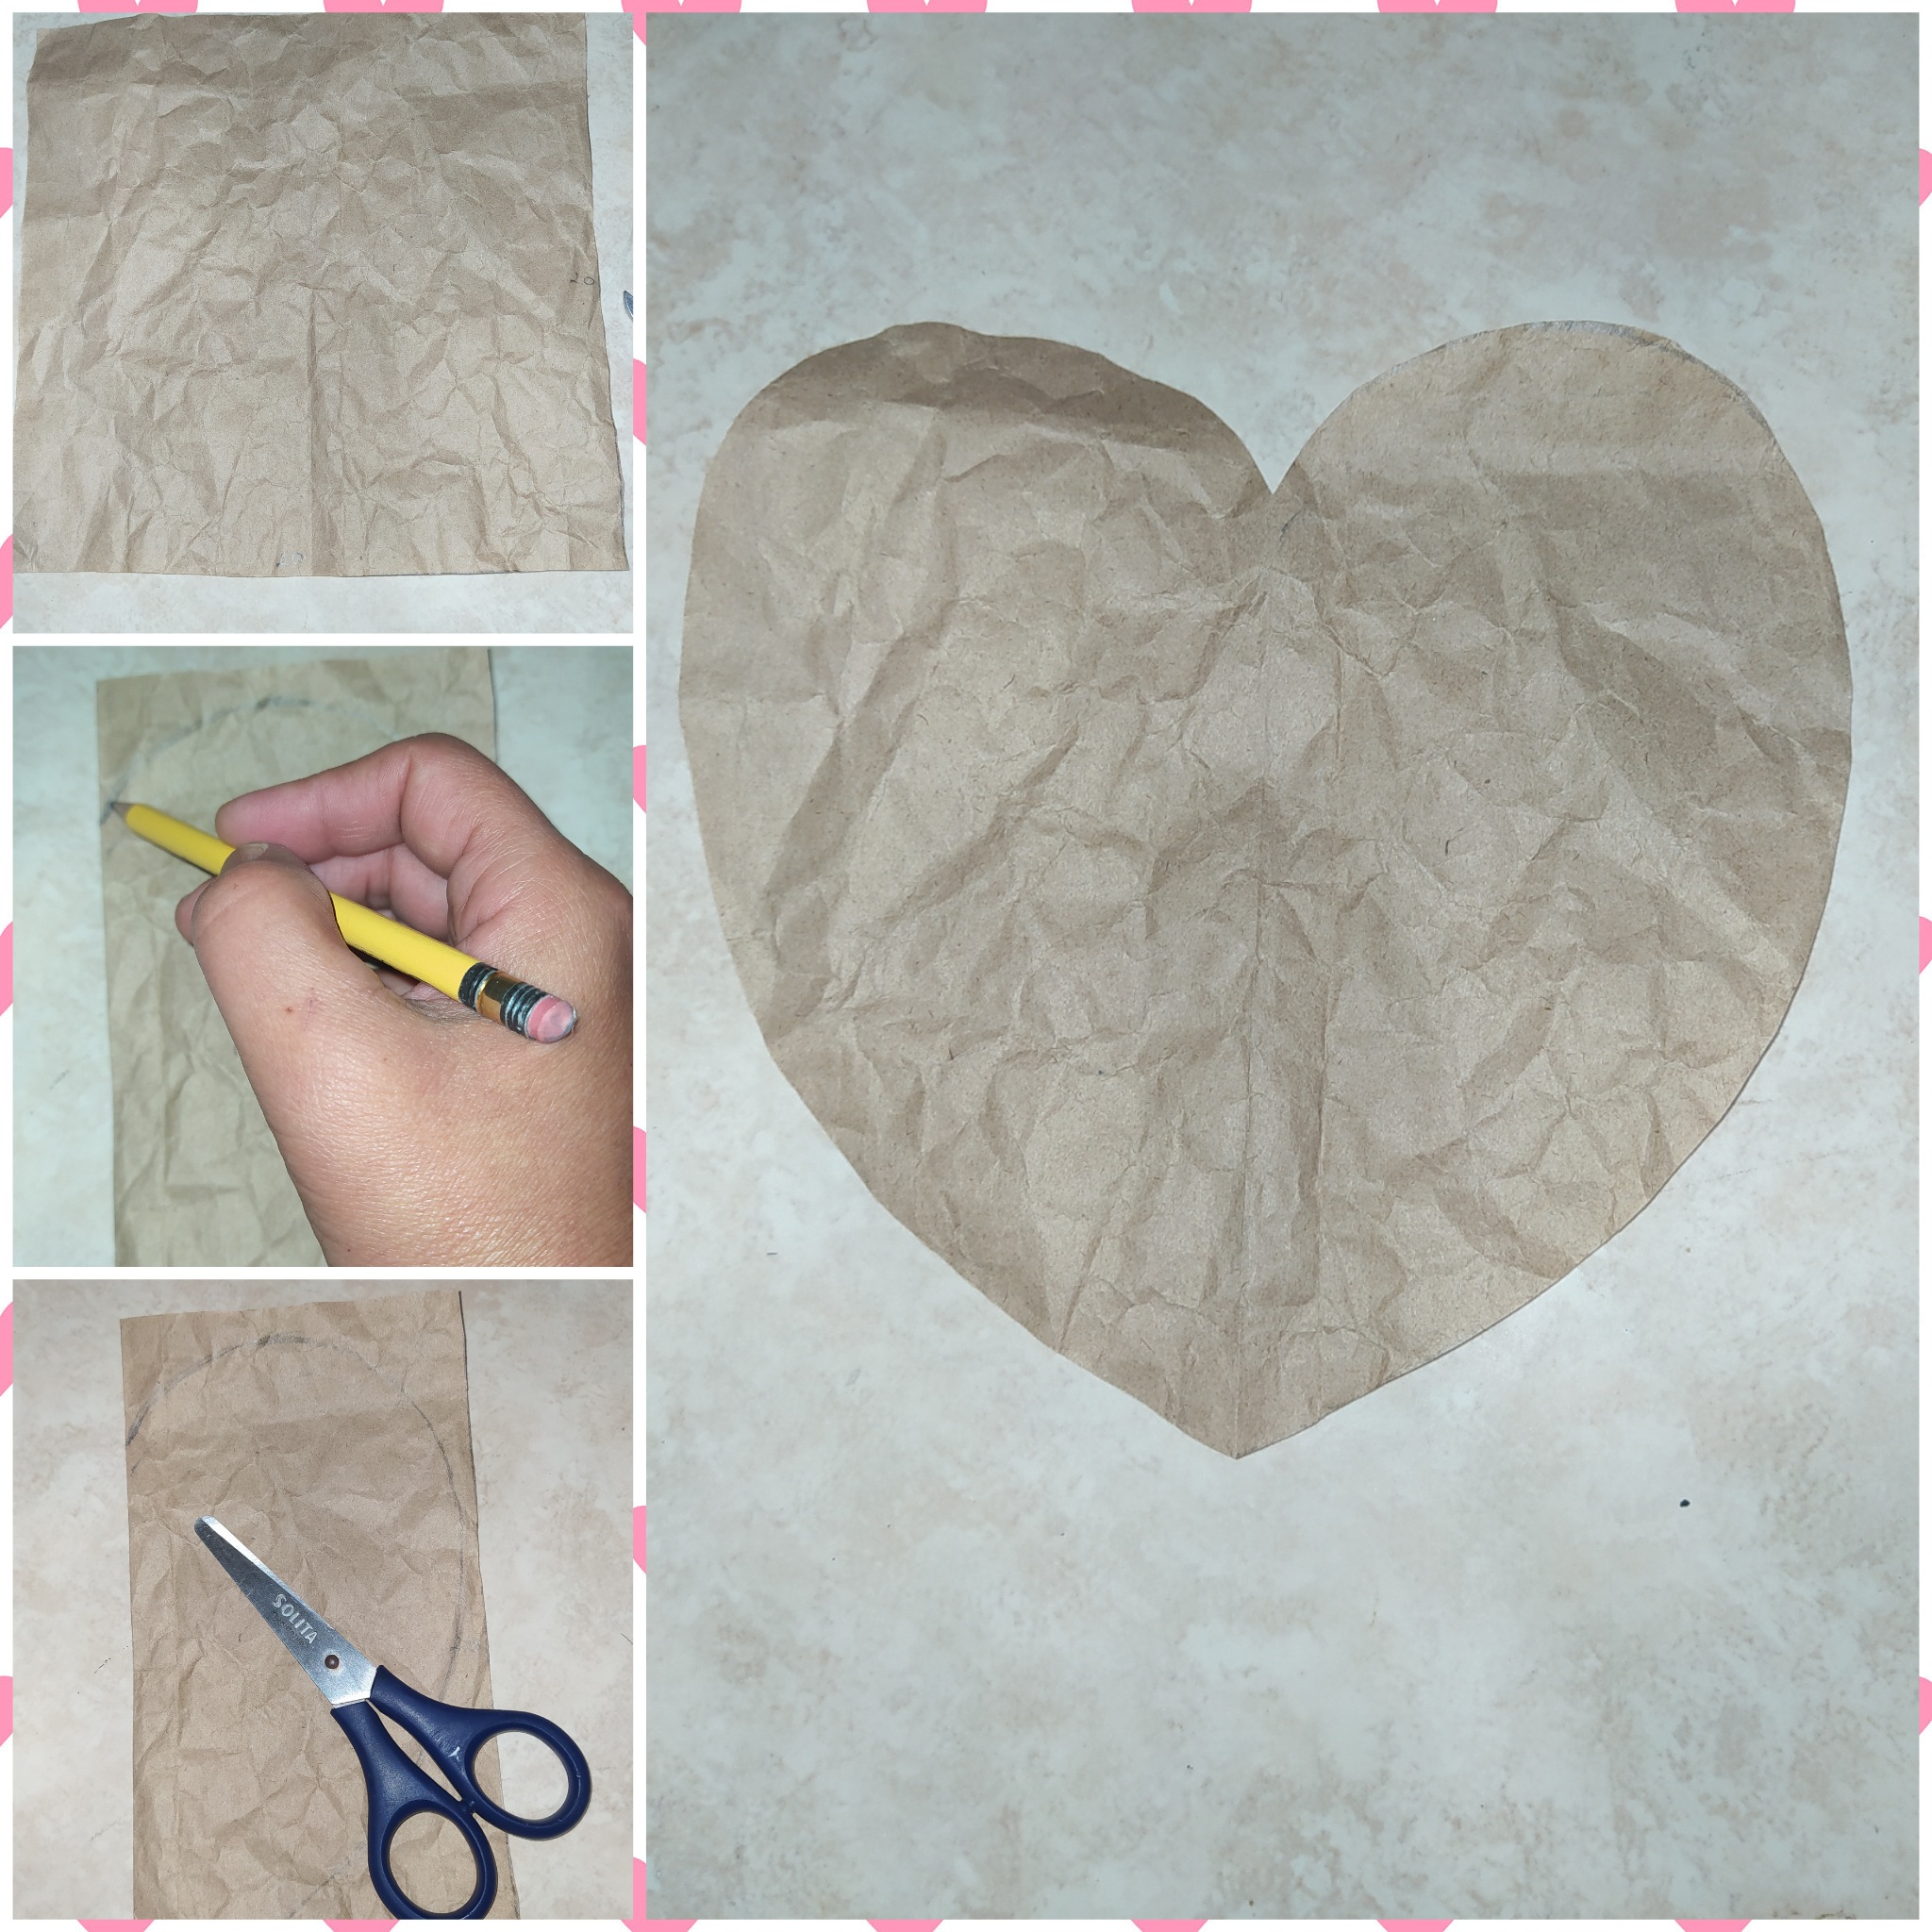
Paso 1
- En el papel de bolsa marcamos un cuadrado que mida 20 cm de largo x 20 cm de ancho, y lo recortamos.
- Luego lo doblamos a la mitad.
- Dibujamos la mitad del corazón
- Procedemos a recortarlo doblado
- Luego lo abrimos y tenemos el molde del corazón completo.
Now I show you how I did it
Step 1
- On the paper bag we mark a square measuring 20 cm long x 20 cm wide, and we cut it out.
- Then we fold it in half.
- We draw half of the heart
- We proceed to cut it out folded
- Then we open it and we have the complete heart mold.
Paso 2
- Coloqué el molde encima de la cartulina blanca.
- Luego lo marque con el lápiz por todo el borde.
- Luego lo recorte por todo el borde.
Step 2
- Place the mold on top of the white cardboard.
- Then mark it with the pencil all around the edge.
- Then I cut it out all the way around the edge.
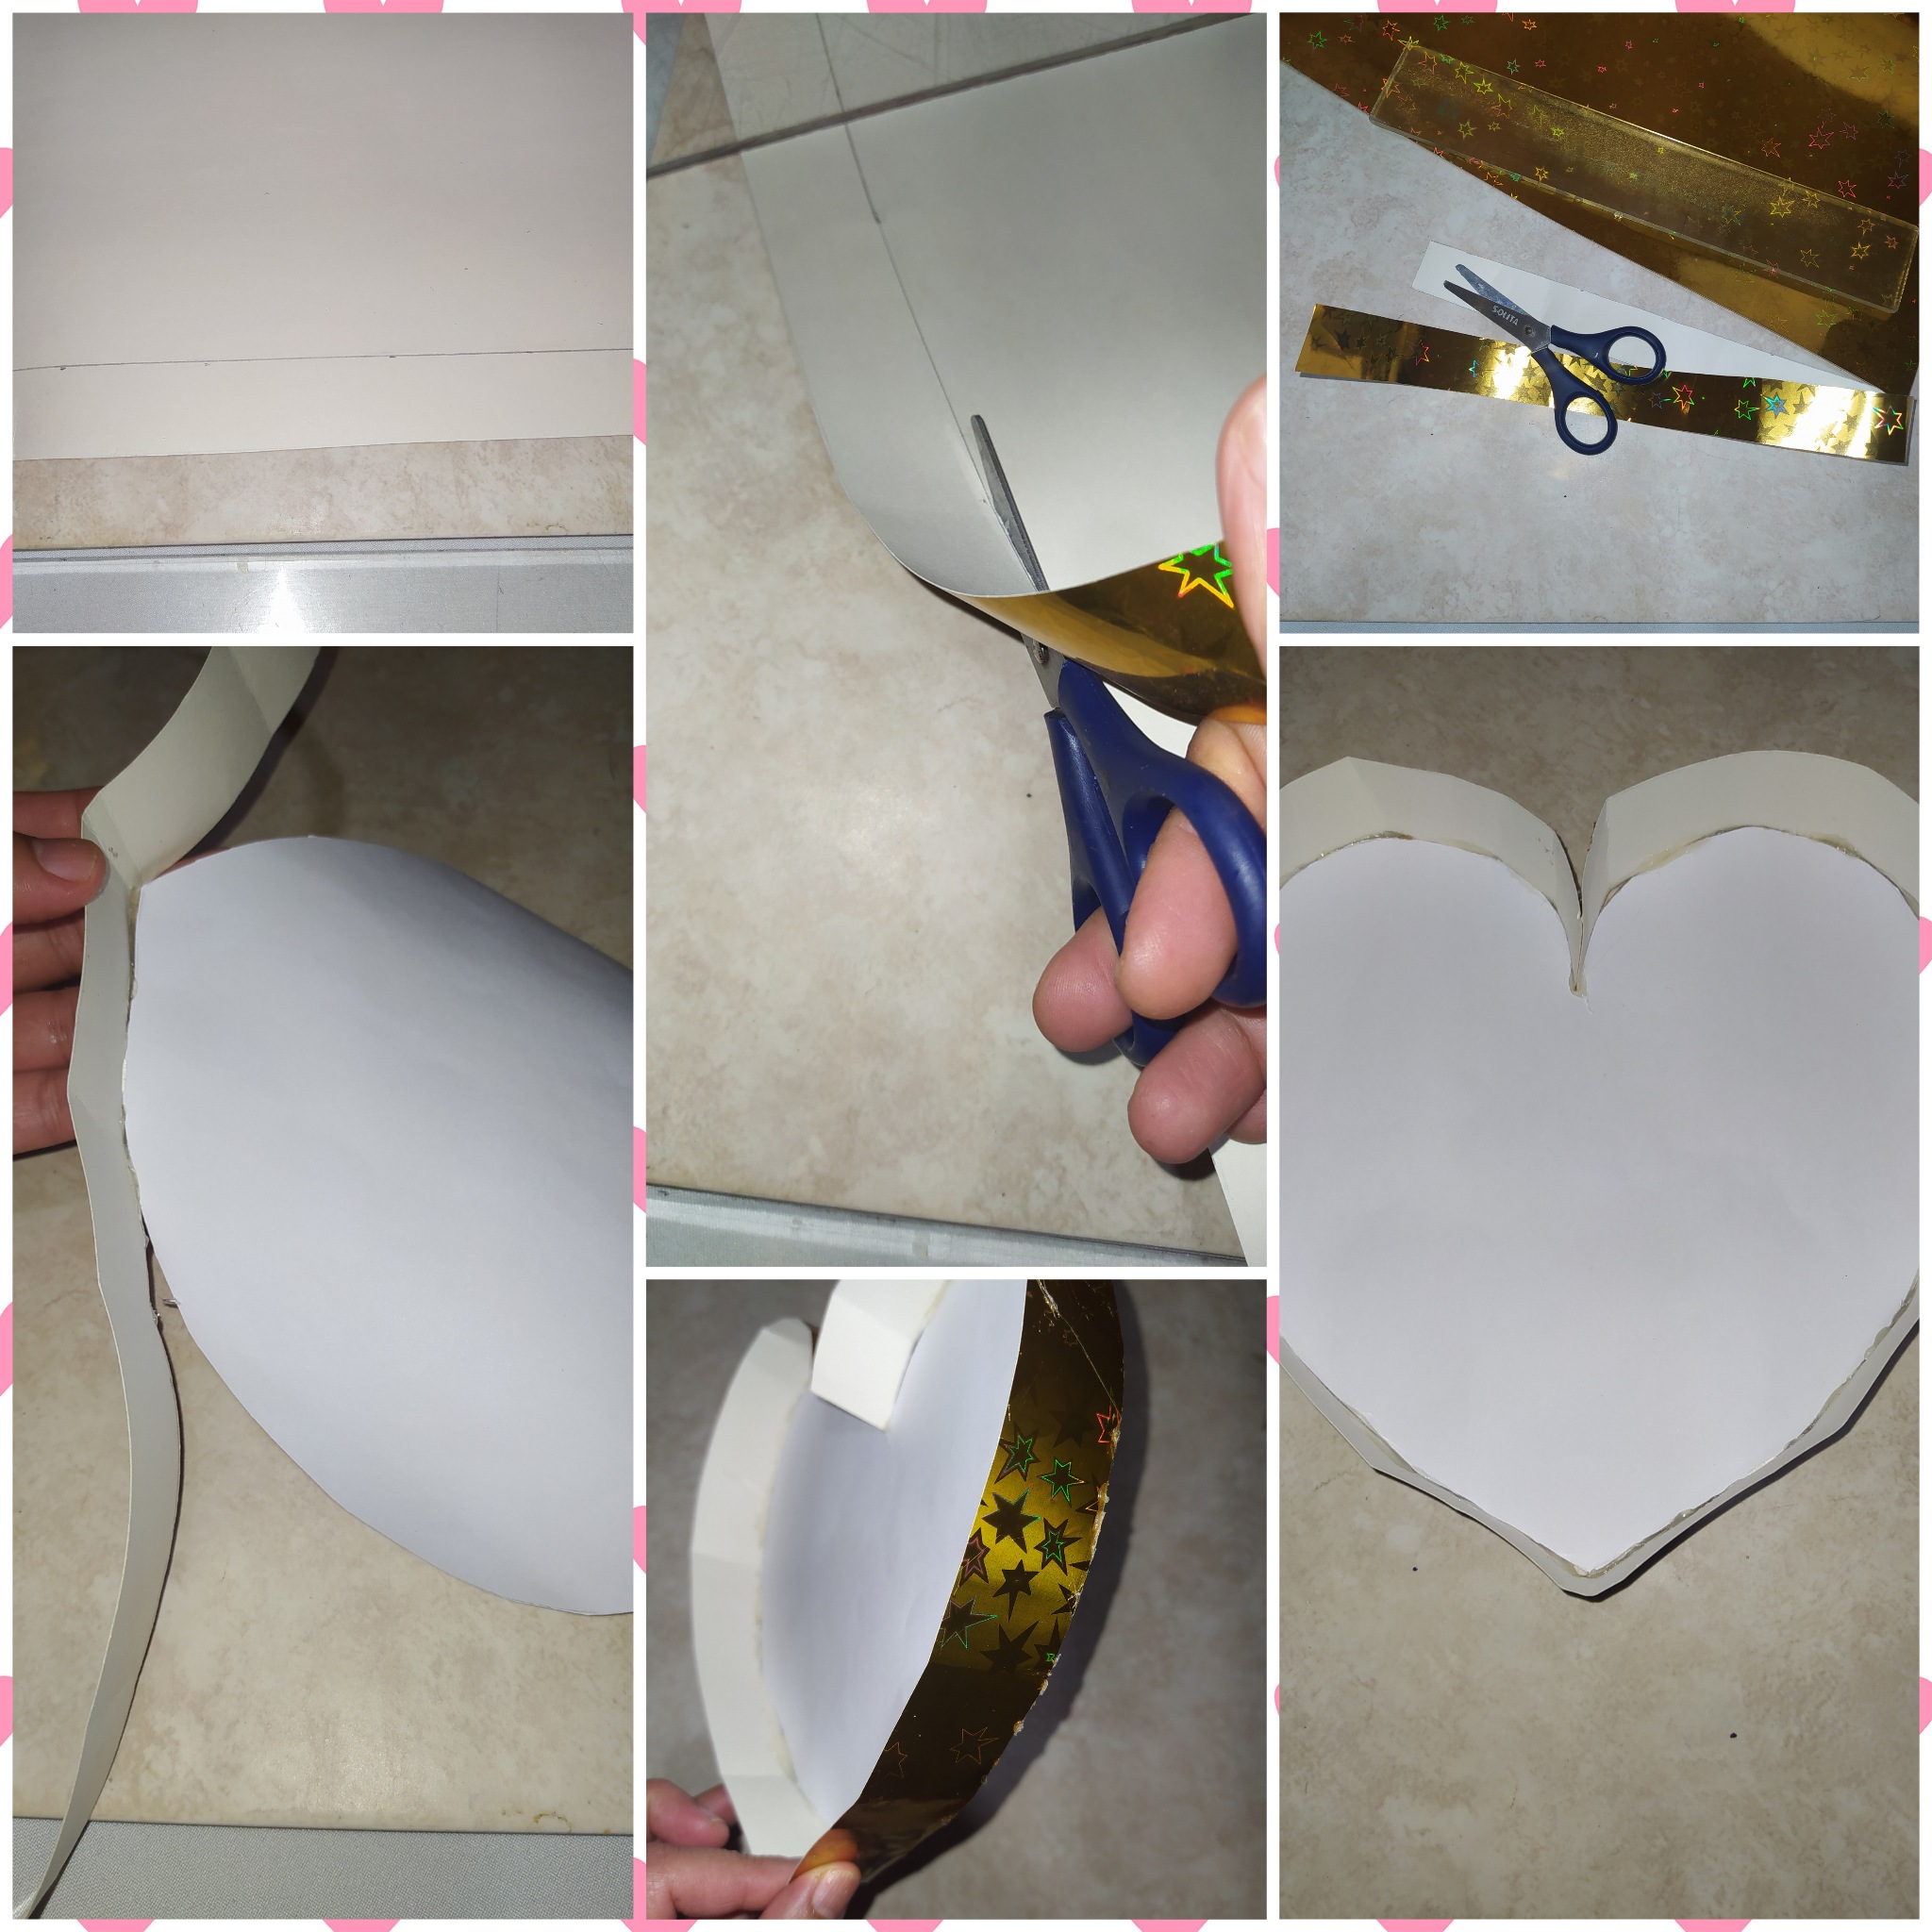
paso 3
- En la cartulina dorada de estrellas marque con la regla una tira de 63 cm de largo por 3 cm de ancho, que es lo que mide el corazón por todo su alrededor.
- Luego lo recorte.
- Le coloque silicón por todo el borde y lo fui pegando al corazón hasta armarlo completo.
step 3
- On the gold star cardboard mark with the ruler a strip 63 cm long by 3 cm wide, which is the length of the heart all around.
- Then cut it out.
- I put silicone all around the edge and glued it to the heart until it was completely assembled.
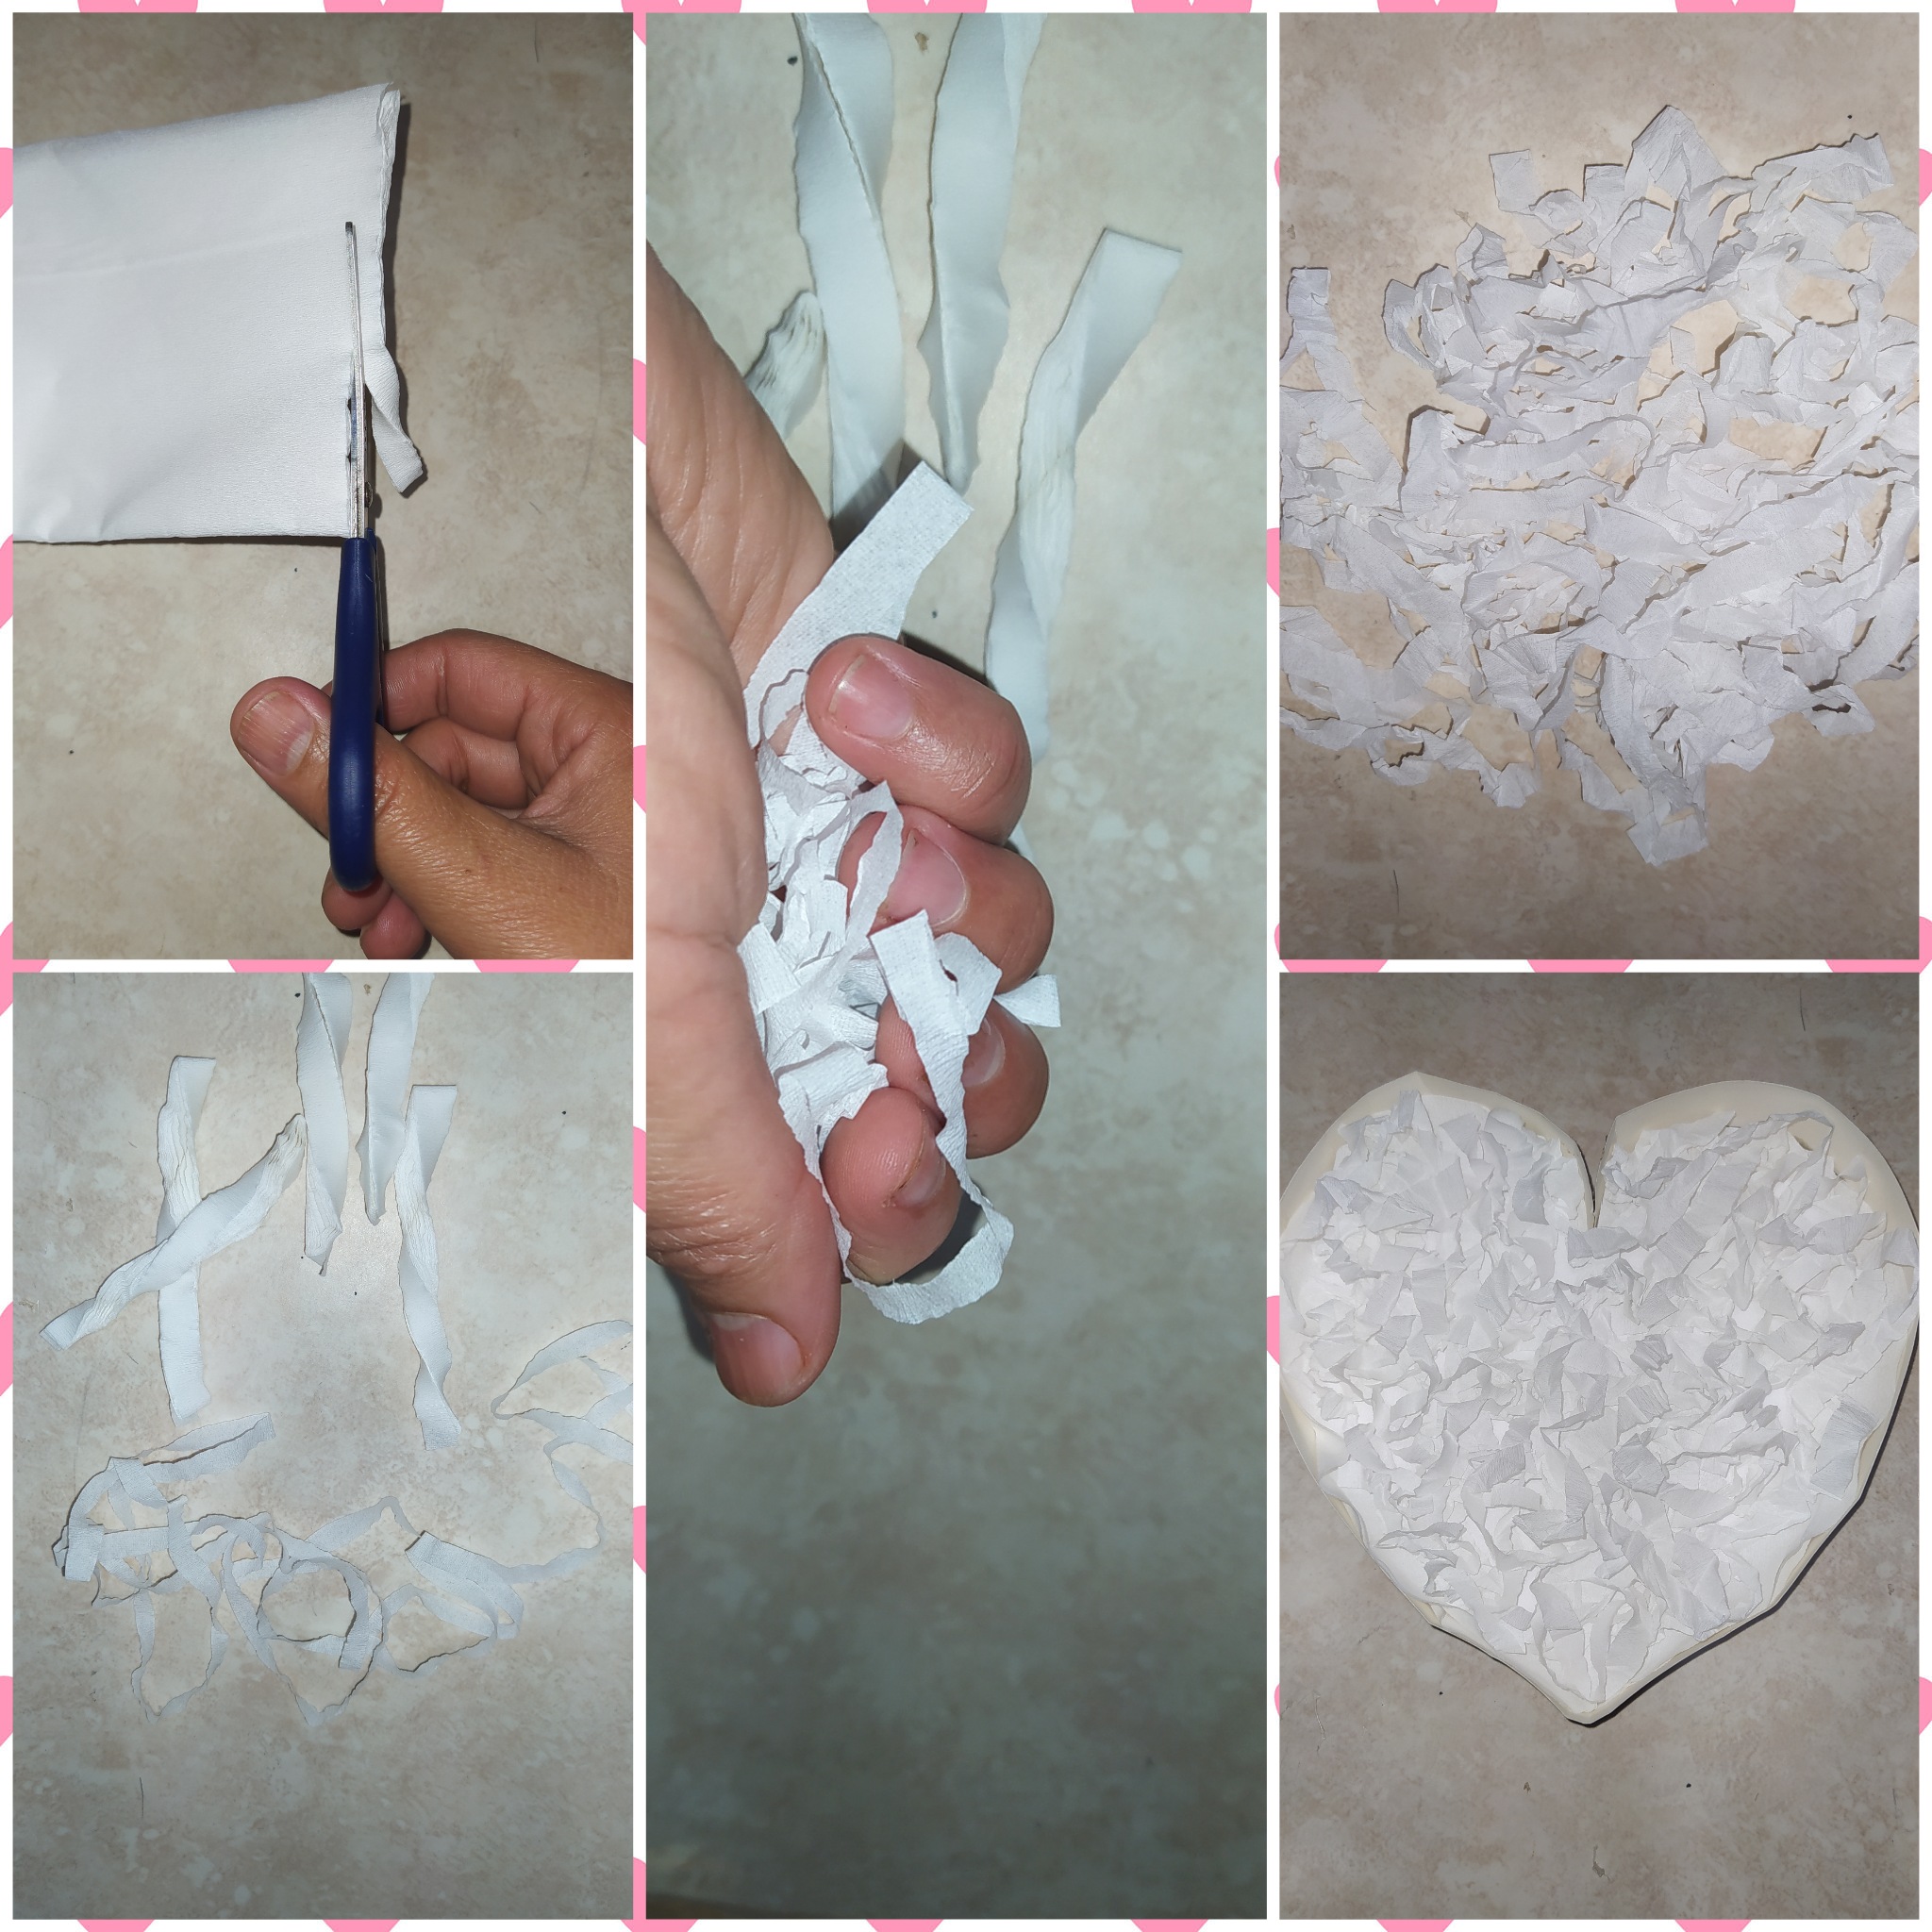
paso 4
- Corto varias tiras finas de papel crepe blanco.
- Luego las desenvuelvo
- Las agarro en la mano y las empuño poco a poco cada una de las tiras de papel crepé, para darles volumen.
*Luego las coloco en el corazón.
step 4
- I cut several thin strips of white crepe paper.
- Then I unwrap them
- I hold them in my hand and push them little by little each of the crepe paper strips, to give them volume.
*Then I place them in the heart.
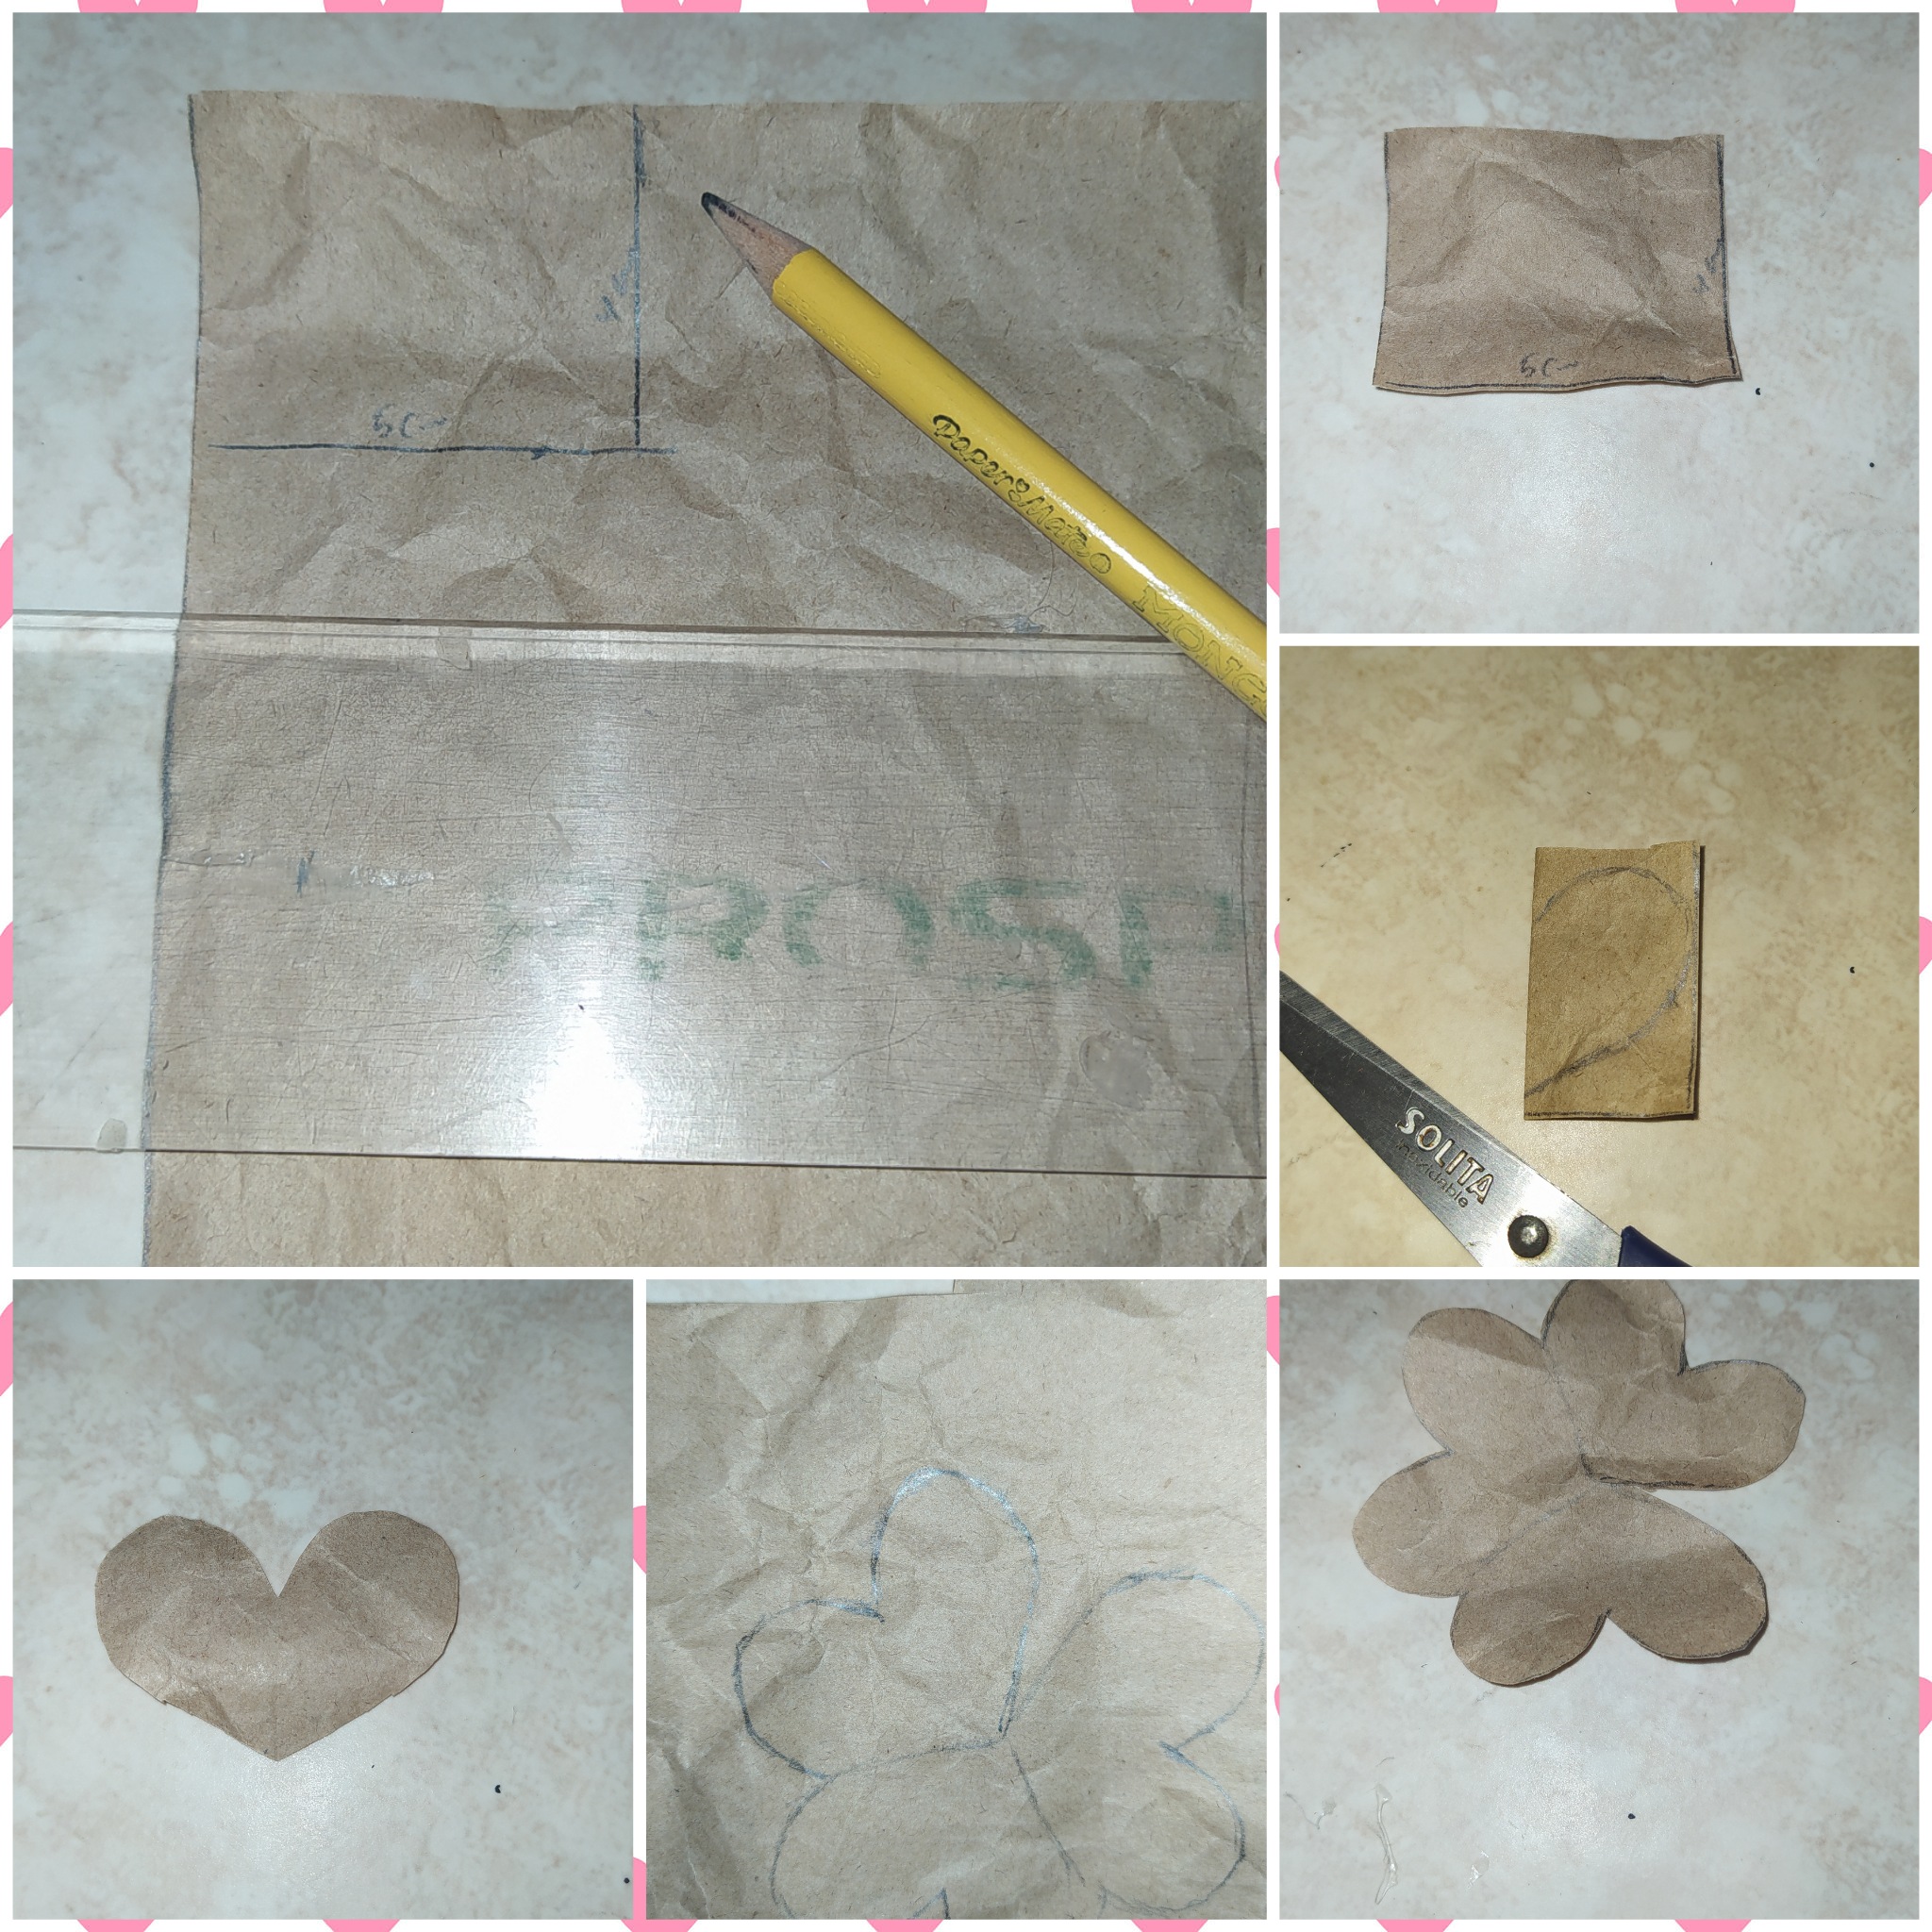
paso 5
- En el papel de bolsa marco un cuadro con la regla que mide 5 cm de largo x 4 de ancho.
- Lo recorte
- Luego lo doble y dibuje la mitad de un corazón y lo recorte por todo el borde.
- Luego en un pedazo de papel de bolsa para sacar el molde de la flor coloque el corazón y lo marque tres veces uno al lado del otro.
- Luego lo recorte por todo el borde y listo tenía el molde de la flor,lo deje de un lado más separado.
step 5
- On the paper bag I mark a square with the ruler measuring 5 cm long x 4 cm wide.
- Cut it out
- Then fold it and draw half of a heart and cut it out all around the edge.
- Then on a piece of paper bag to draw the mold of the flower, place the heart and mark it three times side by side.
- Then cut it all the way around the edge and you have the flower mold, leave it on one side further apart.
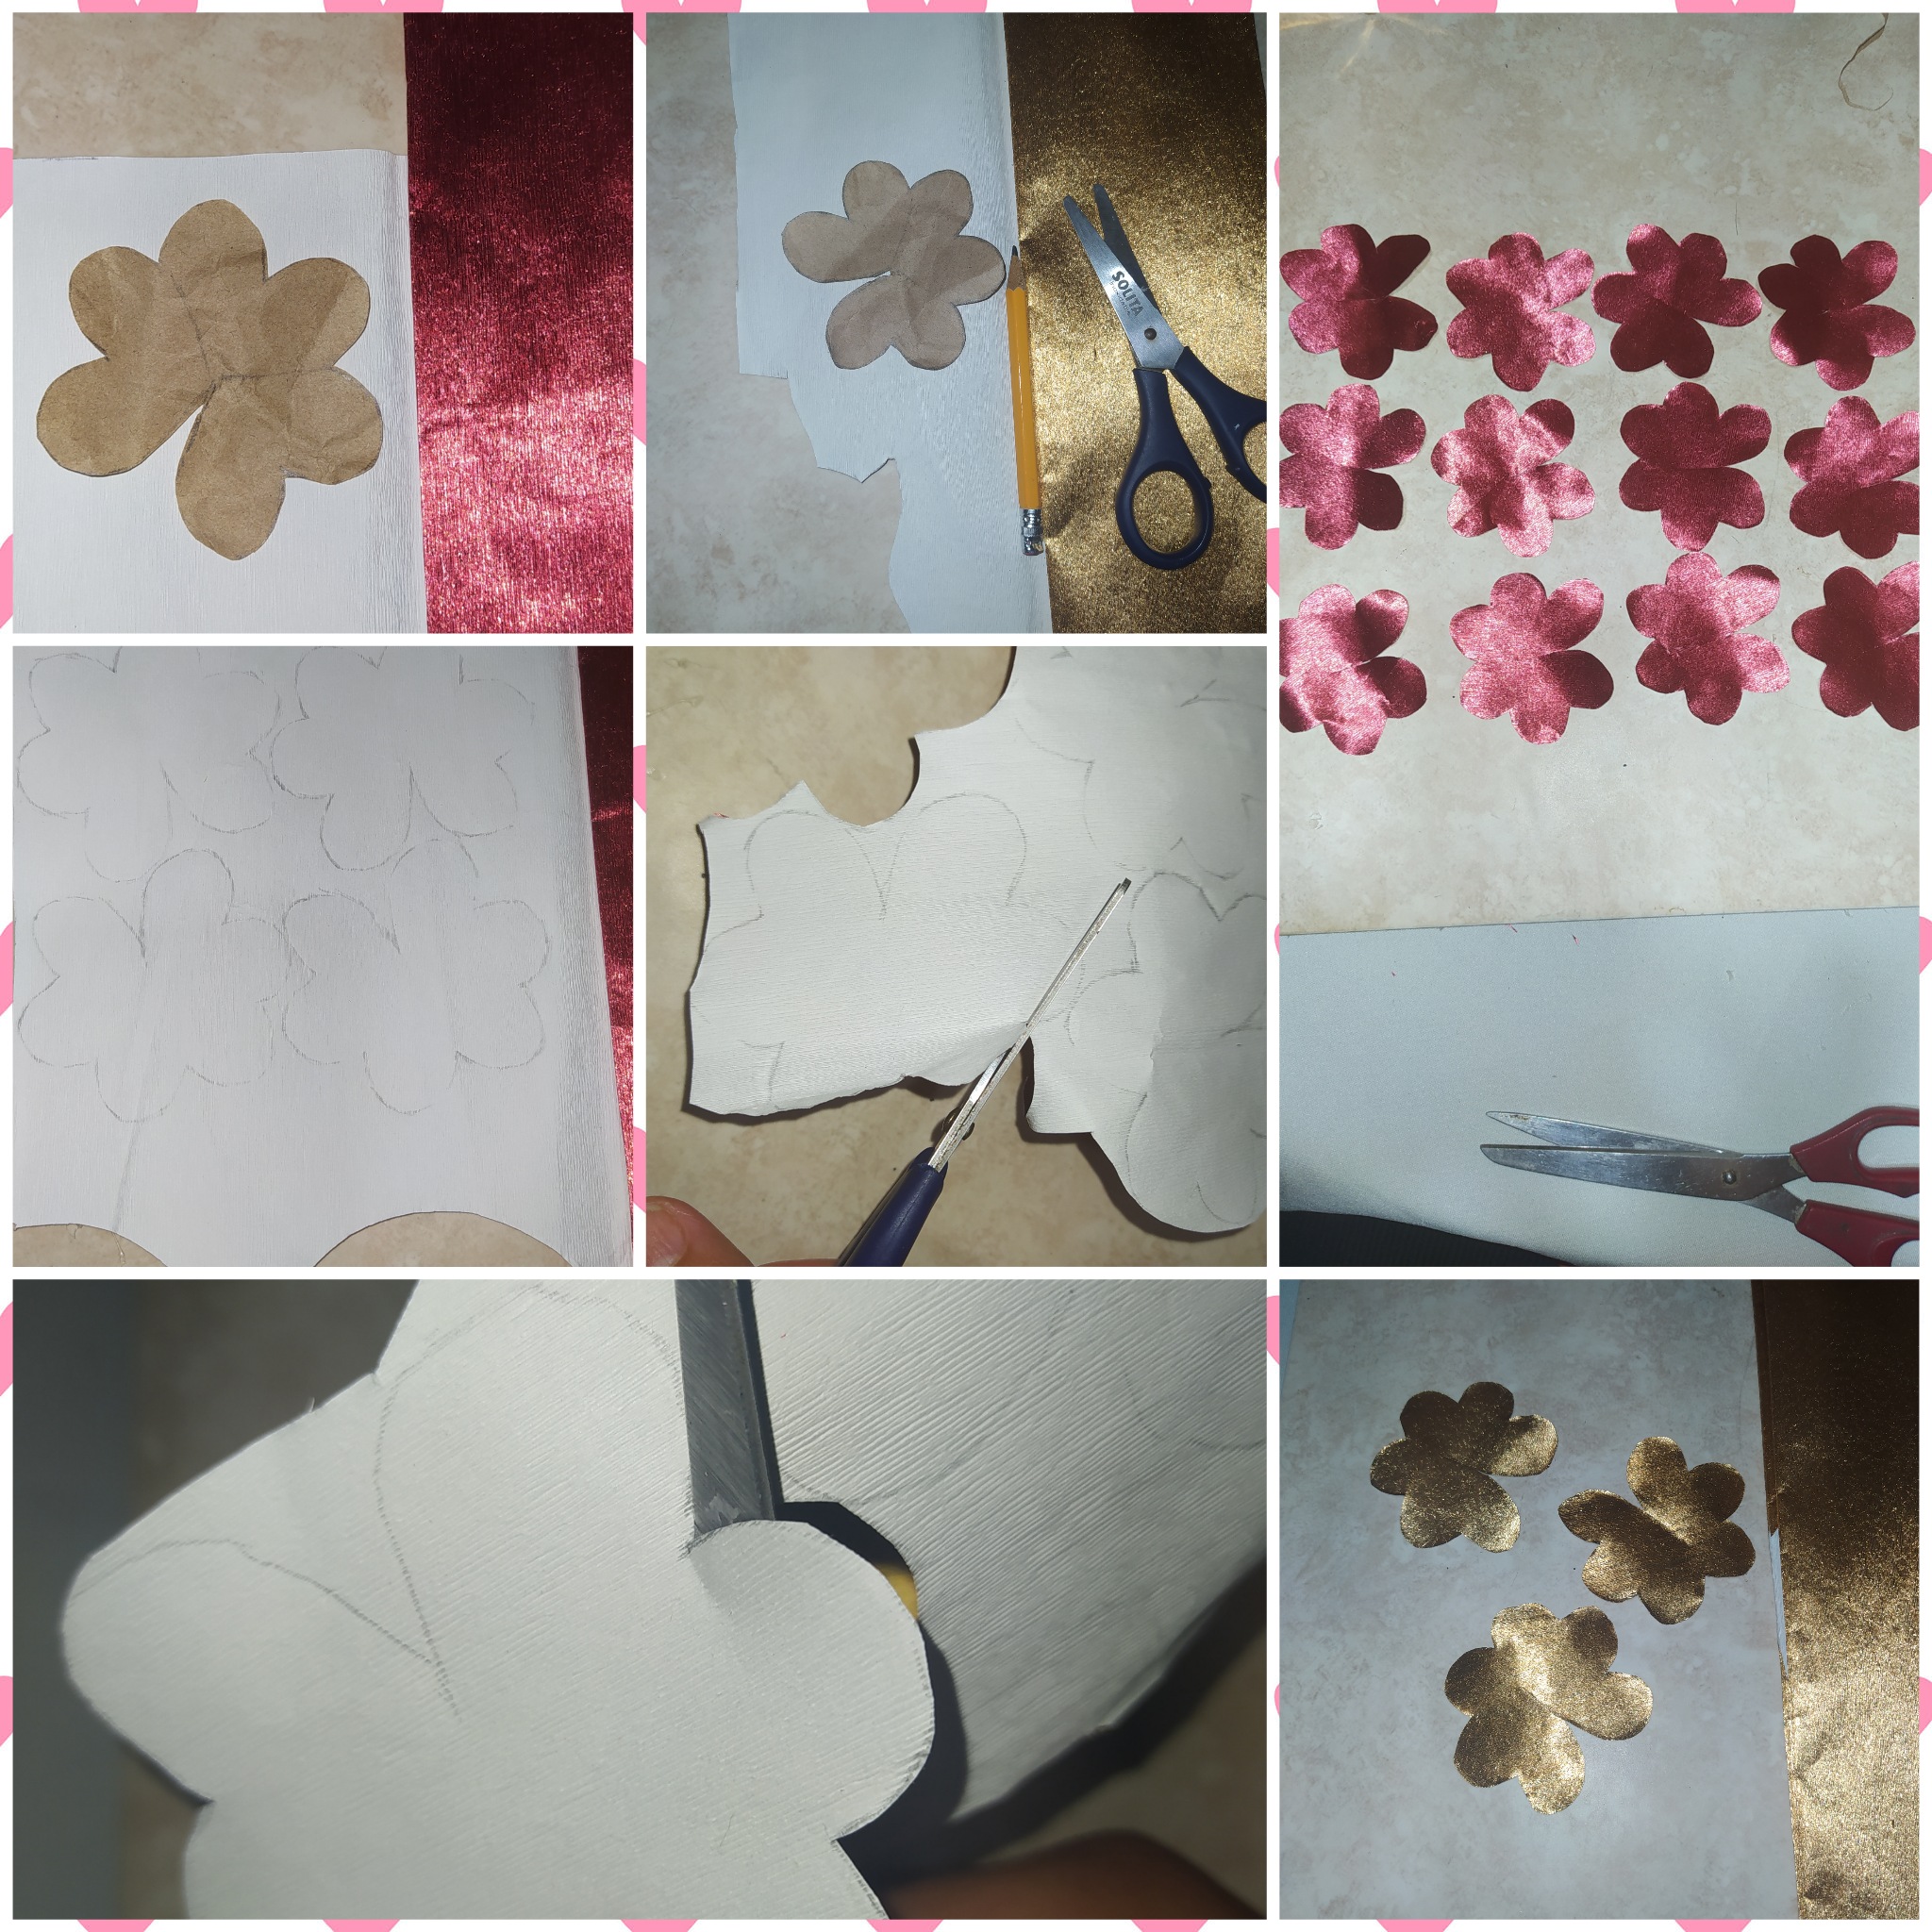
paso 6
- Colocamos la flor encima de papel crepé metalizado (dorado,rojo),y marcamos el molde.
- Luego recortamos por todo el borde.
step 6
- Place the flower on top of metallic crepe paper (gold, red), and mark the mold.
- Then we cut out all around the edge.
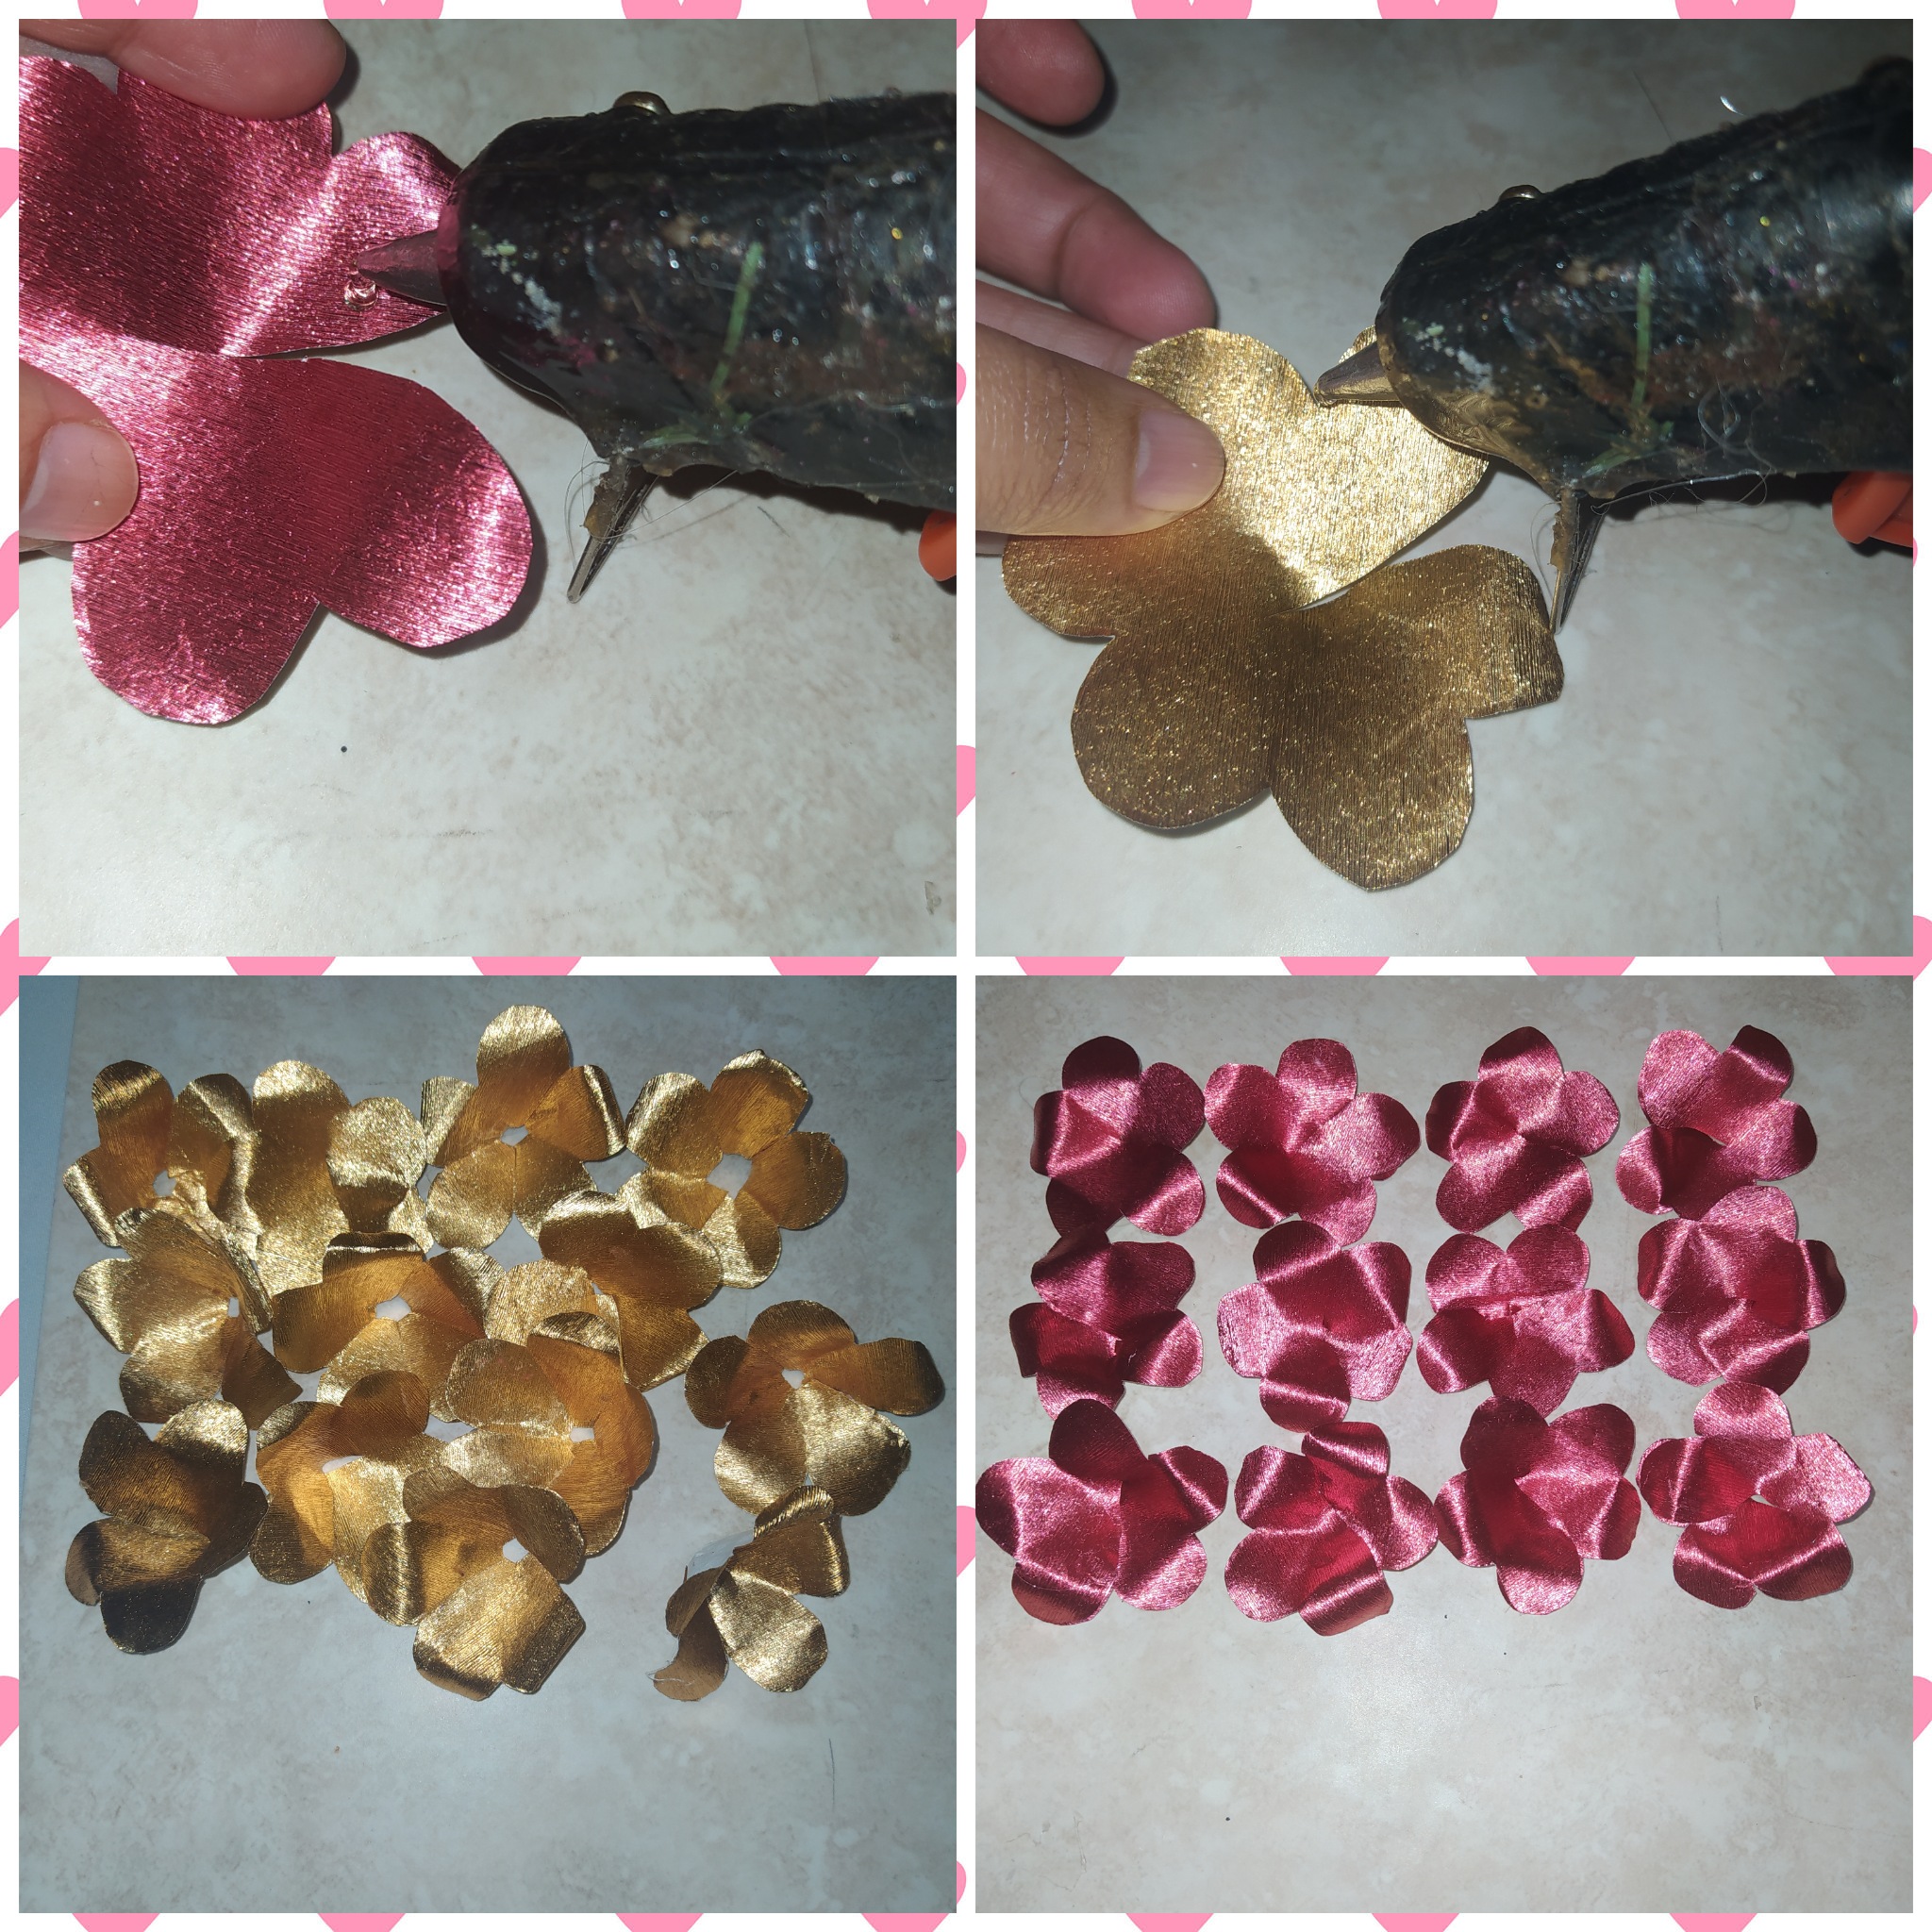
paso 7
- Vamos a pegar la flor pero para que nos pueda quedar honda en el centro,le colocamos el silicón y montamos un pétalo encima del otro.( Cuando la recortamos tiene 6 pétalos luego cuando la pegamos nos queda de 5 pétalos).
step 7
- We are going to glue the flower but so that it can be deep in the center, we put the silicone and mount a petal on top of the other. (When we cut it has 6 petals then when we glue it we have 5 petals).
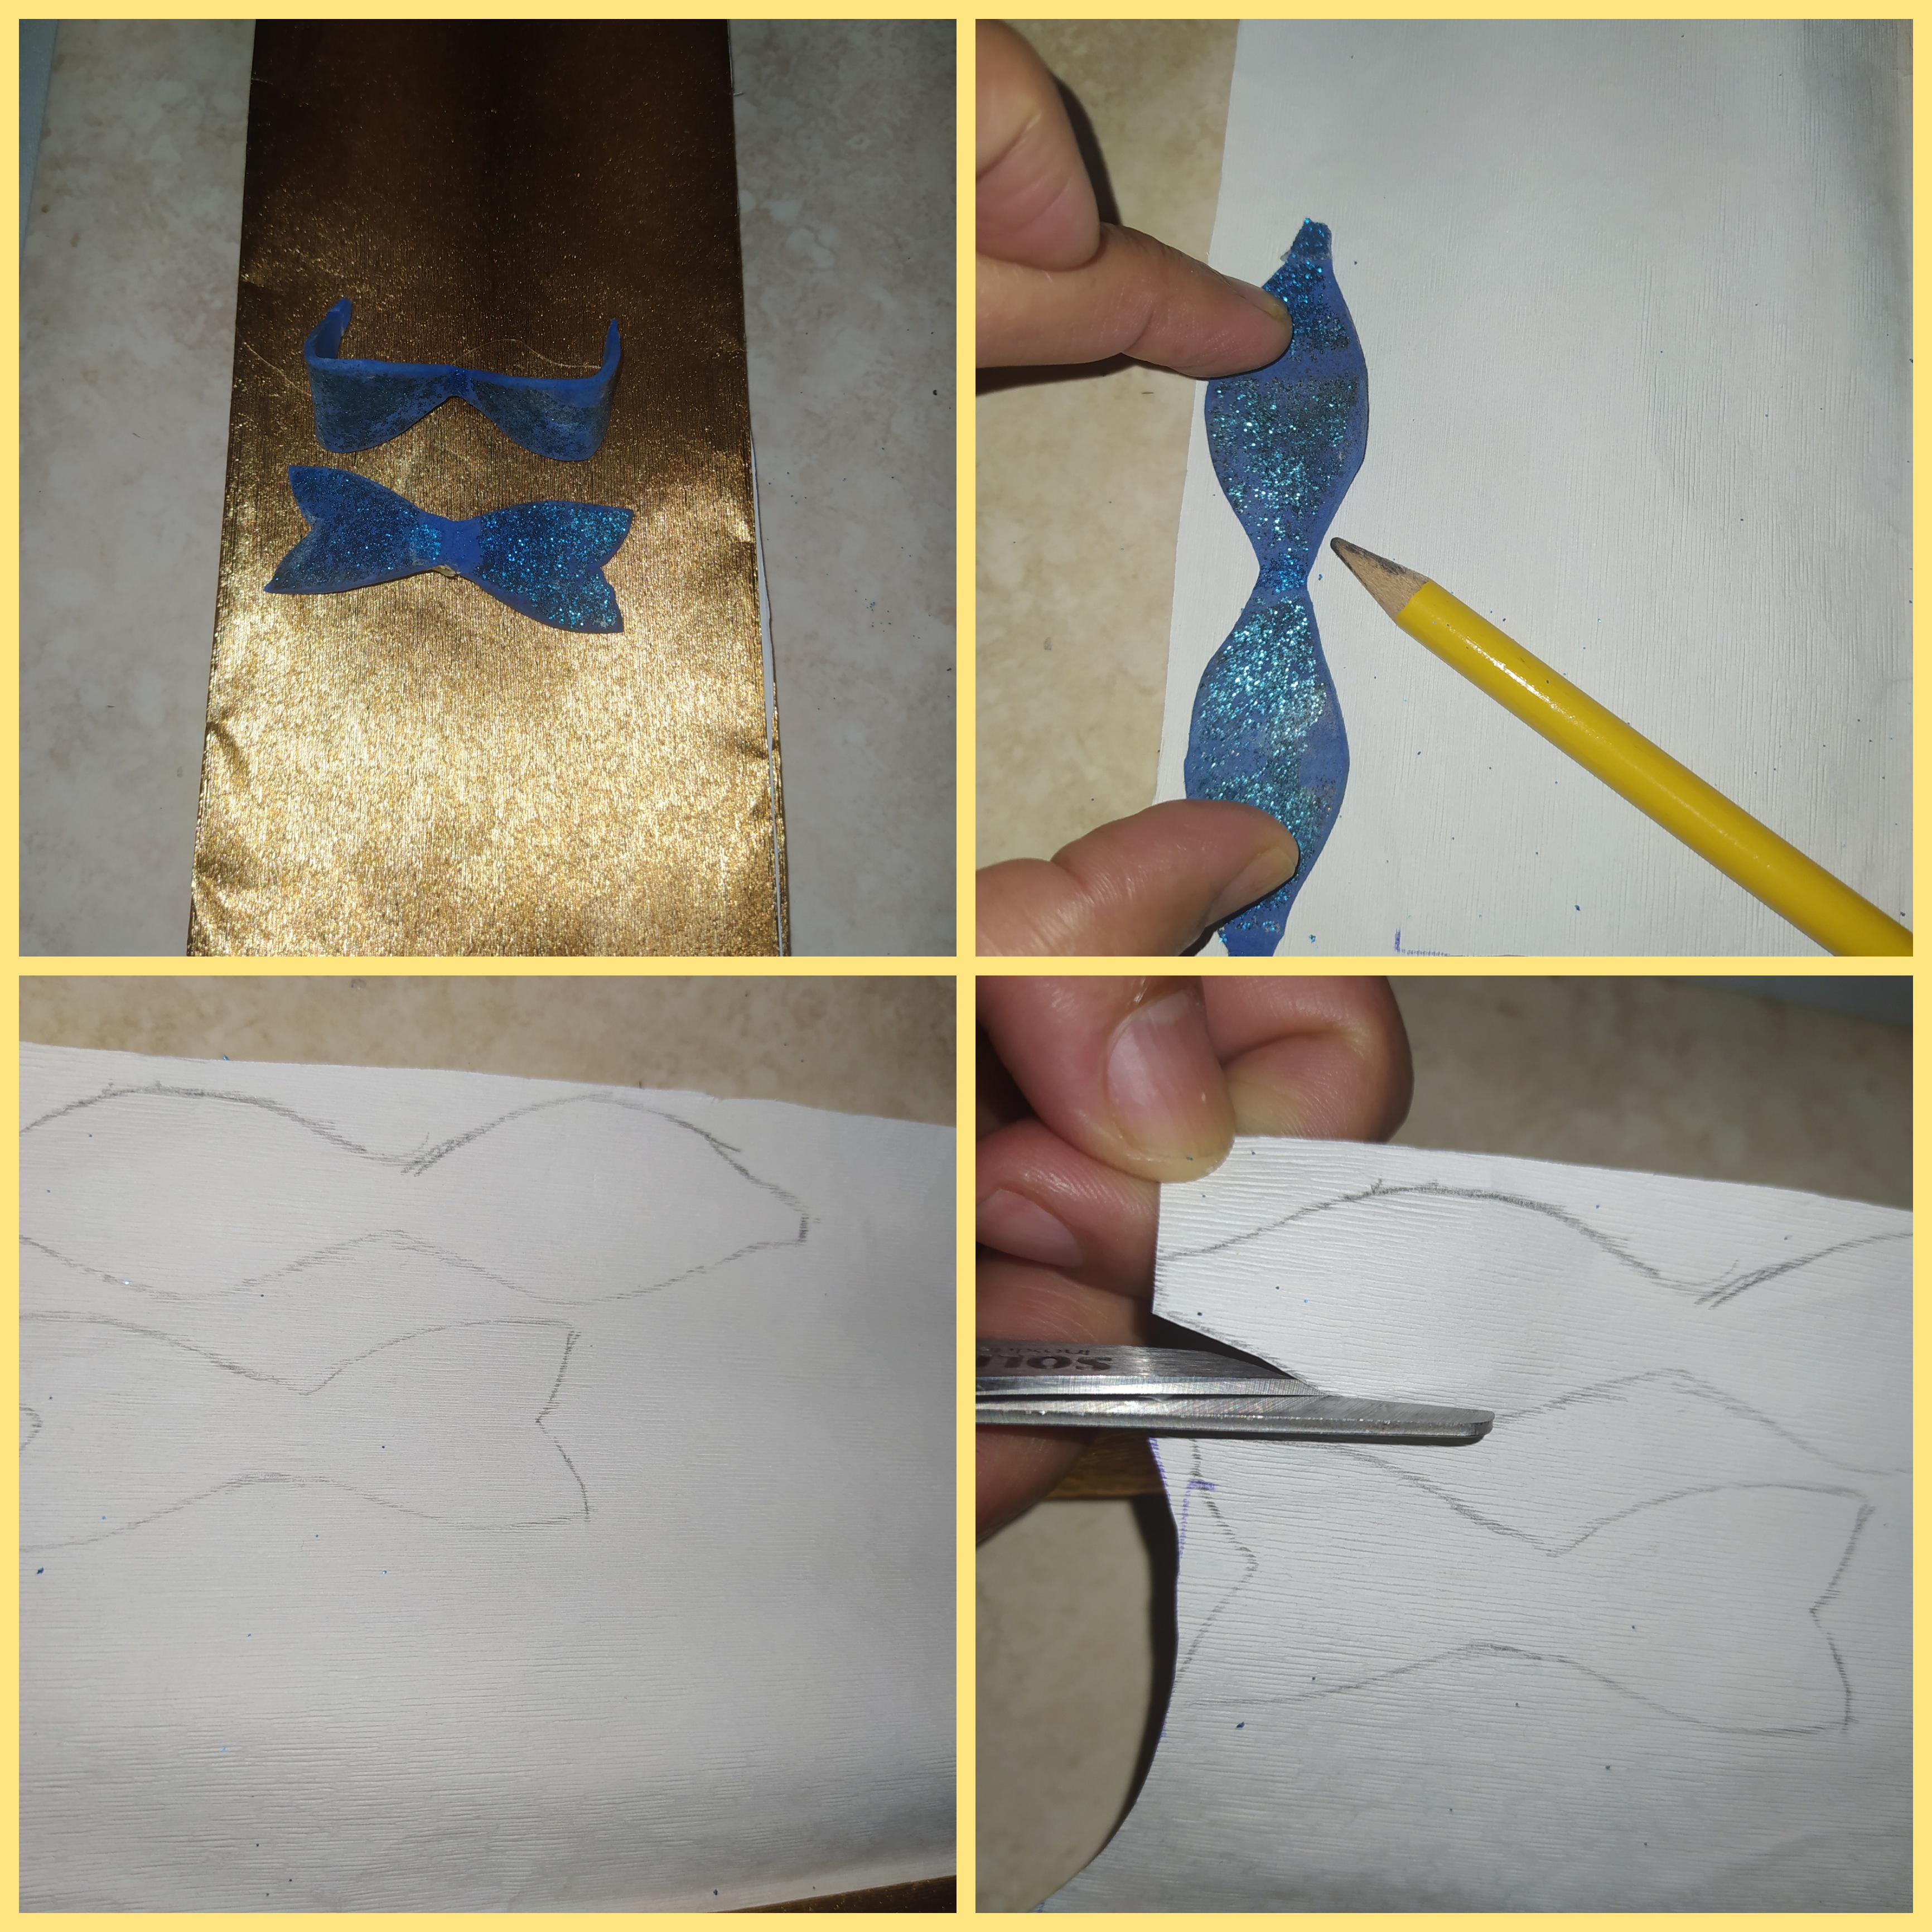
paso 8
- Ahora el lacito viejo lo desarmamos para sacar el molde
- Lo colocamos encima del papel crepé, lo marcamos
- Luego recortamos por todo el borde.
step 8
- Now we take apart the old bow to remove the mold.
- Place it on top of the crepe paper and mark it.
- Then we cut out all around the edge.
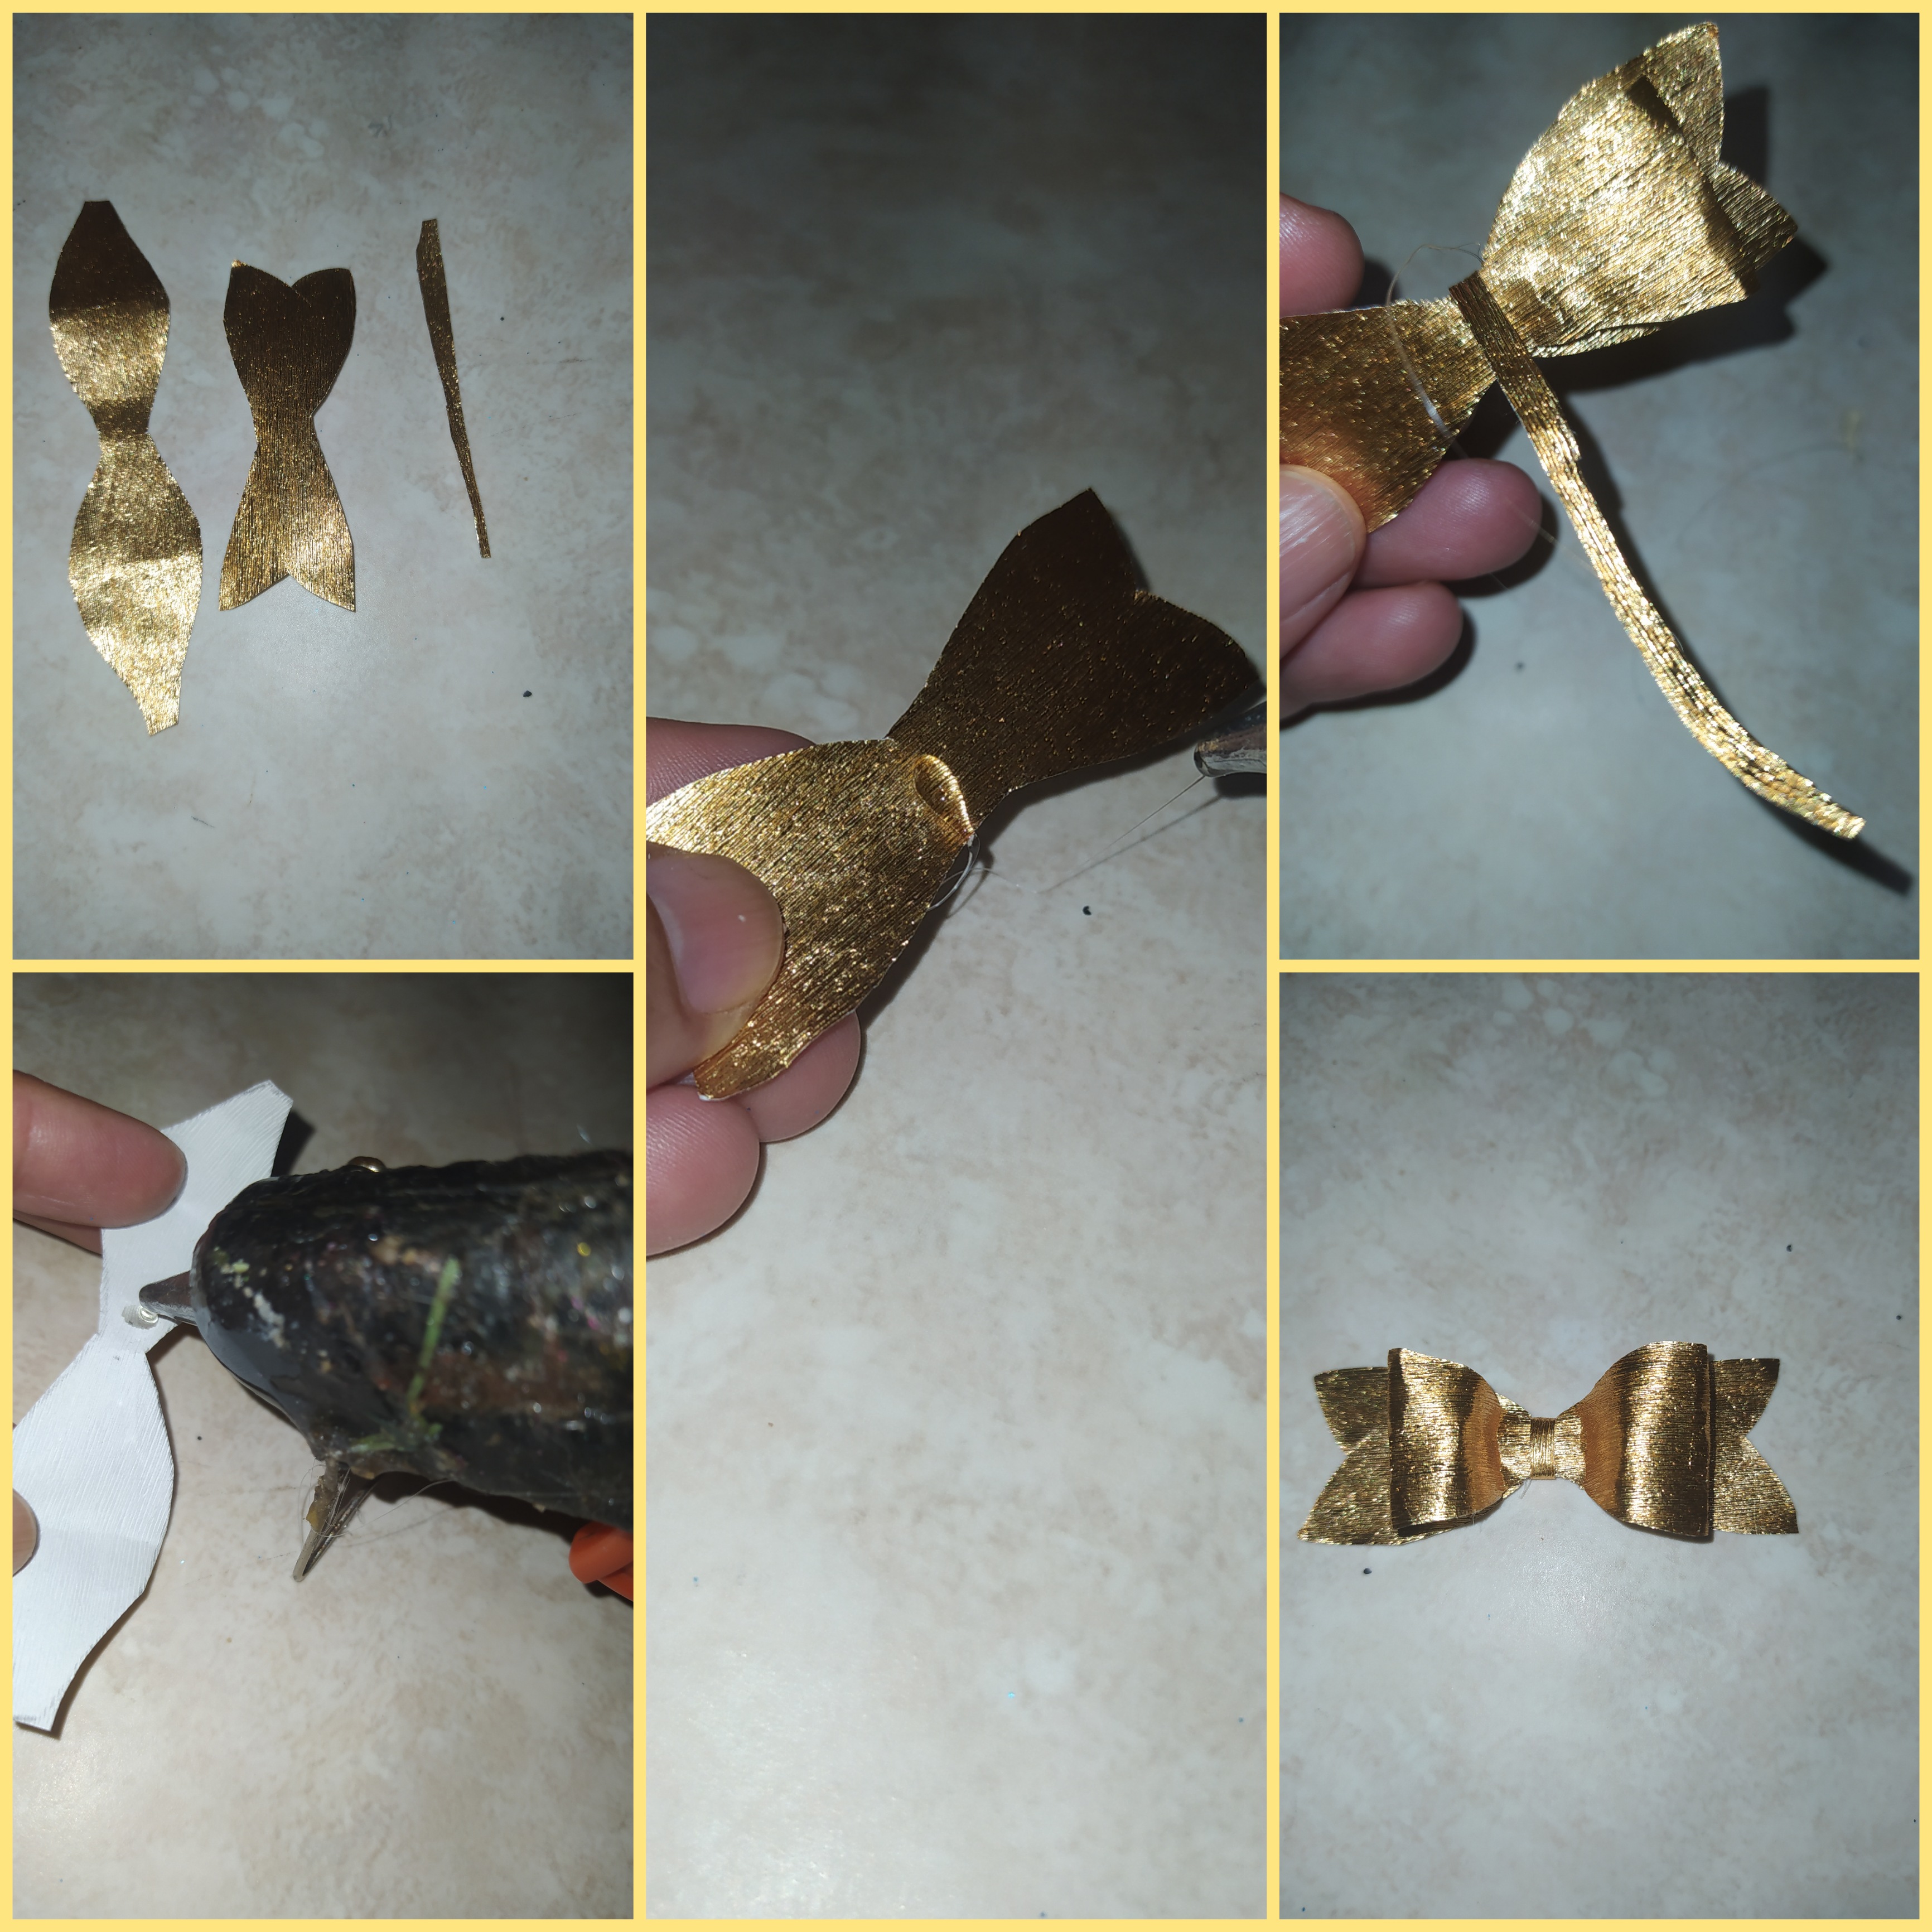
paso 9
- Ya que tenemos todas las piezas del lazo cortadas, procedemos a colocarle silicón y armar nuestro lazo.
step 9
- Once we have all the pieces of the ribbon cut, we proceed to place silicone and assemble our ribbon.
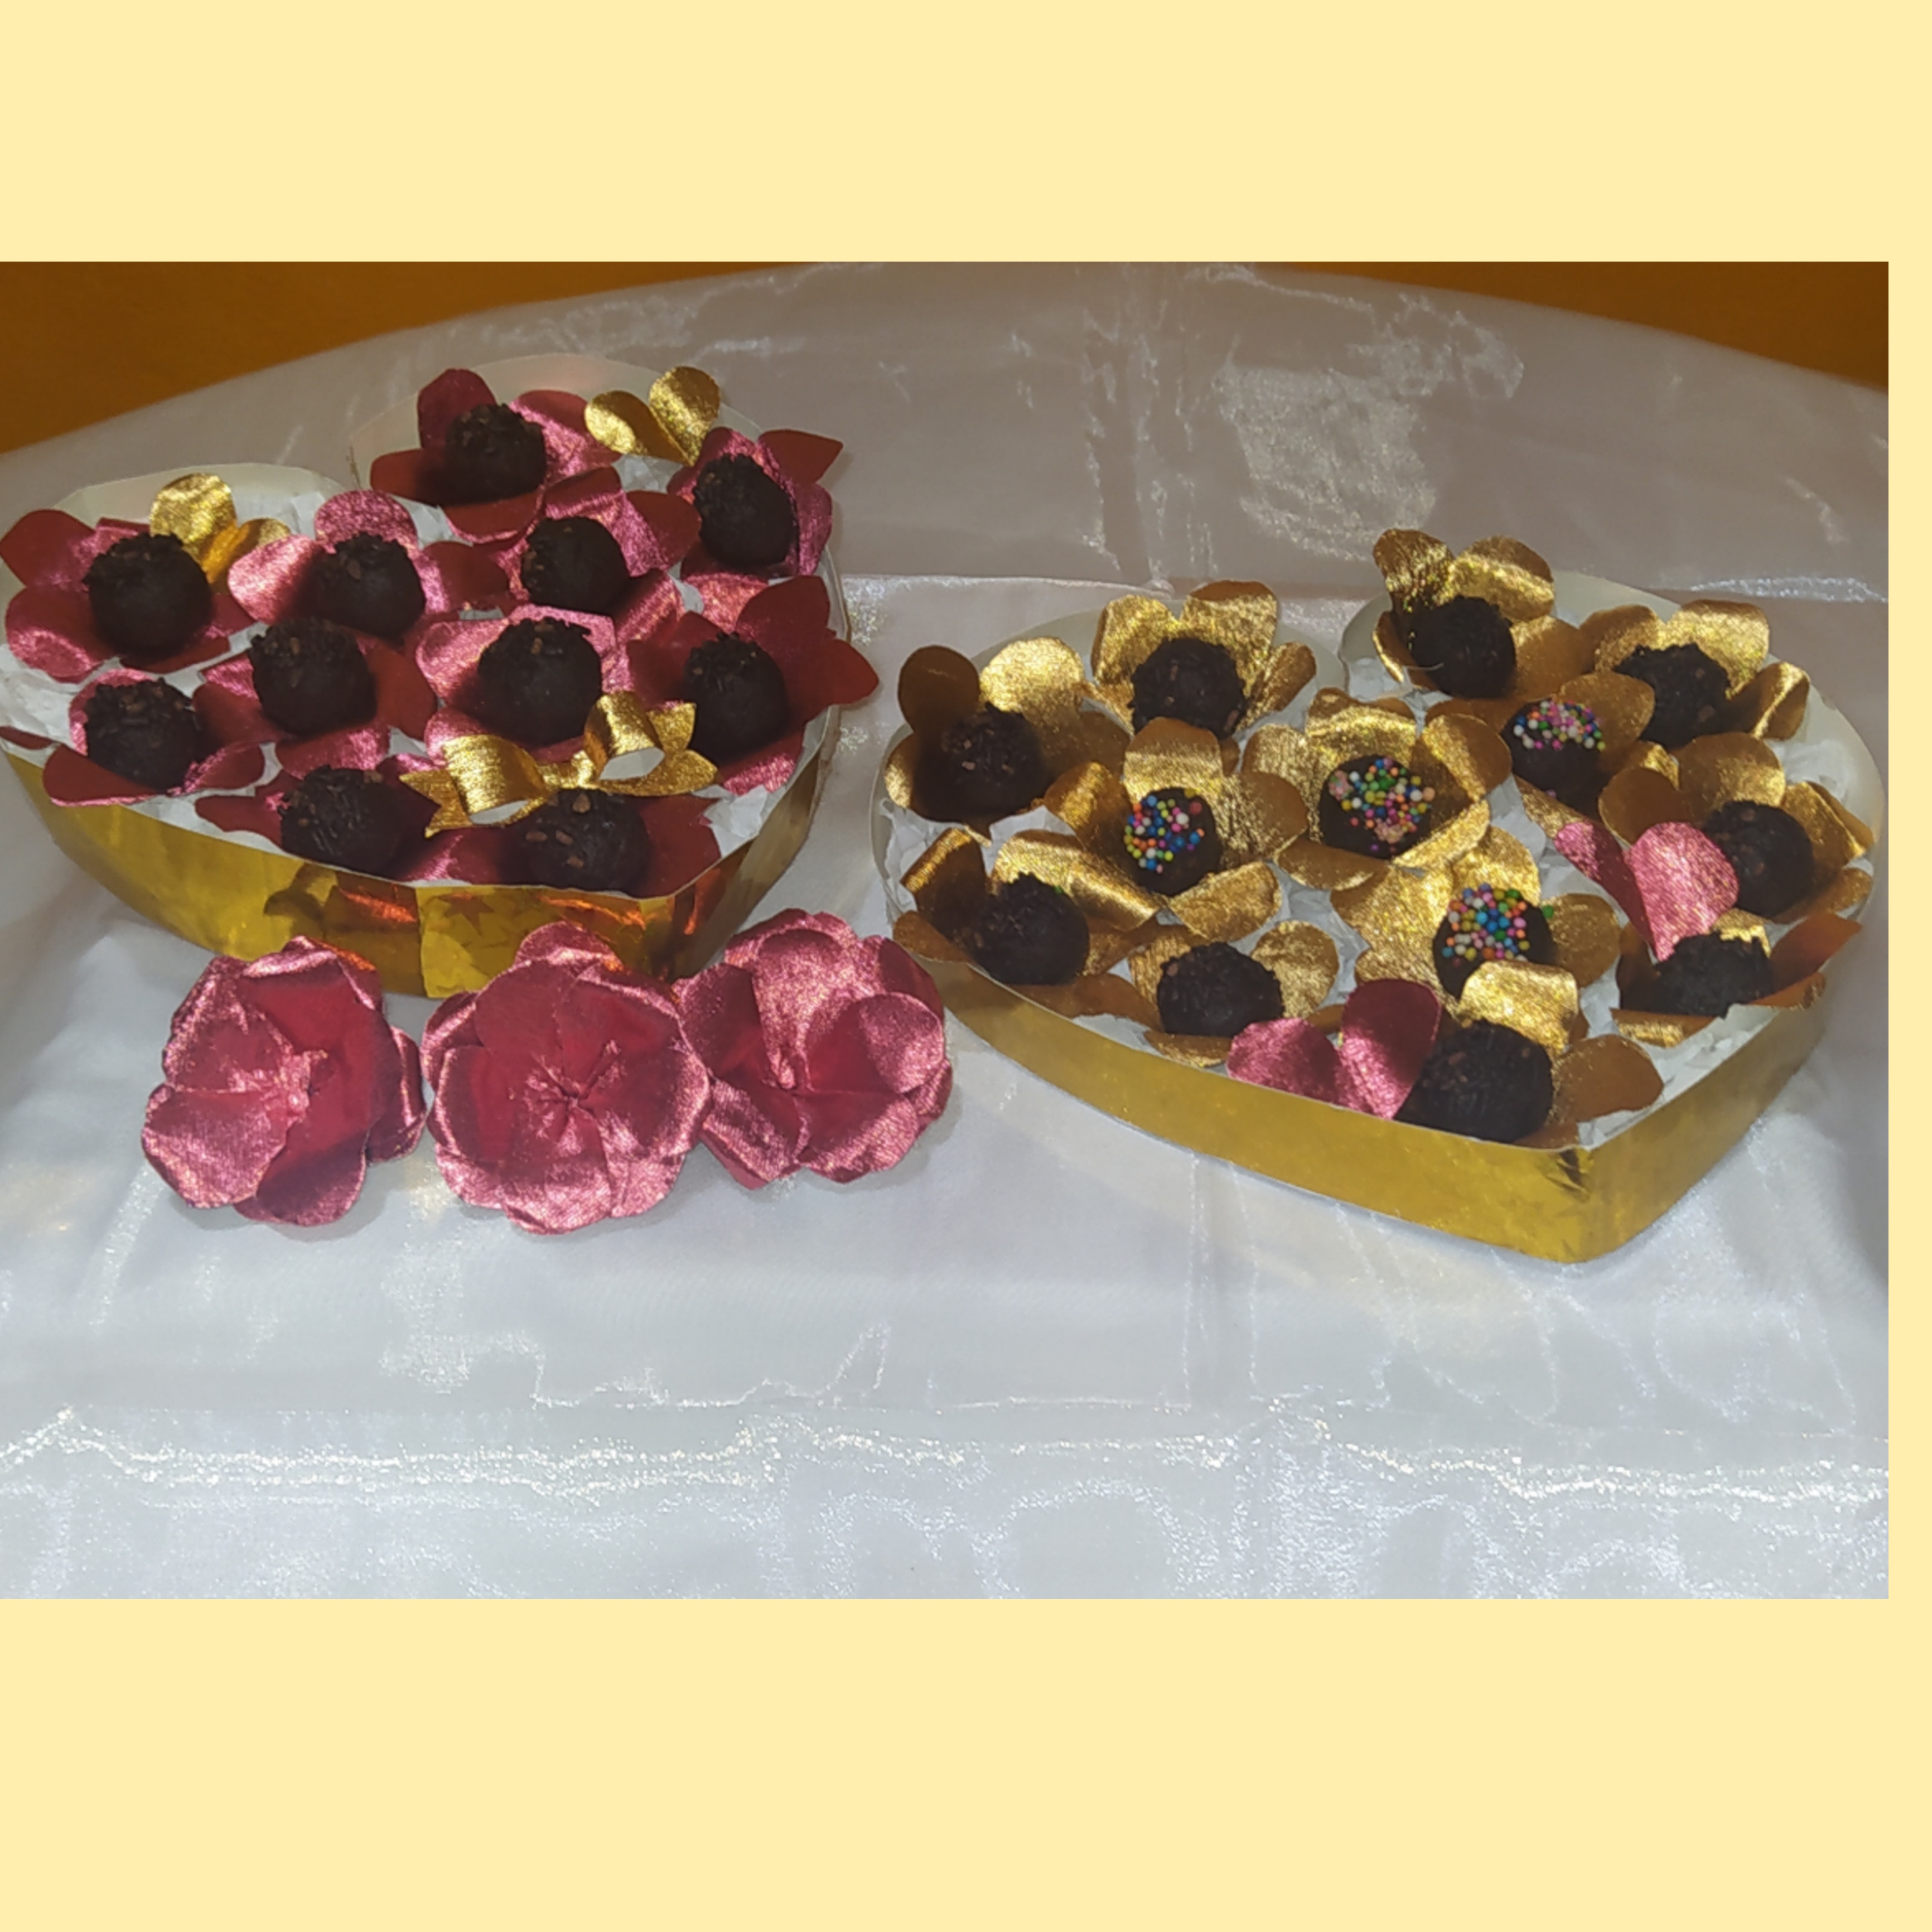
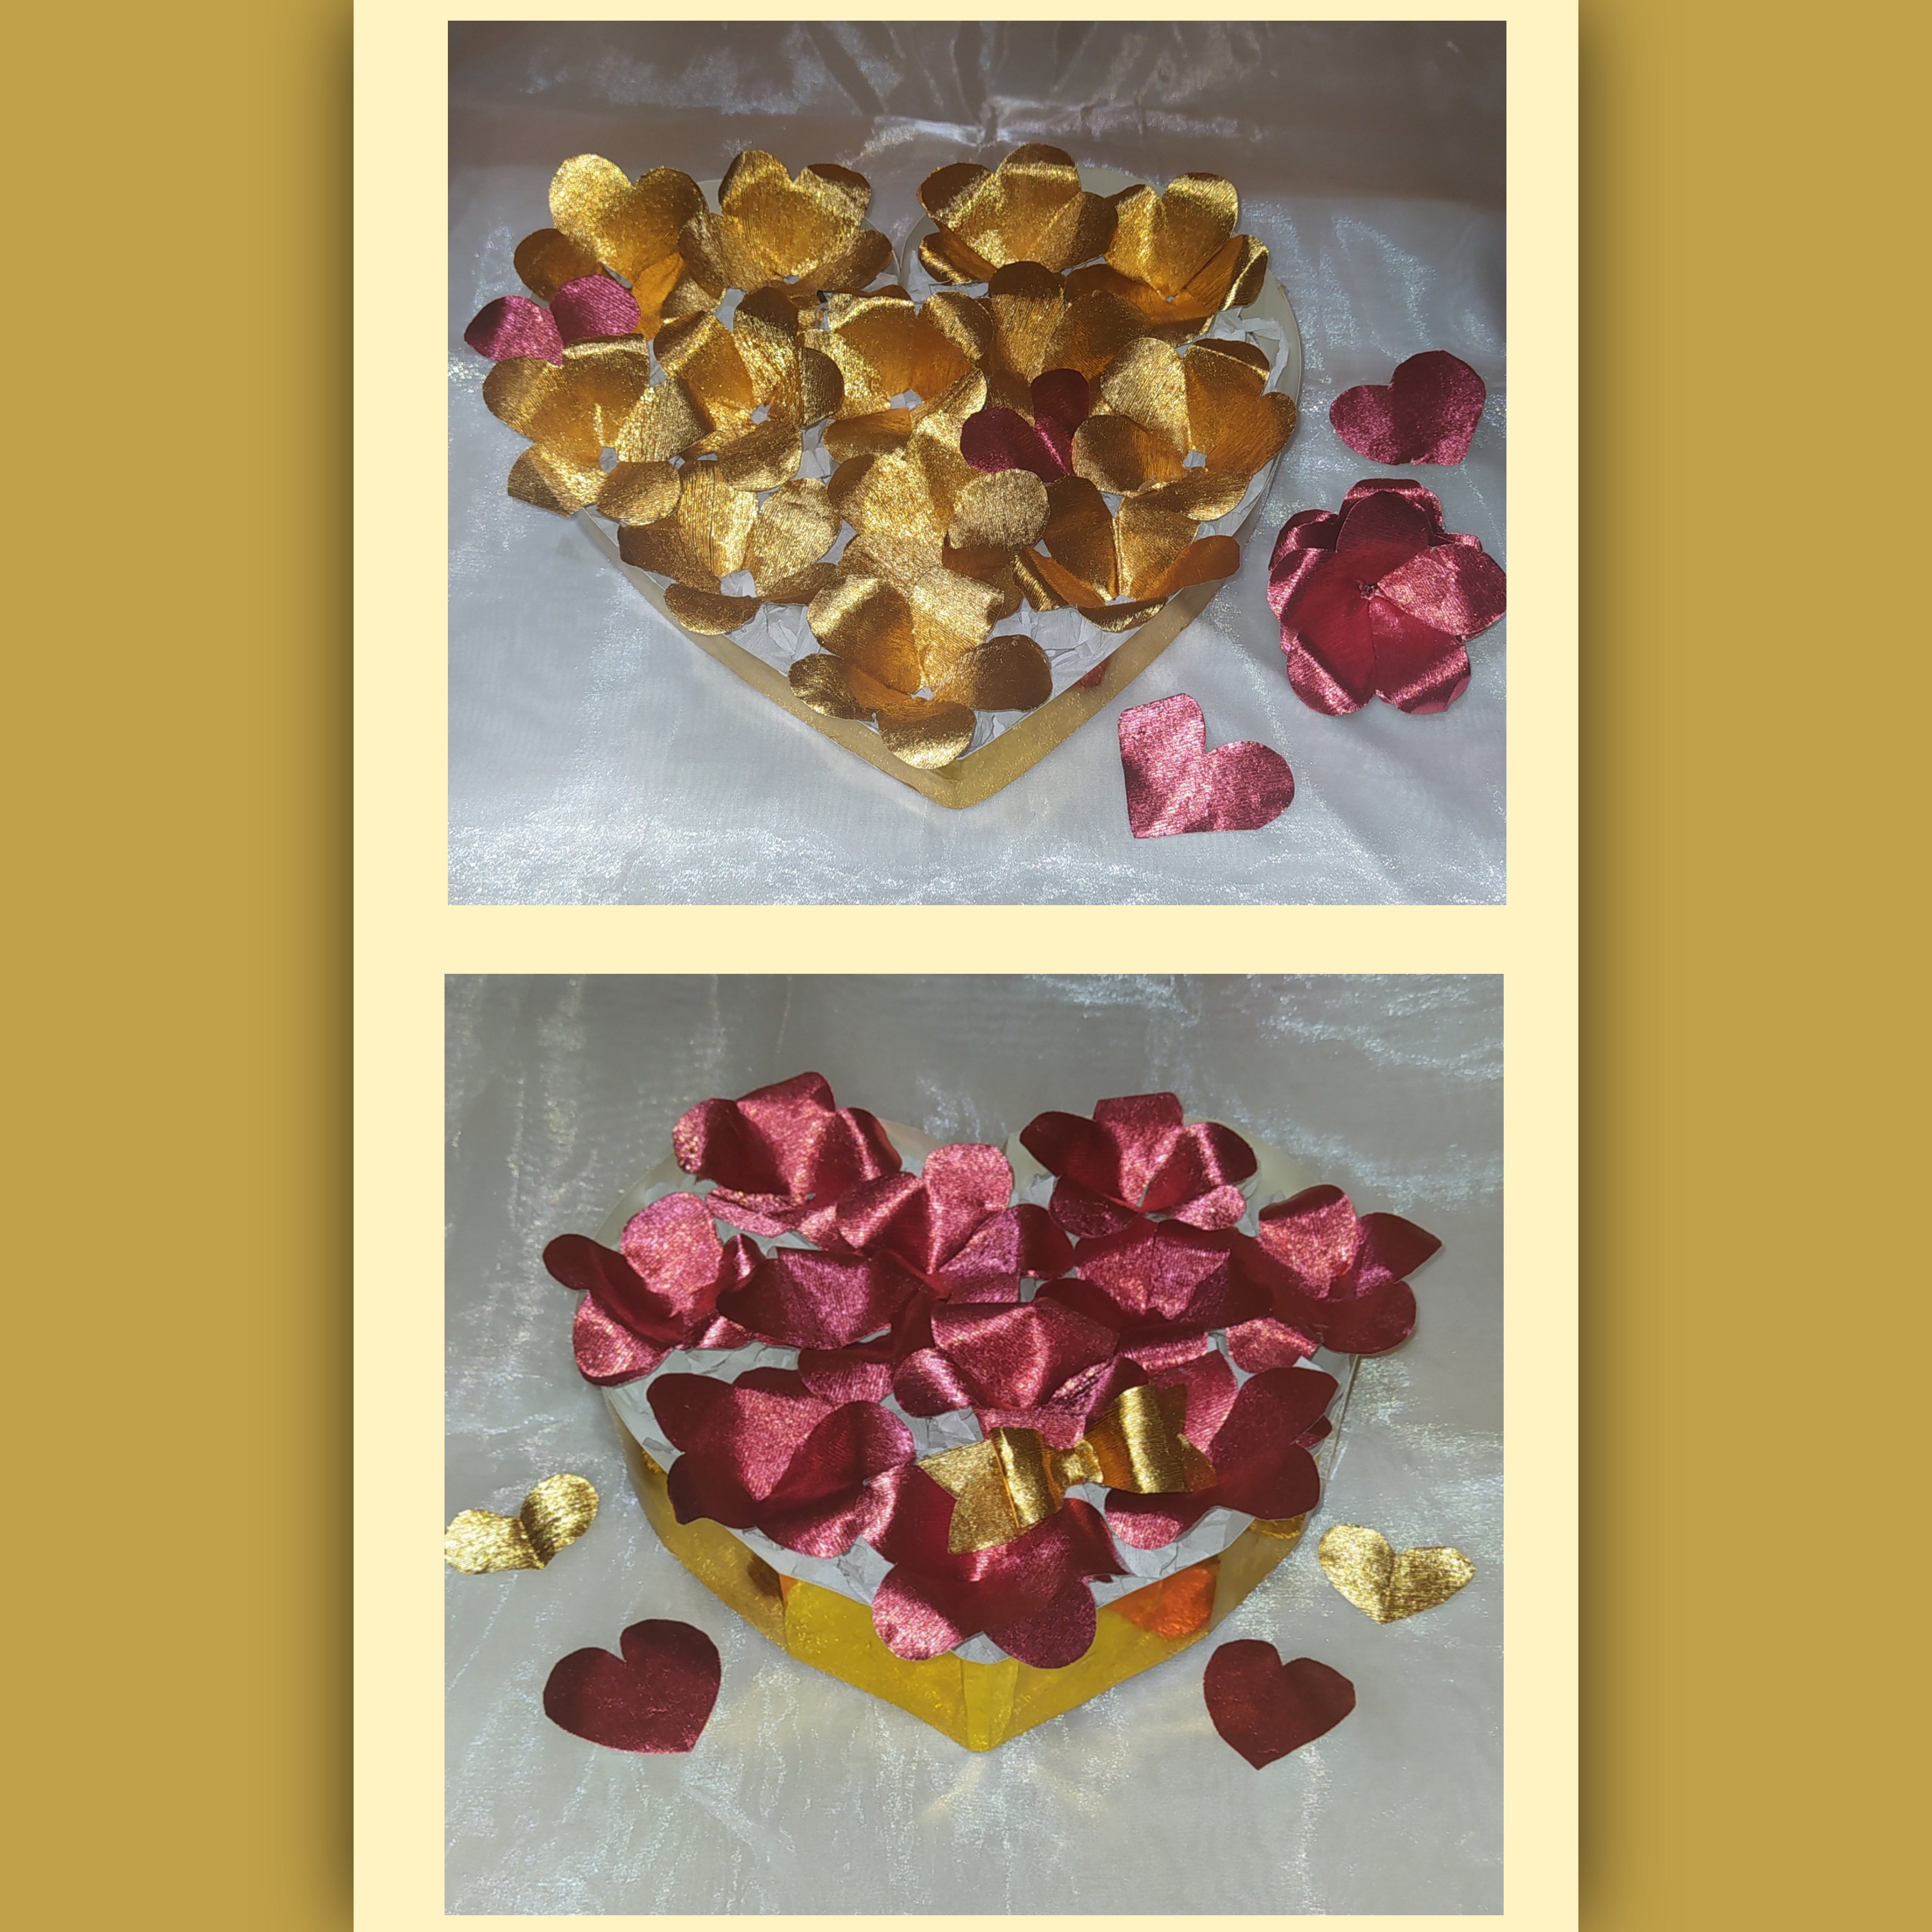
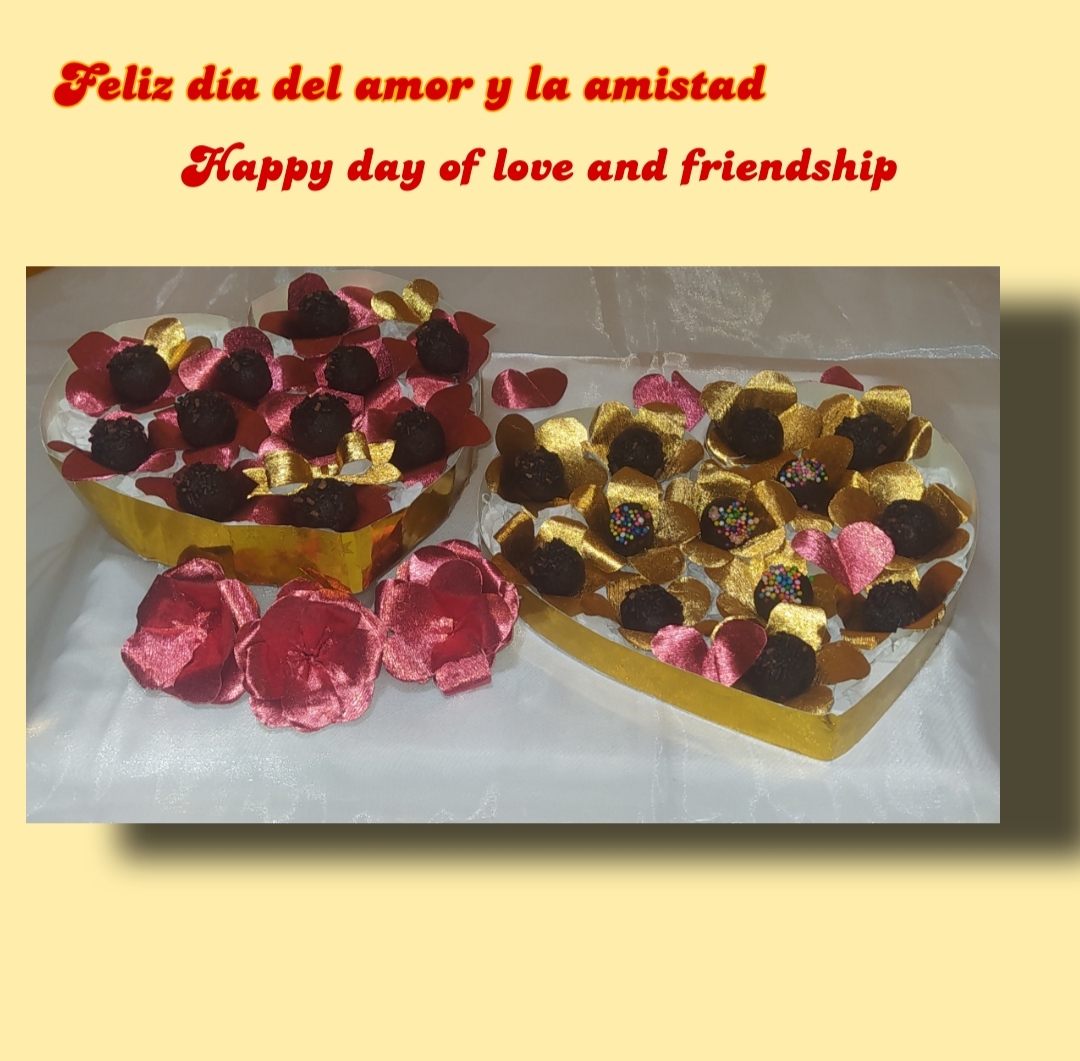
Y de esta forma tan linda quedó nuestra bombonera una forma muy bella para brindarle un presente a nuestros seres queridos y festejar el día del amor y la amistad.
And in this beautiful way was our bombonera a very beautiful way to give a present to our loved ones and celebrate the day of love and friendship.
Espero sea de su agrado y se animen a realizarlo, no se olviden de dejarme sus comentarios y de seguirme para que no se pierdan las cosas lindas que estaré subiendo
I hope you like it and are encouraged to do it, do not forget to leave me your comments and follow me so you do not miss the beautiful things that I will be uploading.
❤️Gracias por leer mi blog y haberme acompañado en esta mágica aventura.🤗
❤️Thank you for reading my blog and for joining me in this magical adventure🤗.
📝Todo el contenido es mio .
📸Fotos tomada teléfono redmi note 8
✨Éditor picsArt.
✨Traductor DeepL
📝All the content is mine.
📸Photos taken phone redmi note 8
✨Éditor picsArt.
✨Translator DeepL
The rewards earned on this comment will go directly to the person sharing the post on Twitter as long as they are registered with @poshtoken. Sign up at https://hiveposh.com.
Your content has been voted as a part of Encouragement program. Keep up the good work!
Use Ecency daily to boost your growth on platform!
Support Ecency
Vote for new Proposal
Delegate HP and earn more
Gracias por su apoyo es muy importante para mí para poder seguir creciendo