¡Saludos 👋 Queridos 💞 Amigos de #HiveDiy😘! // Greetings 👋 Dear 💞 Friends of #HiveDiy😘!
Hermoso 💕 Bolsito de Mariquita 🐞 para Niñas // Beautiful 💕 Ladybug Purse 🐞 for Girls.
Hola espero se encuentre muy bien, les deseo una felices Semana Santa. Estoy un poco triste ya que no he podido resolver el problema del Internet en mi casa 😔 y eso me tiene un poco desmotivada, me prestaron un chip Movistar para poder hacer esta publicación ya que el servicio que tengo no me cargan las fotos. Pero seguiré en diligencias para poder optar por una línea y tener internet en casa para así poder compartir con ustedes mis tutoriales.
Hello, I hope you are very well, I wish you a happy Easter. I'm a little sad because I have not been able to solve the problem of the Internet at home 😔 and that has me a little unmotivated, I borrowed a Movistar chip to make this publication because the service I have does not load the photos. But I will continue in diligences to be able to opt for a line and have internet at home so I can share with you my tutorials.

Hoy vengo a compartir con ustedes un tutorial de cómo hacer un Bolsito de Mariquita 🐞 cosido a mano el cual elaboré con mucho cariño 😍 para una sobrina que tienes 2 añitos, la mamá siempre andaba con el biberón en una bolsa jajajaja! Y yo le dije, le voy hacer un Bolsito a Laura para que lleve su biberón y como a ella le encanta un peluche que es una Mariquita 🐞 yo pensé le haré un bolso de Mariquita 🐞.
Today I come to share with you a tutorial on how to make a Ladybug Bag 🐞 hand sewn which I made with much love 😍 for a niece who is 2 years old, the mom always walked with the bottle in a bag hahaha! And I told her, I'm going to make a little bag for Laura to carry her bottle and as she loves a stuffed animal that is a ladybug 🐞 I thought I'll make her a ladybug bag 🐞.
Para comenzar con este tutorial les voy a dar los materiales que utilice.
To start with this tutorial I am going to give you the materials I used.
🐞 Materiales:🐞
- Tela de color Negra.
- Tela de color Roja.
- Tela de color Blanco.
- Cuero sintético Negro. (Para las antenas)
- Entretela blanco.
- Un cierre de color negro.
- Hilo de color blanco, negro y rojo.
- Aguja de Coser.
- Tijera.
- Papel blanco ( Para dibujar y sacar los patrones de la Mariquita 🐞).
- Alfileres.
- Regla.
- Compás.
🐞 Materials:🐞
- Black fabric.
- Red color fabric.
- White fabric.
- Black synthetic leather. (For the antennas)
- White interlining.
- Black zipper.
- White, black and red thread.
- Sewing needle.
- Scissors.
- White paper ( To draw and draw the patterns of the Ladybug 🐞).
- Pins.
- Ruler.
- Compass.
🐞 Elaboración:🐞 // 🐞Elaboration:🐞
Paso 1:
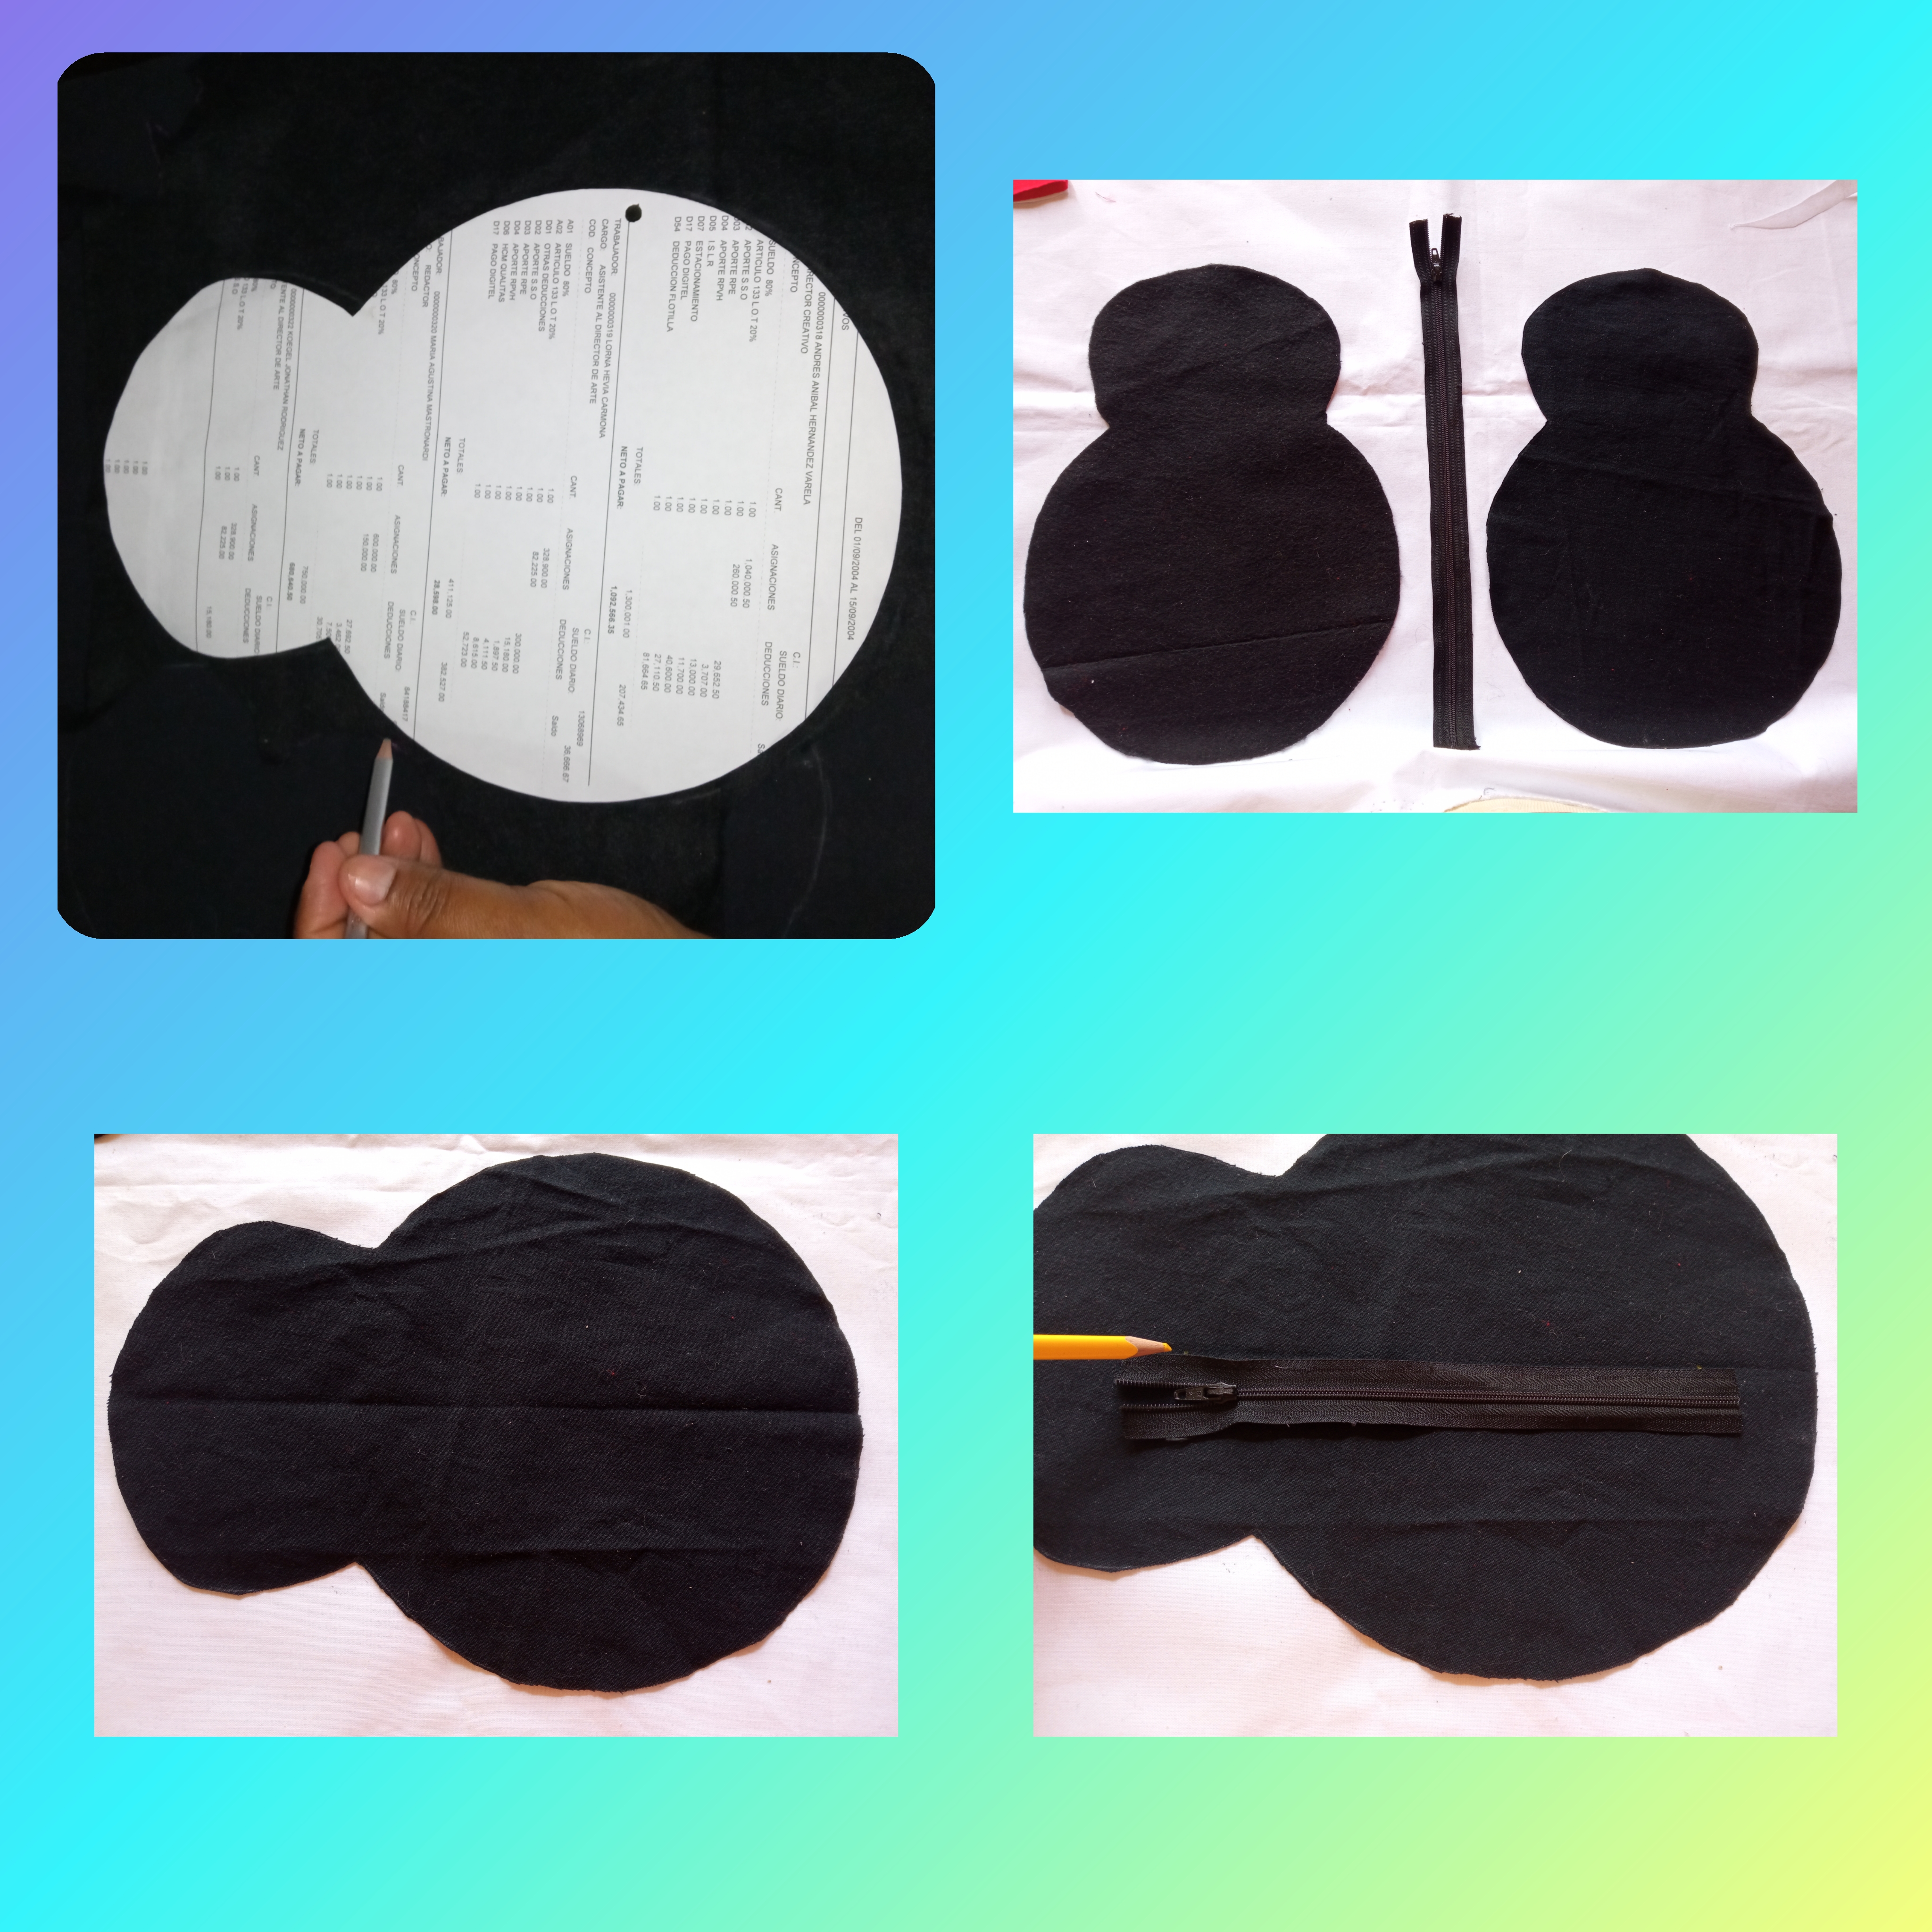
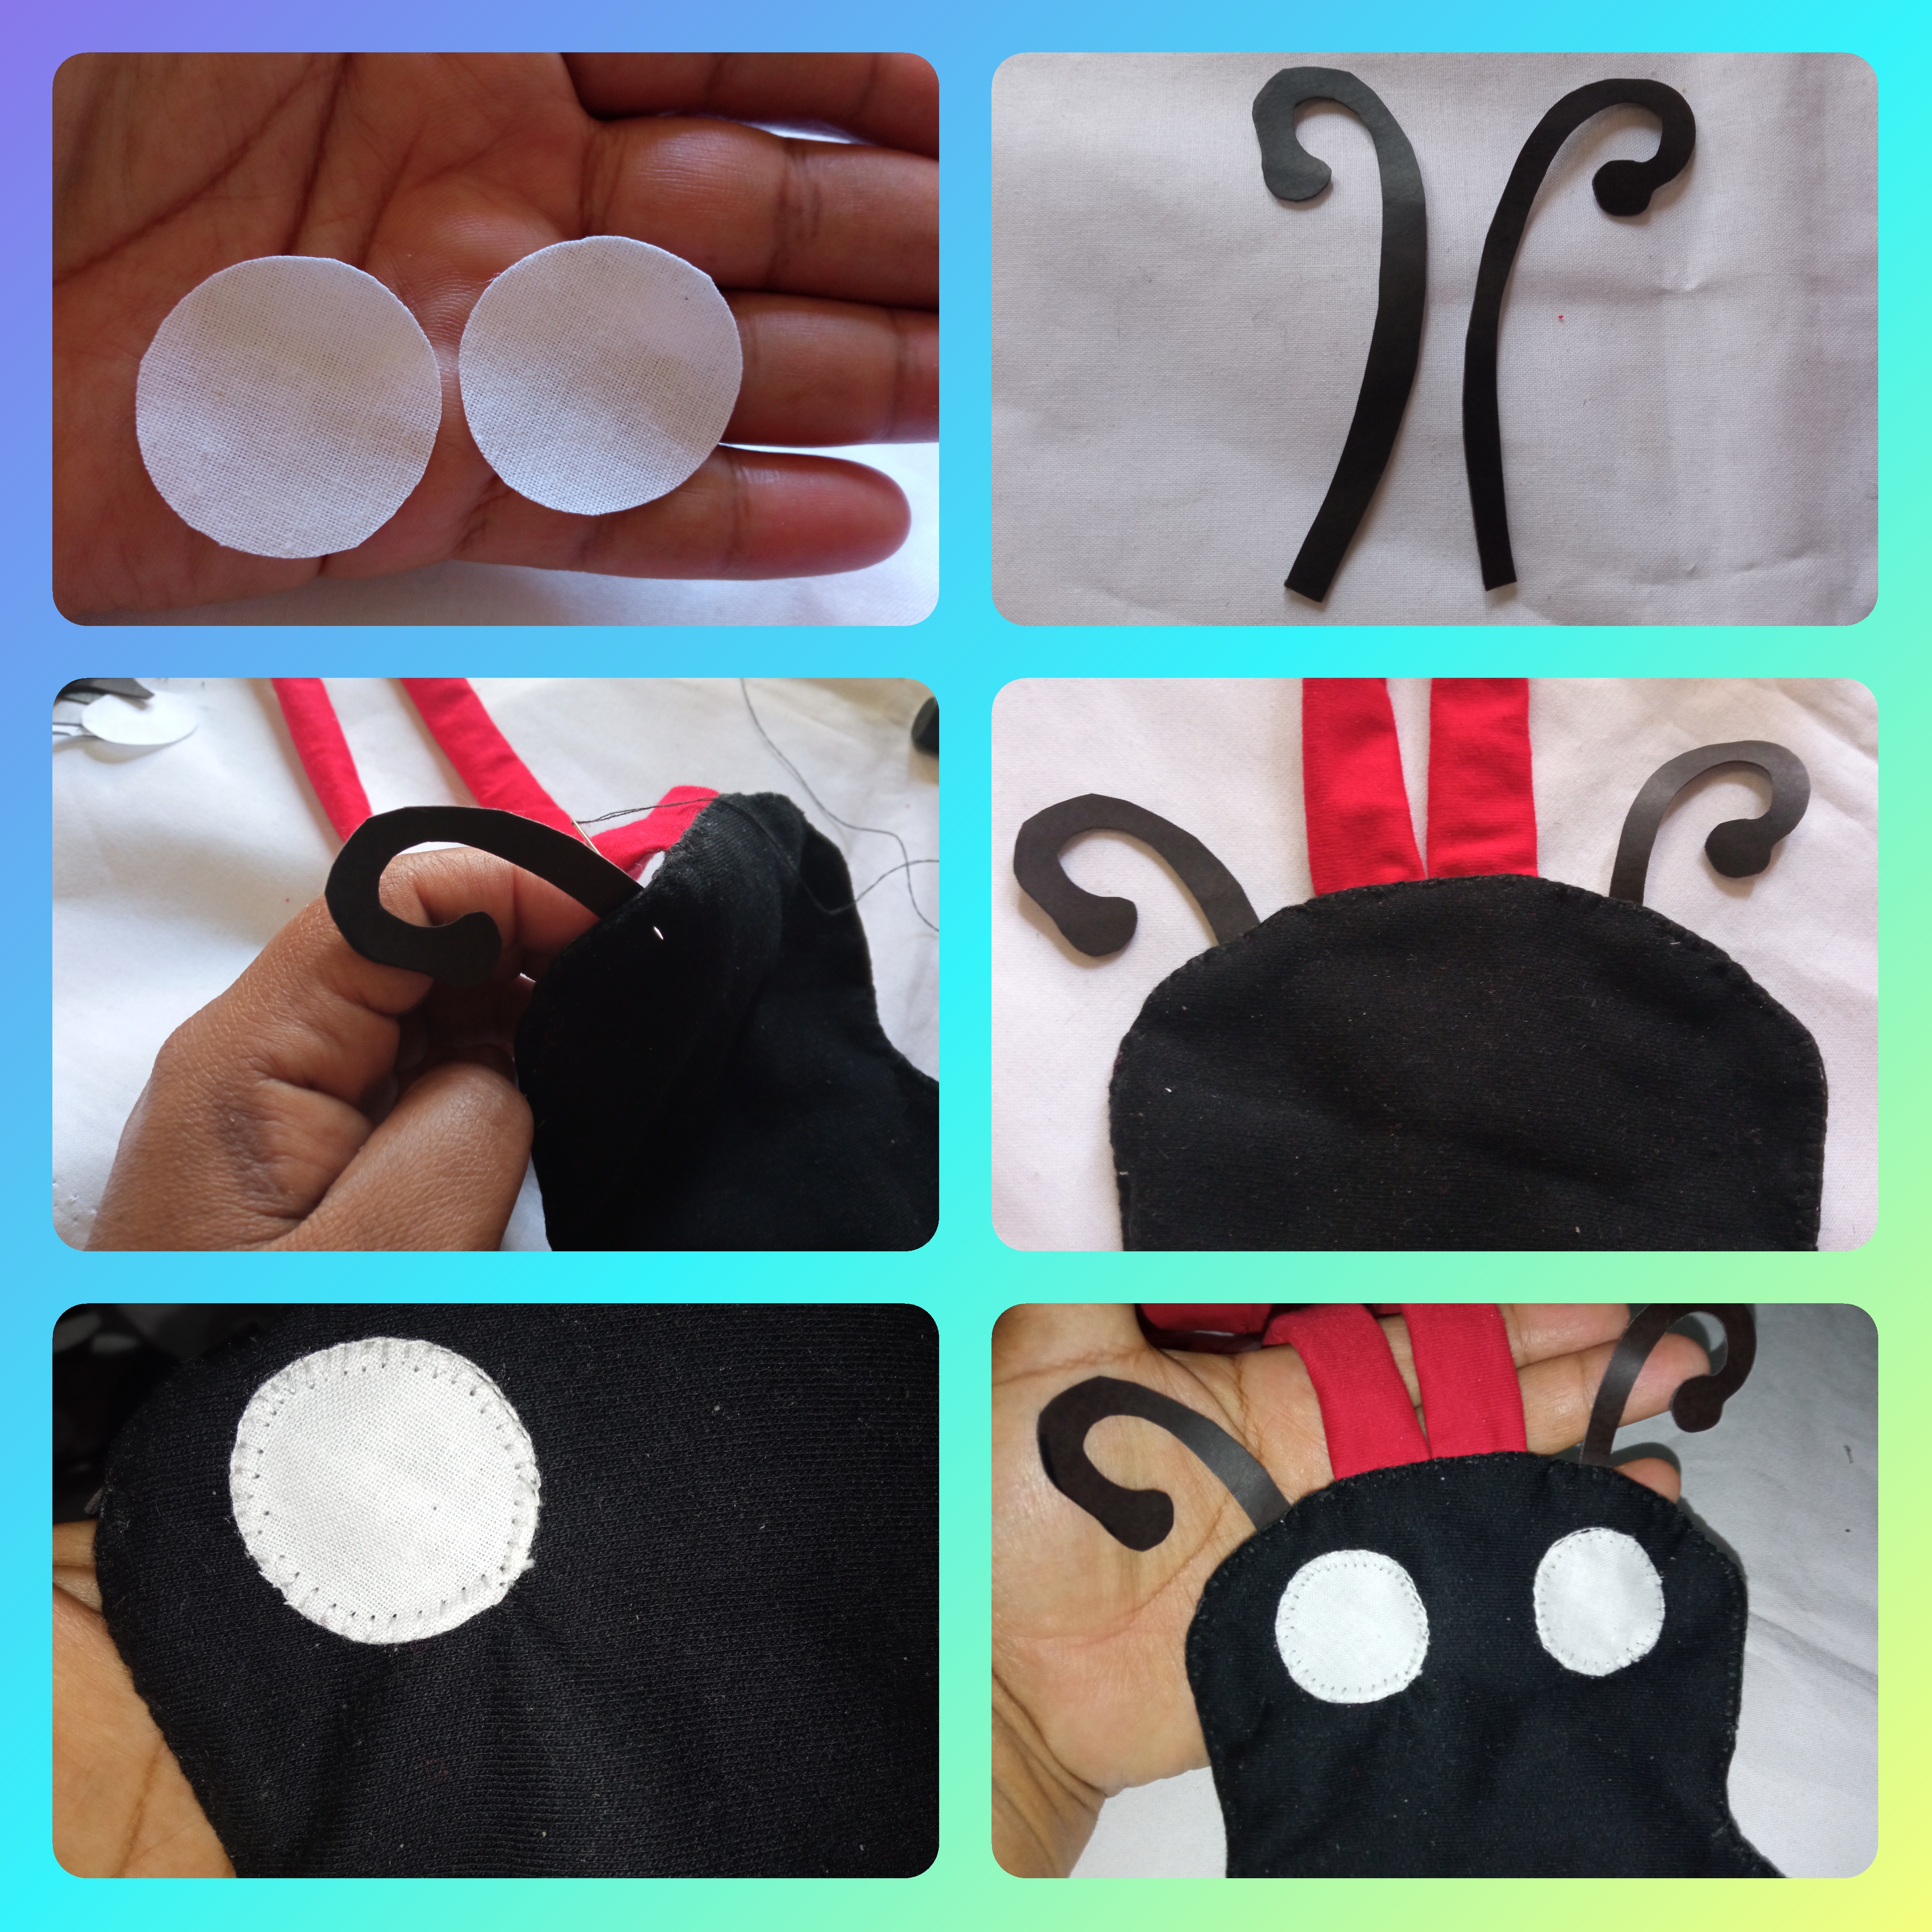
Para comenzar tome la hoja blanca y con ayuda de un compás hice dos círculos, con la regla trace las líneas y marque las medidas de mi Mariquita 🐞, la cabeza la dibuje a mano alzada para que me quedara como quería.
Step 1:
To start I took the white sheet and with the help of a compass I made two circles, with the ruler I drew the lines and marked the measurements of my Ladybug 🐞, I drew the head freehand so that it would look the way I wanted.


Paso 2:
Ya listo el dibujo de la Mariquita 🐞 comencé a sacar los patrones así cómo ven en la foto.
Step 2:
Once the Ladybug drawing was ready 🐞 I started to draw the patterns as you can see in the picture.

Paso 3:
Con ayuda del patrón cortamos dos piezas del cuerpo de la Mariquita 🐞 en tela negra, luego tomamos una pieza y marcamos el tamaño de cierre con ayuda de un lápiz.
Step 3:
With the help of the pattern we cut two pieces of the Ladybug's body 🐞 in black fabric, then we take one piece and mark the size of closure with the help of a pencil.
Paso 4:
Al tener el tamaño del cierre marcado cortamos con una tijera, luego hacemos dos piquetes pequeños en cada lado, doblamos y hacemos una costura provisional, con ayuda de alfileres colocamos el cierre y cosemos con hilo negro.
Step 4:
Once the size of the zipper is marked, we cut with scissors, then we make two small picks on each side, fold and make a provisional seam, with the help of pins we place the zipper and sew with black thread.

Paso 5:
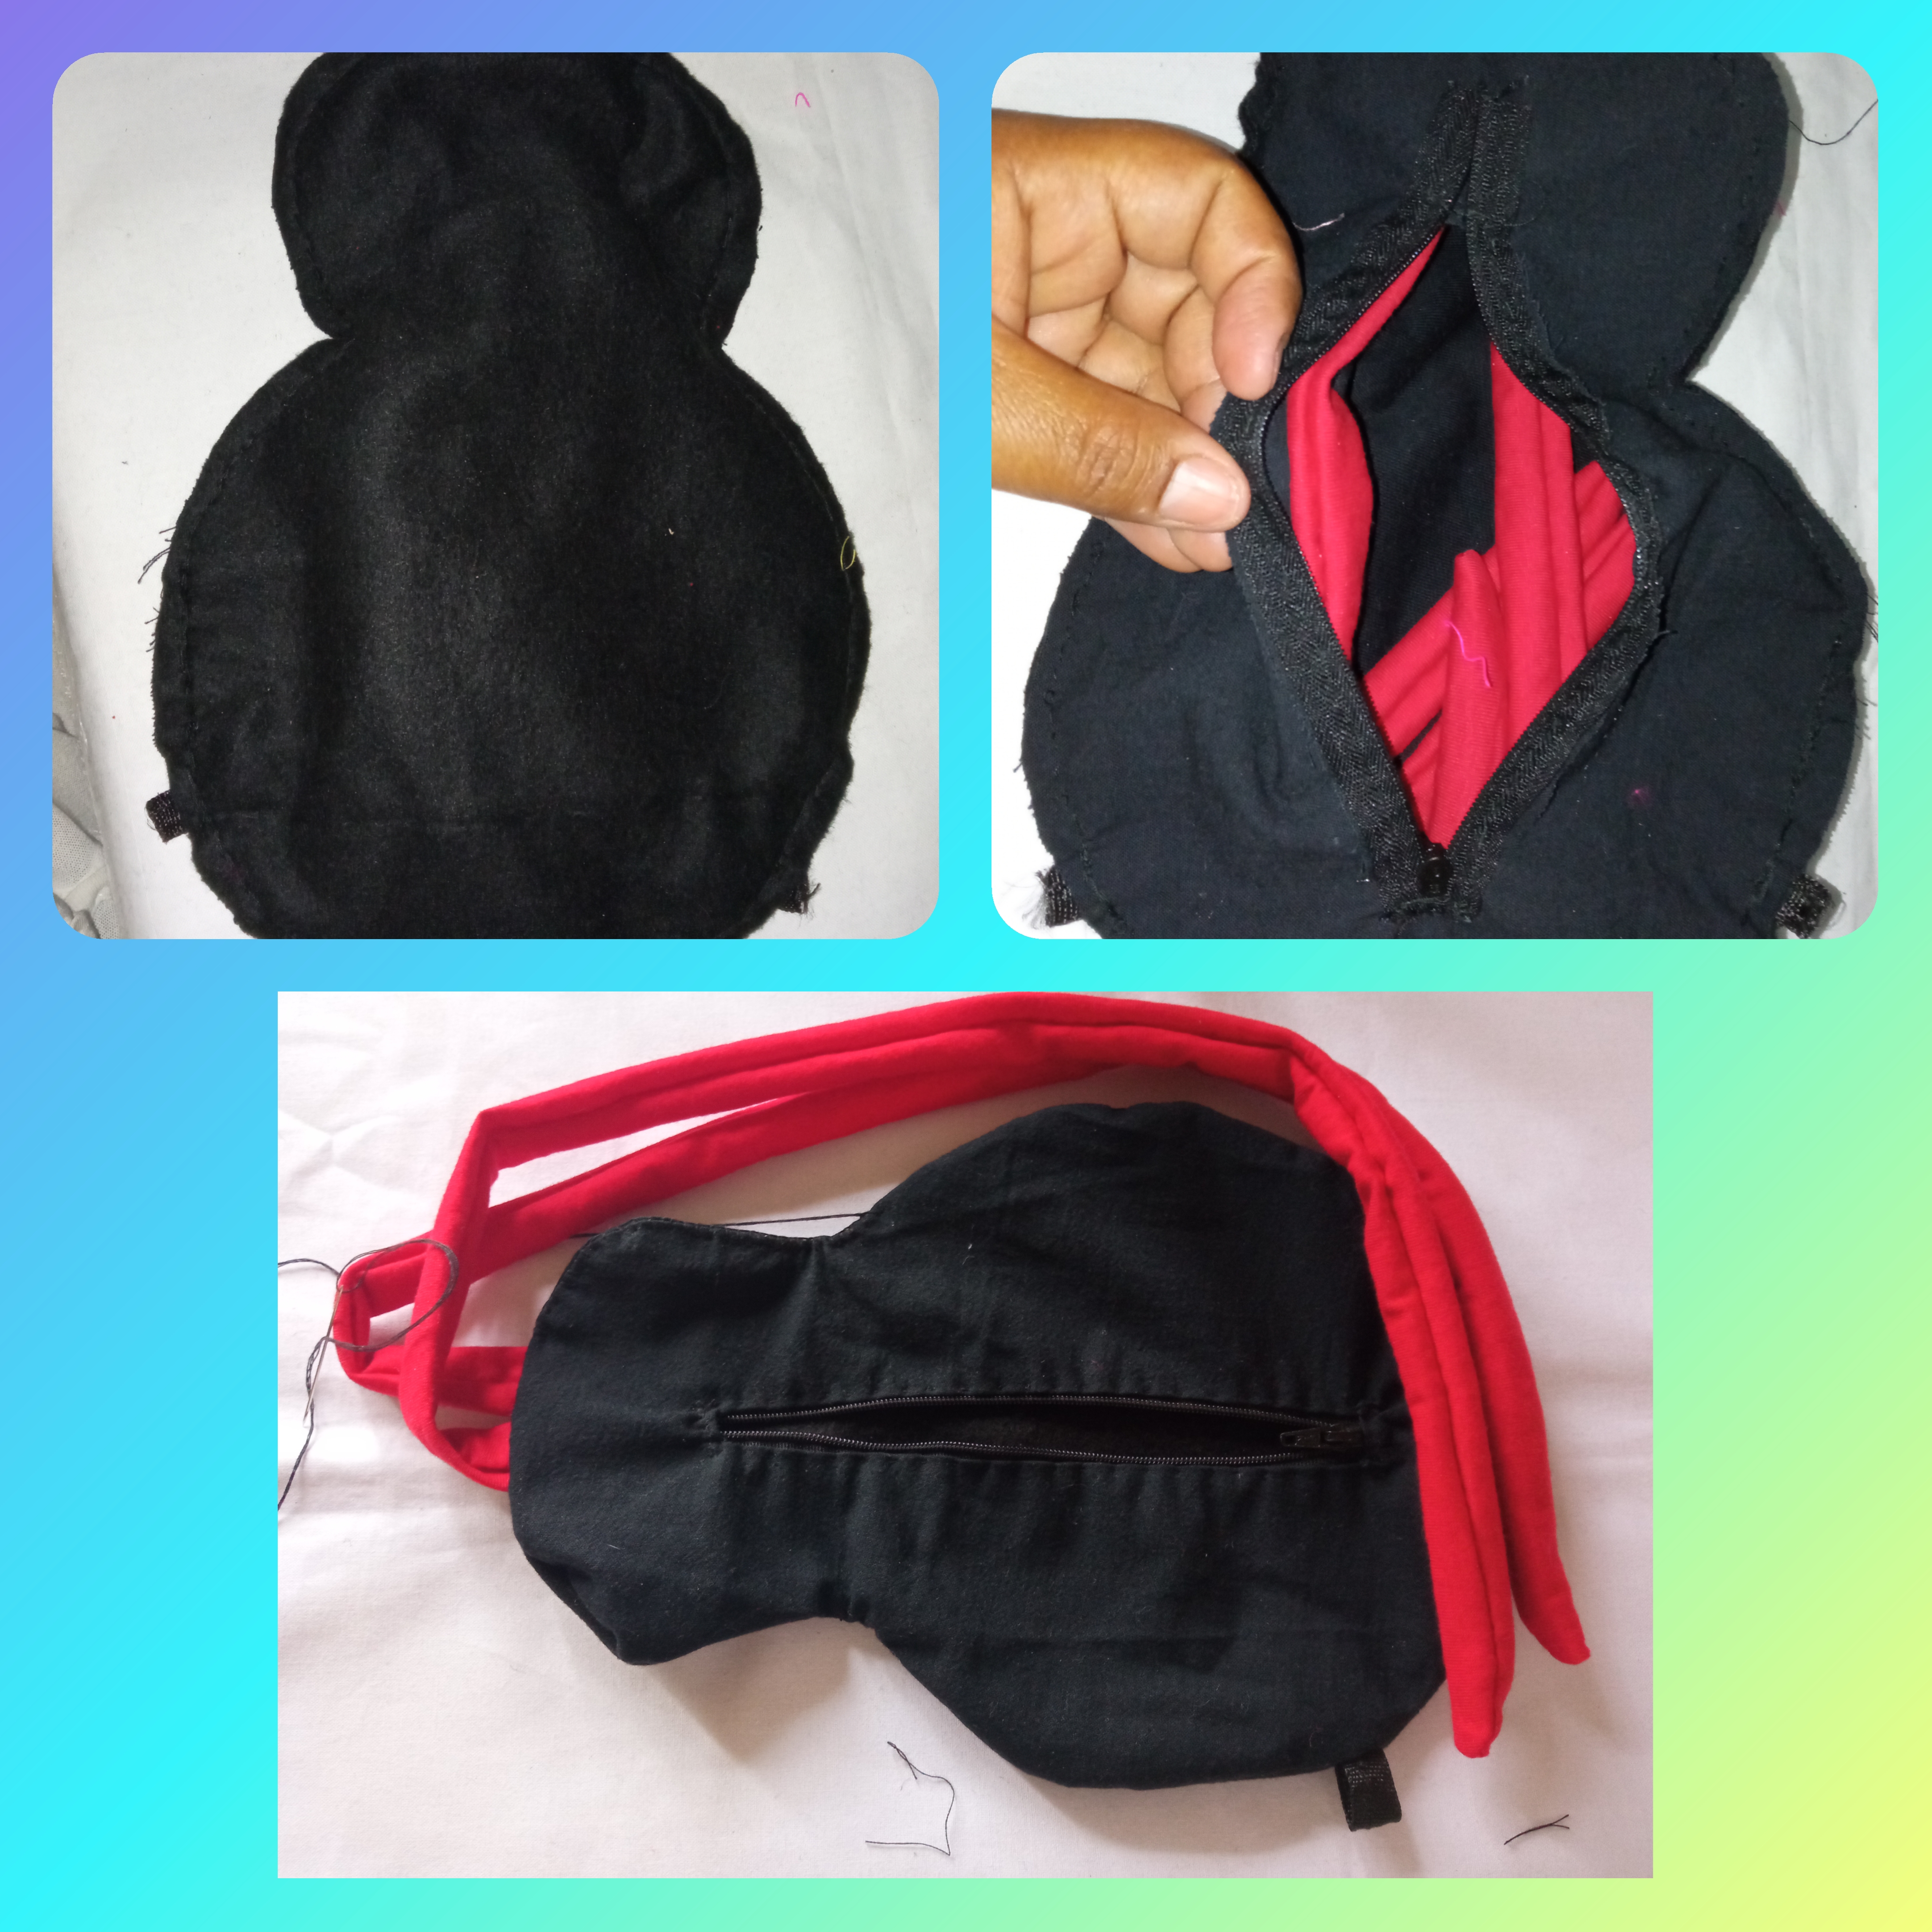
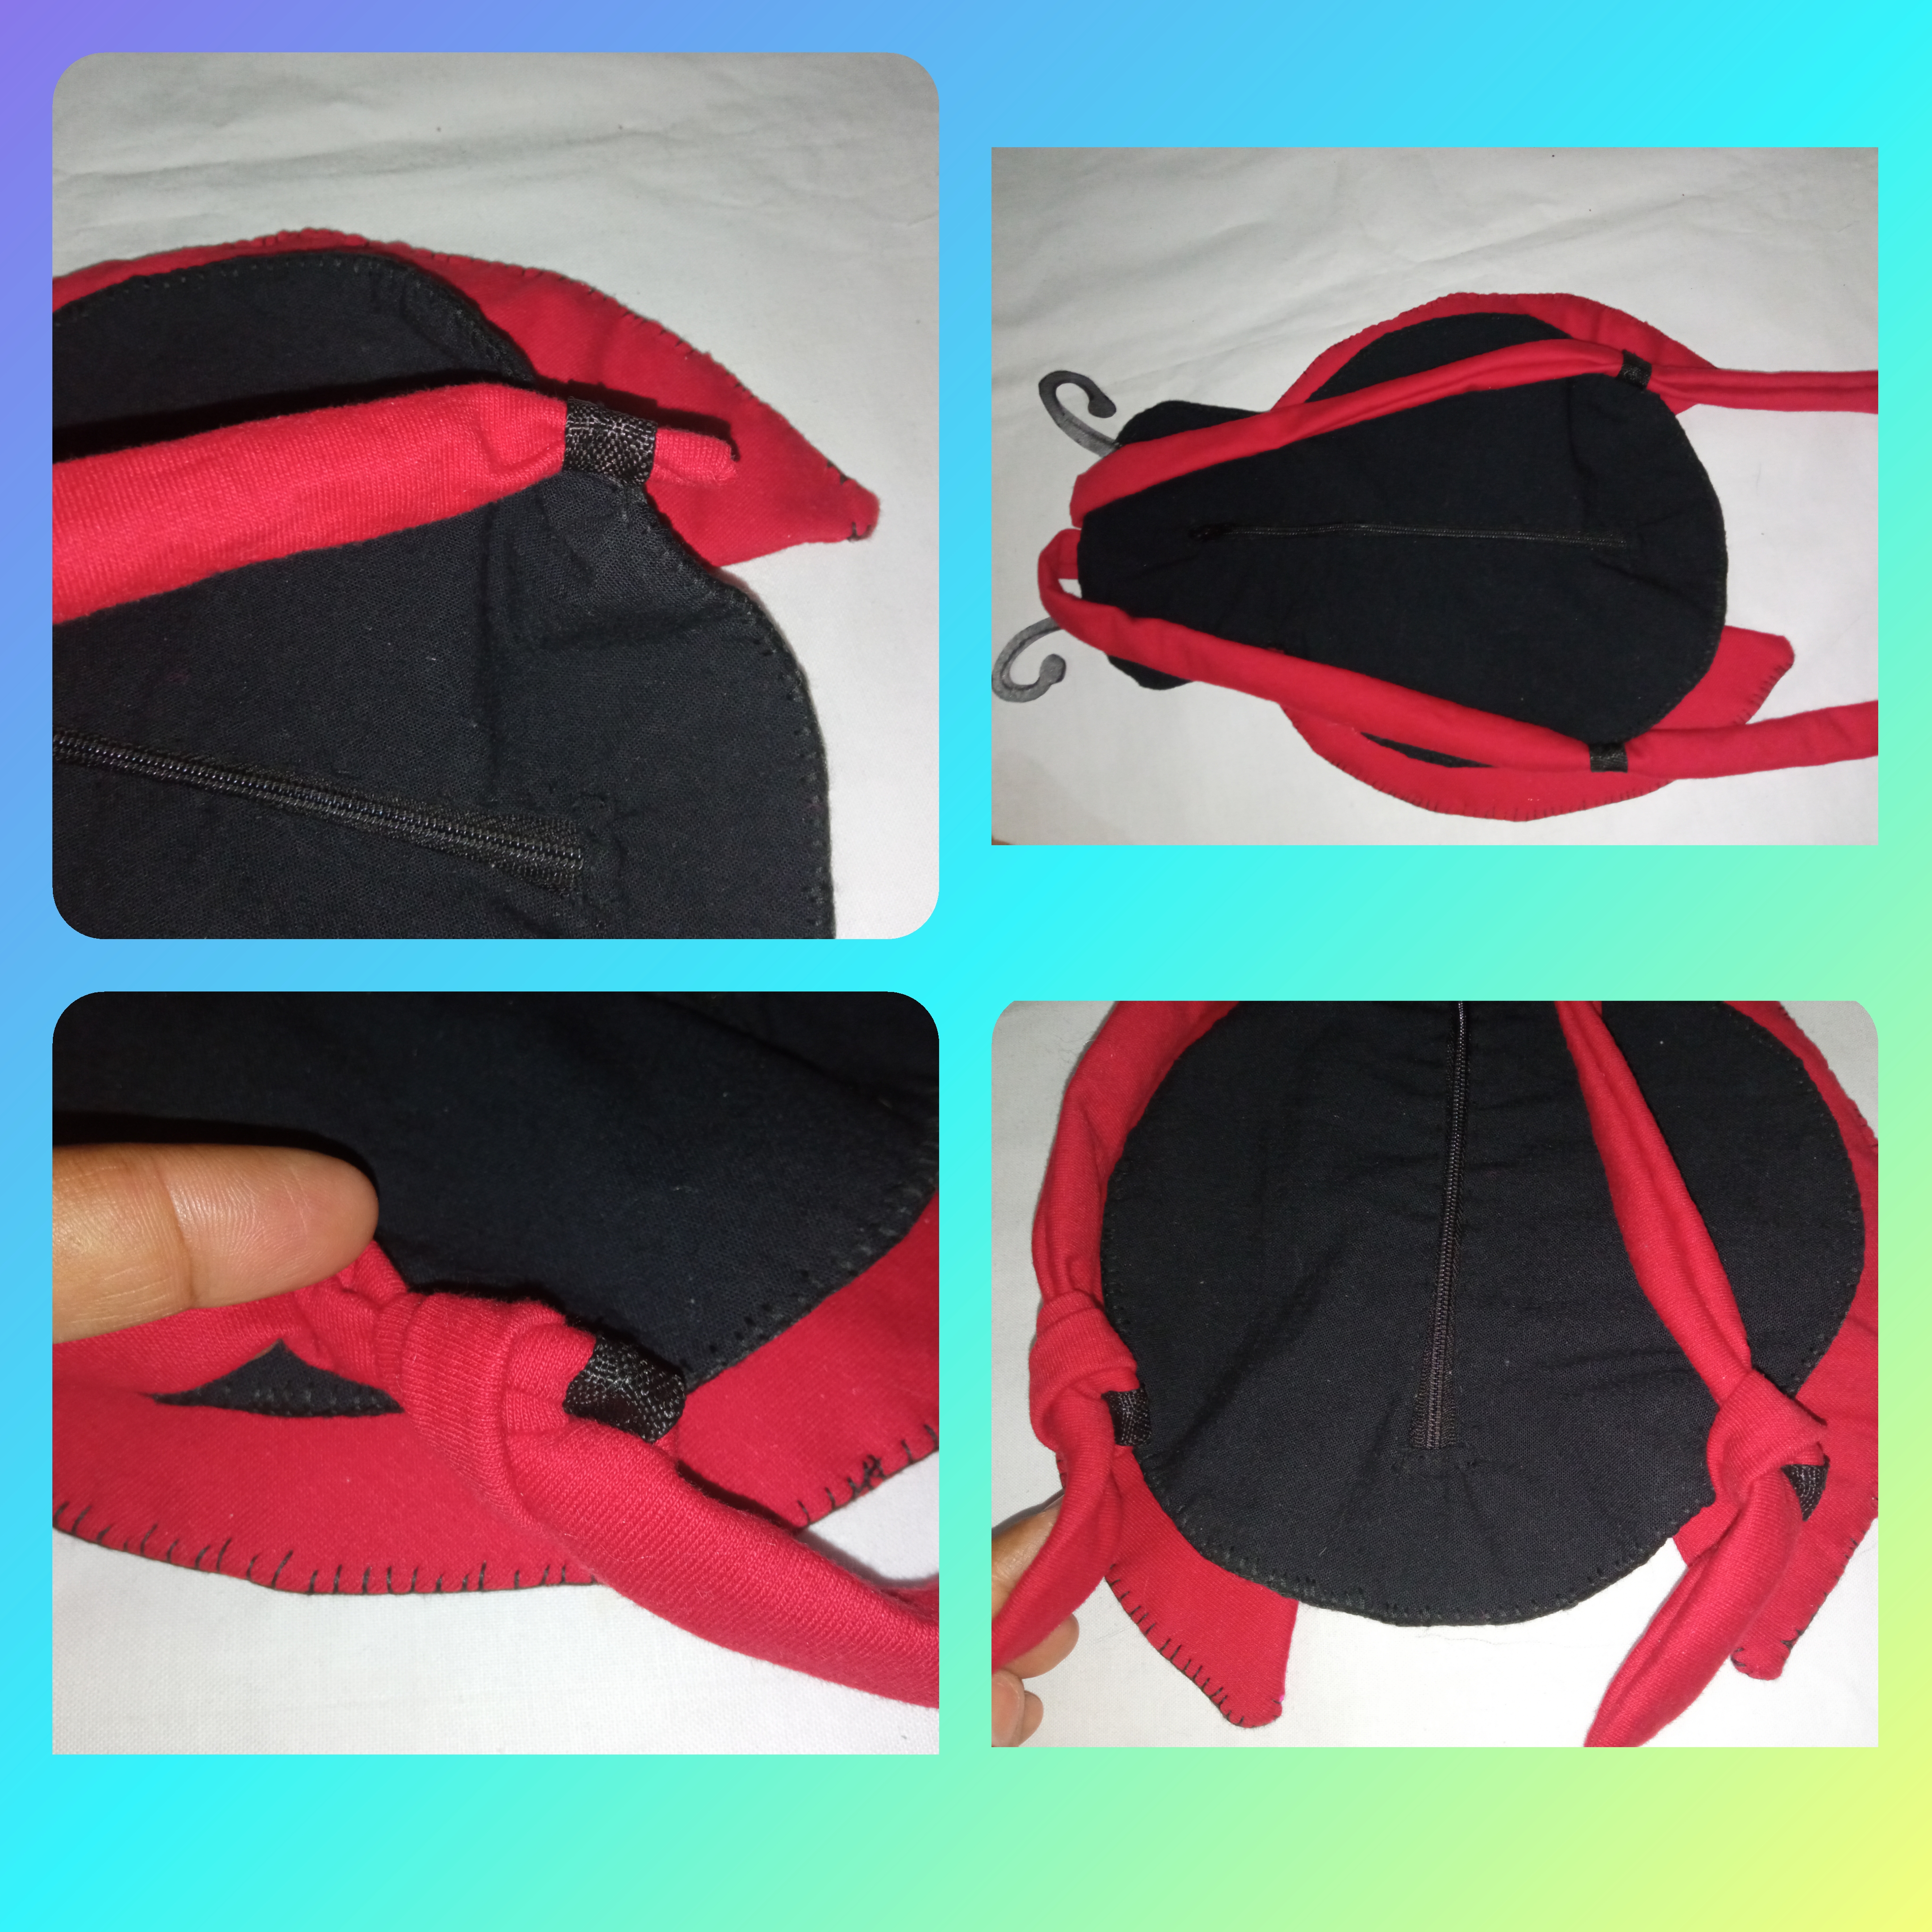
Después de coser nuestro cierre retiramos los alfileres y procedemos a corta dos tiras de 6 cm de largo y 2 cm de ancho y lo cosemos a los lados en la parte inferior del cuerpo de la Mariquita 🐞
Step 5:
After sewing our zipper we remove the pins and proceed to cut two strips of 6 cm long and 2 cm wide and sew it to the sides at the bottom of the Ladybug's body 🐞.

Paso 6:
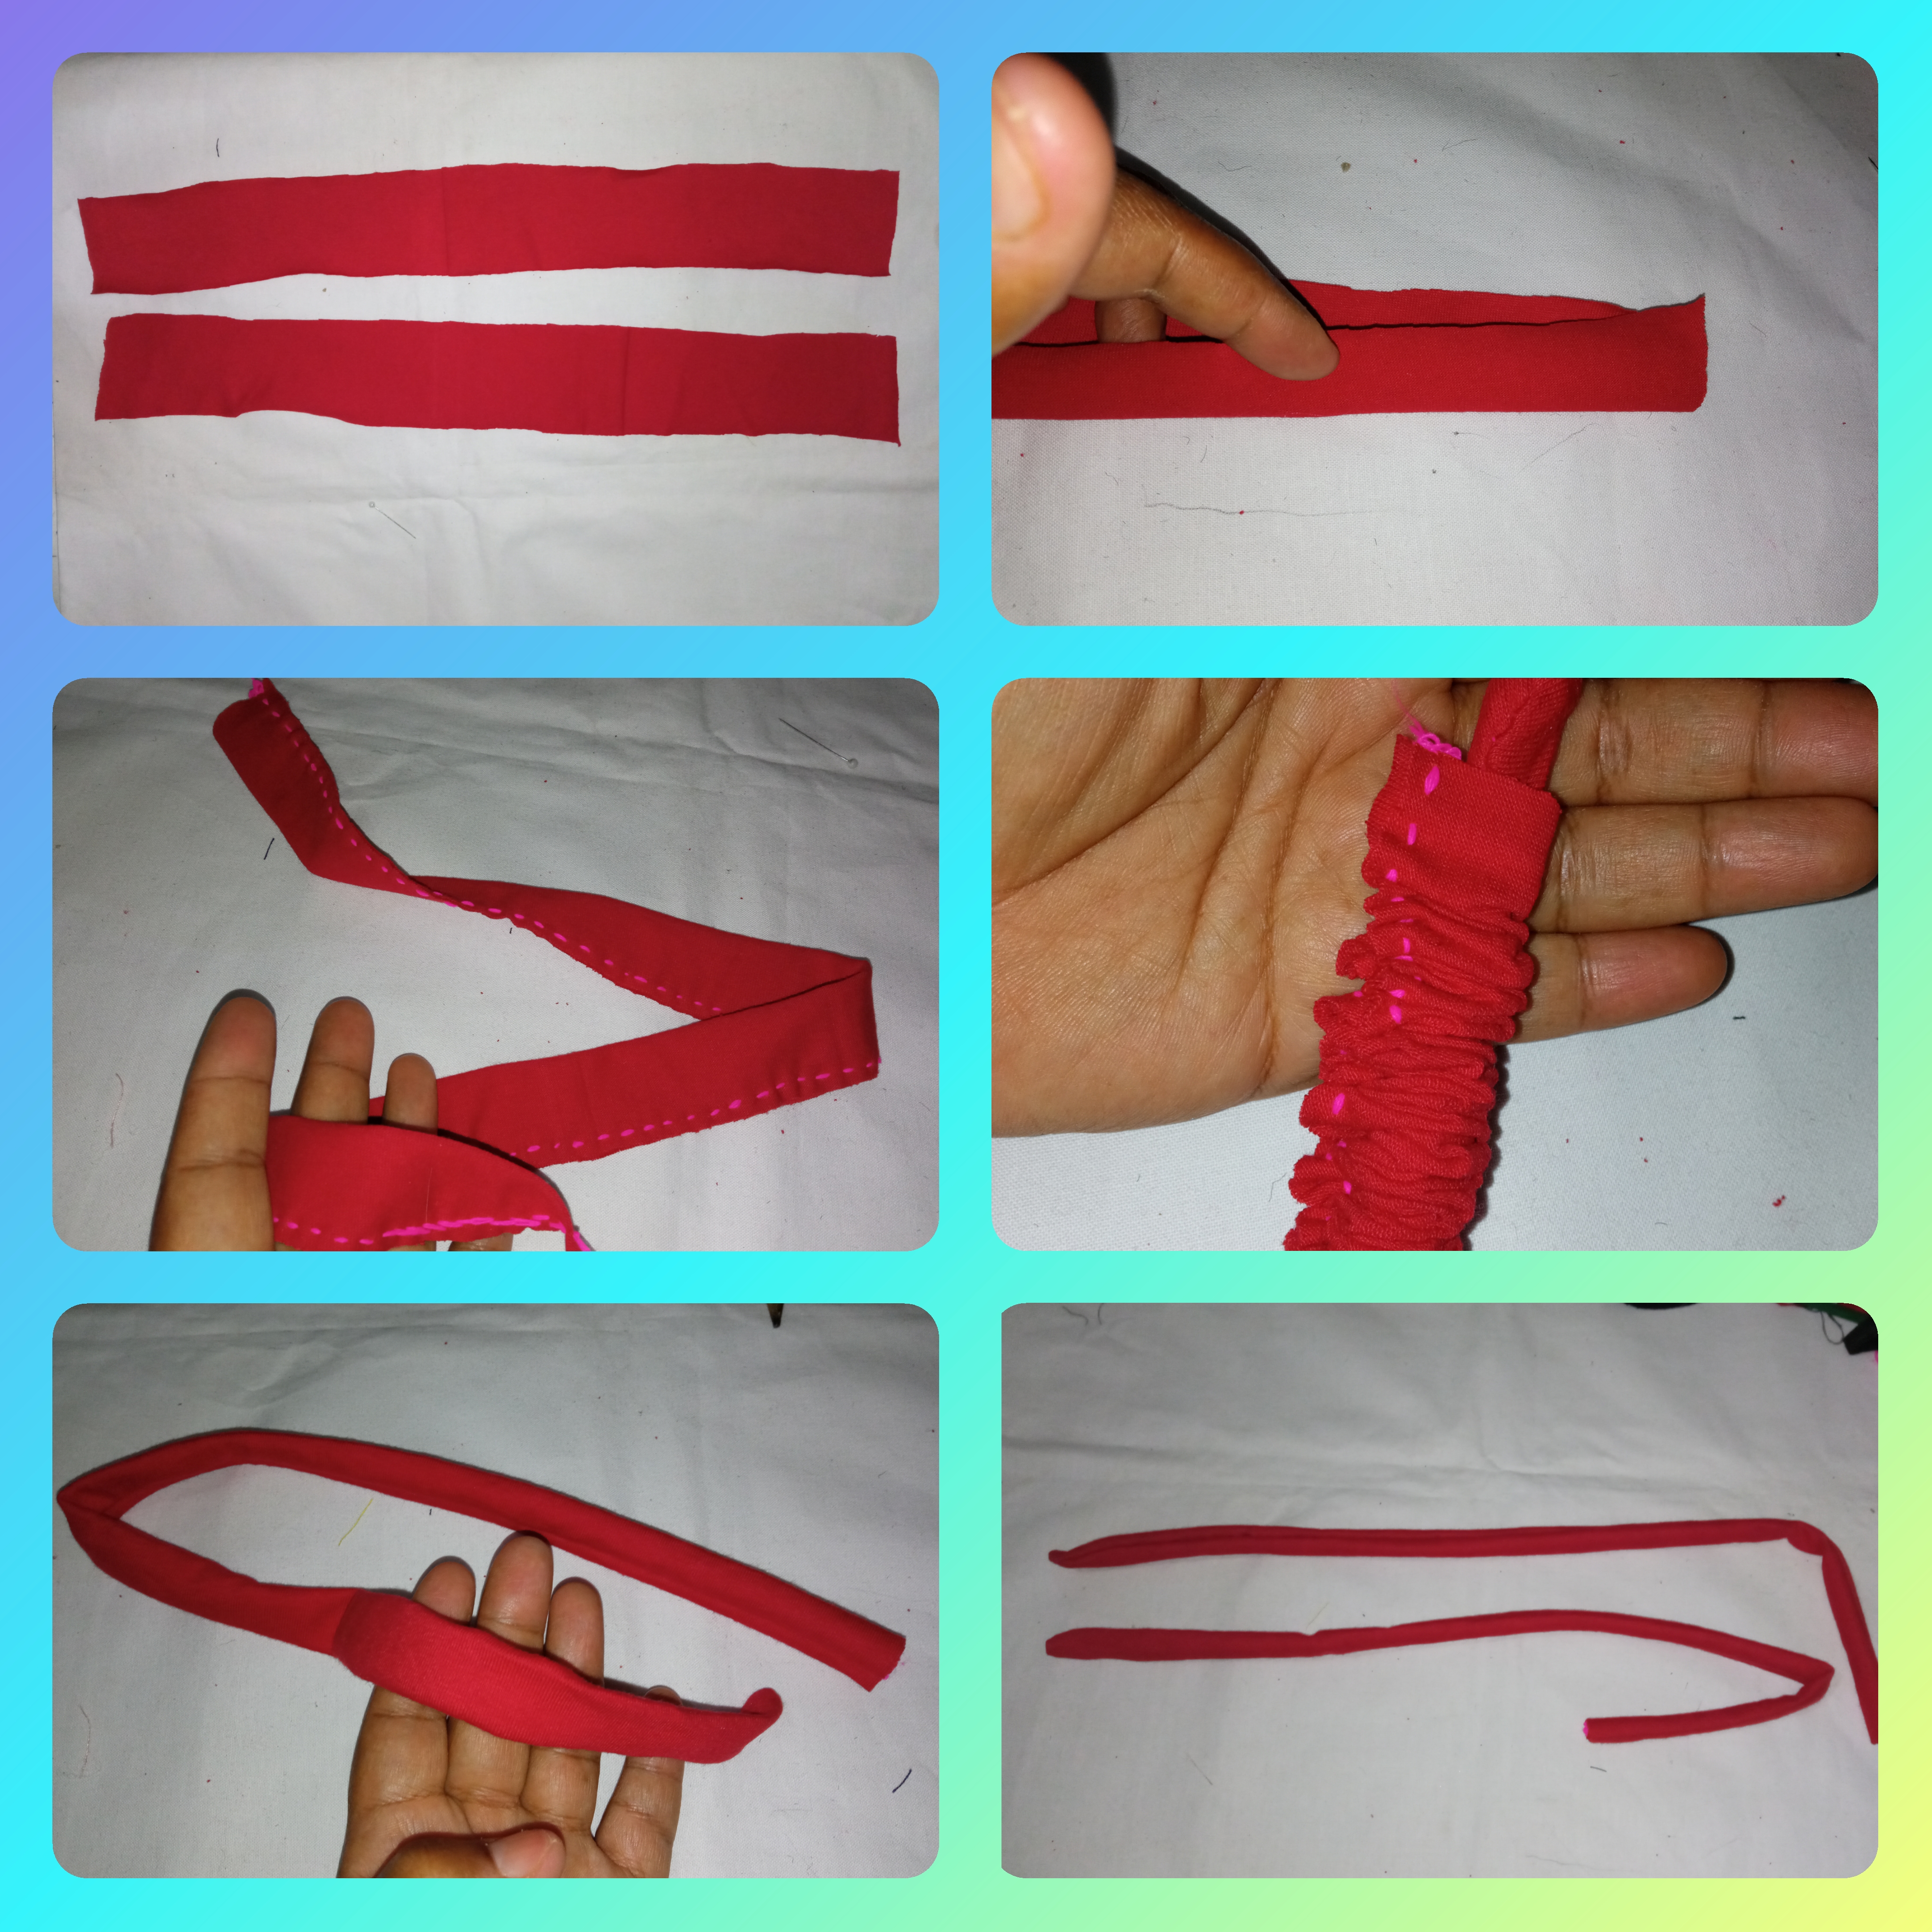
Para poder seguir este trabajo debemos hacer las tiras del bolsito, cortamos dos tiras de 40 cm de largo y 6 cm de ancho doblamos y cosemos de extremo a extremo al terminar volteamos con ayuda de un palito.
Step 6:
To continue this work we must make the strips of the bag, cut two strips of 40 cm long and 6 cm wide, fold and sew from end to end, at the end we turn over with the help of a stick.
Paso 7:
Ahora fijamos con alfileres las tiras en la parte superior del cuerpo de la Mariquita 🐞luego tomamos la otra pieza y la montamos encima y cosemos por todo alrededor.
Step 7:
Now we pin the strips to the top of the Ladybug's body 🐞then we take the other piece and mount it on top and sew all around.

Paso 8:
Al terminar de coser el cuerpo volteamos el cuerpo de la Mariquita 🐞 por la abertura del cierre quedando como pueden ver en la imagen.
Step 8:
When we finish sewing the body, we flip the body of the Ladybug 🐞 through the opening of the zipper, as you can see in the image.
Paso 9:
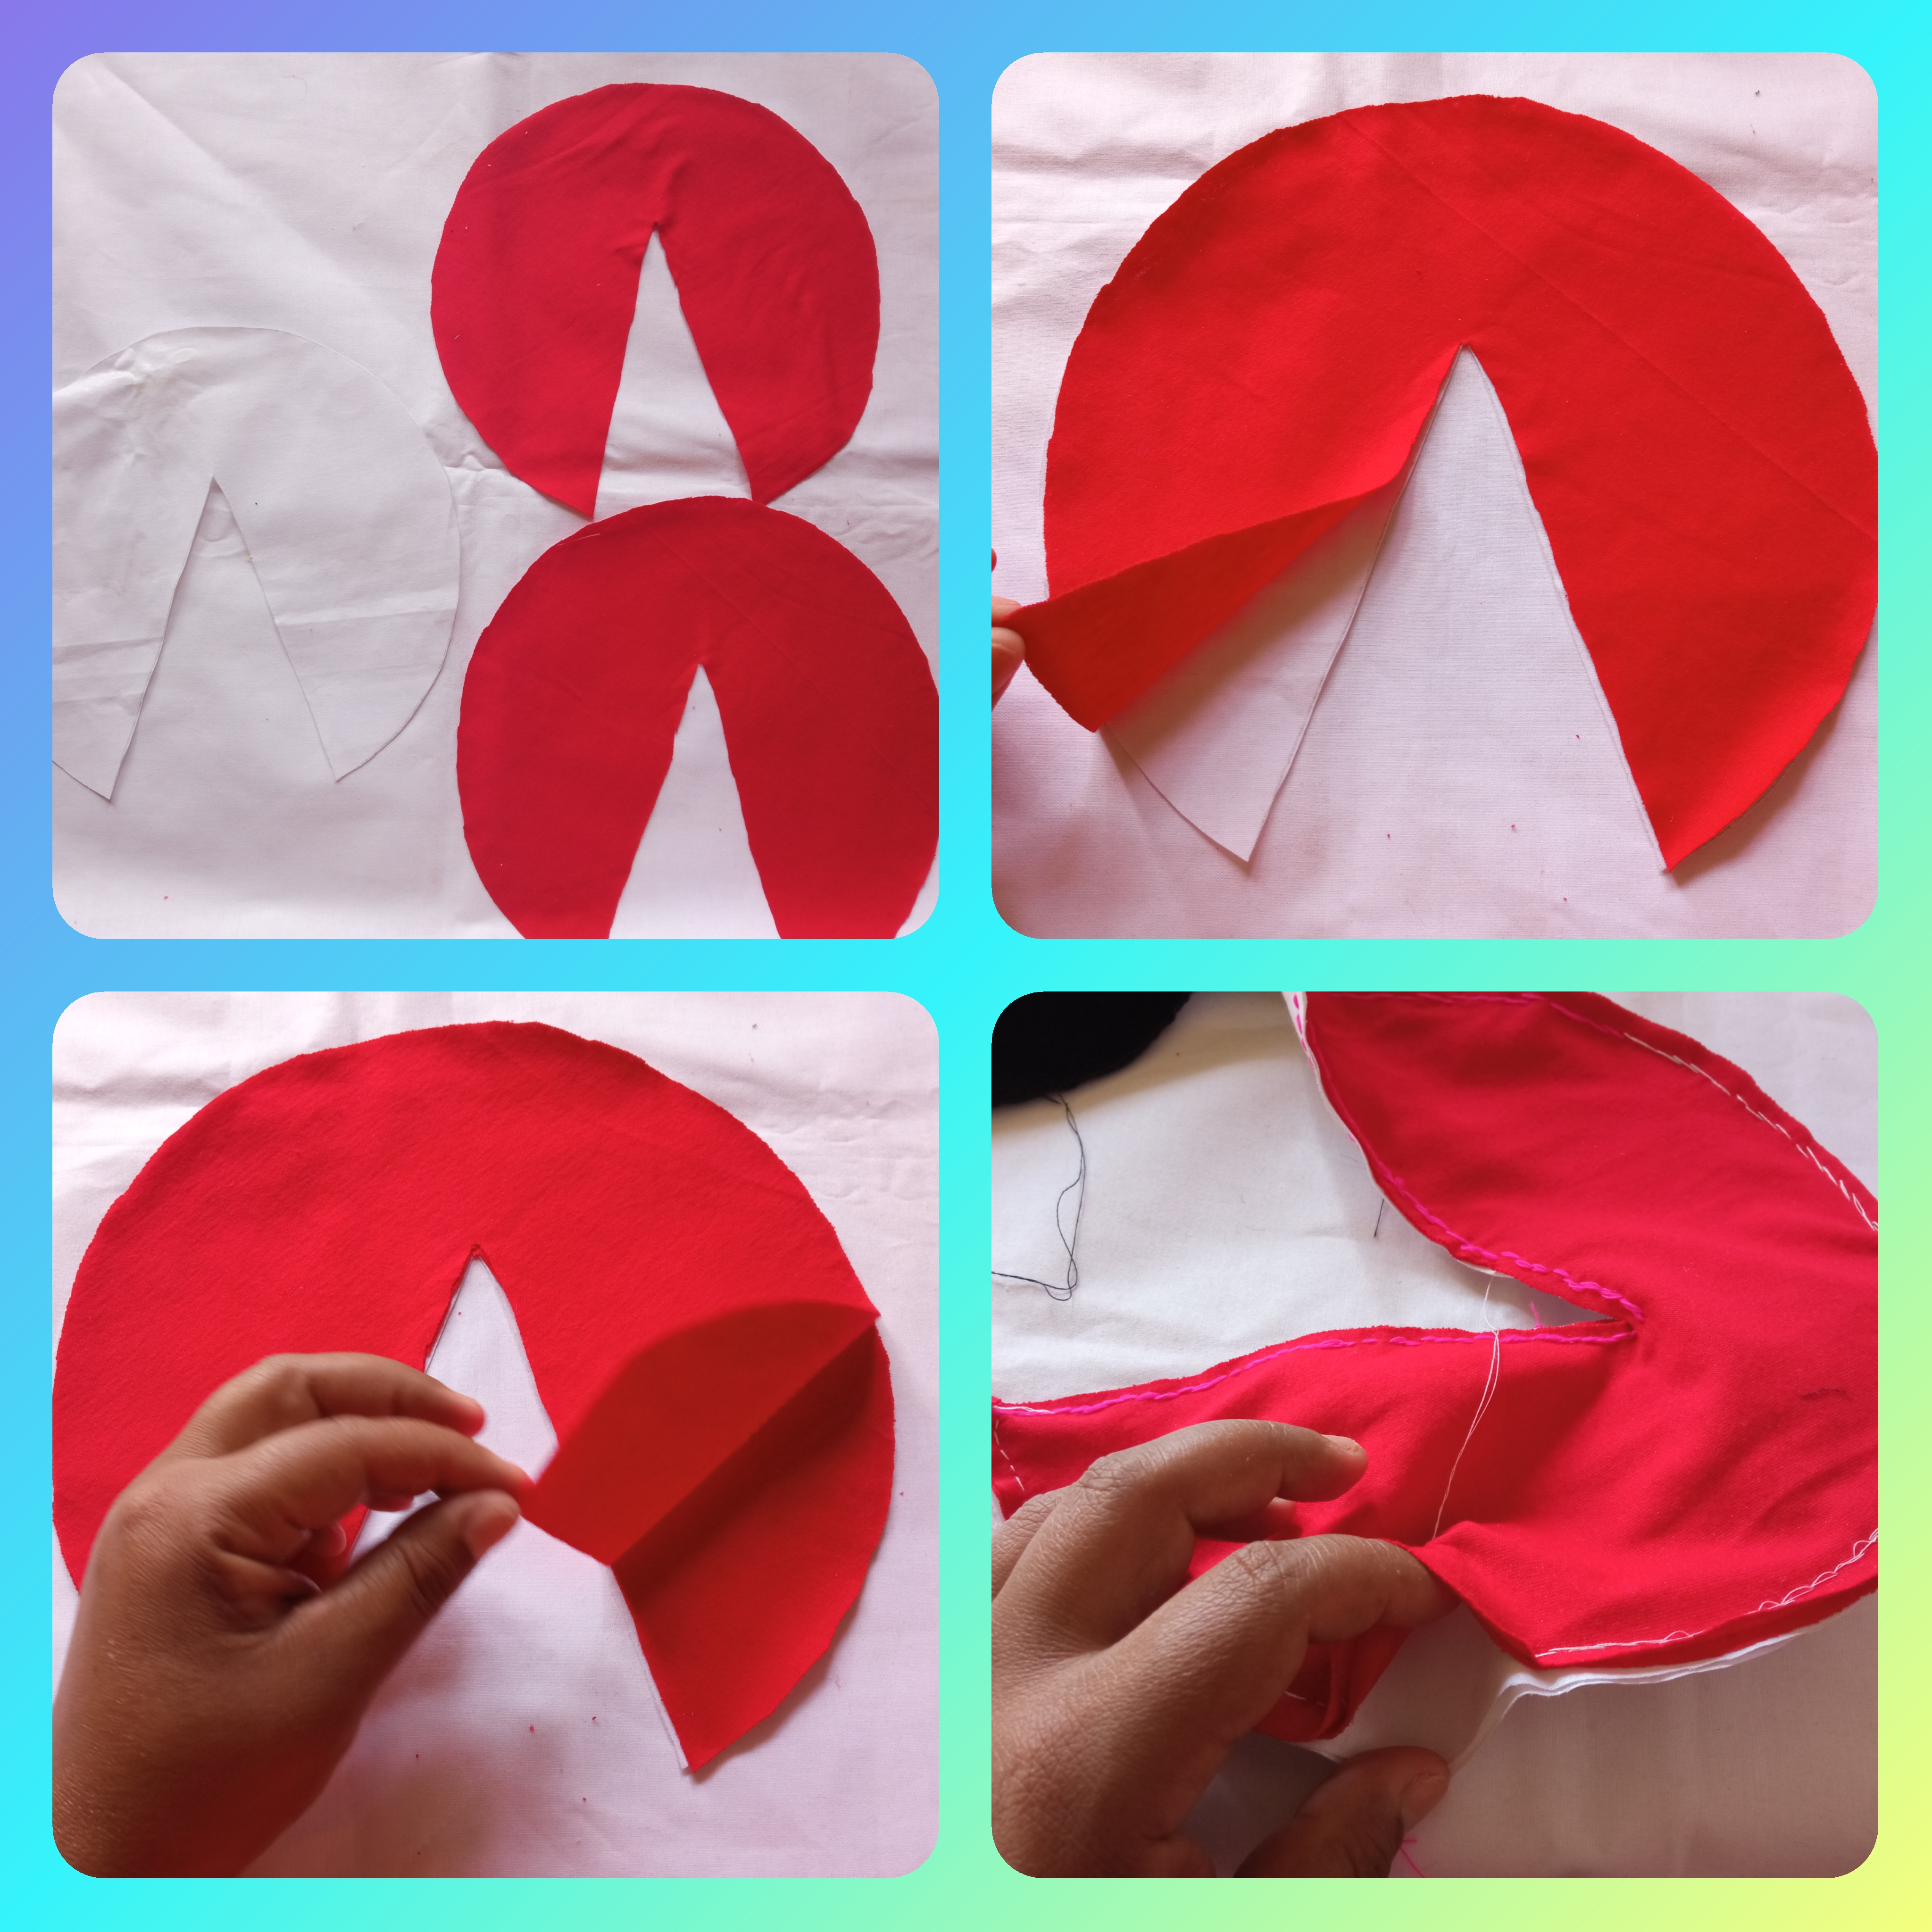
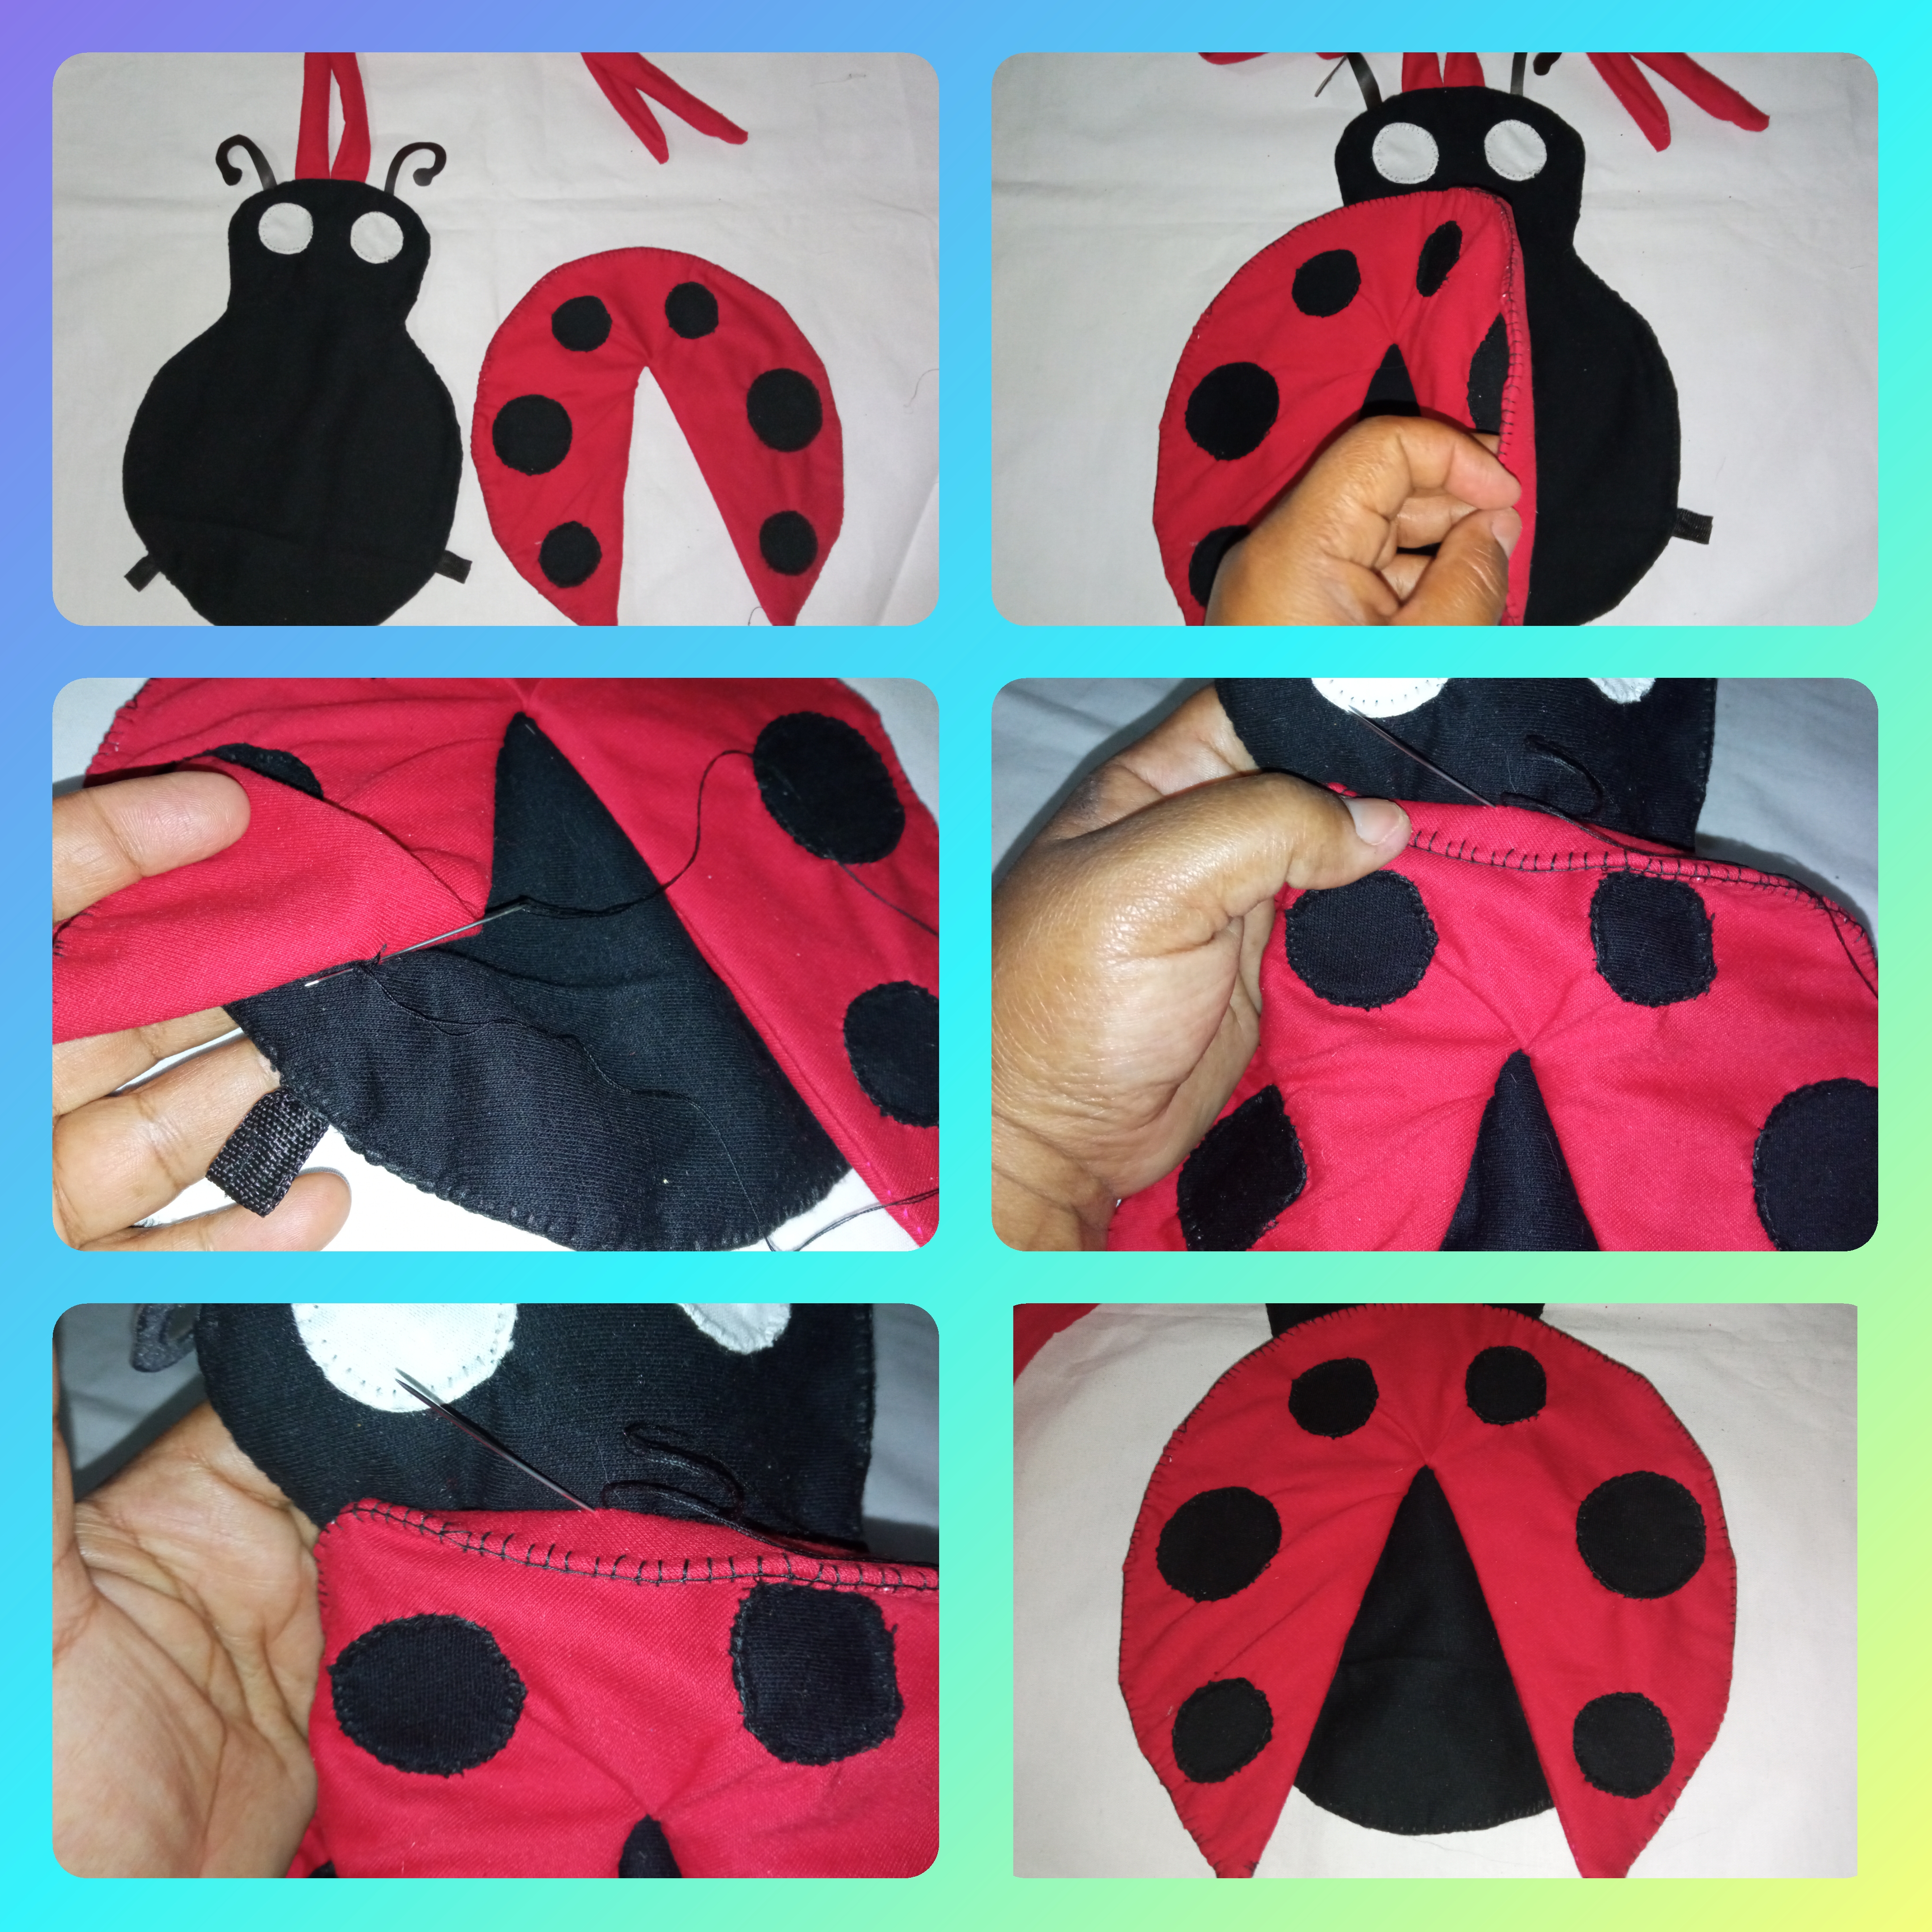
Con la ayuda del patrón cortamos dos piezas de las alas en tela roja y una pieza en entretela blanco, para coser colocamos el entre tela blanco, luego una pieza del ala con el derecho de frente hacia arriba y la otra pieza con el derecho de frente hacia bajo y cosemos por todo el alrededor dejando un agujero.
Step 9:
With the help of the pattern we cut two pieces of the wings in red fabric and one piece in white interlining, to sew we place the white interlining, then one piece of the wing with the right side facing up and the other piece with the right side facing down and sew all around leaving a hole.
Paso 10:
Ahora por el agujero volteamos las alas y cosemos el agujero de manera que no se vea la costura, Cortamos los círculos 2 grande y 4 medianos, luego cosemos con punto ojal a los lados de las alas como ven en la imagen.
Step 10:
Now through the hole we turn the wings over and sew the hole so that the seam is not visible. We cut 2 large and 4 medium circles, then we sew with buttonhole stitch on the sides of the wings as shown in the picture.

Paso 11:
Cortamos dos círculos blancos y lo cosemos con hilo blanco en punto ojal a la cara de mi Mariquita 🐞, luego cortamos las antenas en cuero sintético negro y la cosemos a la cabeza.
Step 11:
We cut two white circles and sew it with white thread in buttonhole stitch to the face of my Ladybug 🐞, then we cut the antennae in black synthetic leather and sew it to the head.
Paso 12:
Ahora cosemos las alas al cuerpo de nuestra Mariquita 🐞 así como les muestro en la imagen.
Step 12:
Now we sew the wings to the body of our Ladybug 🐞 as shown in the picture.
Paso 13:
Tomamos las tiras del bolso y lo introducimos dentro de los agujeros y le hacemos un nudo el cual se ve muy hermoso 😍.
Step 13:
We take the strips of the bag and insert it into the holes and tie a knot which looks very beautiful 😍.
Ya esté Hermoso 💕 Bolsito de Mariquita 🐞 está Terminado!!// This beautiful 💕 Ladybug Bag 🐞 is finished!
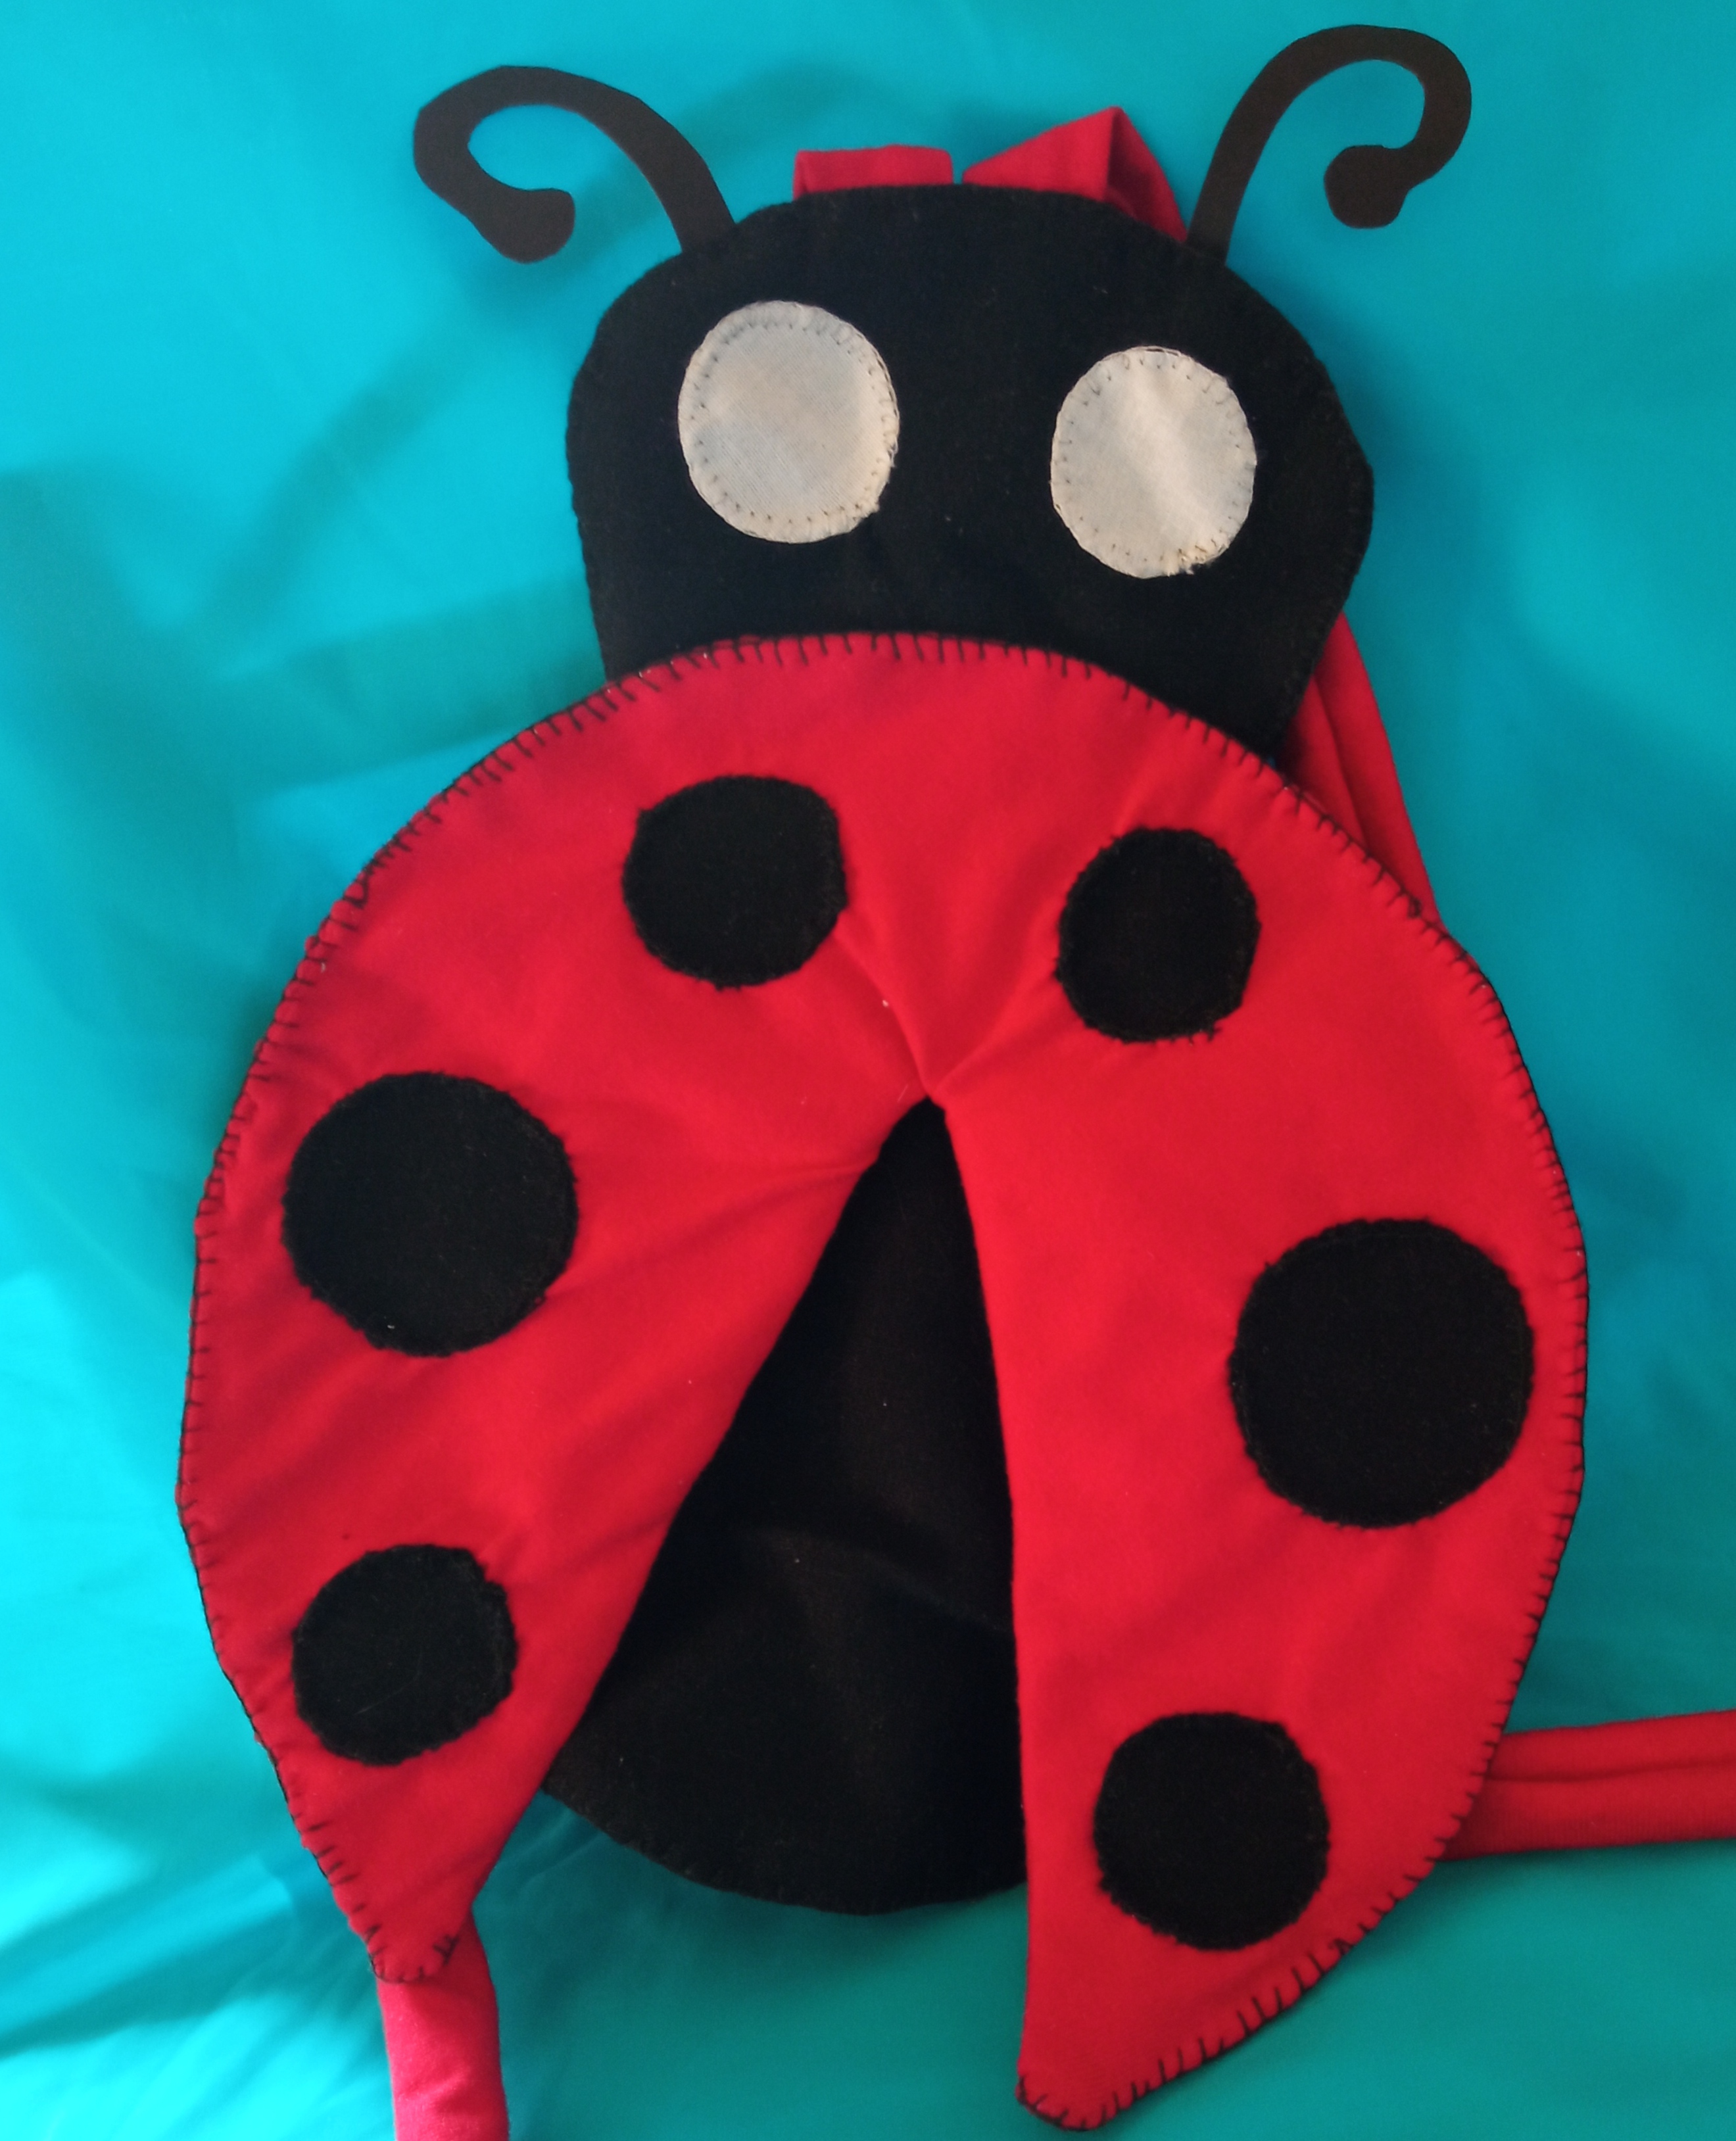
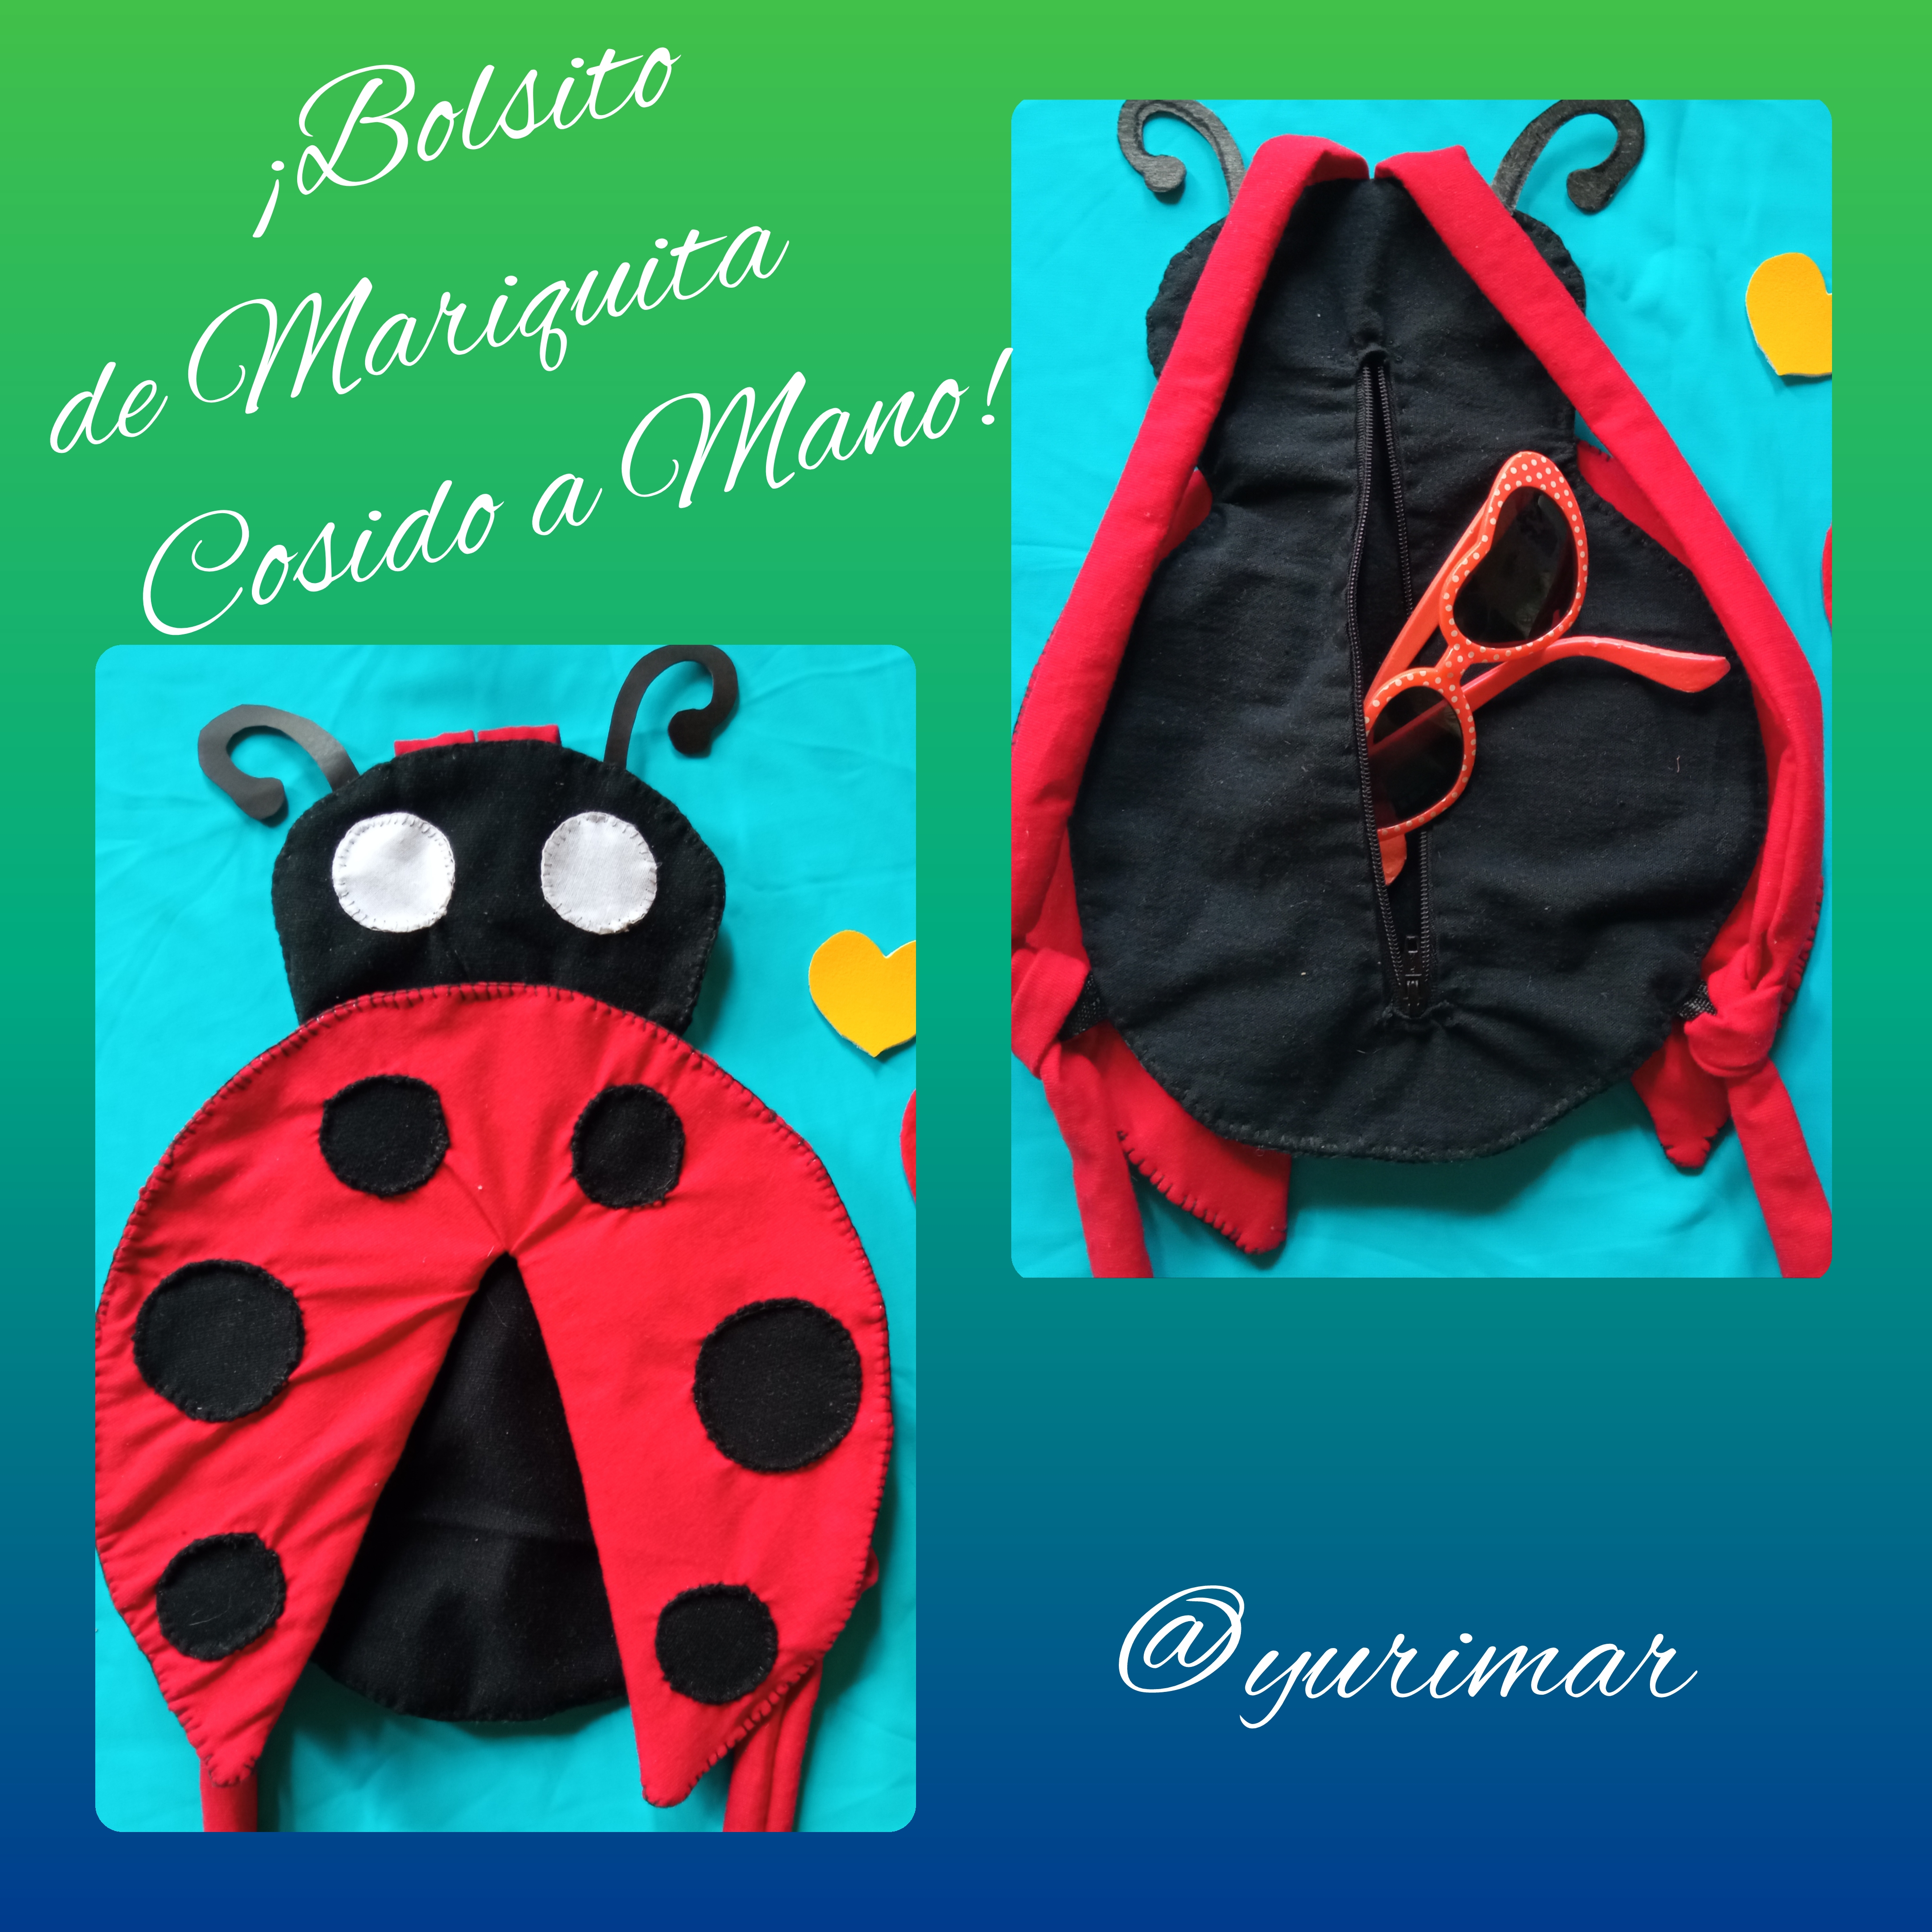
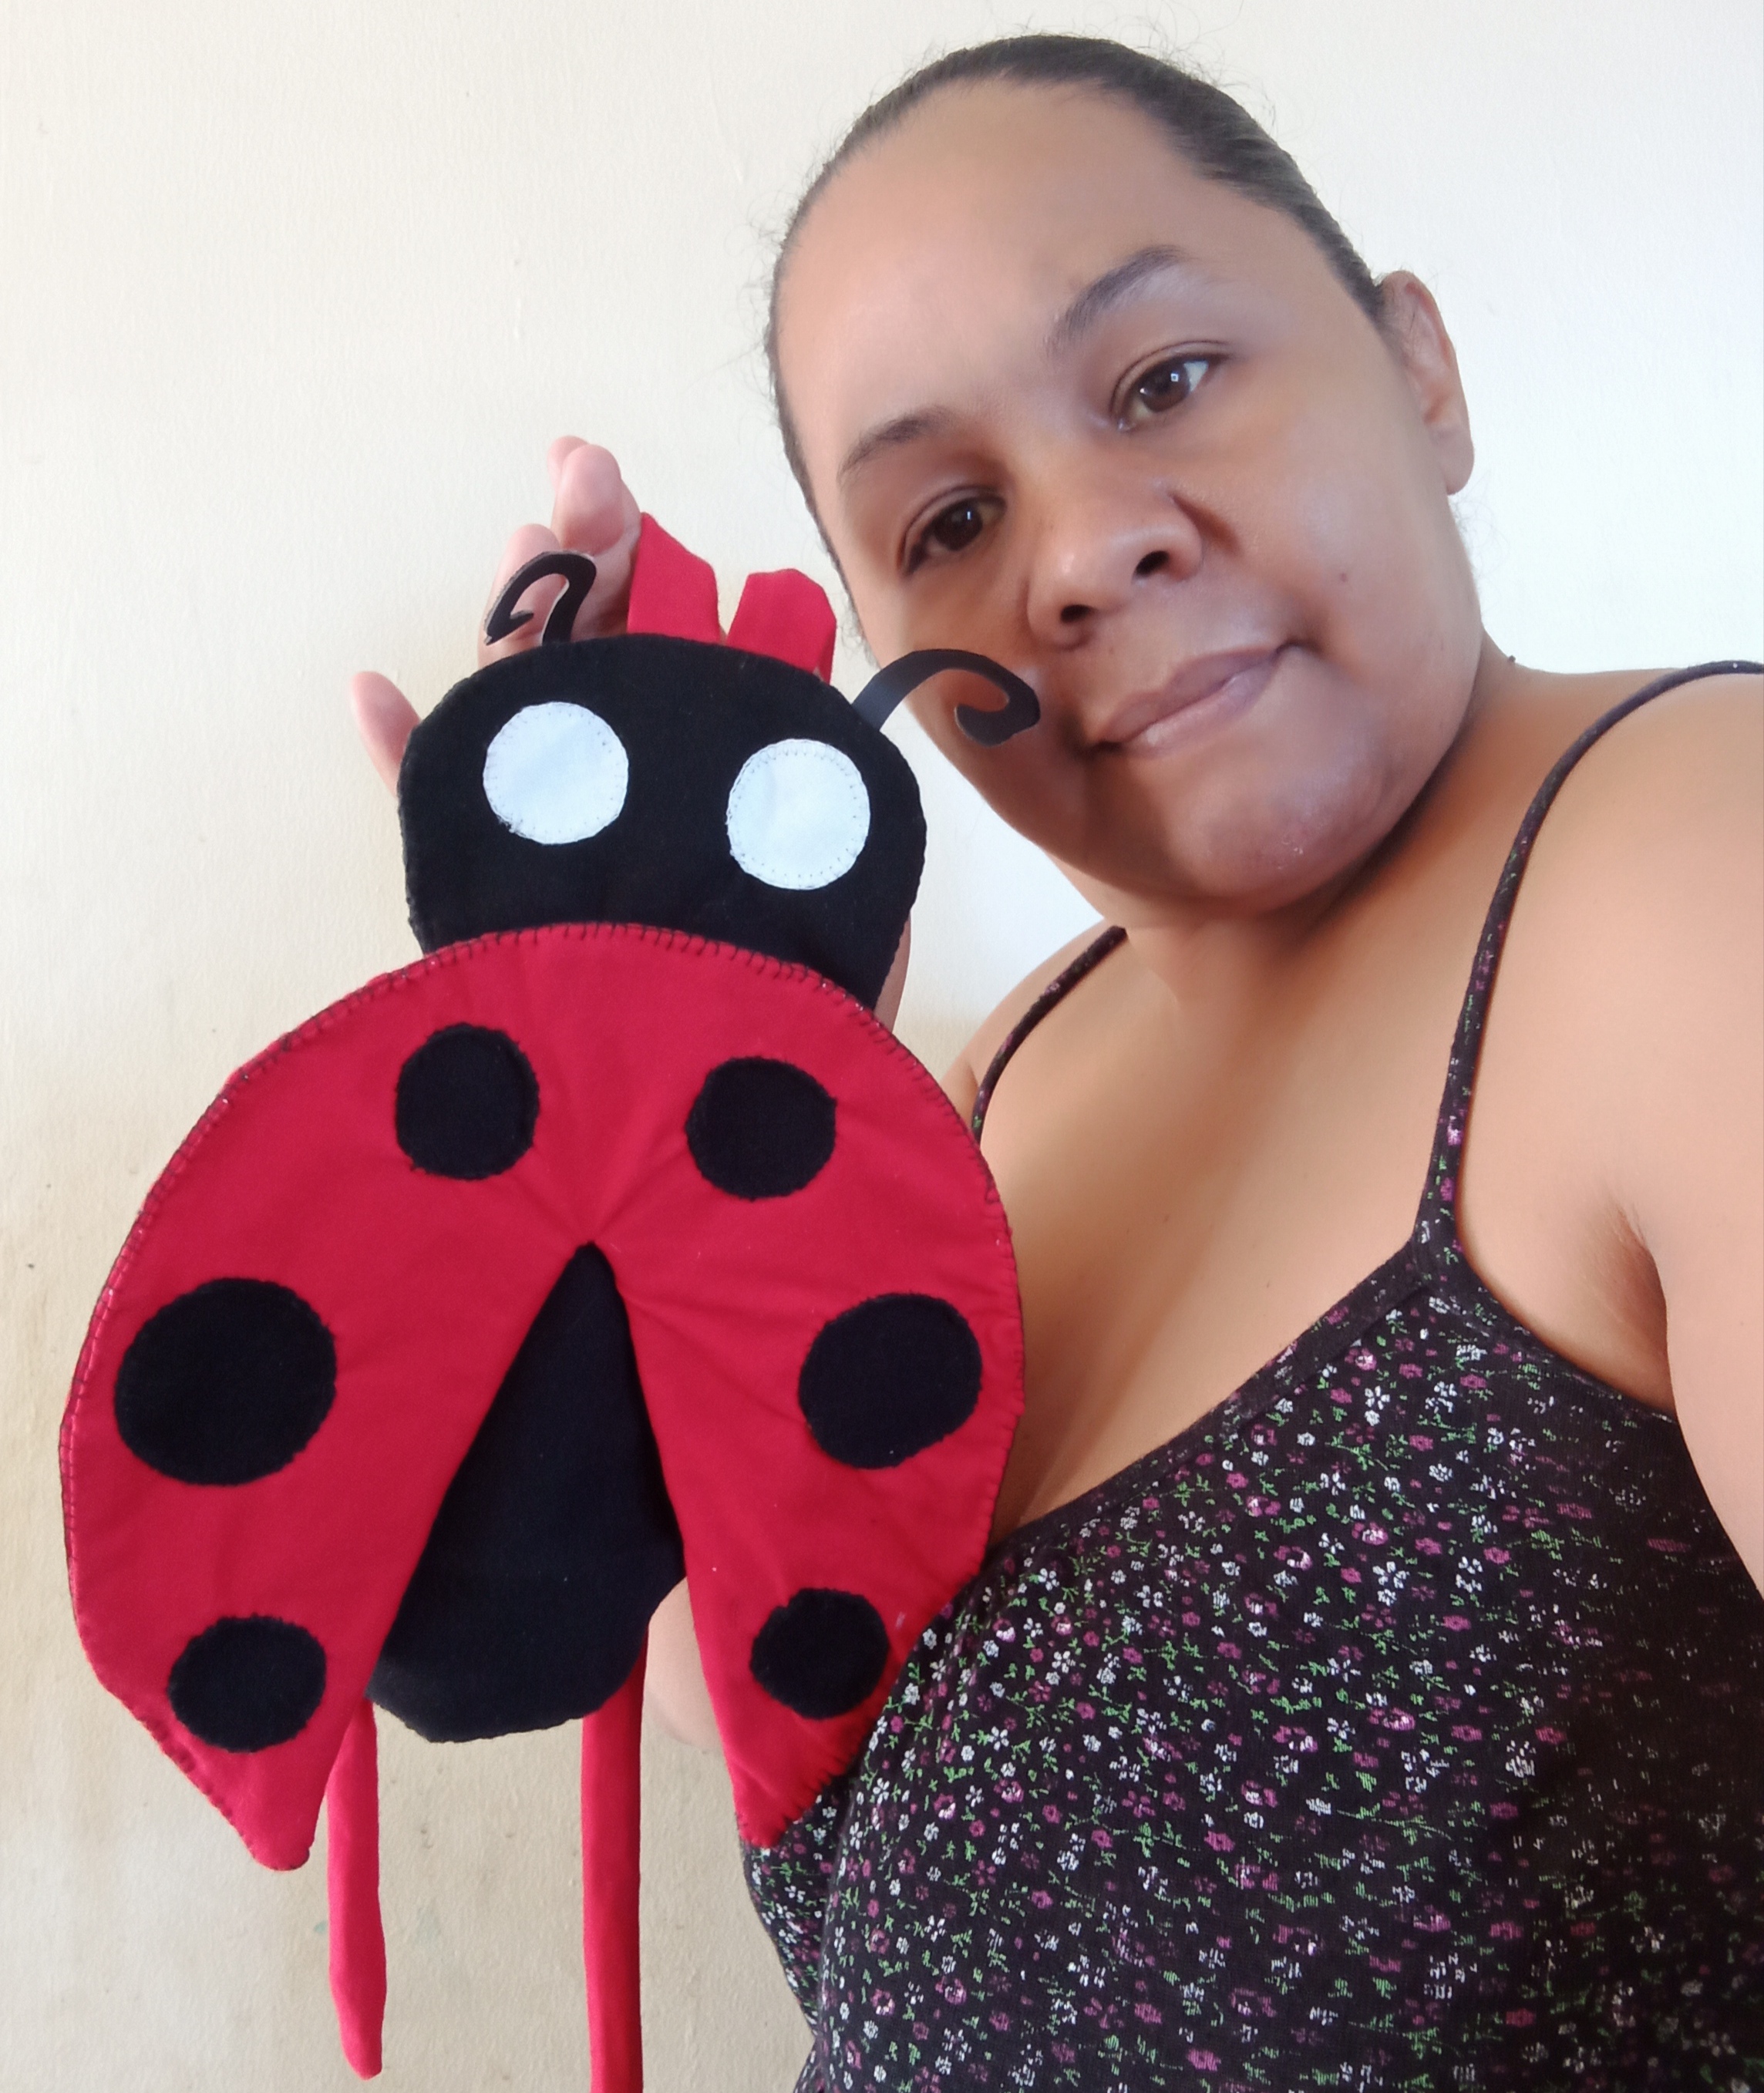
Hasta aquí llegó este hermoso tutorial espero les haya gustado cómo quedo este hermoso 😍 Bolsito de Mariquita 🐞 Cosido a Mano. Quisiera que se animarán en elaborarlo se que ha los pequeños de la casa les va a encantar.
So far this beautiful tutorial I hope you liked how this beautiful 😍 Ladybug Bag 🐞 Hand Sewn. I would like to encourage you to elaborate it, I know that the little ones at home will love it.
Aprovecho está oportunidad para agradecerle a esta maravillosa comunidad por todo el apoyo que me han brindado en cada tutorial que elaboró para ustedes ☺️.
I take this opportunity to thank this wonderful community for all the support you have given me in every tutorial I have made for you ☺️.
Muchas gracias por su gran apoyo 🥰!
Me encantan tus trabajos amiga se ven geniales, este bolsito de mariquita es lindo para las niñas coquetas, gracias por tu paso a paso detallado.
Hola amiga, me alegra mucho que siempre pases a ver mis trabajos, los realizó con mucho cariño 😍 para ustedes ☺️.
Gracias por tu constante apoyo me hace muy feliz 😊!
Hola amiga 👋, me alegra mucho que siempre me vistes para comentar mis trabajos manuales, este hermoso 😍 Bolsito se lo hice a una sobrinita es pequeña pero es muy coqueta jajajaja!!
Gracias siempre por tu apoyo y comentario 👍!
Quedó hermoso, feliz semana para ti también. Bendiciones!
Gracias 😀 me contenta mucho que te gustará, tu apoyo y comentario me alegran mucho.
Holaaa, que precioso ha quedado este bolso! Me encanto😍