¡Saludos 👋 Queridos 💞 Amigos de #HiveDiy😘! // Greetings 👋 Dear 💞 Friends of #HiveDiy😘!
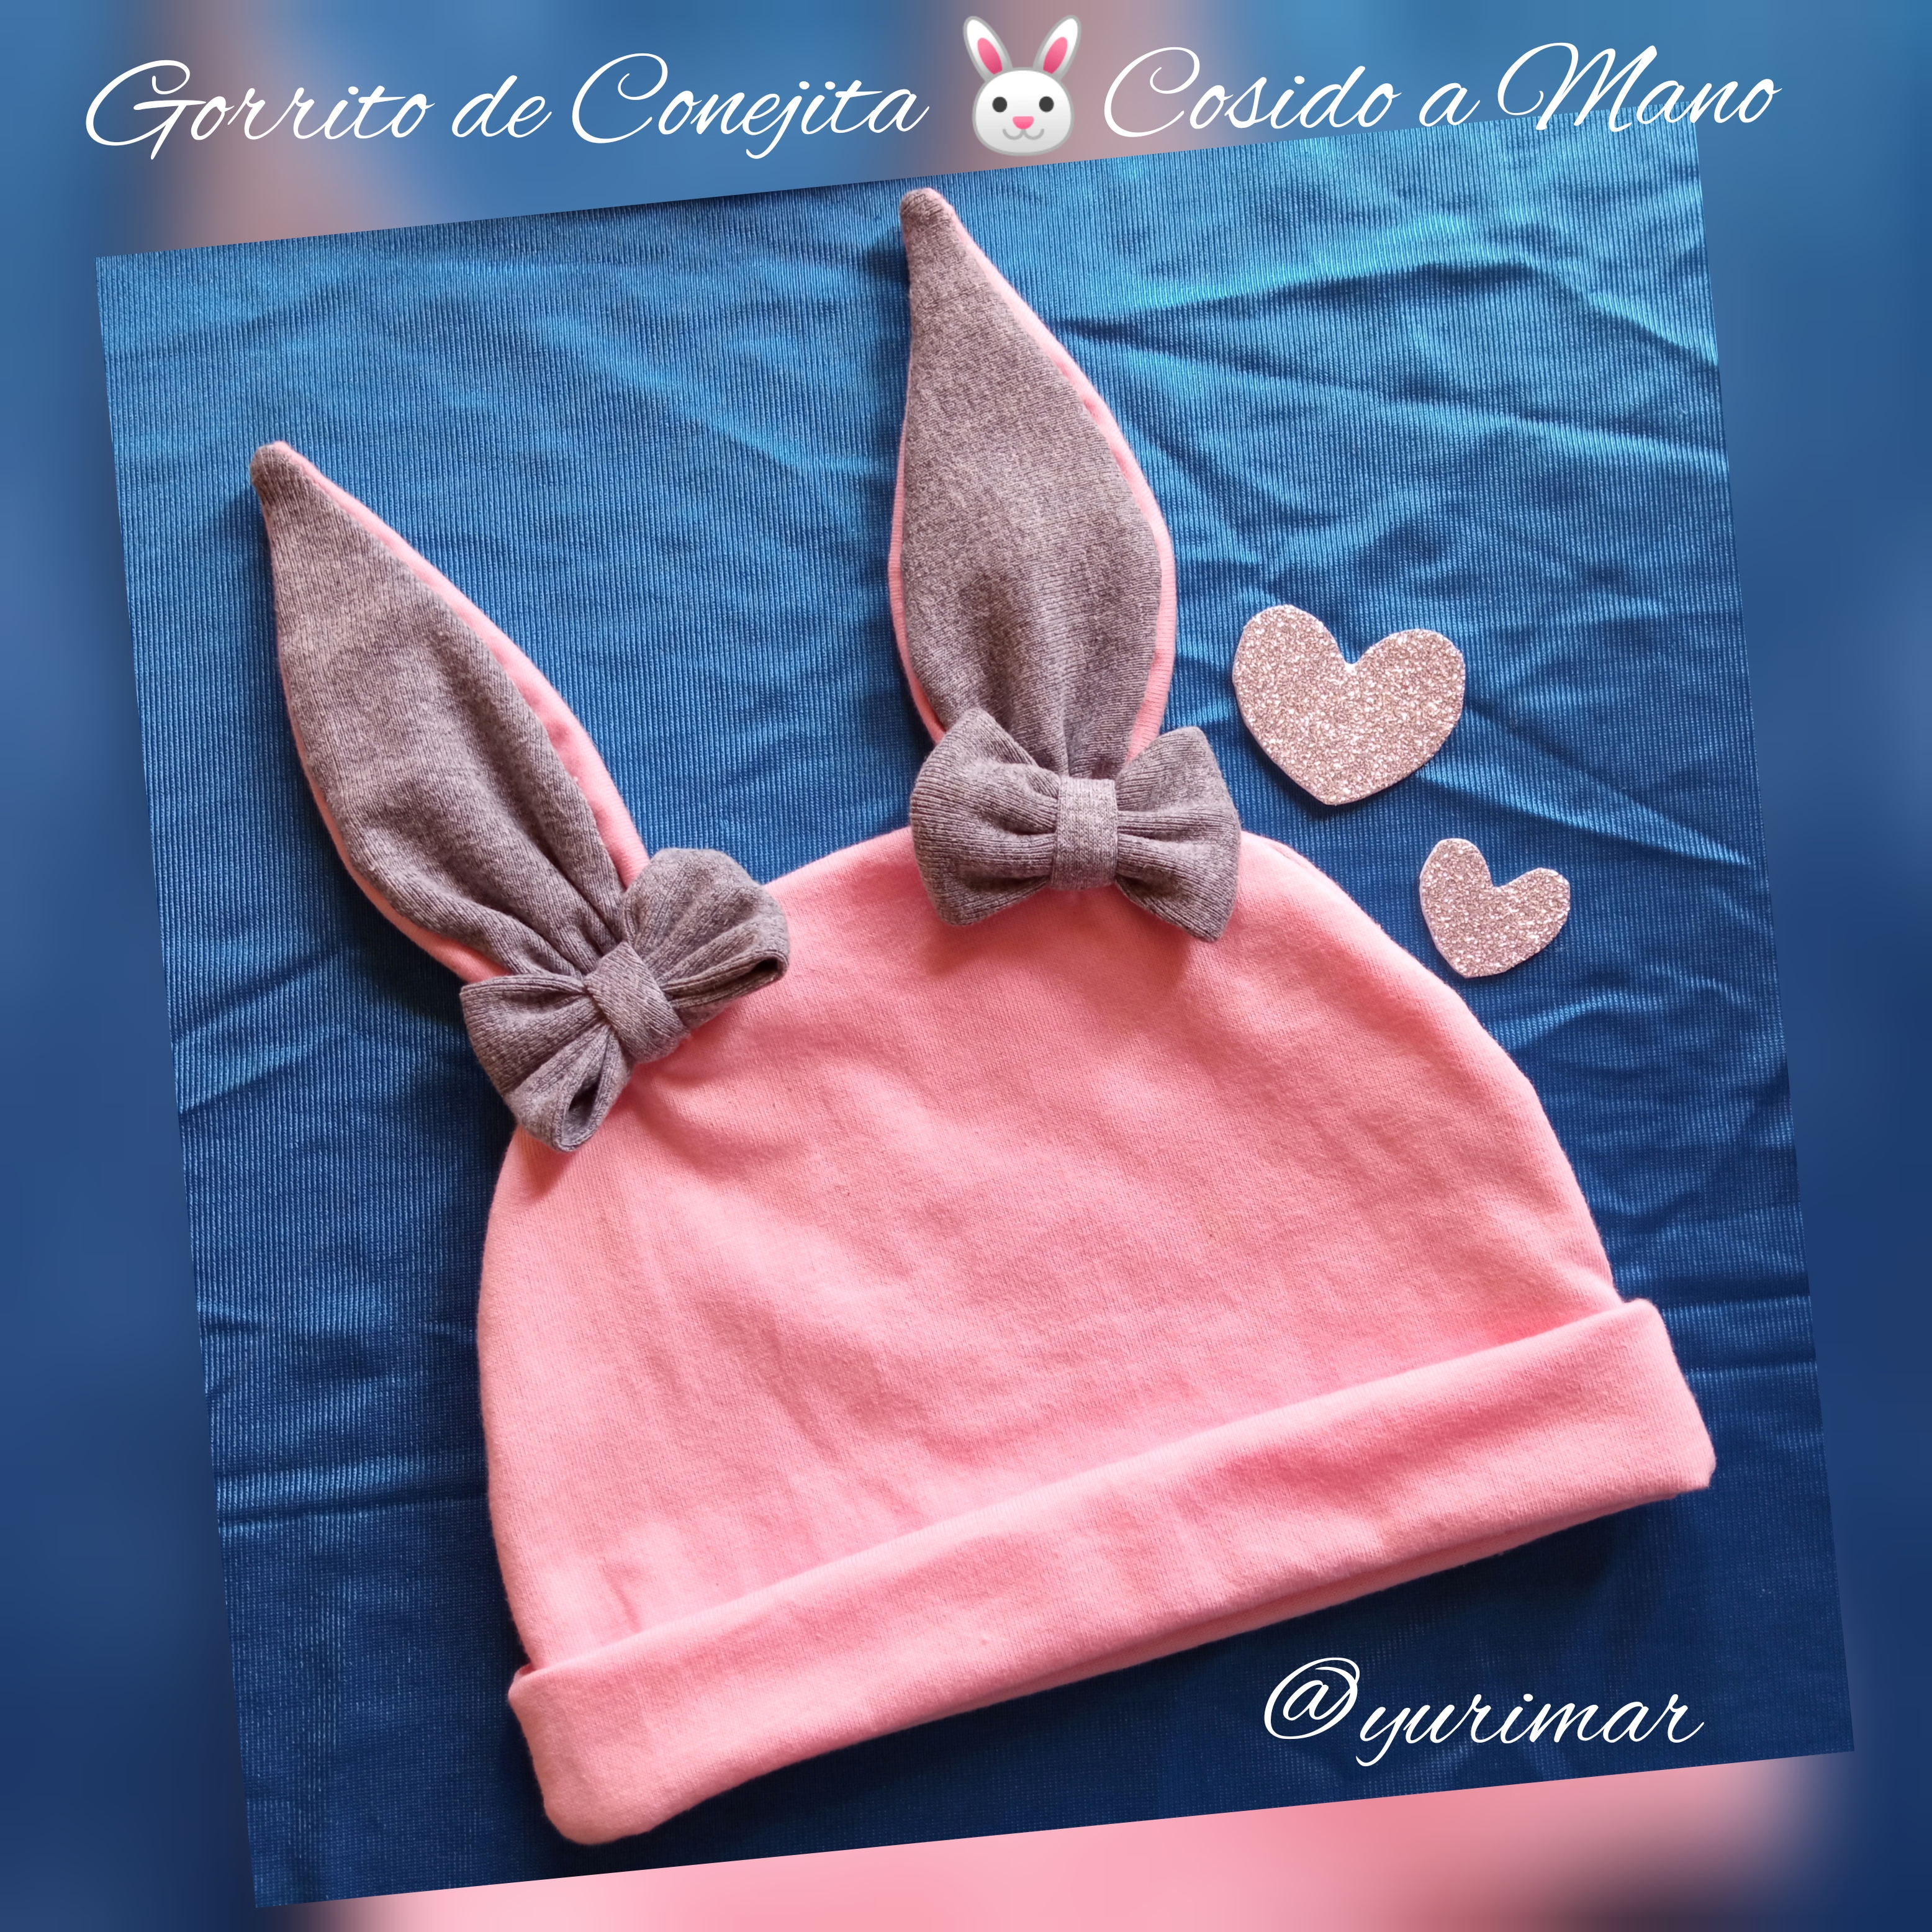
Hermoso 😍 Gorrito de Conejito🐰 para Niñas // Beautiful 😍 Bunny Beanie🐰 For Girls
Hola! esperó se encuentren muy bien por aquí, Les cuento que he estado un poco ausenté debido a que en estos momentos no poseo internet en casa, cuento con datos en el teléfono y el servicio que estoy usando es muy tedioso, no hay manera de poder subir una imagen, tengo varios proyectos que les quiero mostrar es por ello que hoy decidí ir a casa de mi madre y me compartiera WiFi para mostrarle un hermoso 😍 tutorial de cómo hacer un gorrito de Conejita 🐰para niñas.
Hello! I hope you are very well here, I tell you that I have been a little absent because right now I do not have internet at home, I have data on the phone and the service I'm using is very tedious, there is no way to upload an image, I have several projects that I want to show you is why today I decided to go to my mother's house and share WiFi to show you a beautiful 😍 tutorial on how to make a bunny hat 🐰for girls.
Como saben todos mis trabajos los coso a mano ya que es una técnica que me encanta y me relaja, espero que esté tutorial les sirva para poder aprender cómo hacer un gorrito en doble tela y partiendo de aquí pueden manejar su imaginación y elaborar diferentes diseños.
As you know all my works I sew them by hand because it is a technique that I love and relaxes me, I hope this tutorial will help you to learn how to make a beanie in double fabric and from here you can use your imagination and elaborate different designs.
Además que me parece un buen emprendimiento ya que todos los días nacen niños y pueden obtener ganancias haciendo variedad de estos hermosos 😍 gorritos. Este en particular se lo hice a mi sobrina Laura que tiene 1 añito, se que a su mami le va encantar ponérselo.
Besides, I think it's a good idea since children are born every day and they can make a profit by making a variety of these beautiful 😍 beanies. This particular one I made for my niece Laura who is 1 year old, I know her mommy will love to wear it.
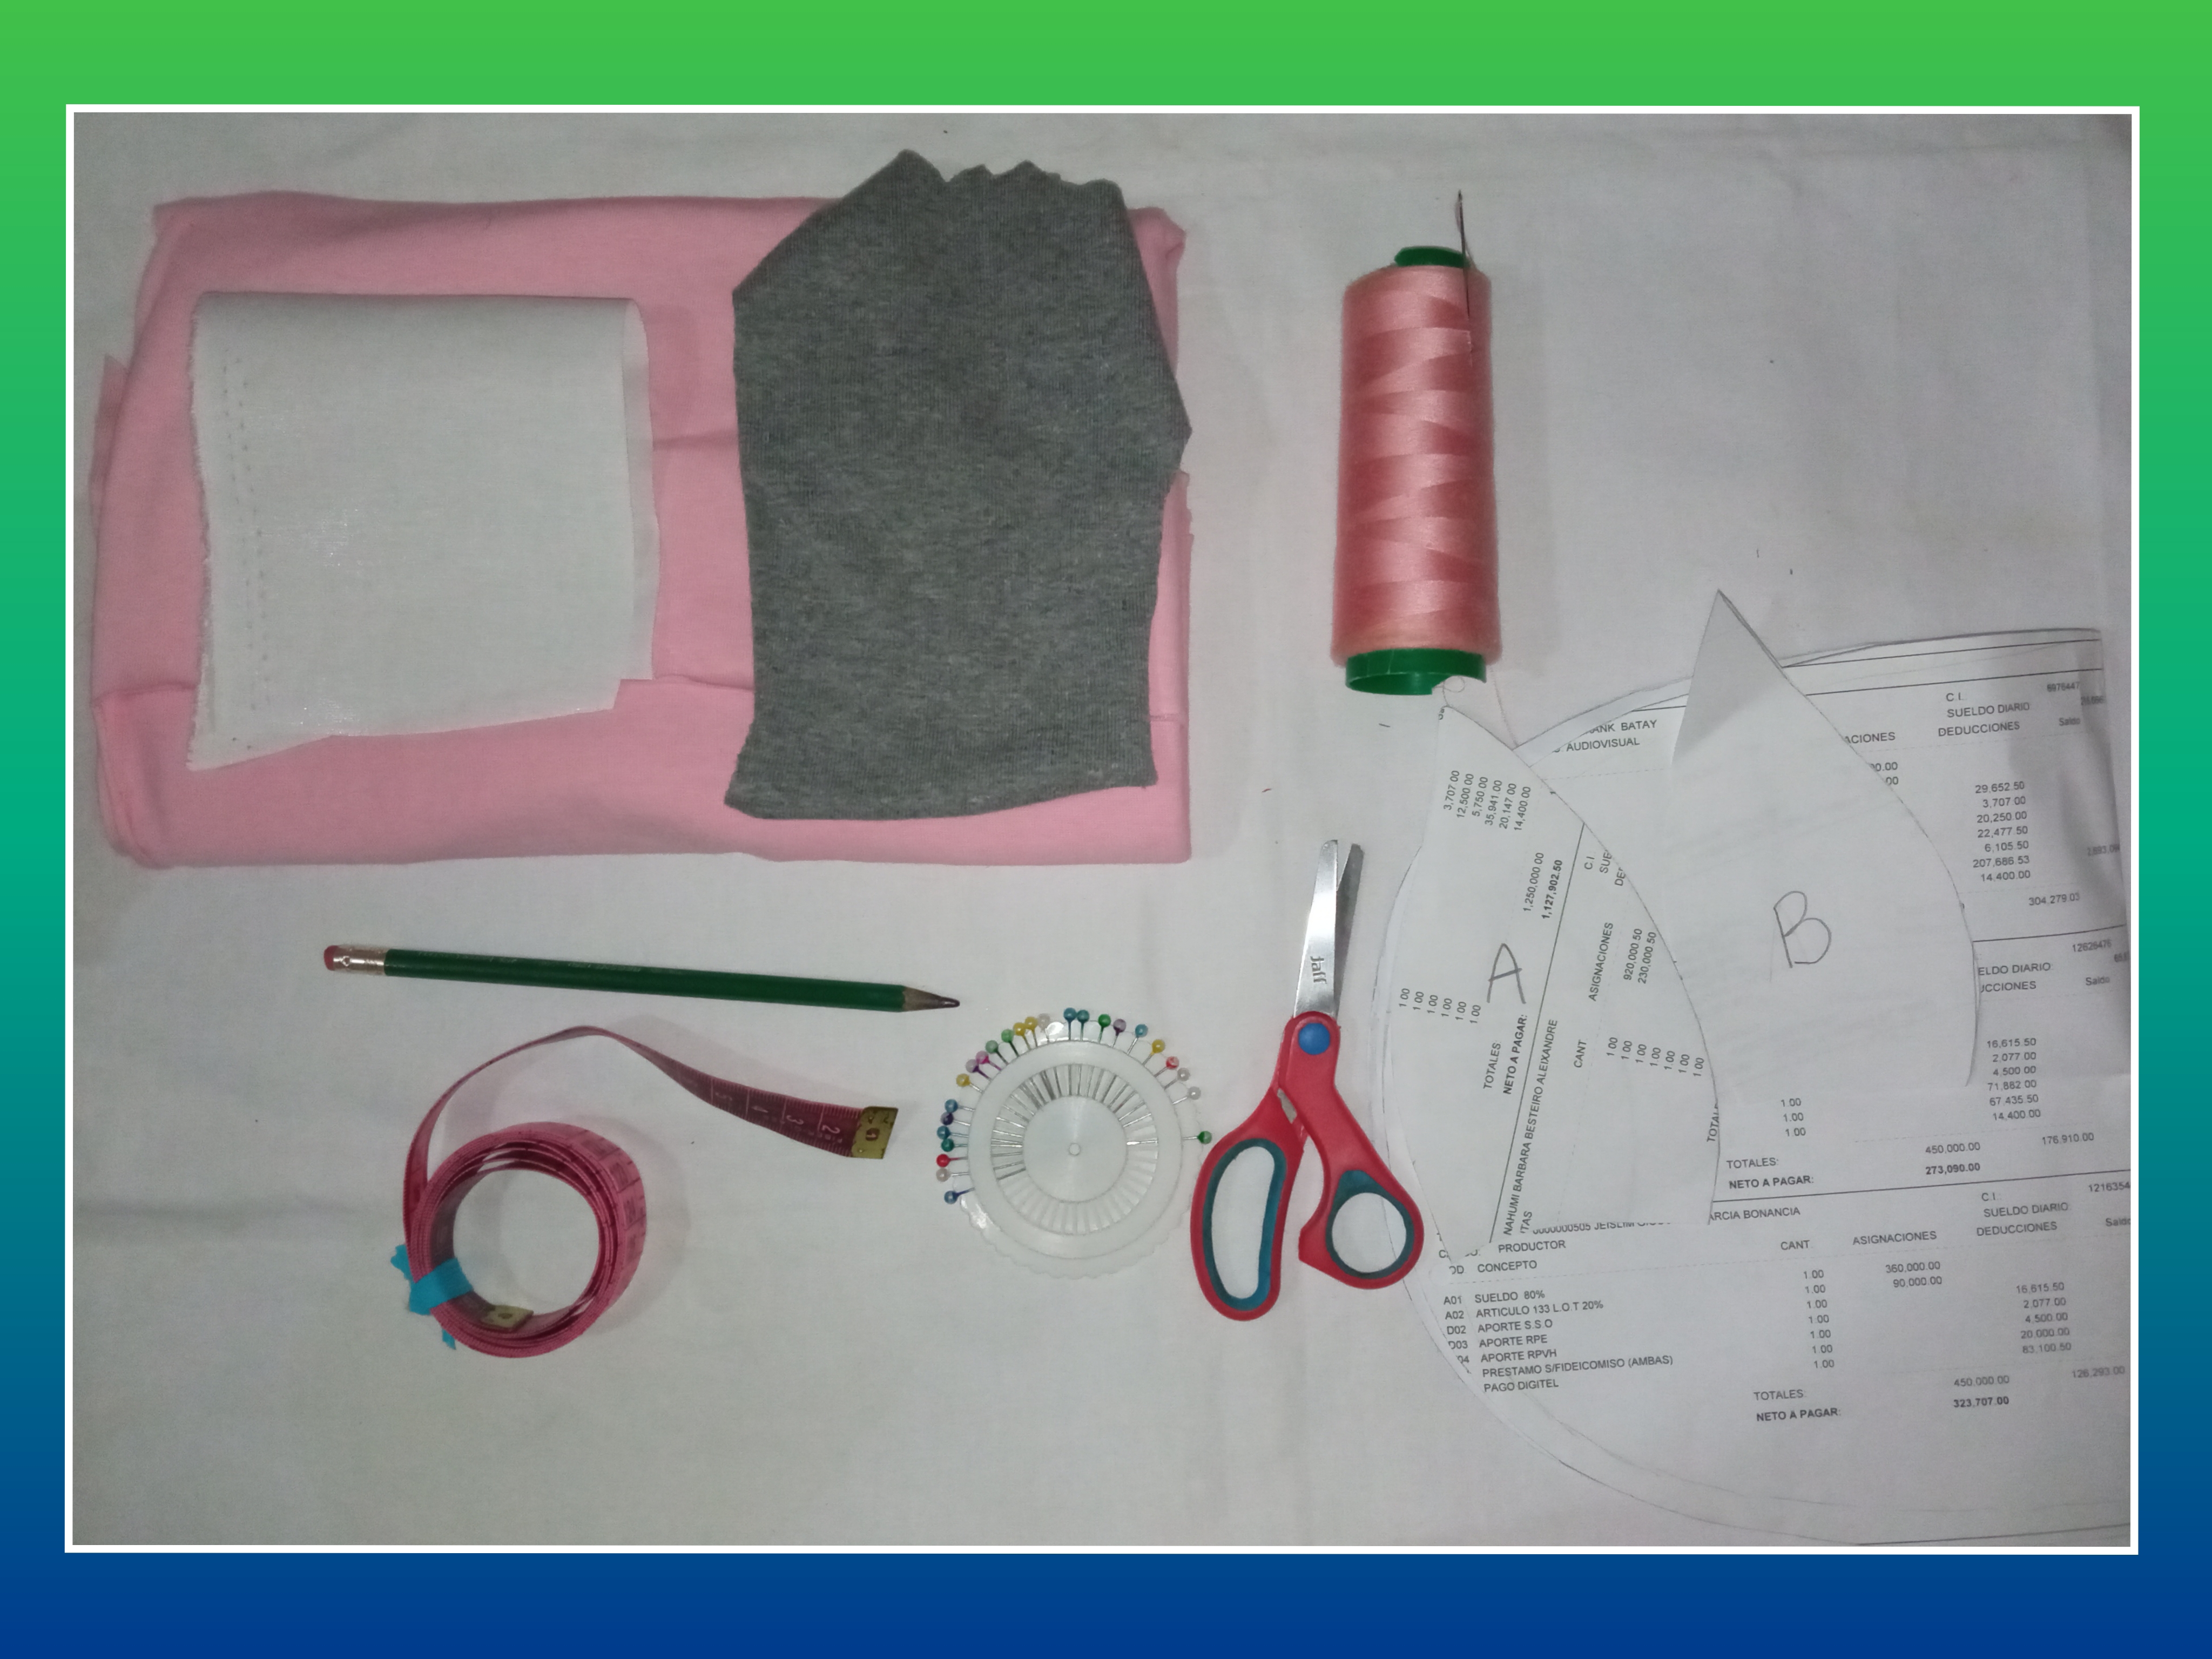
Para la elaboración de este Gorrito de Conejito 🐰 les voy a detallar los materiales que utilice.
For the elaboration of this Bunny Beanie 🐰 I am going to detail you the materials I used.
🐰 Materiales:🐰
- Tela stretch de color rosado.
- Tela stretch de color gris.
- Entretela. (para darle firmeza a las orejas)
- Hilo de color rosado.
- Agujas de coser.
- Tijera.
- Lápiz.
- Cinta métrica.
- Papel para sacar el patrón.
- Alfileres.
🐰 Materials:🐰
- Pink stretch fabric.
- Grey stretch fabric.
- Interlining. (to give firmness to the ears).
- Pink thread.
- Sewing needles.
- Scissors.
- Pencil.
- Tape measure.
- Paper to draw the pattern.
- Pins.
🐰Elaboración:🐰 // 🐰 Elaboration:🐰
Paso 1:
Comenzamos sacando los patrones del Gorrito en una hoja de papel y las orejas de Conejito 🐰.
Step 1:
We started by pulling out the patterns for the Beanie on a sheet of paper and the Bunny ears 🐰.

Paso 2:
Tomamos el patrón de la oreja A y lo cortamos en tela rosada y entretela blanco, luego tomamos el patrón de la oreja B y lo cortamos en tela gris.
Step 2:
We take the pattern for ear A and cut it out of pink fabric and white interfacing, then we take the pattern for ear B and cut it out of gray fabric.

Paso 3:
Ahora vamos uniendo las piezas de las orejas comenzando por la oreja cortada en el entretela, luego la oreja en tela rosada y para finalizar la oreja en tela gris luego cosemos por toda la orilla como les muestro en la foto, al terminar volteamos.
Step 3:
Now we are joining the pieces of the ears starting with the ear cut in the interlining, then the ear in pink fabric and finally the ear in gray fabric, then we sew all around the edge as shown in the photo, when we finish we turn over.

Paso 4:
Tomamos cada oreja cosemos en la parte inferior con hilo rosado al terminar jalamos el hilo quedando arruchando, luego fijamos la costura.
Step 4:
We take each ear and sew on the lower part with pink thread, at the end we pull the thread, then we fix the seam.

Paso 5:
Ahora tomamos el patrón de gorro, cortamos dos piezas en la tela rosada, luego tomamos una de las piezas y medimos 4 cm en la parte superior partiendo del centro y colocamos las orejas con alfileres para que no se muevan con la parte gris hacia bajo.
Step 5:
Now we take the hat pattern, cut two pieces in the pink fabric, then we take one of the pieces and measure 4 cm in the upper part starting from the center and place the ears with pins so that they do not move with the gray part down.
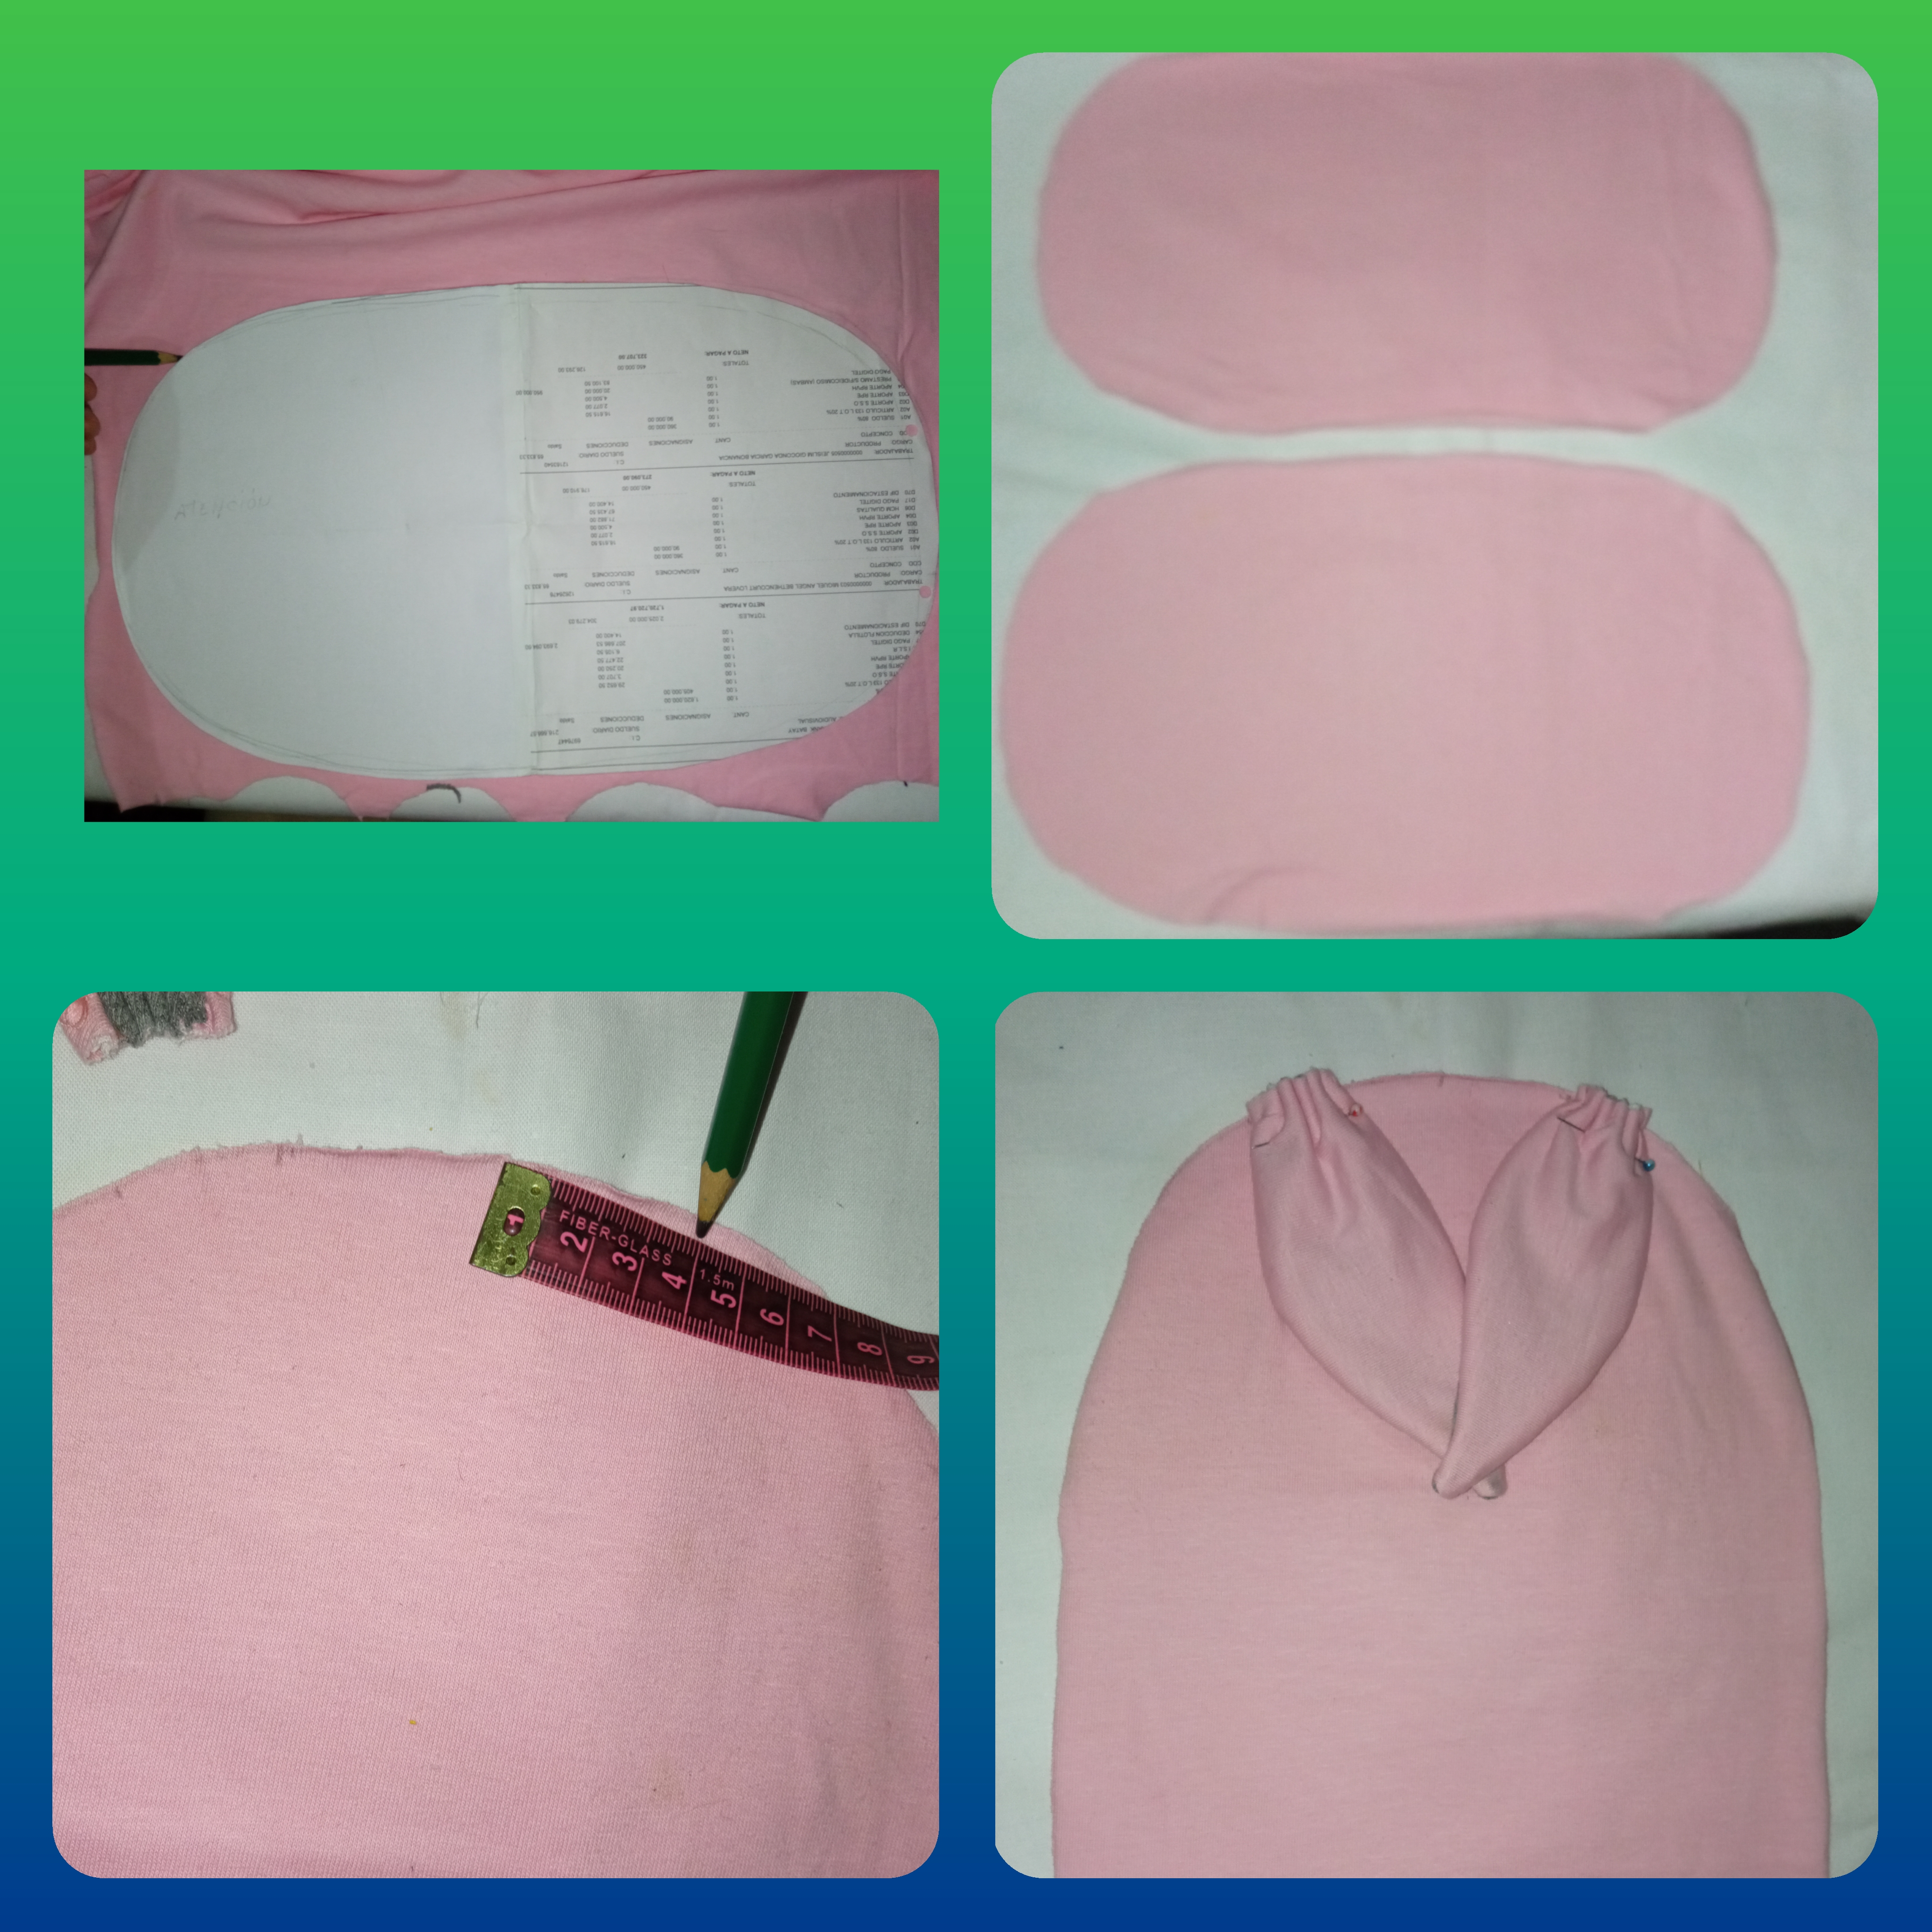
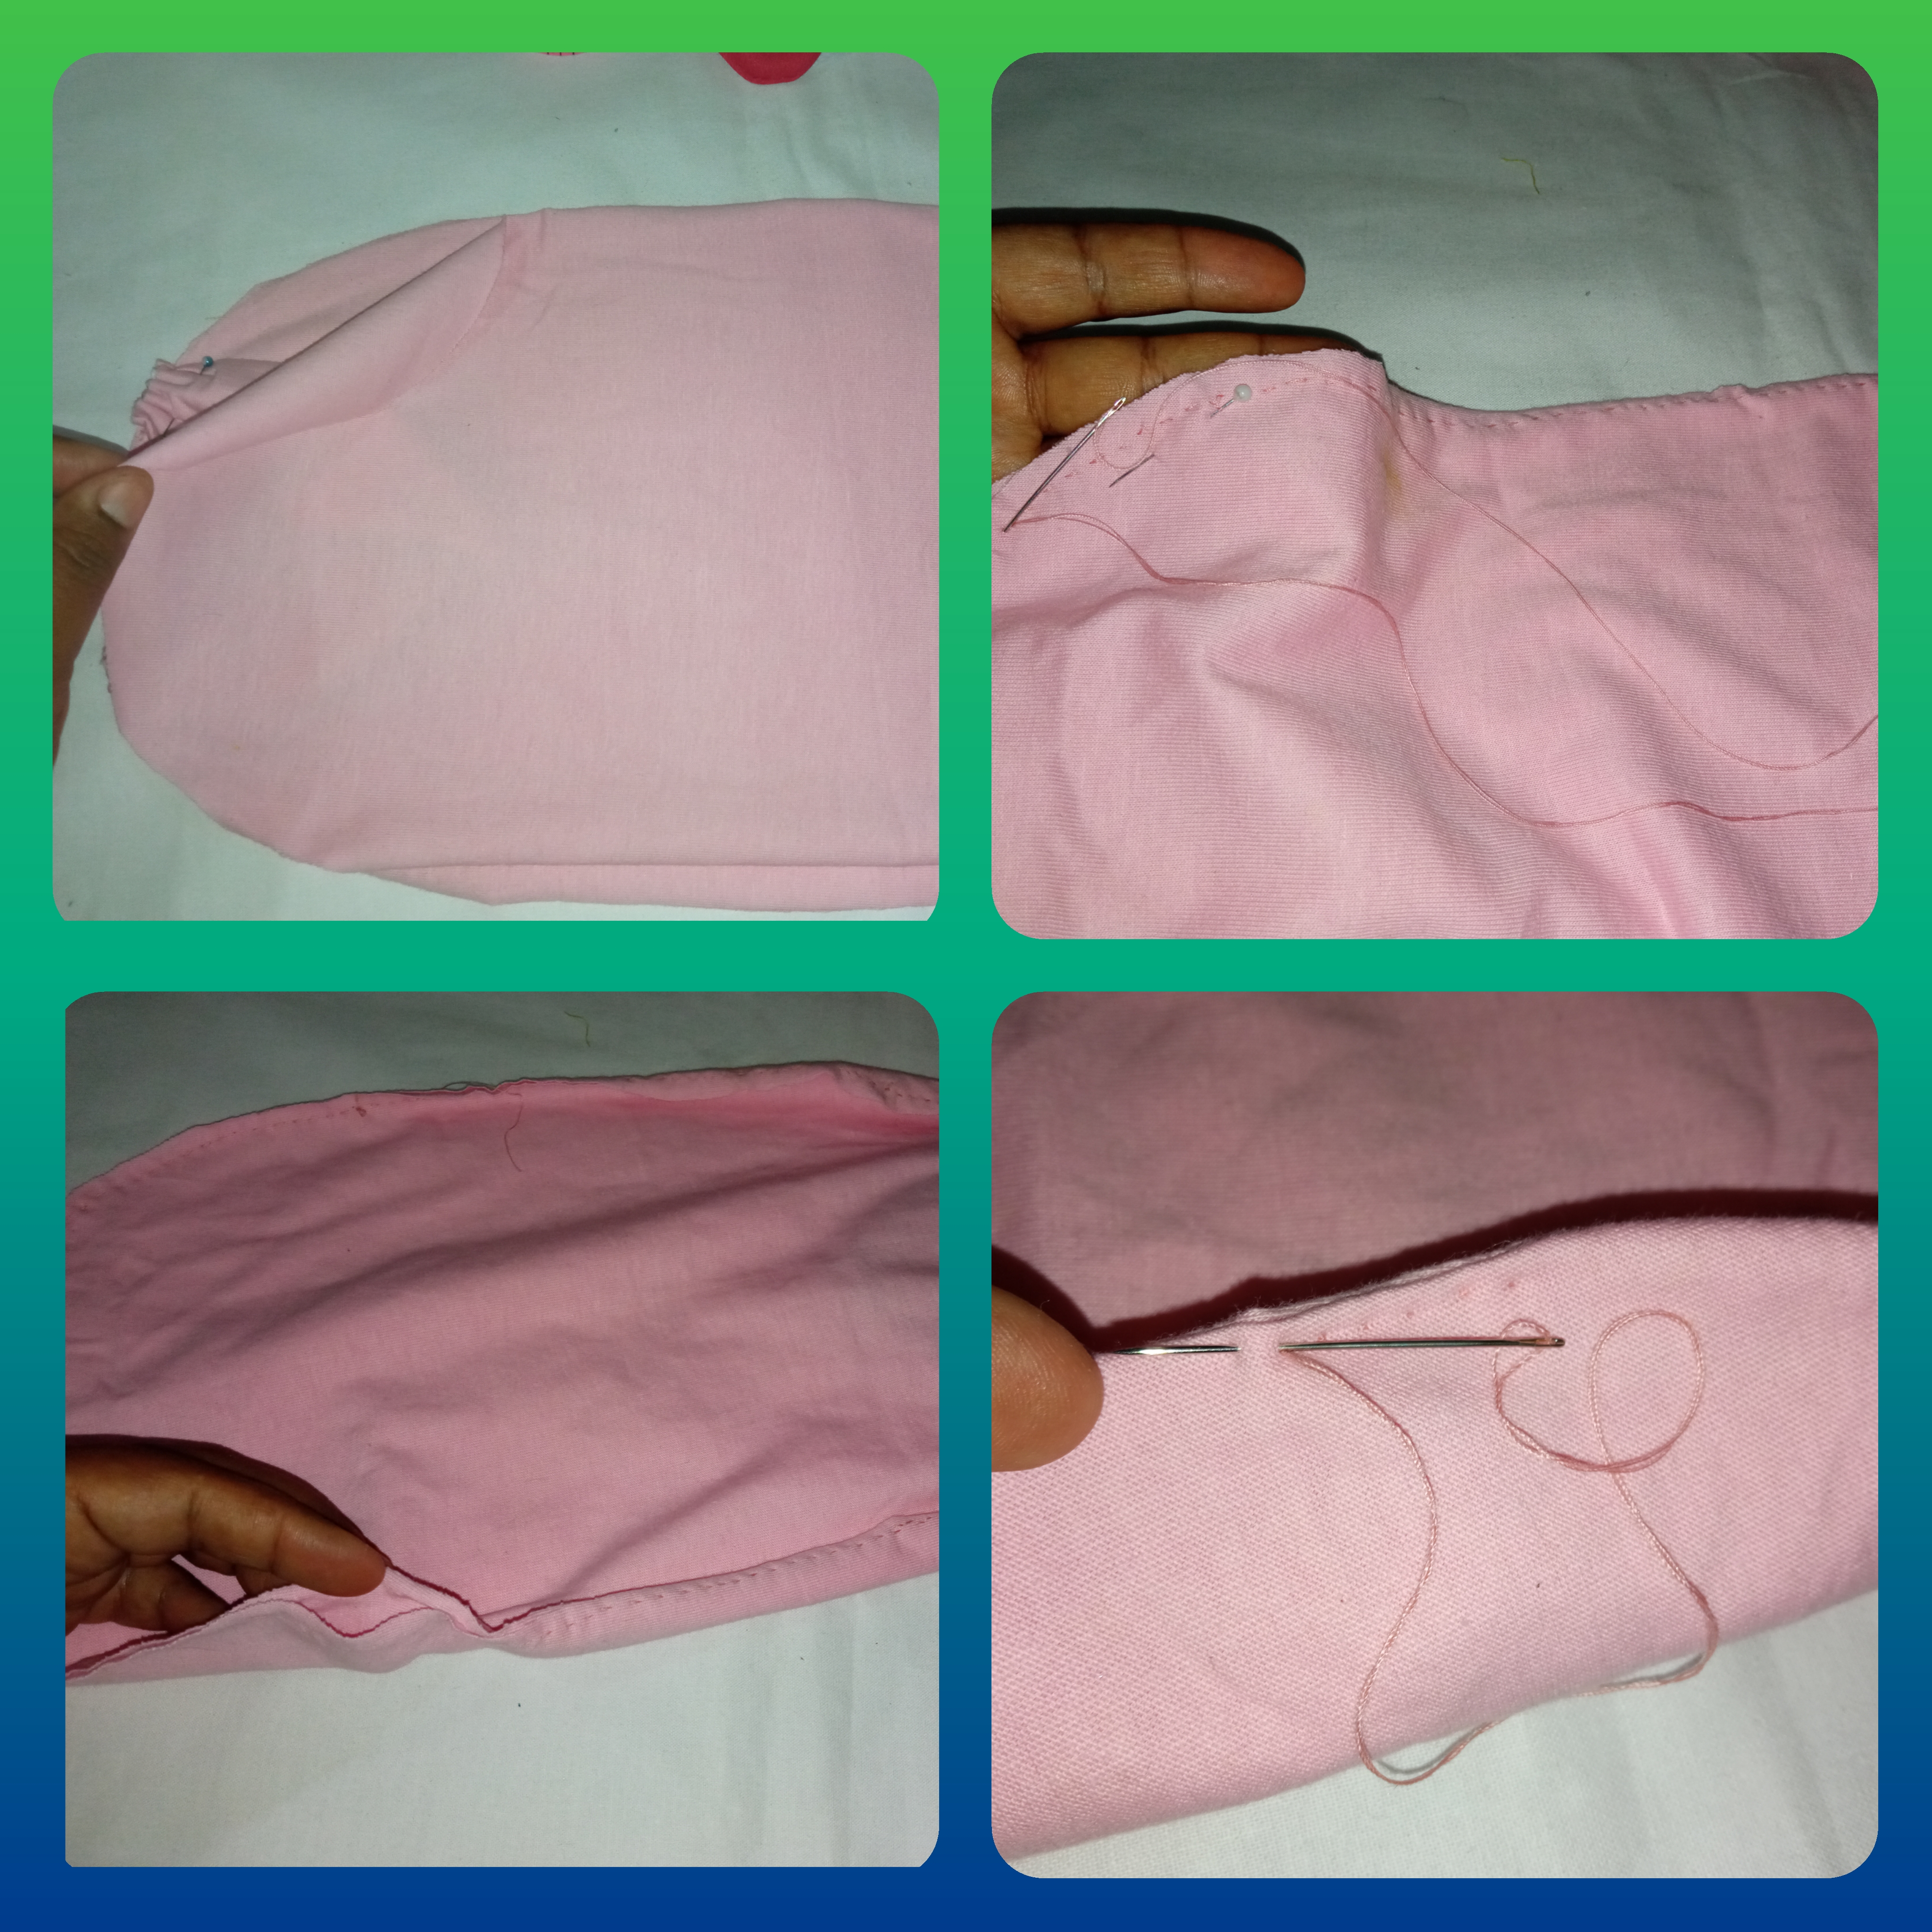
Paso 6:
Luego montamos la otra pieza del gorro encima y cosemos por todo el alrededor pasando por las orejas y dejamos un agujero para poder voltear mi gorro, cuando lo volteamos cosemos el agujero con una puntada pequeña de manera que no se note.
Step 6:
Then we mount the other piece of the hat on top and sew all around passing through the ears and leave a hole to be able to turn my hat over, when we turn it over we sew the hole with a small stitch so that it is not noticeable.
Paso 7:
Haremos un hermoso lazo en tela gris cortamos un rectángulo de 19 cm de largo y 10 cm de ancho y doblamos los lado al centro luego volvemos a doblar como les muestro en la imagen, cosemos en el centro jalamos el hilo arruchando y le hacemos vuelta, tomamos una tira de 2 cm de ancho doblamos y cosemos al centro del lazo, repetimos el mimos proceso y hacemos otro lazo.
Step 7:
We will make a beautiful bow in gray fabric cut a rectangle of 19 cm long and 10 cm wide and fold the sides to the center then fold again as I show in the picture, sew in the center pull the thread and turn it around, take a strip of 2 cm wide fold and sew to the center of the bow, repeat the same process and make another bow.

Paso 8:
Tomamos el gorrito y le cosemos los lazos en cada orejitas sin coser la tela de abajo.
Step 8:
We take the hat and sew the loops on each ear without sewing the bottom fabric.

Paso 9:
Ahora tomo el gorro y con la ayuda de nuestras manos metemos la parte superior hacia dentro formando el gorrito así como les muestro en la imagen, si gustan pueden dobla un poco la parte inferior.
Step 9:
Now I take the hat and with the help of our hands we put the upper part inwards forming the hat as shown in the image, if you like you can fold the lower part a little bit.

Ya mi Hermoso 😍 Gorrito de Conejito 🐰 está para Niñas Terminado! // Already my Beautiful 😍 Bunny Beanie 🐰 is for Girls Finished!


Hasta aquí llegó este maravilloso 💕 tutorial espero les haya gustado cómo quedo este hermoso 😍 Gorrito de Conejito 🐰cosido a mano. Anímense en elaborarlo ya verá que les quedará igual de lindo.
So much for this wonderful 💕 tutorial I hope you liked how this beautiful 😍 Bunny Beanie 🐰 hand sewn. I hope you liked it and you will see that it will be just as cute.
Como siempre estoy muy agradecida con esta maravillosa comunidad por permitirme mostrar mis tutoriales para ustedes ☺️.
As always I am very grateful to this wonderful community for allowing me to showcase my tutorials for you ☺️.
Te quedó bellísimo amiga
Muchas gracias amiga, le alegra que te gustará besos 😘!
hola, te quedo muy lindo el gorrito. felicidades.
Hola amiga muchas gracias 😘.
Thank you for sharing this amazing post on HIVE!
Your content got selected by our fellow curator @stevenson7 & you just received a little thank you via an upvote from our non-profit curation initiative!
You will be featured in one of our recurring curation compilations and on our pinterest boards! Both are aiming to offer you a stage to widen your audience within and outside of the DIY scene of hive.
Join the official DIYHub community on HIVE and show us more of your amazing work and feel free to connect with us and other DIYers via our discord server: https://discord.gg/mY5uCfQ !
If you want to support our goal to motivate other DIY/art/music/homesteading/... creators just delegate to us and earn 100% of your curation rewards!
Stay creative & hive on!
Es un trabajo precioso.🥰💋😘😍
Me encantó. Yo soy fanática de los gorritos.
Gracias por compartir
🍄🍁💜🌼👍🏼👏🏼🌹🌺🌷🥀🏵️🌸💐🌻
Gracias amiga 😊, me contenta que te gustará lo hice con mucho cariño 😍.
Hola este gorro te ha quedado muy hermoso, siempre he querido hacerle un gorro así a mi bebé, pueda que me animé a seguir tu tutorial. Te vendría bien que publicar tus costuras en la comunidad de @needleworkmonday
Saludos👏👏