

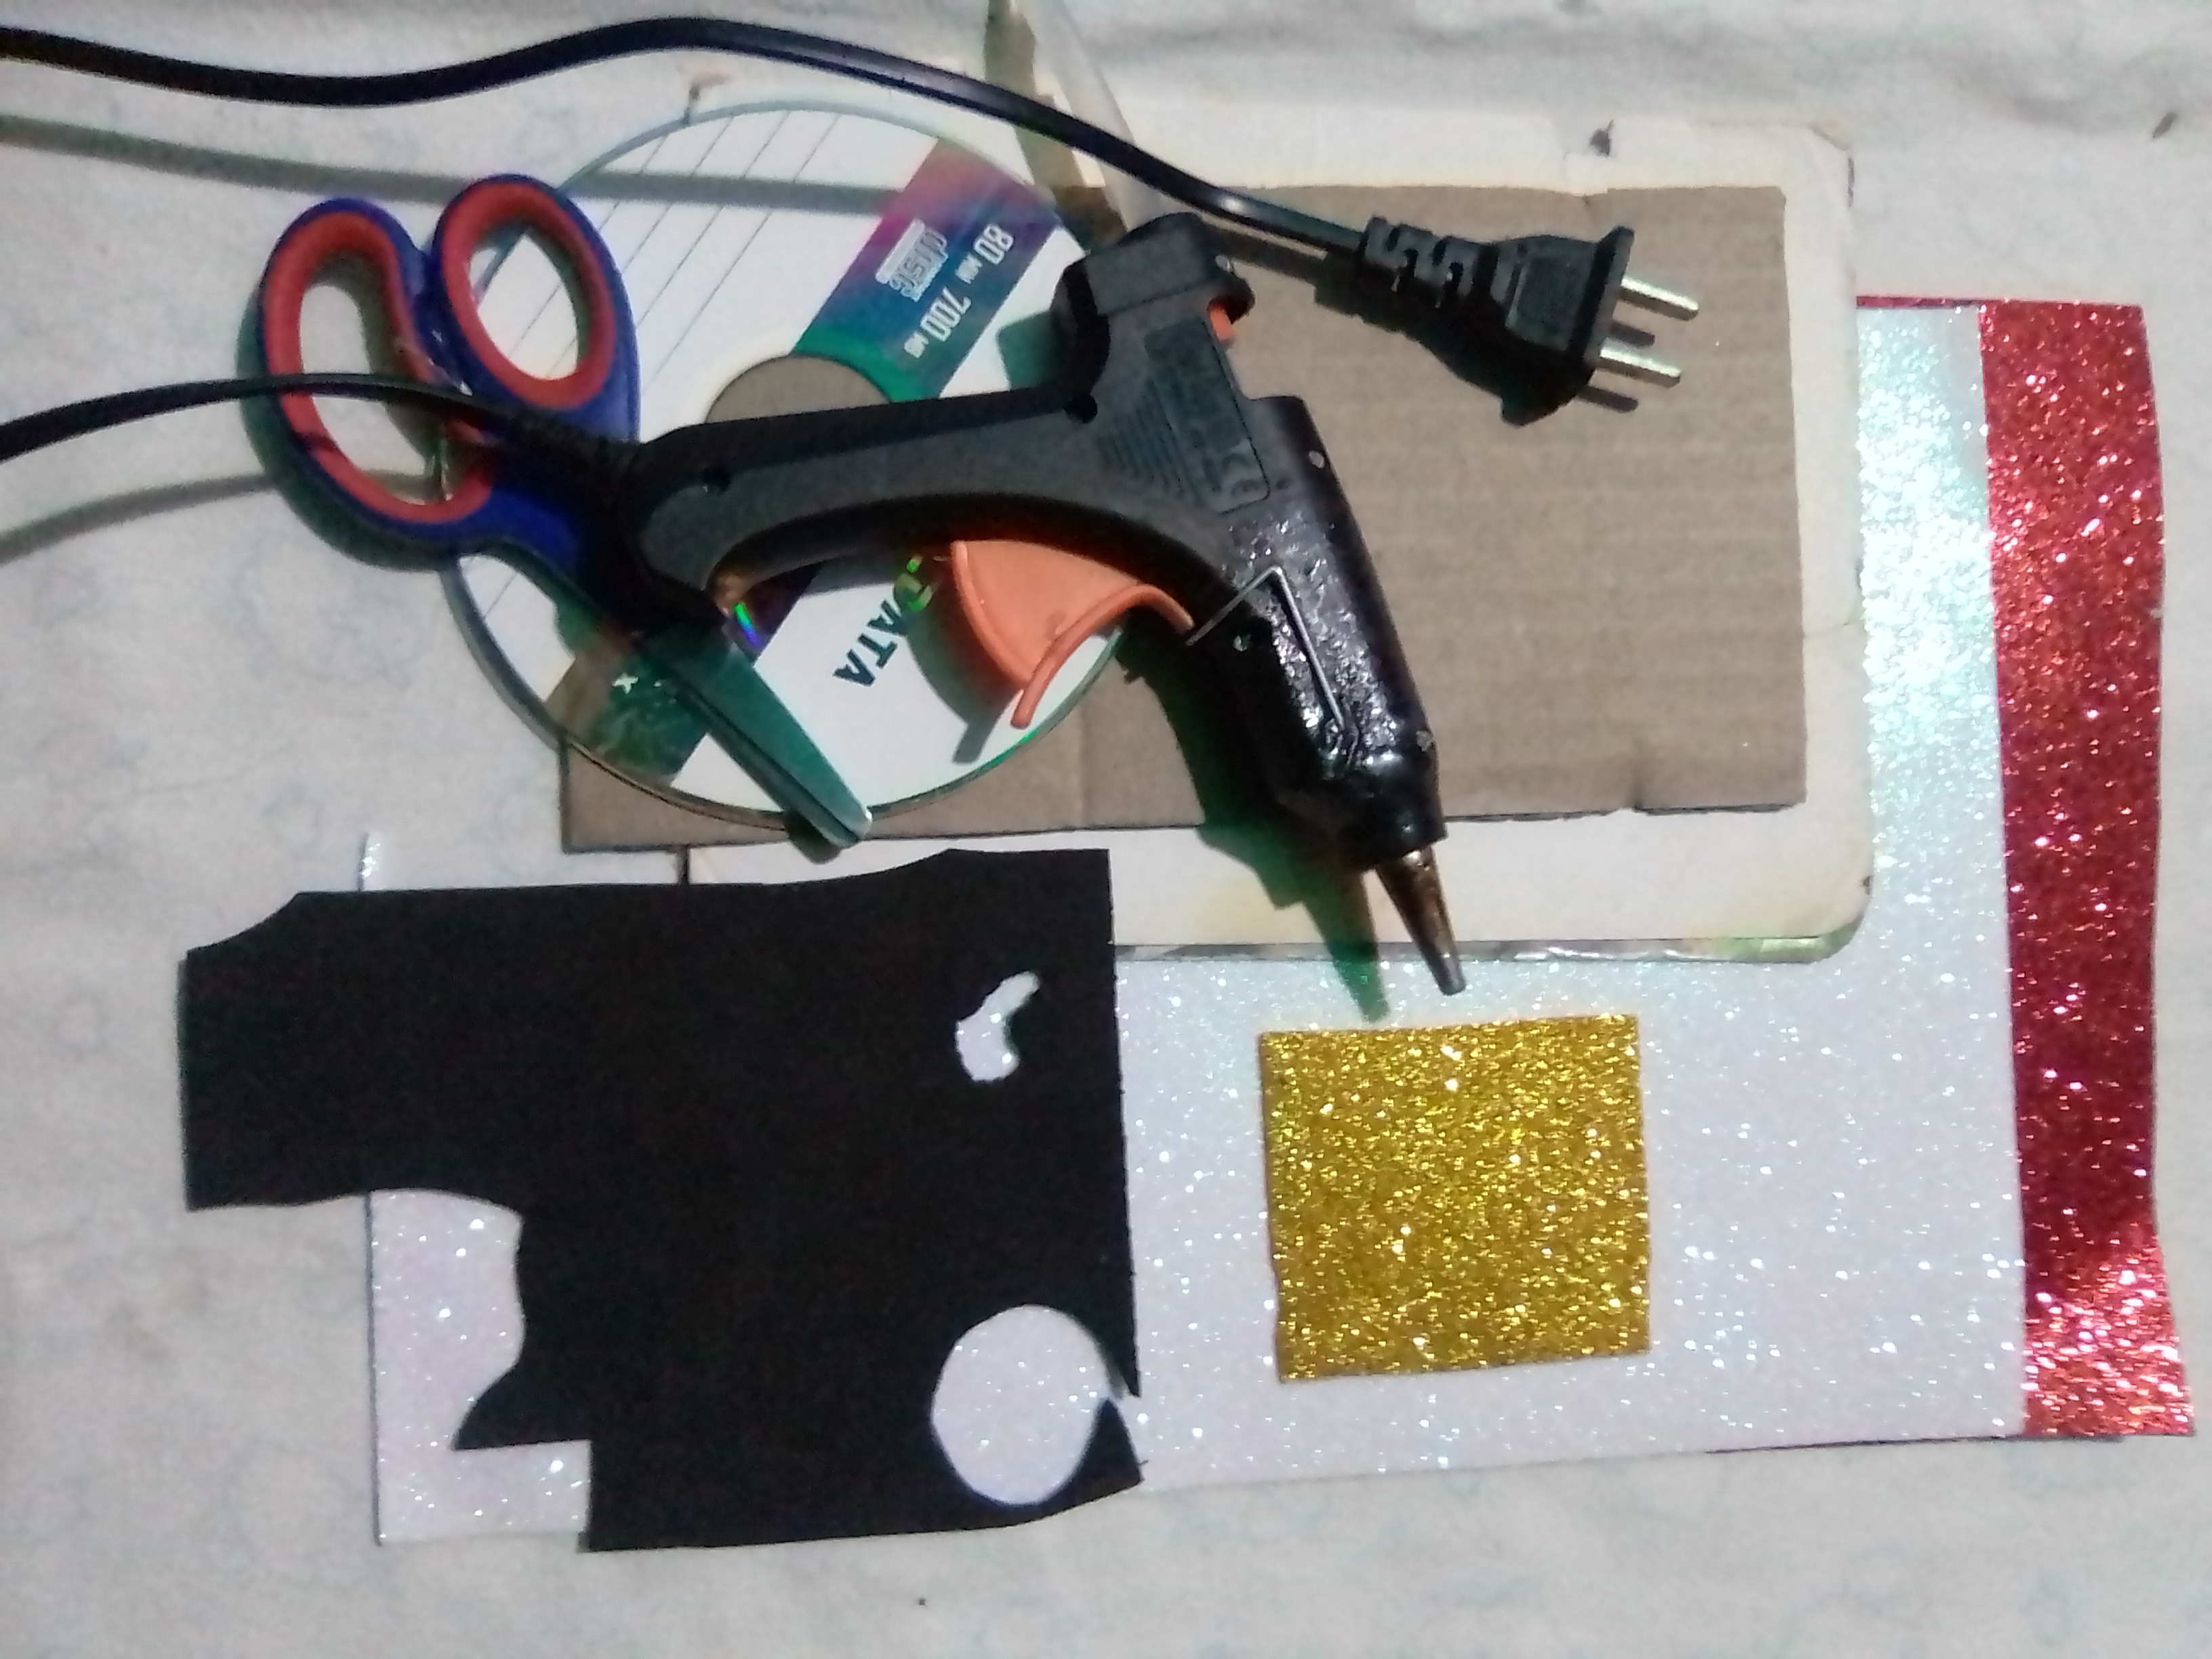
MATERIALS
✓ Colored frosted foami: white, red, black, and gold
✓ White cardboard
✓ Pencil and scissors
✓ Gun and silicone bars
✓ Cardboard
✓ CD
STEP BY STEP
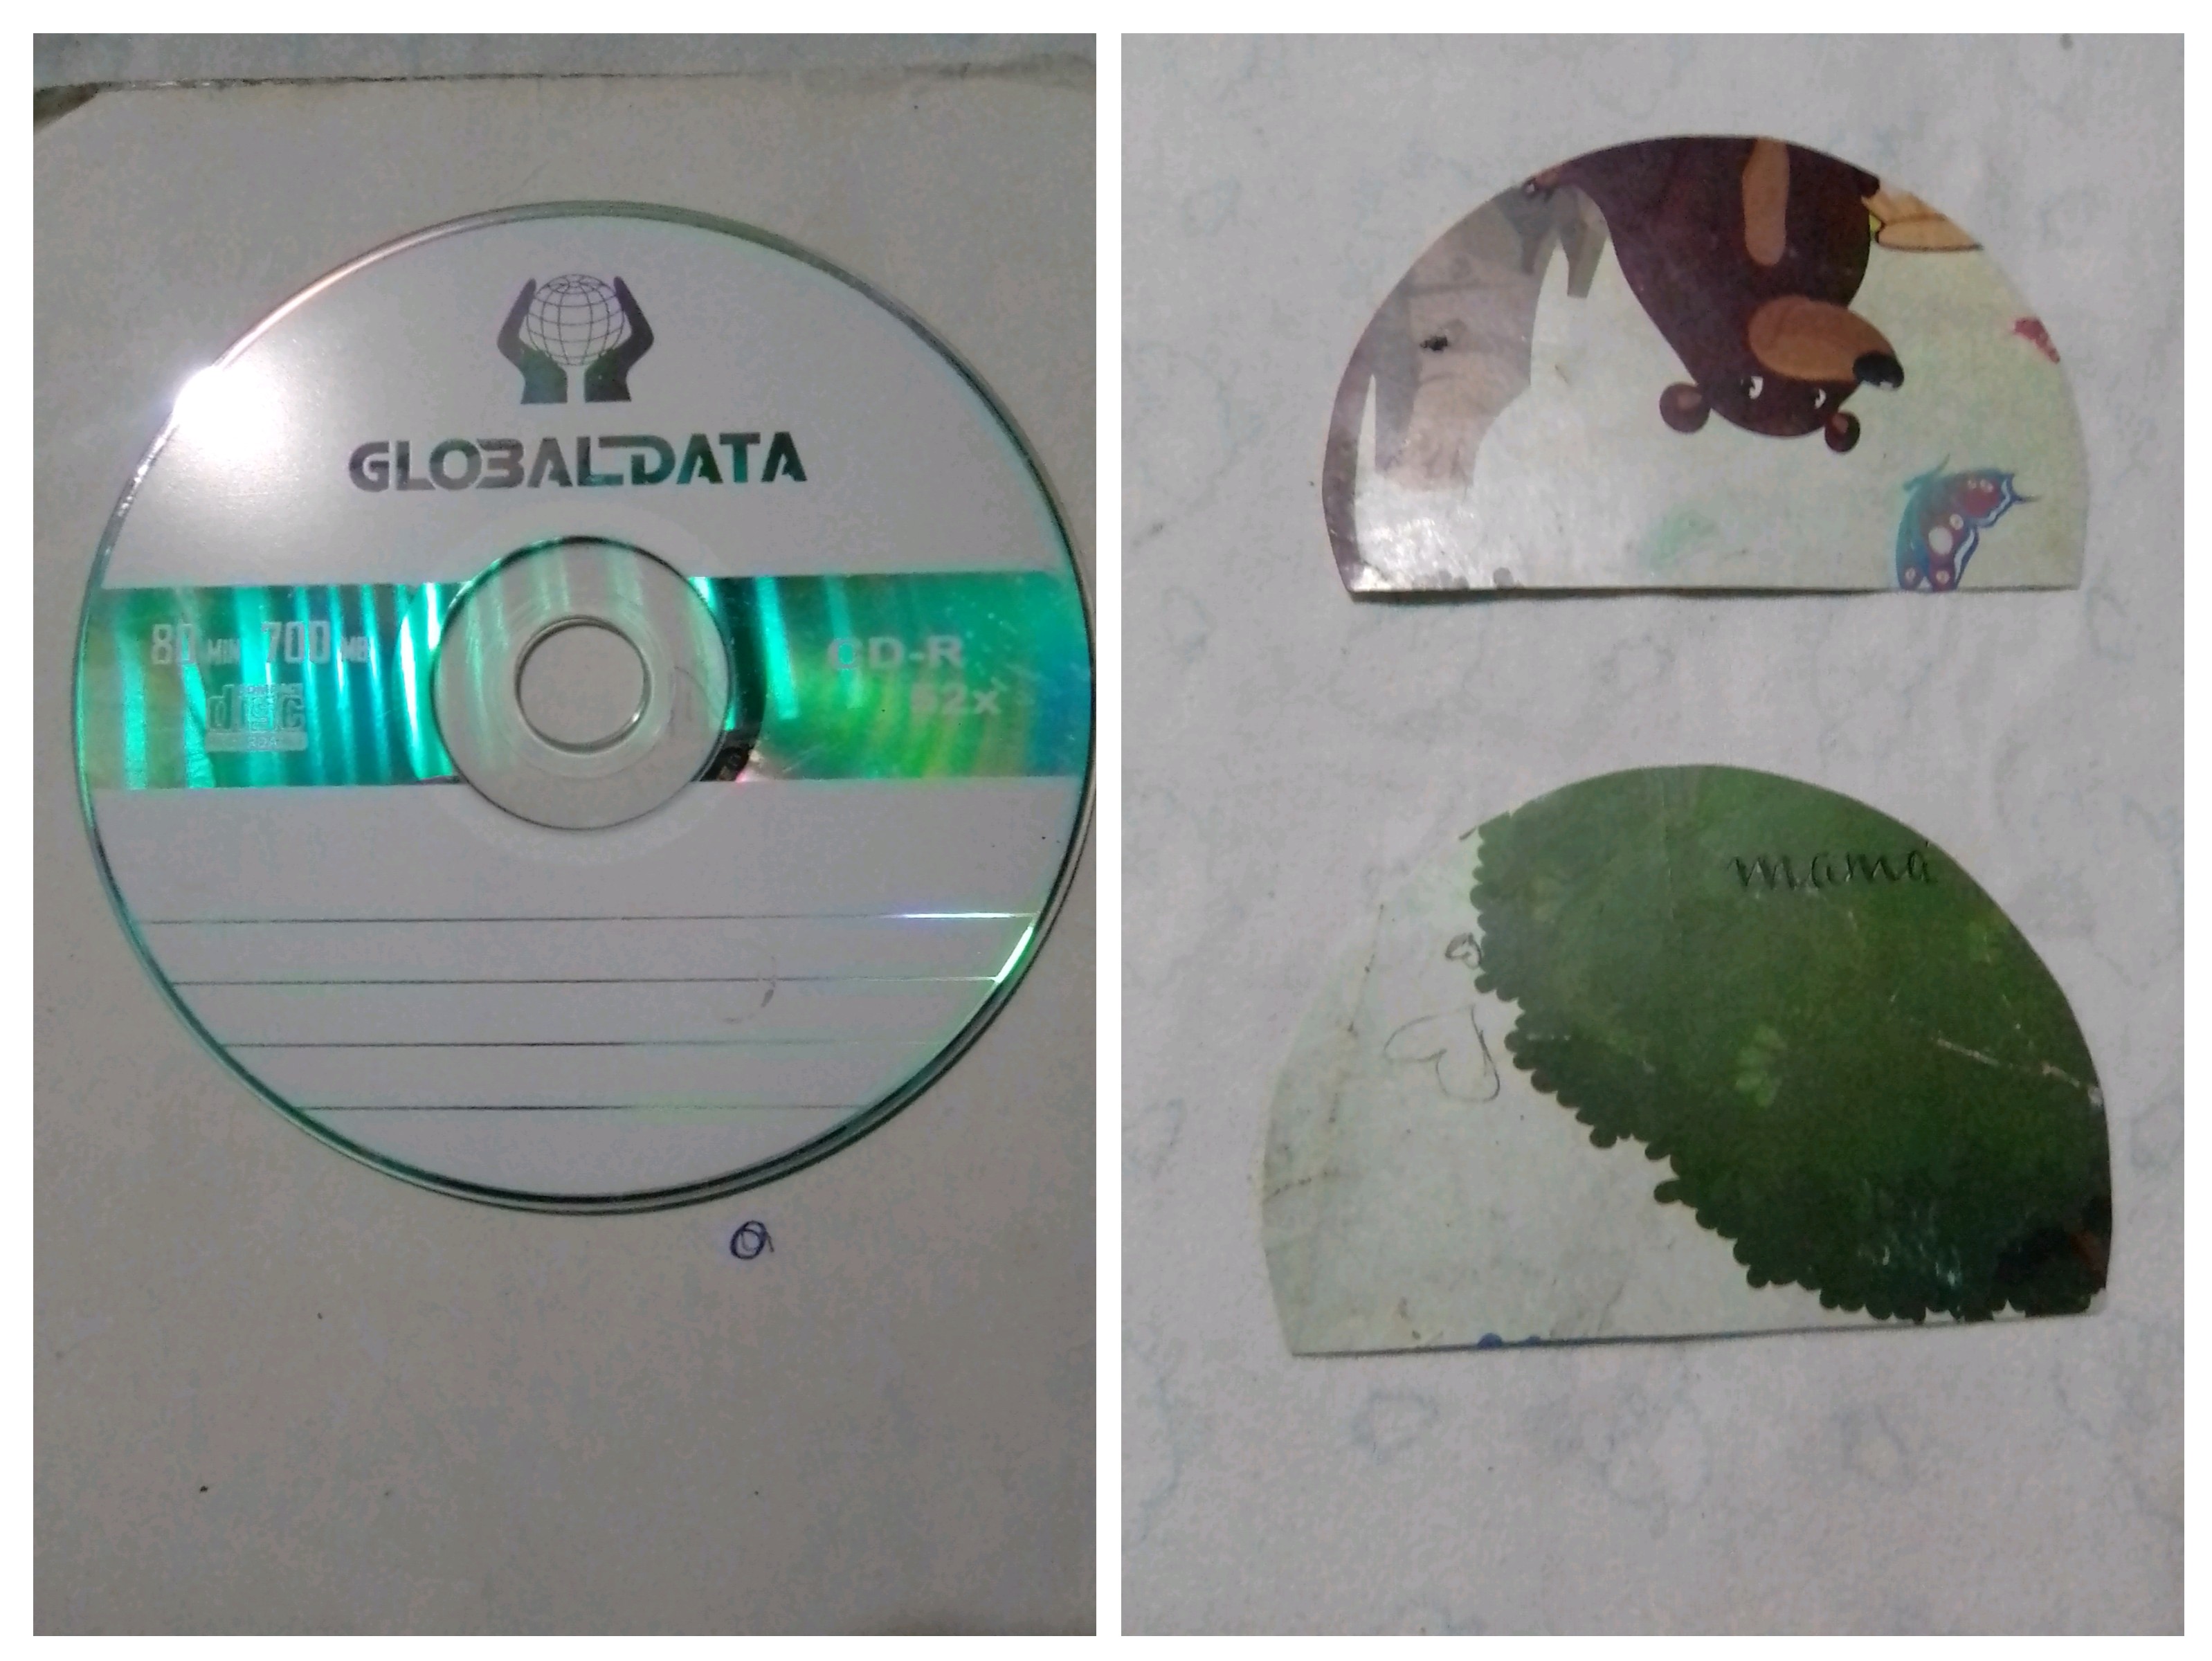
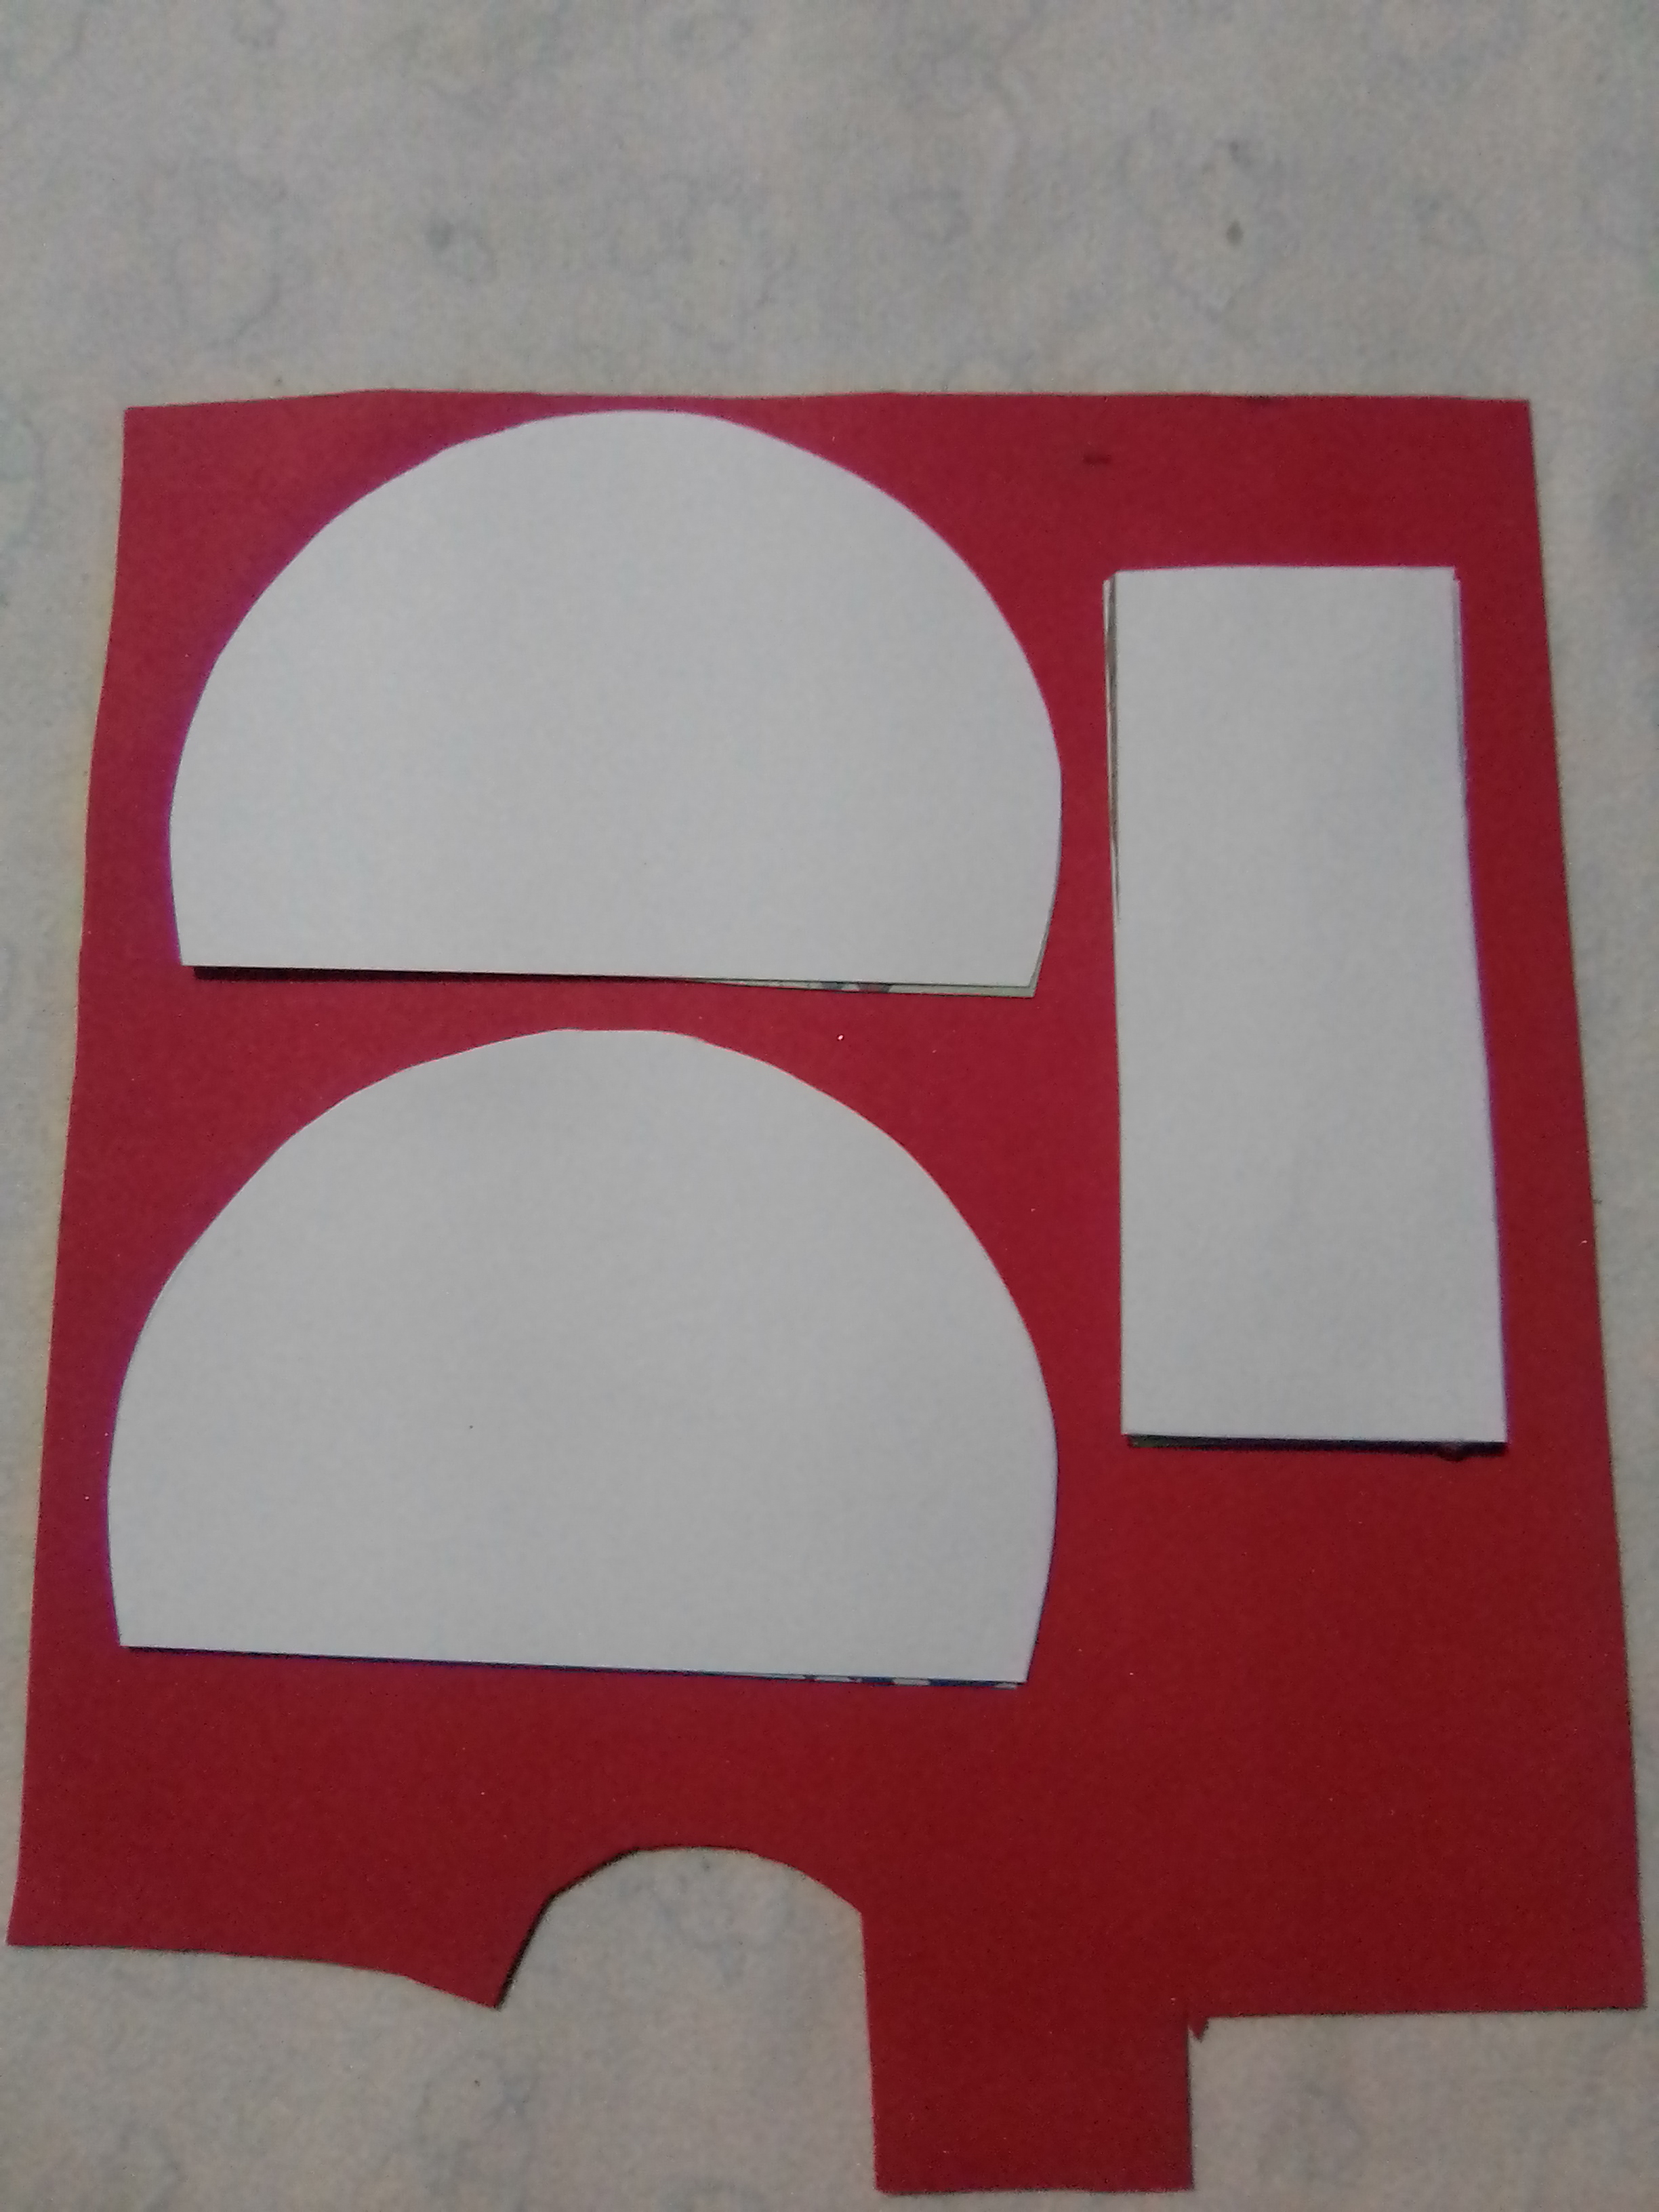
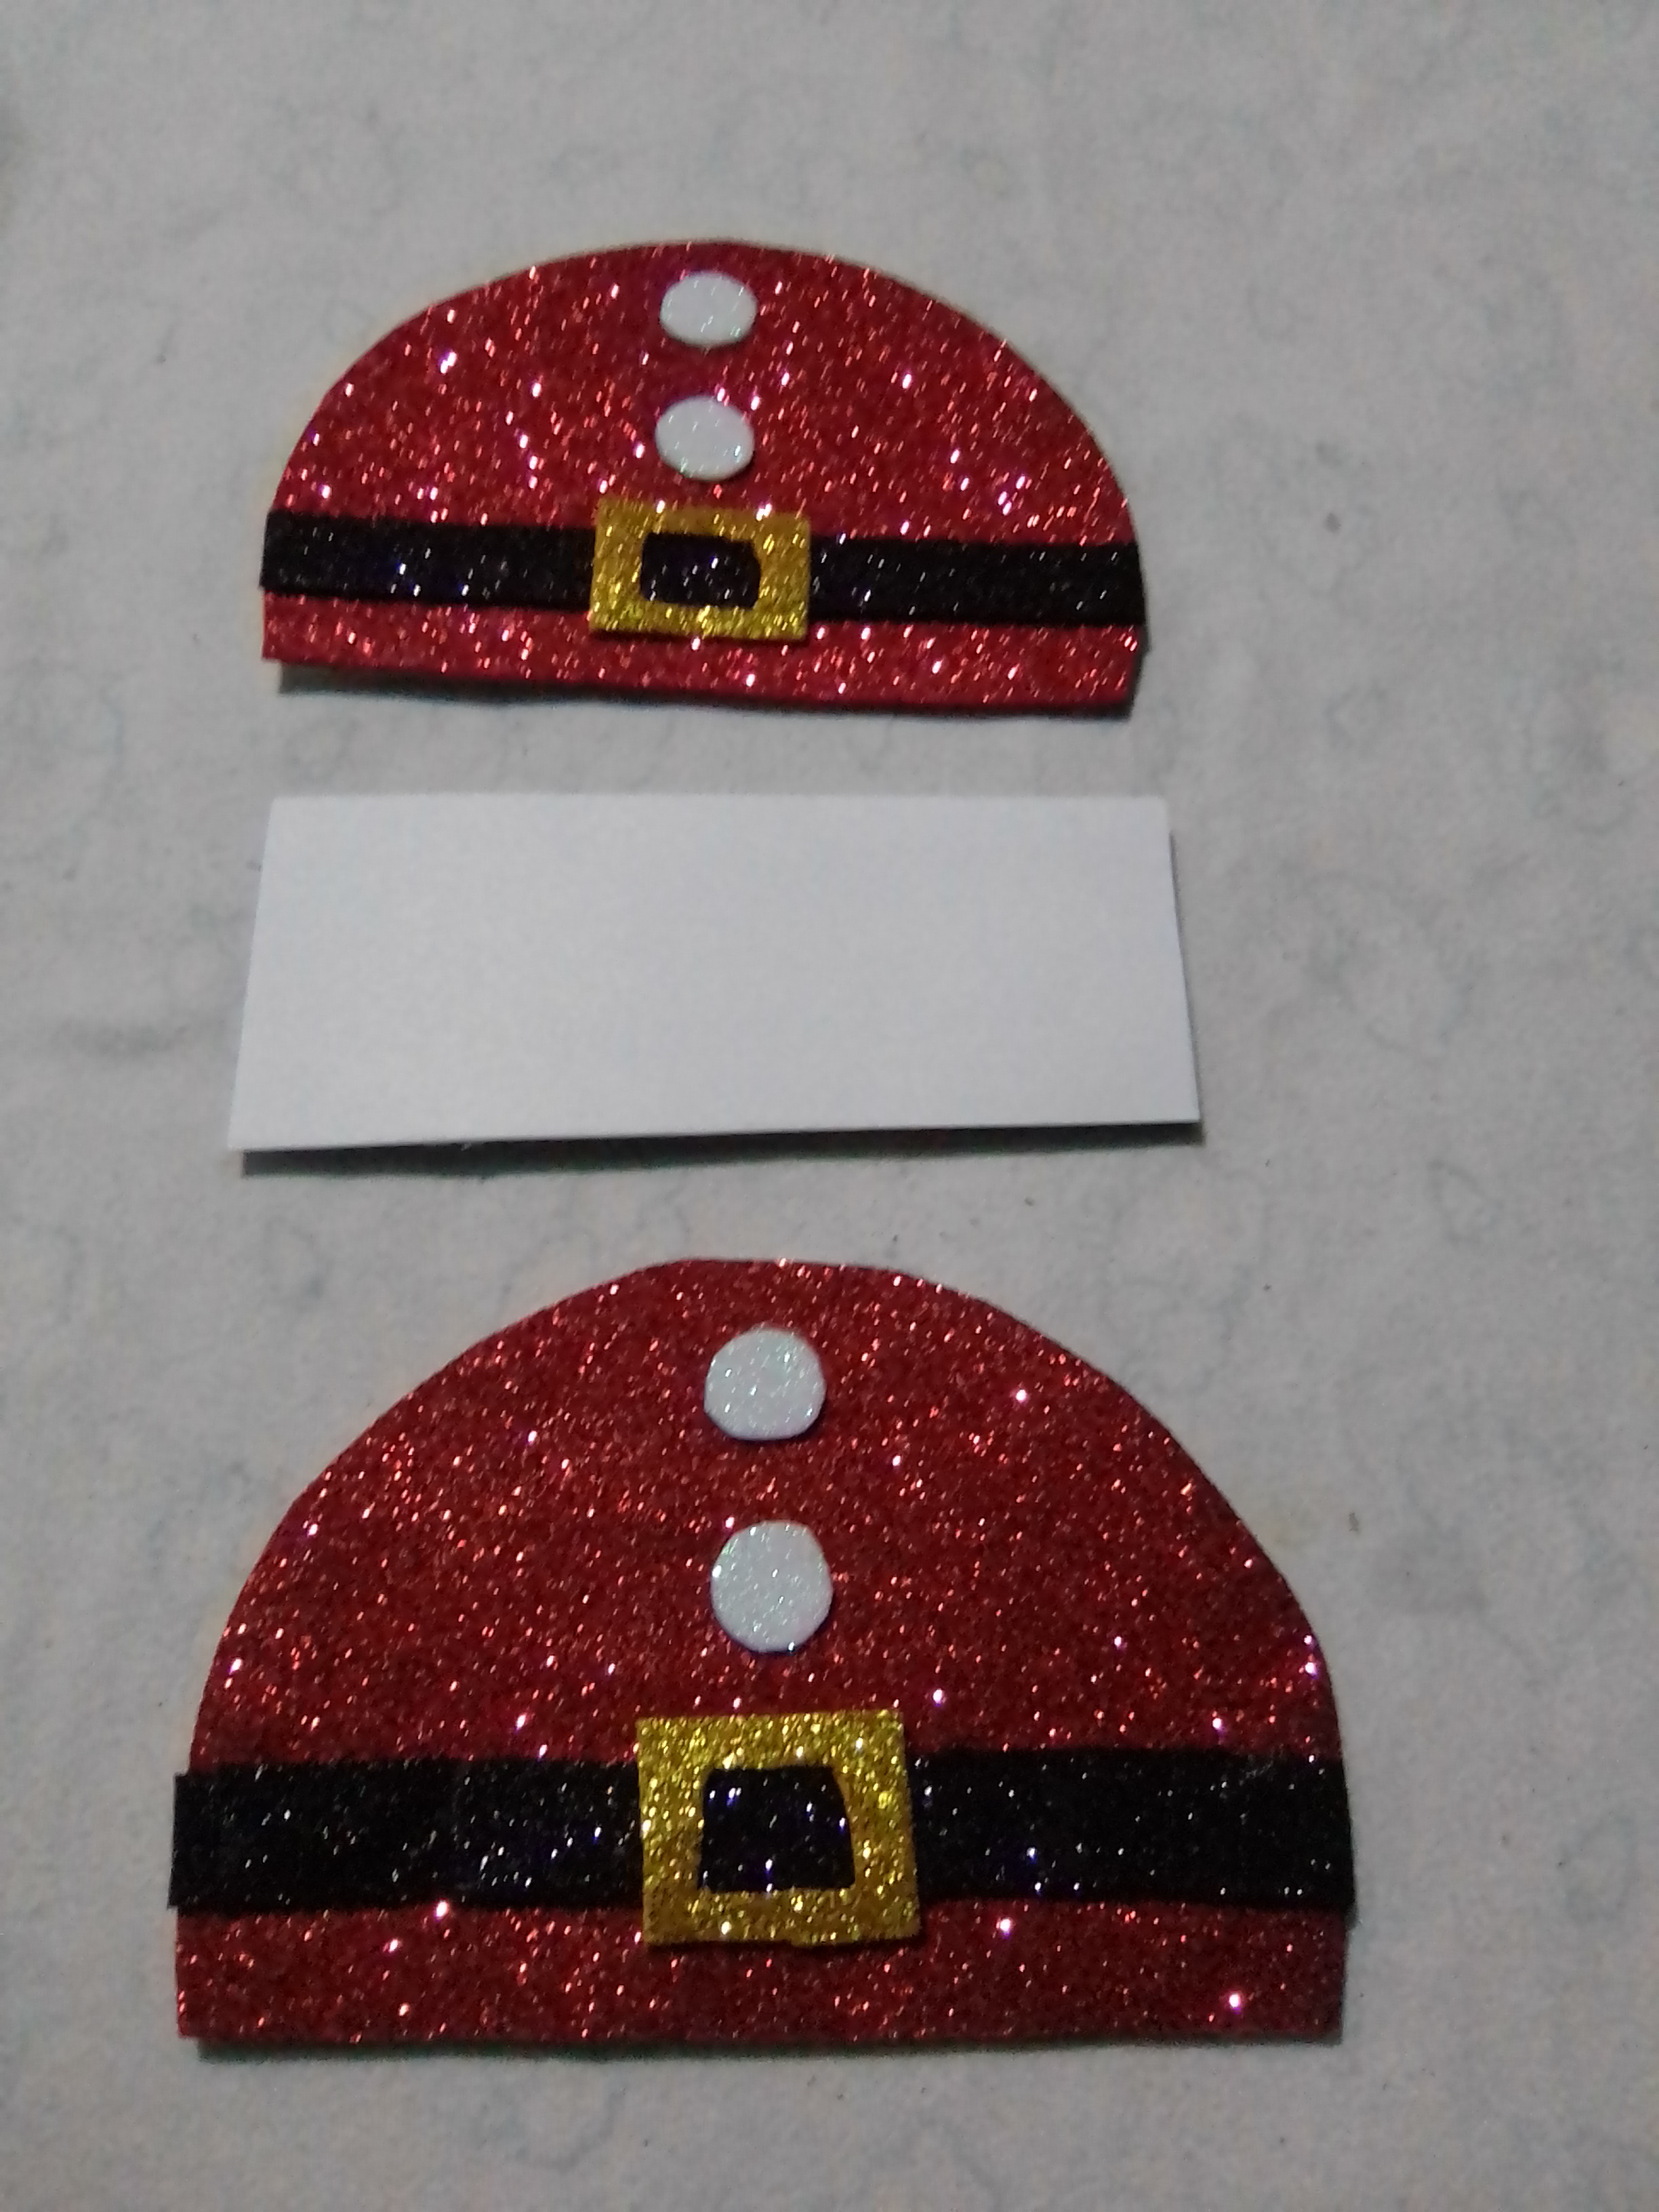
To start, this Christmas napkin ring, the first thing was to make the faces with cardboard, for this take a CD, to copy the shape of it, place the CD on the thin cardboard and measure 8.5 centimeters in the highest part, and cut two pieces for the faces of the napkin ring.
Then cut a piece of thick cardboard with a measurement of 5 X 12 centimeters, which will be the base of the napkin ring. With the three pieces of cardboard ready, I proceed to make each one its pair of white cardboard, to cover what will be the internal part of the napkin ring, except for the thick cardboard that will be covered on both sides.
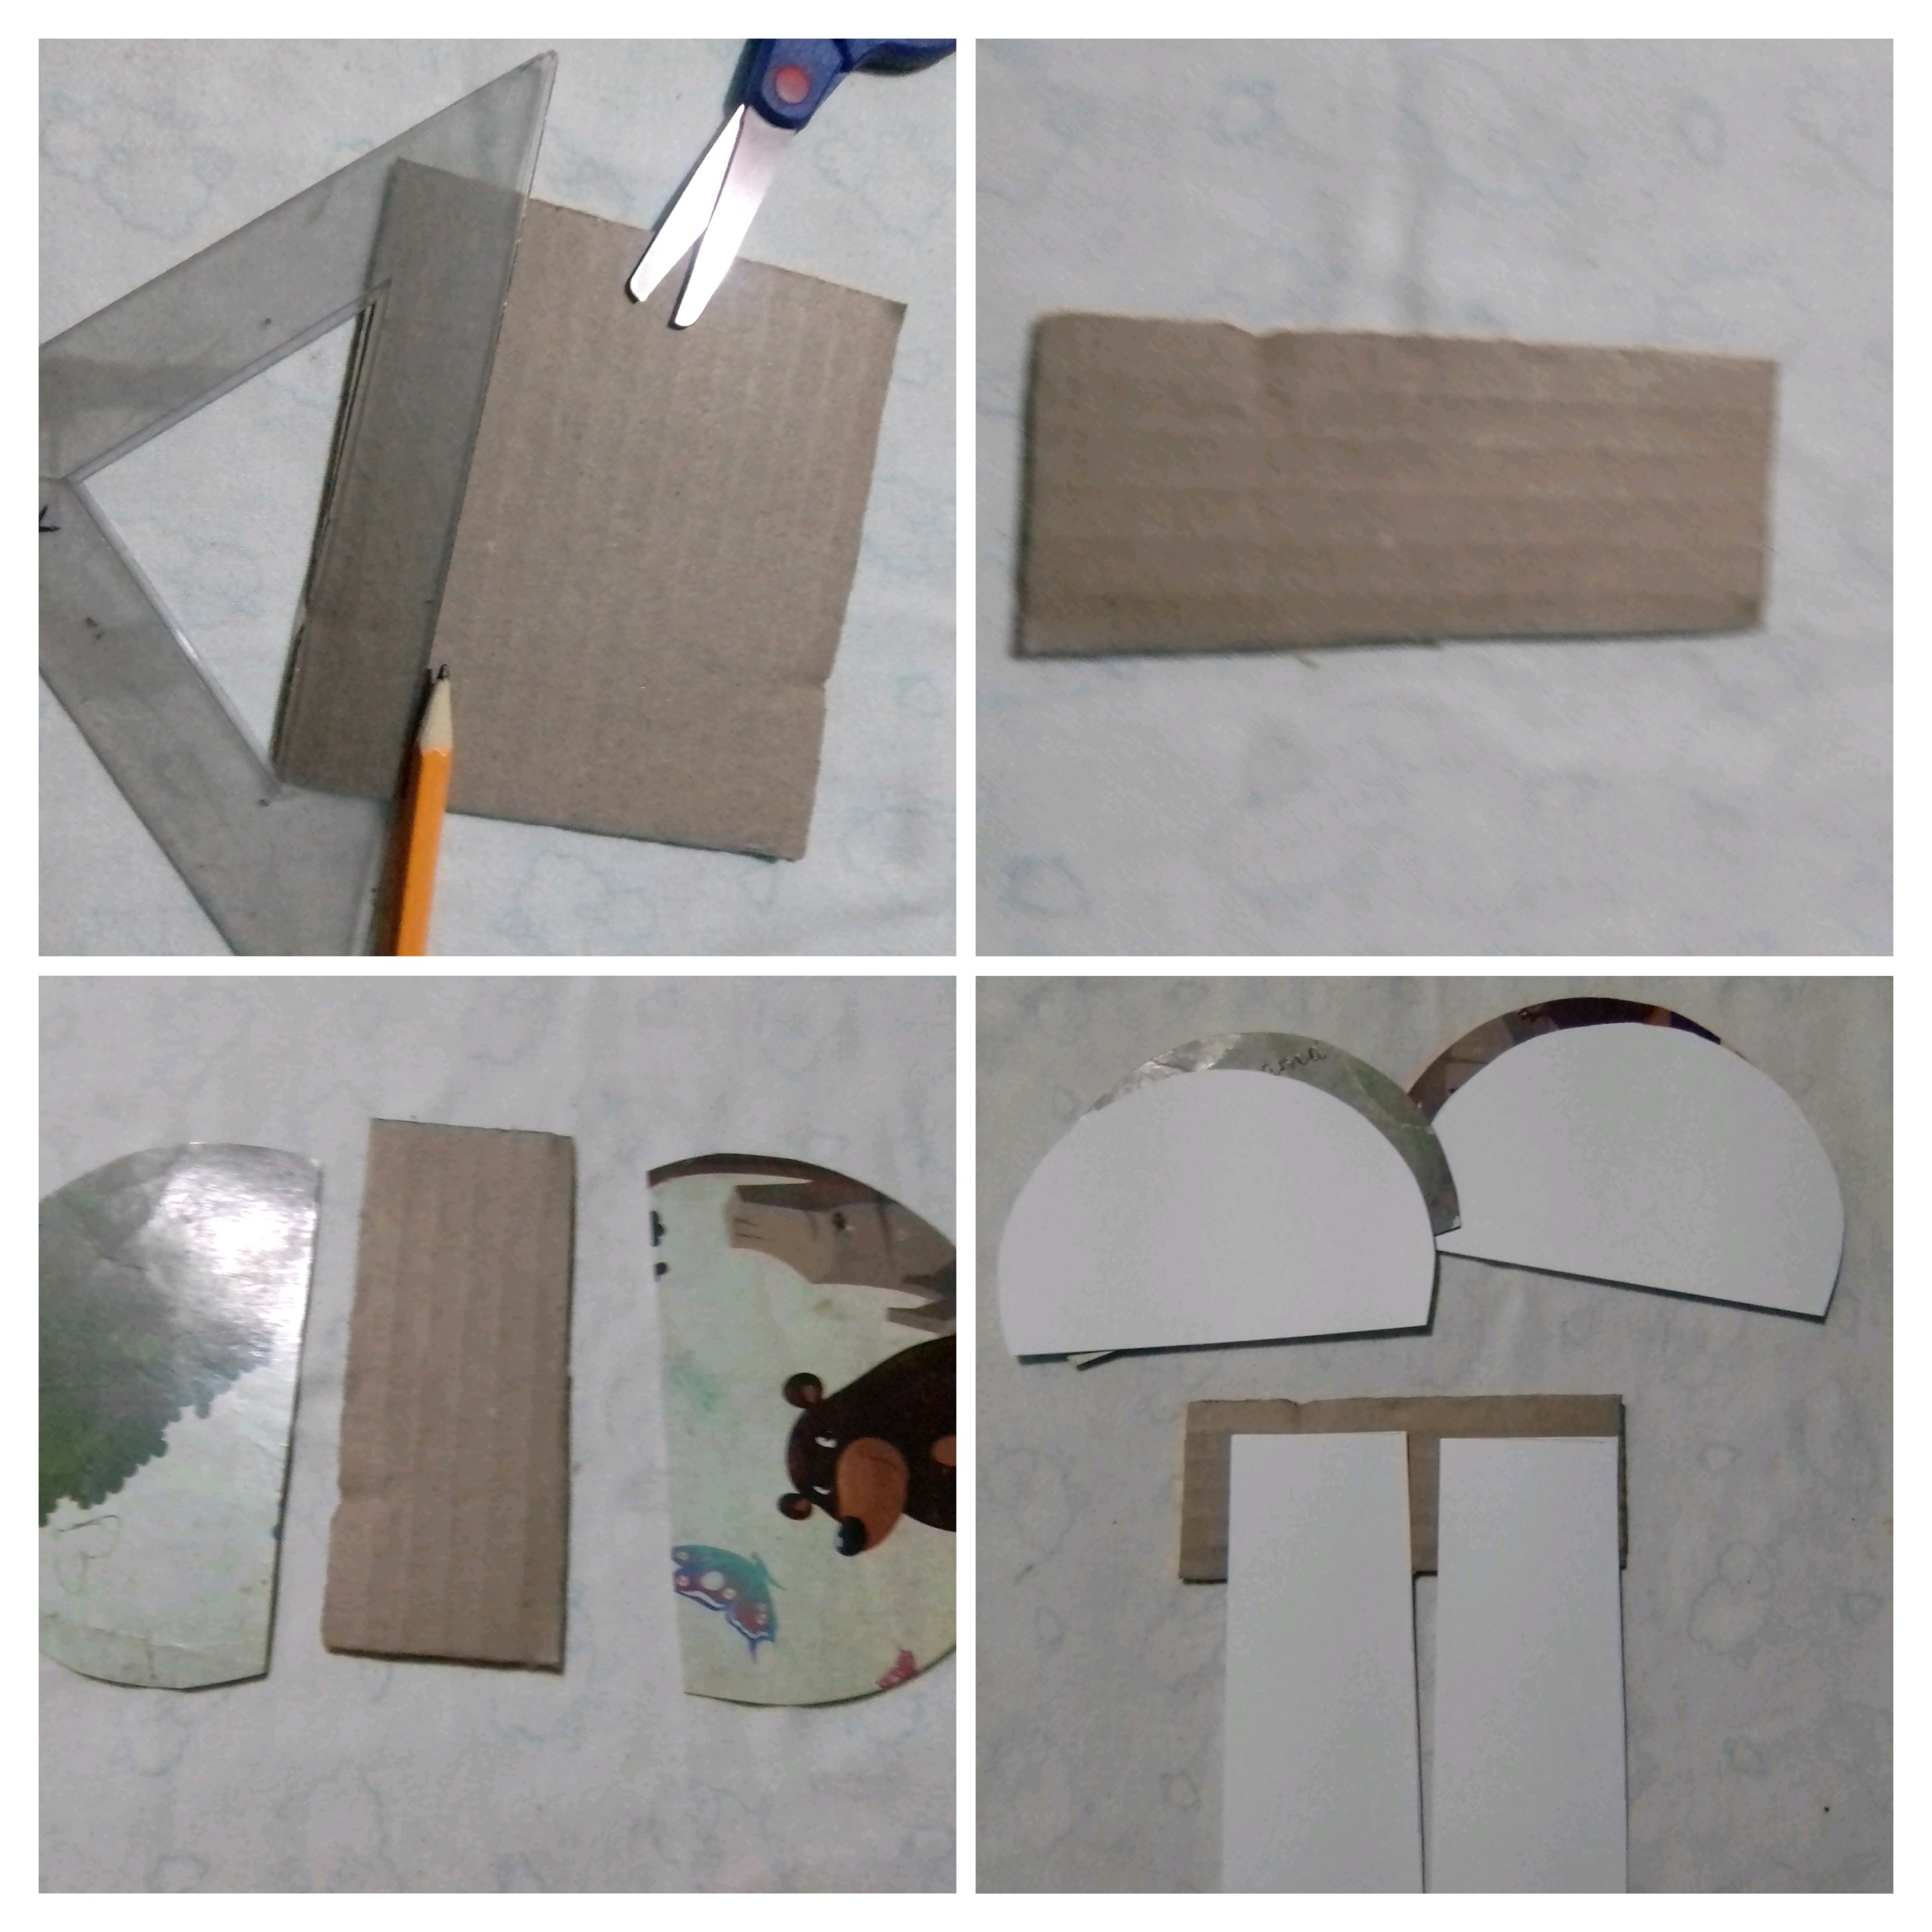
I cover one of the faces with white, each of the rounded pieces, on both sides the base cardboard for the napkin ring.
With my pieces covered in white, the next step is to make the shapes for the outer cover, and that will transform the napkin ring into the body of Santa Claus or Santa Claus, for this I cut frosty red foami like the classic Santa suit.
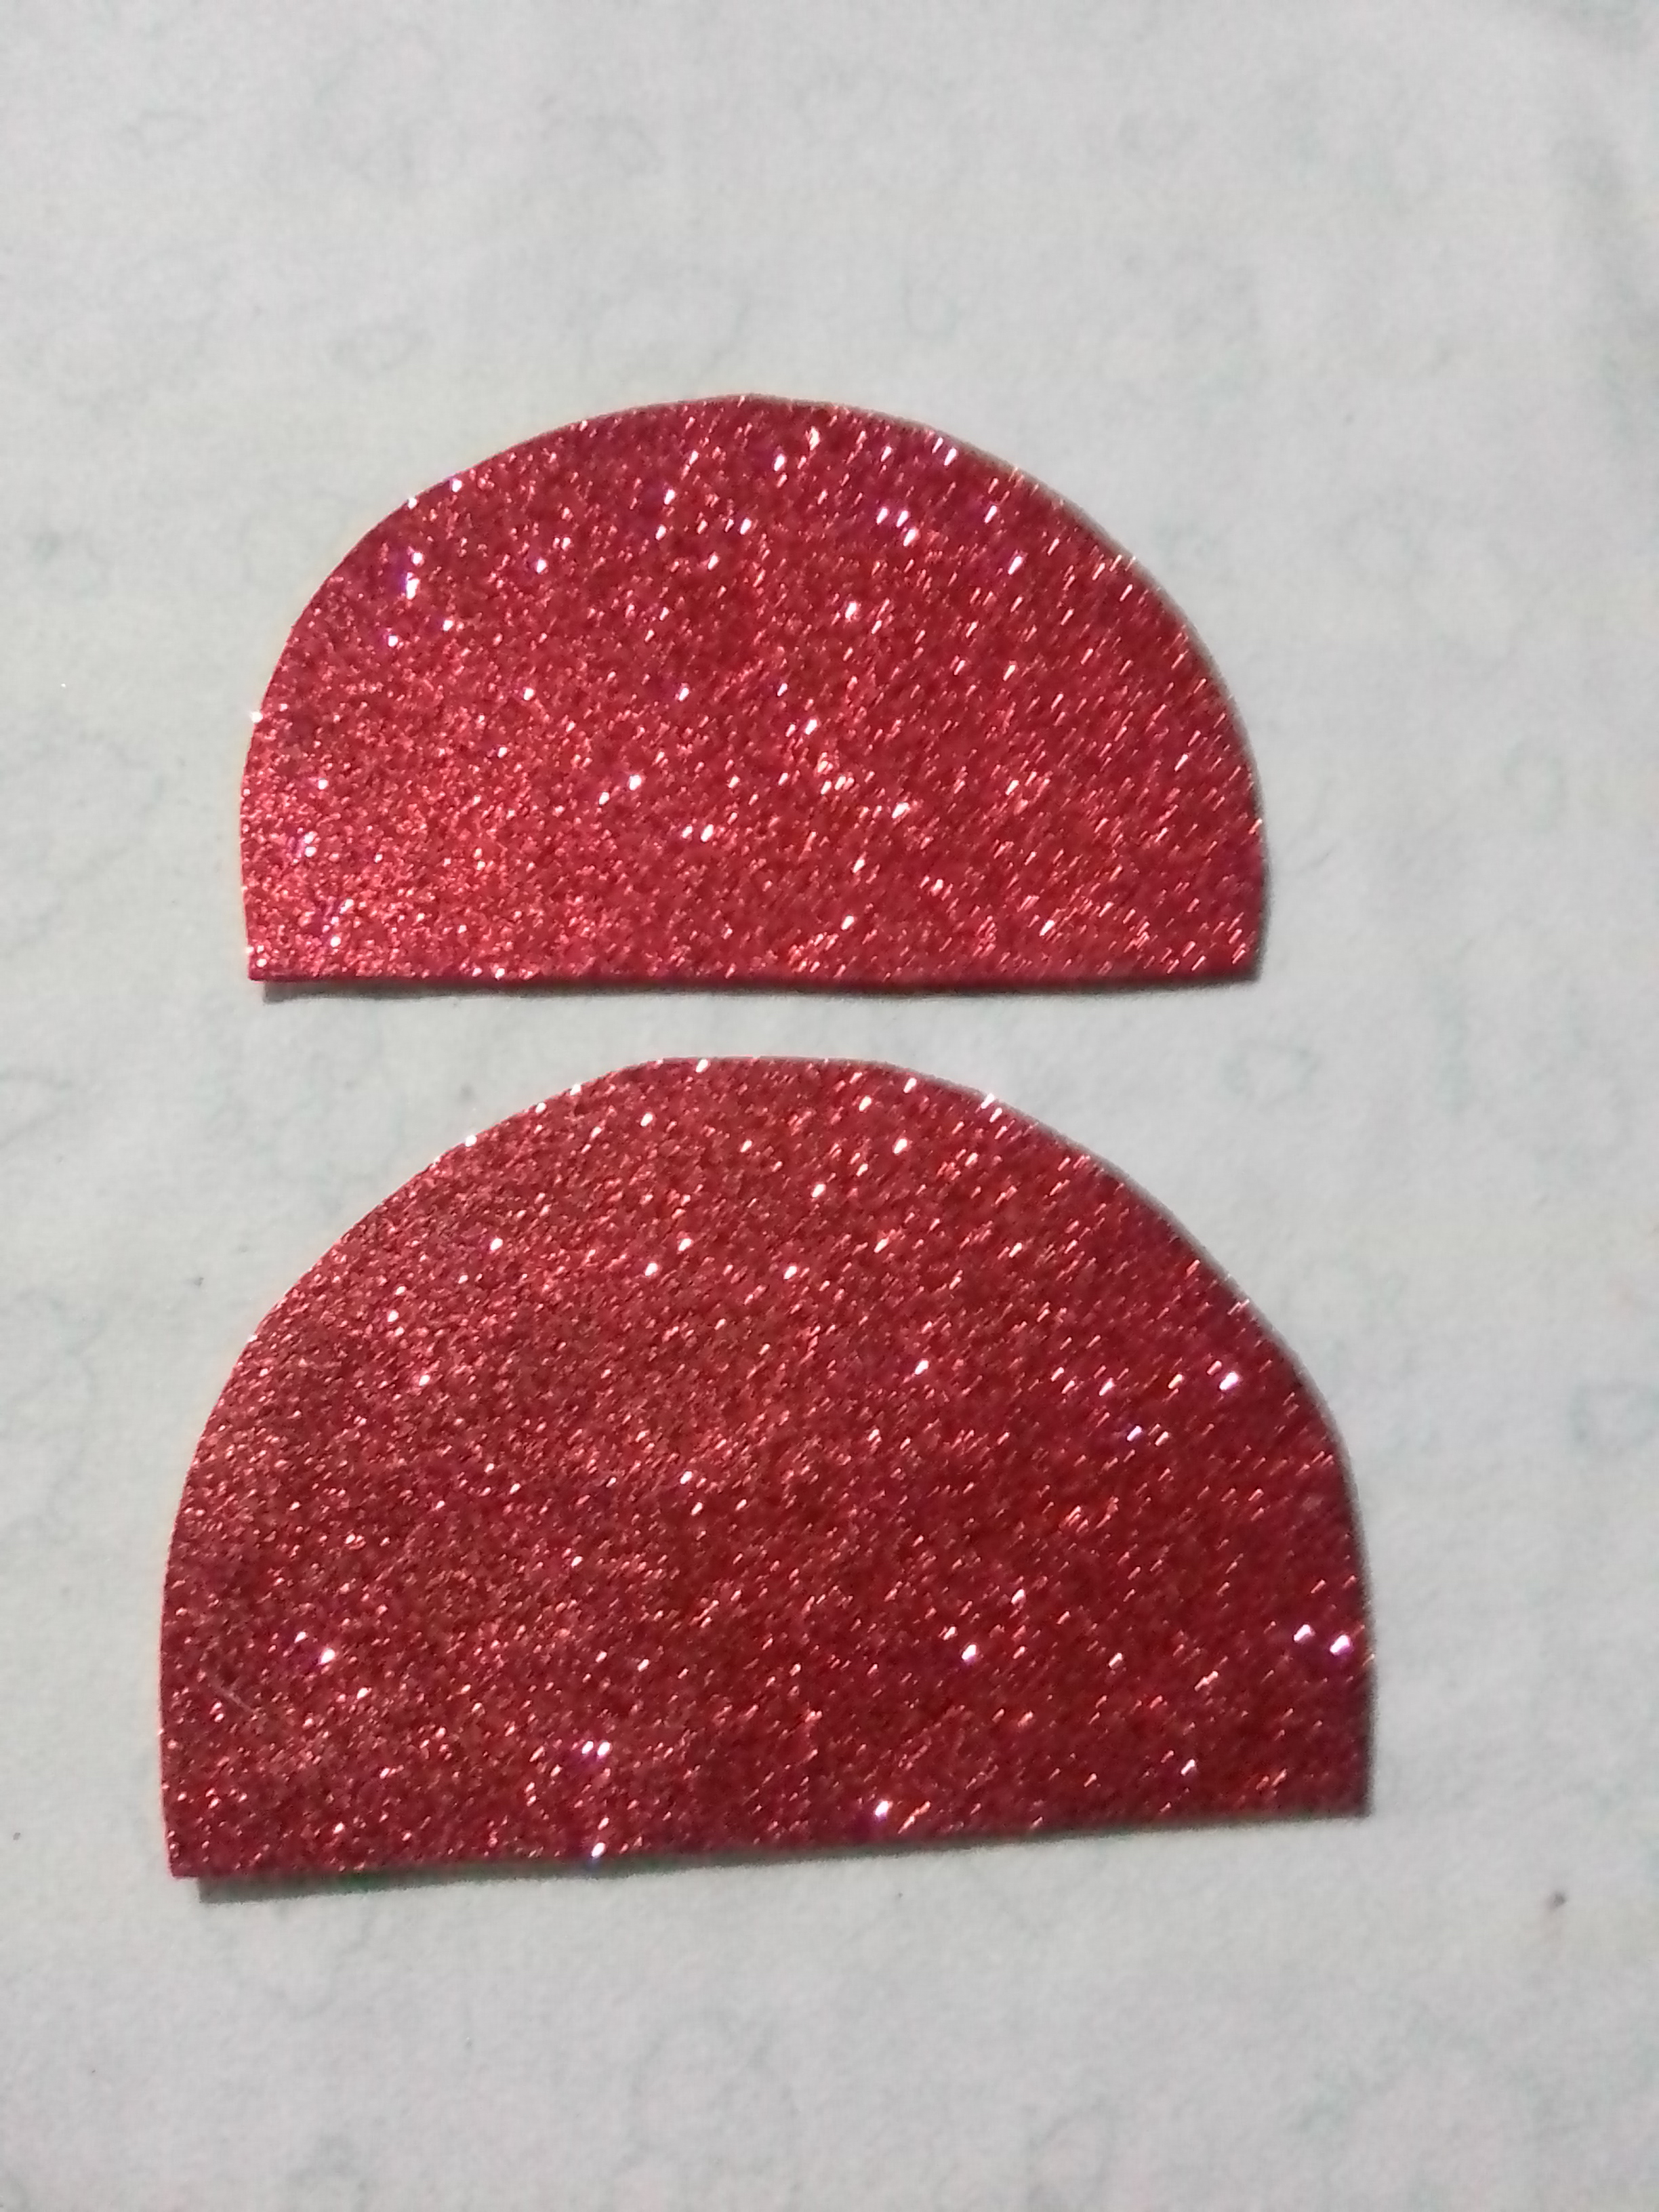
It is time to cover the remaining face of the napkin ring with red, to then make Santa's belt, to do this, cut two 1.2 x 12-centimeter ribbons of black frosted foam, likewise cut two 2.5 X 3 rectangles centimeters of gold color that will be the belt buckle.
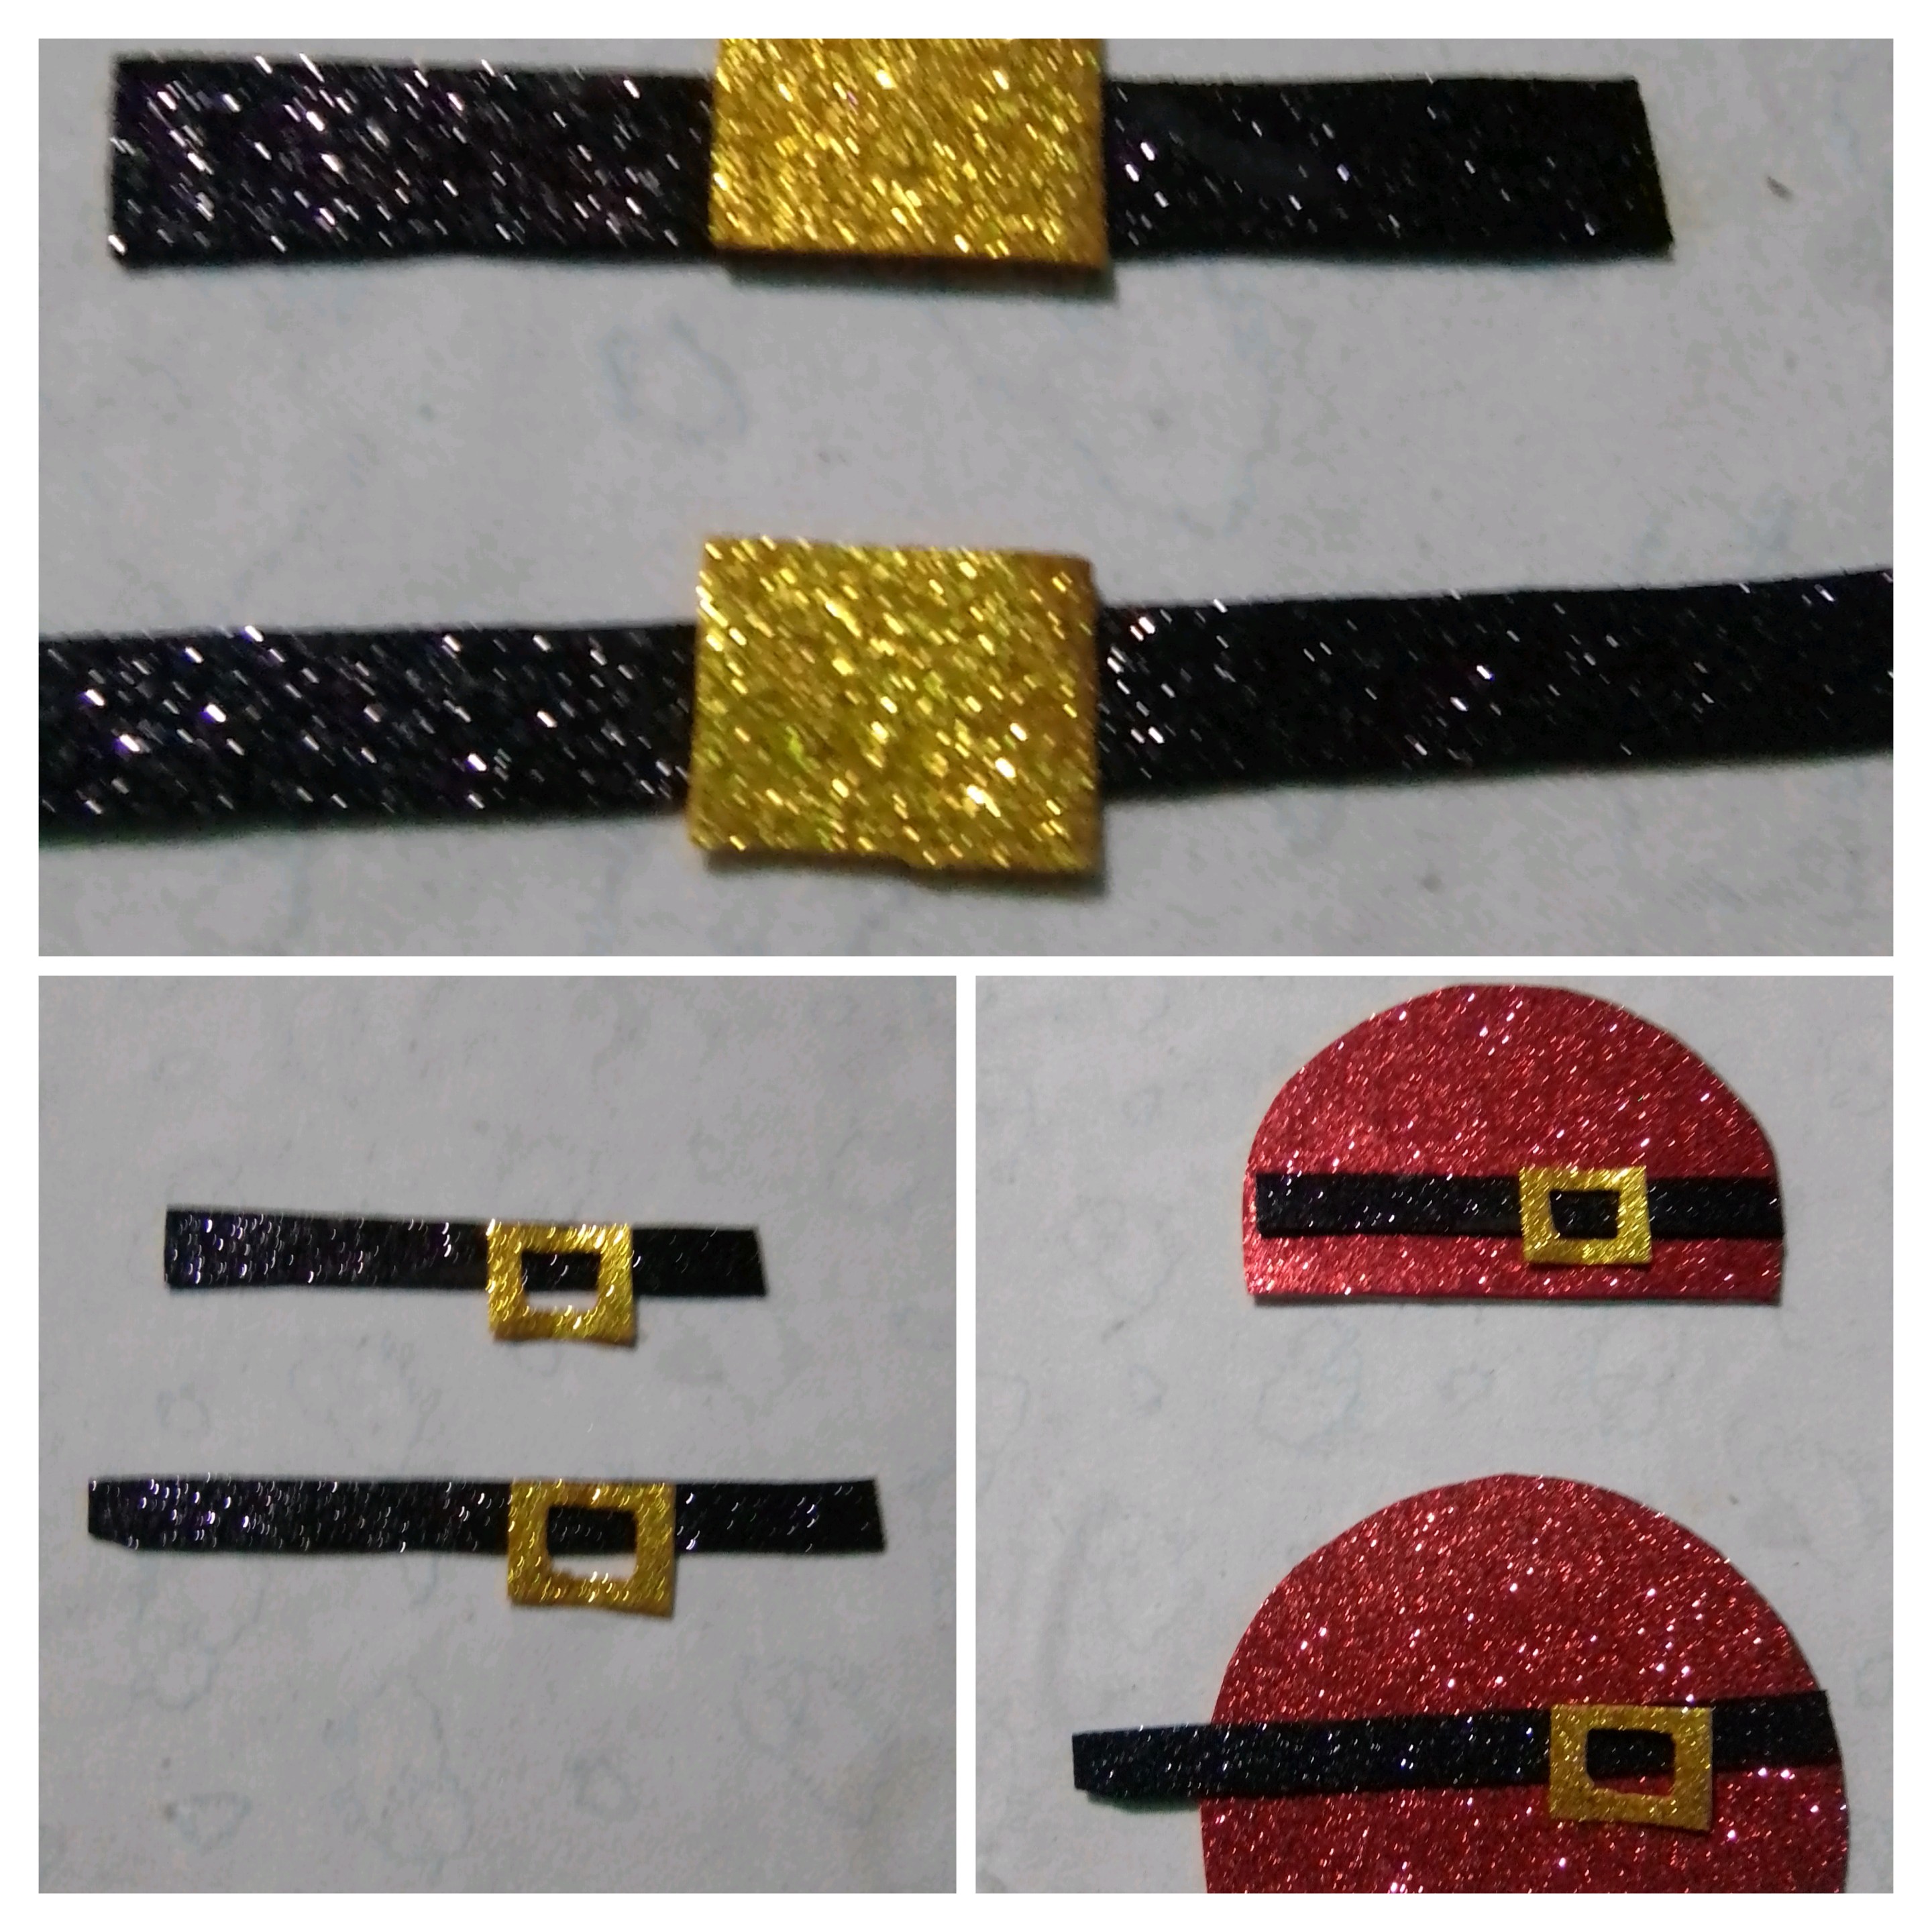
Before gluing the belt and buckle, I cut two small circles of white frosted foam, which represent the buttons of Santa's suit, and once the elements were ready, I began to fix each one with hot silicone.
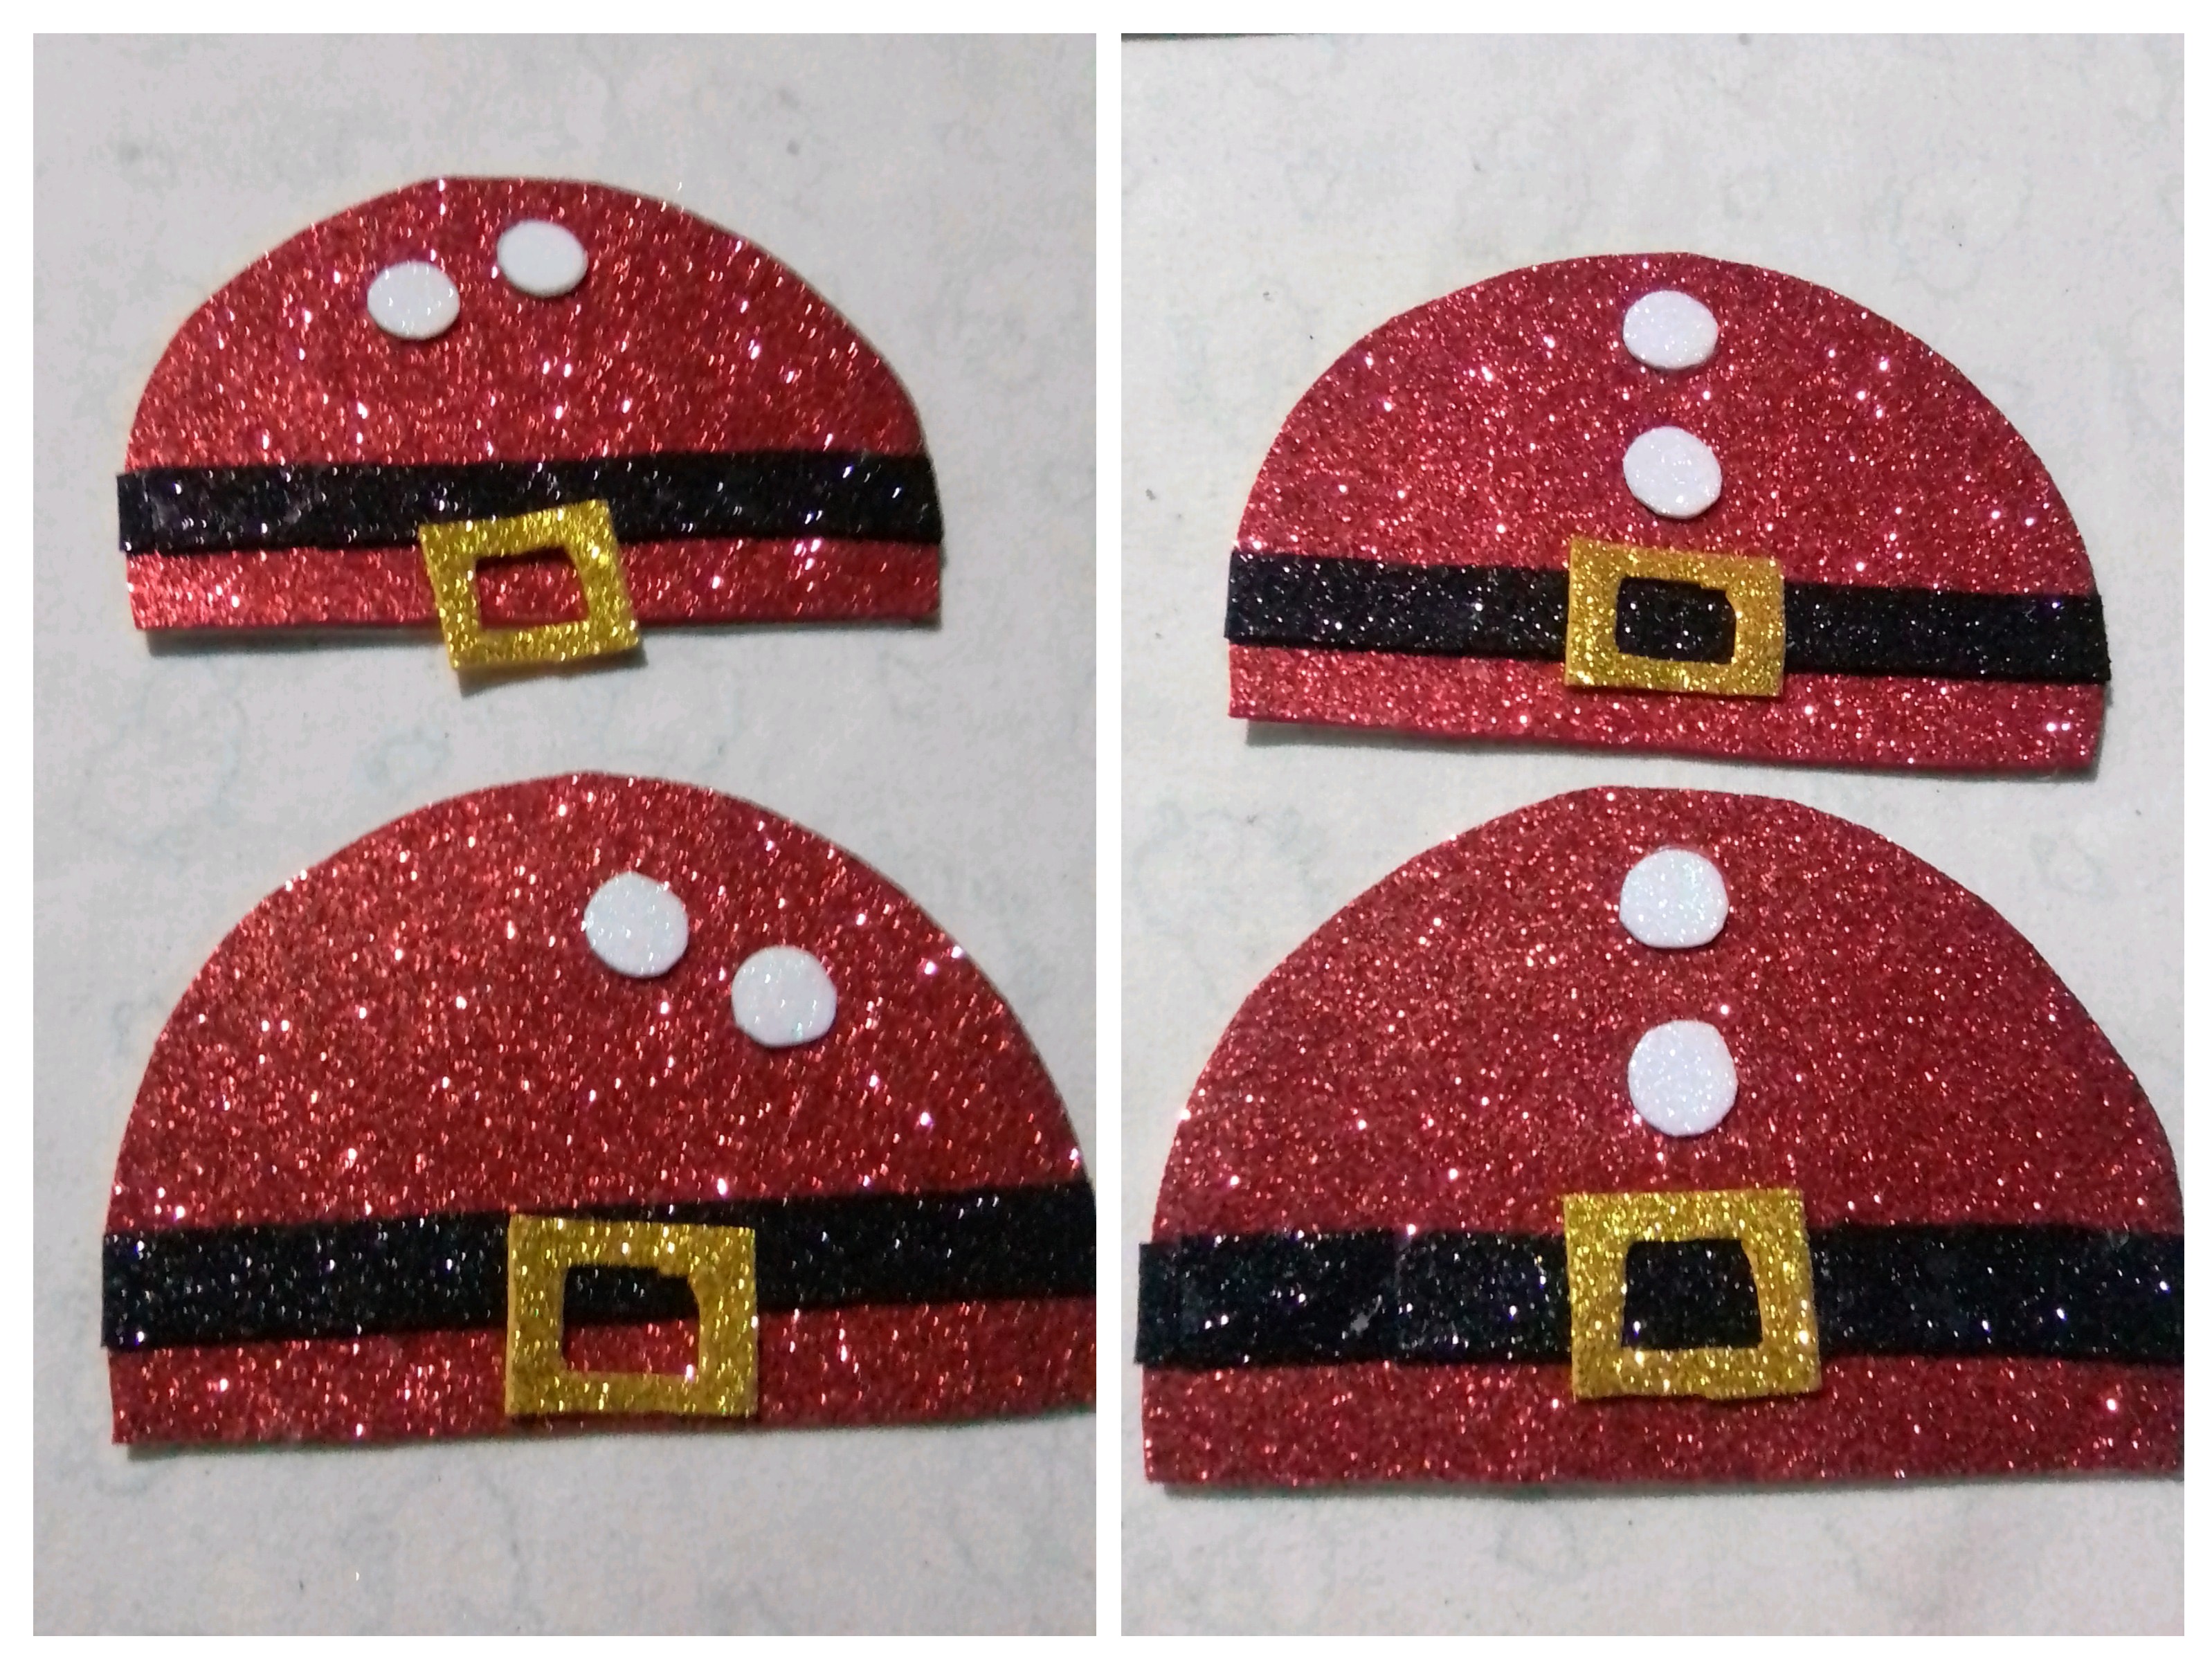
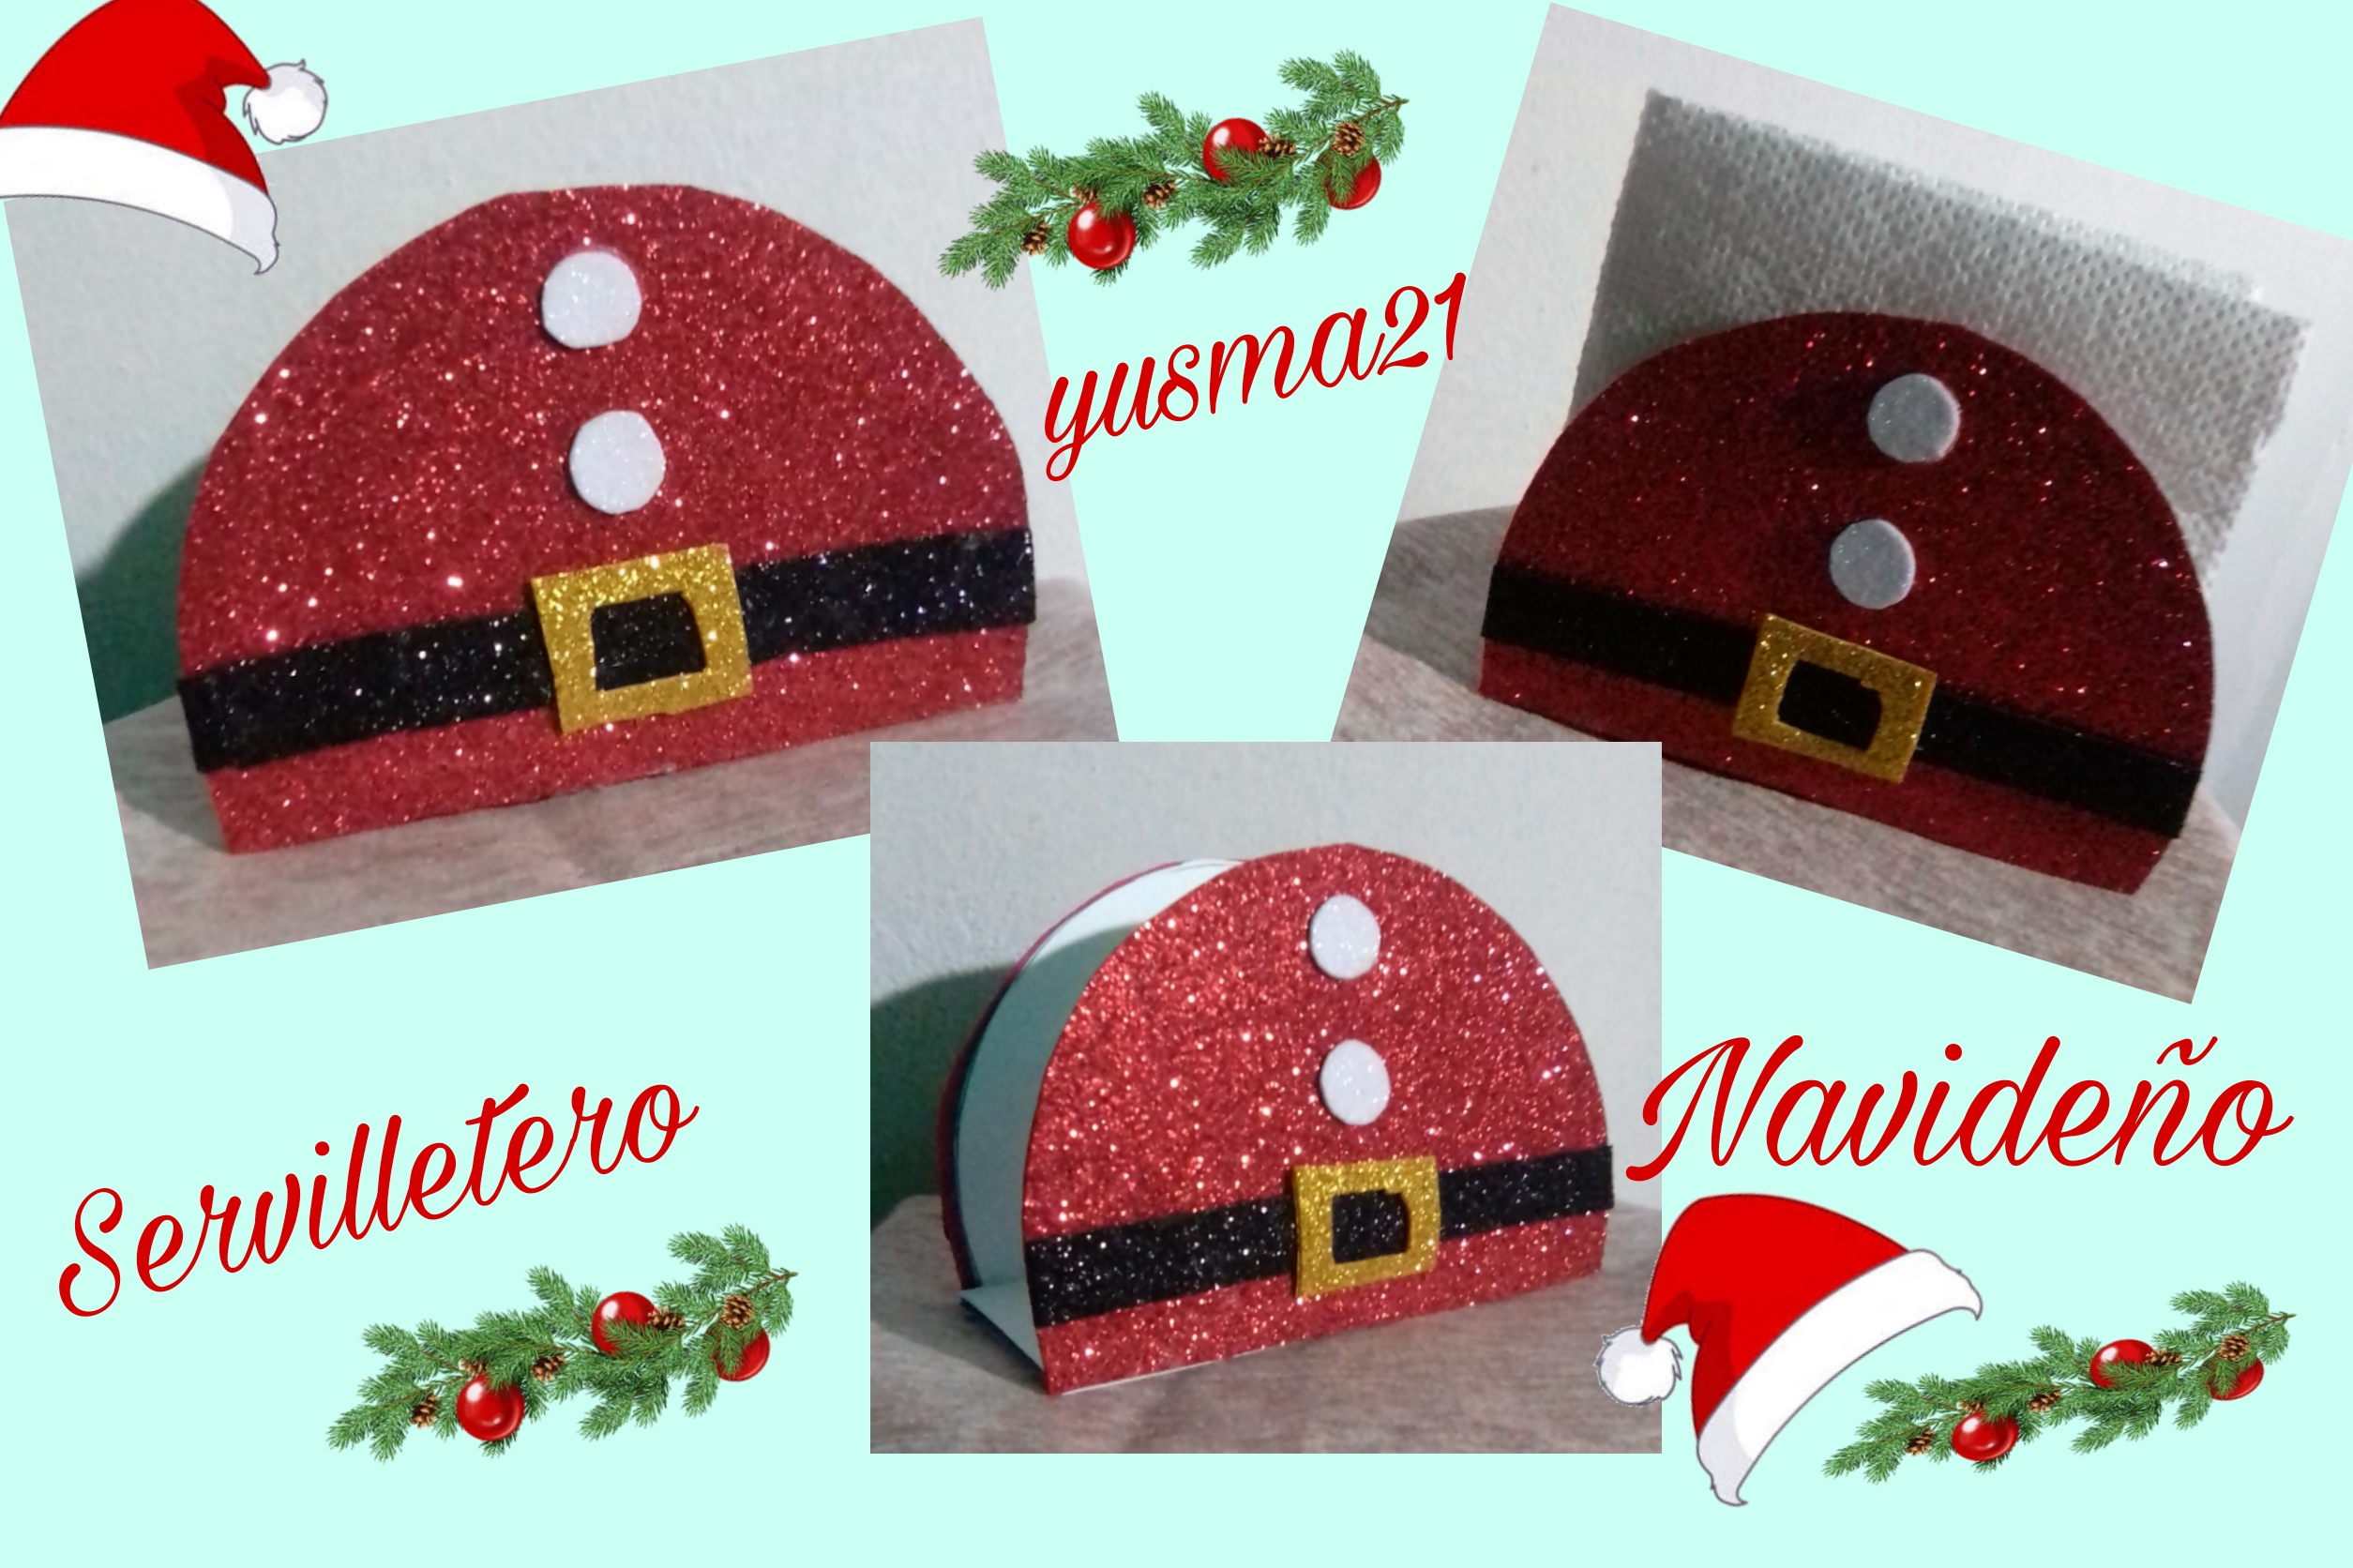
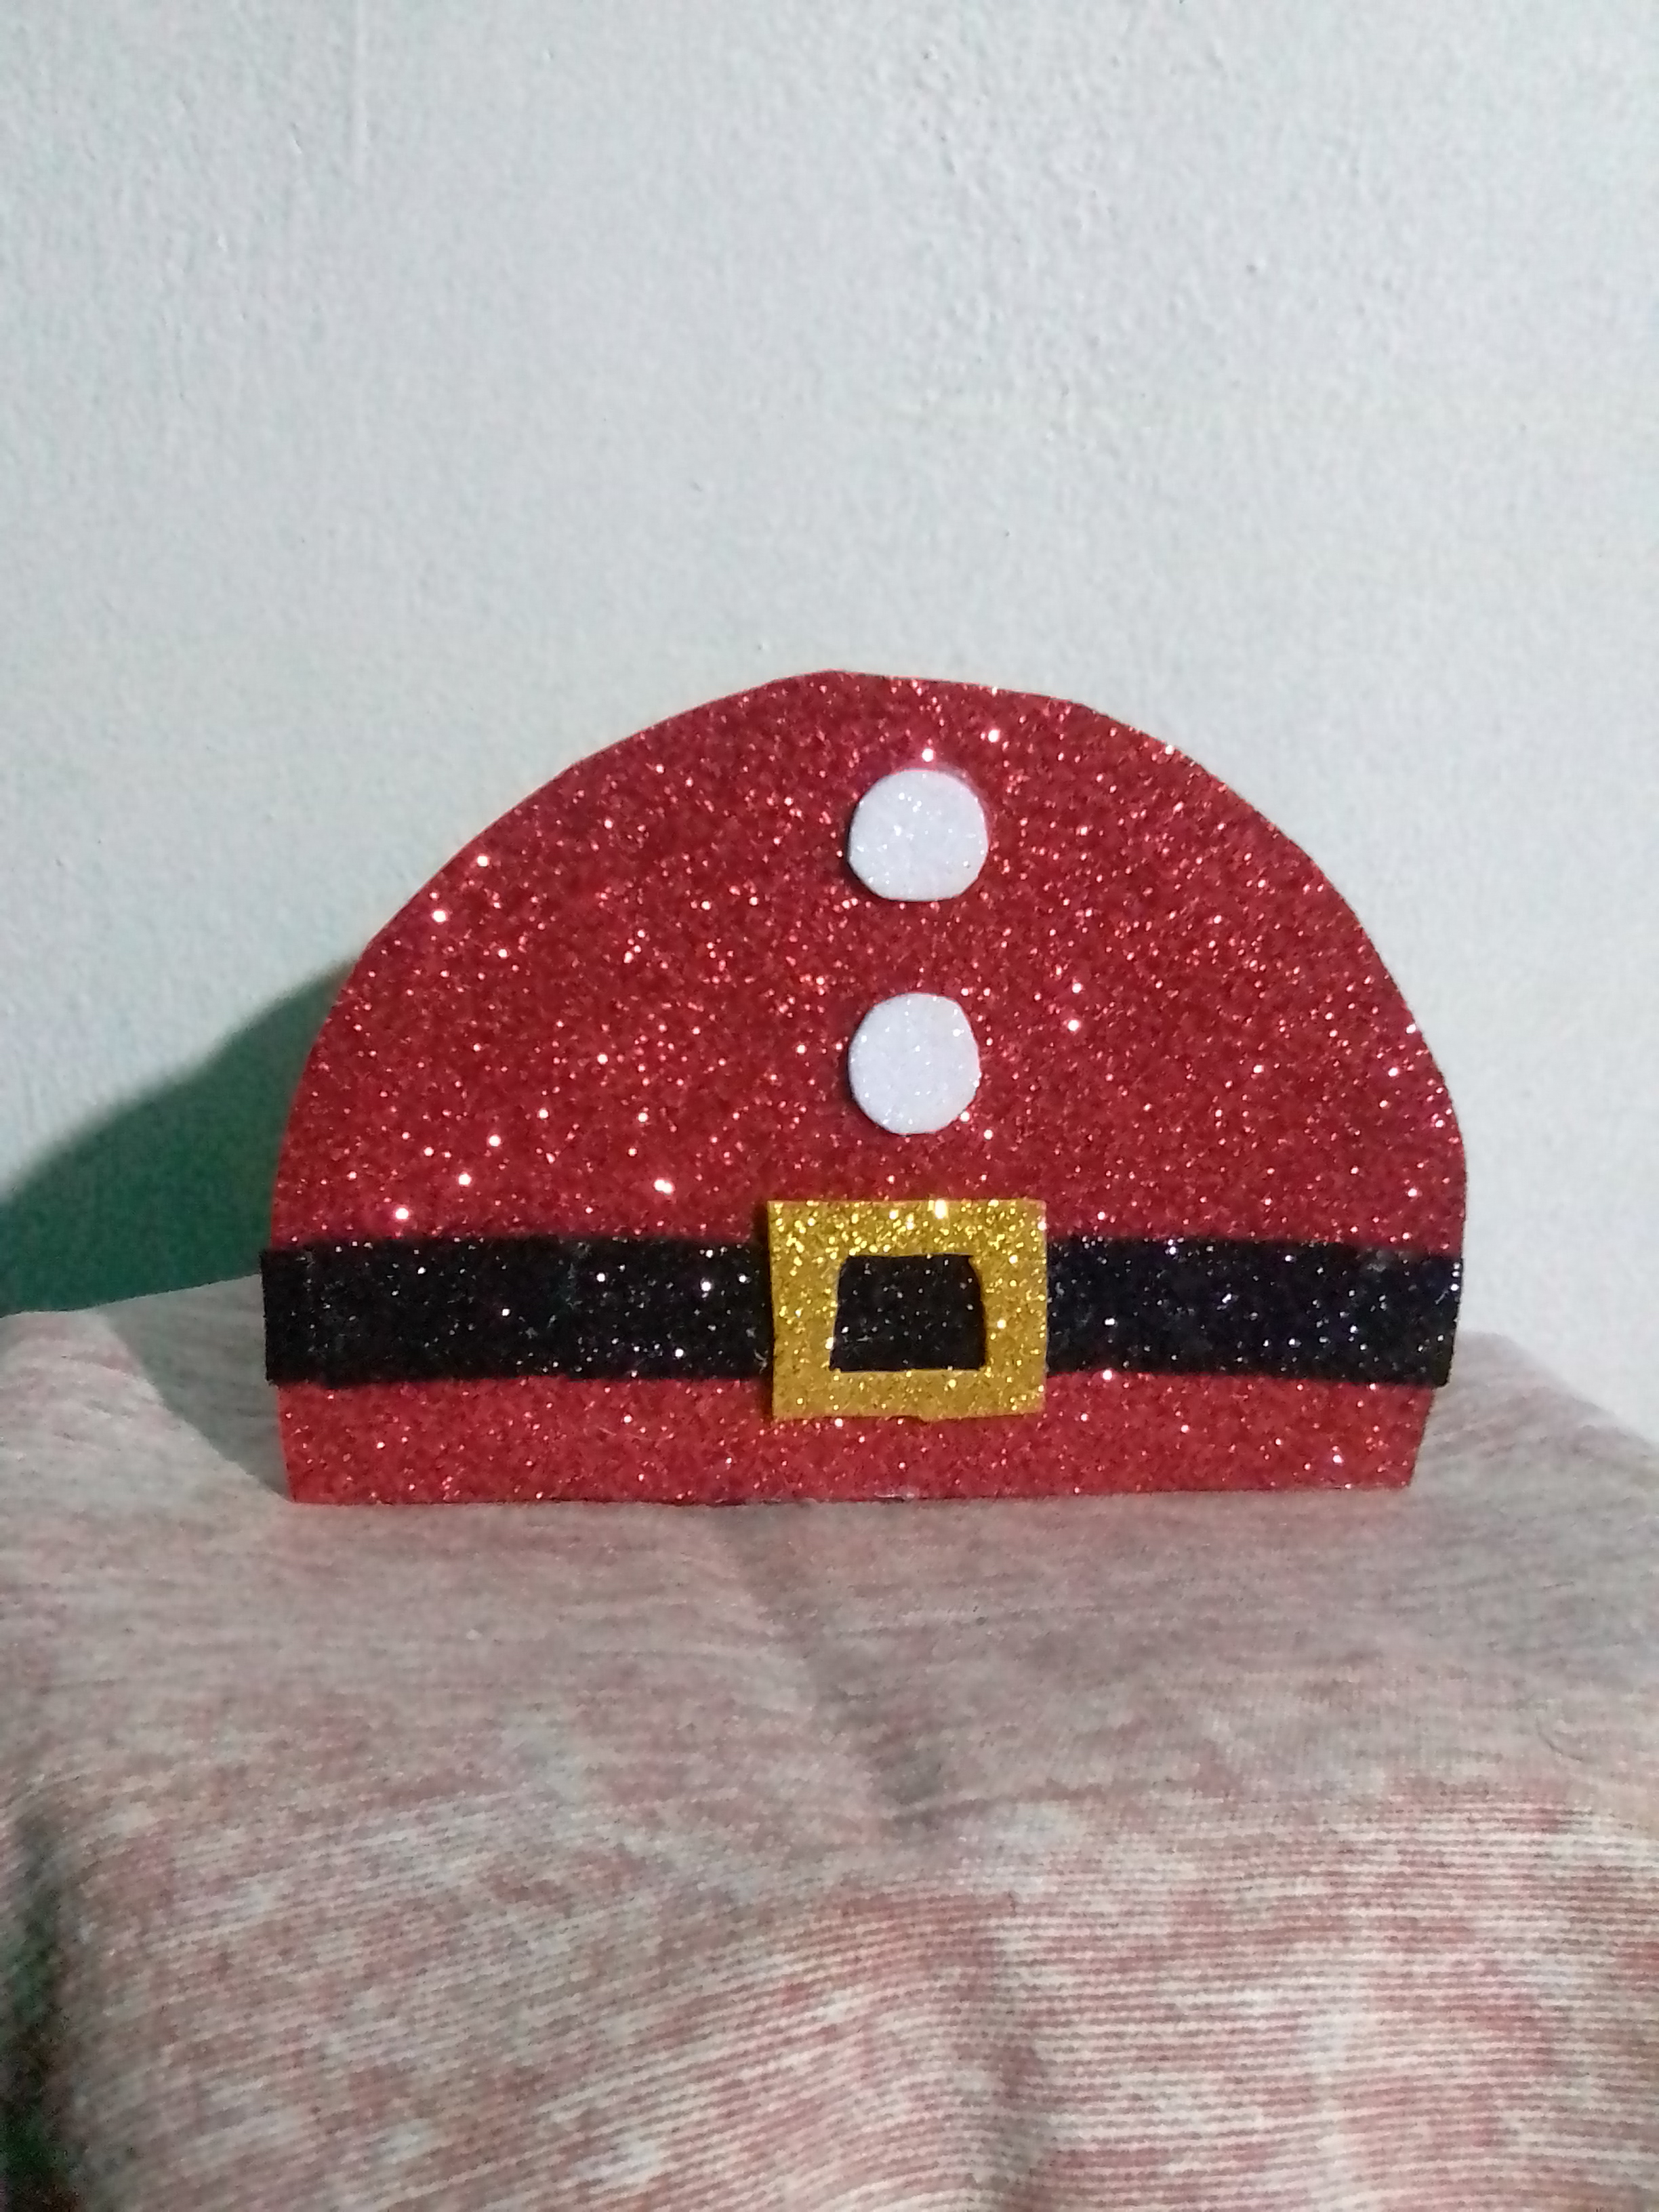
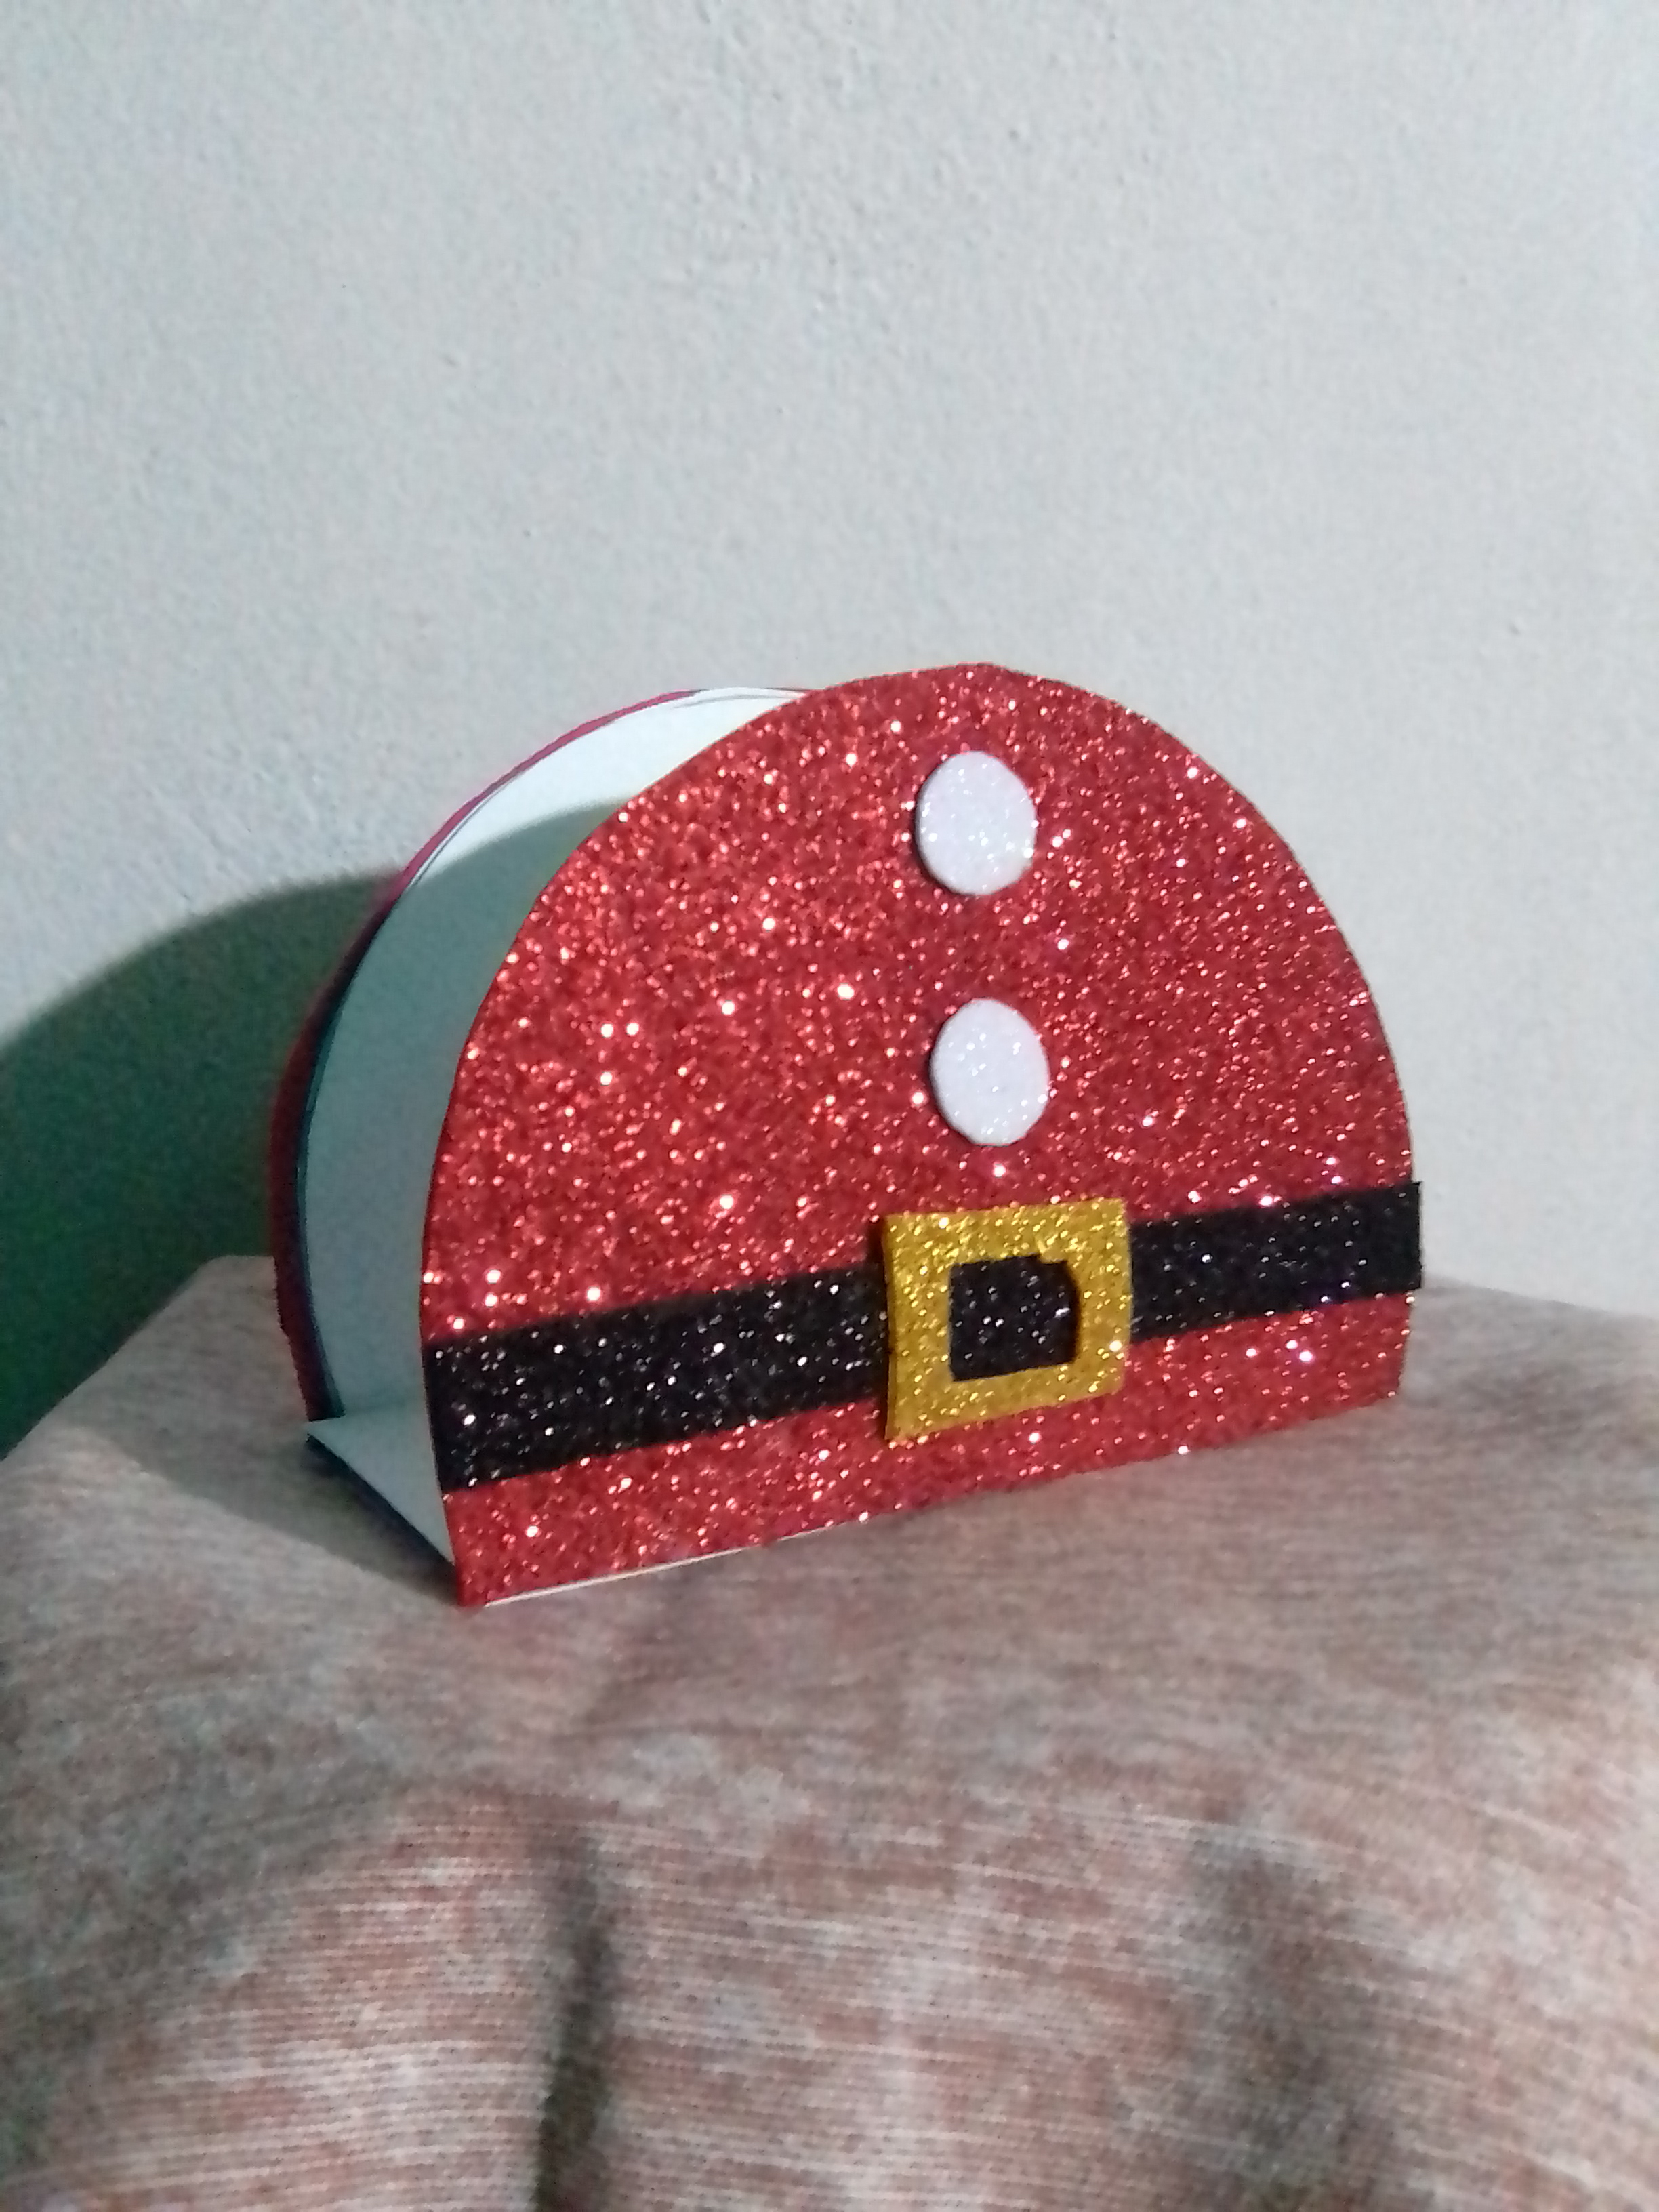
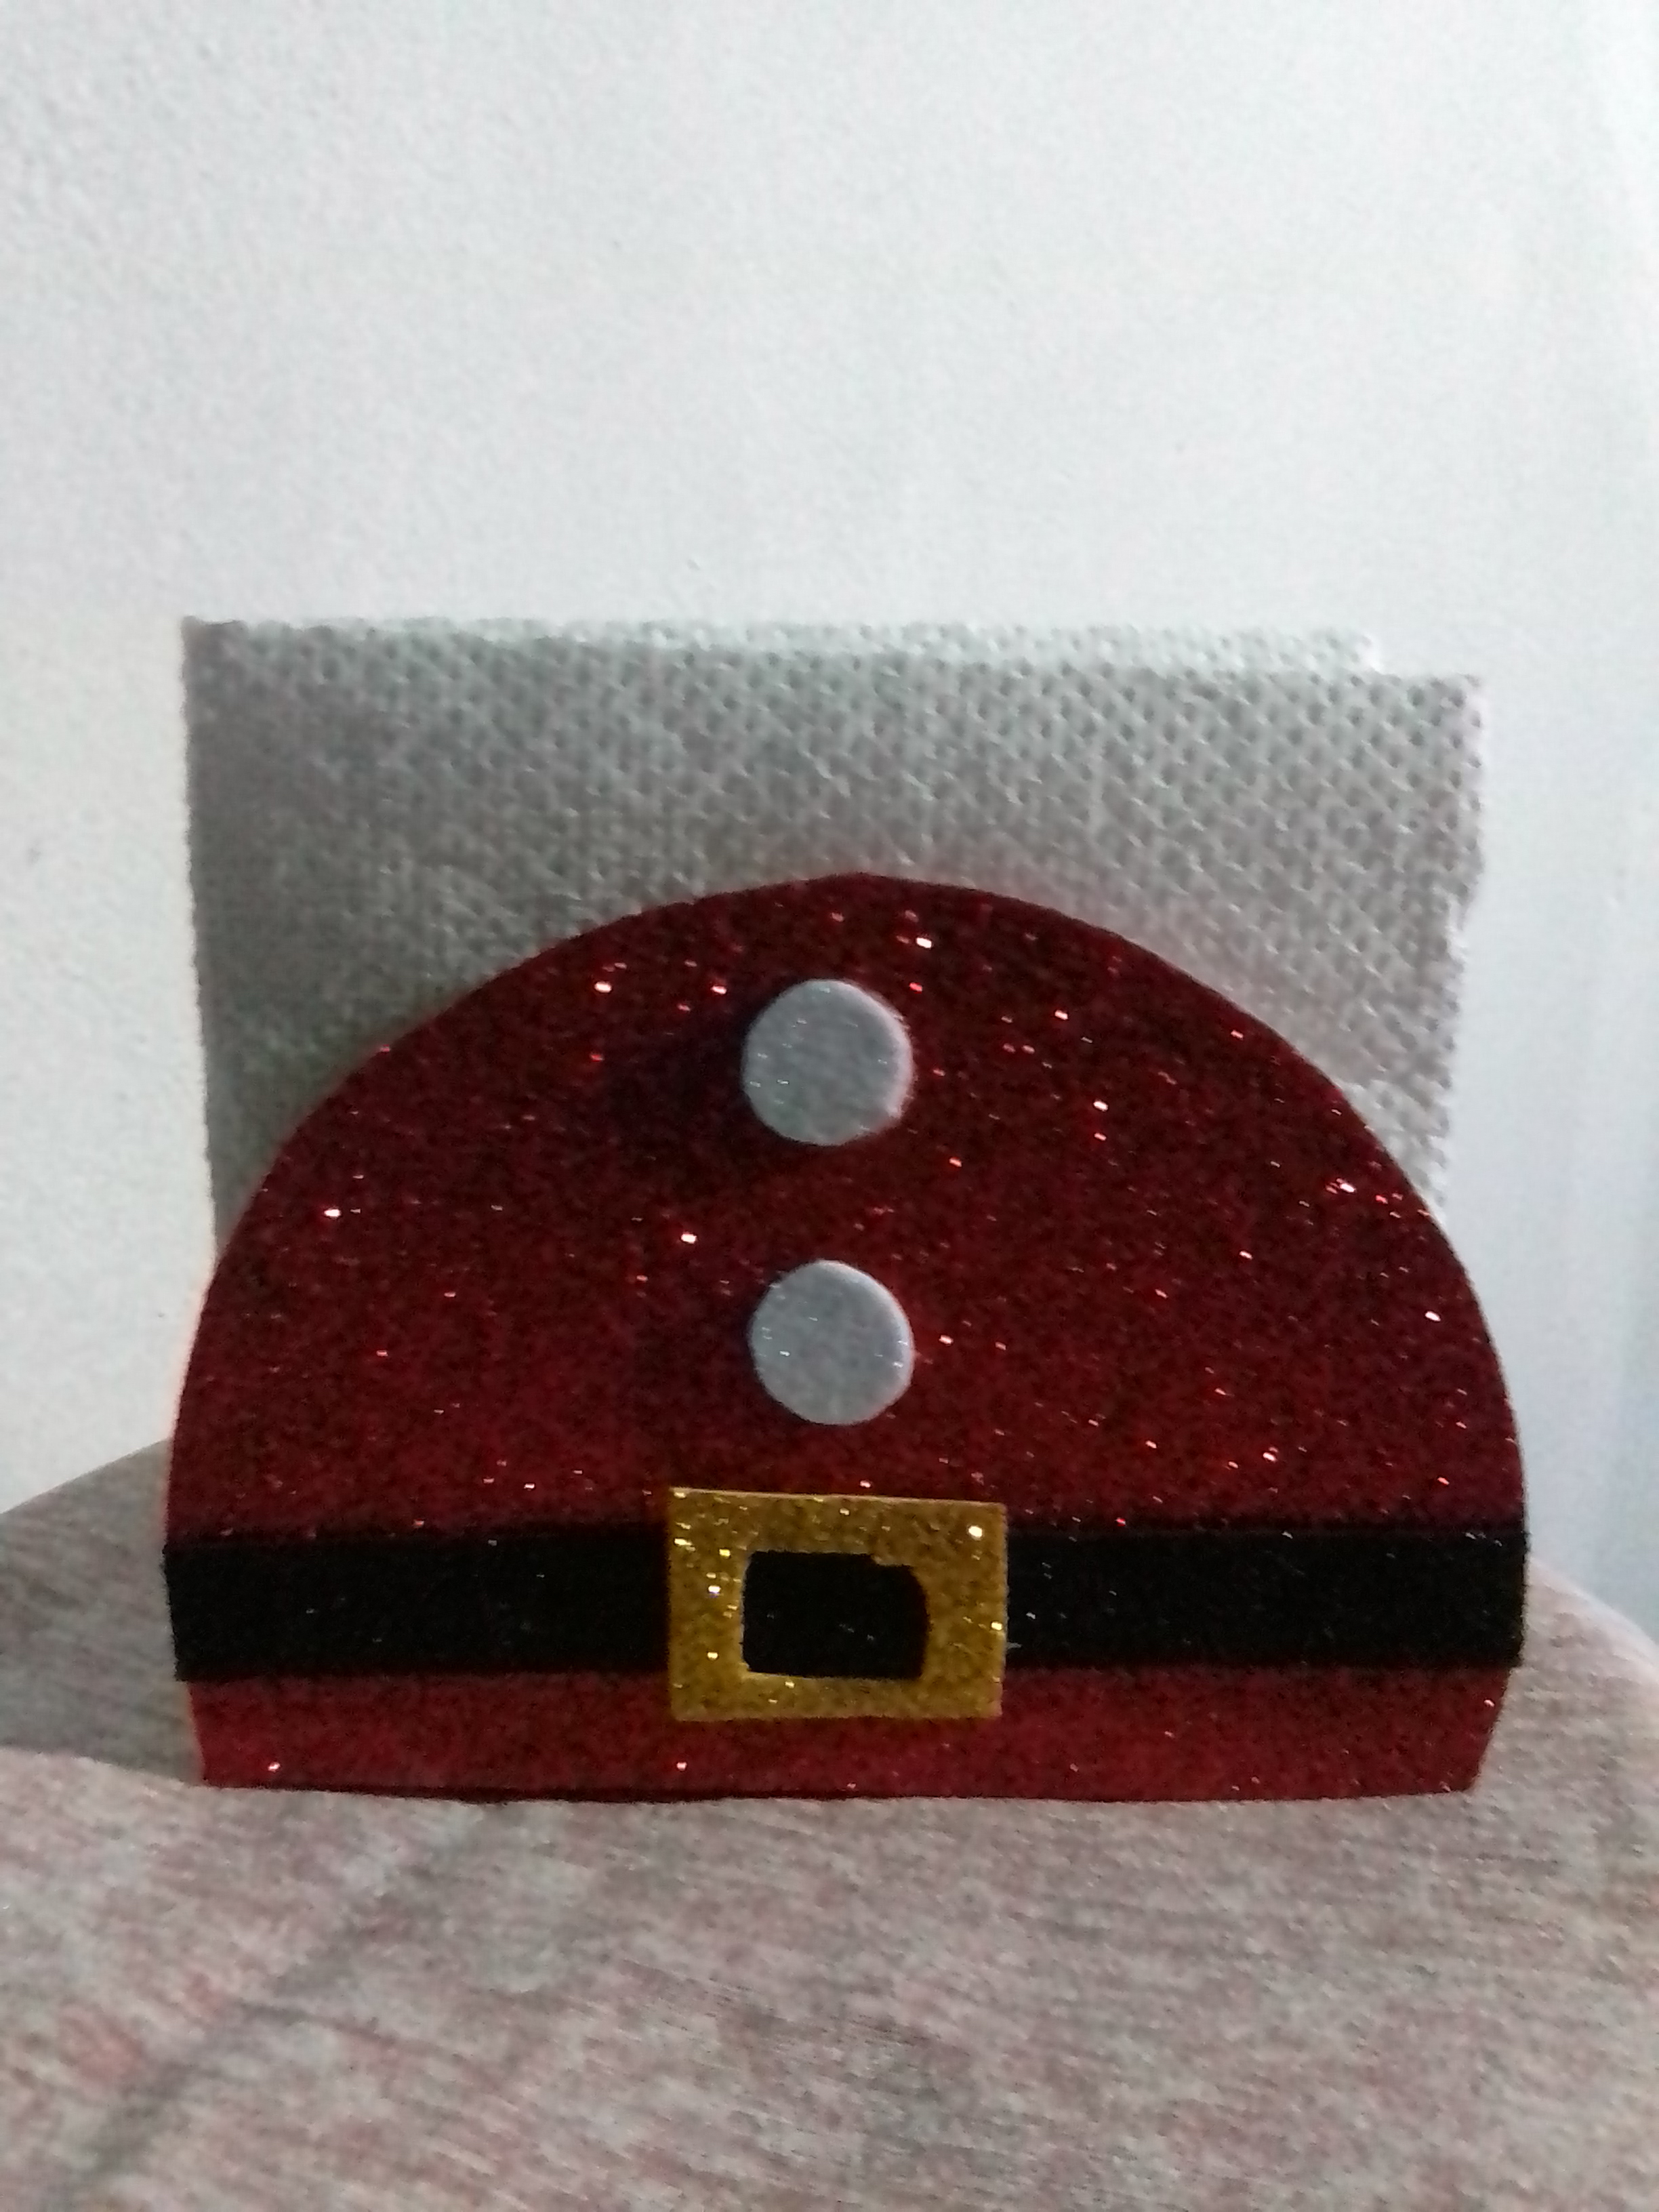
With the covers of the Santa suit already ready, what remains is to glue each cover to the white covered cardboard base with enough hot silicone, and thus finish this beautiful Christmas napkin ring, to decorate the table at these parties where a lot is shared with family and friends.
Result
The photos are my property, taken exclusively in this project.
The collages of the procedure were made with the tool of my Blue C6 and the main one in Canva
The separators and the banners were edited by me in Canva
The translation was made with
DeepL Translator

MATERIALES
✓ Foami escarchado de colores: blanco, rojo, negro, y dorado
✓ Cartulina de color blanco
✓ Lápiz y tijera
✓ Pistola y barras de silicona
✓ Cartón
✓ CD
PASO A PASO
Para iniciar, este servilletero navideño, lo primero fue realizar el las caras con cartón, para ello tome un CD, para copiar la forma de este, coloque el CD, sobre el carton delgado y medi 8,5 centímetros en la parte más alta, y corte dos piezas para las caras del servilletero.
Luego corte una pieza de cartón grueso con una medida de 5 X 12 centímetros, que será la base del servilletero. Ya con las tres piezas de cartón listas, procedo entonces a realizar a cada una su par de cartulina blanca, para cubrir lo que será la parte interna del servilletero, a excepción del caton grueso que será cubierto por ambos lados.
Cubro de blanco una de las caras cada una de las piezas redondeadas , por ambos lados el cartón base para el servilletero.
Con mis piezas cubiertas de blanco, el siguiente paso es realizar las formas para la cubierta exterior, y que dará transformará al servilletero en el cuerpo de Papá Noel o Santa Claus, para ello recorte foami rojo escarchado como el traje de clásico de Santa.
Es el momento de cubrir de rojo, la cara restante del servilletero, para entonces realizar el cinturón de Santa, para ello recorte dos cintas de foami negro escarchado de 1,2 x 12 centímetros, así mismo corte dos rectángulos de 2,5 X 3 centímetros de color dorado que serán la hebilla del cinturón.
Antes de pegar el cinturón y la hebilla, corte dos pequeños círculos de foami blanco escarchado, que representan los botones del traje de Santa, y ya listos los elementos, comencé a fijar con silicón caliente cada uno.
Con las tapas del traje de Santa ya listas, lo que queda es pegar con suficiente silicón caliente cada tapa a la base de cartón cubierta blanco, y así termine este lindo servilletero navideño, para adornar la mesa en estás fiestas donde se comparte mucho con familiares y amigos.
Resultado
Las fotos son de mi propiedad tomadas exclusivamente en este proyecto.
Los collages del procedimiento los hice con la herramienta de mi Blue C6 y el principal en Canva
Lo separadores y el banners fueron editados por mi en Canva
La traducción fue realizada con
DeepL Traductor

Me parece que creaste algo super útil a partir de materiales reciclados, muy bonito ✨🎄✨🎄
Gracias, si tenemos que reutilizar los materiales, tanto como se pueda. Gracias por tu visita.
Wow 😍😍 me gusta mucho y es muy llamativo!! Seguro se va a ver muy bien en la mesa navideña🎄🎄
Un lindo, sencillo y útil adorno para nuestra mesa navideñas. Me alegra que te guste.
I see so many users are posting about their craft for Christmas, maybe I should start creating a few ornaments myself. This is actually a good idea for the Christmas dinner table and a good use of old CDs that we don't use anymore.
Yes, many of us are already excited about Christmas, preparing the decoration, and these simple ideas invite us to give the materials a second chance.
Está hermoso. Un adorno muy útil y acorde a la época navideña ❤️. Gracias por compartir 👍
Gracias a ti por la visita.
Hermosa idea navideña amiga, para llenar cada rincón de detalles en esta época y no pueden faltar en la mesa ♥️
Genial hacer nosotras mismas cada adorno de cada rincón de la casa como tú dices. Gracias por tu visita
Hermosa creación, sencilla y práctica. Además es muy útil, nunca se me había ocurrido hacer un servilletero navideño.
Gracias por compartir @yusma21 👊🌺👏🏻💪🏻🙂🌟✨🌞🌻🤗🙏🏻🙏🏻
Jajaja me alegra haberte dado esta pista navideña.
Un servilletero que debe estar en la cena navideña ajajaj, lo mejor es que es muy fácil de hacer es genial cuando los tutoriales son tan simples y hermosos.
Si @jennyzer tratando de hacer lo más sencillo y útil para comodid de todo y sobre todo que se vea lindo para la navidad
Bellisimo😍😍 el rojo llama la atencion donde sea, por eso la navidad es asi jeje me encanta!! Cualquier negocio deberia tener uno asi en esta epoca🥰
El rojo no puede faltar en navidad, tu idea es genial, cuando uno va a comer algo en la calle y que tengan un lindo servilletero navideño . Gracias por tu visita
Que hermoso detalle para la mesa , que no falte nada por decorar 🤭 mientras más ambiente navideño más bonito.
Muy hermoso amiga, una gran idea. Saludos bella! ✨👋🏻
A decorar todos los ambientes, gracias amiga por tu visita.