

MATERIALS
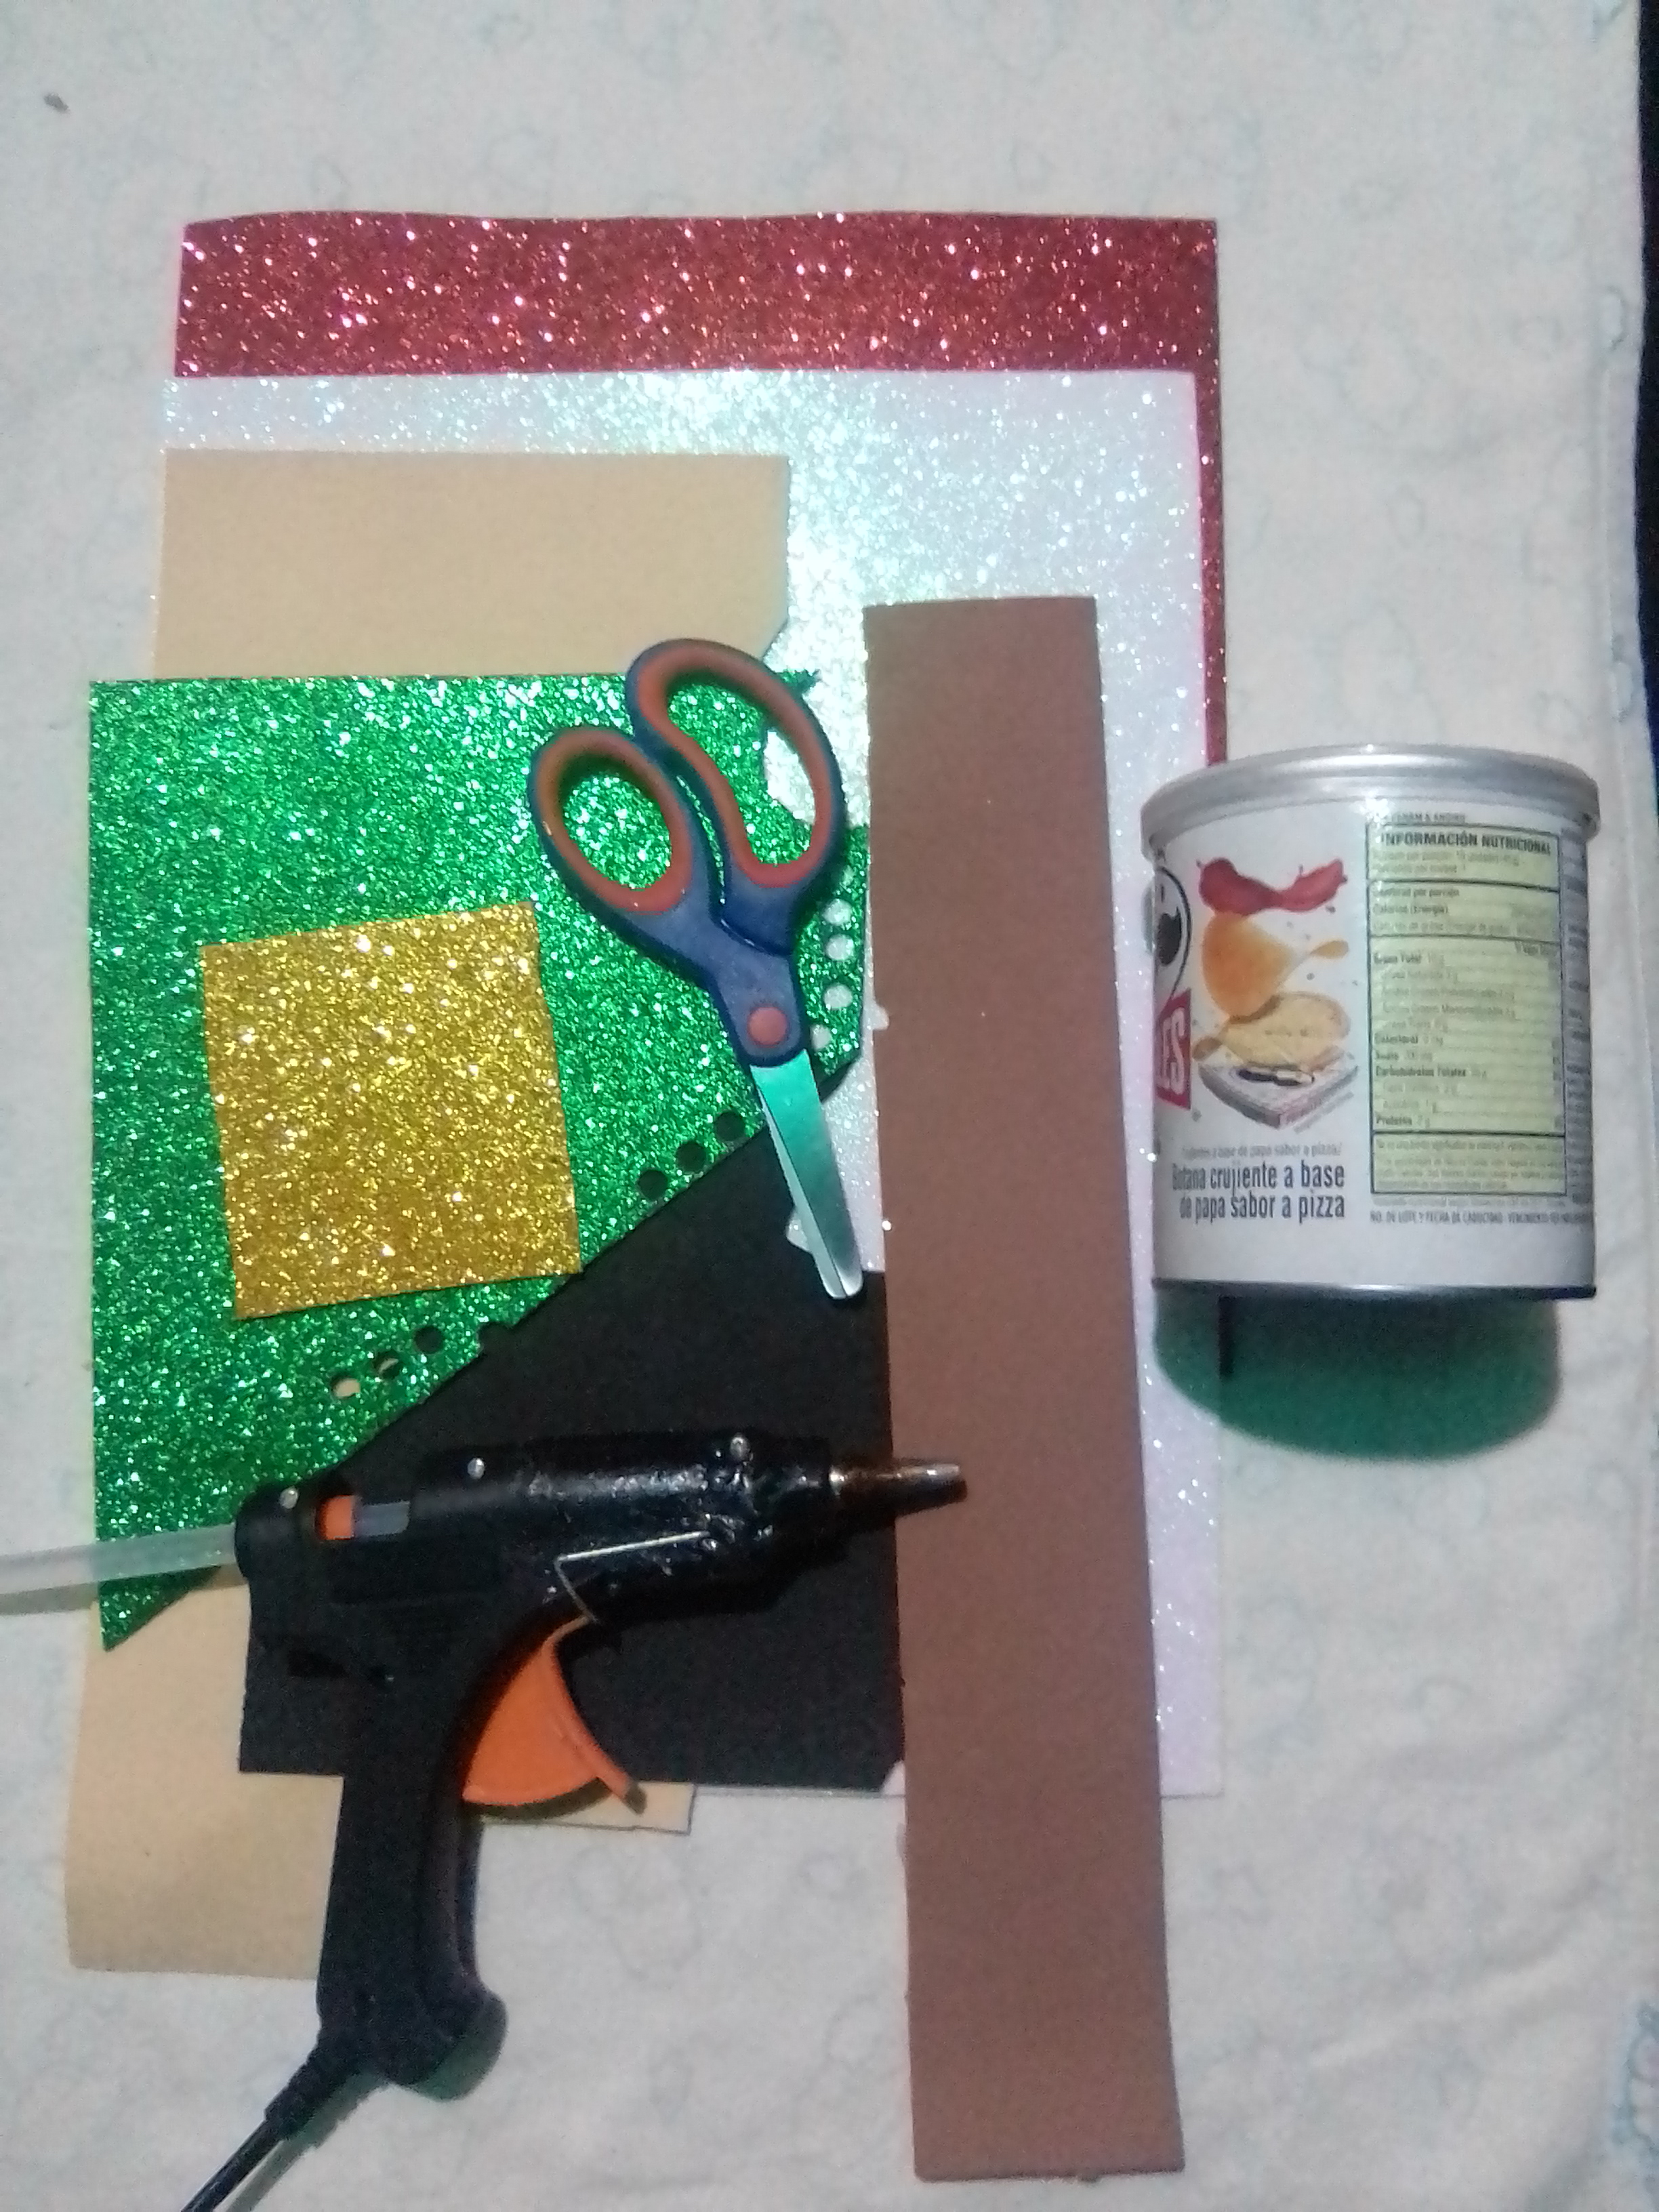
✓ Colored frosted foami: white, red, black, green and gold
✓ Brown, cream and fuchsia foami
✓ Potato container with lid
✓ Clothes iron
✓ White card stock
✓ Recycling sheets and pencil
✓ Gun and silicone bars
✓ Scissors.
STEP BY STEP
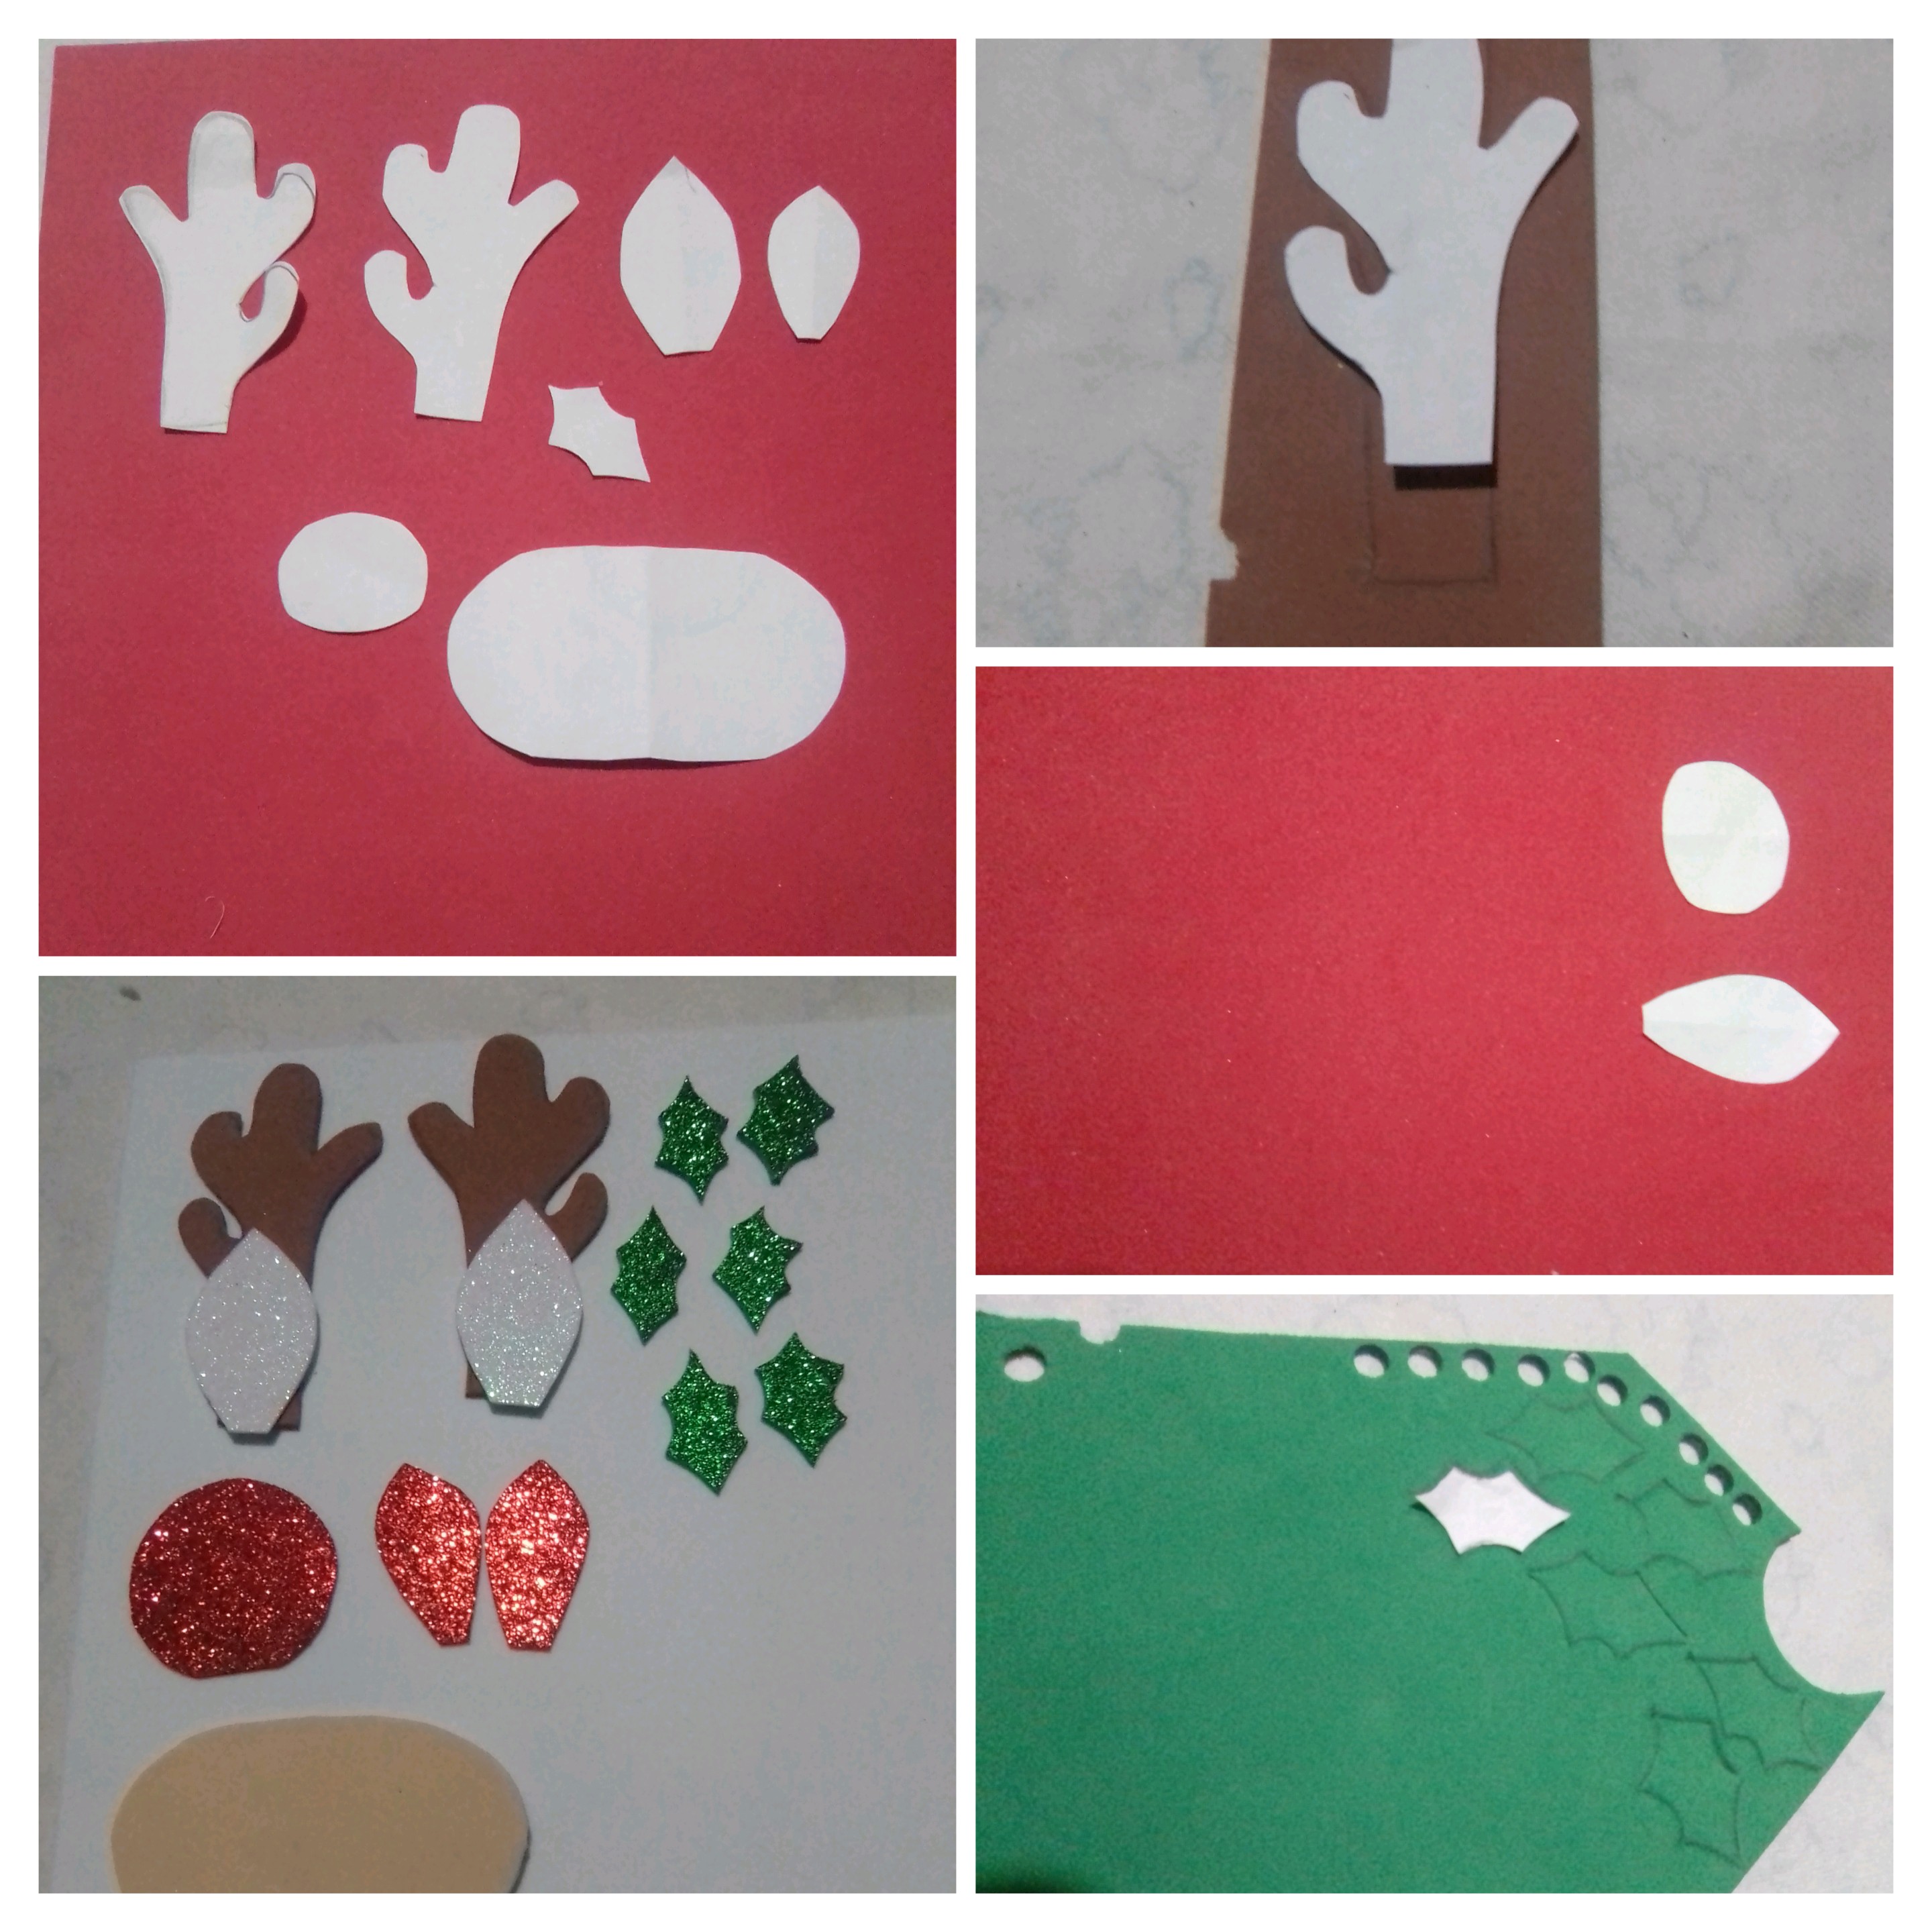
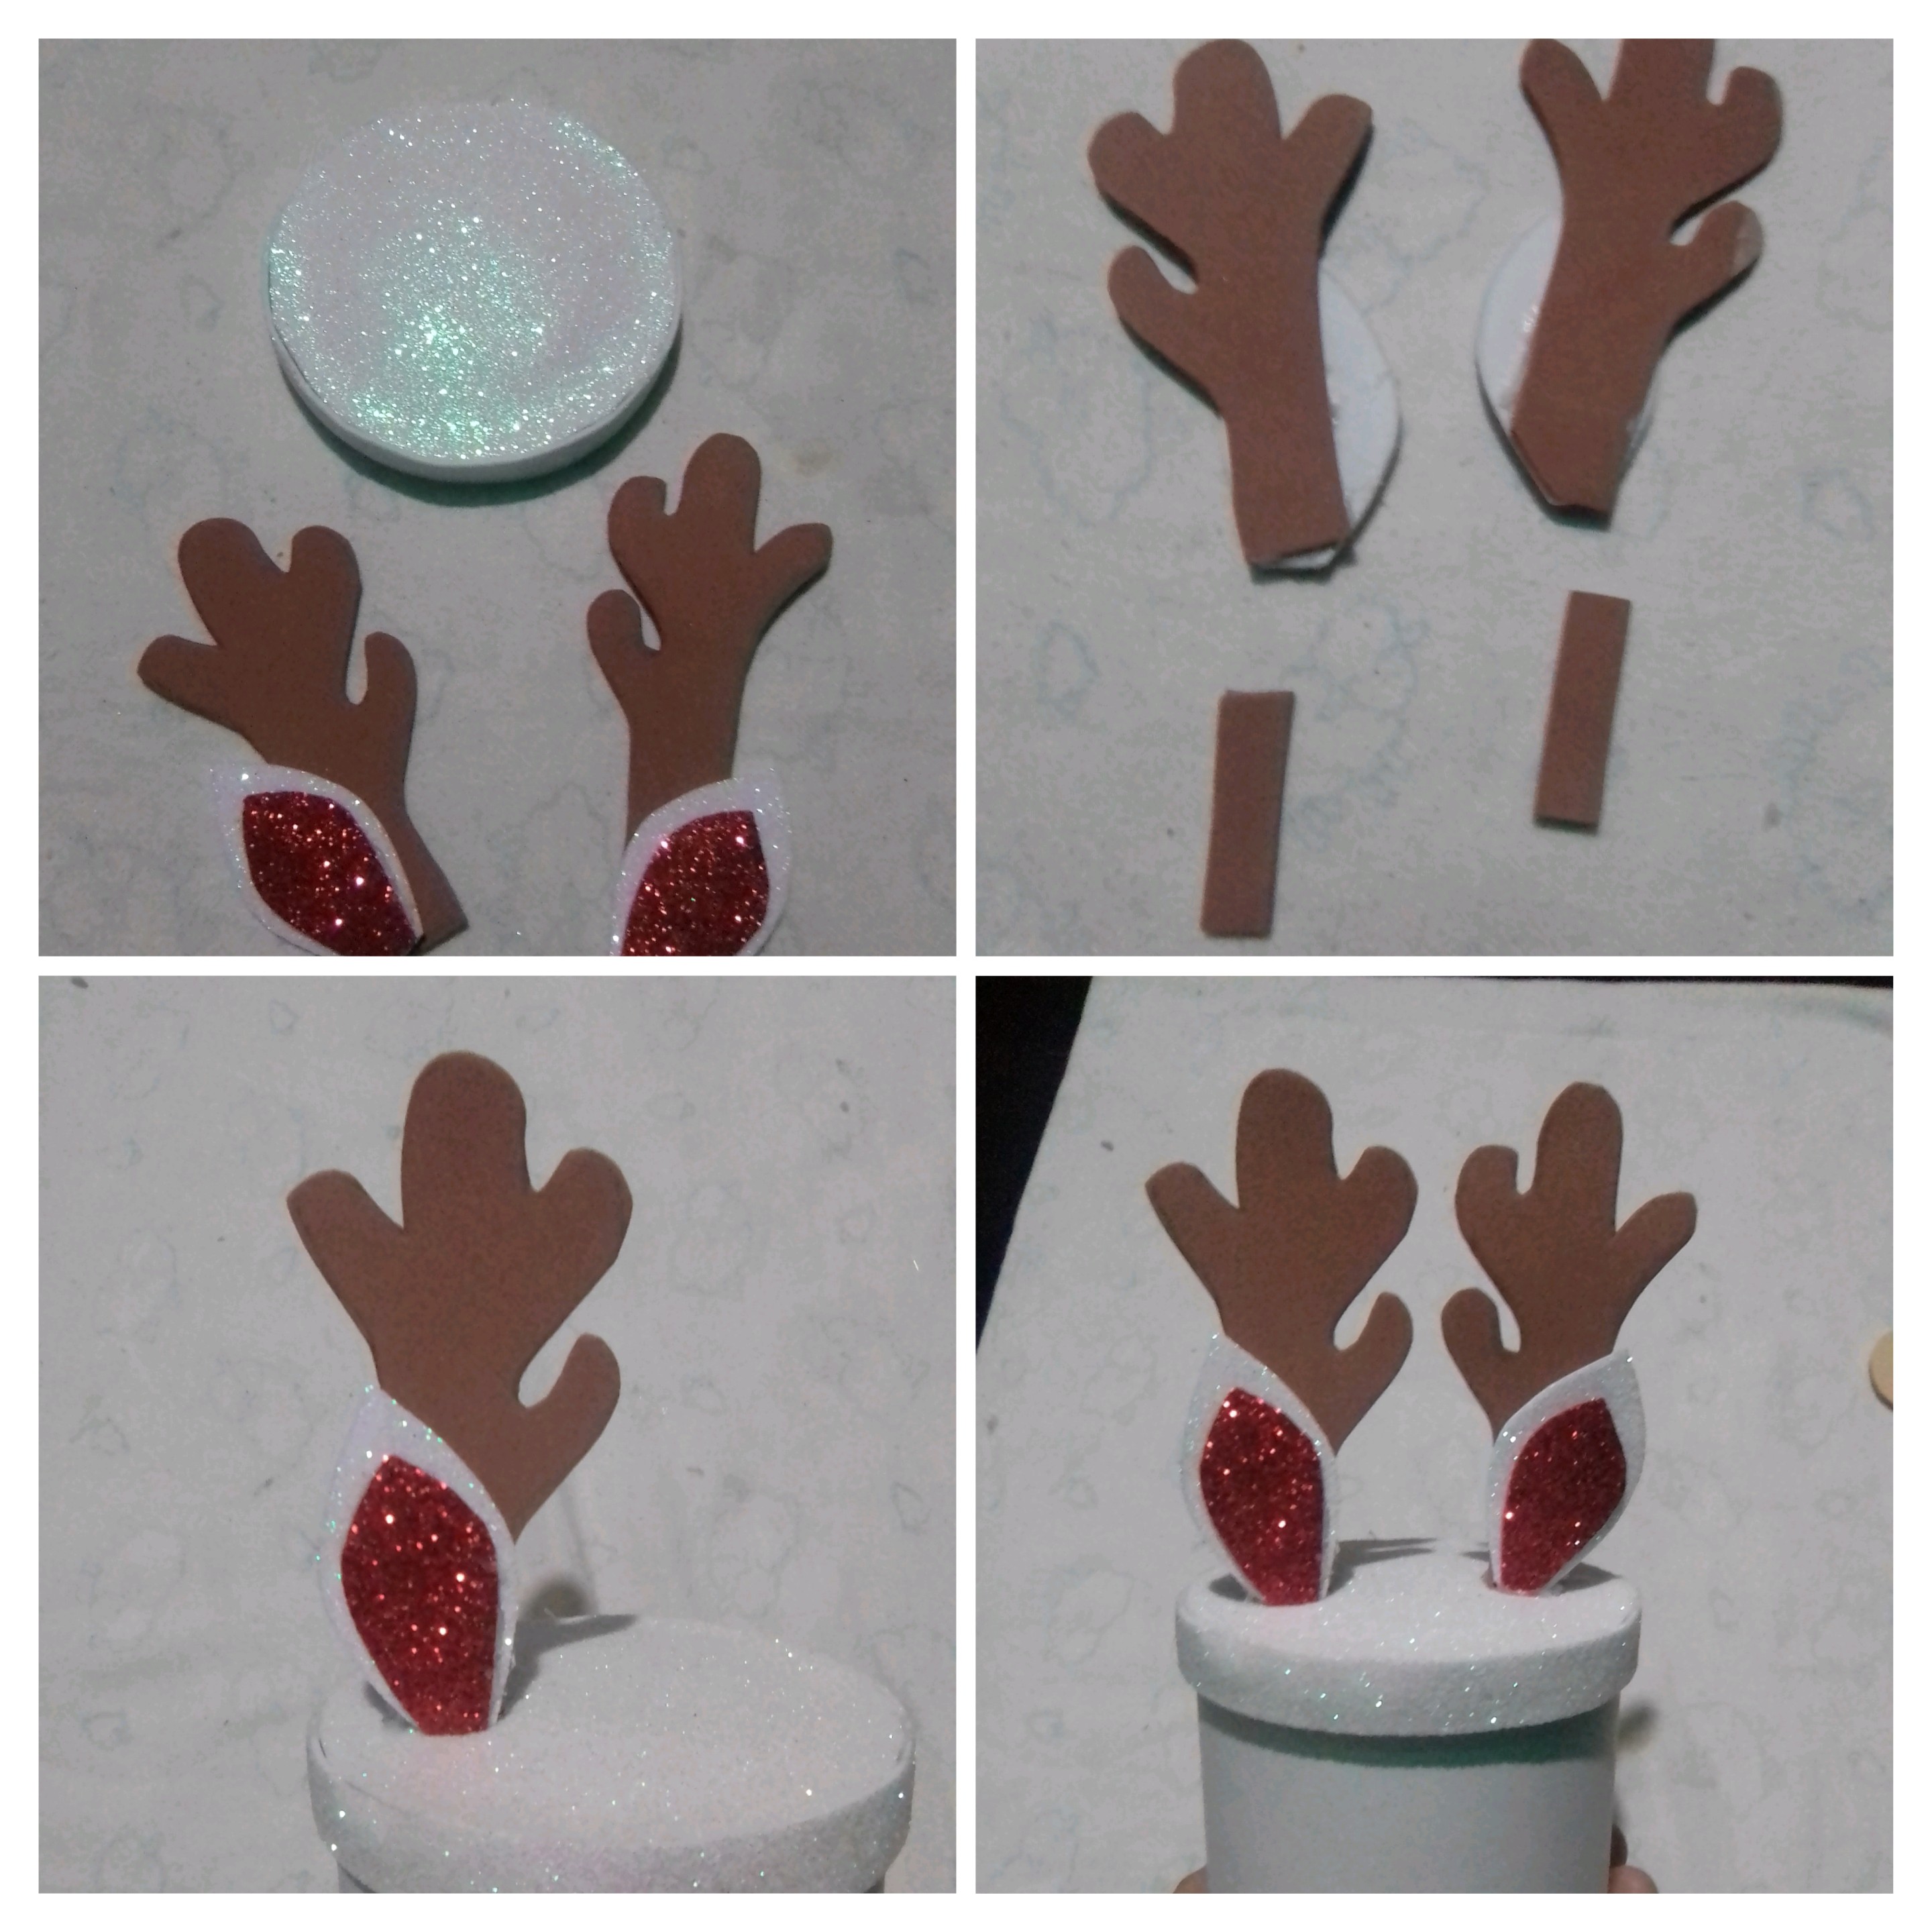
To start, make the molds for the antlers, the ears (inside and outside), the mouth, the circle for the nose and the Christmas leaf mold. I transferred these to the respective colors of foami, such as the ears the outer part in white and the inner part in red, the Christmas leaves in green, the antlers in brown, the base for the mouth and the nose in cream.
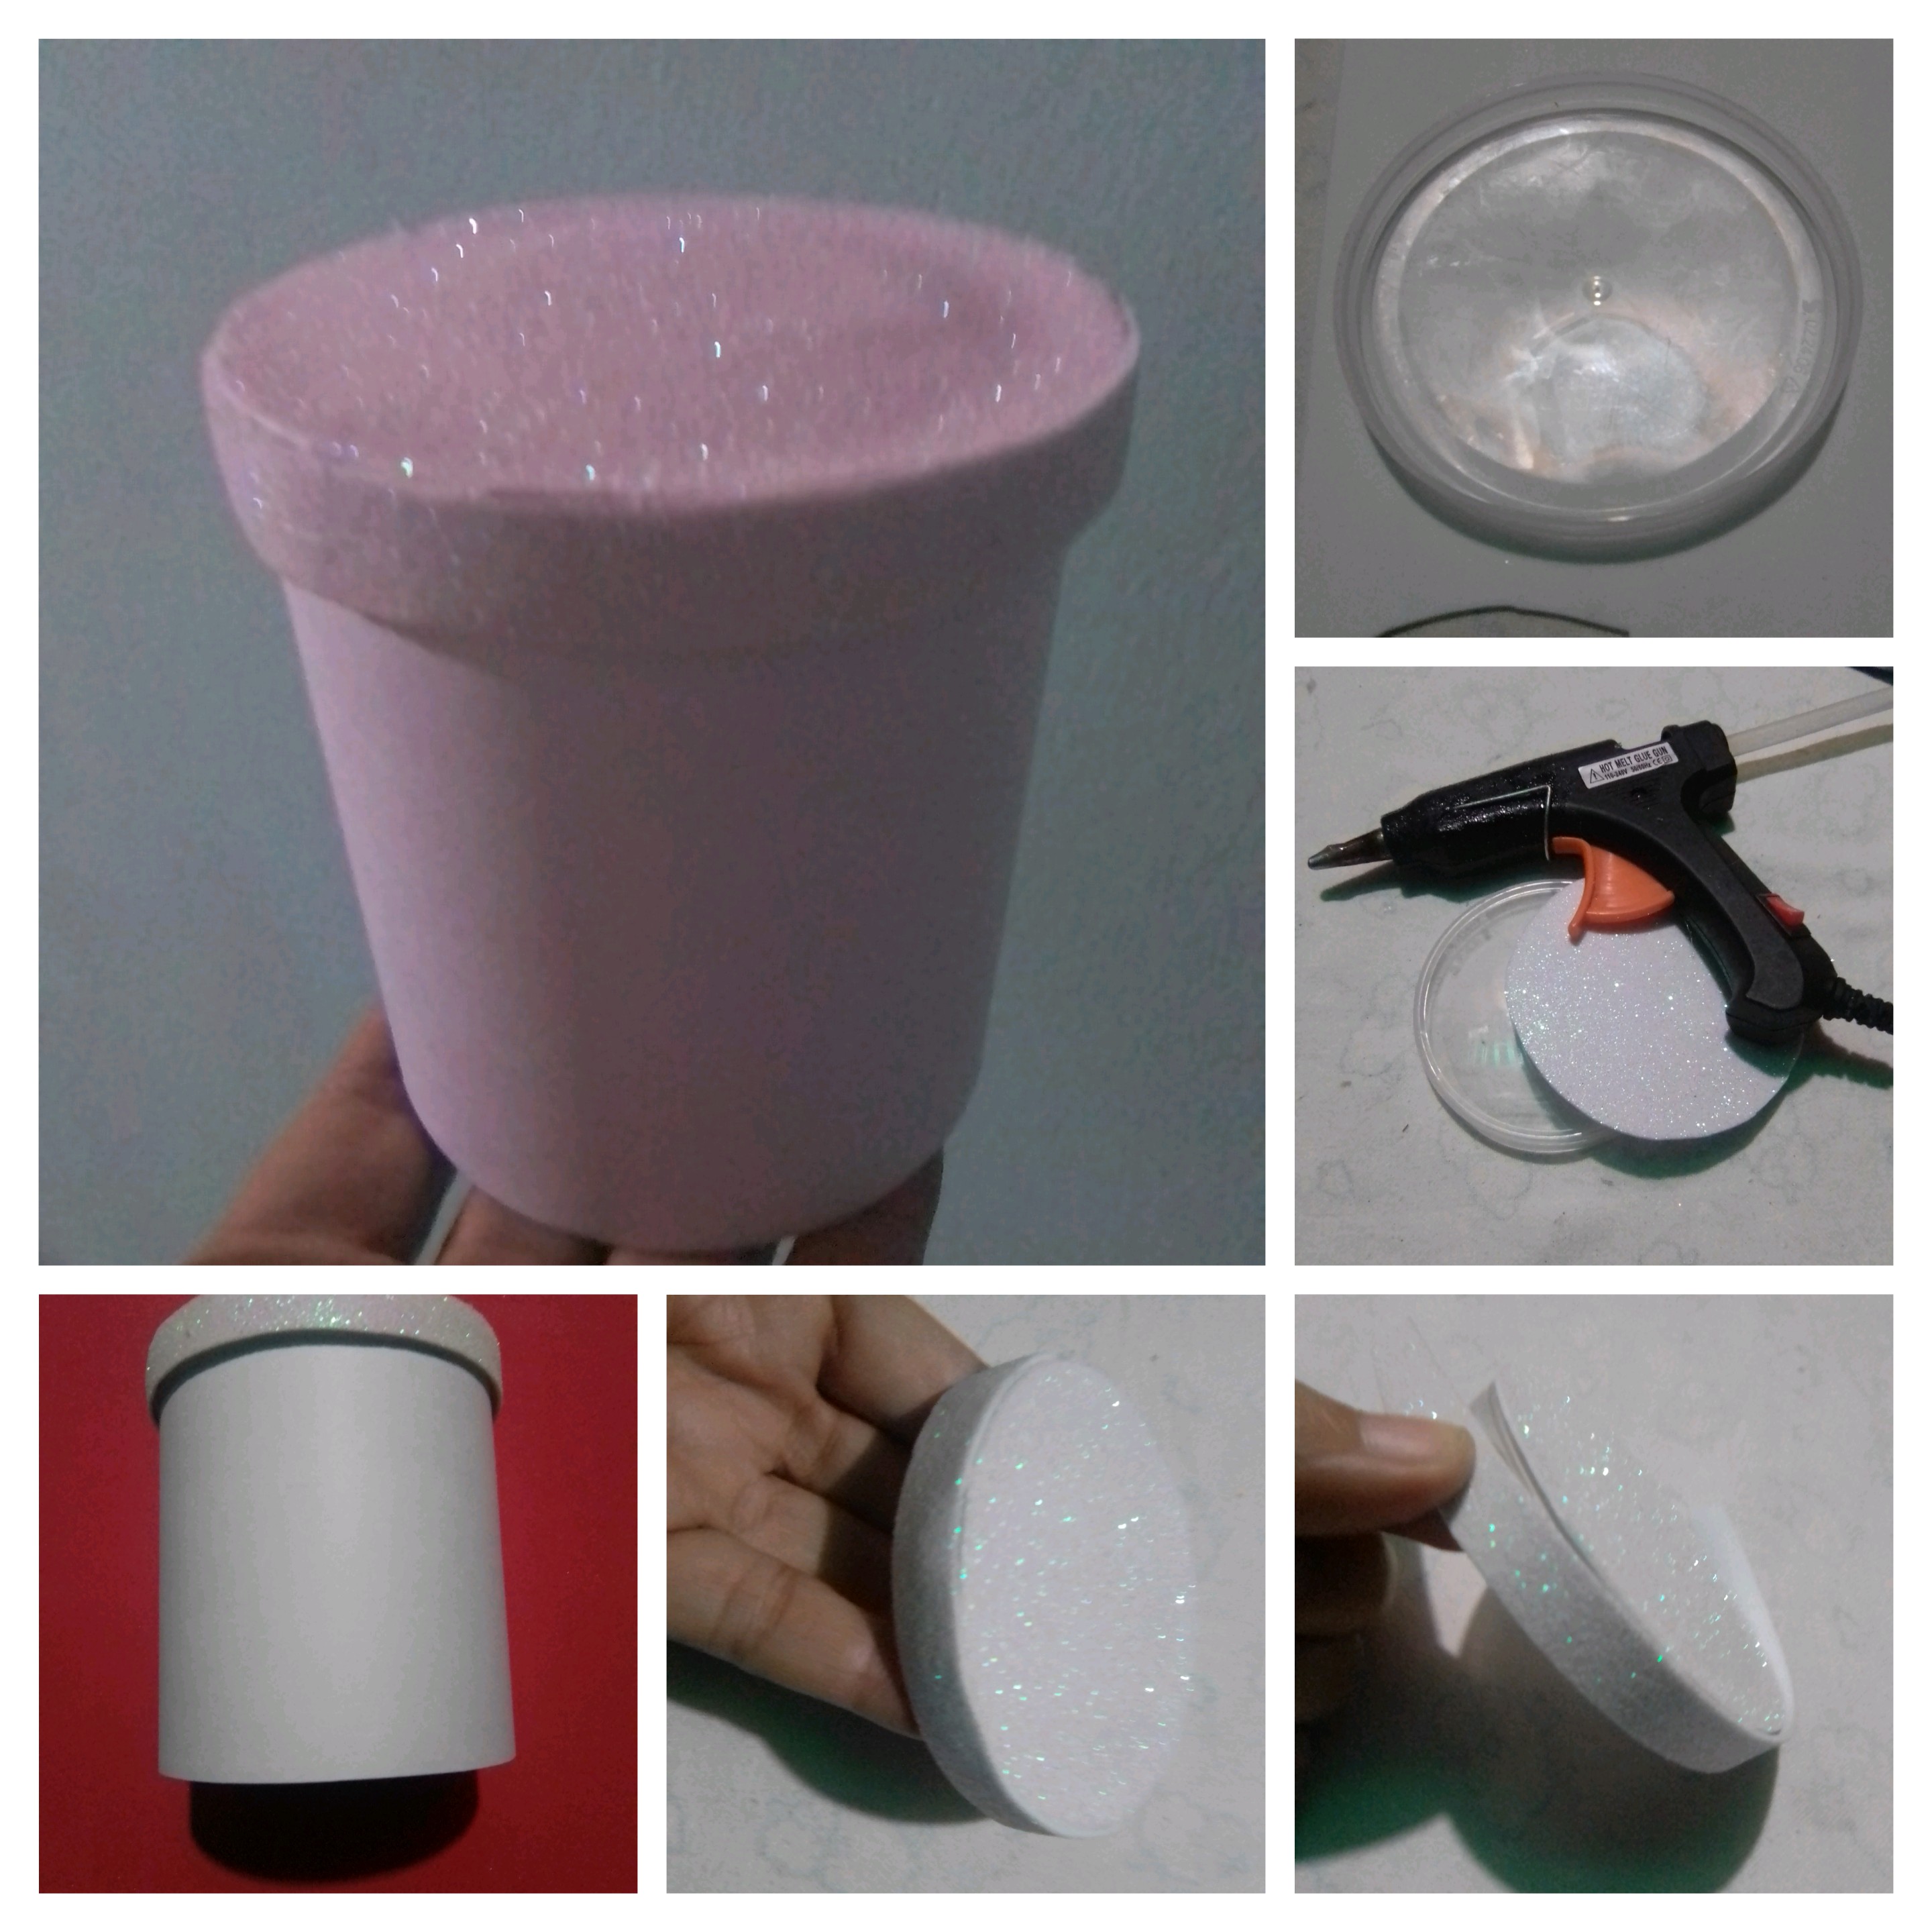
The next step is to prepare the box, that is to say to cover it, for this project I wanted to try white, although I know that reindeer are brown, but since Christmas is a beautiful fantasy, I dared to change the color, to cover the container of potatoes, use white cardboard, cut a piece of 16 x 8.5 centimeters, and glue with hot silicone, just below the aluminum ring of the container, since the lid of these is plastic and fits under pressure.
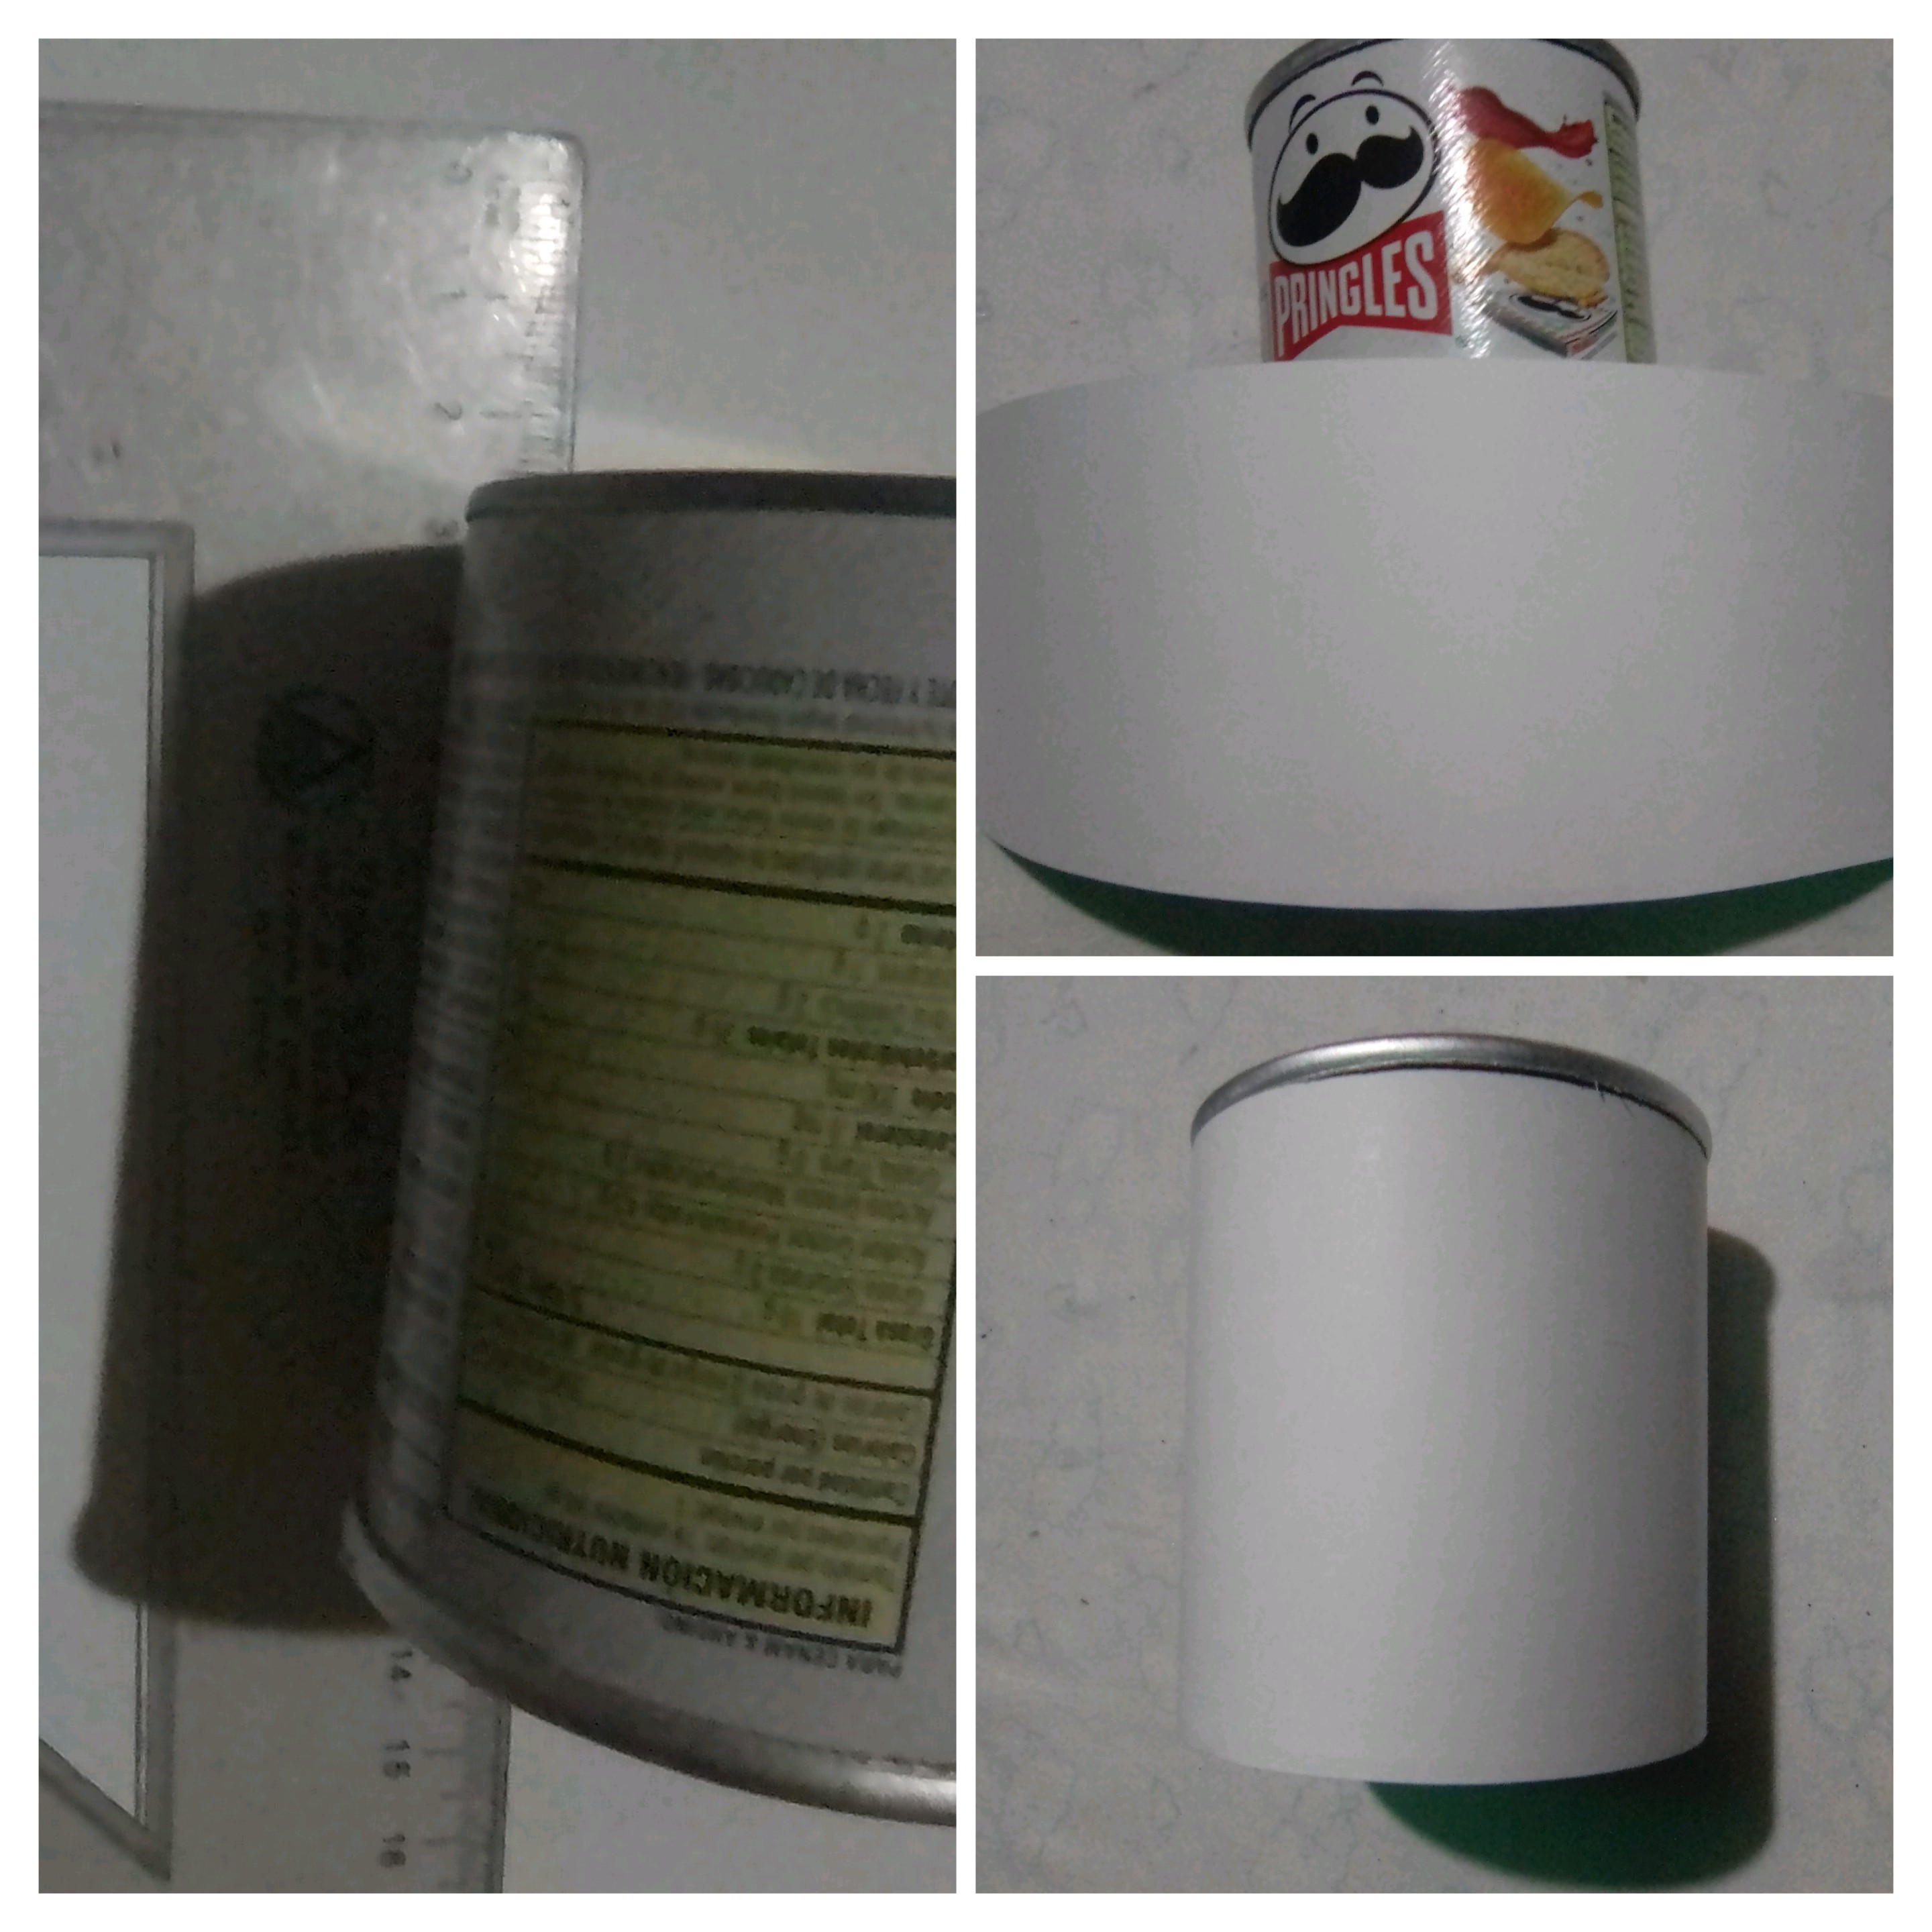
Next is the time to cover the lid of the box, use of course the same as the container, which is plastic, but this time use frosted foami, so that it stands out, since the lid is a very important part of this project. Take the measurement from the back of the foami, and I took the circle out of the lid and fixed it with hot silicone, then cut a strip 1 centimeter wide at the bottom of the lid, so that all the transparent plastic is covered.
With the box lined, and with the foam shapes ready, I then proceed to assemble the antlers and ears, and place them in the center of the lid, with a separation of 3 centimeters between them. To fix the antlers place a piece of foami to reinforce and give stability to the antlers.
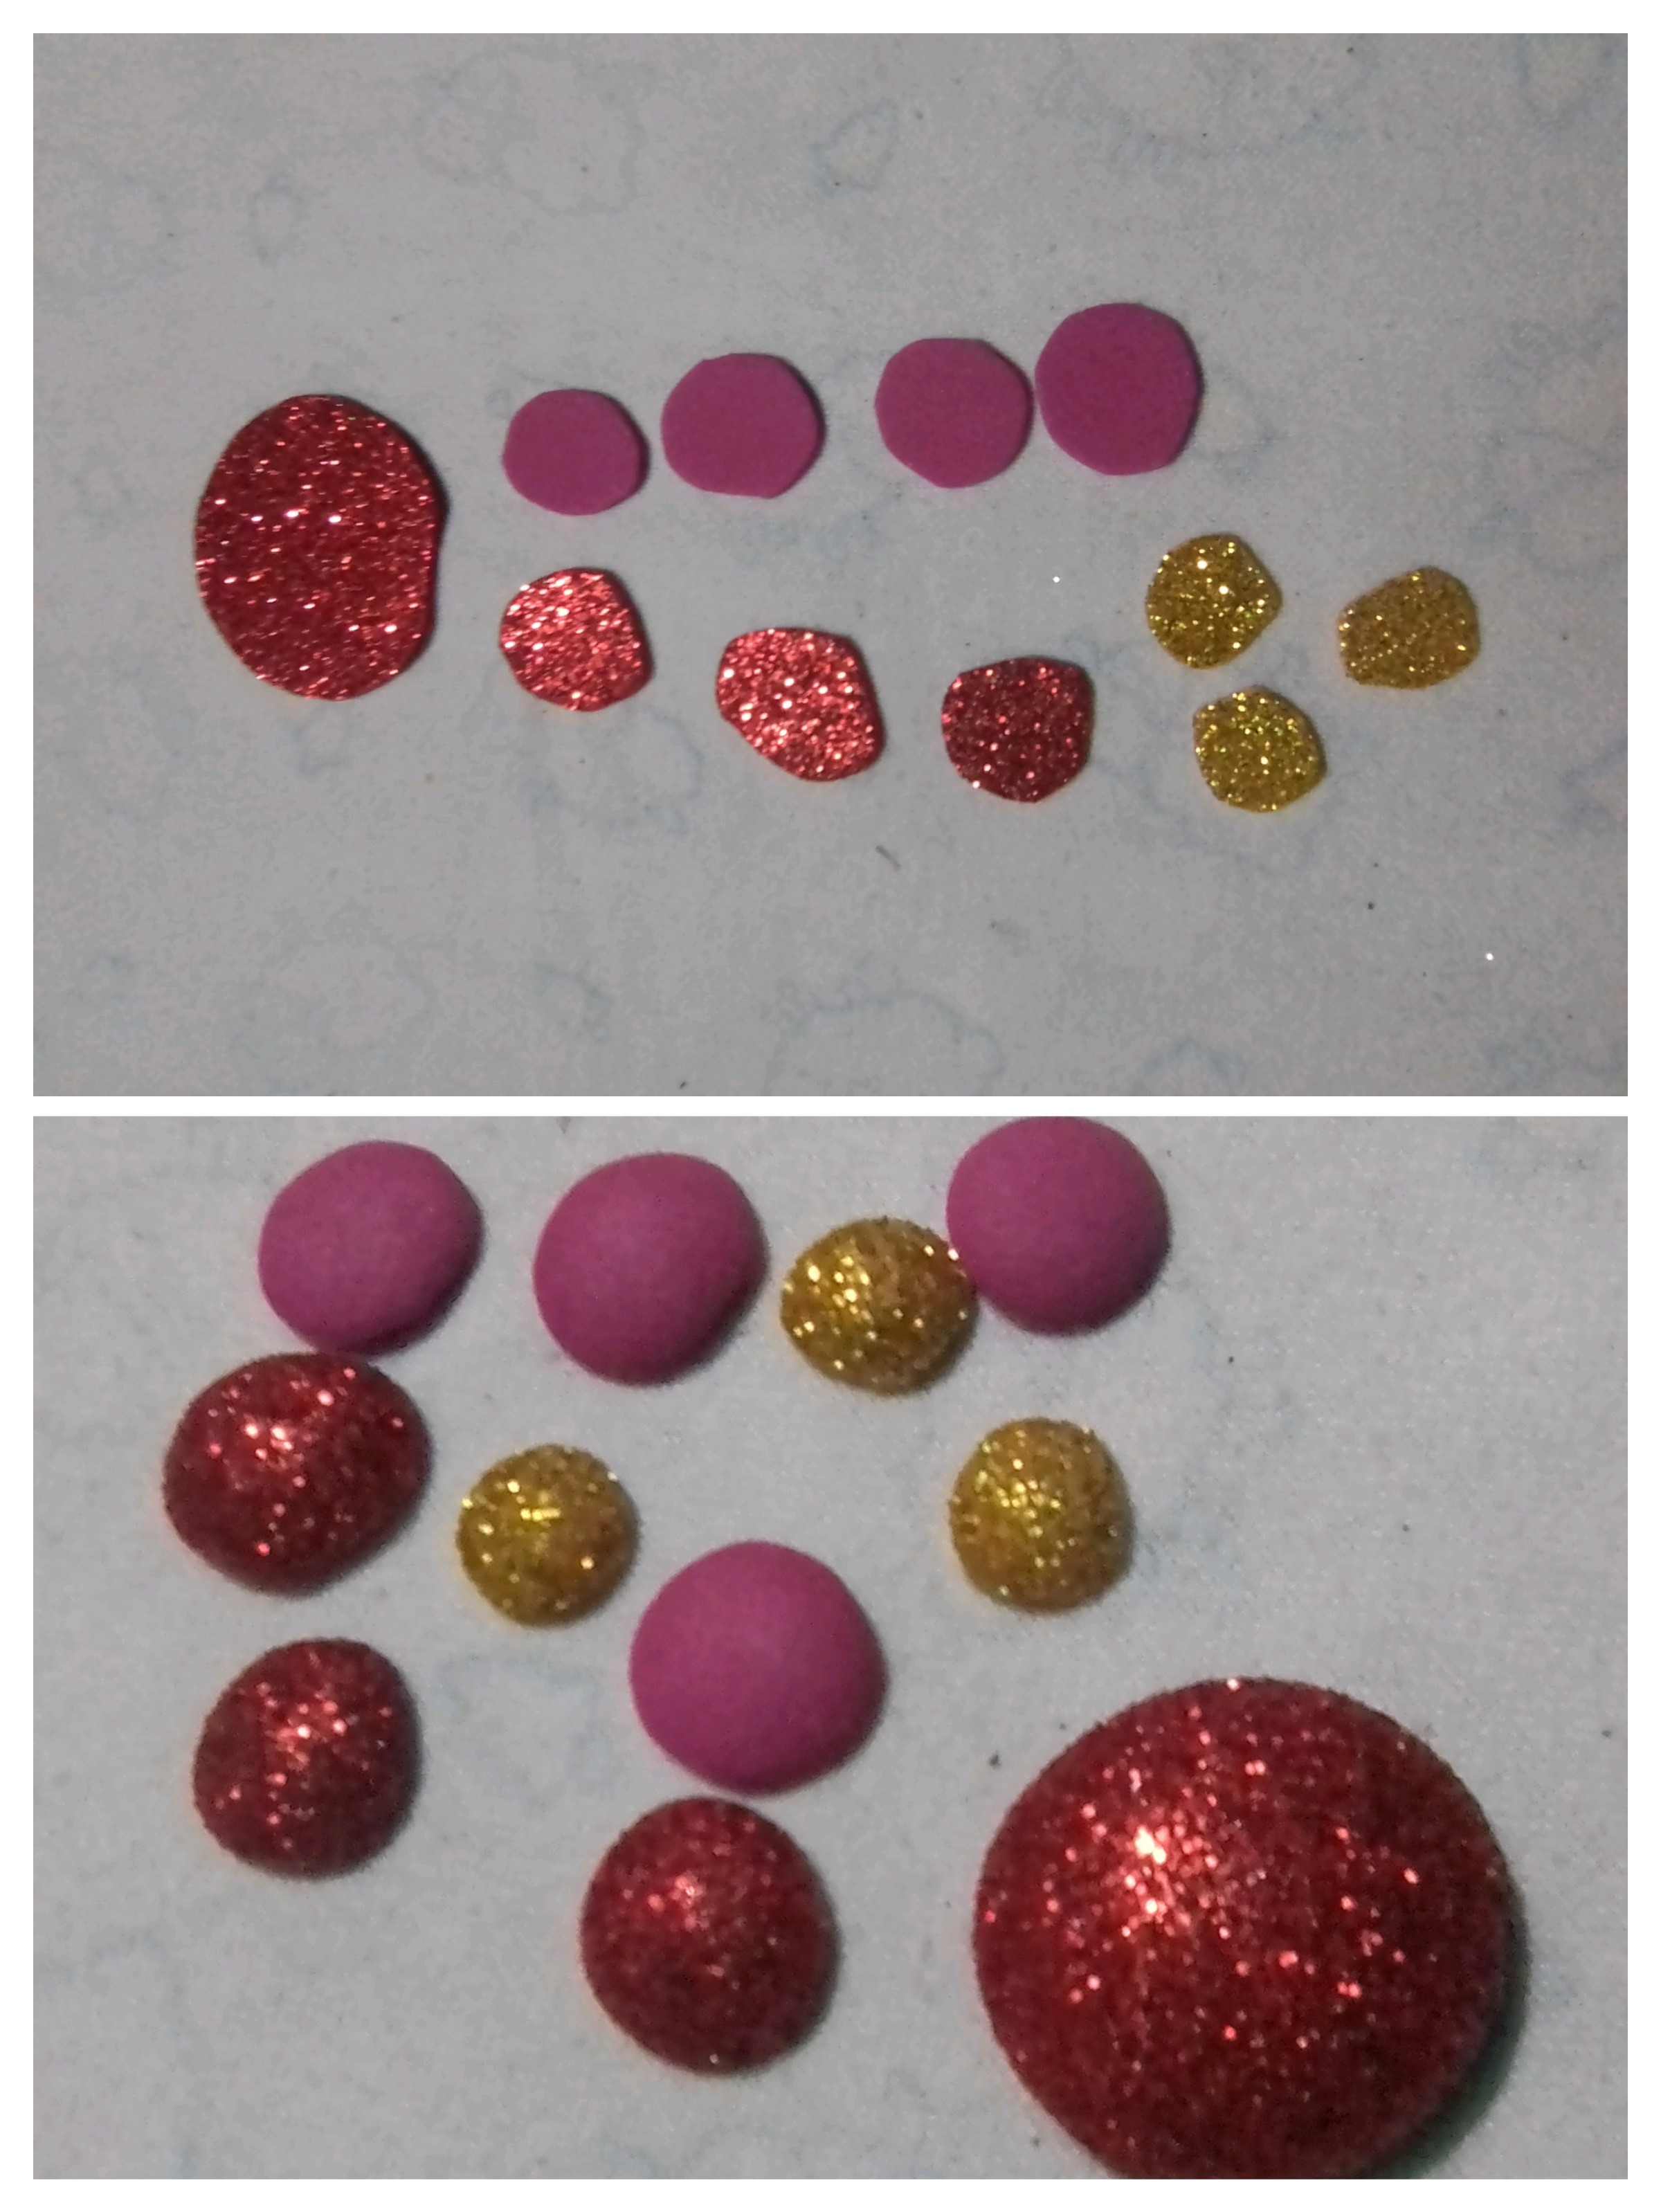
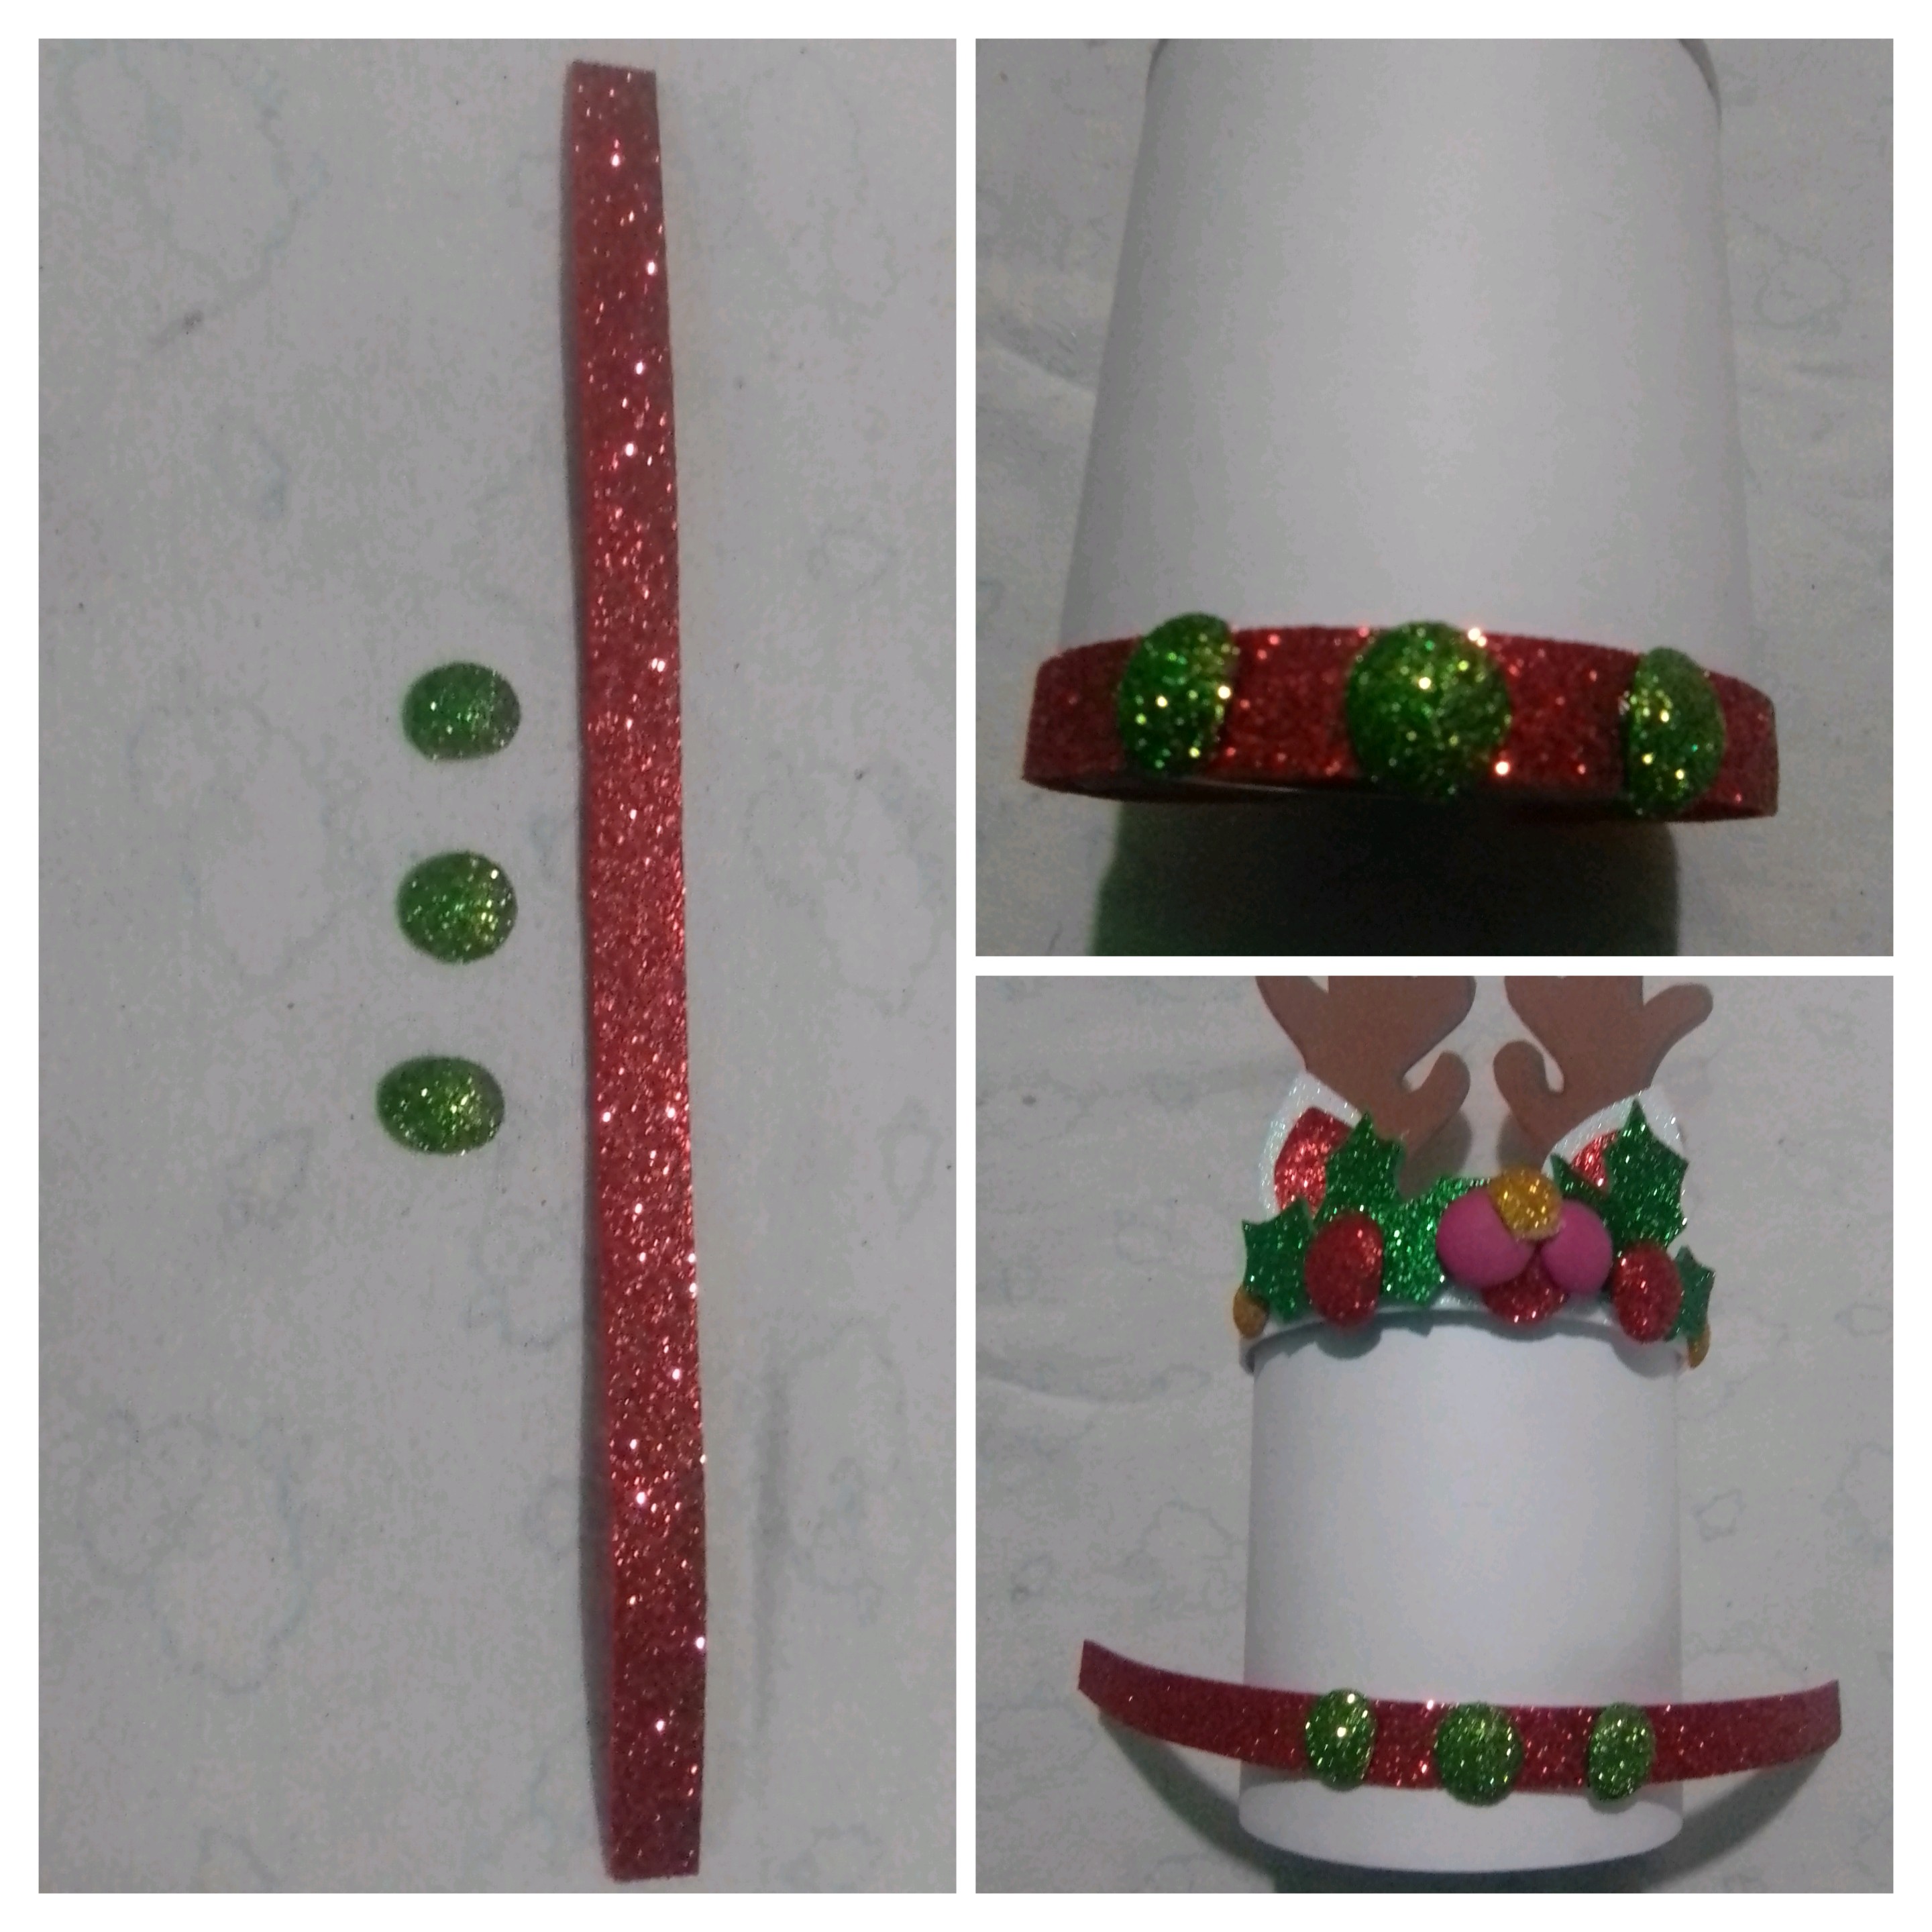
He continued with the decoration of the lid, now I cut some small circles of red, fuchsia and gold foami to apply heat with the clothes iron, to obtain some nice buttons, I also take the opportunity to apply heat to the circle of the nose.
Then I begin to make a Christmas headband or diadem, I was placing the Christmas leaves in the front of the cover and taking the ears as a reference, place two volumes of three leaves with a small separation and place the red buttons in the center of the leaves , to decorate the center of the bouquets uni fuchsia, red and gold buttons, at each end of the headband a gold button, thus trying to incorporate colors and Christmas elements such as leaves, on the lid of the gift box.
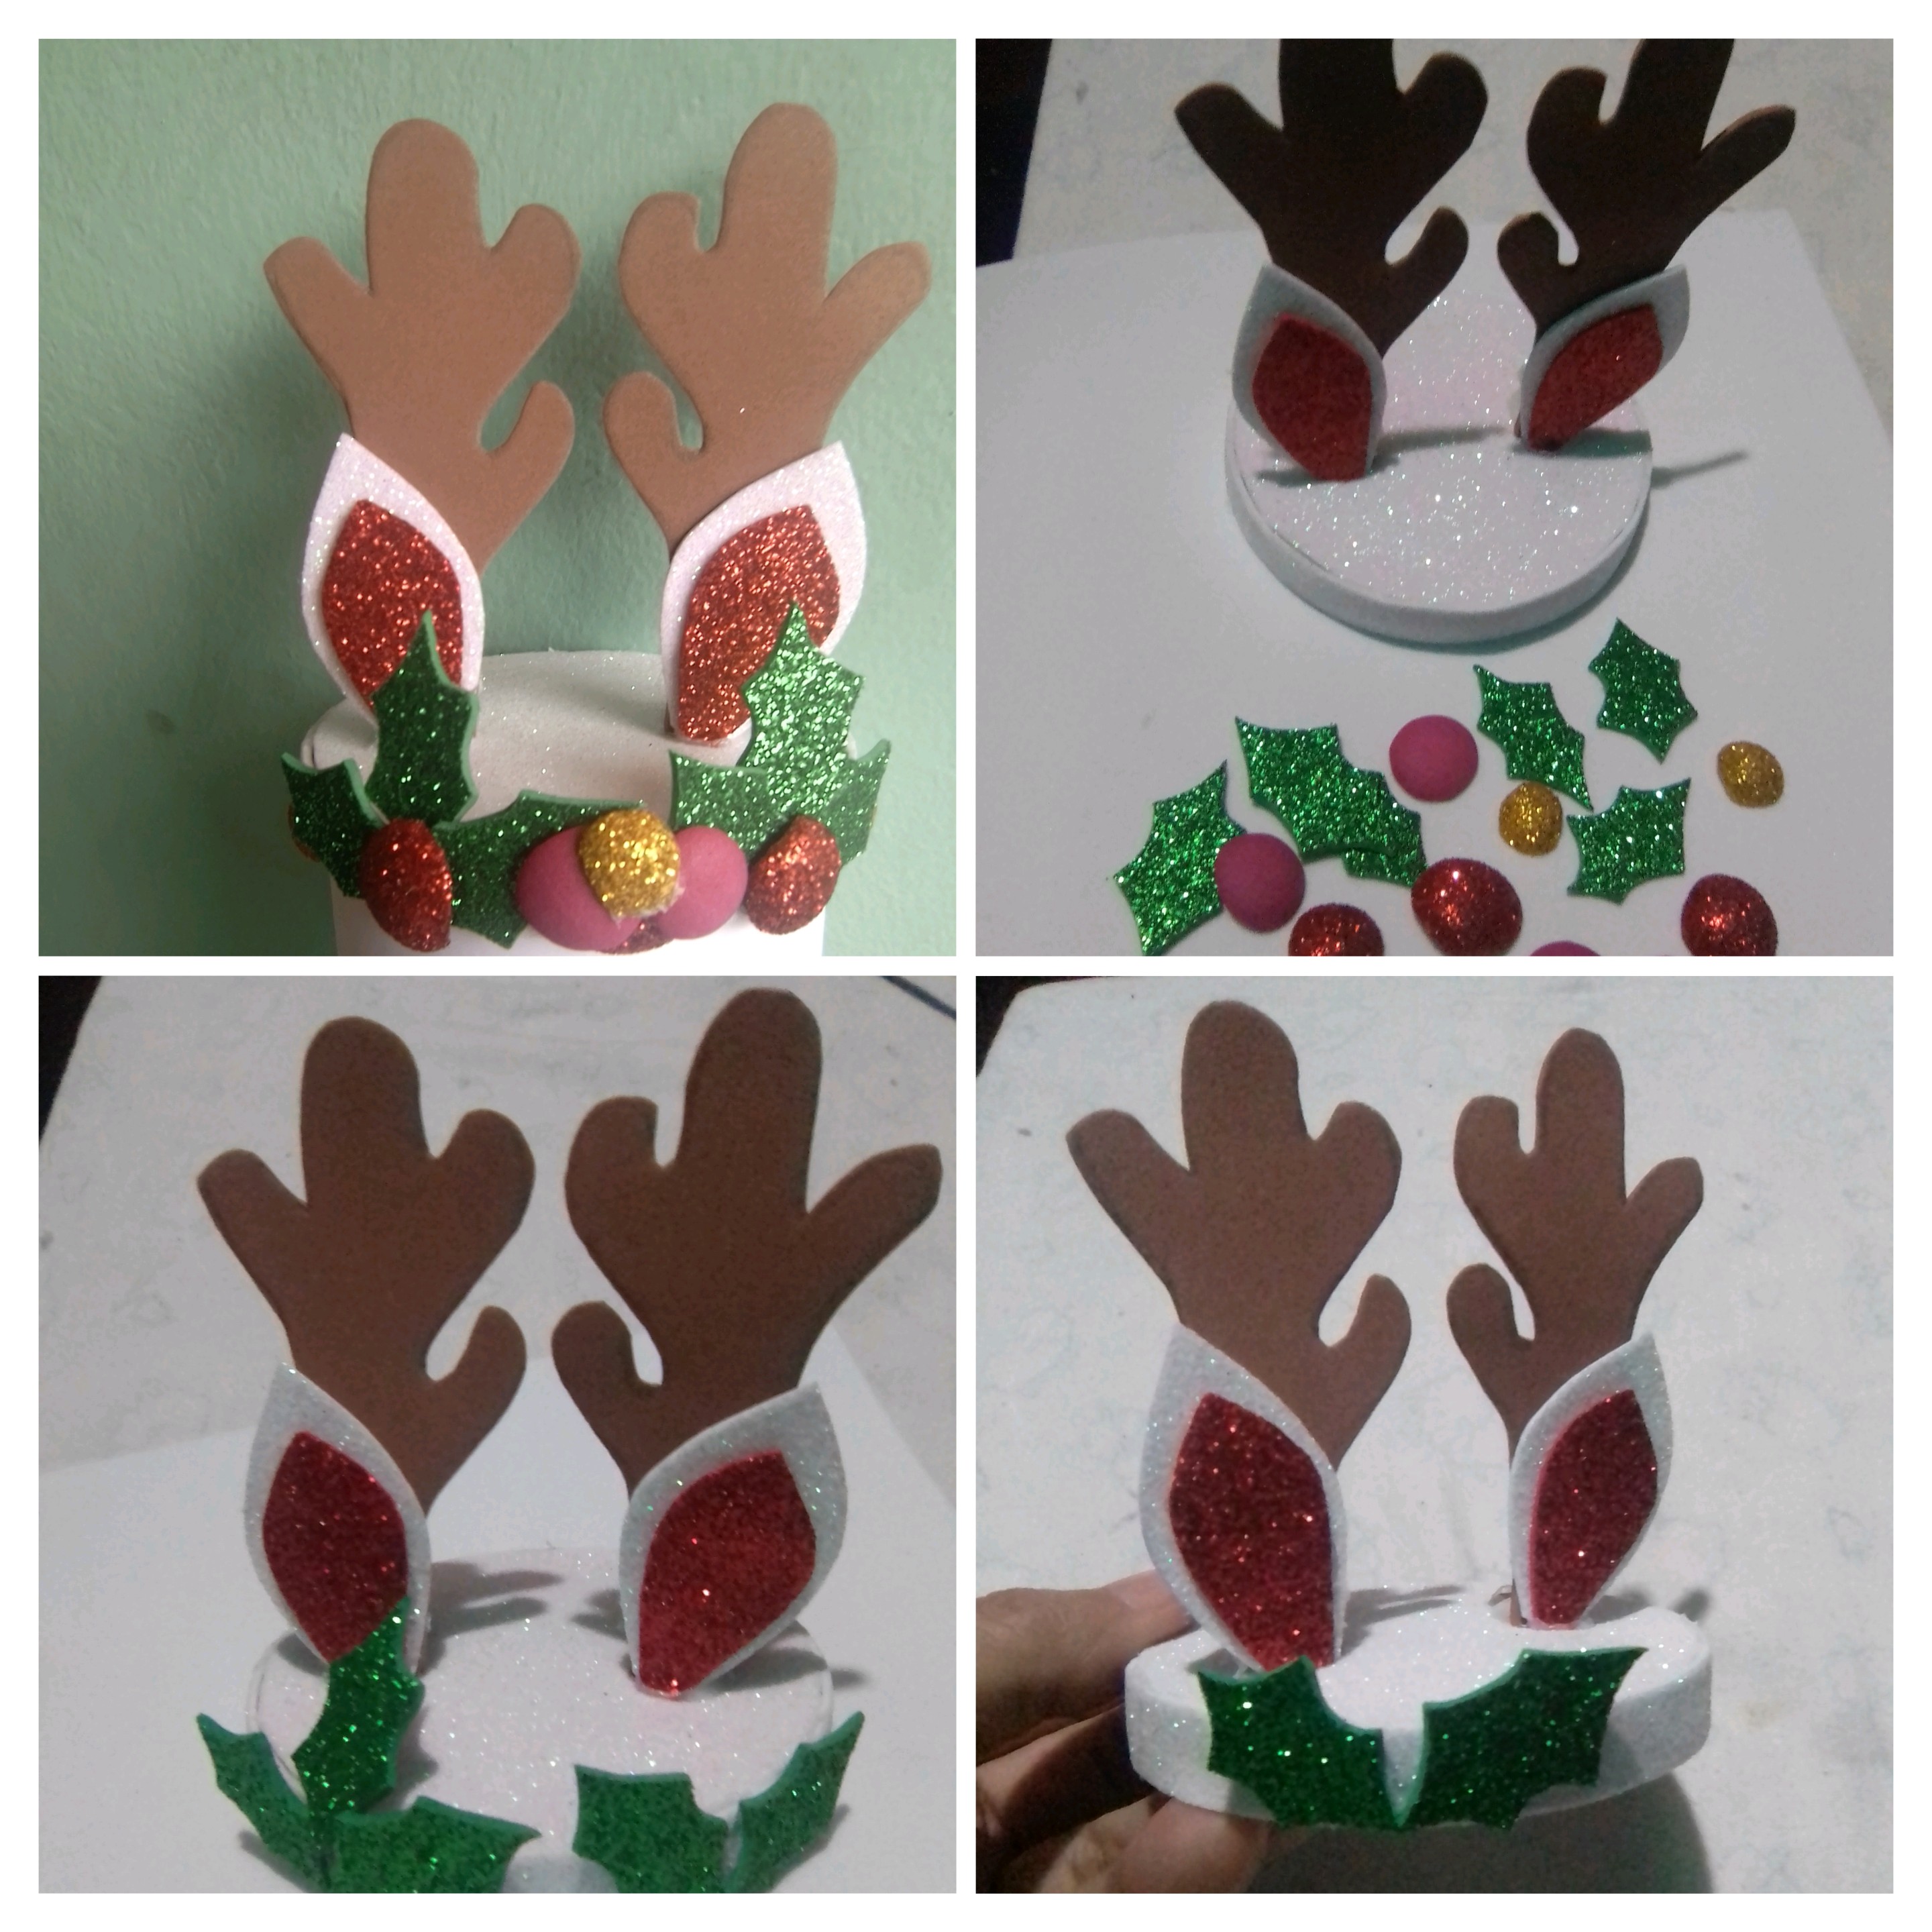
For the box I will make the necklace of the cute little deer, for this I cut a 16 x 1 centimeter strip of frosty red foami and three circles of a lighter shade of green and apply heat to them, then glue them to the red ribbon and fix it at the bottom of the box.
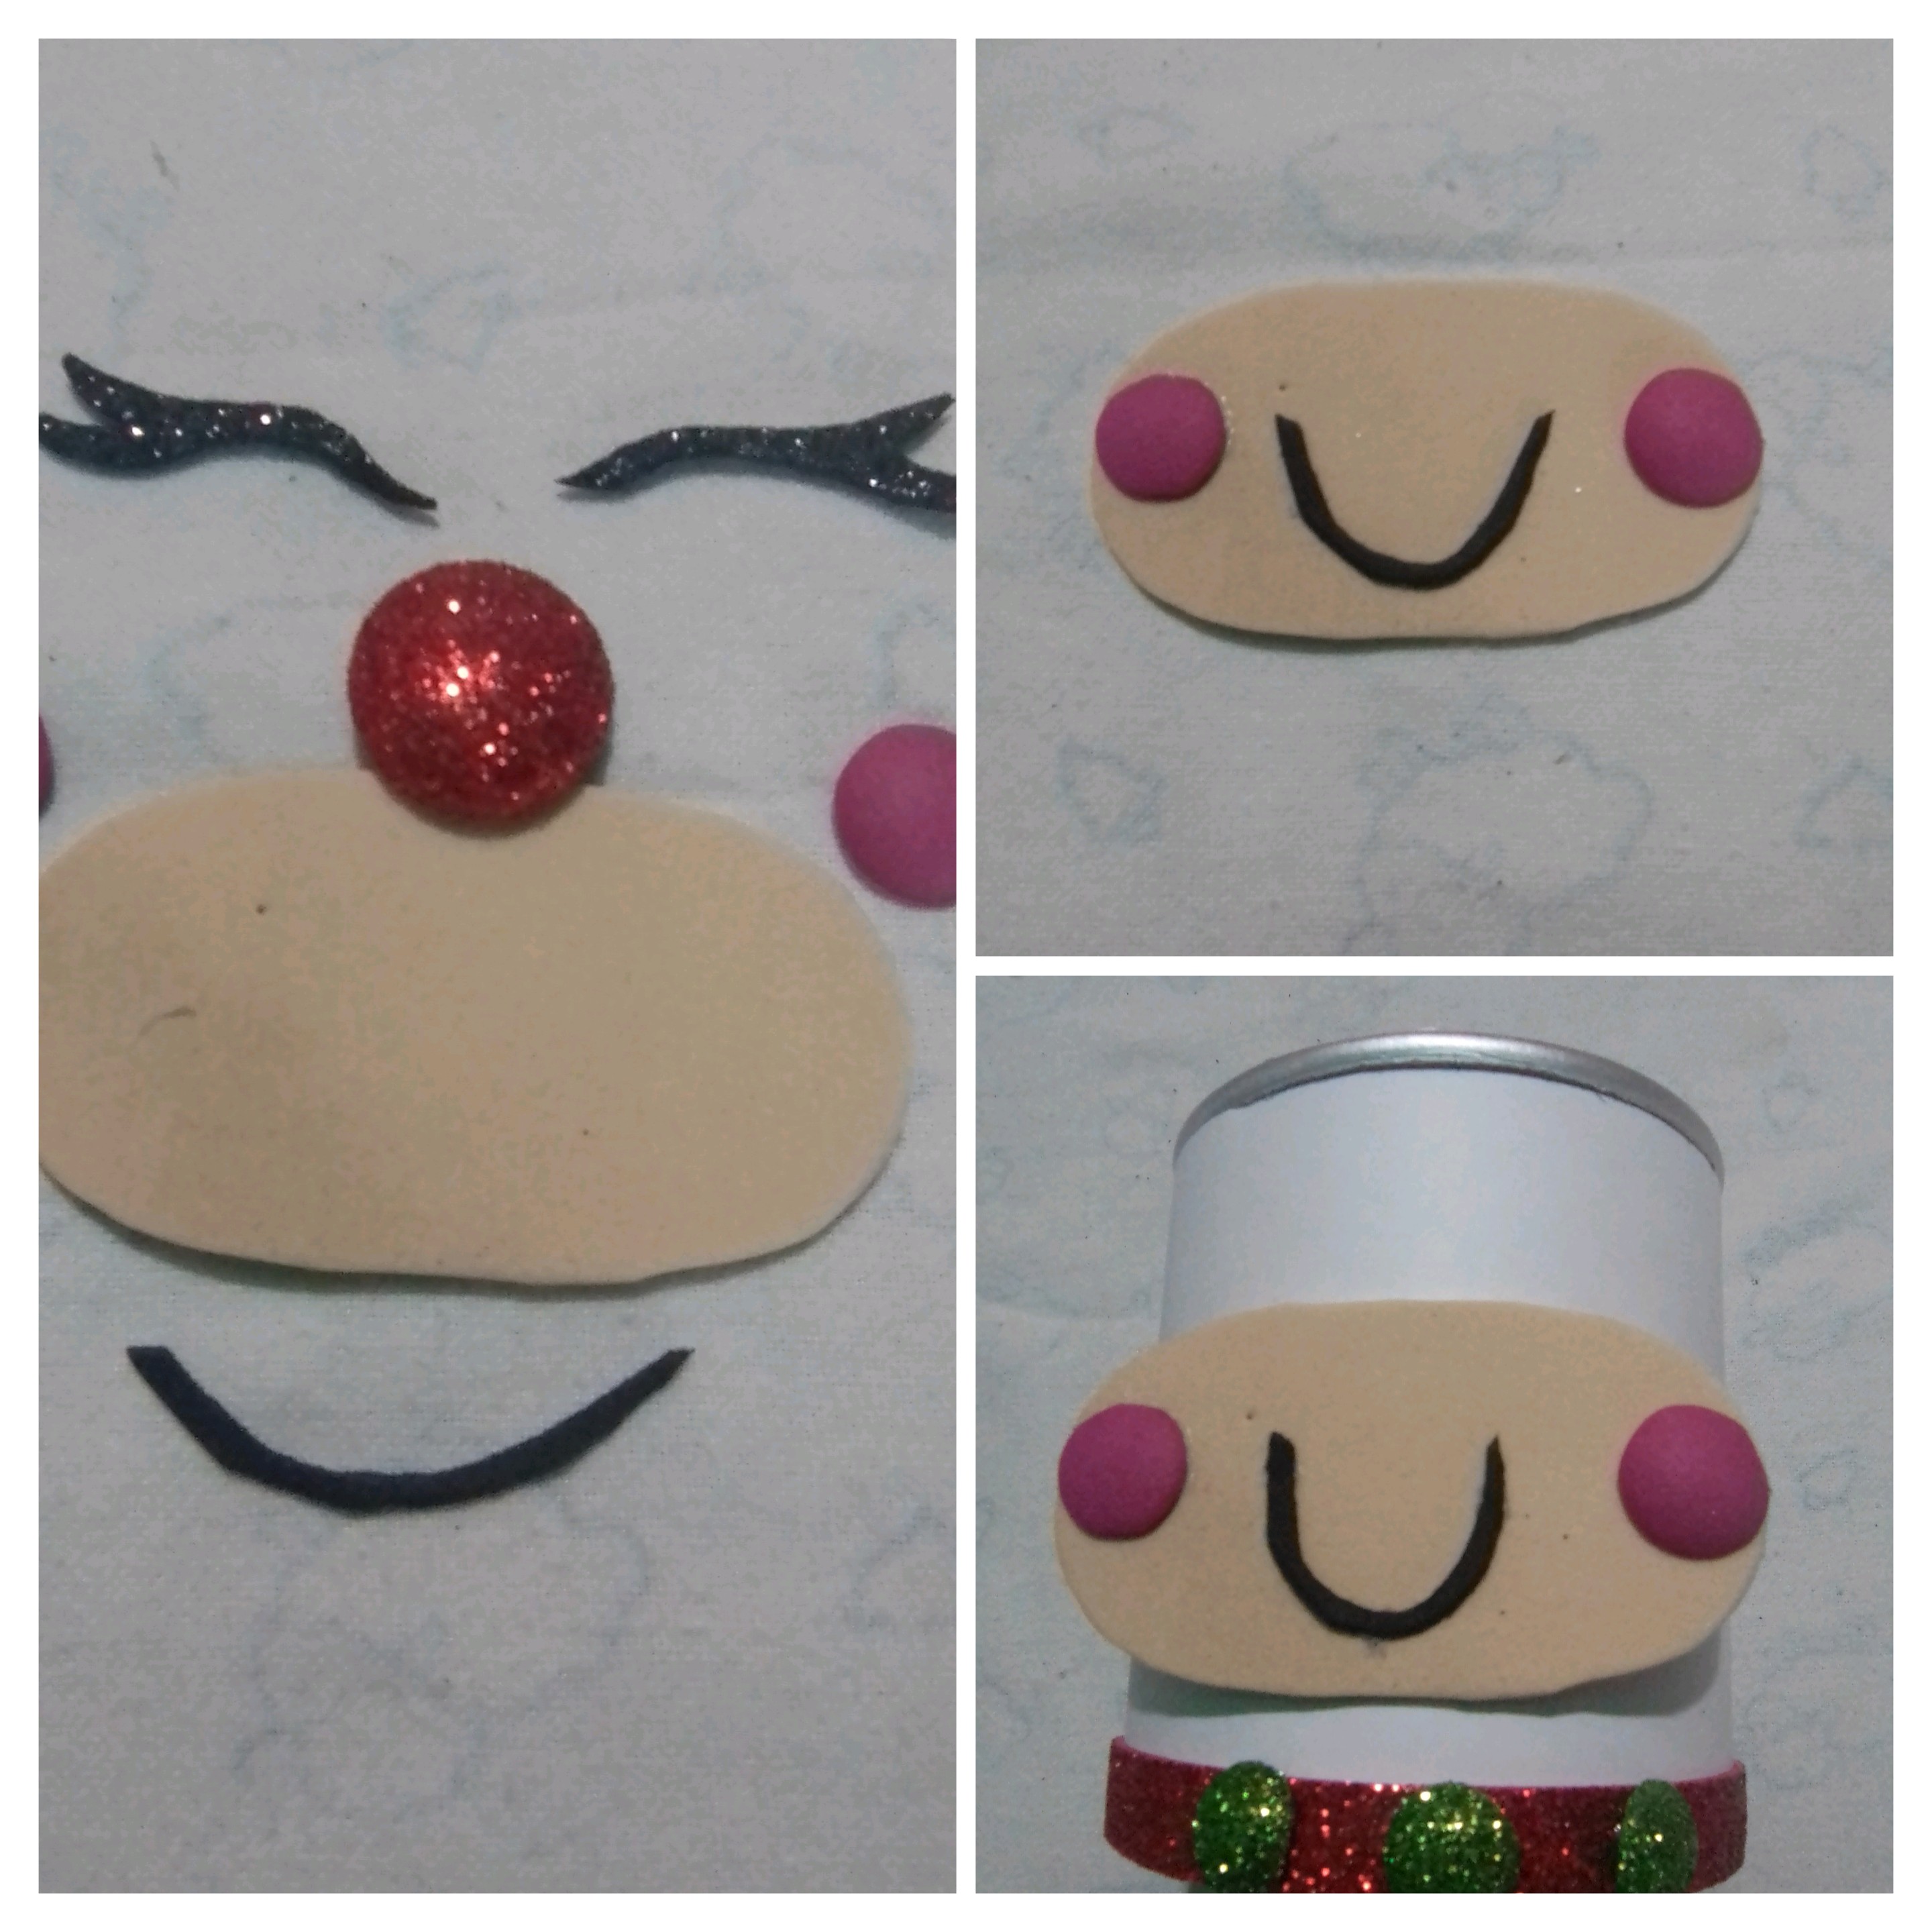
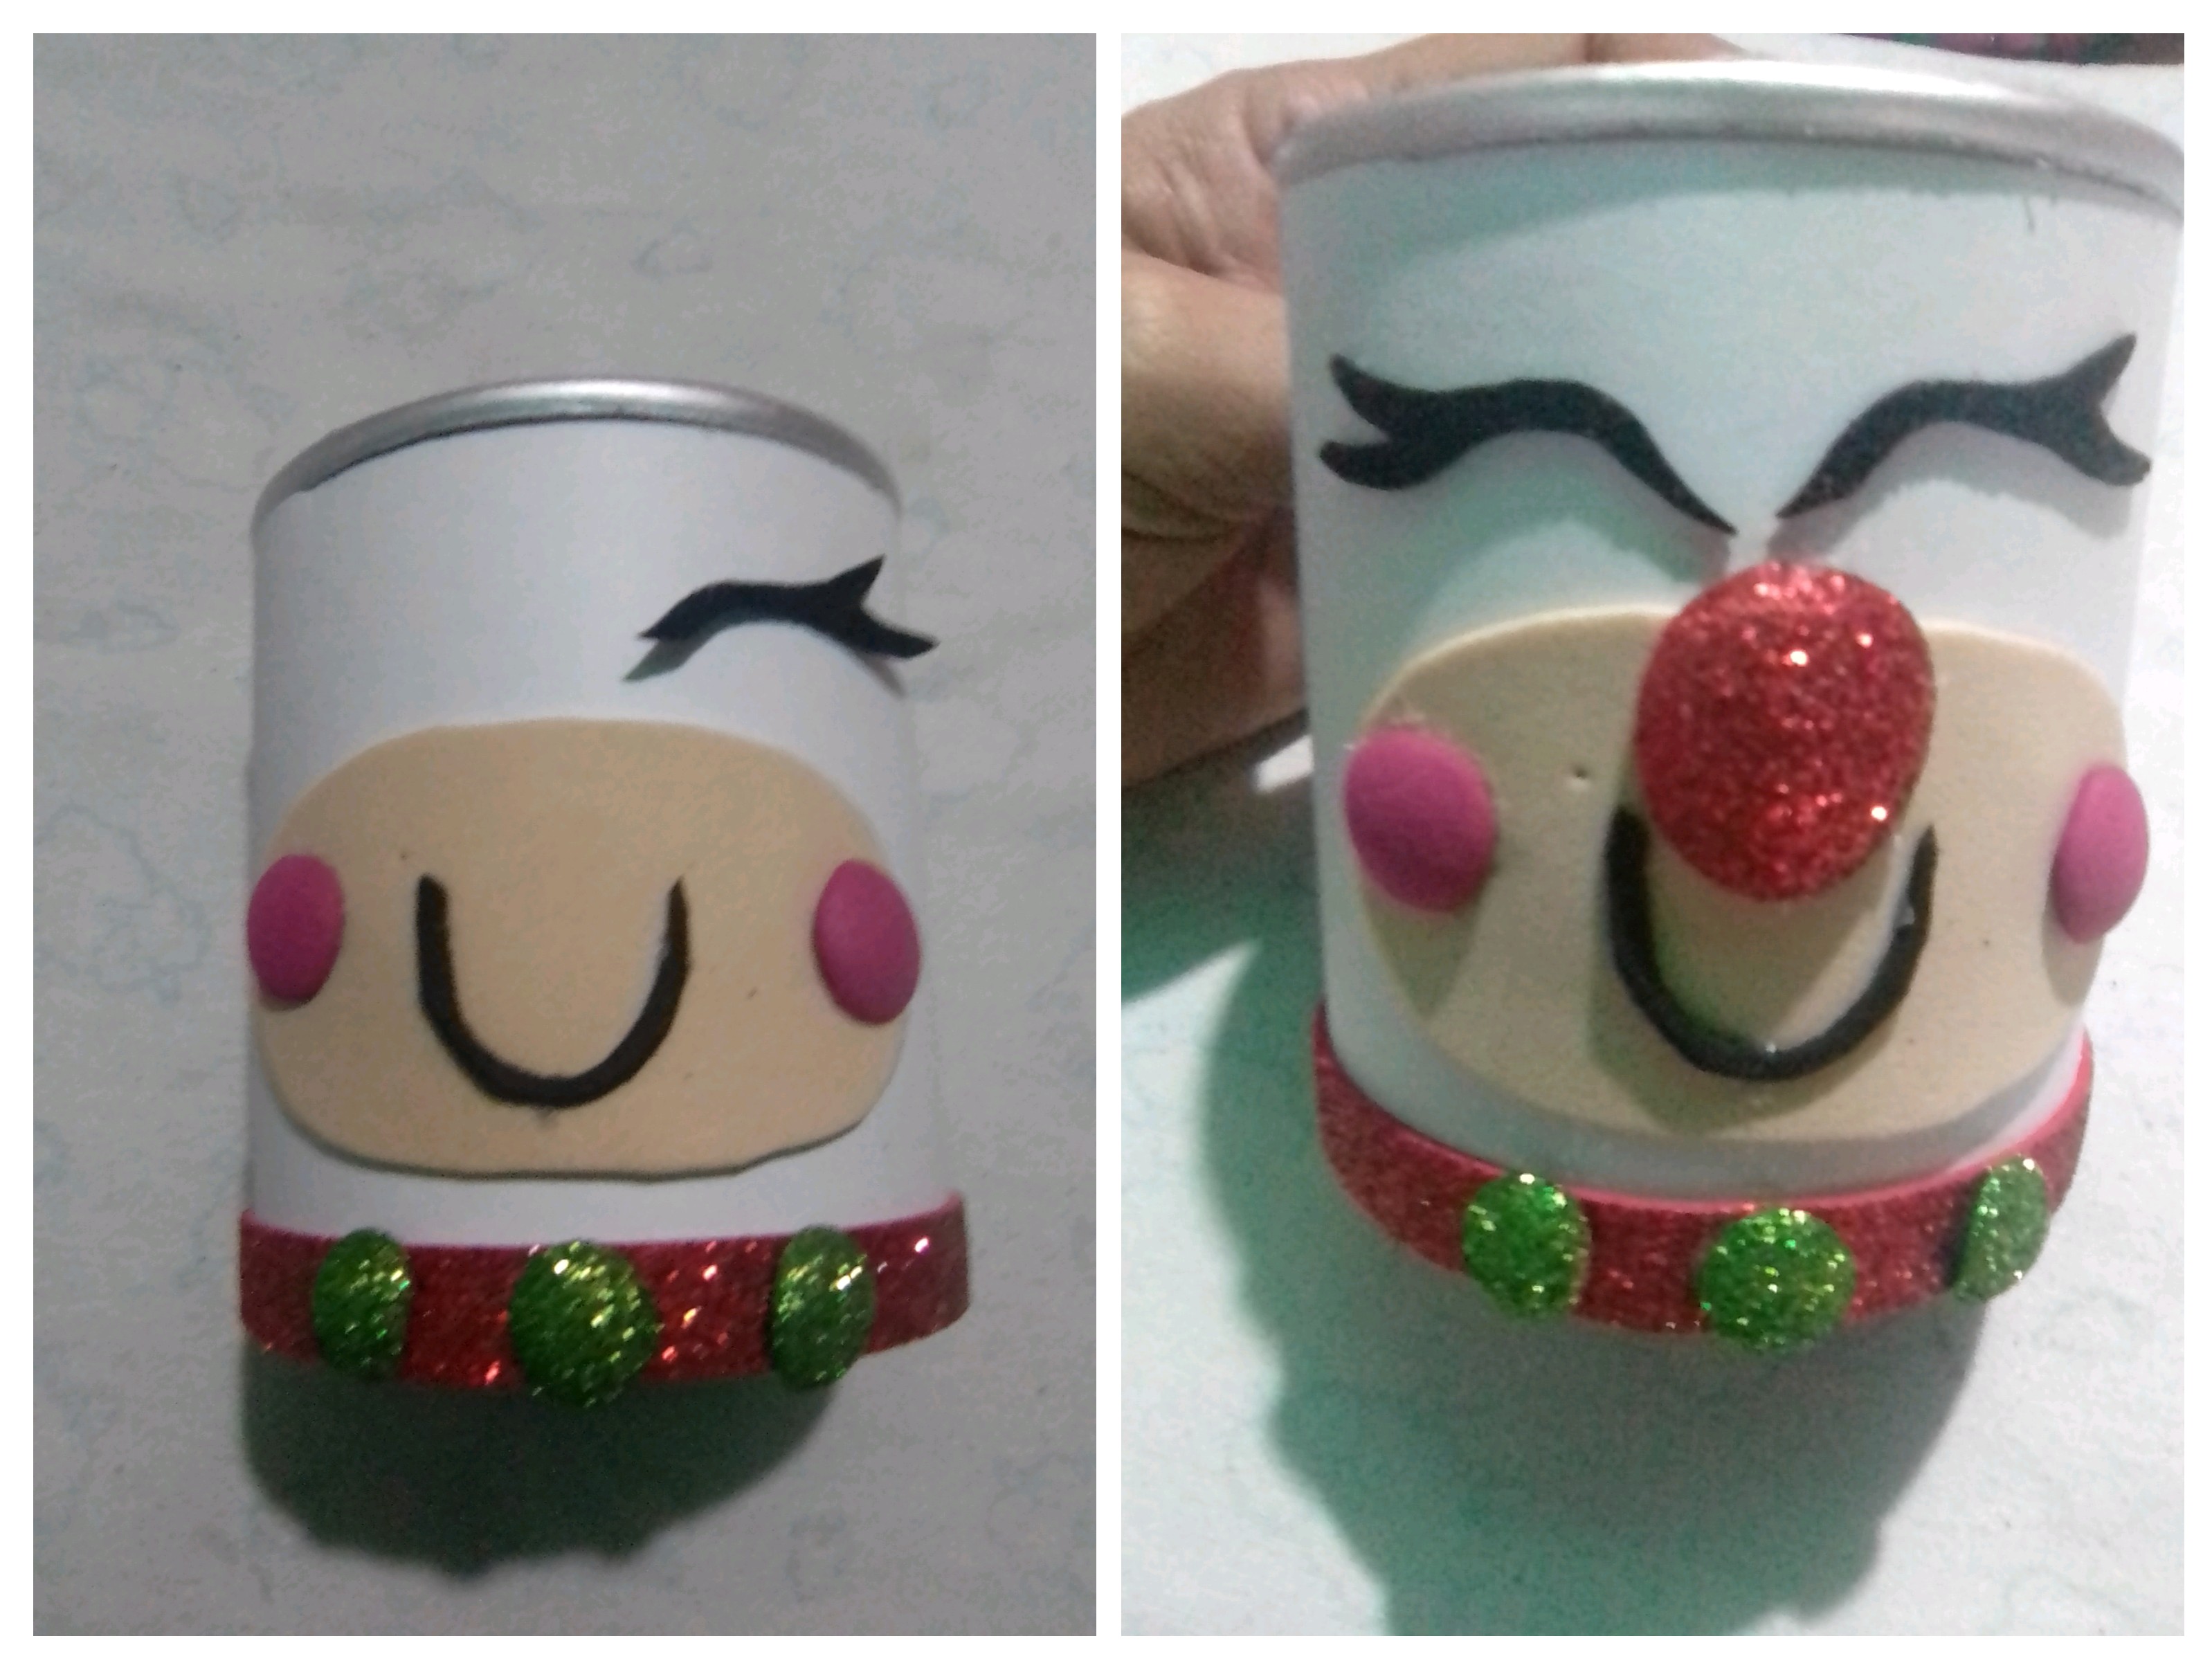
For the face, first build the cheeks and mouth on the cream base and the nose a little outside the base.
Finally I placed the eyes, which I made with frosty black foami, and after several attempts, they came out, it was difficult for me to cut them, I almost gave up.
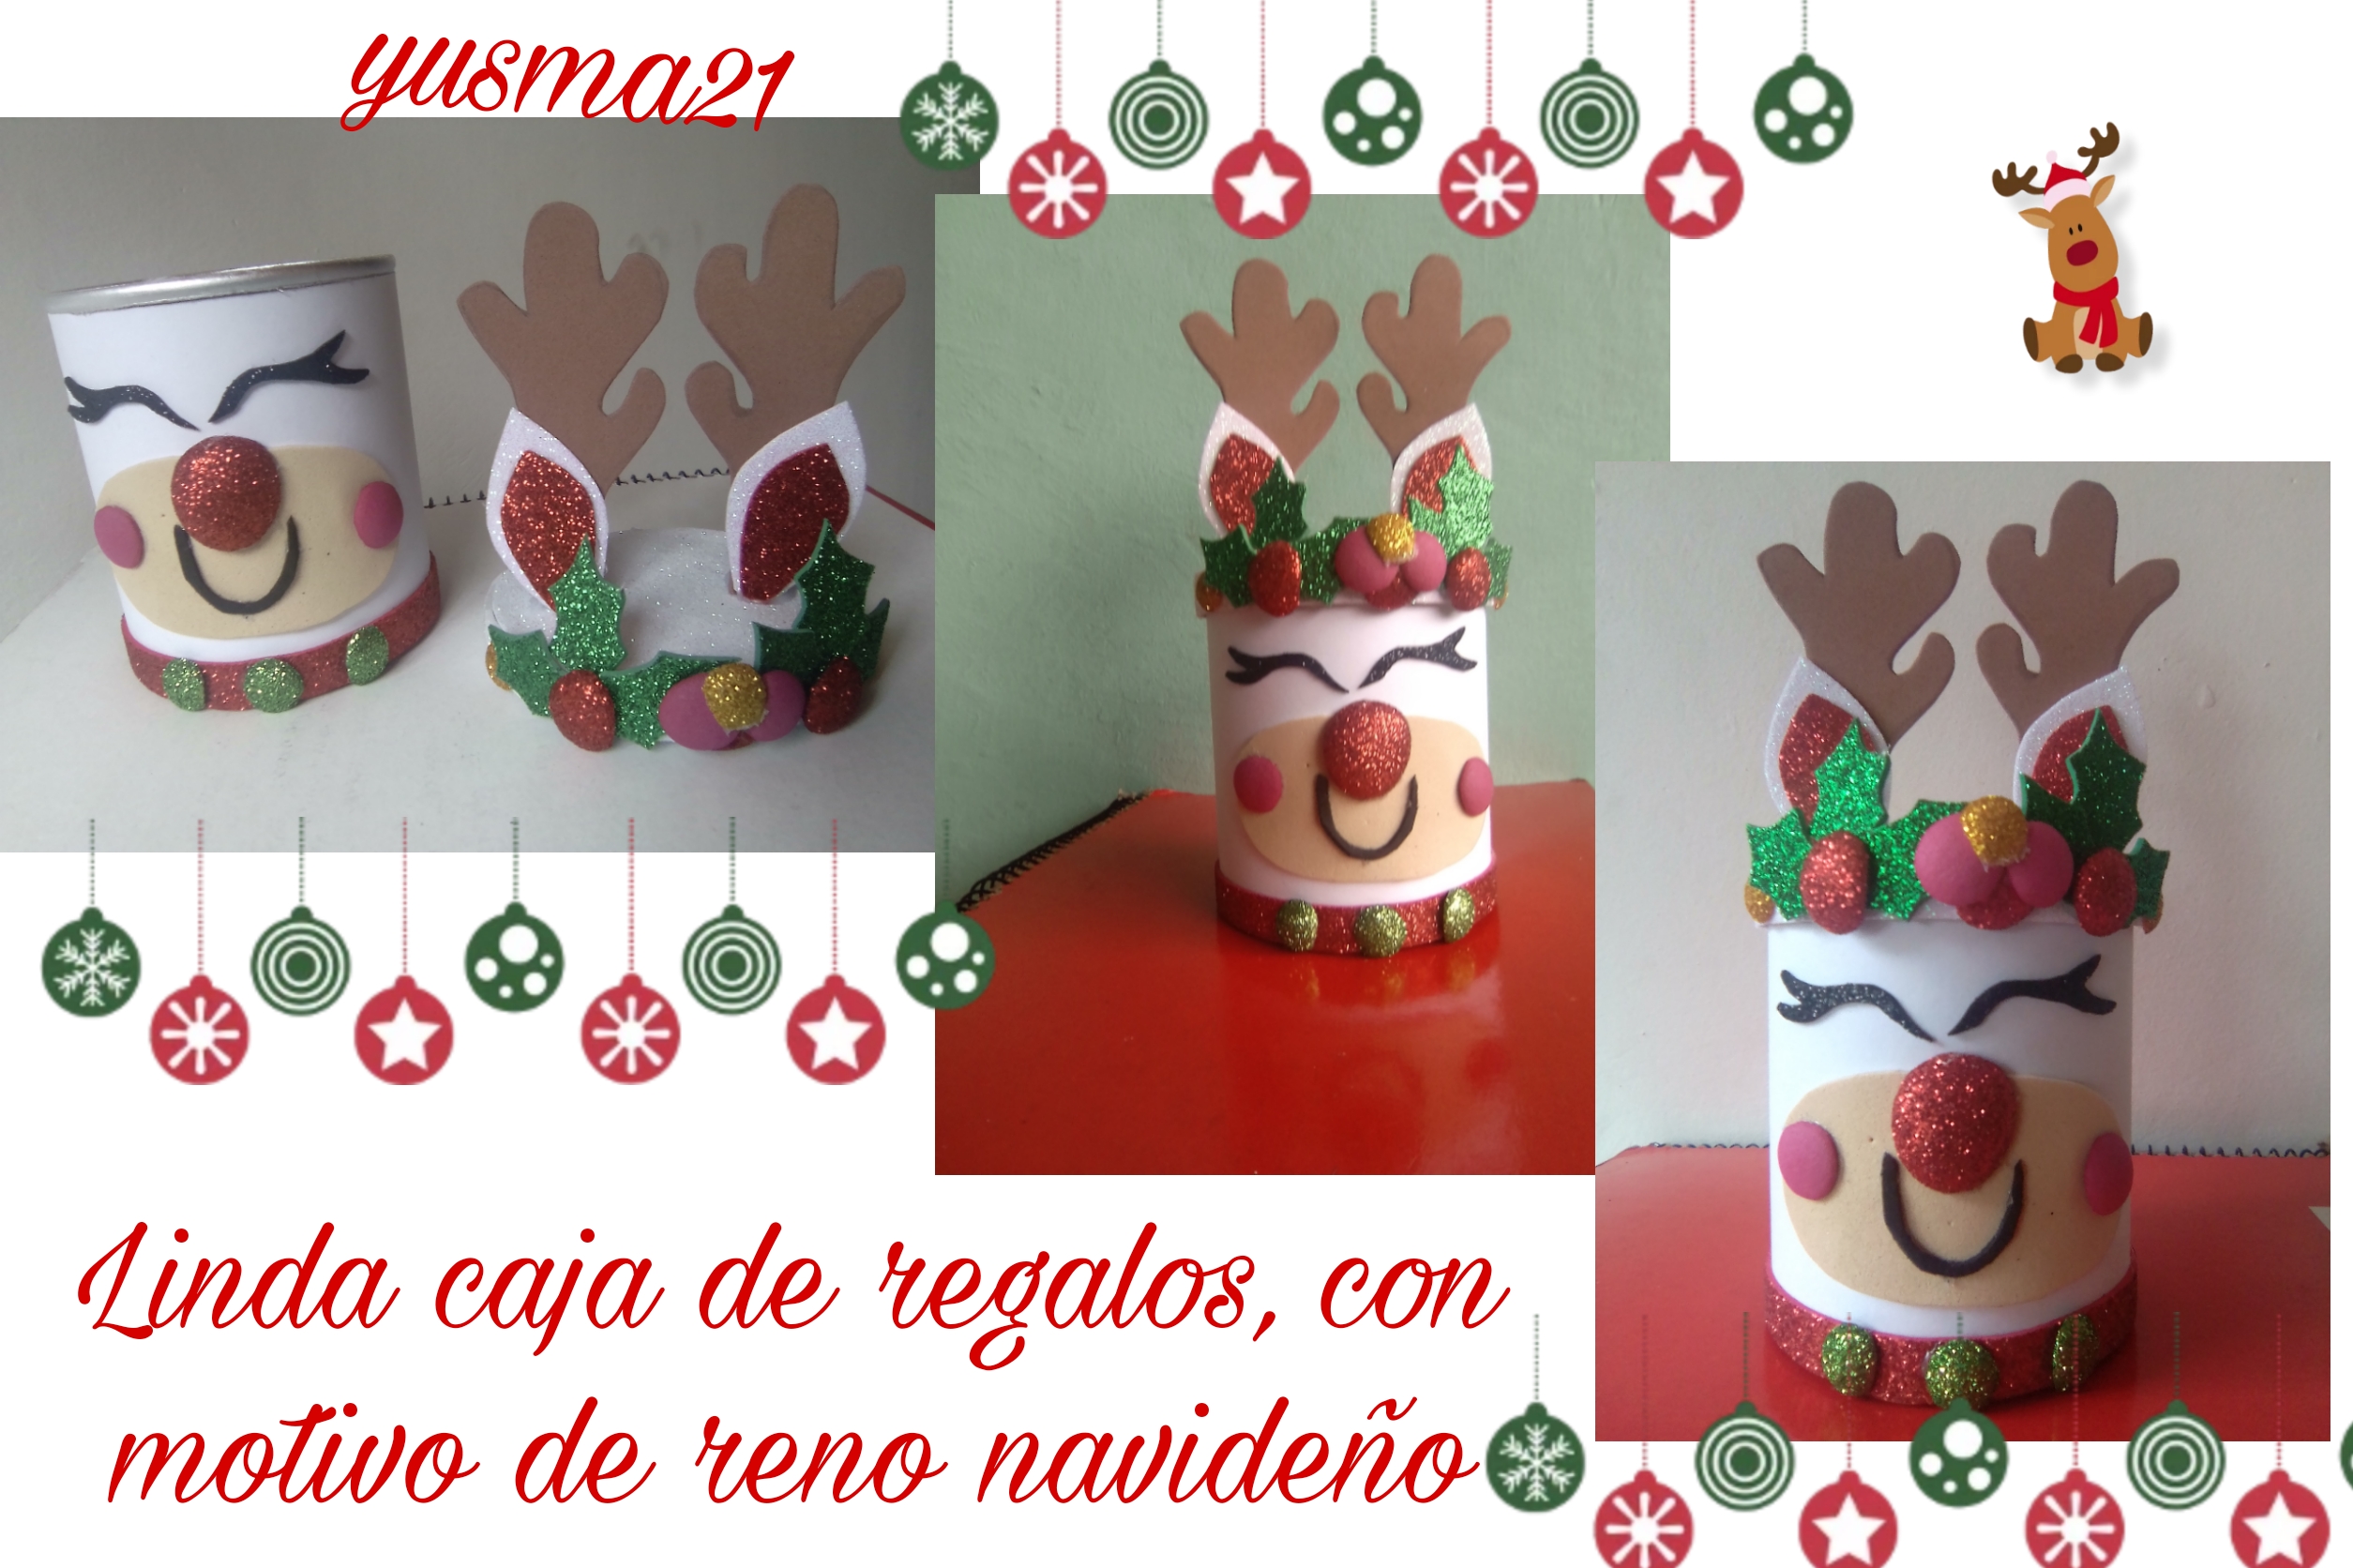
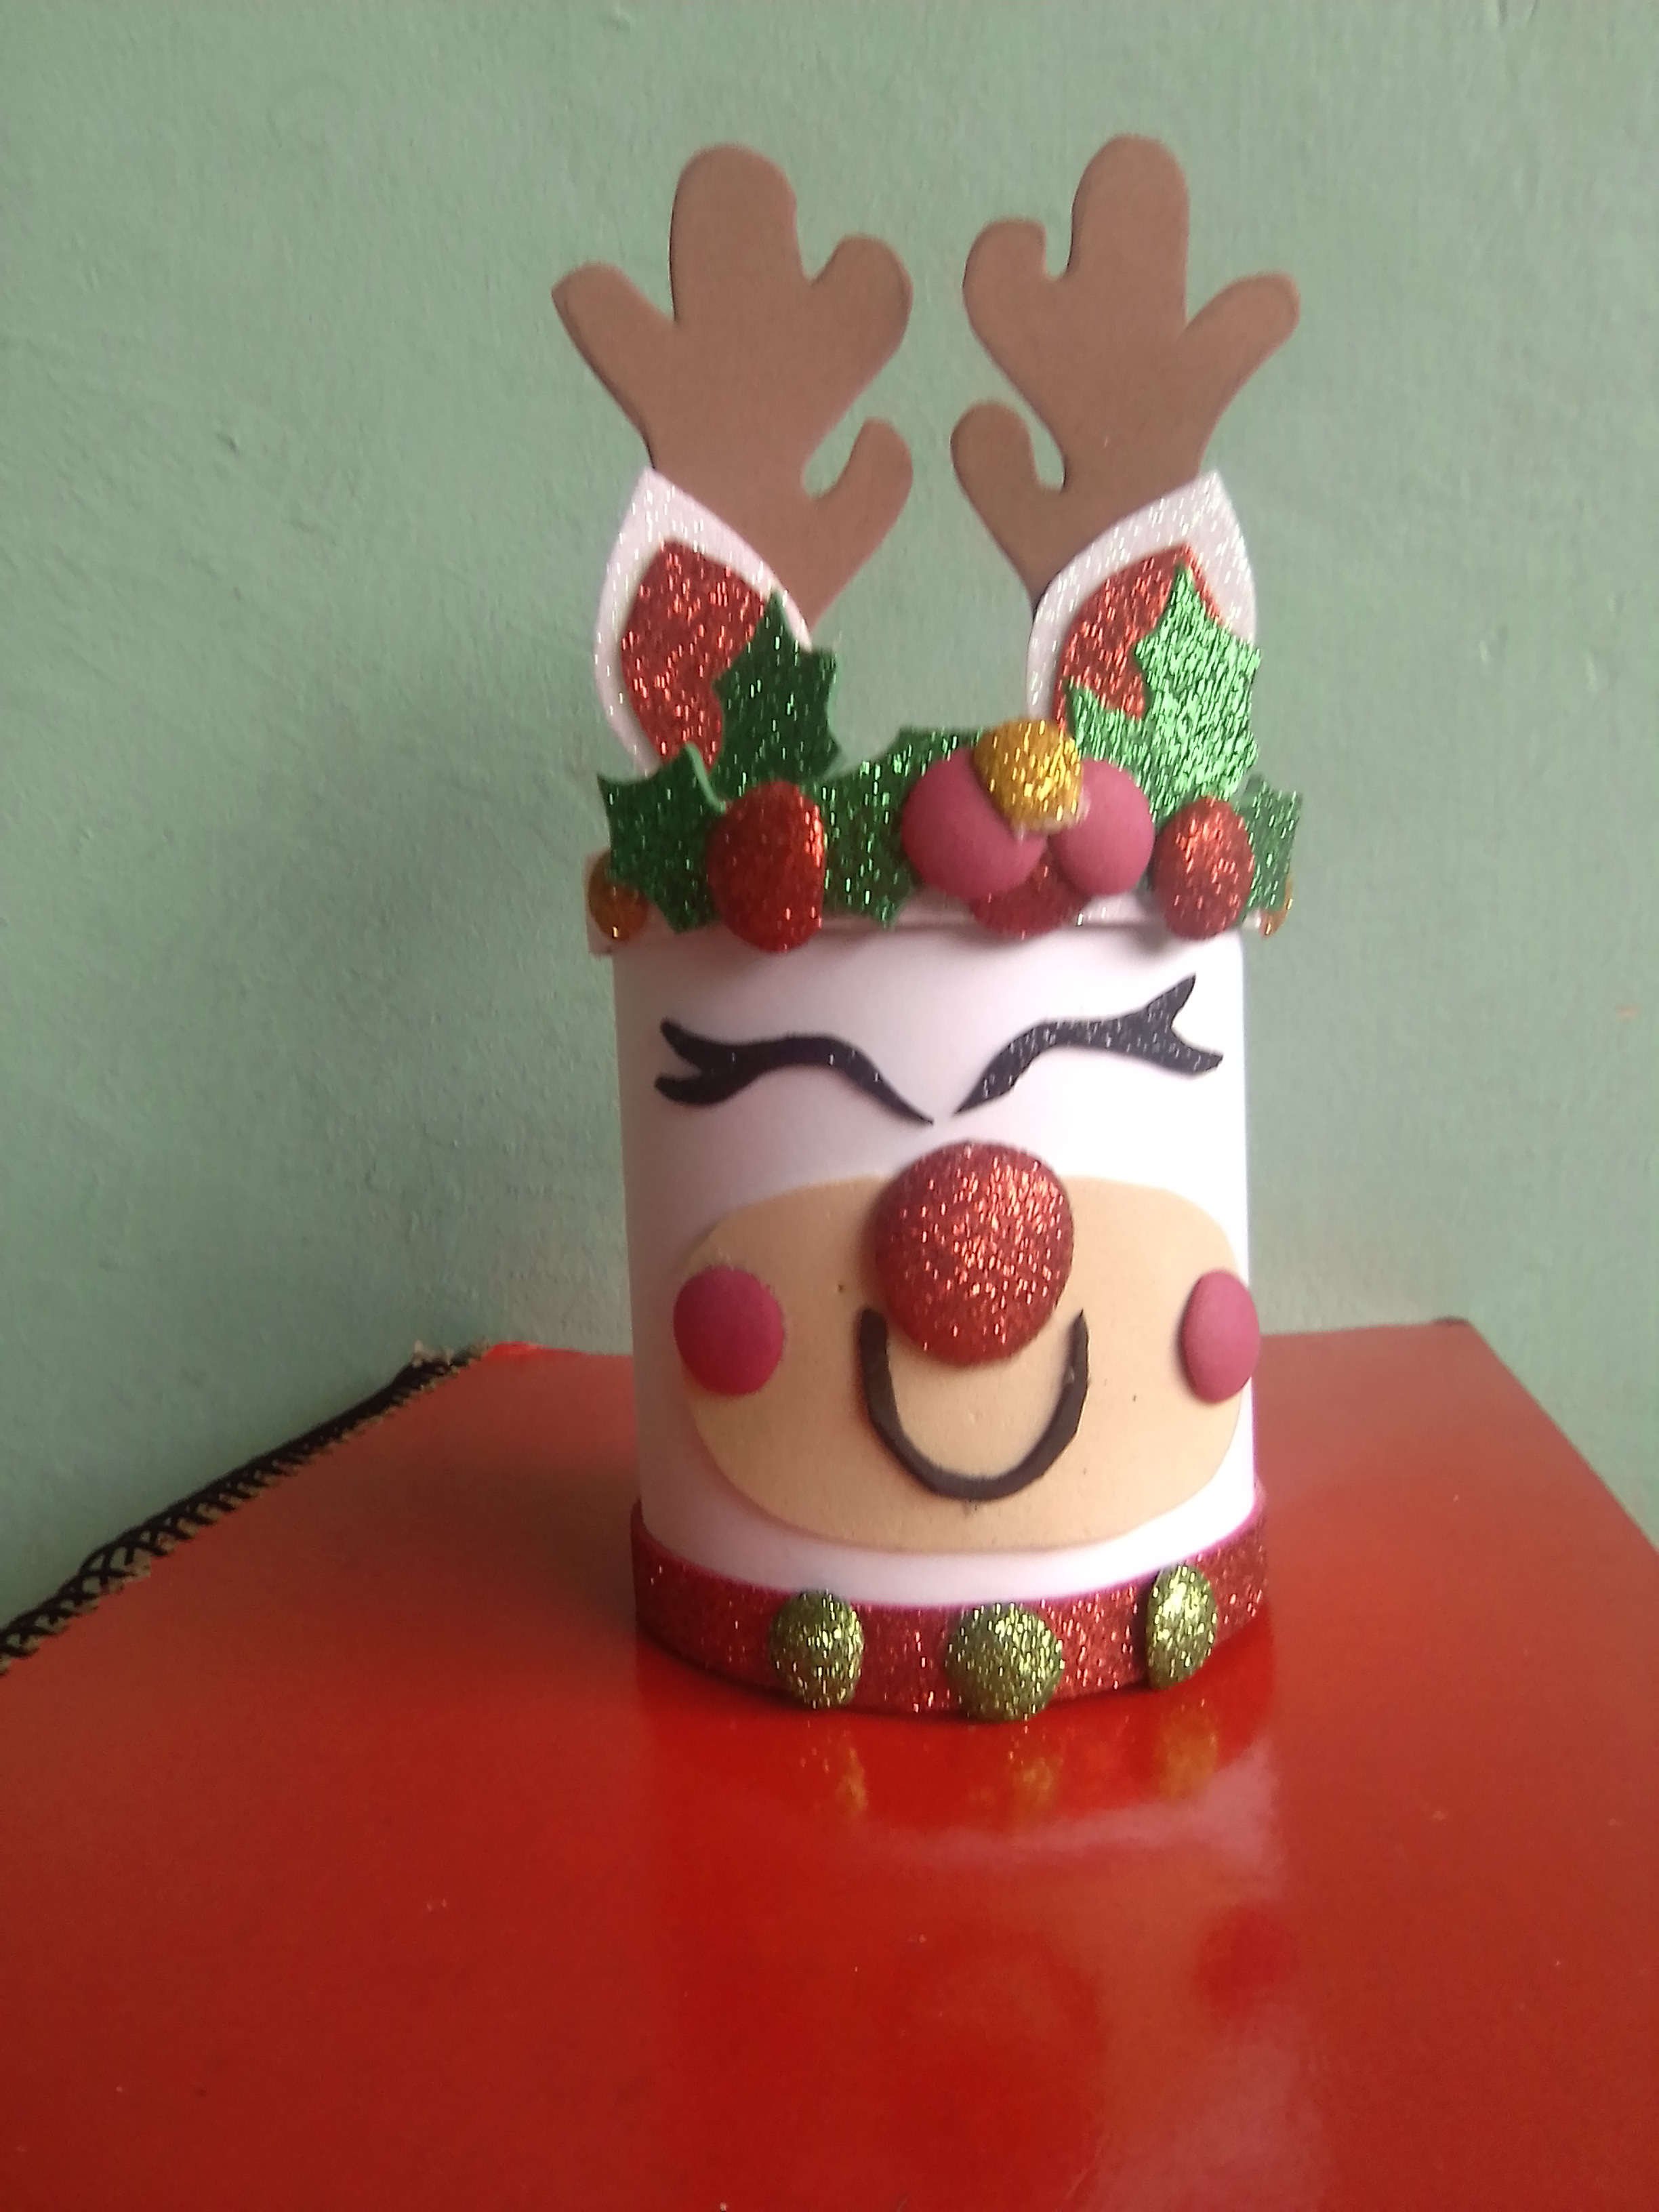
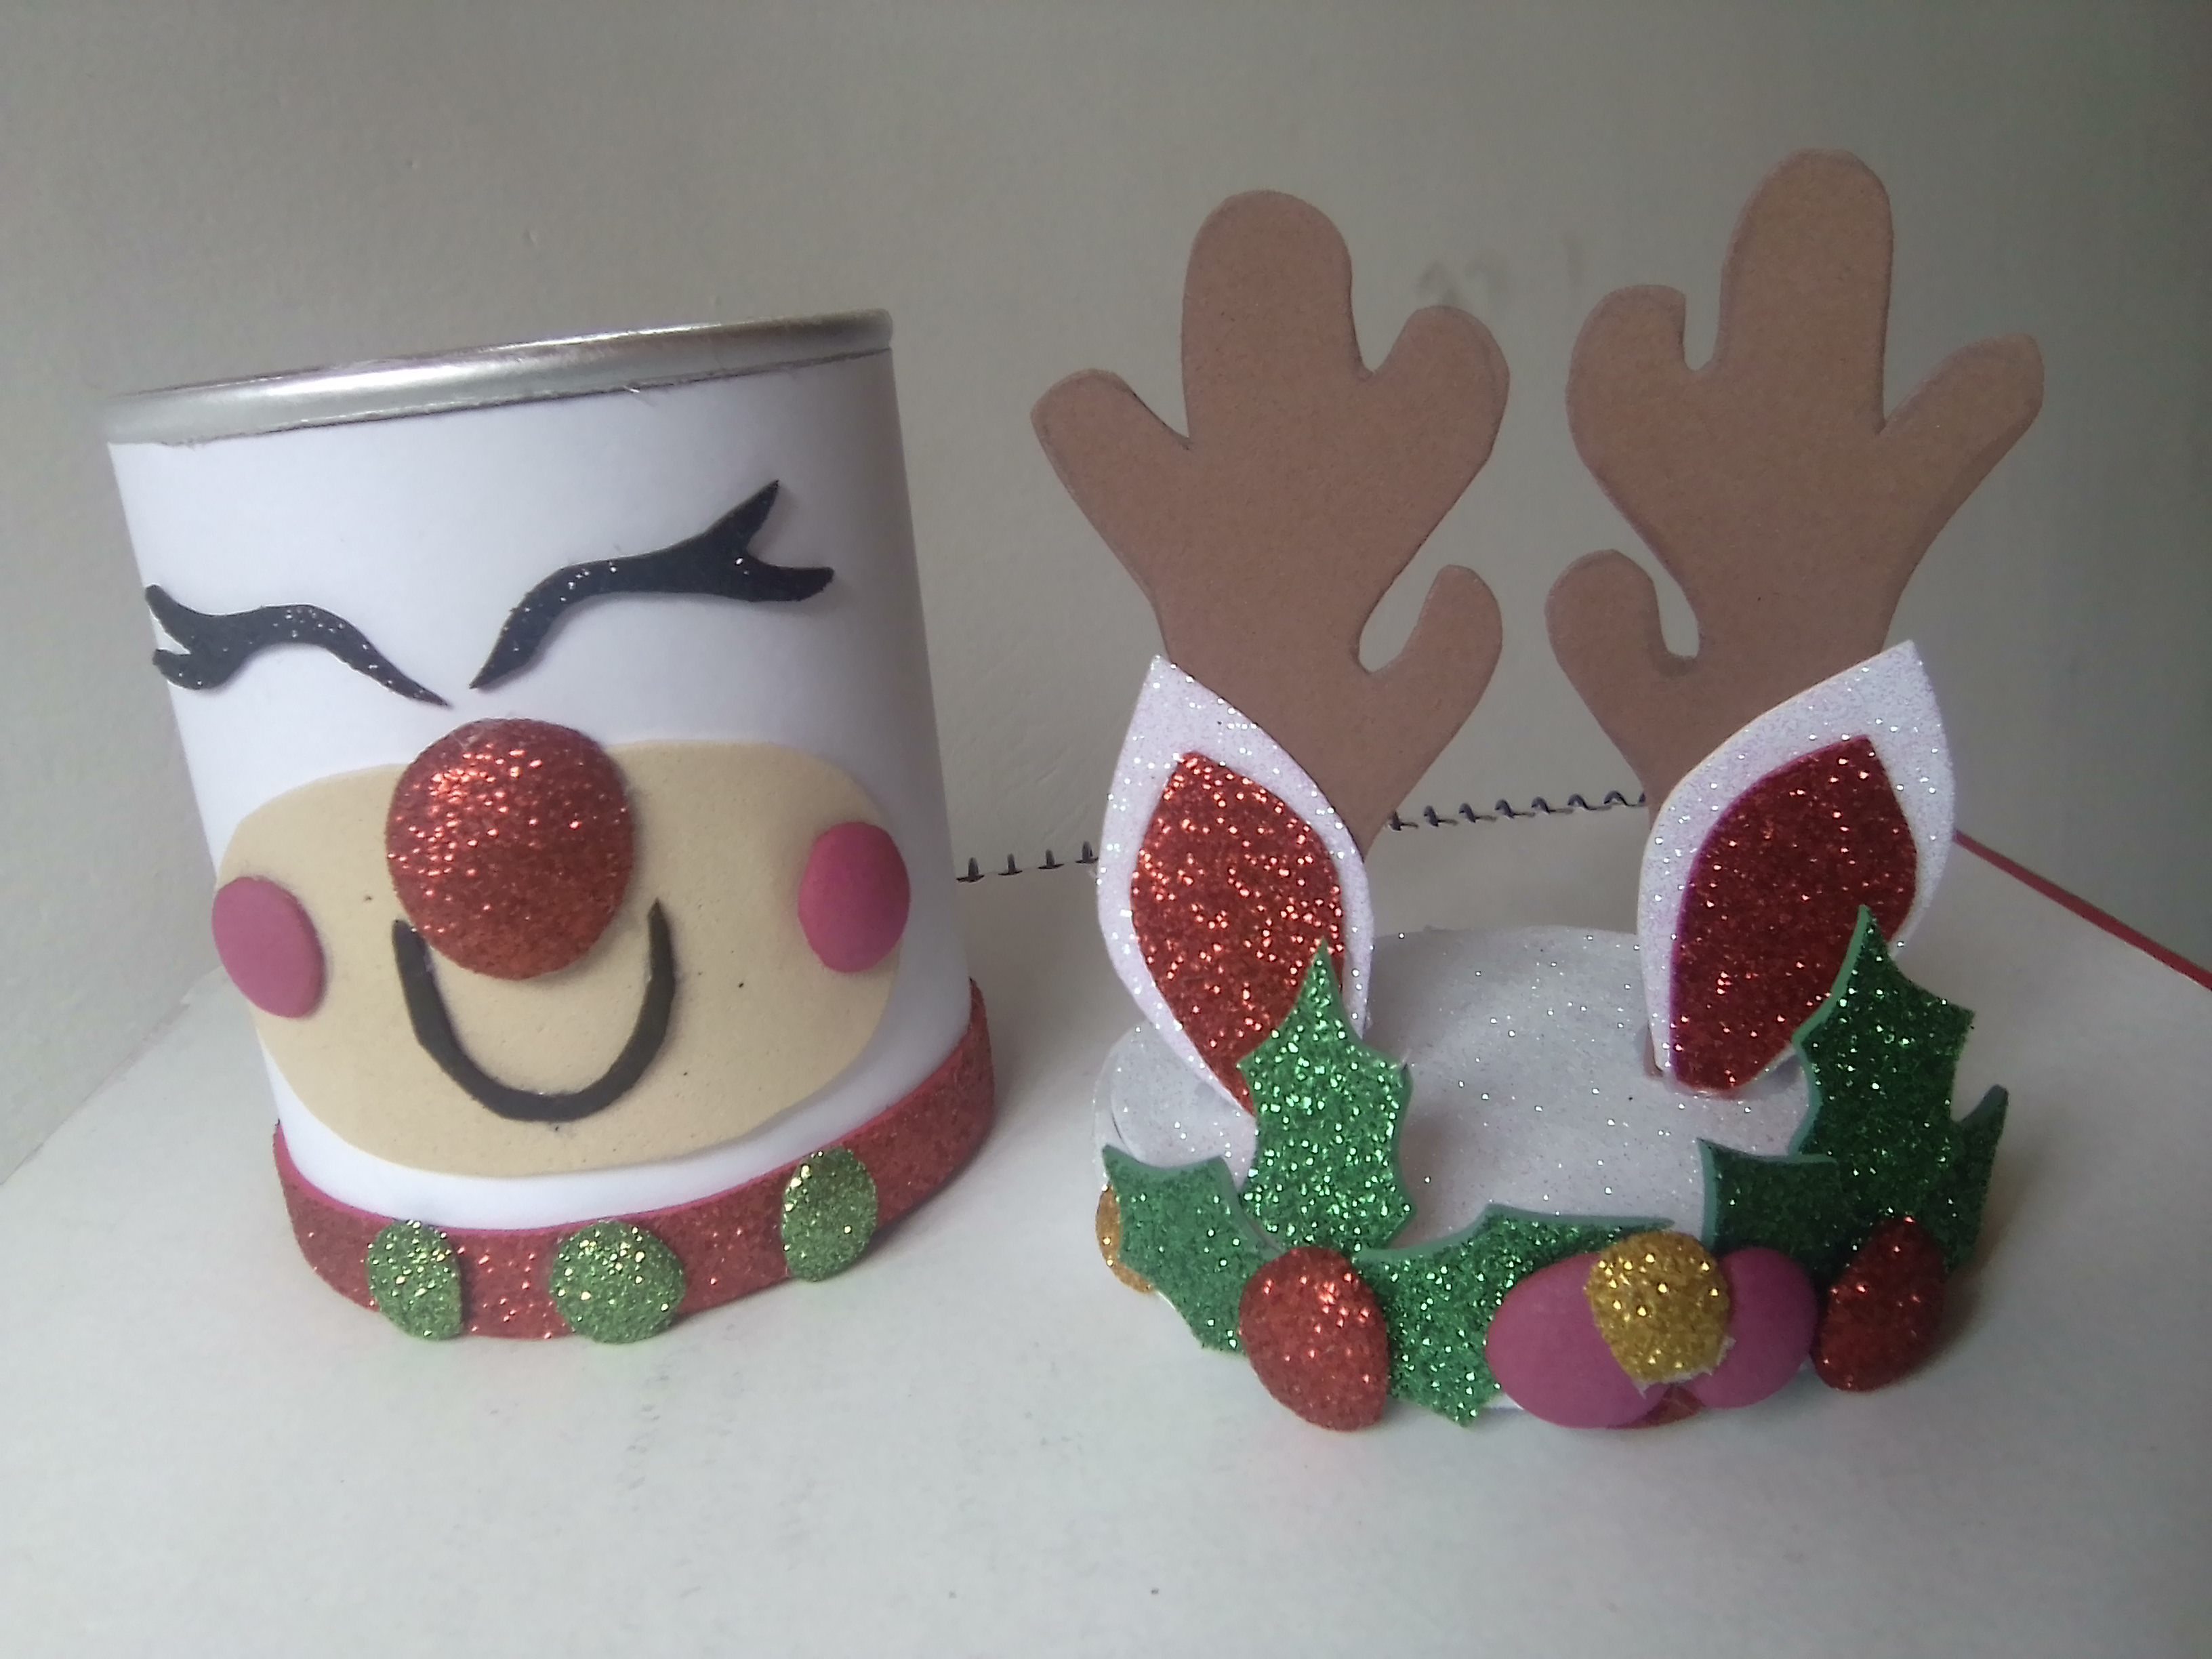
And in this way, make a nice gift box or it can also be a candy box, with a reindeer motif for these Christmas parties.
Result

The photos are my property taken exclusively in this project.
The collages of the procedure were made with the tool of my Blue C6 and the main one in Canva
The dividers and the banners were edited by me in Canva
The translation was made with
DeepL Translator


MATERIALES
✓ Foami escarchado de colores: blanco, rojo, negro, verde y dorado
✓ Foami marrón , crema y fucsia
✓ Envase de papas con tapa
✓ Plancha de ropa
✓ Cartulina de color blanco
✓ Hojas de reciclaje y lápiz
✓ Pistola y barras de silicona
✓ Tijera.
PASO A PASO
Para iniciar, realice los moldes de las astas, las orejas (la parte interna y externa), la boca, el círculo para la nariz y el molde de la hoja de navidad. Transferí estos a los colores de foami respectivos, como las orejas la parte externa en color blanco y la interna en rojo, las hojas de navidad en verde , las astas en color marrón, la base para la boca y la nariz en color crema .
El siguiente paso es preparar la caja, es decir cubrirla, para este proyecto quise probar con el color blanco, aunque se que los renos son marrón, pero como la navidad es una hermosa fantasía, me atreví a cambiar el color, para cubrir el envase pequeño de papas, utilice cartulina blanca, corte una pieza de 16 x 8.5 centímetros, y pegue con silicona caliente, justo debajo del anillo de aluminio del envase, ya que la tapa de estos es plástico y calza a presión.
A continuación es el momento de cubrir la tapa de la caja, use por supuesto la misma del envase que es plástico, pero esta vez use foami escarchado, para que resalte, pues la tapa es parte muy importante en este proyecto. Tome la medida por el reverso del foami, y saqué el círculo de la tapa y lo fijé con silicona caliente, posteriormente recorte una tira de 1centimetro de ancho en la parte inferior de la tapa, para que así quede cubierto todo el plástico transparente.
Ya con la caja forrada, y con las formas de foami listas, procedo entonces a ensamblar las astas y las orejas, y las coloco en el centro de la tapa , con una separación entre ellas de 3 centímetros. Para fijar las astas coloque un trozo de foami para reforzar y dar estabilidad a las astas.
Continuó con la decoración de la tapa, ahora corte unos pequeños círculos de foami rojo, fucsia y dorado para aplicarles calor con la plancha de ropa, para obtener unos lindos botones, también aprovecho para aplicar calor al círculo de la nariz.
Comienzo entonces a realizar un cintillo o diadema navideña, fui colocando las hojas de navidad en el frente de la tapa y tomando como referencia las orejas, coloque dos tomos de tres hojas con una pequeña separación y ubique los botones rojos en el centro de las hojas , para decorar el centro de los ramos uni botones fucsia, rojo y dorado, a cada extremo de la diadema un botón dorado, tratando así de incorporar colores y elementos navideña como las hojas, en la tapa de la caja de regalos.
Para la caja realizaré el collar de la linda ciervita, para ello corte una tira de foami rojo escarchado de 16 x 1 centímetro y tres círculos de un tono más claro de verde y les aplique calor, luego los pegue a la cinta roja y la fijé en el parte inferior de la caja.
Para la cara, arme primero las mejillas y la boca sobre la base de color crema y la nariz la ubique un poco por fuera de la base.
Por último coloque los ojos, los cuales realice con foami negro escarchado, y después de varios intentos, me salieron, me fue difícil recortarlas casi me di por vencida.
Y de esta manera realice una linda caja de regalo o también puede ser un dulcero, con motivo de reno para estas fiestas navideñas.
Resultado
Las fotos son de mi propiedad tomadas exclusivamente en este proyecto.
Los collages del procedimiento los hice con la herramienta de mi Blue C6 y el principal en Canva
Lo separadores y el banners fueron editados por mi en Canva
La traducción fue realizada con
DeepL Traductor
Que lindo detalle para navidad, ese renito quedó muy tierno, me encanta ♥️
Gracias @mariajcastro28
The rewards earned on this comment will go directly to the people( @mariajcastro28 ) sharing the post on Twitter as long as they are registered with @poshtoken. Sign up at https://hiveposh.com.
Muy practico y util esta cajita de navidad que nos compartes. Saludos
Gracias por visitar mi blog, es muy útil para las fiestas navideñas
Quedó muy bonito este adorno con la temática de la temporada, aplicable y adaptable a otros estilos jeje
Algo distinto y atrevido. Jajaja. gracias Gabo
Llegó la navidad y con ella manualidades hermosas,gracias por compartir ❄️🌲❄️🌲❄️
Si ya con el espíritu de la navidad activo, queriendo hacer cosas muy lindas para la temporada.
Beautiful
Tiene una expresión bastante agradable. Es un trabajo con apariencia divertida.
that is so very cute I love it