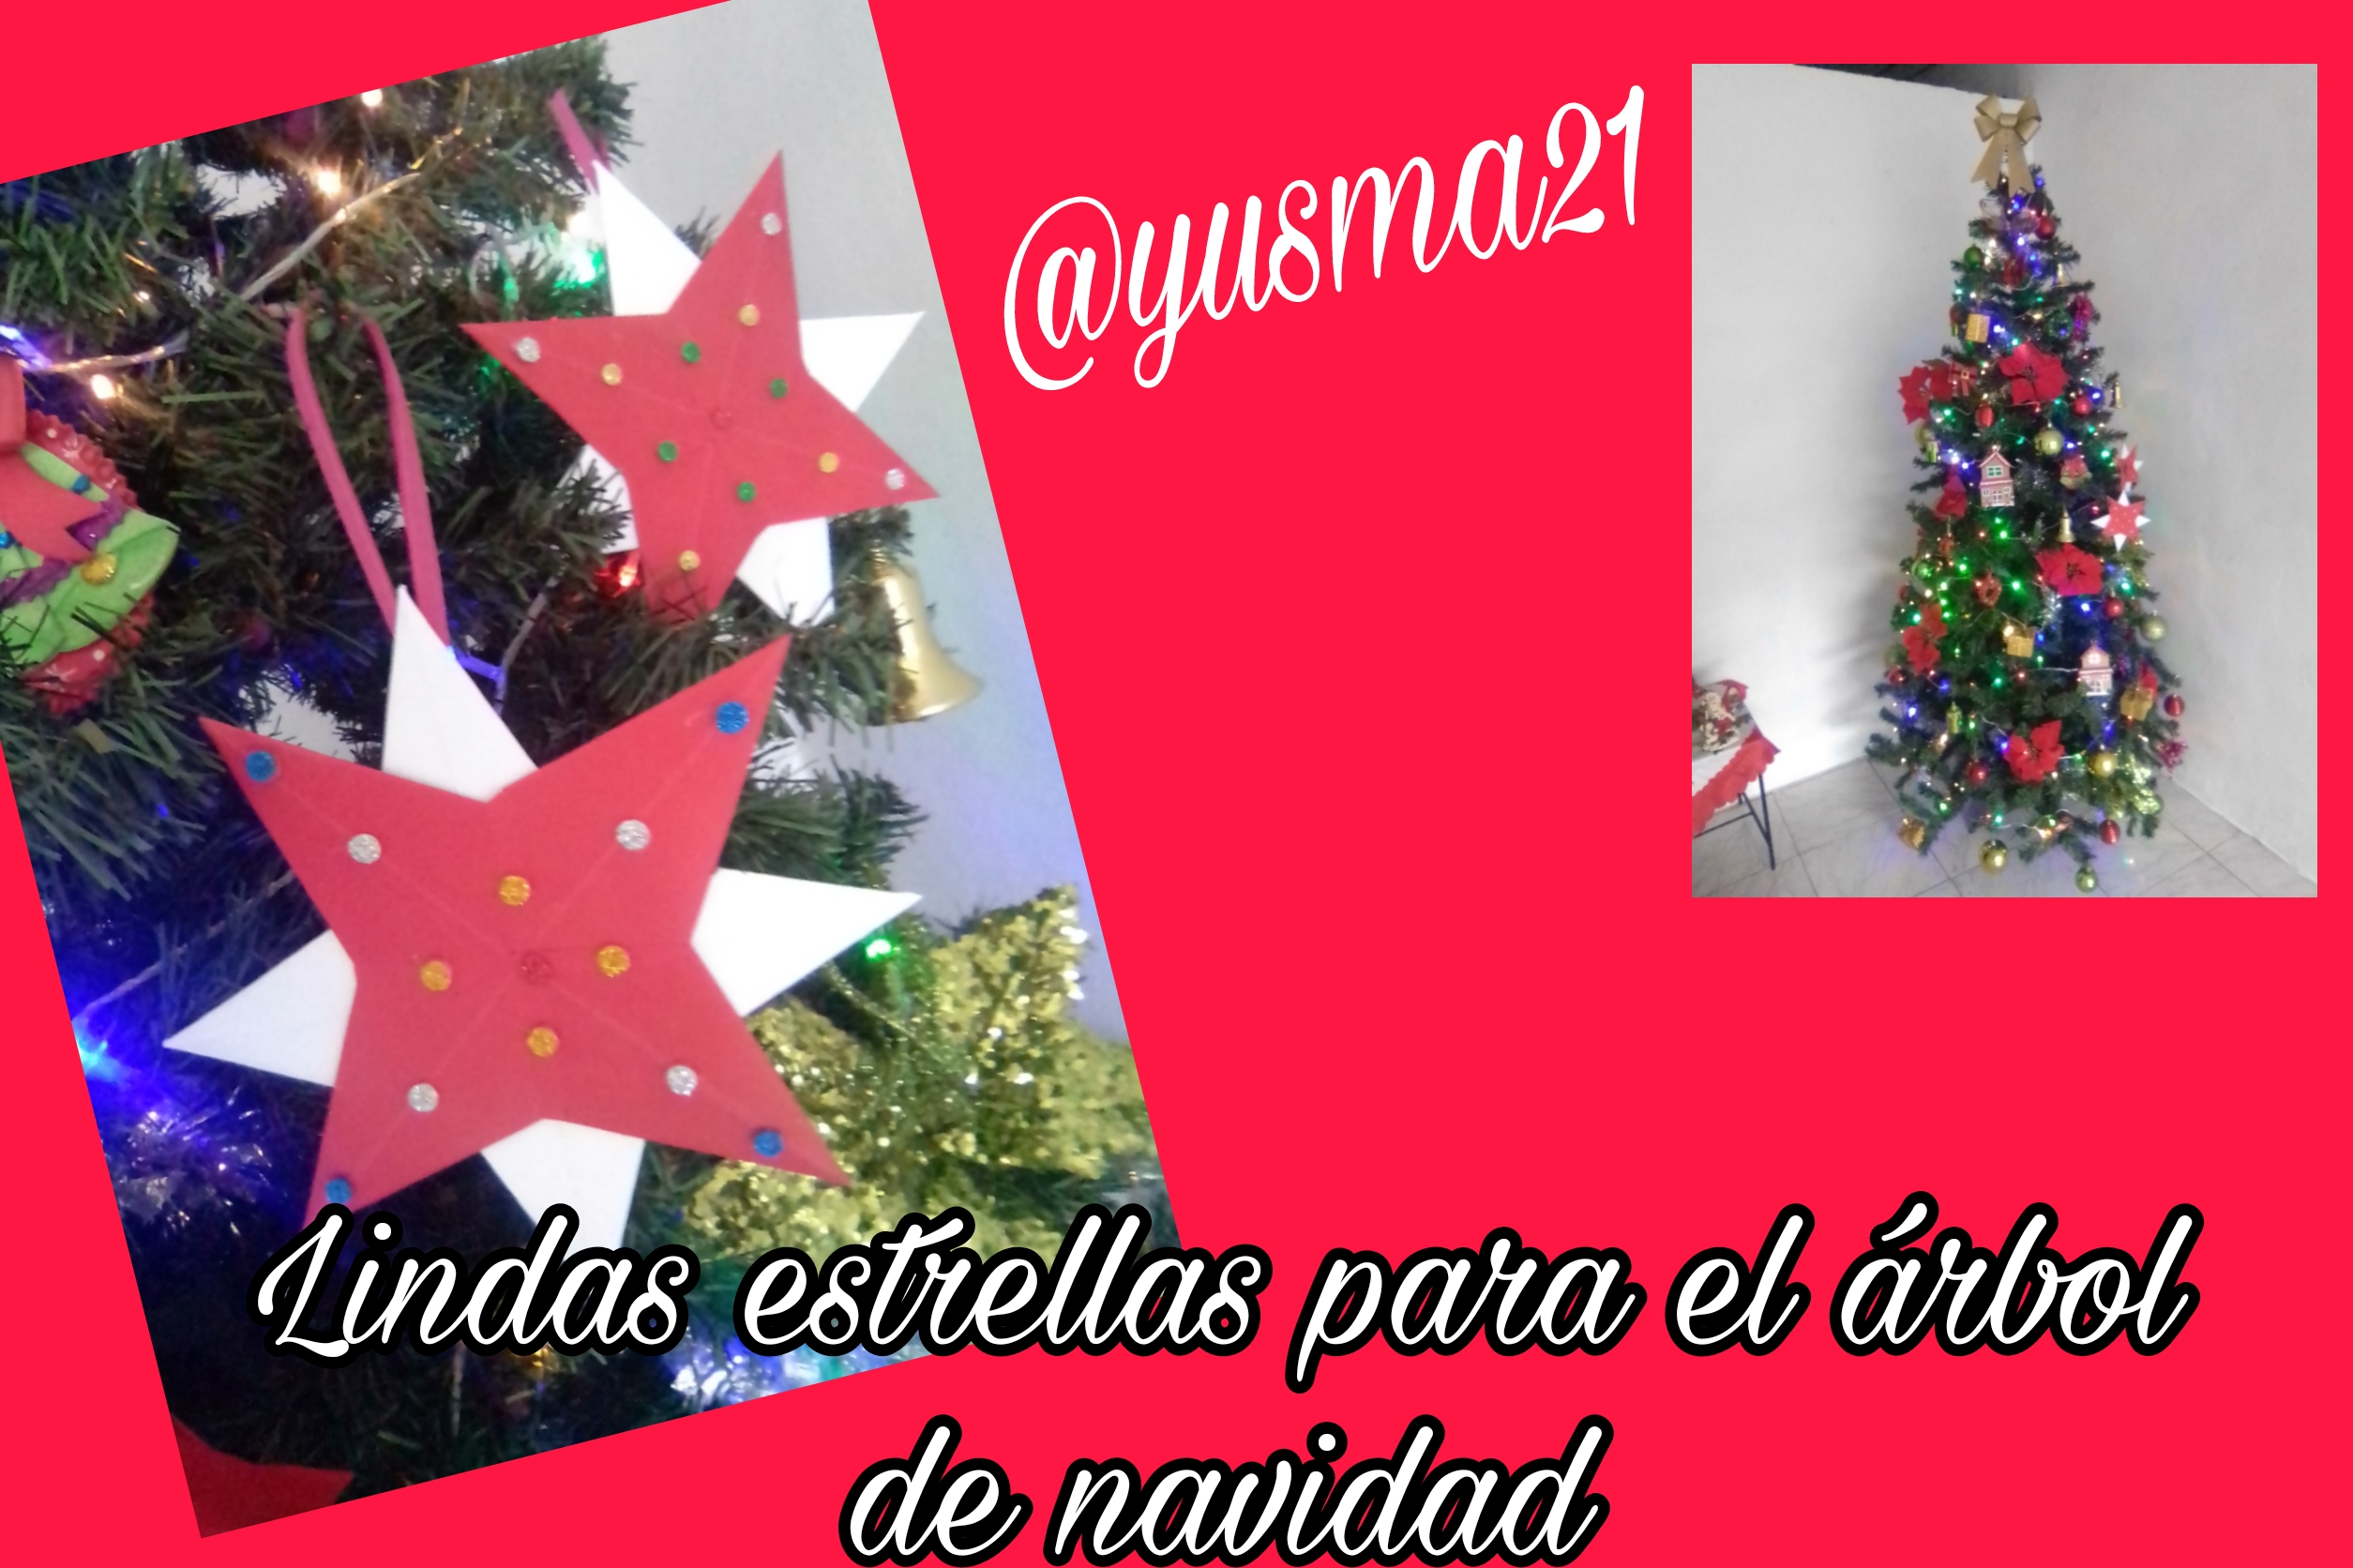

Very pleased to be back again, sharing with all the creatives and lovers of crafts, who are passionate about creating with their hands and dedicate part of their time to this art. Already very close to the culmination of this year 2022, I am sure we have learned and taught many, in this path of giving and receiving in Hive Diy, and with the expectation that next year will be of greater benefit and learning for all. Today I want to share how to make a nice ornament for the Christmas tree, it is about cardboard stars, and I will tell you below how to make them with a few simple steps.

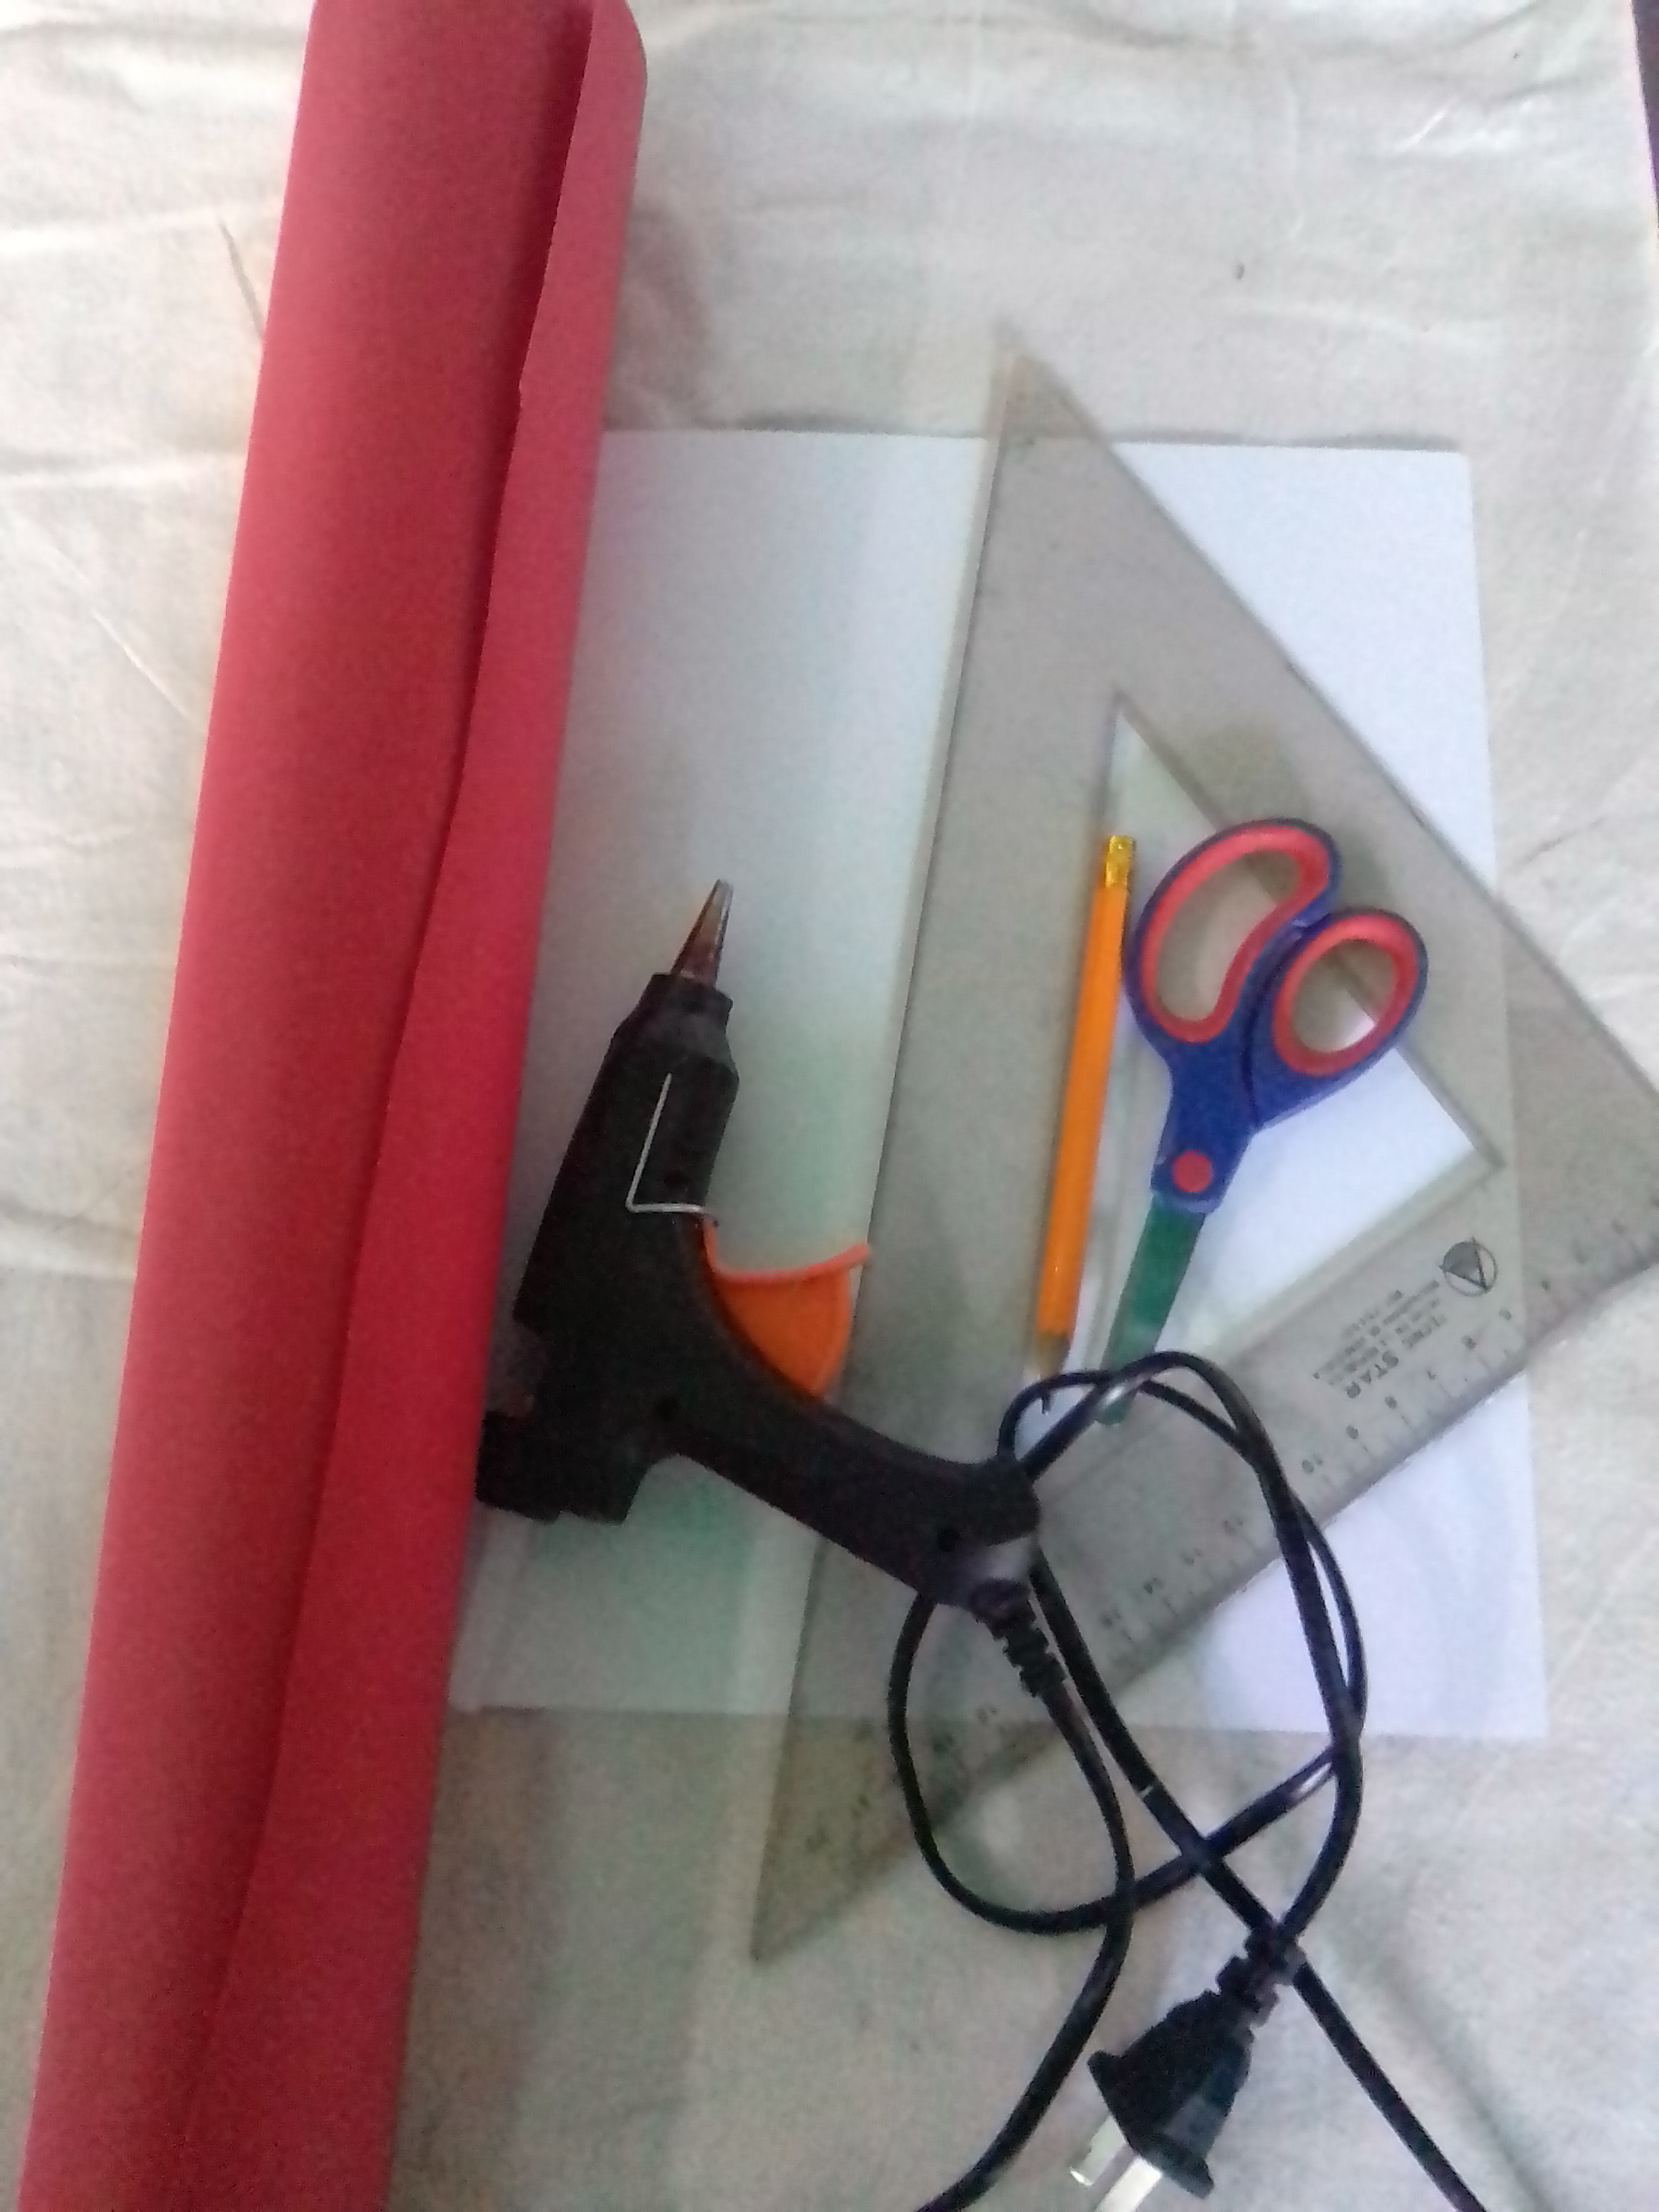
MATERIALS
✓ Red and white cardstock
✓ Frosted foami of assorted colors
✓ Scissors, pencil and ruler
✓ Gun and glue stick
✓ Glue stick
✓ Drill
STEP BY STEP
Christmas decorations are never enough and we always want to add new elements to our tree.
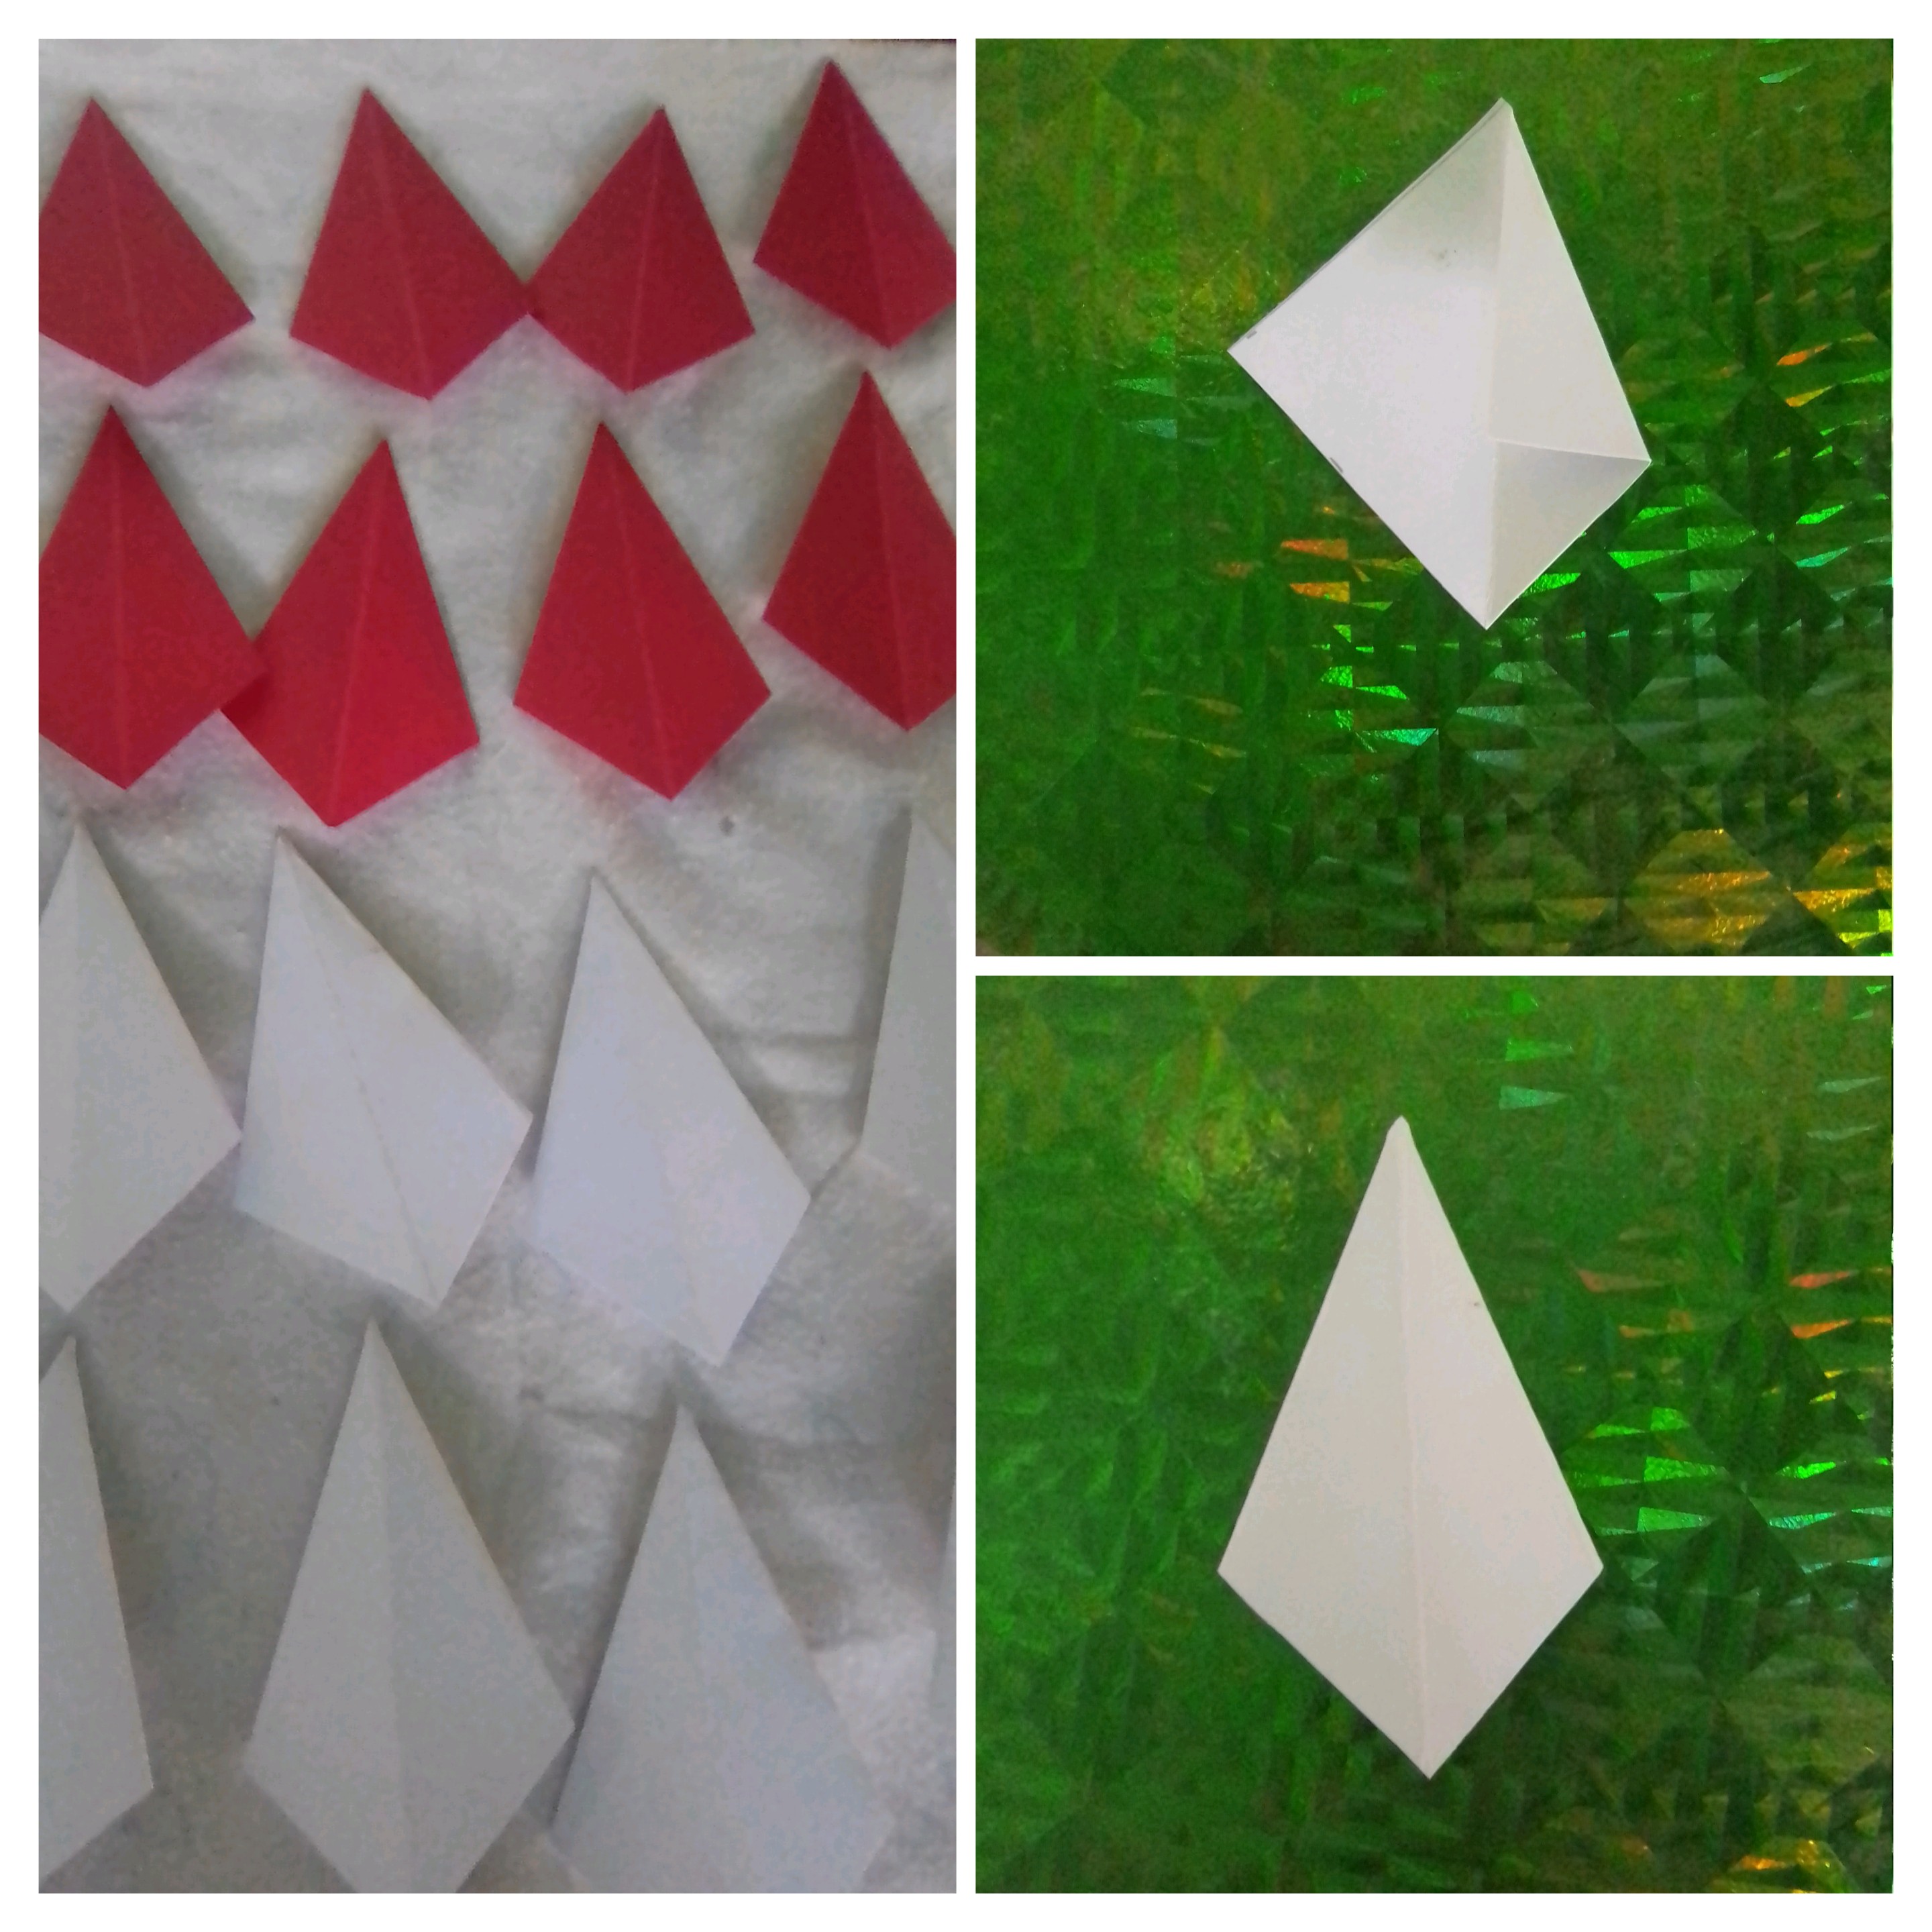
To make these beautiful and simple cardboard stars, select the colors red and white, which are basic colors in Christmas themes. I started by measuring a 24 x 12 centimeter rectangle, which I later divided into 6 x 6 centimeter squares.
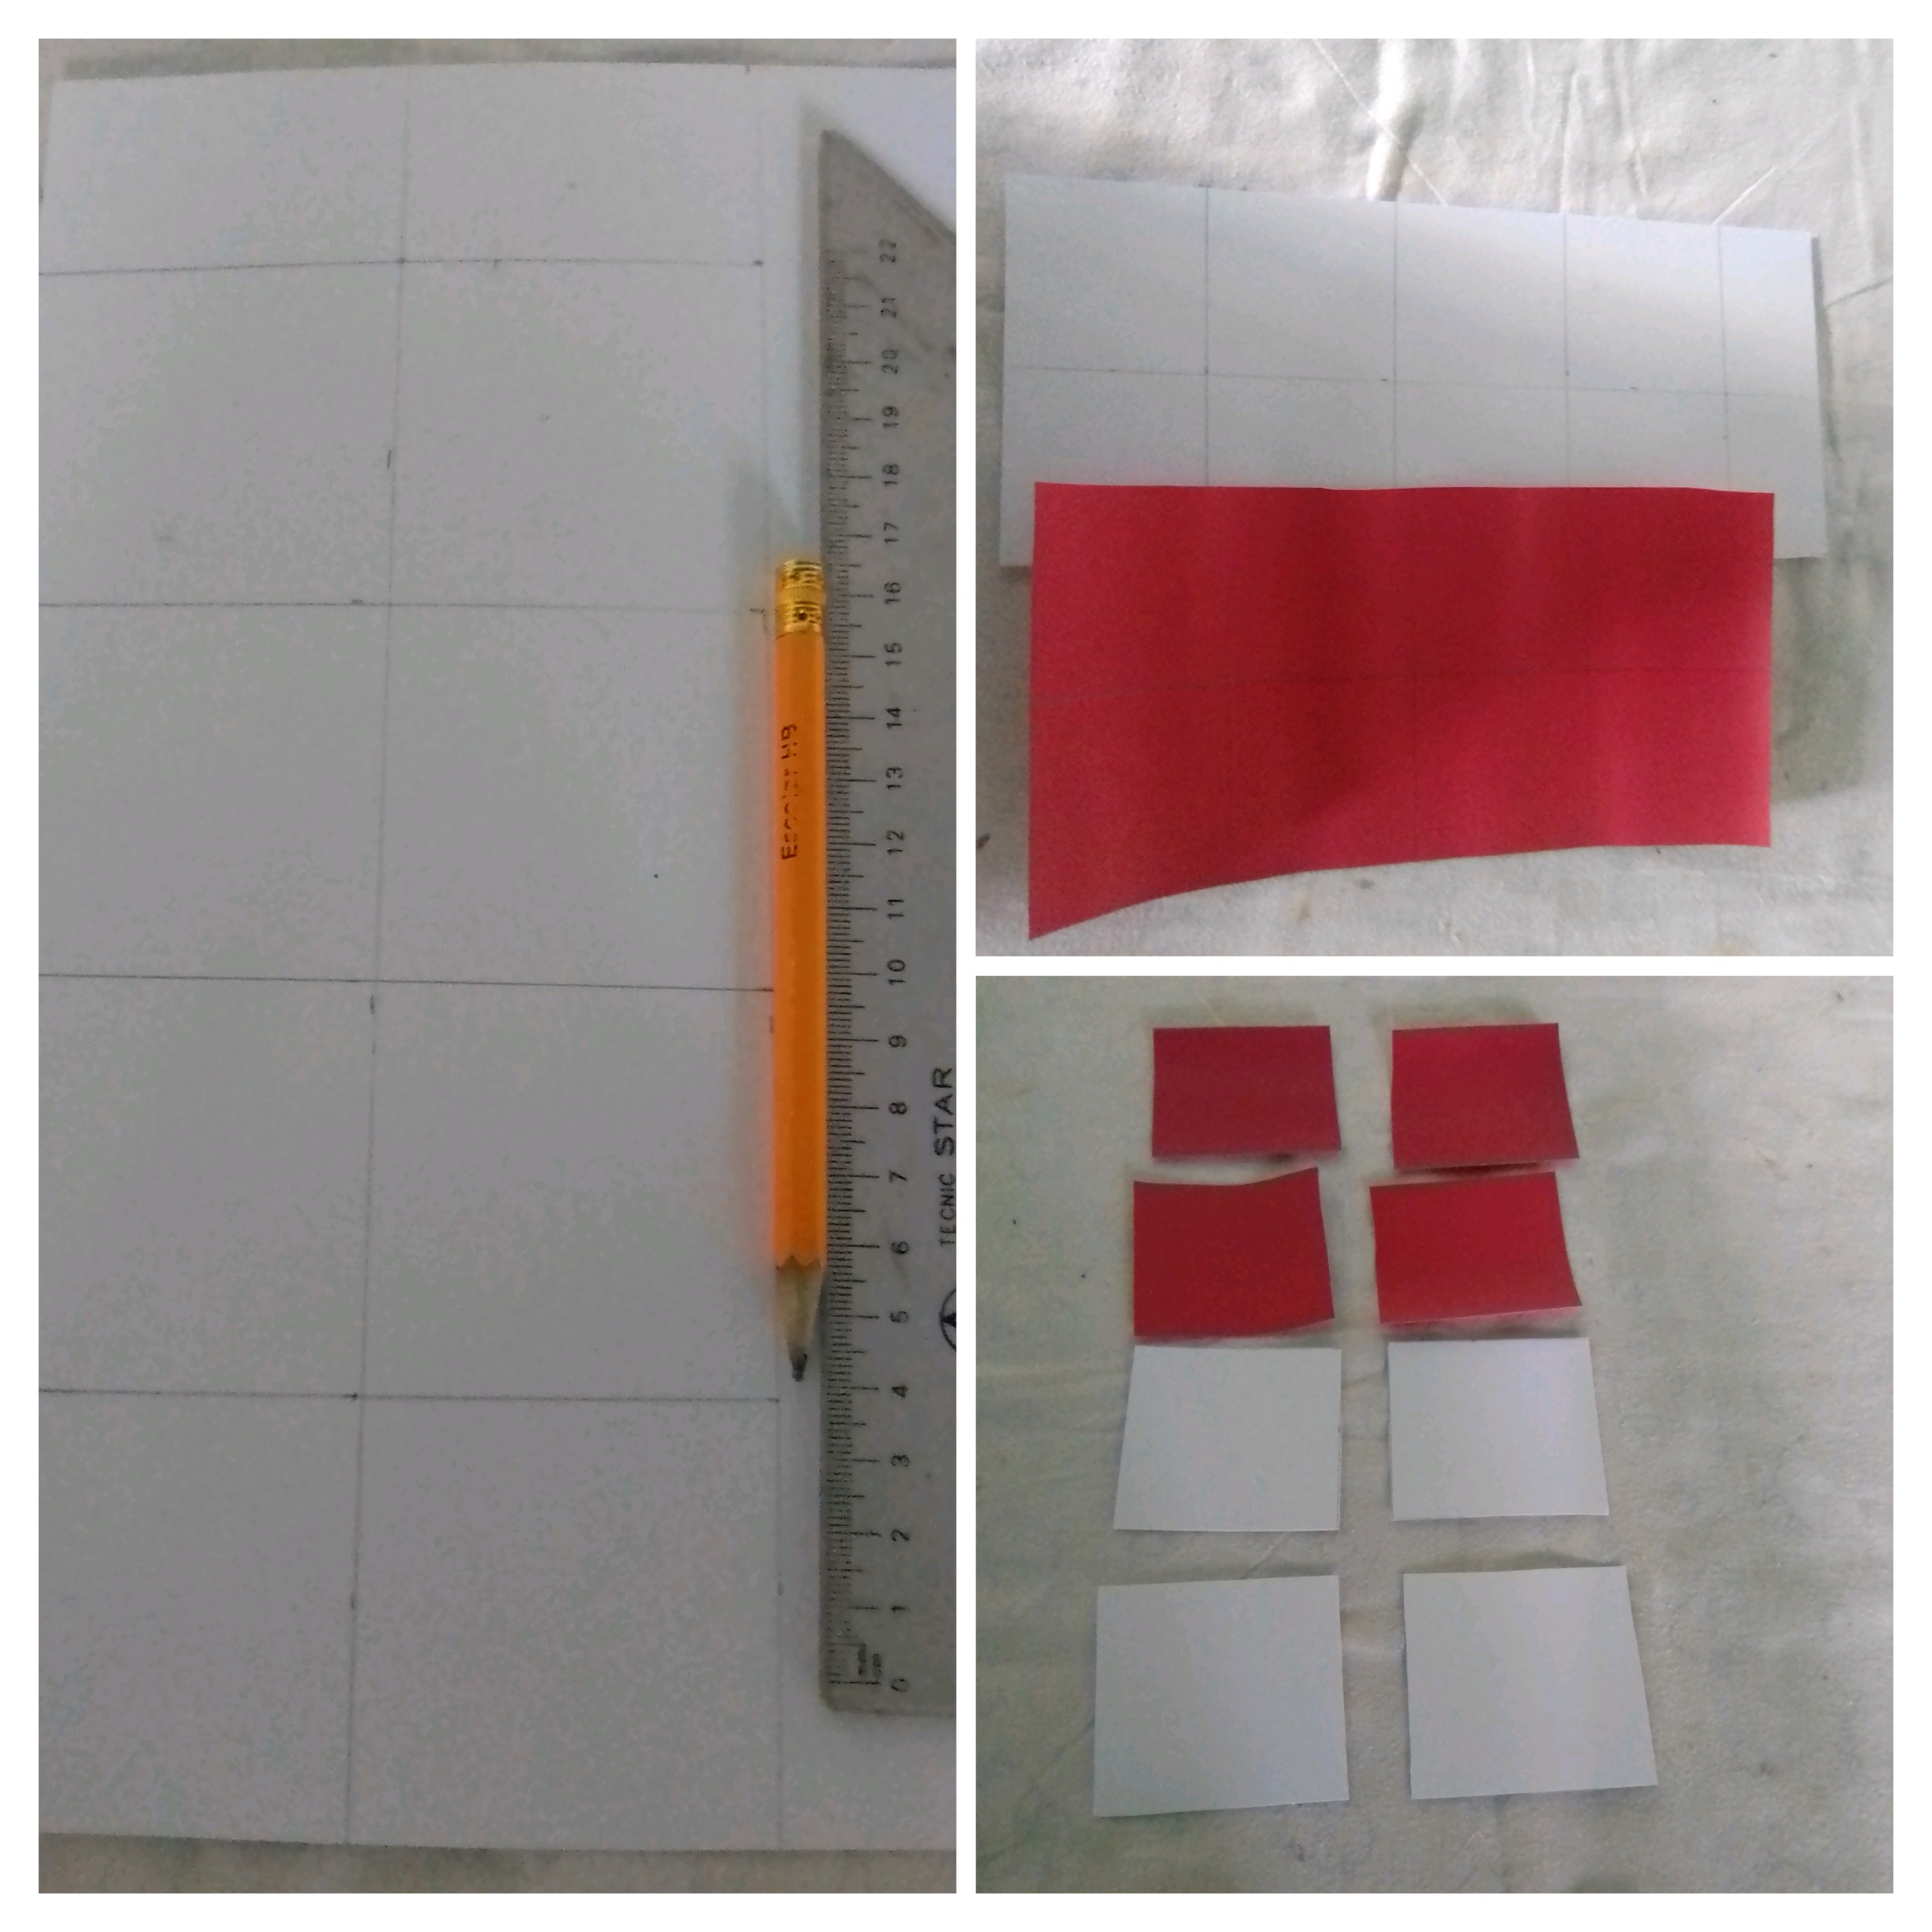
Having my 8 squares of both colors, white and red, I then proceed to fold with the help of a ruler, in order to obtain 2 triangles
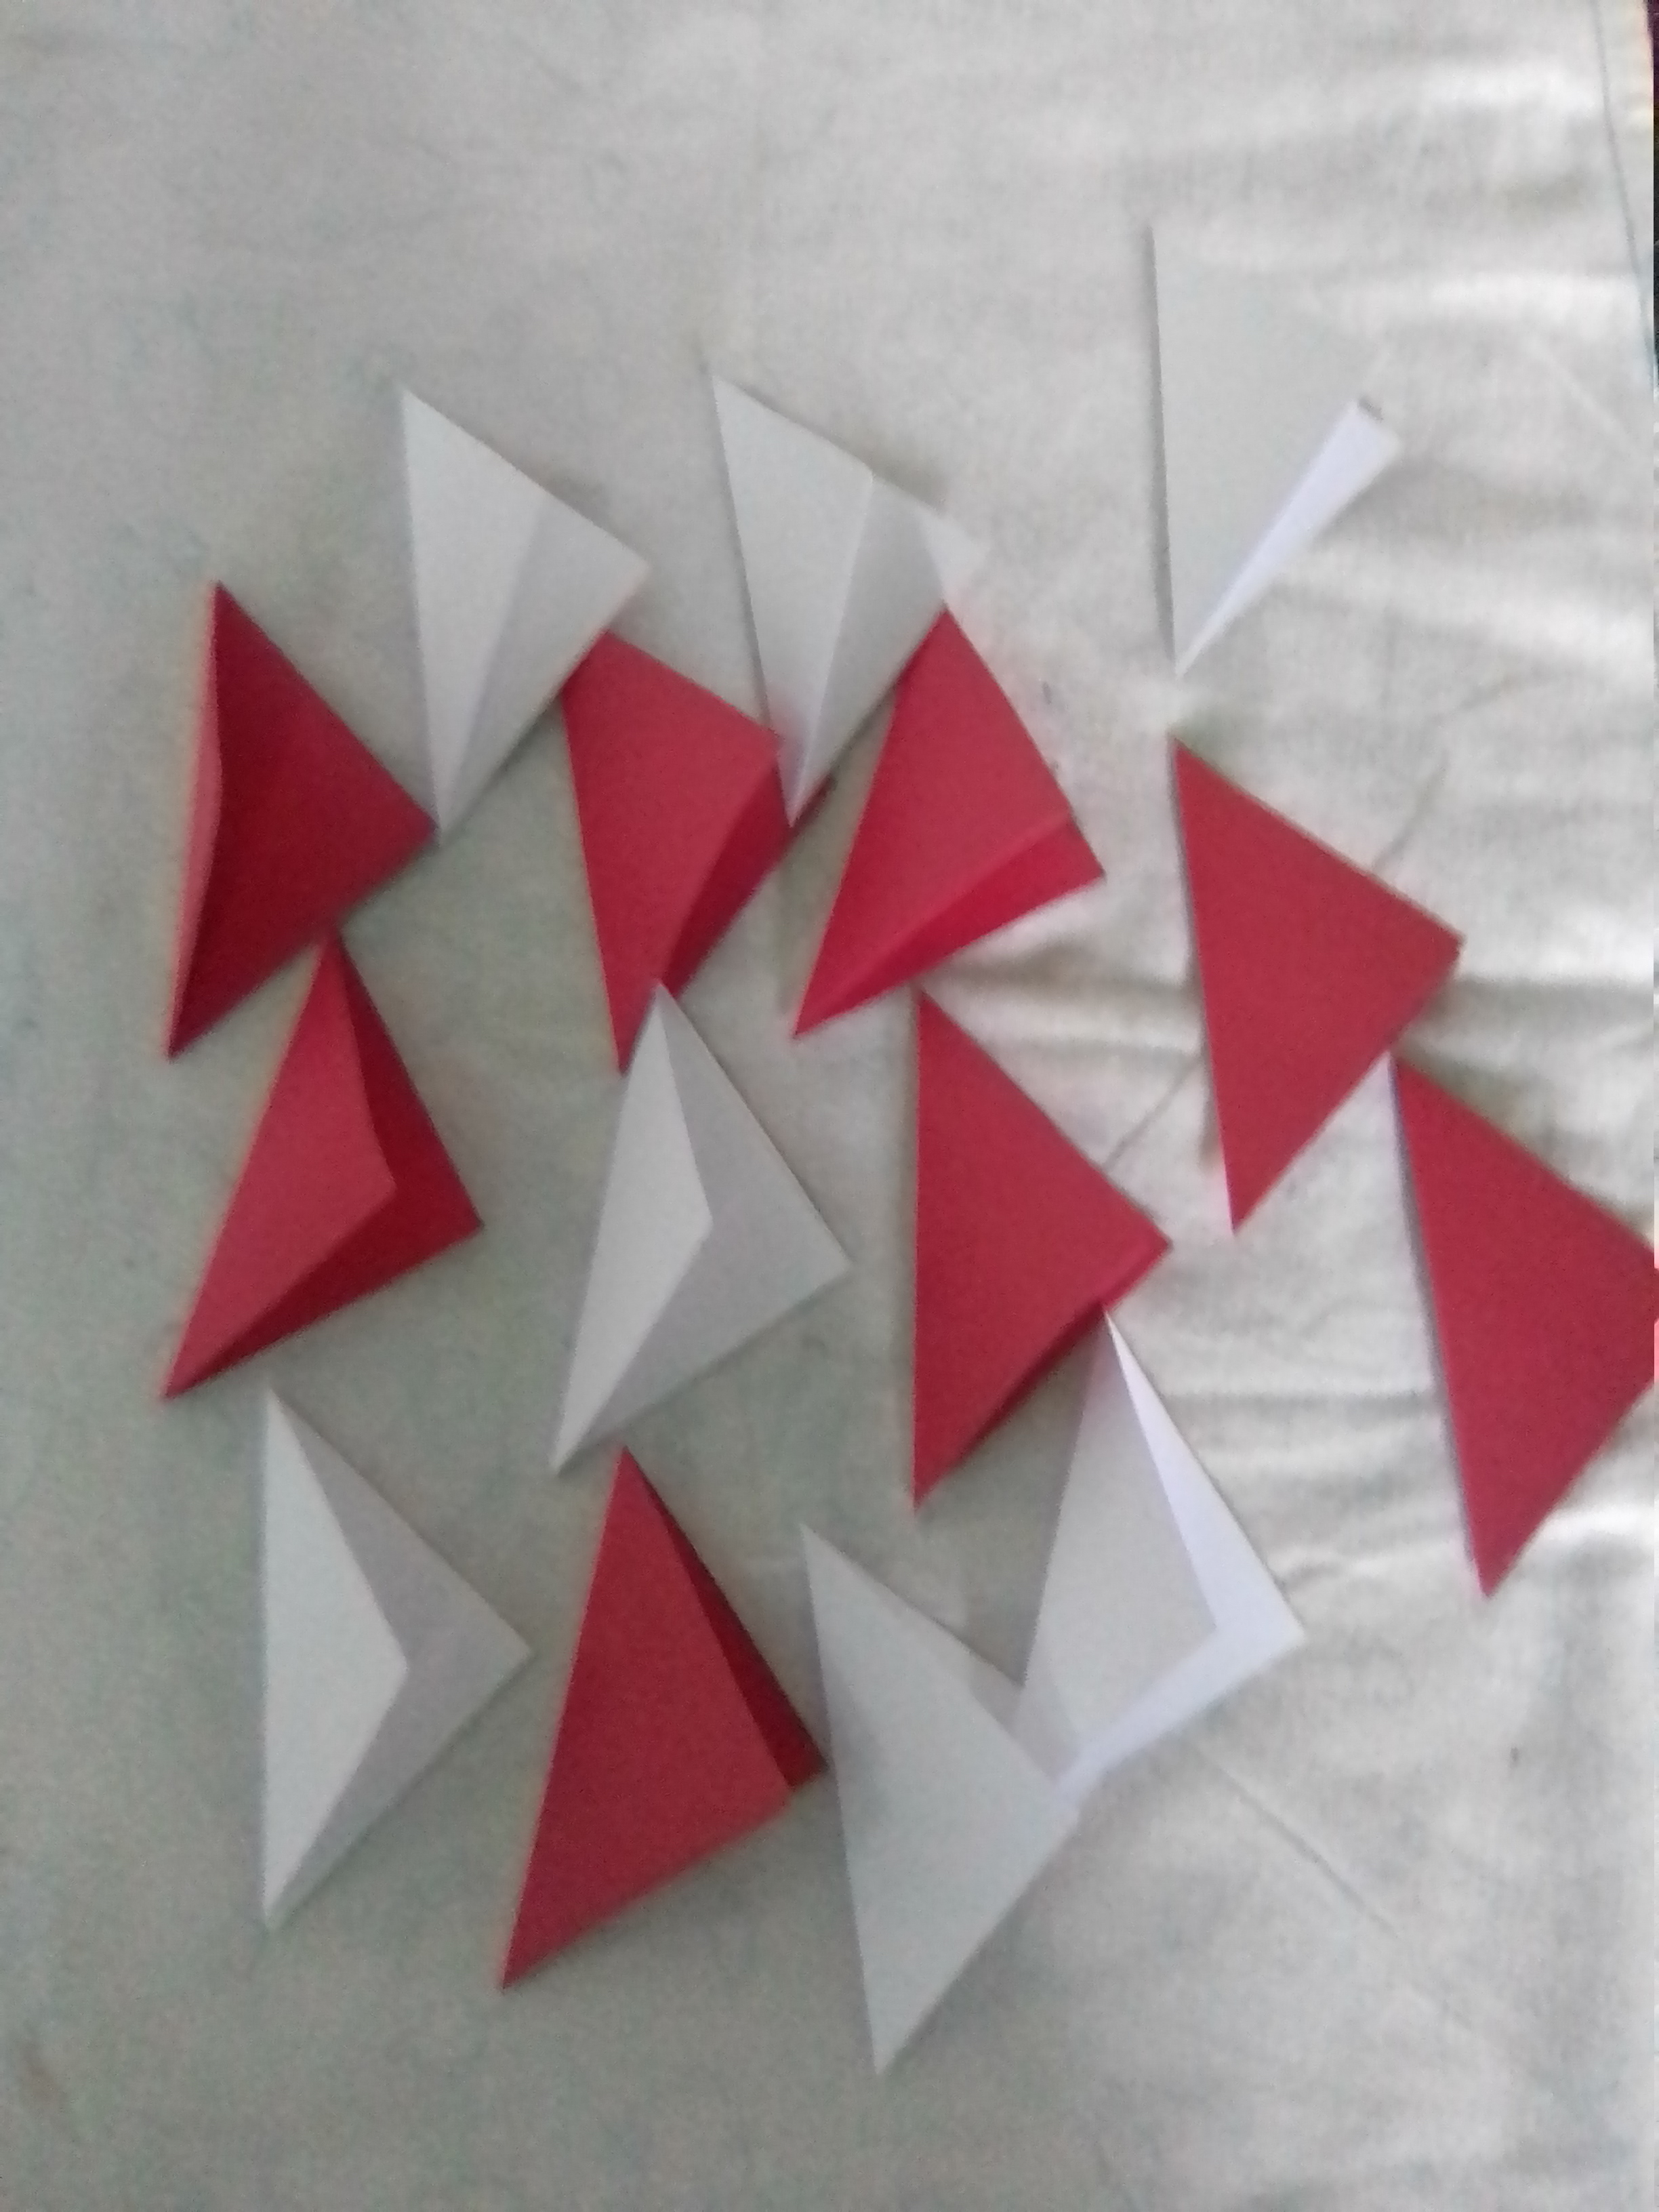
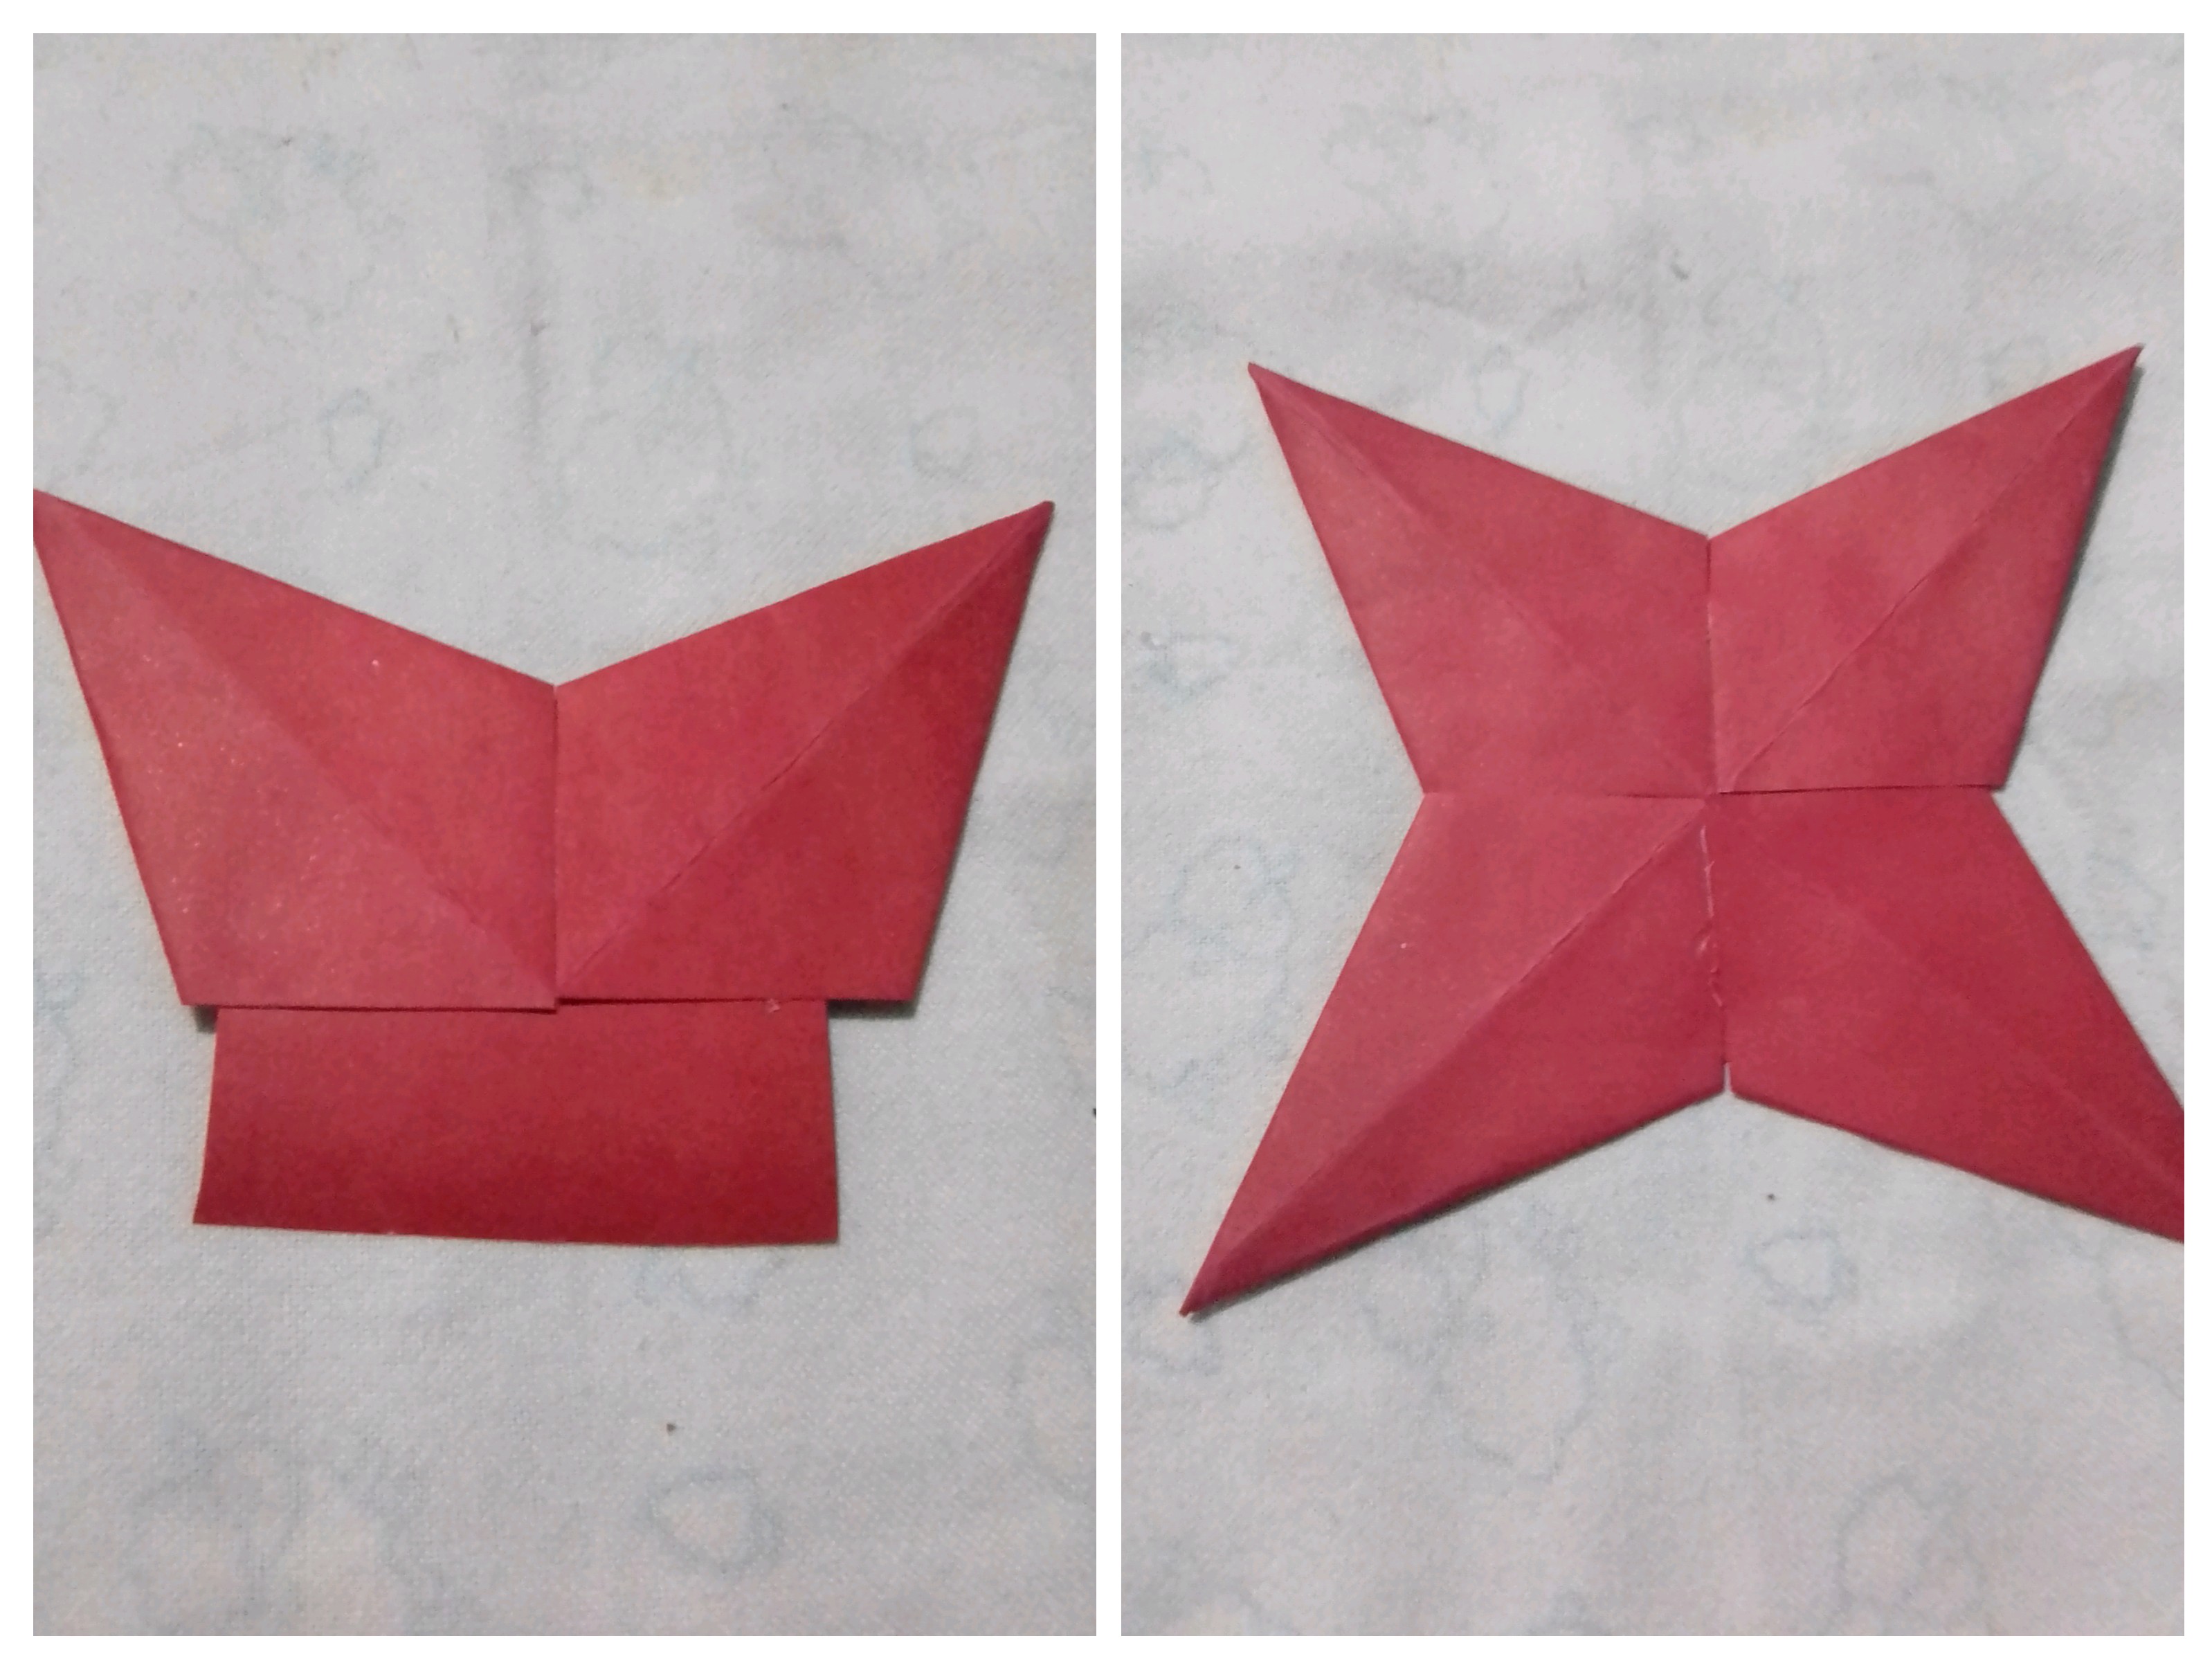
It is time to shape the pieces, to reach each one of the points of the star, for this I fold each one of the points of the triangles inwards and making each one coincide with the first fold of the square.
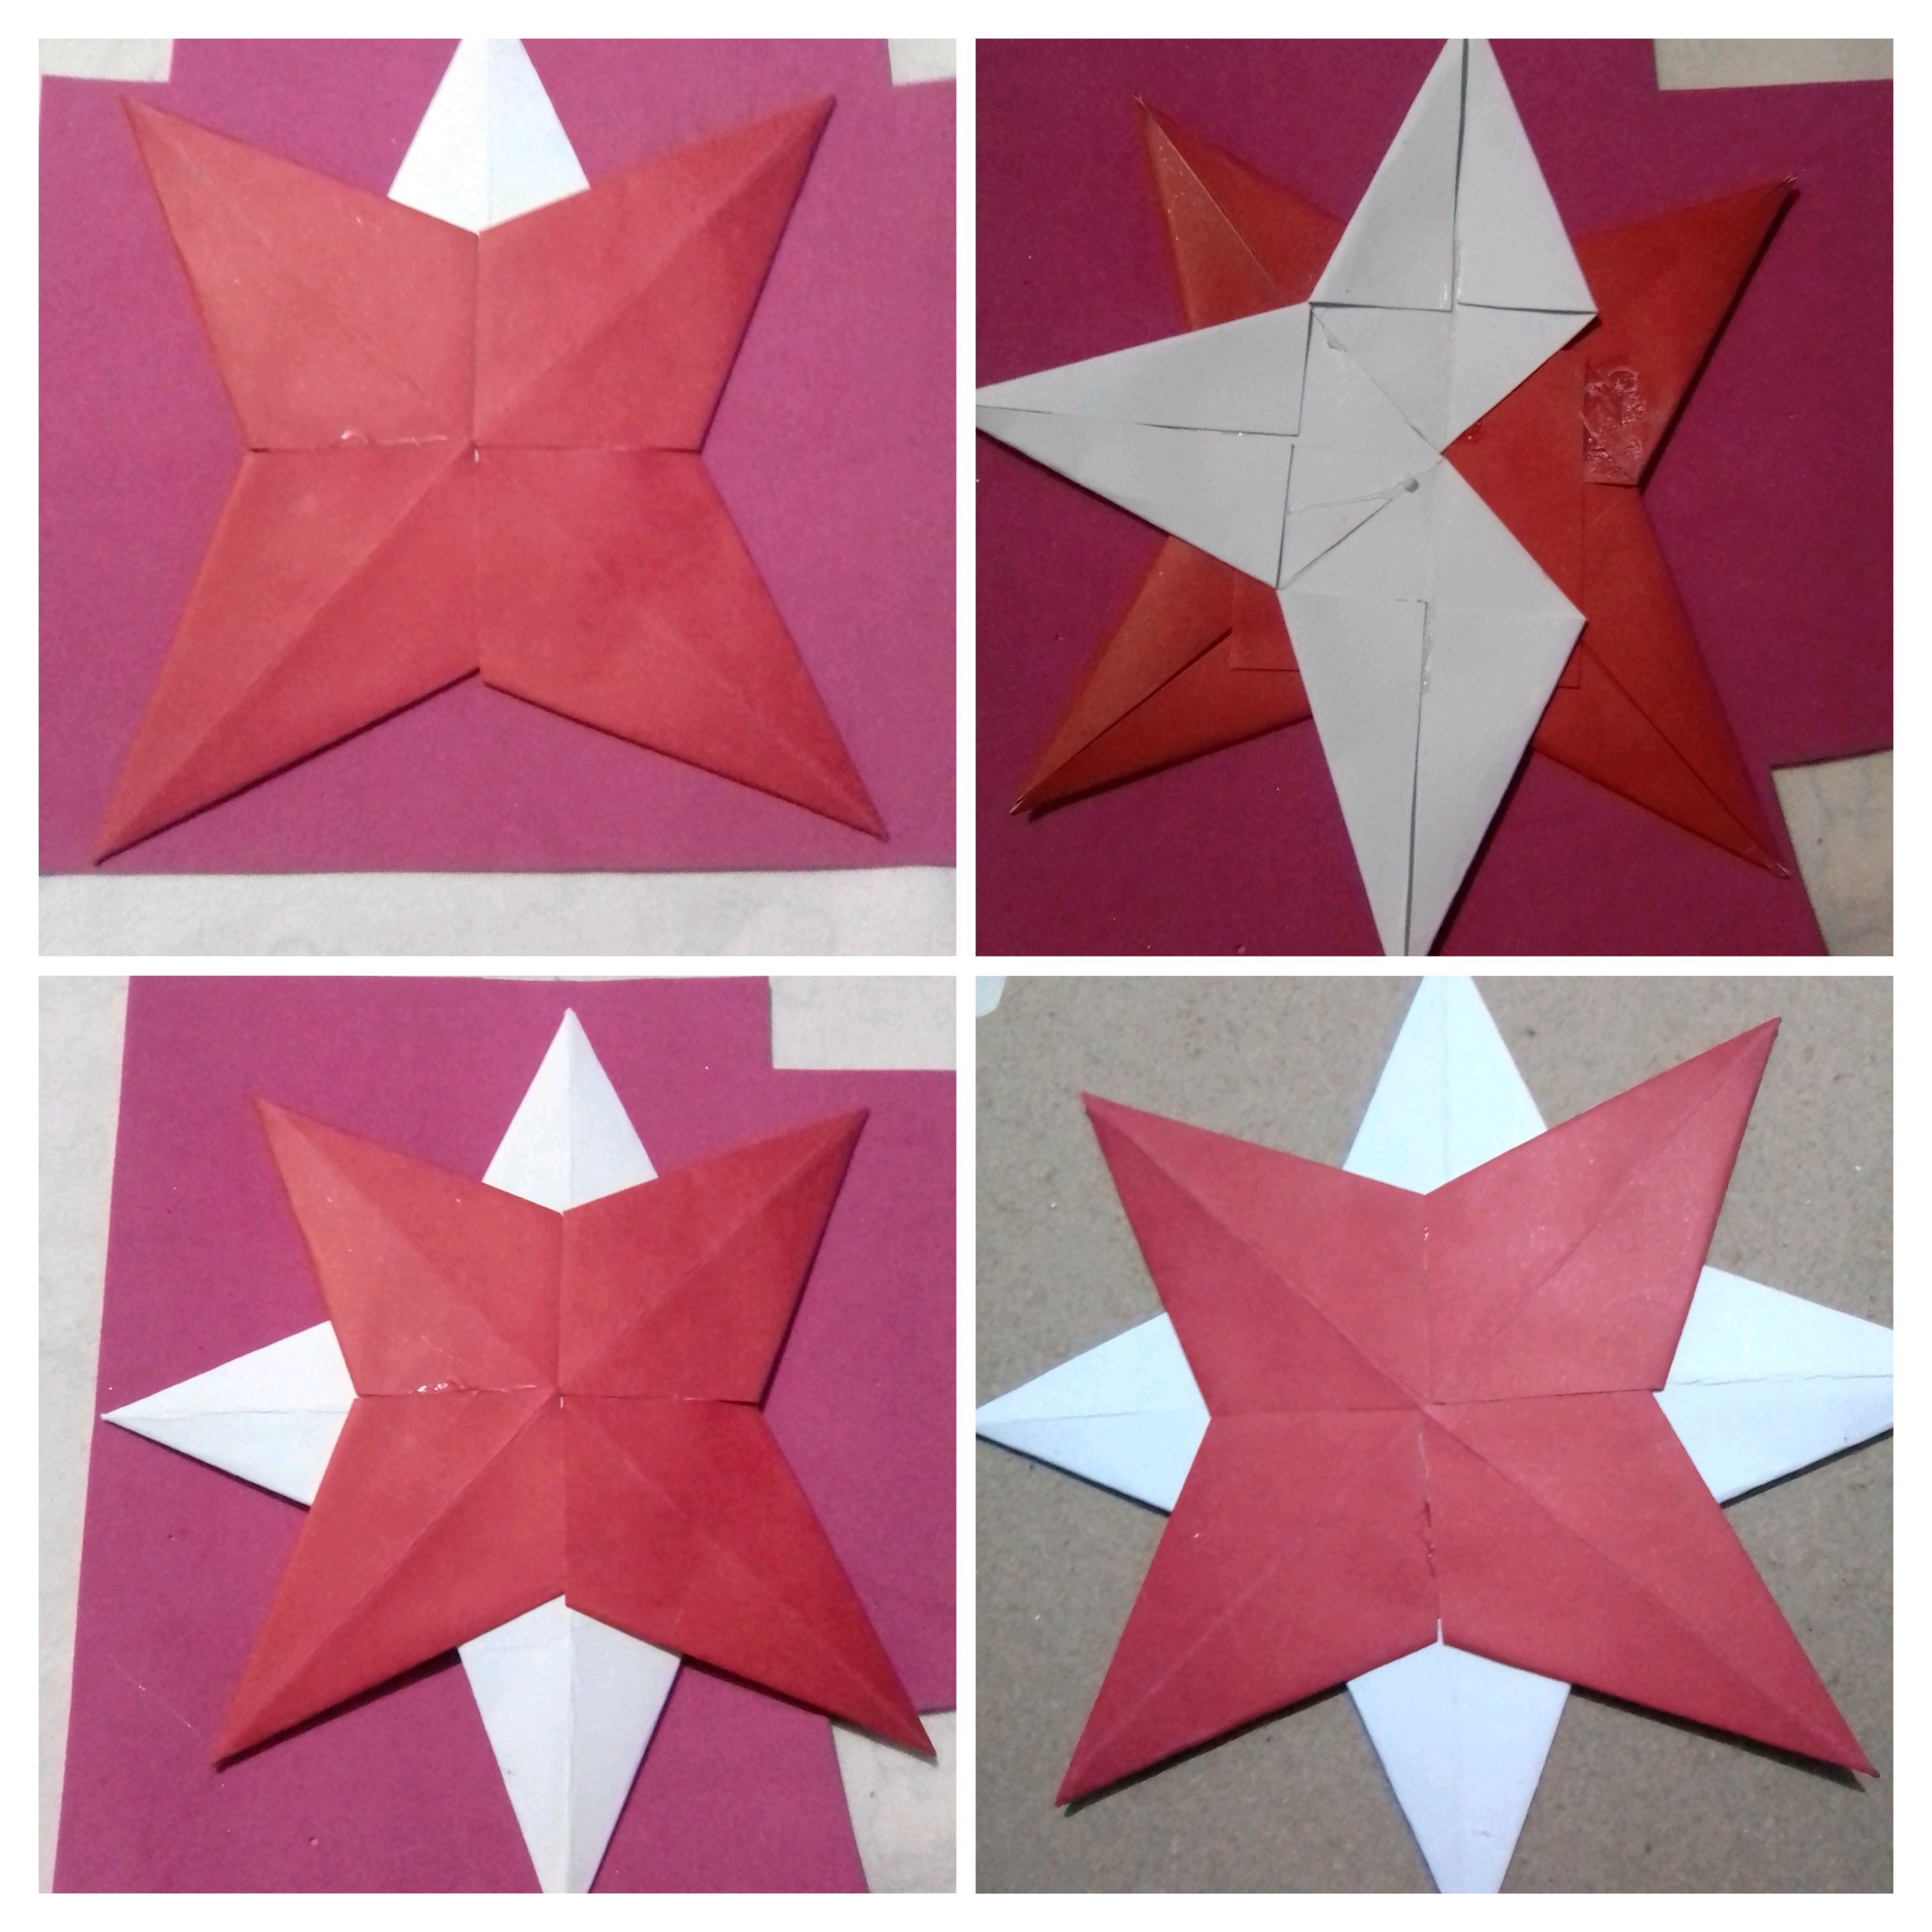
With each of the tips of the star ready, I then proceed to assemble the star, placing a red cardboard box, and on it, fixing each of the red tips with hot silicone, ensuring that they are perfectly aligned.
Next, I assembled my white star, behind the red one, starting with the empty spaces that are perfectly aligned.
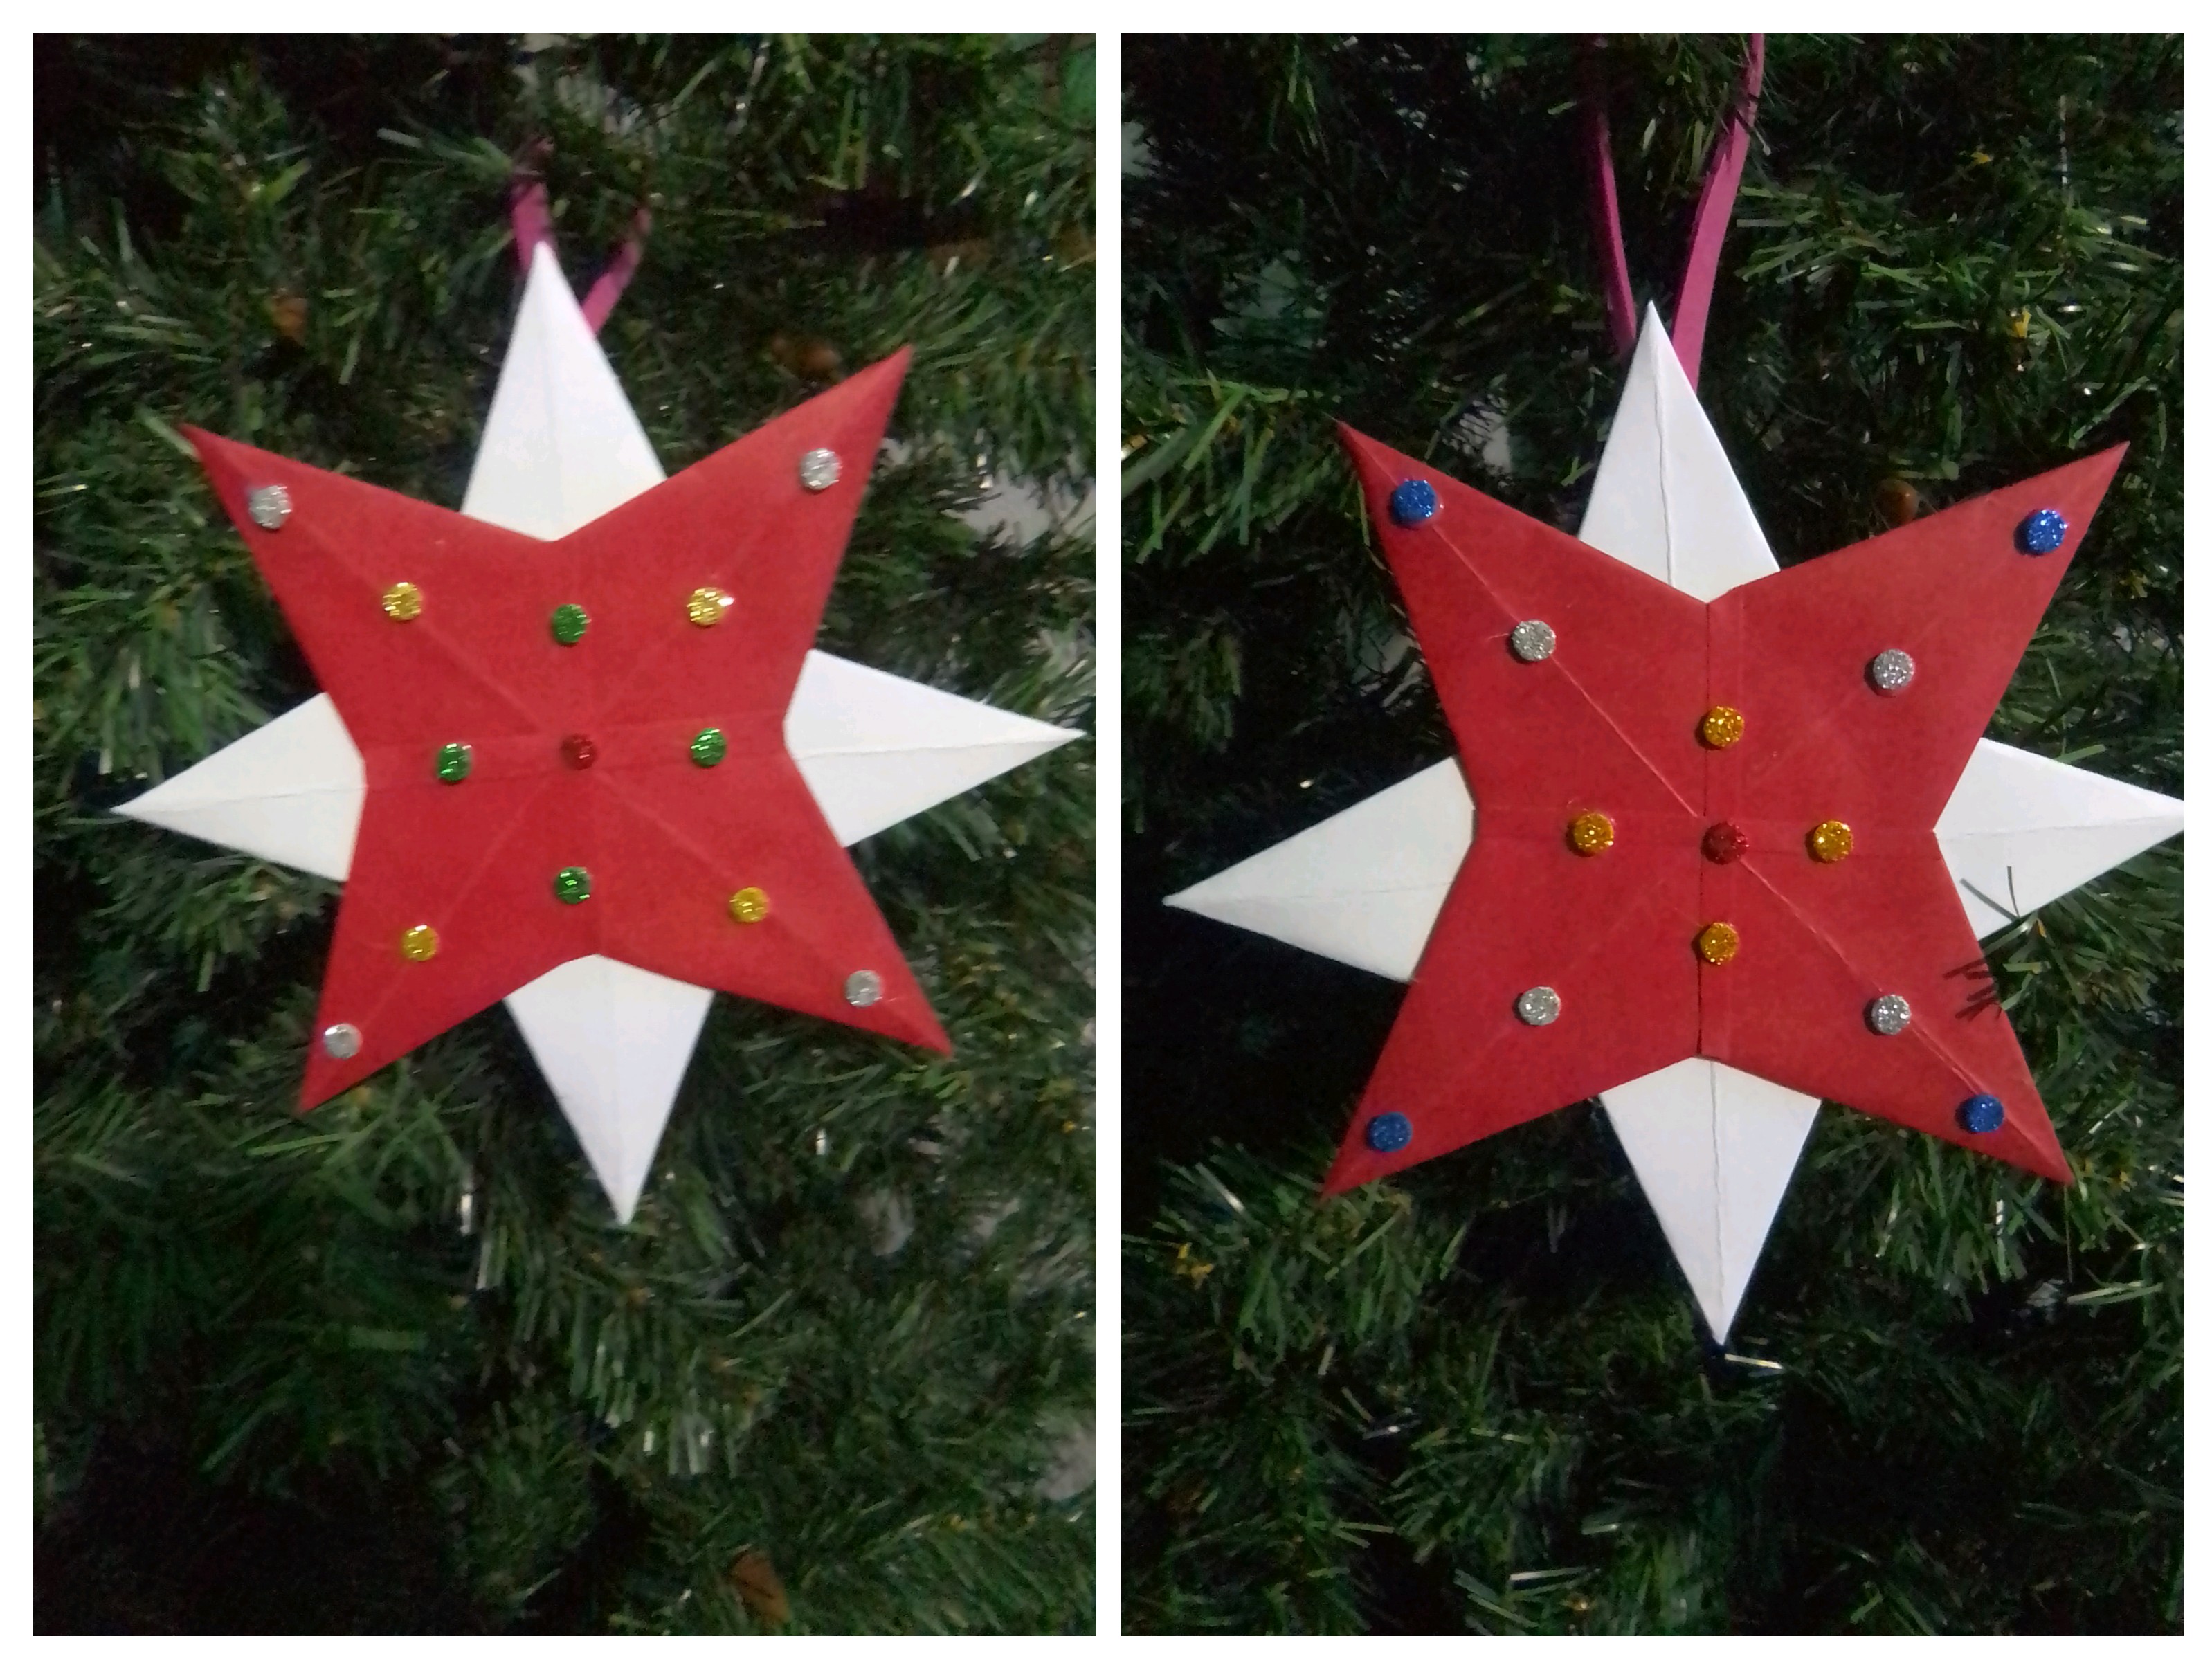
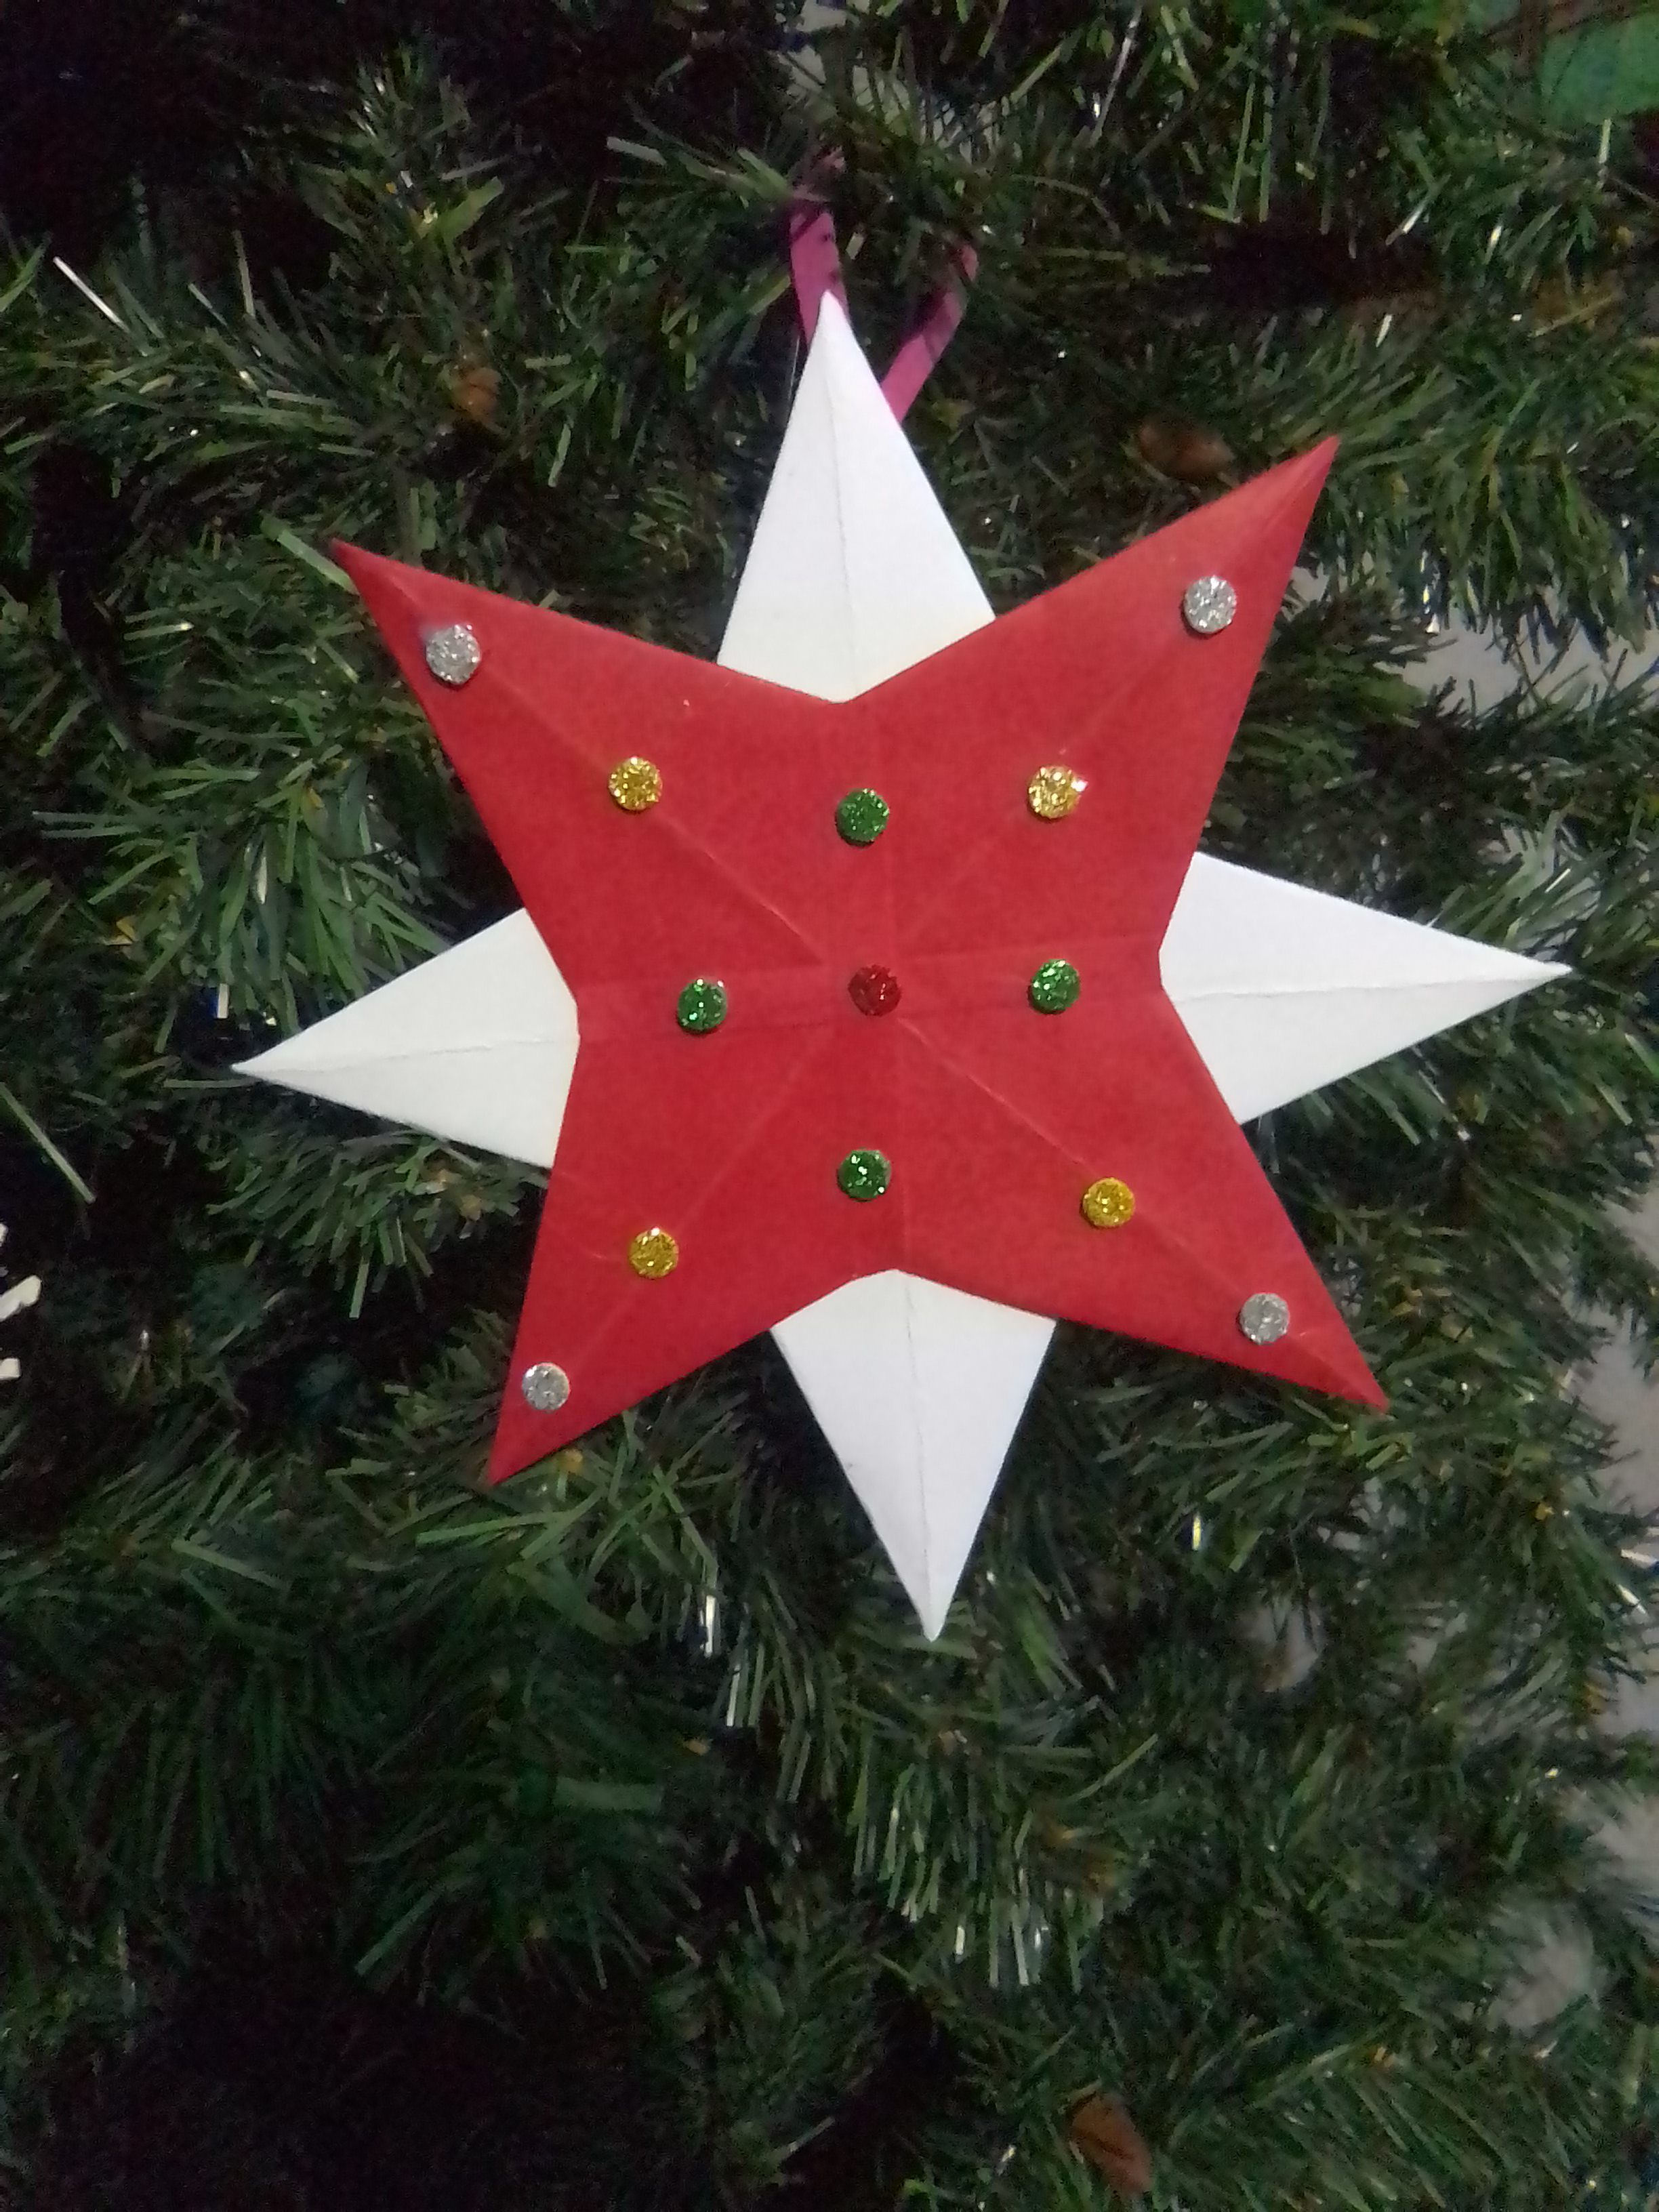
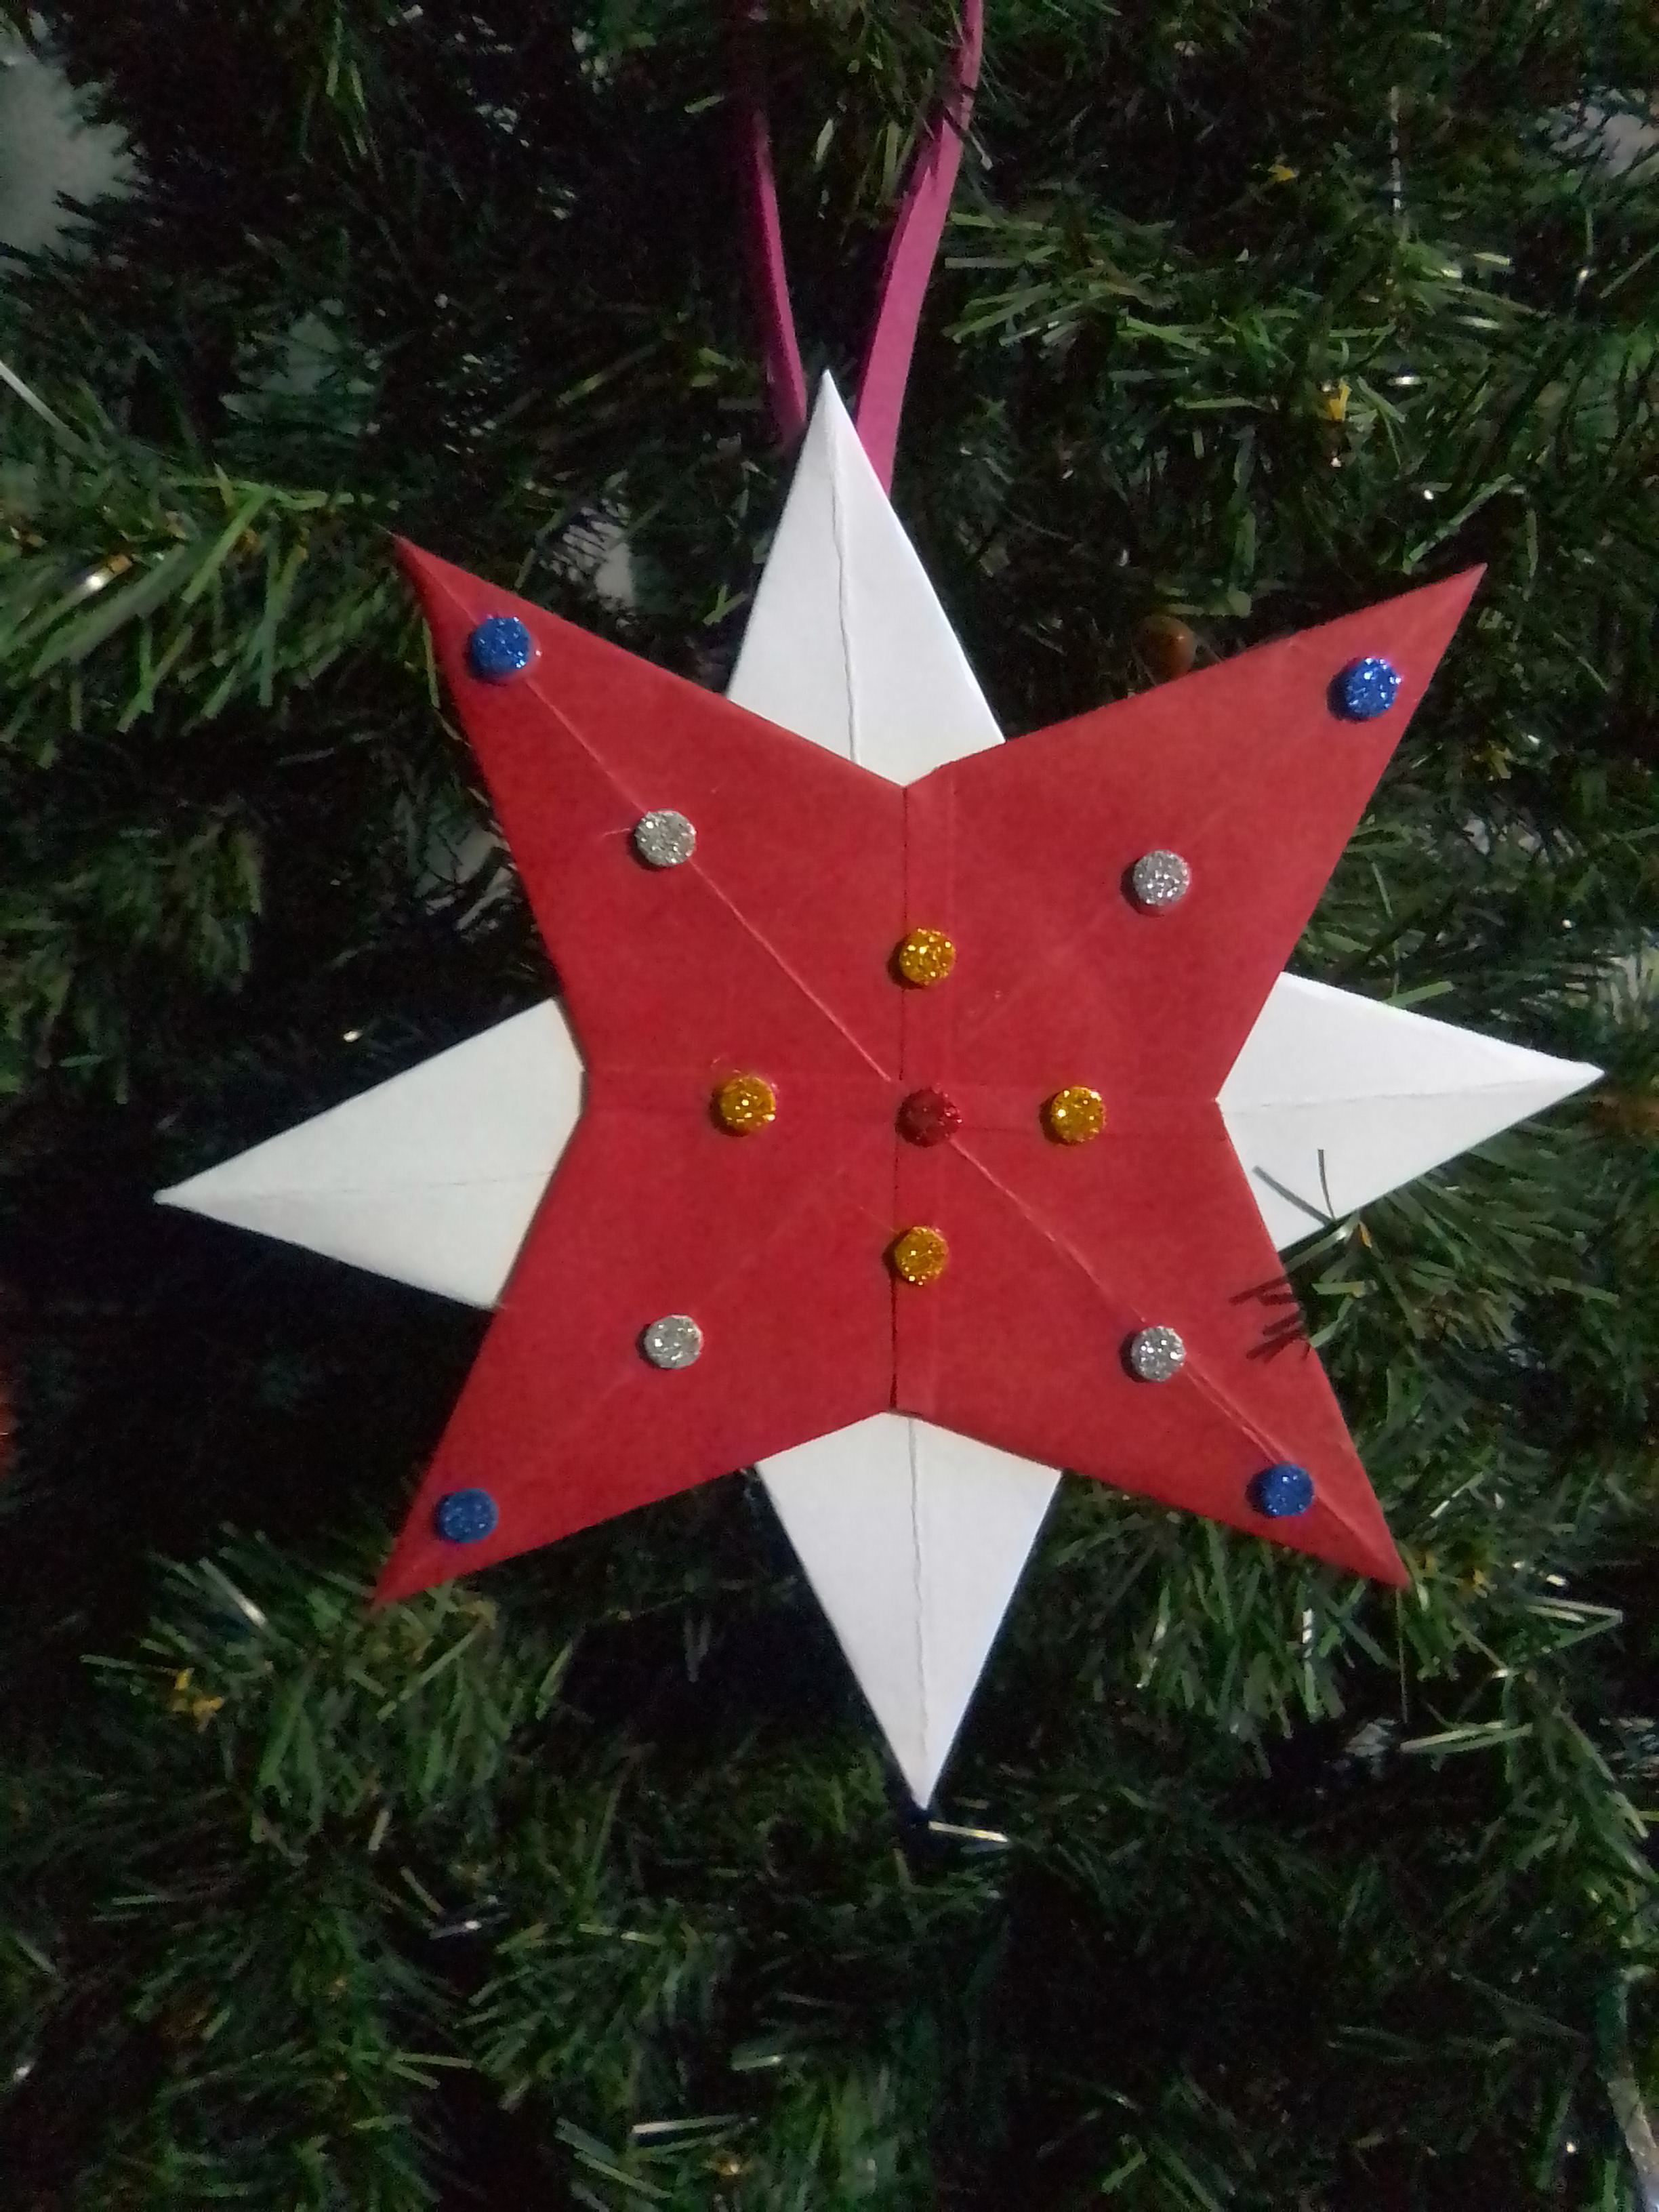
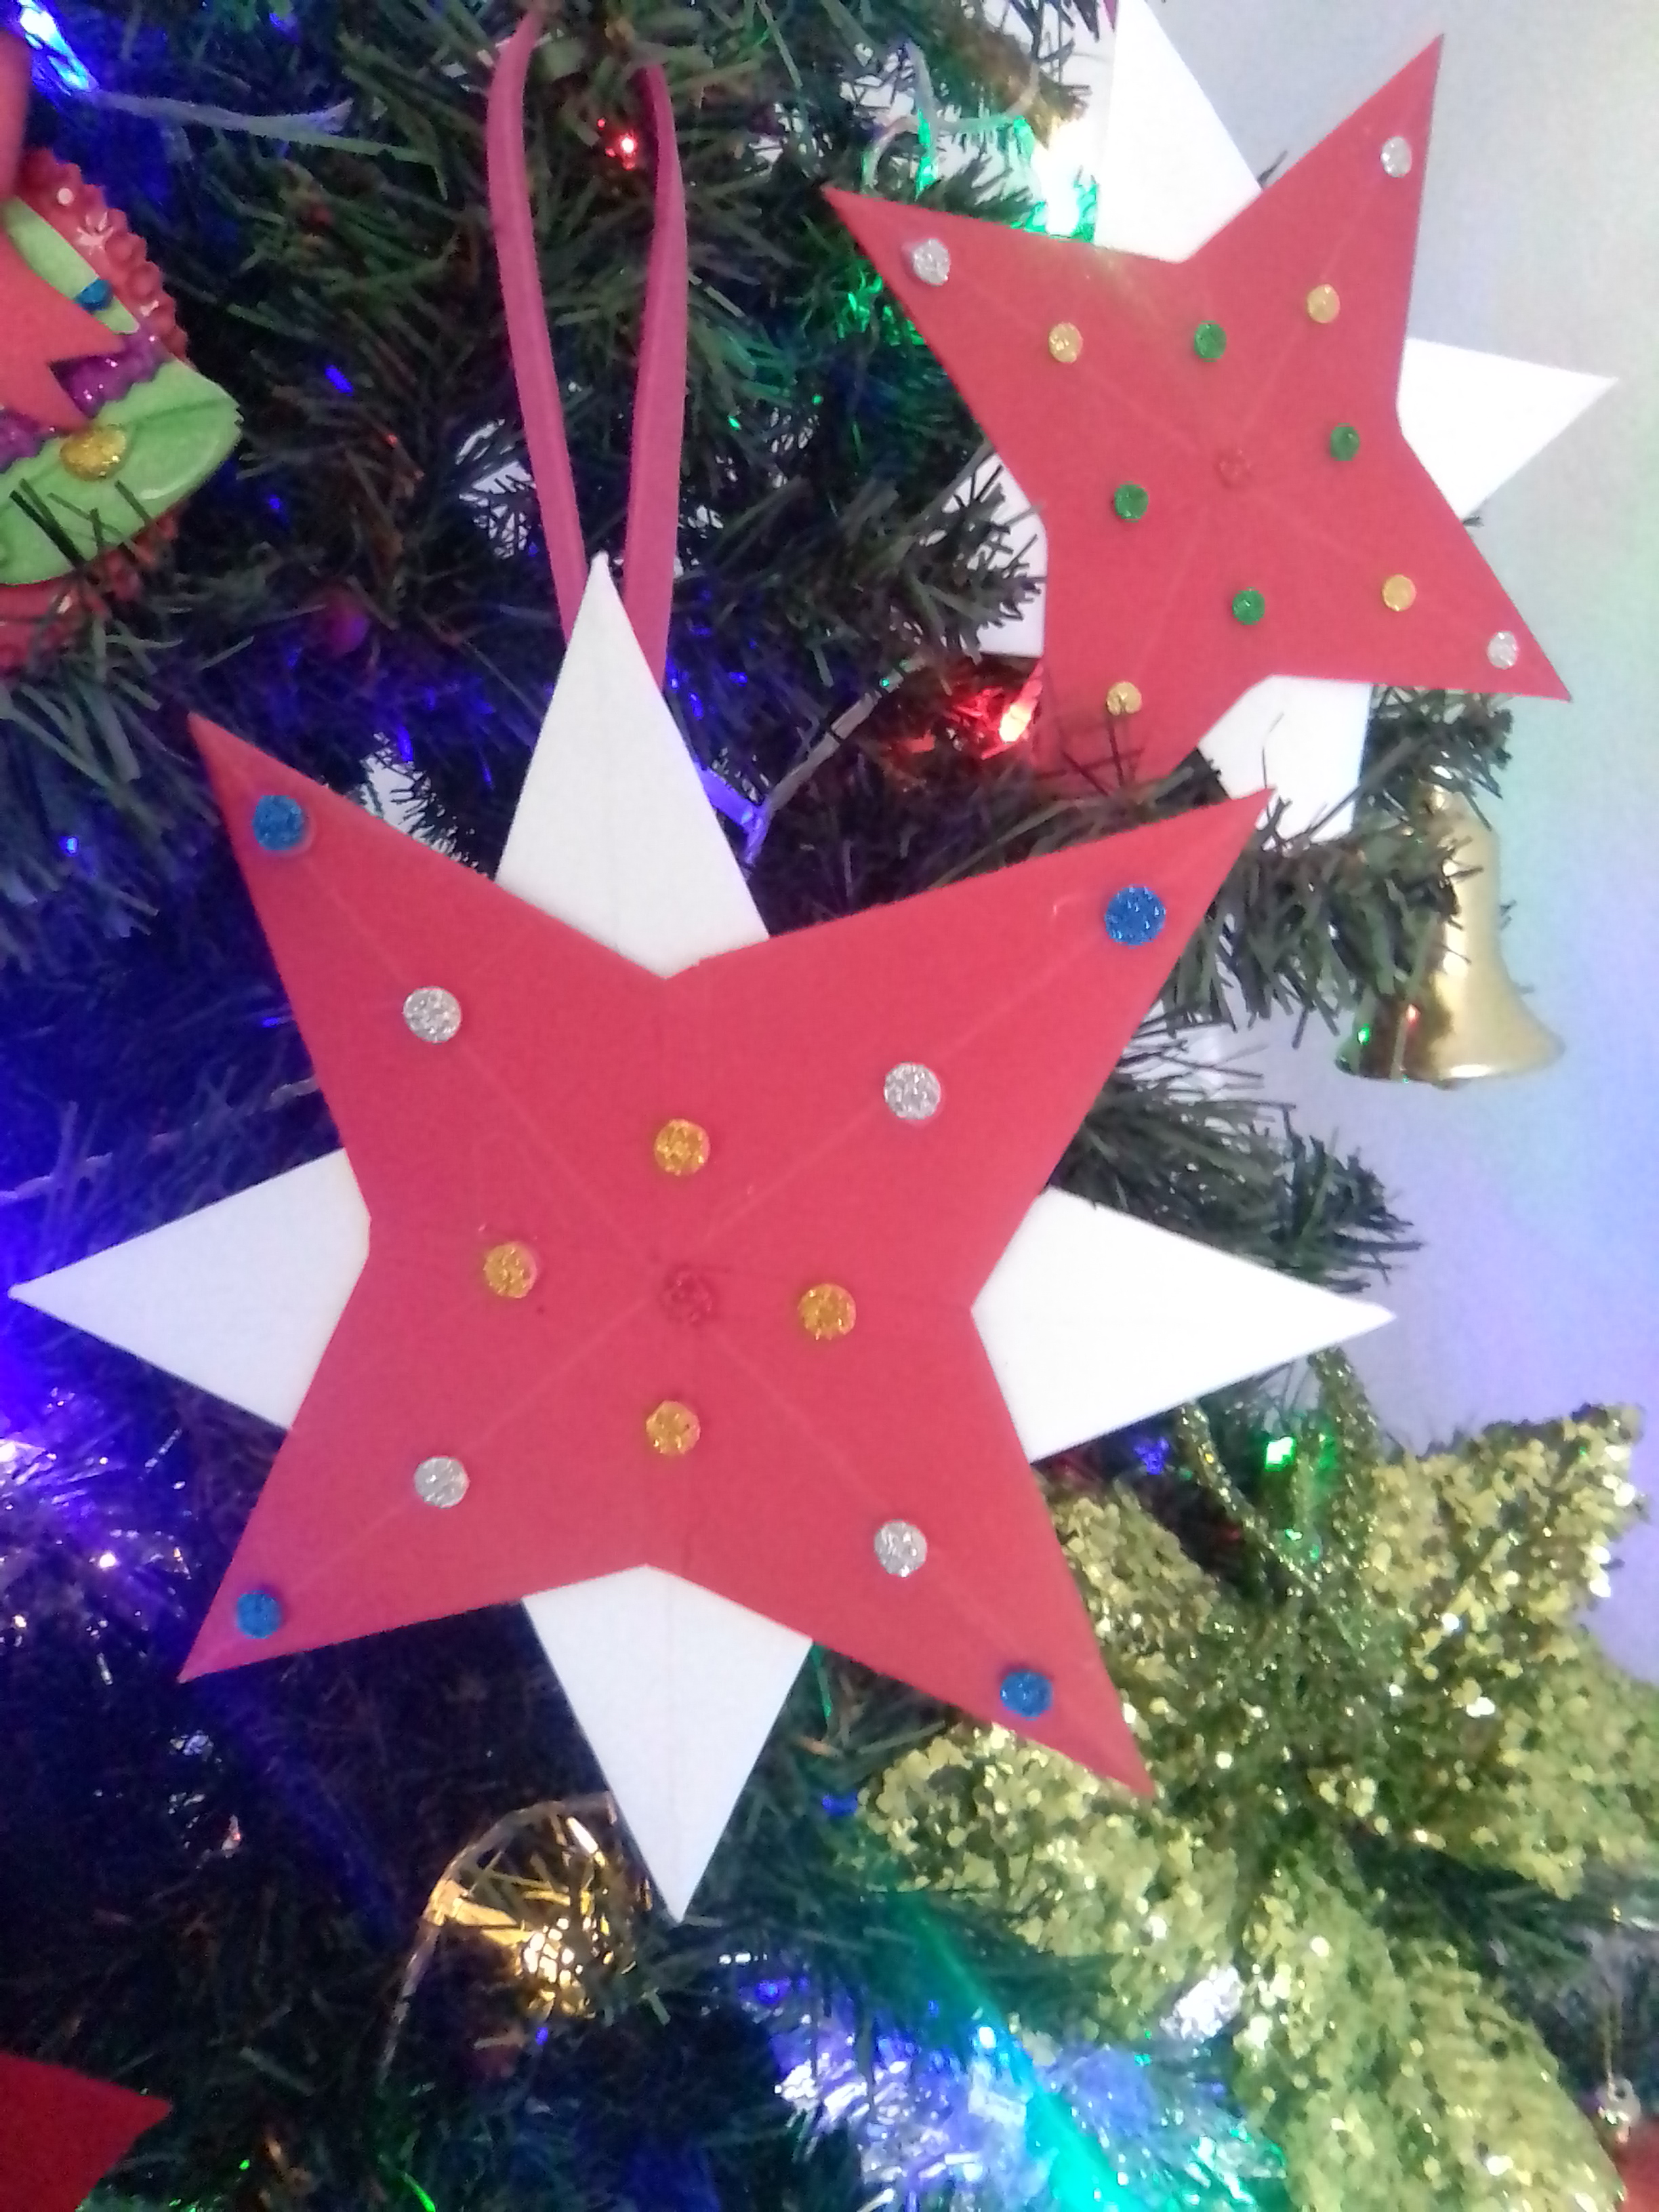
I already assembled my eight-pointed stars and two colors, the next step is to decorate them with a bit of Christmas glitter, for this I chose some pieces of foami in various frosted colors and with a hole punch I obtained several circles that I glued on the star to give brightness.
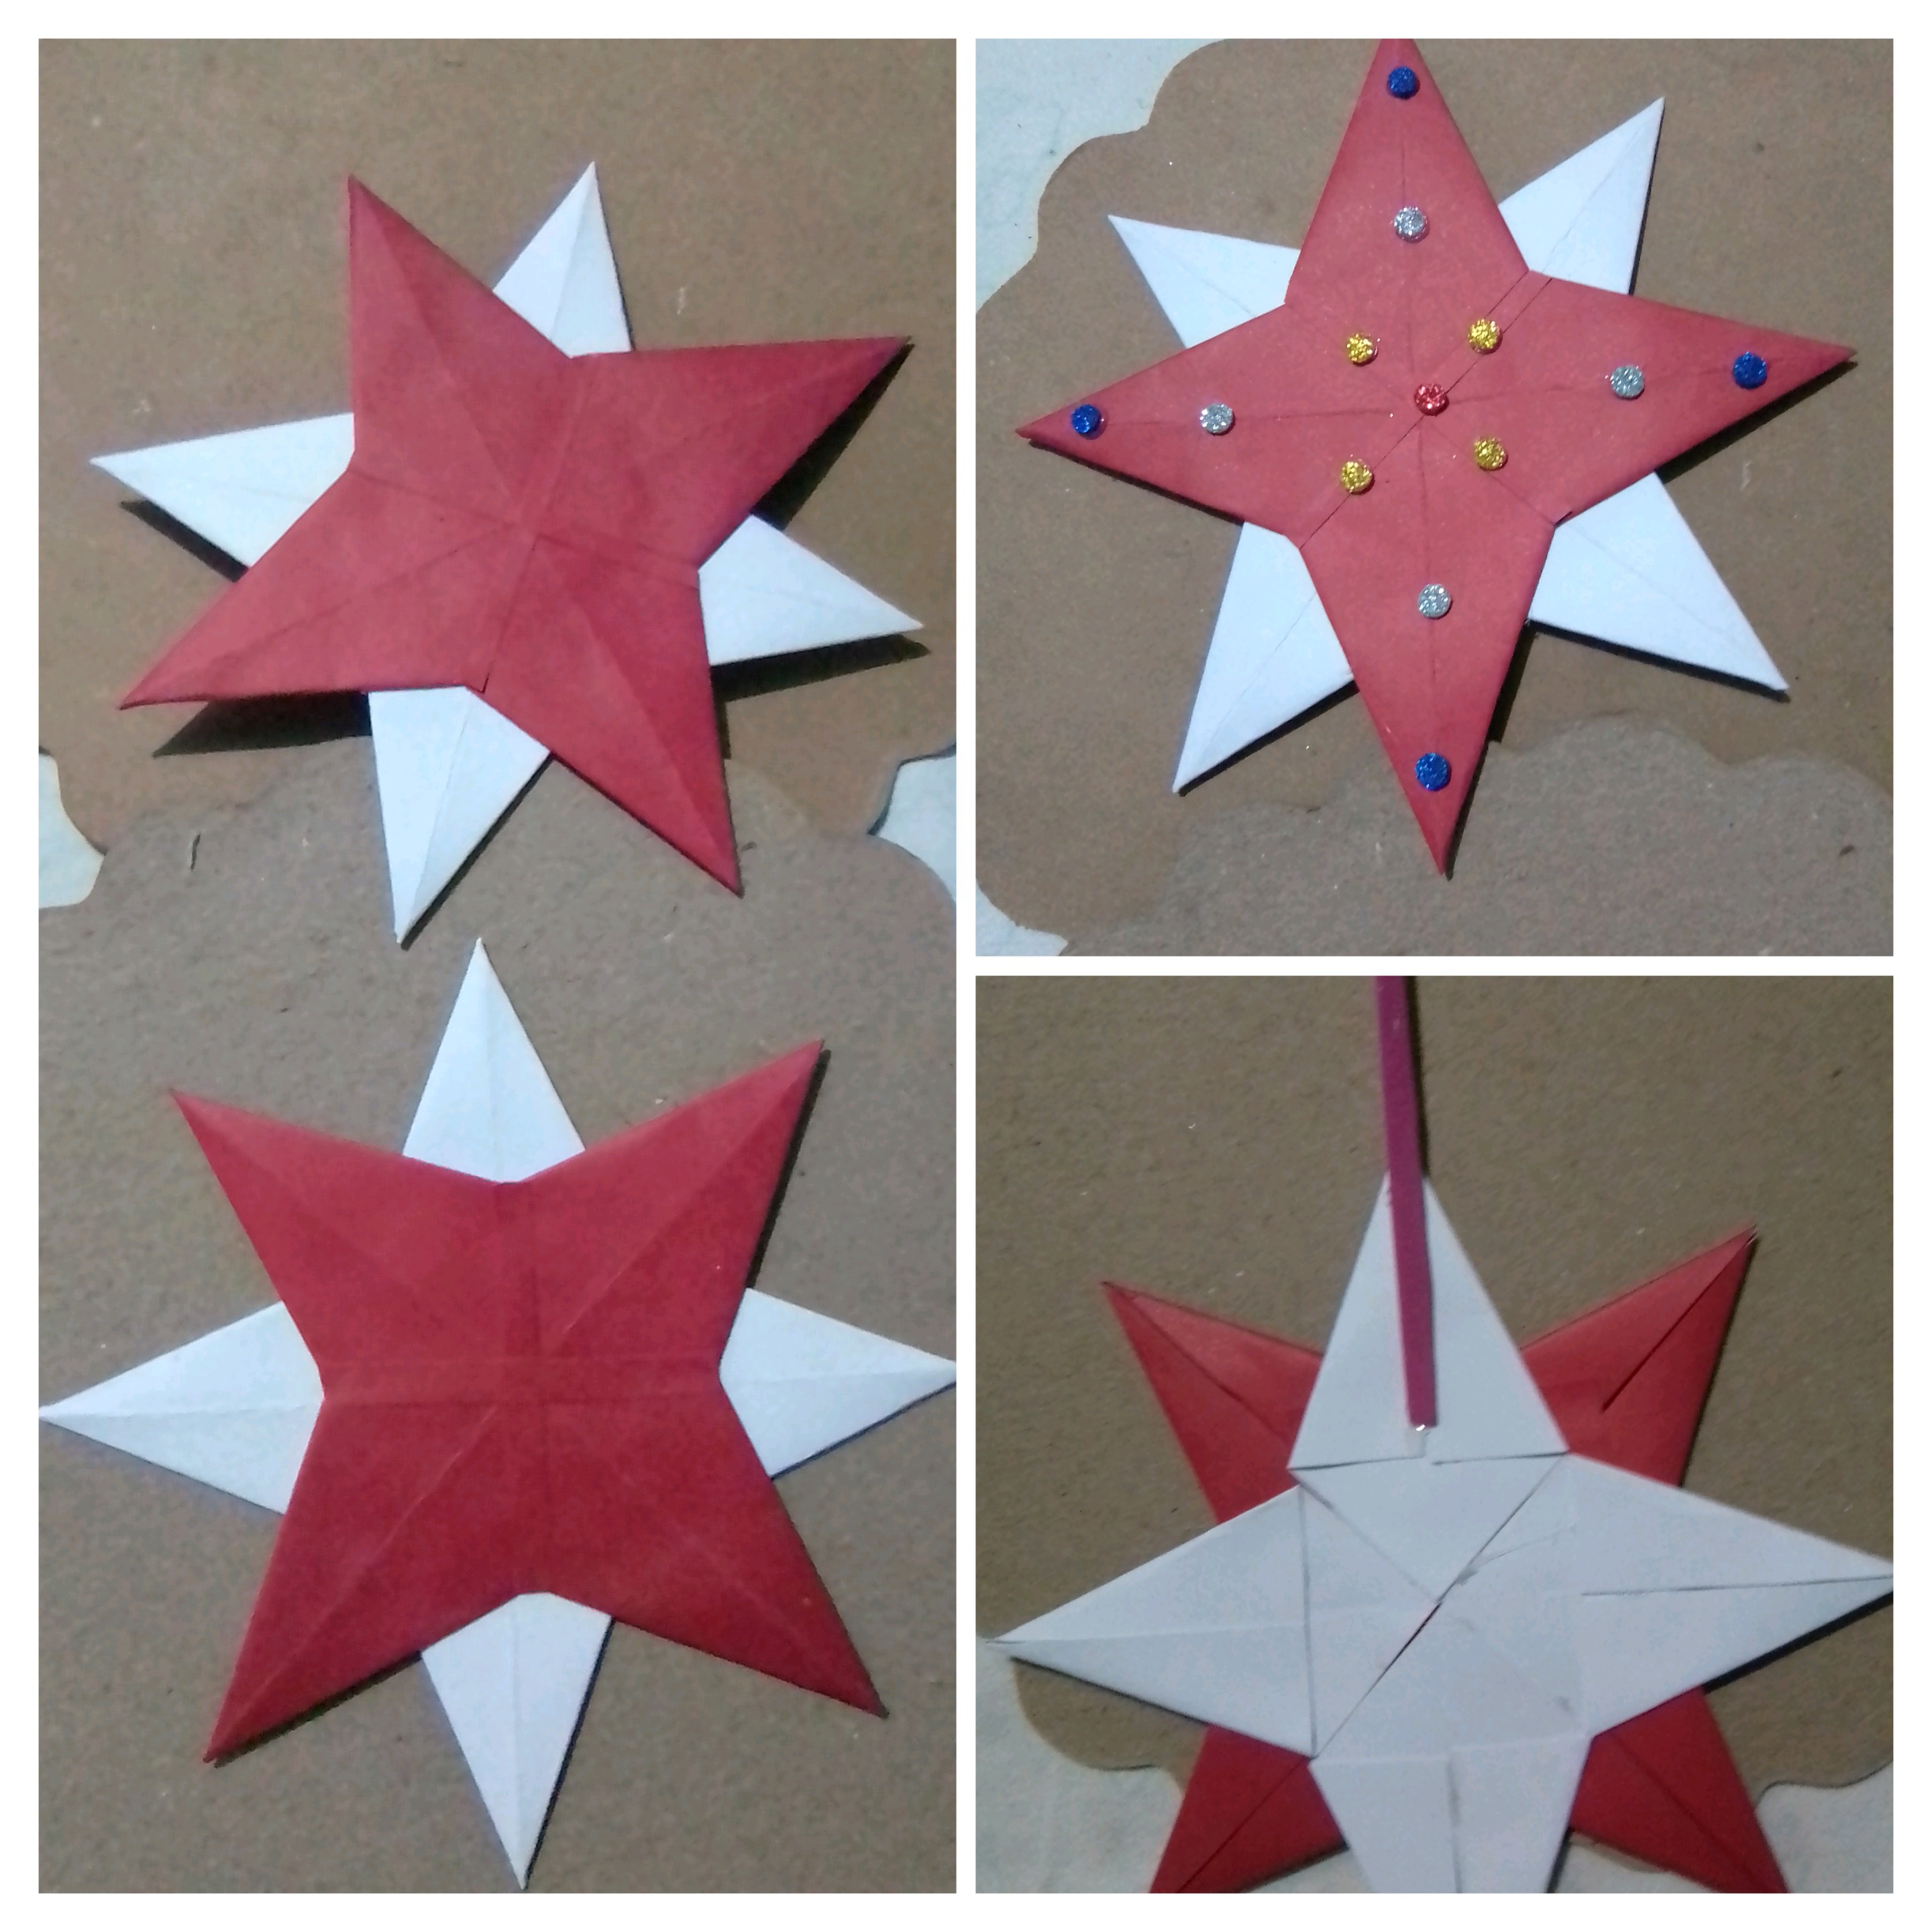
In this simple way, make eight-pointed stars and two colors.
Result
The photos are my property, taken exclusively in this project.
The collages of the procedure were made with the tool of my Blue C6 and the main one in Canva
The separators and the banners were edited by me in Canva
The translation was made with
DeepL Translator

Muy complacida de estar nuevamente, compartiendo con todos los creativos y amantes de las manualidades, a los que les apasiona crear con las manos y dedican parte de su tiempo a este arte. Ya muy cerca de la culminación de este año 2022 son muchas lo que estoy segura hemos aprendido y enseñado, en este camino de dar y recibir en Hive Diy, y con la expectativa de que el próximo año sea de mayor provecho y aprendizaje para todos. Hoy quiero compartir cómo hacer un lindo ornamento para el árbol de navidad, se trata de unas estrellas de cartulina, y les contaré a continuación como elaborarlas con unos sencillos pasos.
MATERIALES
✓ Cartulina rojo y blanco
✓ Foami escarchado de colores variados
✓ Tijera, lápiz y regla
✓ Pistola y barra de silicona
✓ Pegamento en barra
✓ Perforadora
PASO A PASO
Los ornamentos navideños nunca son suficientes y siempre queremos colocar nuevos elementos a nuestro árbol.
Para elaborar estás lindas y sencillas estrellas de cartulina, seleccione los colores rojo y blanco, que son colores básicos en los temas navideños. Comencé midiendo un rectángulo de 24 x 12 centímetros al que dividi luego, en cuadrados de 6x 6 centímetros.
Al tener mis 8 cuadrados de ambos colores, blanco y rojo, procedo entonces a doblar con ayuda de una regla, de manera de obtener 2 triángulos
Es el momento de dar forma a las piezas, para llegar a cada una de las puntas de la estrella, para ello doblo cada una de las puntas de los triángulos, hacia adentro y haciendo que cada una coincida con el primer doblez del cuadrado.
Con cada una de las puntas de la estrella lista, procedo entonces a ensamblar la estrella, colocando un cuadro de cartulina roja, y sobre el, ir fijando con silicona caliente cada una de las puntas de color rojo, procurando que queden perfectamente alineadas.
A continuación, ensambló mi estrella de color blanco, por detrás de la roja, comenzando por los espacios vacios y que están alineadas de manera perfecta.
Ya ensamble mis estrellas de ocho puntas y de dos colores, el siguiente paso es decorarlas con un poco de brillo navideño, para ello escogí unos retazos de foami de varios colores escarchado y con una perforadora obtuve varios círculos que fui pegando en la estrella para dar brillo.
De esta sencilla manera realice estrellas de ocho puntas y de dos colores.
Resultado
Las fotos son de mi propiedad tomadas exclusivamente en este proyecto.
Los collages del procedimiento los hice con la herramienta de mi Blue C6 y el principal en Canva
Lo separadores y el banners fueron editados por mi en Canva
La traducción fue realizada con
DeepL Traductor

Thank you for sharing this post on HIVE!
Your content got selected by our fellow curator semarekha & you just received a little thank you upvote from us for your great work! Your post will be featured in one of our recurring compilations which are aiming to offer you a stage to widen your audience within the DIY scene of Hive. Stay creative & HIVE ON!
Please vote for our hive witness <3
Gracias por su apoyo
Esta muy bien hecha, las fotos me gustaron muchisimo como quedo!
@fixie gracias por visitar mi blog, me alegra que te haya gustado esta manualidad navideña
Congratulations @yusma21! You have completed the following achievement on the Hive blockchain And have been rewarded with New badge(s)
Your next target is to reach 600 comments.
You can view your badges on your board and compare yourself to others in the Ranking
If you no longer want to receive notifications, reply to this comment with the word
STOPCheck out our last posts:
Support the HiveBuzz project. Vote for our proposal!
Hola yusma,quedaron muy bonitas las estrellas y se ven chévere en el arbolito 🌲Un abrazote fuerte para ti🥰
Gracias @brume7 , agradezco tu lindo comentario