

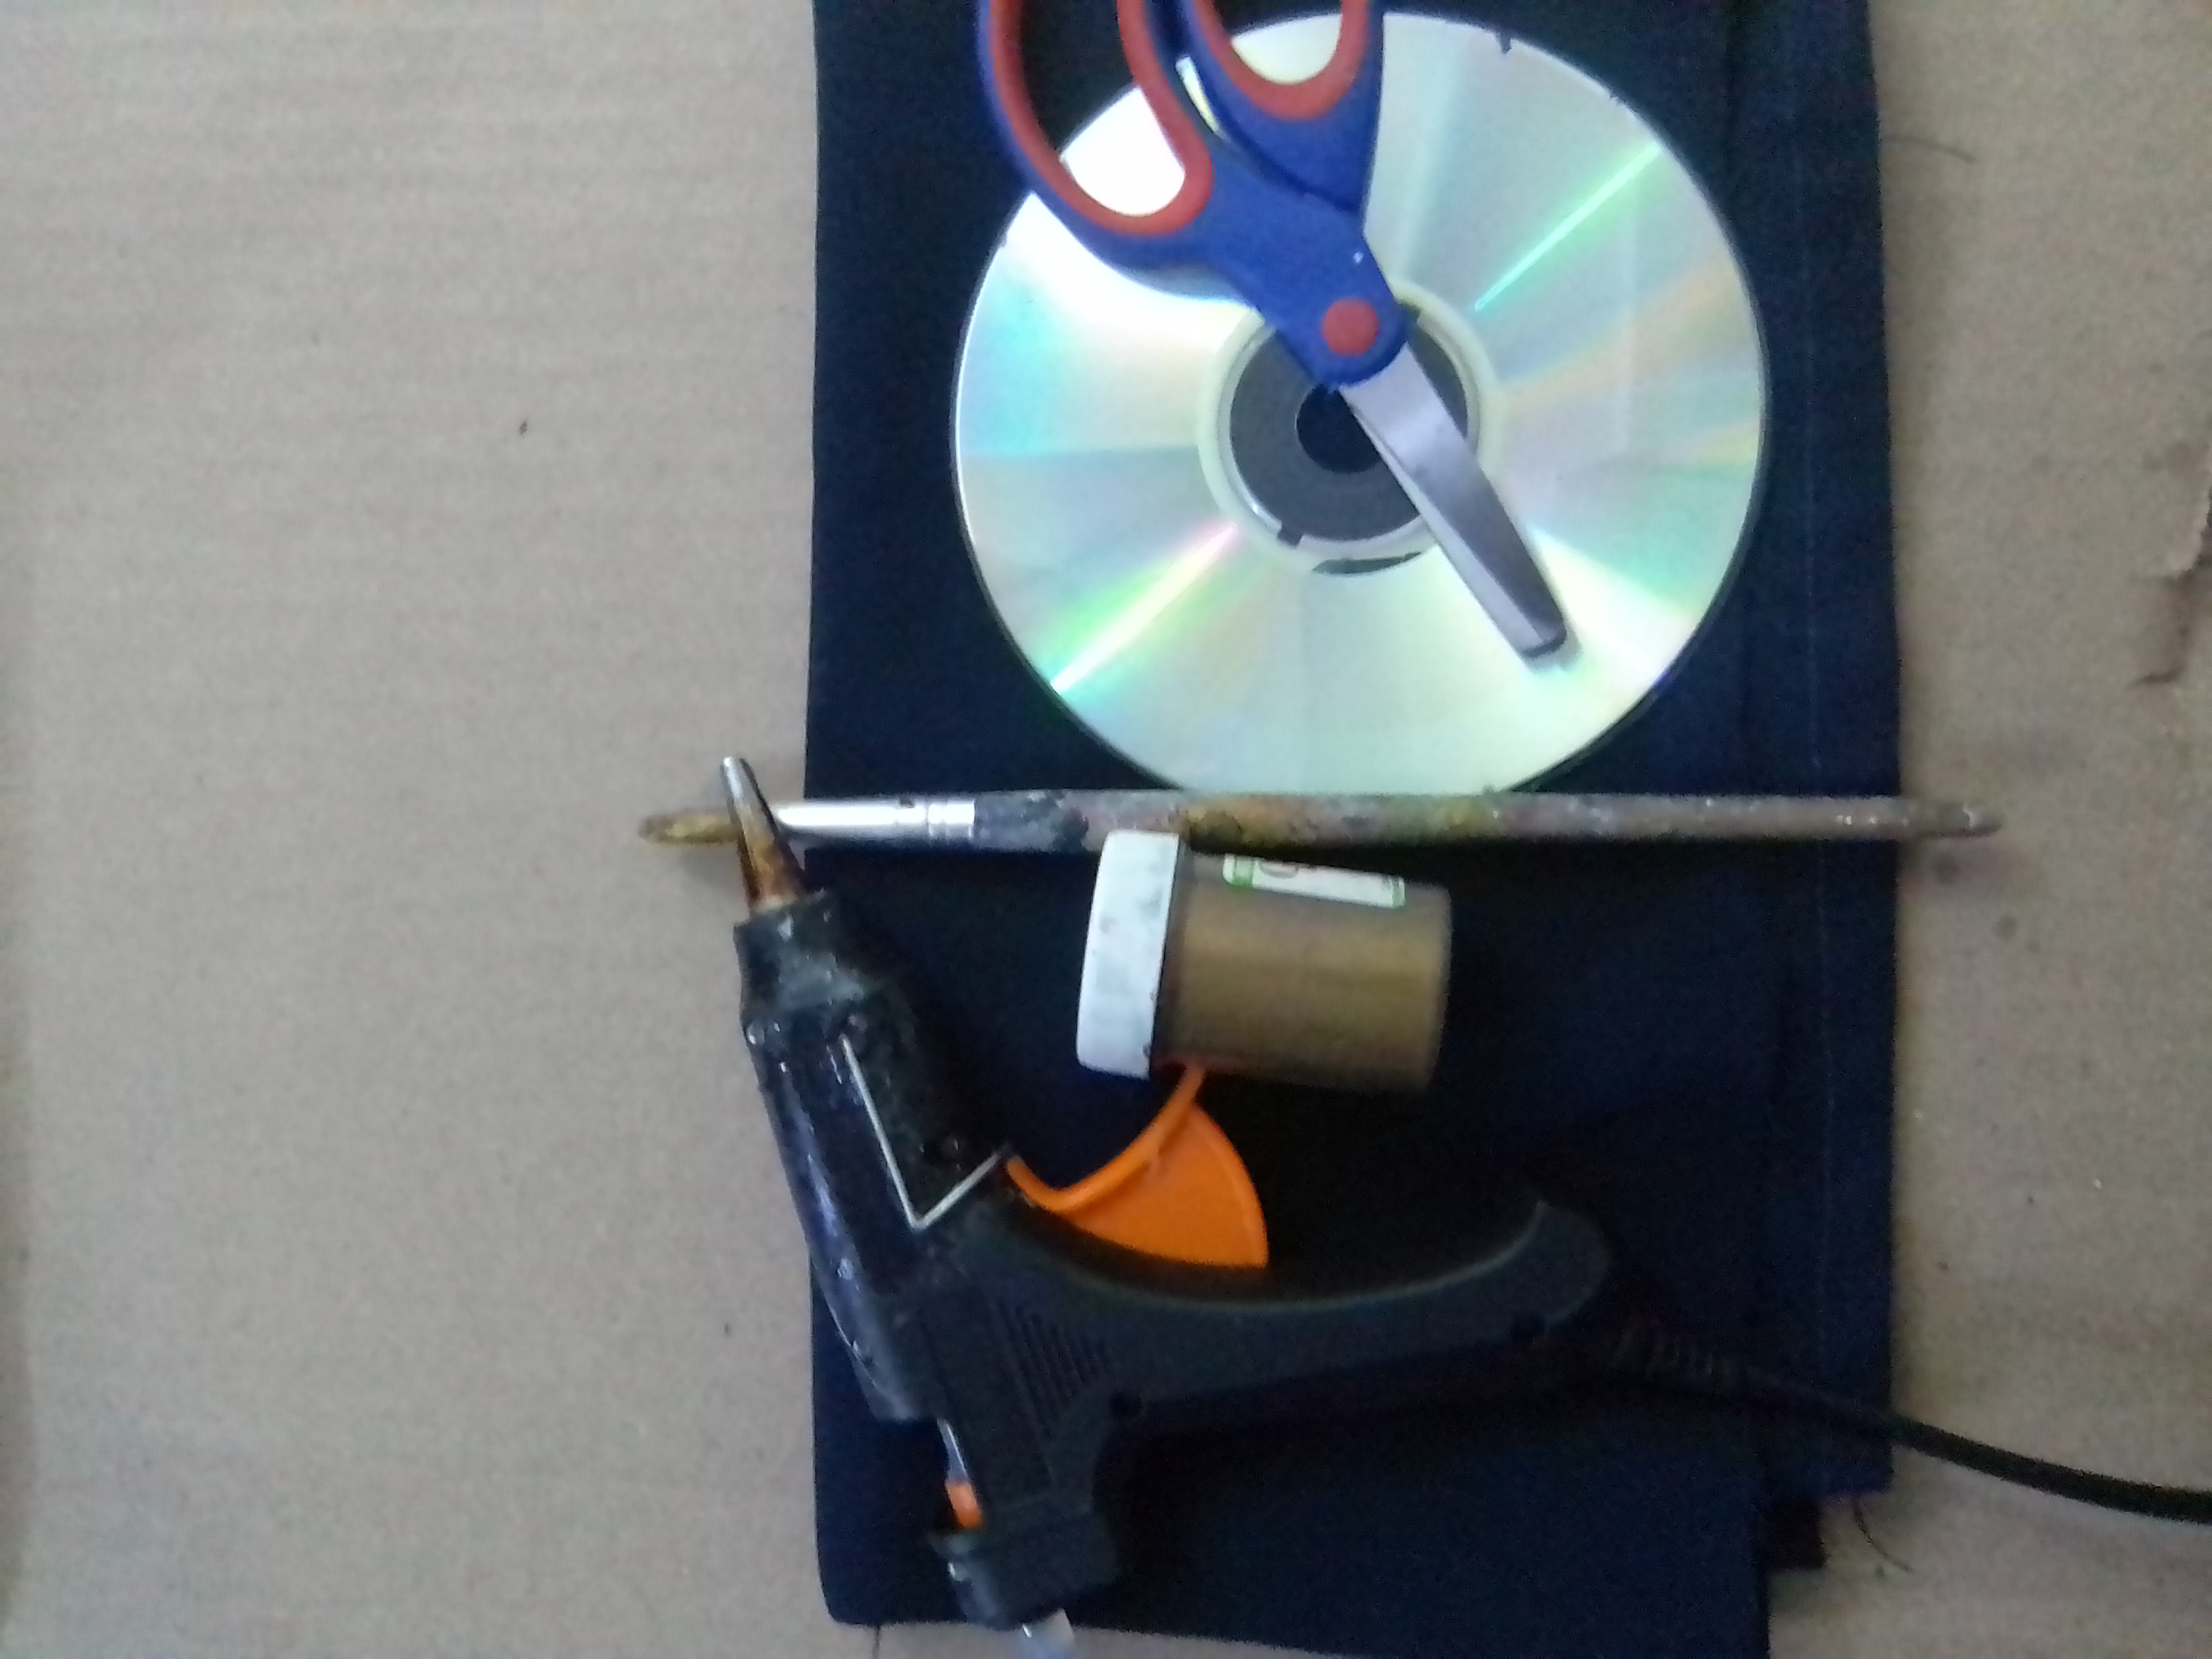
Materials
✓ Cardboard
✓ Gold paint
✓ Brush
✓ Pencil
✓ Scissor
✓ Gun and silicone bar
✓ Recycled paper
Step by Step
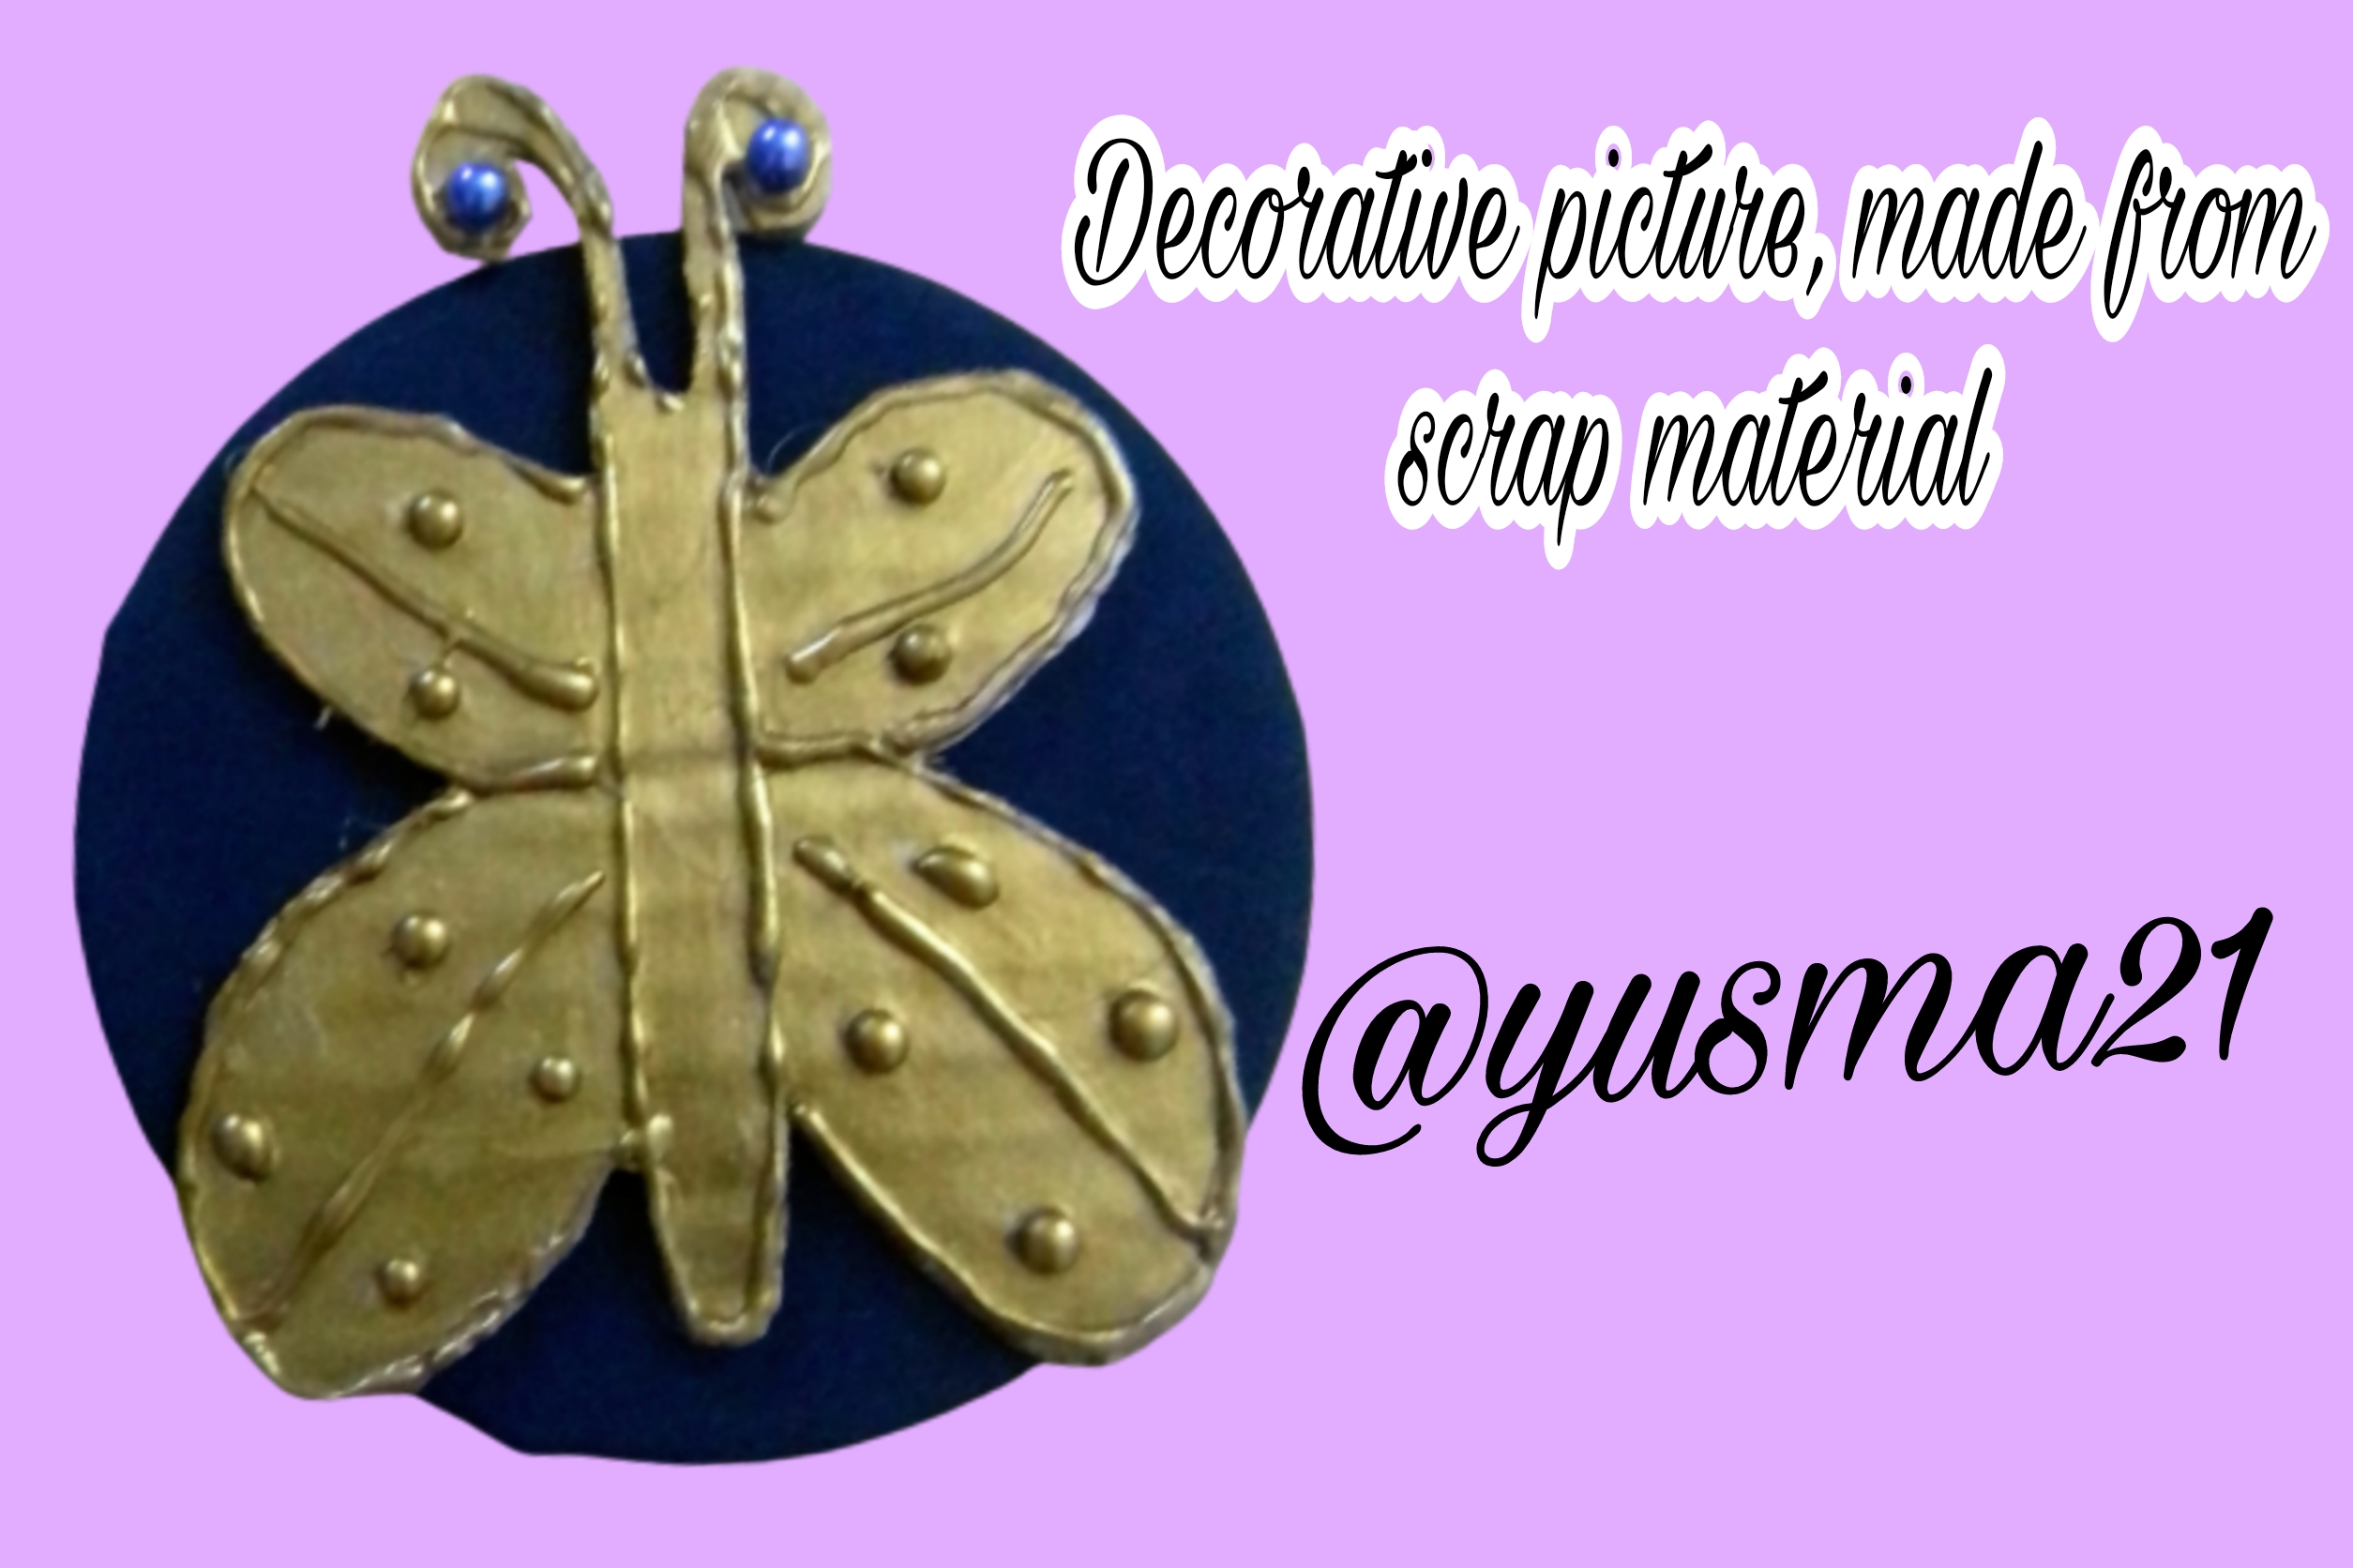
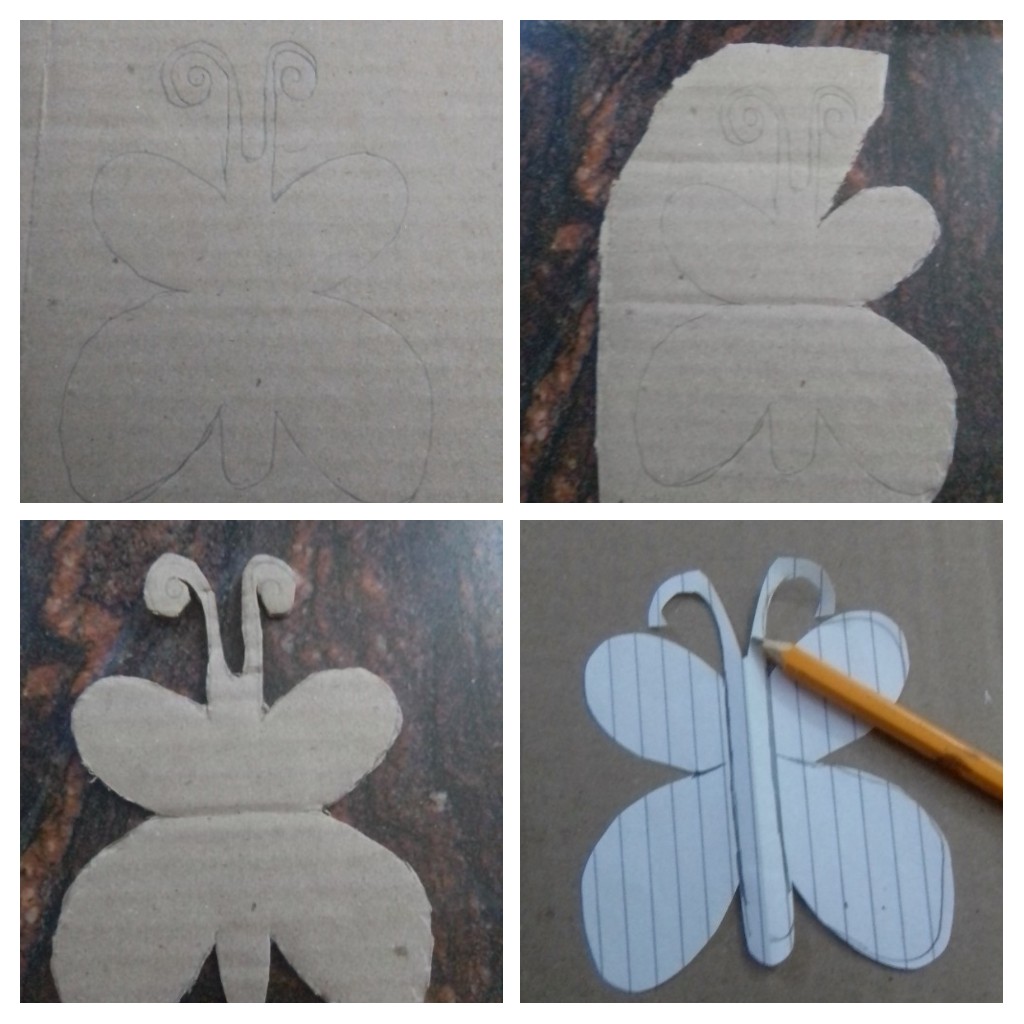
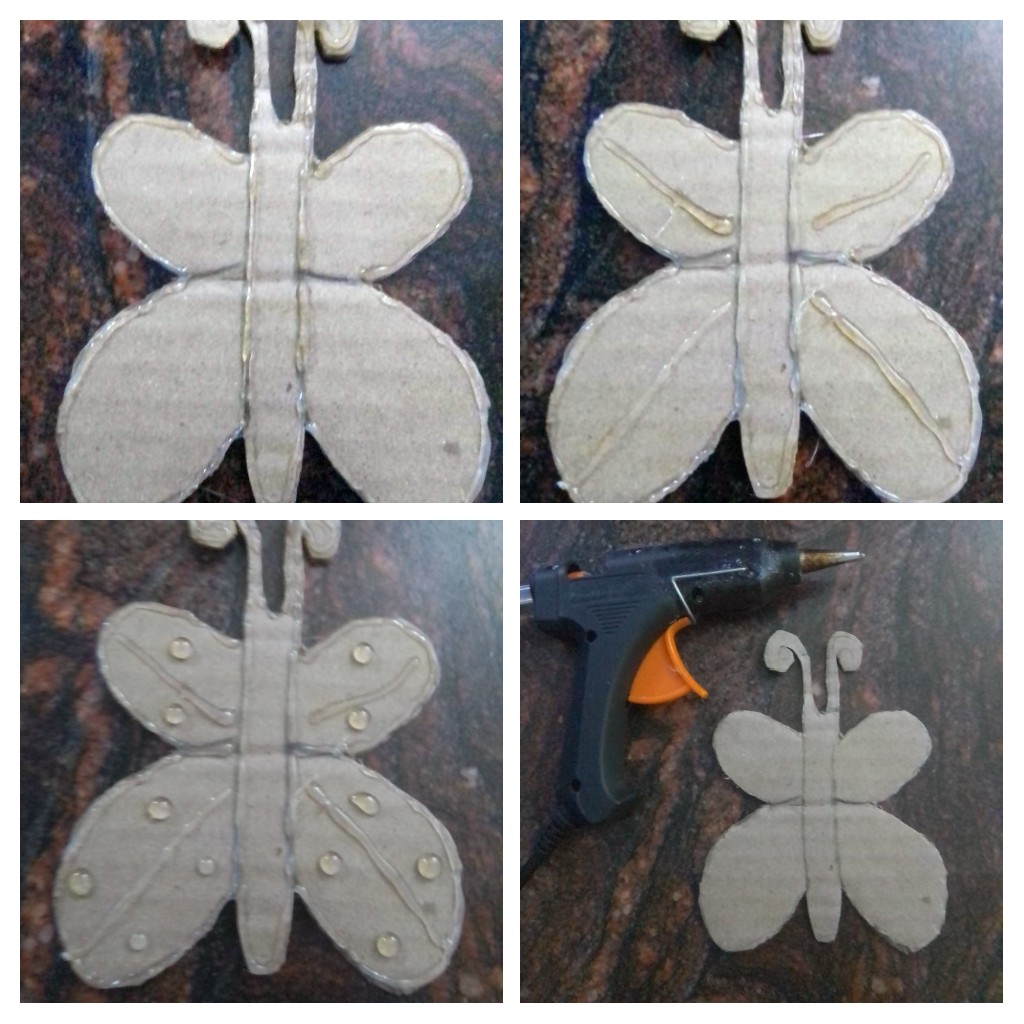
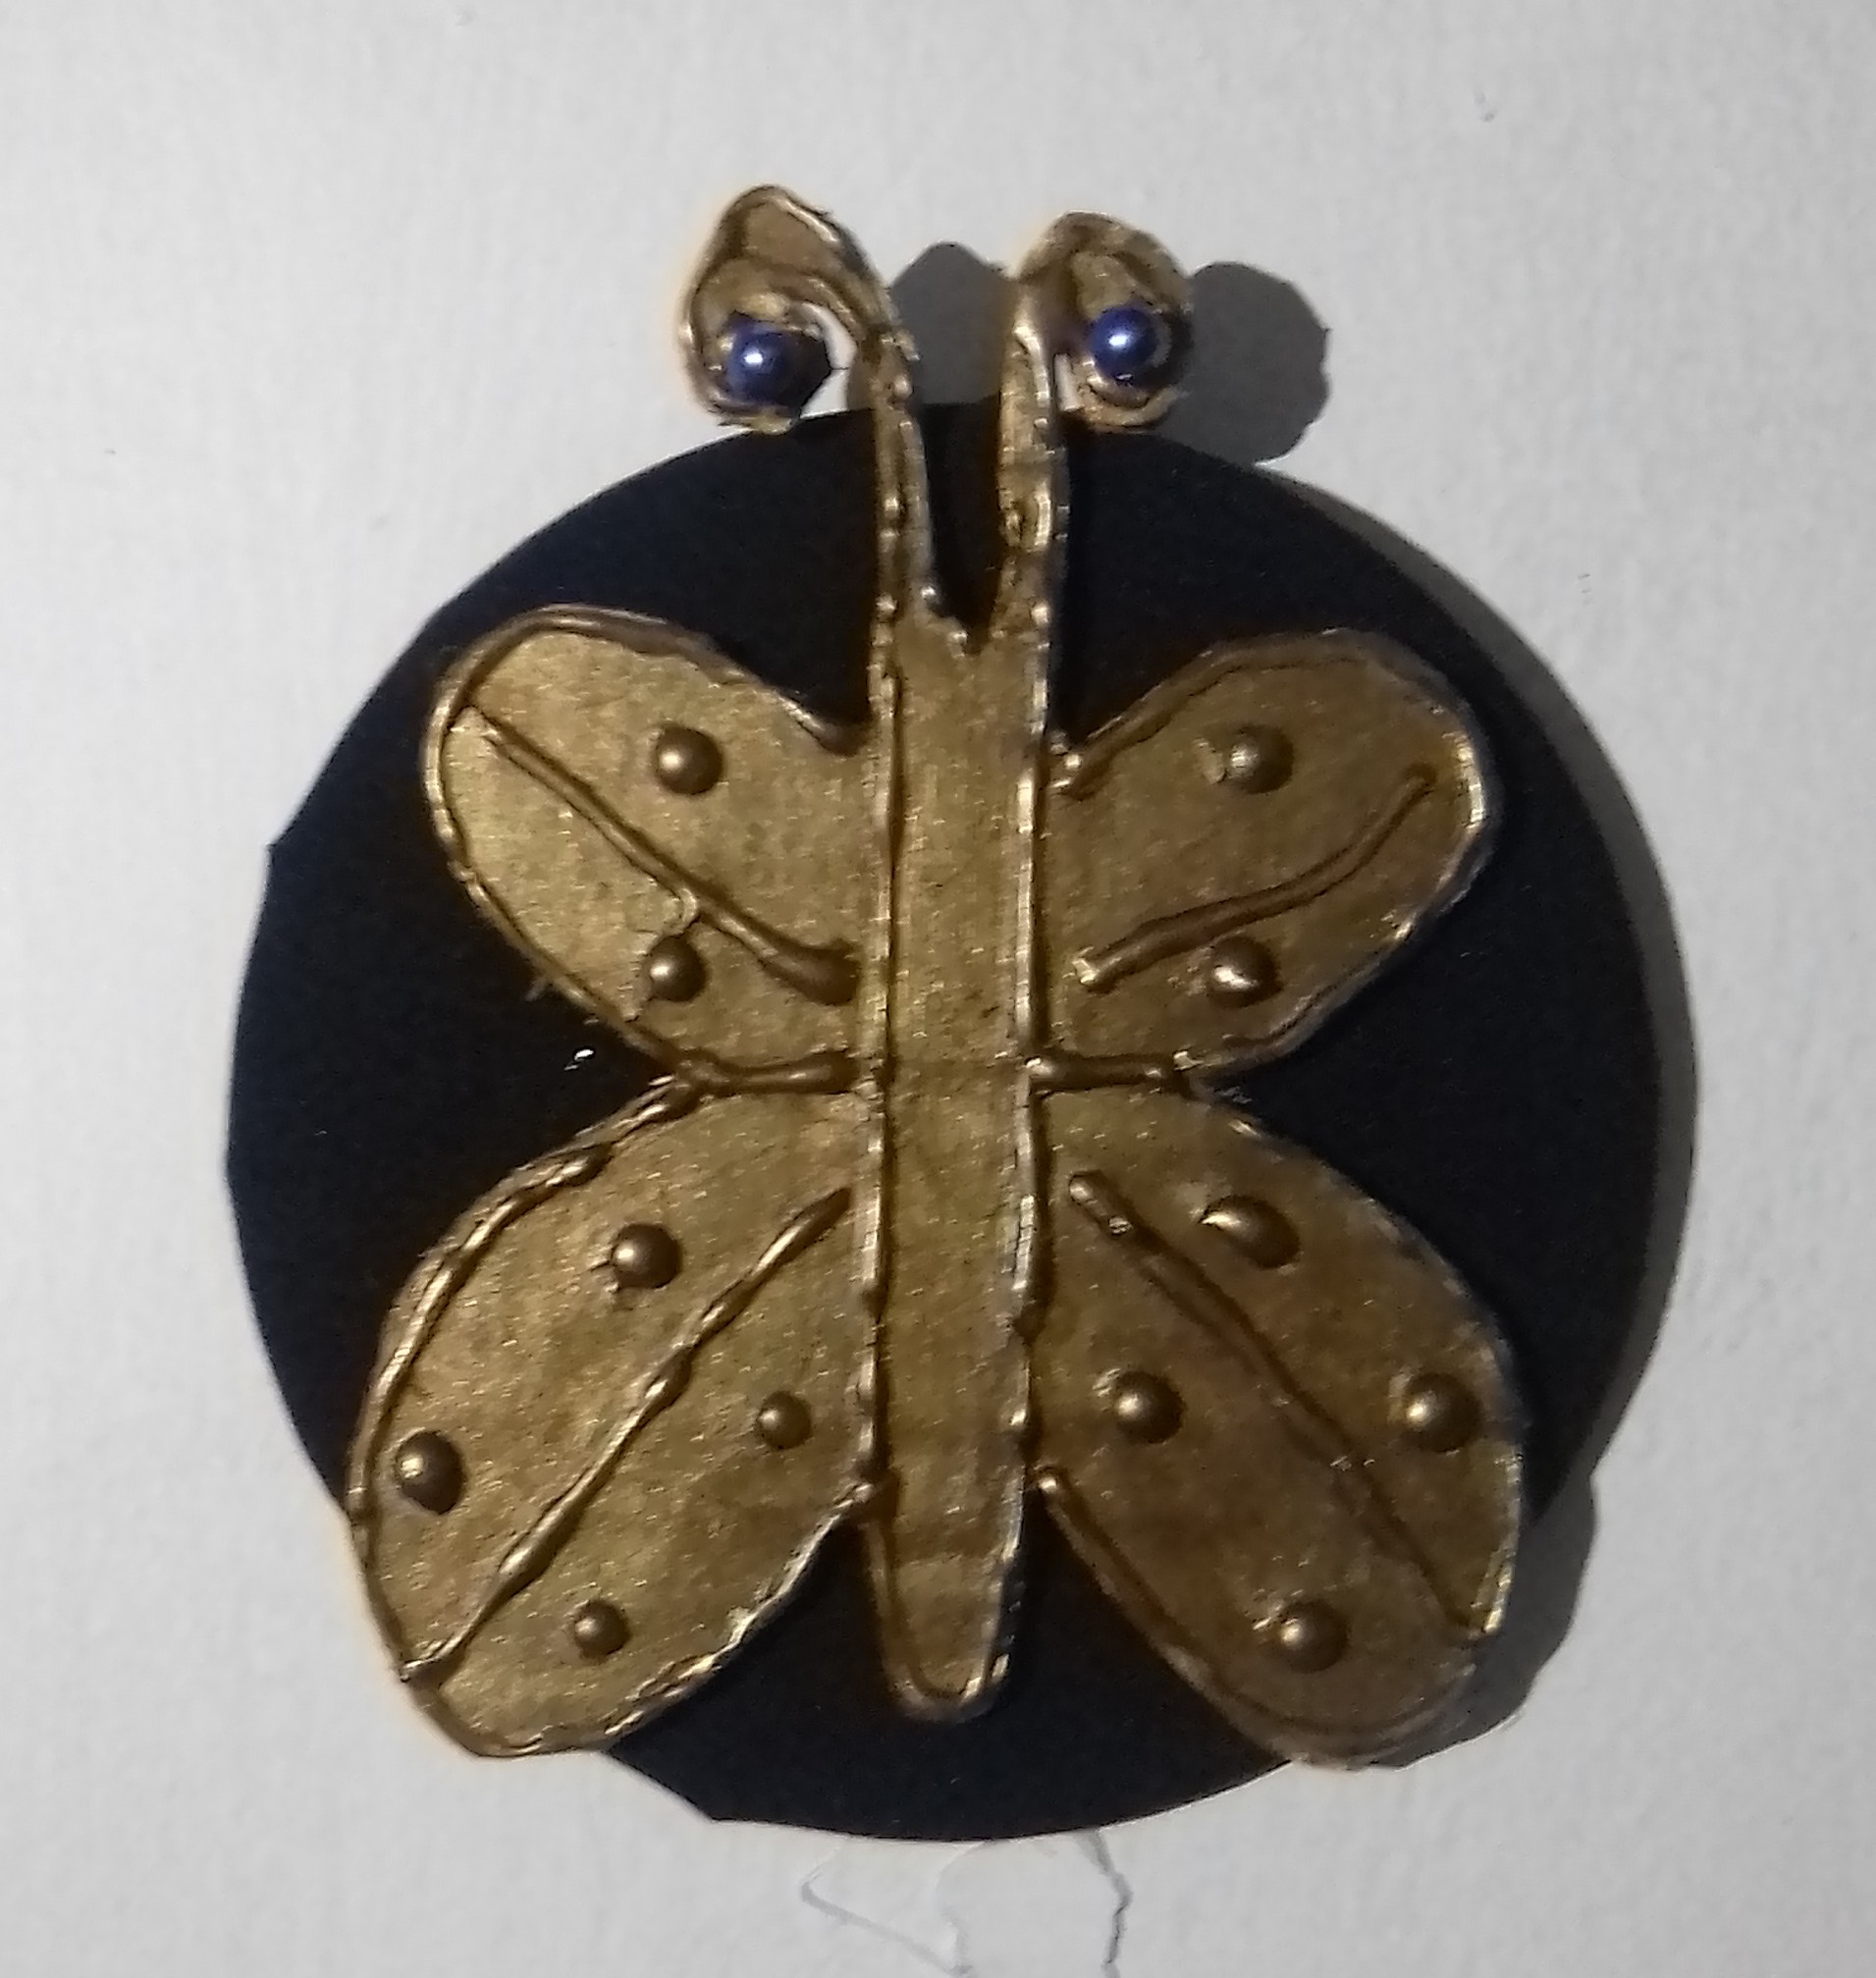
In these mini paintings, we can capture the theme of our preference, to make this post I wanted a butterfly theme. Make the design of a simple butterfly, take into account the size, because my idea is that the butterfly protrudes a few centimeters from the round base. The design measures 10 centimeters in its widest part and 13 centimeters in its highest part.
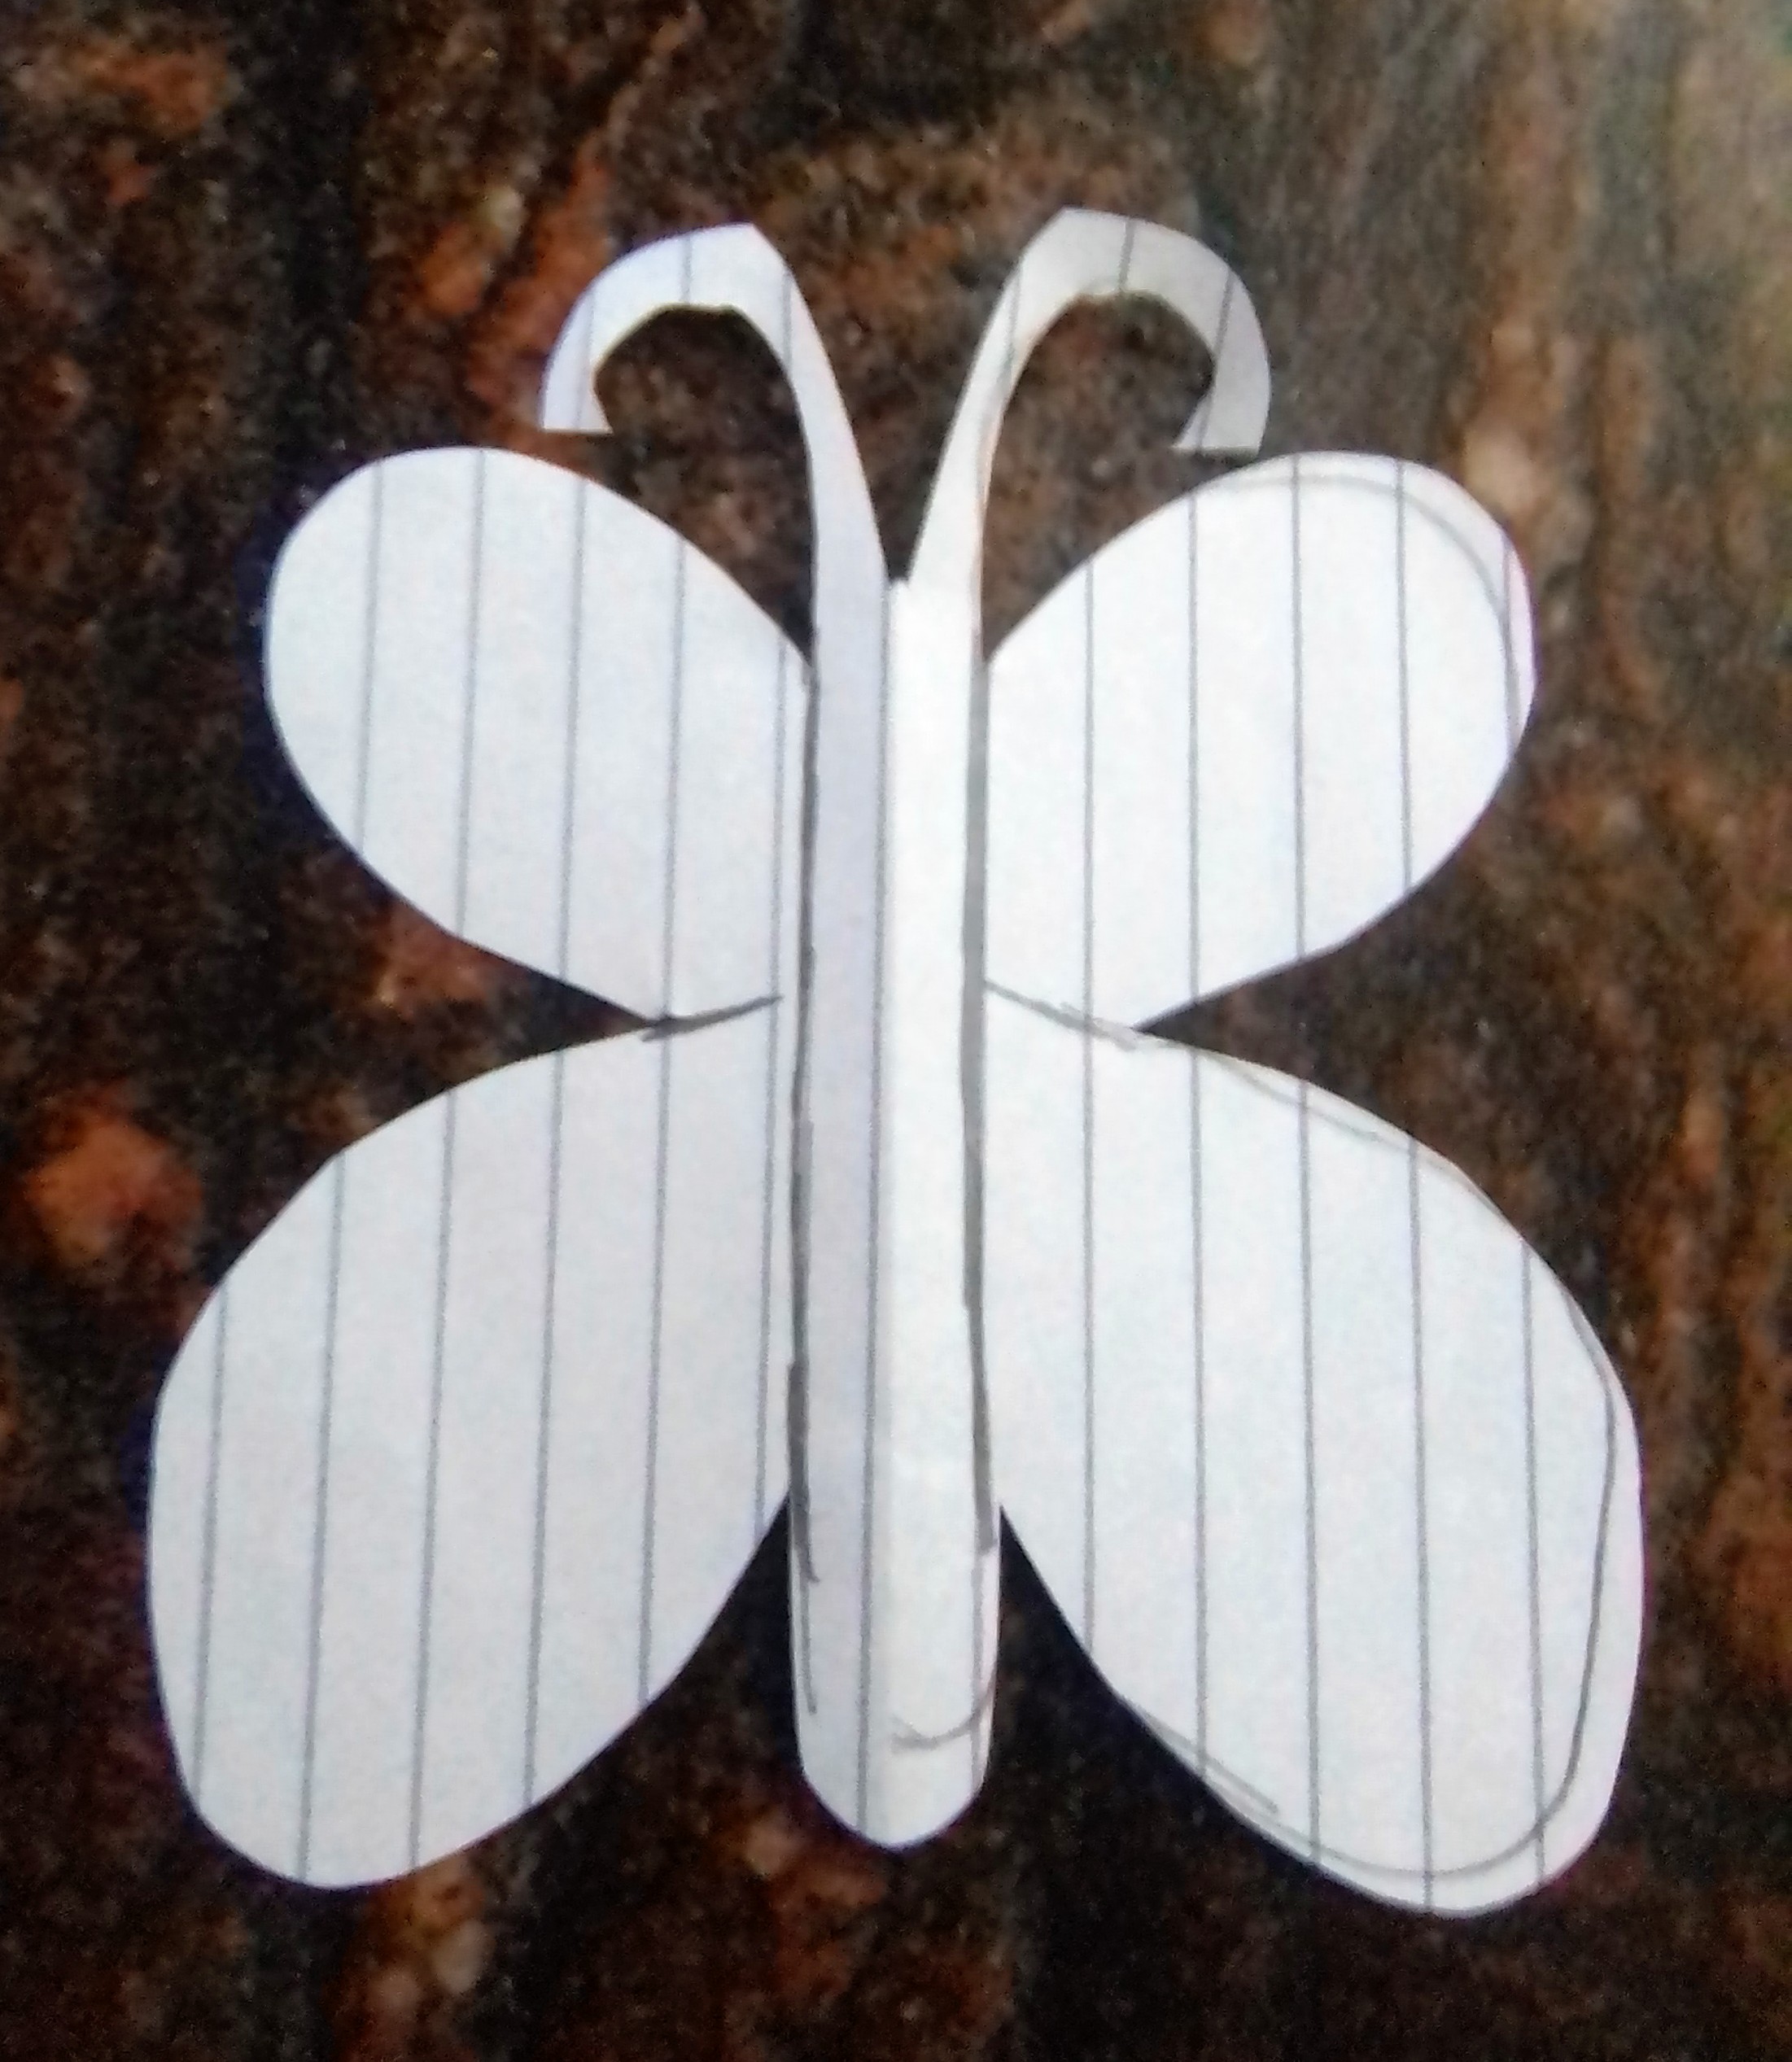
I transferred the design to the cardboard, outlined very well. Cut with scissors, with a cutter it is more practical to cut. And then I proceed to heat the silicone gun very well, then I begin to place hot silicone around the entire butterfly, trying as much as possible not to cut the lines, that is, continuity in the silicone line is important and that it fits us as thick as possible. When doing everything around, we continue with the internal outline and to make the points and avoid the silicone threads remaining, we put the point and with a stick we cut the thread before removing the gun.
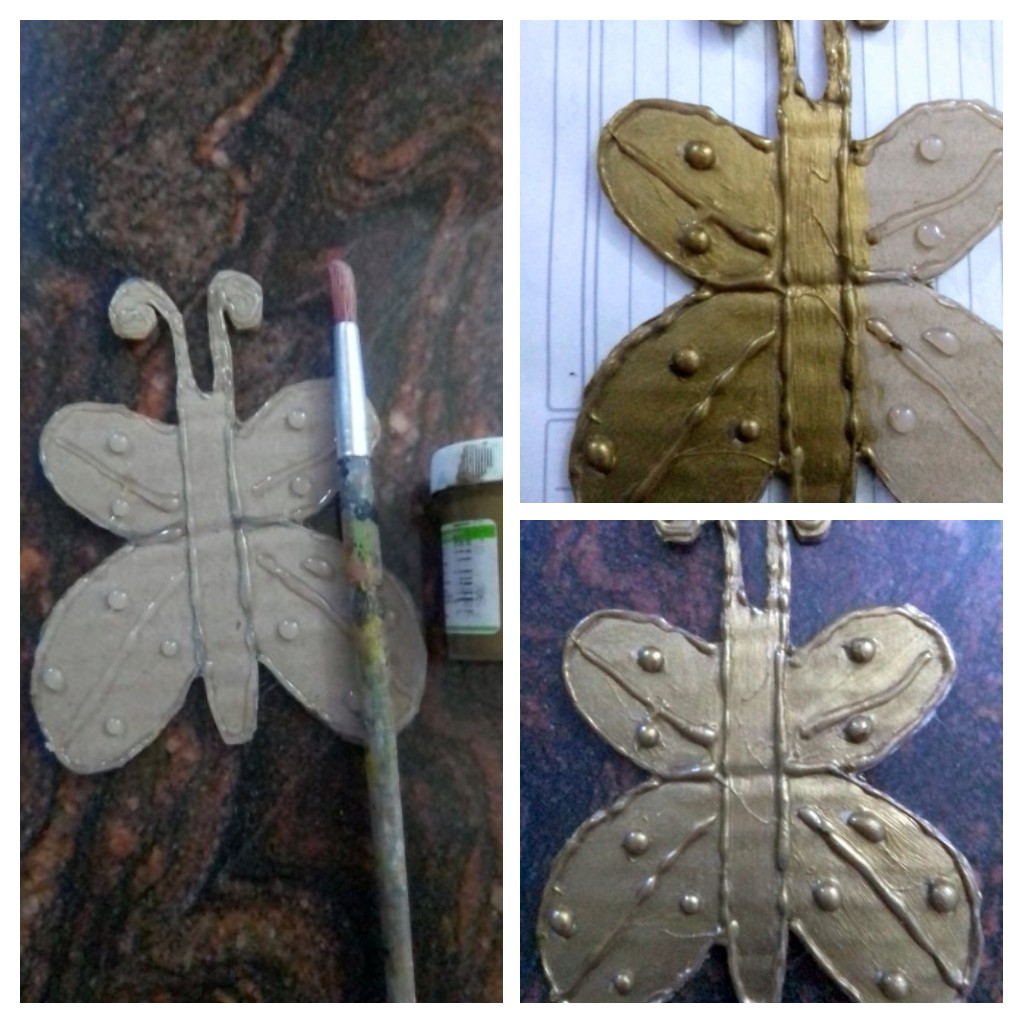
With the figure already outlined with silicone, now I paint with gold paint, use cold paint, another also gives the same result. It dries quickly and you can see how nice it looks.
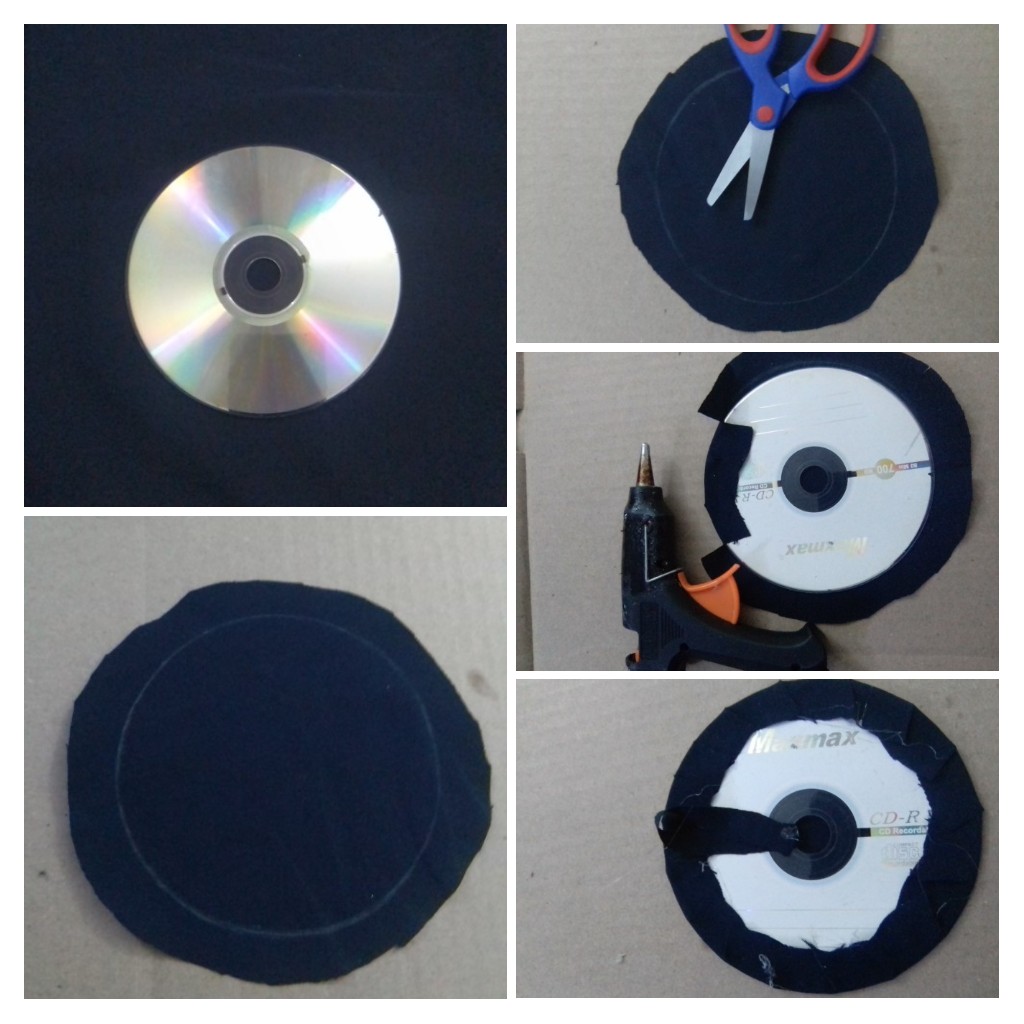
For the base of the painting, I use a CD, take the measure of the dark blue fabric and cut about 2 centimeters more, then I covered the CD with the fabric and glued it with hot silicone, with the same fabric I made the hanging tape.
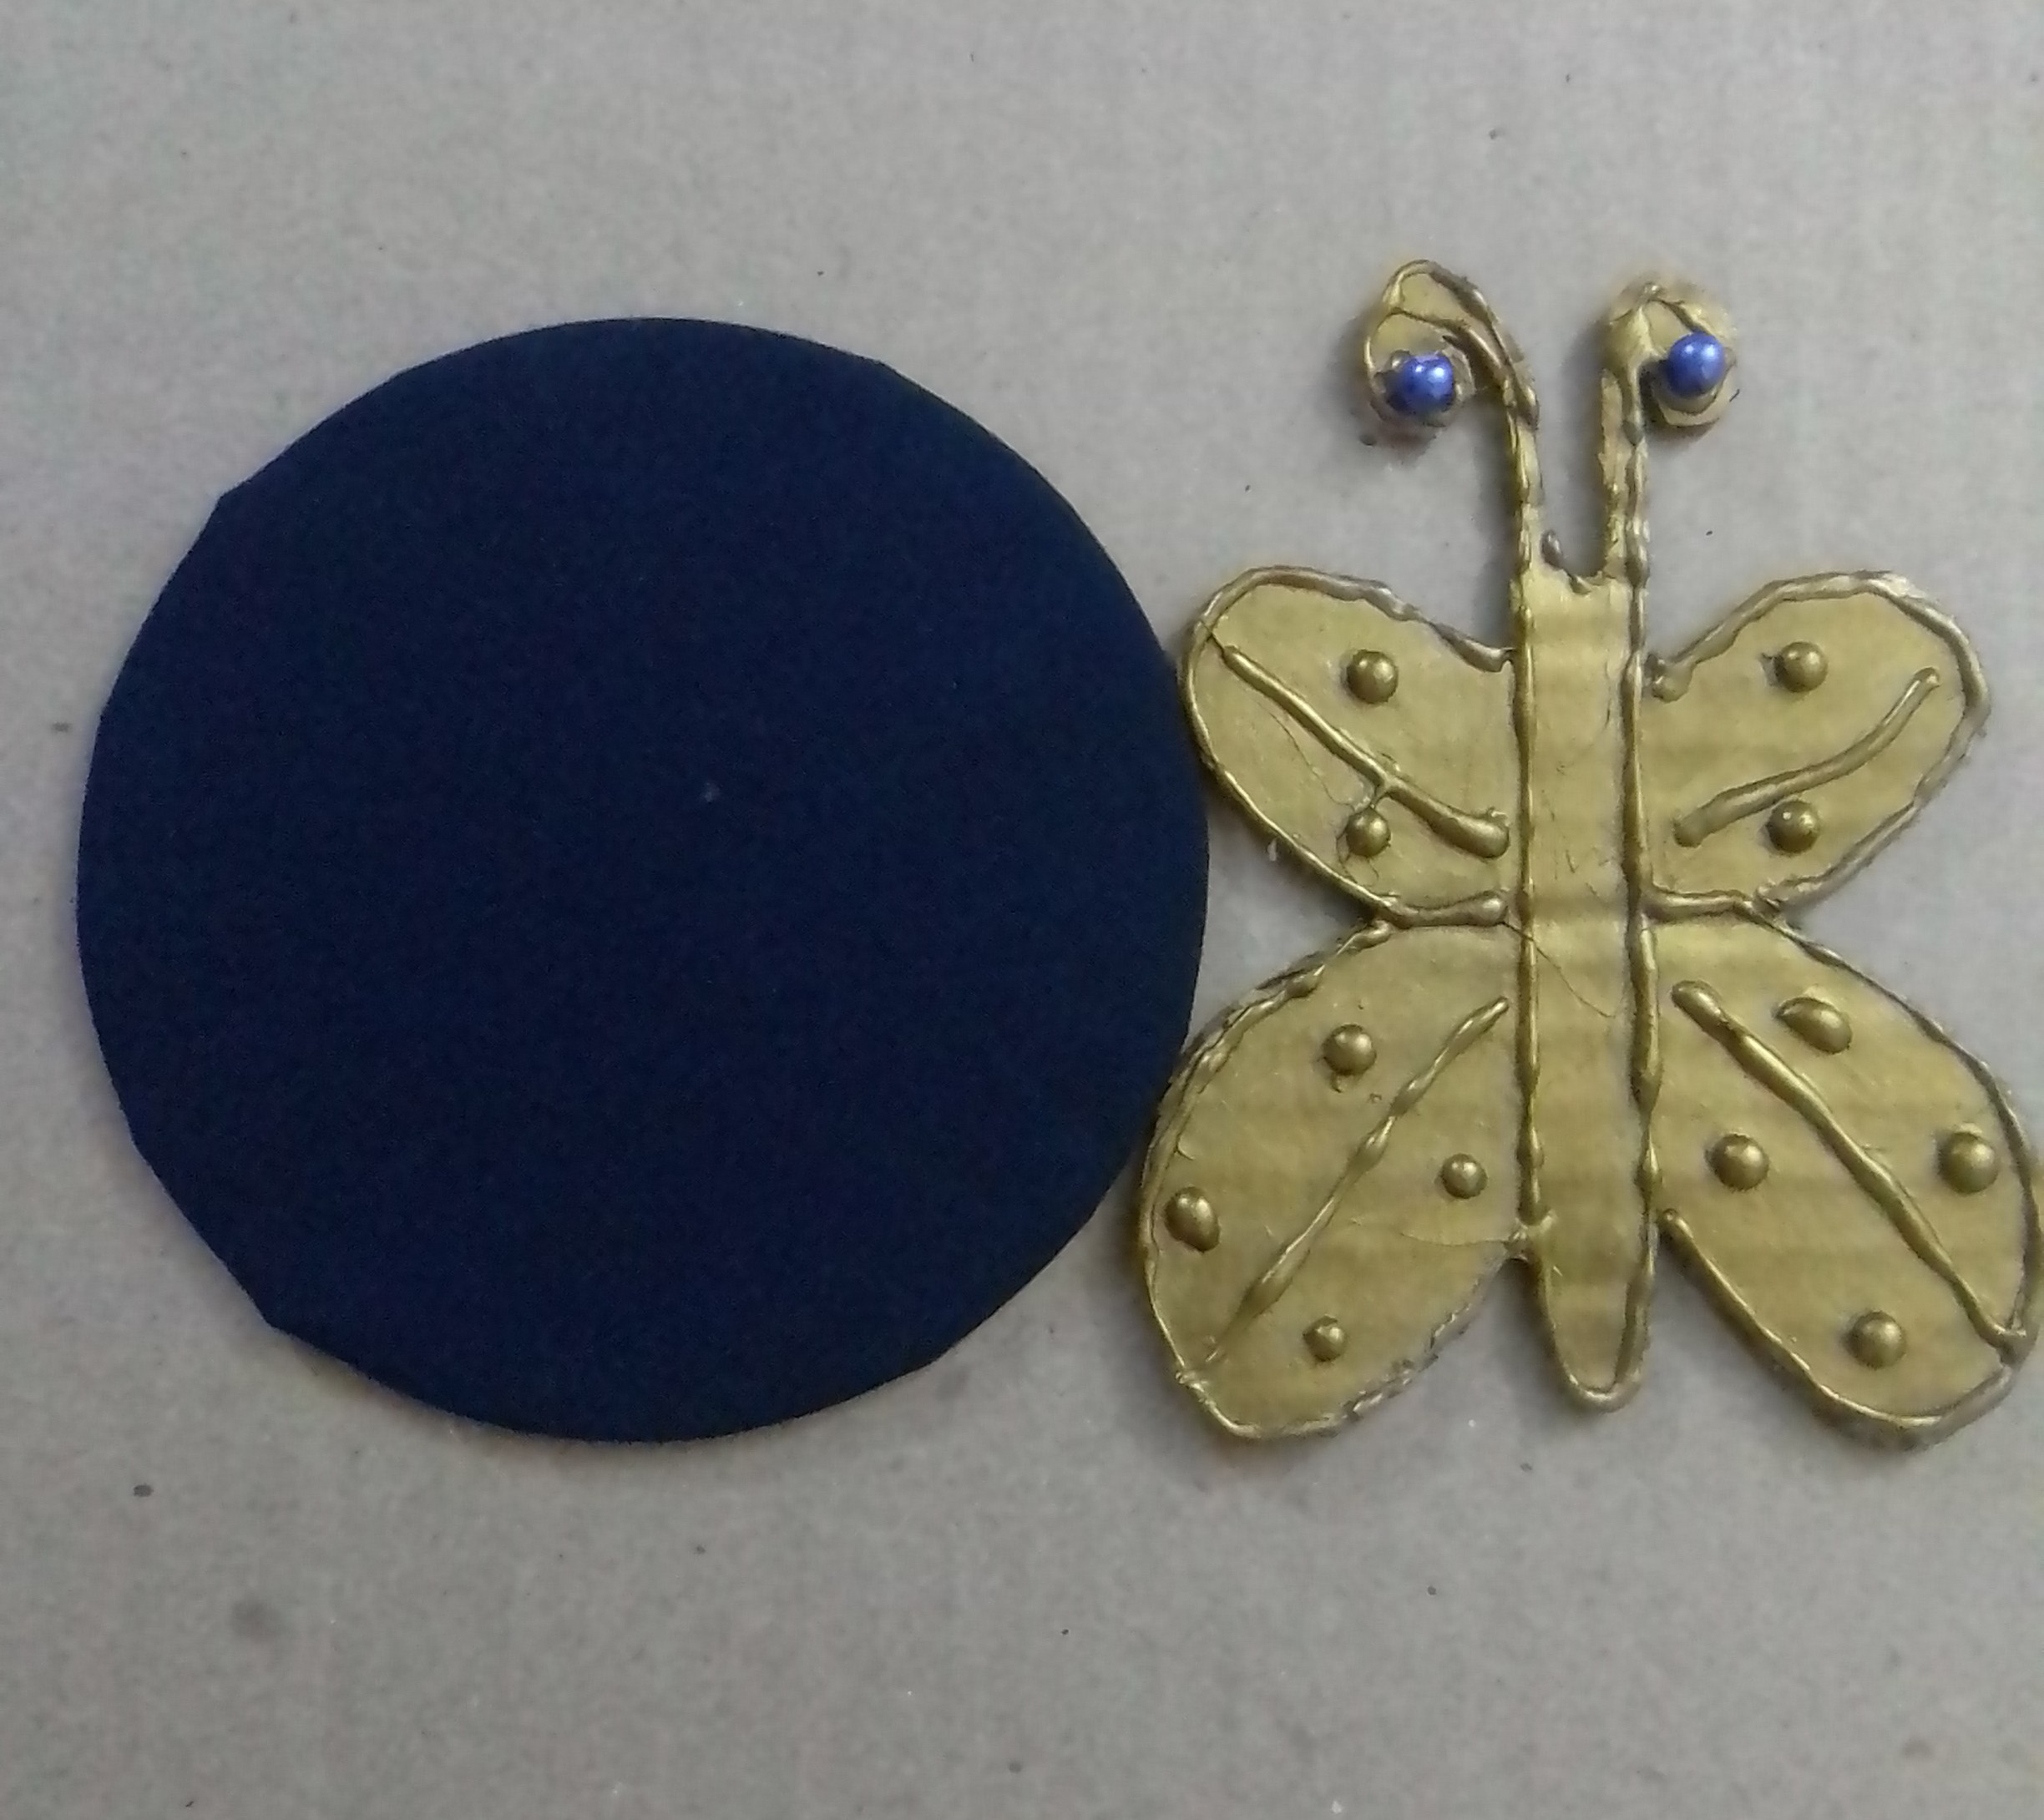
To finish, I attached two purple beads to the butterfly's antennae and glued the butterfly onto the dark base and the contrast is really pretty.
These mini pictures would be ideal for decorating a hallway or corridor, or even used to hang at the entrance to a room. A nice detail made by us and with useful material.
Result
The photos are my property taken exclusively in this project.
The collages of the procedure were made with the tool of my Blue C6 and the main one in Canva
The dividers and the banners were edited by me in Canva
The translation was made with
DeepL Translator

Materiales
✓ Cartón
✓ Pintura dorada
✓ Pincel
✓ Lápiz
✓ Tijera
✓ Pistola y barra de silicona
✓ Papel reciclado
Paso a paso
En estos mini cuadros, podemos plasmar la temática de nuestra preferencia, para realizar este post quise una temática de mariposa. Realice el diseño de una mariposa sencilla, tome en cuenta el tamaño, pues mi idea es que la mariposa, sobresalga unos pocos centímetros de la base redonda. El diseño mide en si parte más ancha 10 centímetros y en su parte más alta 13 centímetros.
Transferí el diseño al cartón, delineado muy bien. Recorte con tijeras, con un cuter es más práctico para cortar. Y luego procedo a calentar muy bien la pistola de silicona, comienzo entonces a colocar silicona caliente alrededor de toda la mariposa, tratando en lo posible de no cortar las líneas, es decir es importante una continuidad en la línea de silicona y que está nos quede en lo posible del mismo grosor. Al realizar todo alrededor, continuamos con el delineado interno y para hacer los puntos y evitar que nos queden los hilos de silicona, ponemos el punto y con un palito cortamos el hilo antes de retirar la pistola.
Con la figura ya delineada con silicona, ahora pinto con pintura dorada, use pintura al frío, otra también da igual resultado. Está seca rápidamente ya se ve el lindo aspecto que toma.
Para la base del cuadro, utilizo un CD, tome la medida de la tela azul oscuro y corte unos 2 centímetros más, luego cubrí el CD con la tela y la pegue con silicona caliente, con la misma tela le hice la cinta de colgar.
Para finalizar, fijé dos cuentas de color violeta en las antenas de la mariposa y pegue la mariposa sobre la base oscura y el contraste es realmente muy bonito.
Estos mini cuadros serían ideales para la decoración de un pasillo o corredor, o incluso utilizarlos para colgar en la entrada de una habitación. Un bonito detalle hecho por nosotros y con material de provecho.
Resultado
Las fotos son de mi propiedad tomadas exclusivamente en este proyecto.
Los collages del procedimiento los hice con la herramienta de mi Blue C6 y el principal en Canva
Lo separadores y el banners fueron editados por mi en Canva
La traducción fue realizada con
DeepL Traductor
Creo que varios de estos se verían bien en la pared,quedó muy lindo.
Gracias por compartir 👍
Thank you for sharing this amazing post on HIVE!
Your content got selected by our fellow curator @hafizullah & you just received a little thank you via an upvote from our non-profit curation initiative!
You will be featured in one of our recurring curation compilations and on our pinterest boards! Both are aiming to offer you a stage to widen your audience within and outside of the DIY scene of hive.
Join the official DIYHub community on HIVE and show us more of your amazing work and feel free to connect with us and other DIYers via our discord server: https://discord.gg/mY5uCfQ !
If you want to support our goal to motivate other DIY/art/music/homesteading/... creators just delegate to us and earn 100% of your curation rewards!
Stay creative & hive on!
Me gusta, la forma de la mariposa es sencilla y el color que utilizaste la hace ver elegante.
Me recuerda mucho a esos cuadros de arte que se ven en la pared de las casas, es una hermosa creación.