

Materials
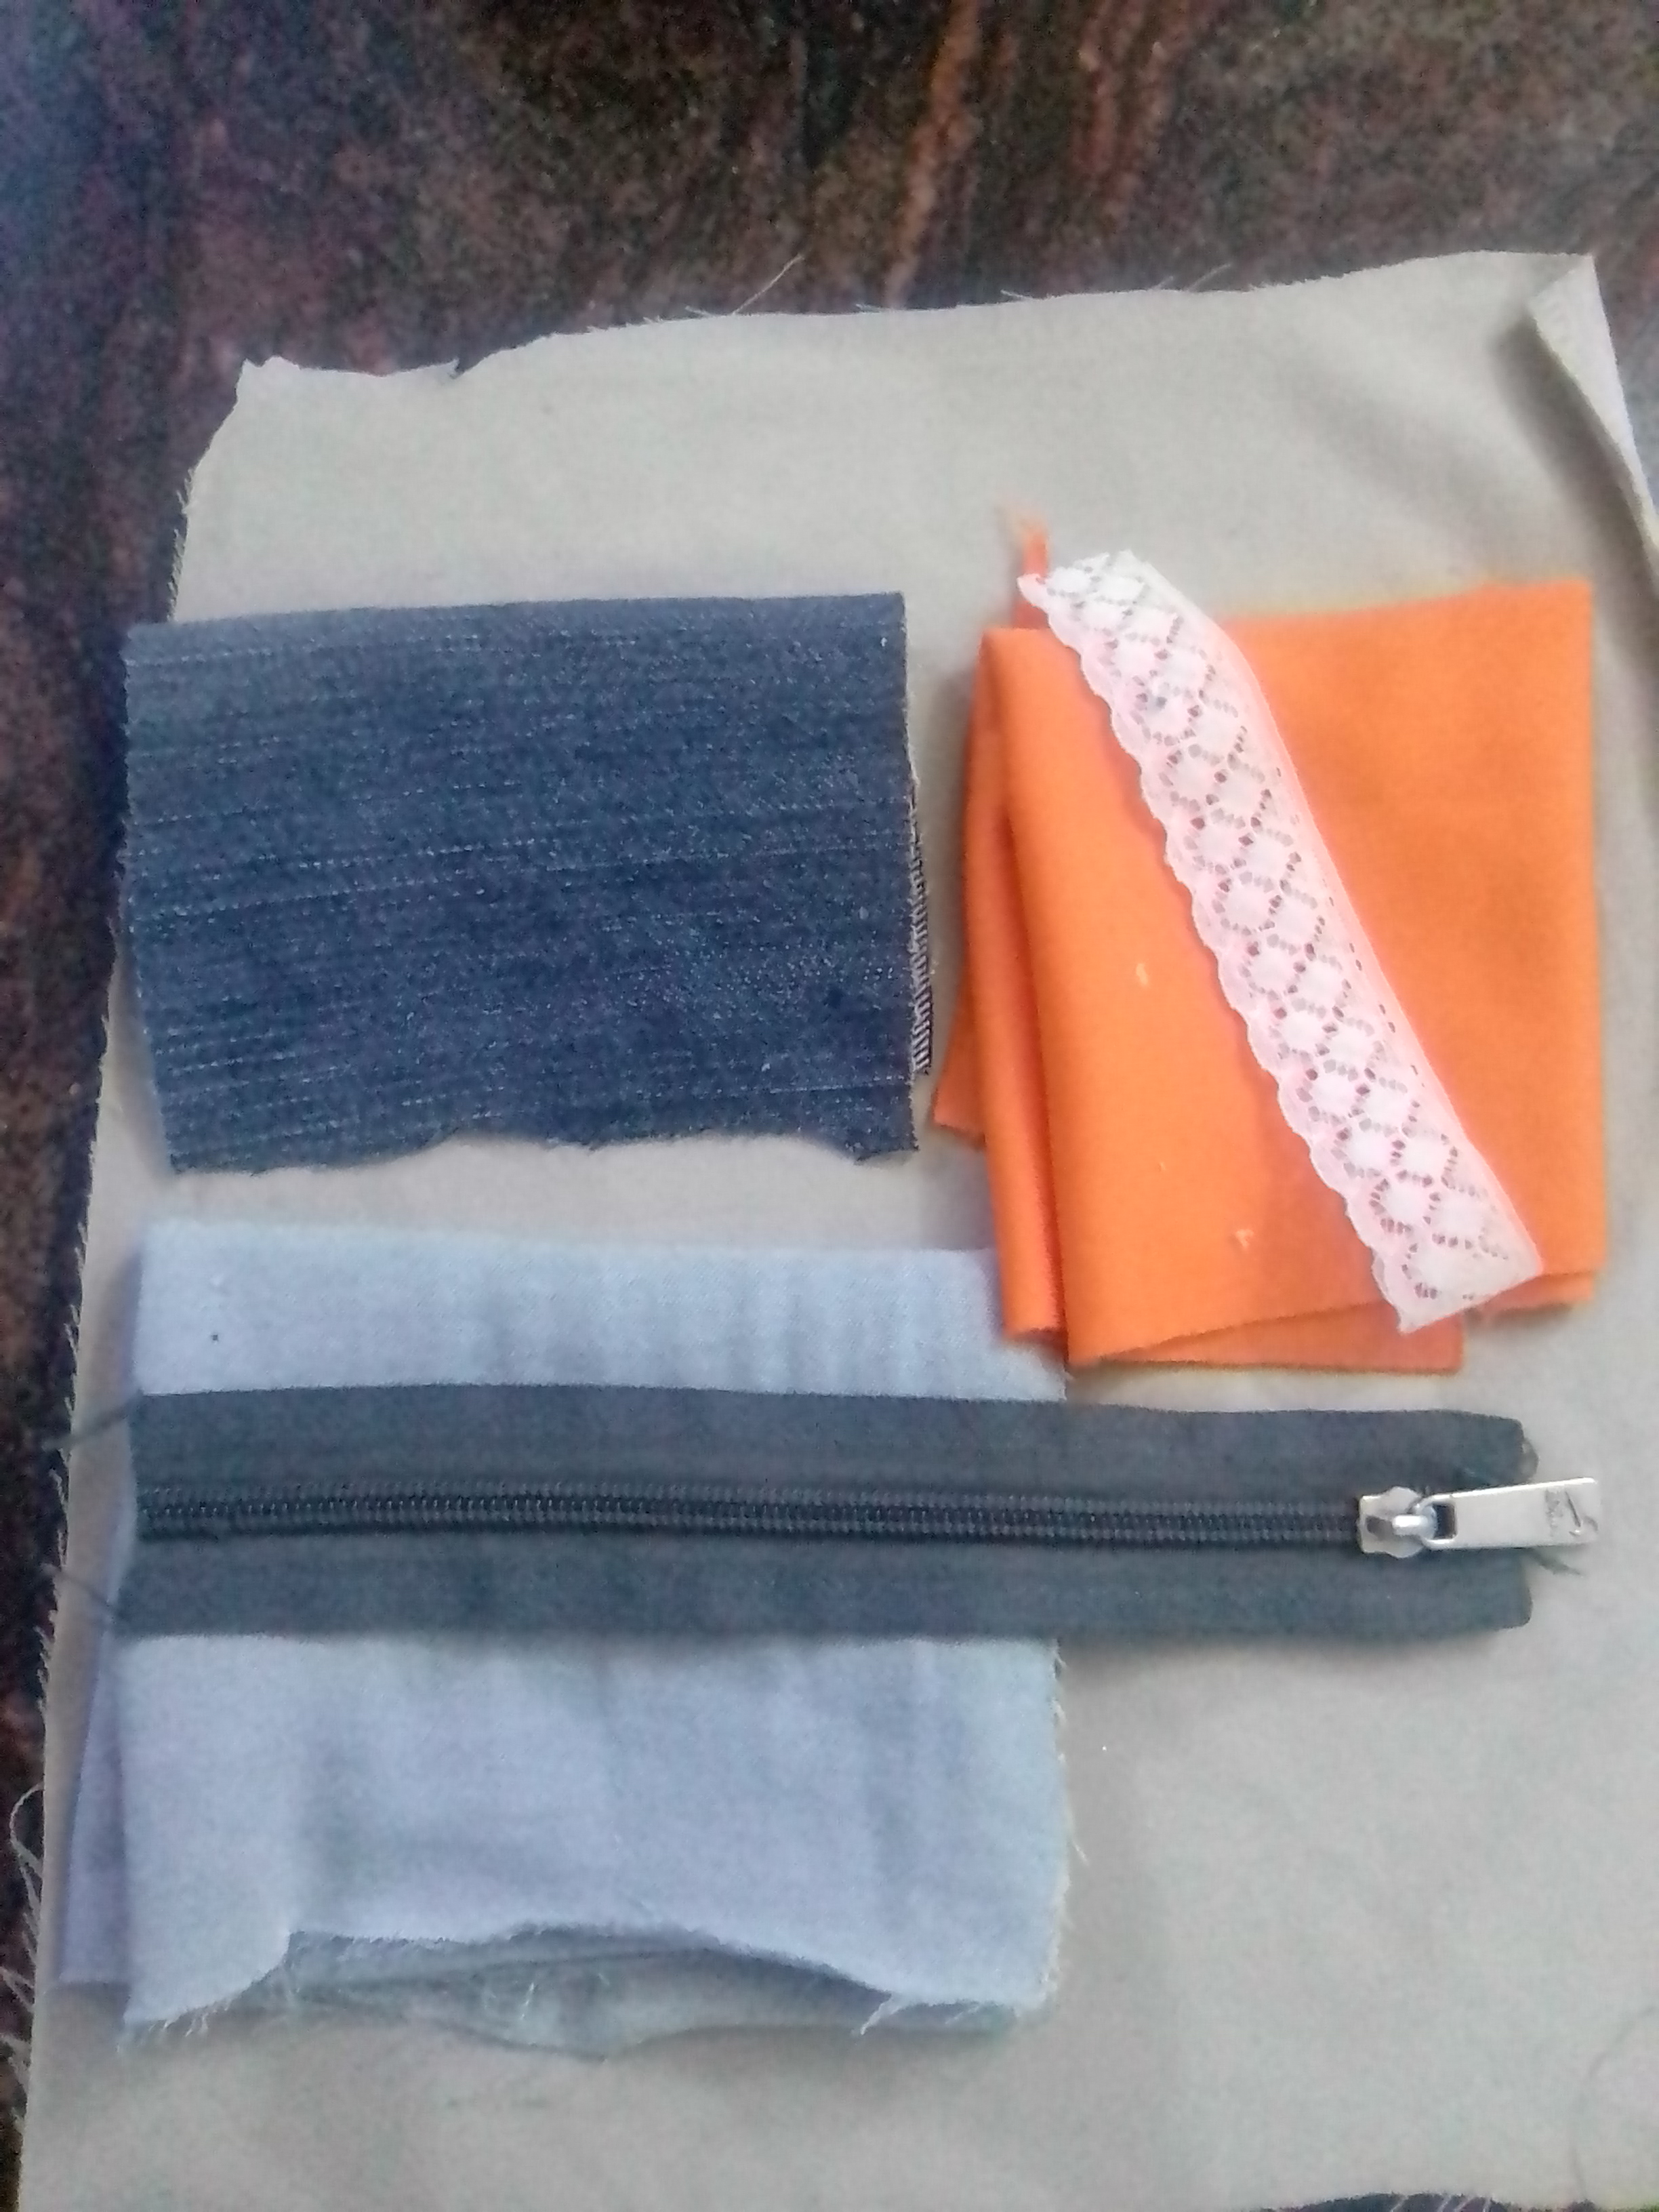
✓ 20 cm closure
✓ Scraps of dark blue and light blue jeans fabric
✓ Scraps of orange fabric
✓ Printed fabric scraps
✓ Thread and needle
✓ Tape measure
✓ Scissor
Step by Step
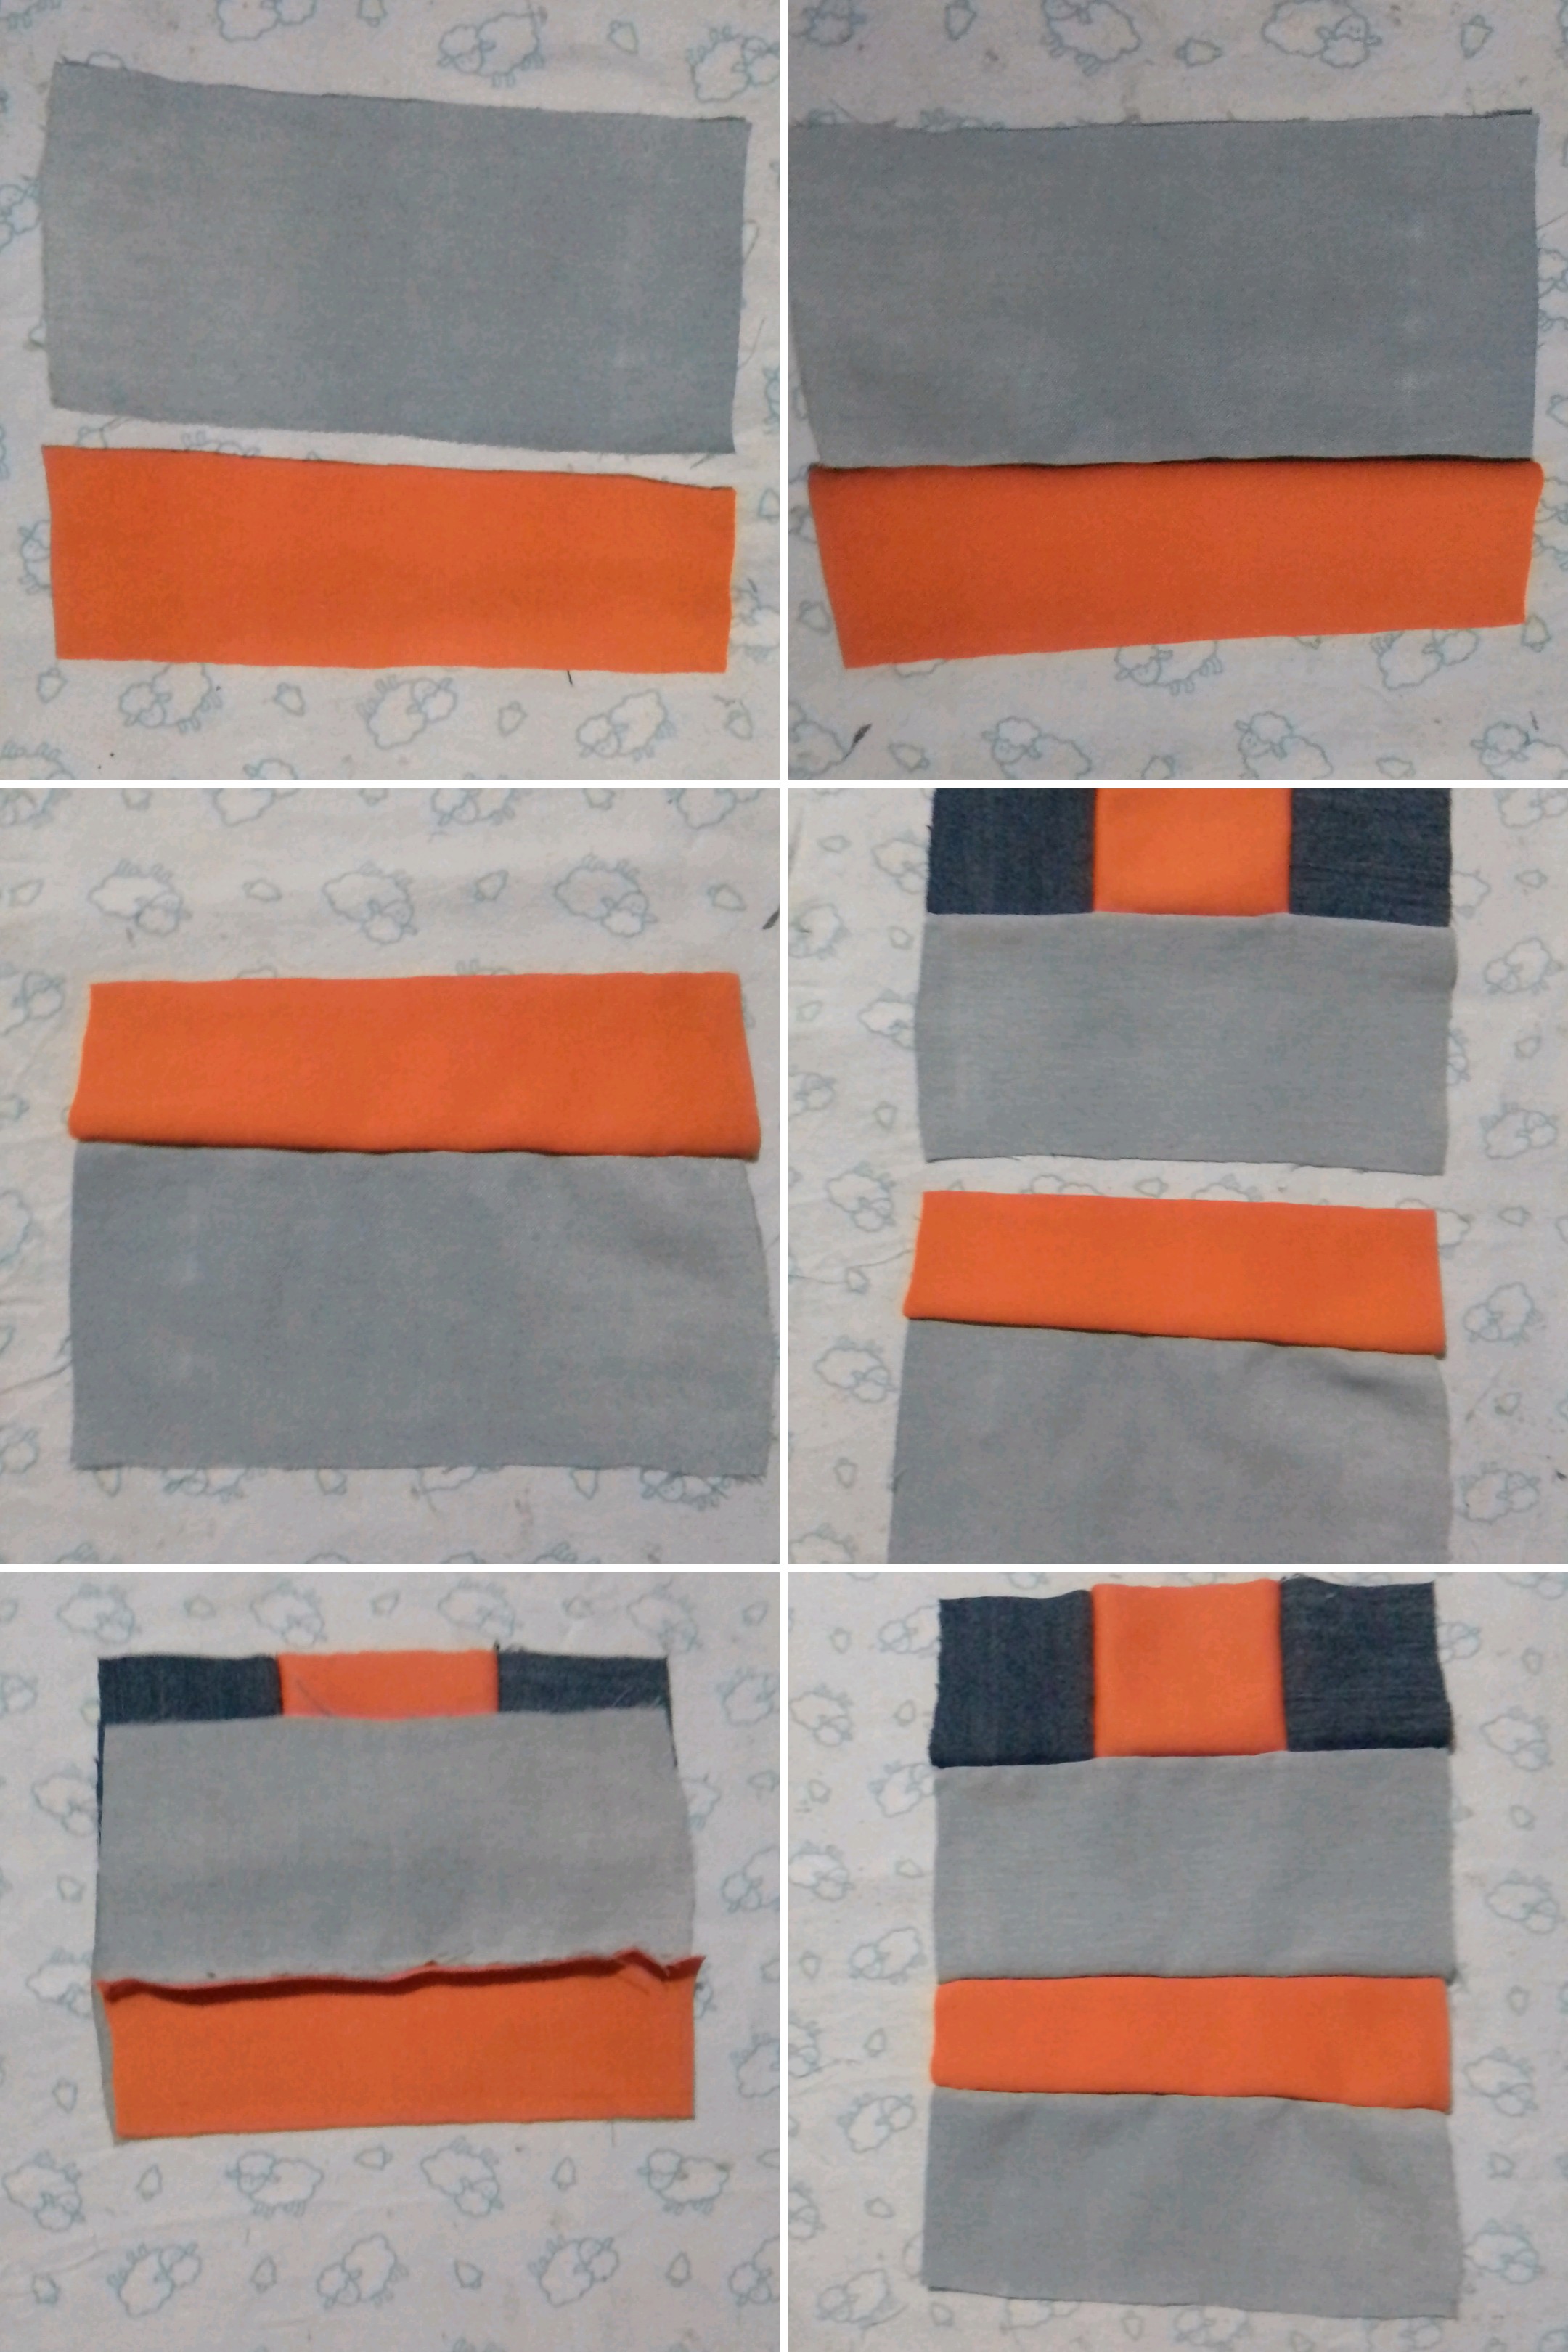
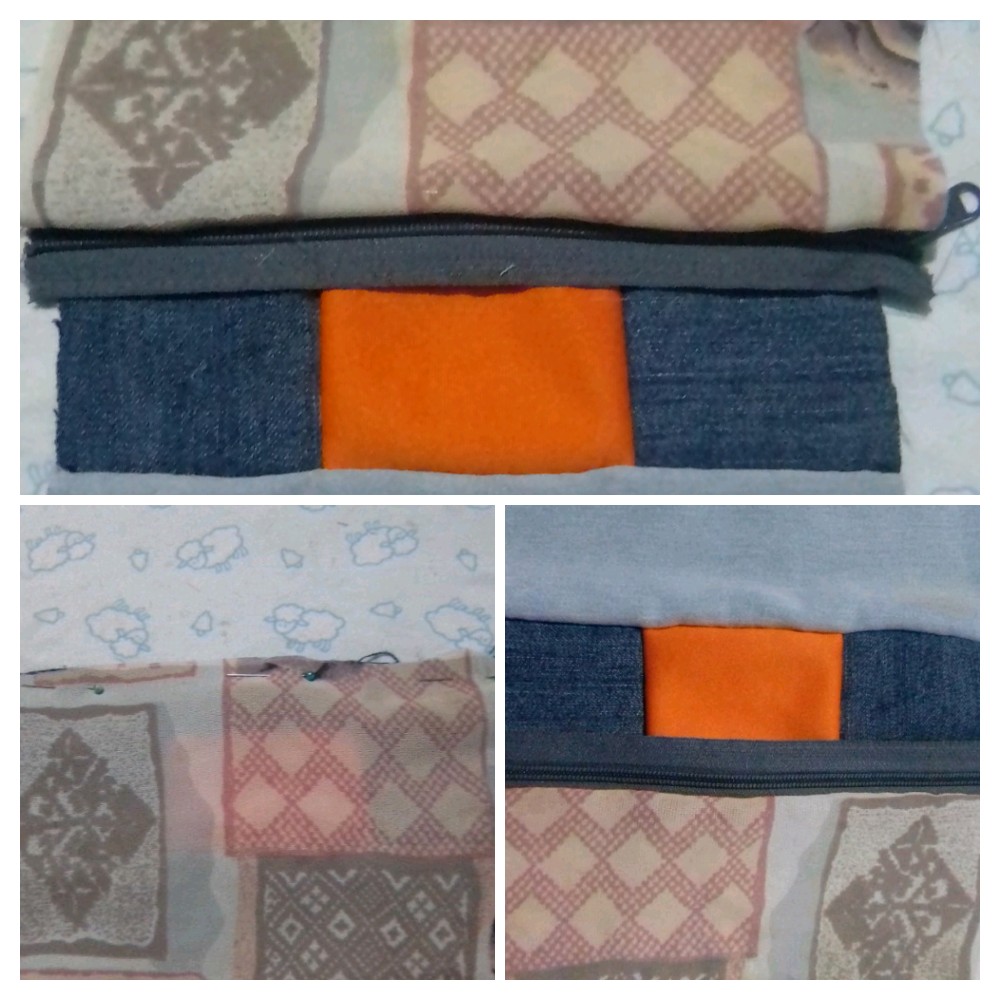
Jeans fabric is very versatile, so I decided to use it in this school bag. For the front, cut 2 squares of dark jean 7x7 centimeters, and 1 rectangle of orange 9x7 centimeters, for the bottom, a piece of light blue jean 20x10 centimeters. It is important to point out that, for all the measurements, I have already considered the centimeter of seam.

Sew by hand, to form a single piece, joining the dark squares on each side of the orange fabric rectangle. This piece is ready, so I sewed the rectangle of light fabric to form the front of the holster.
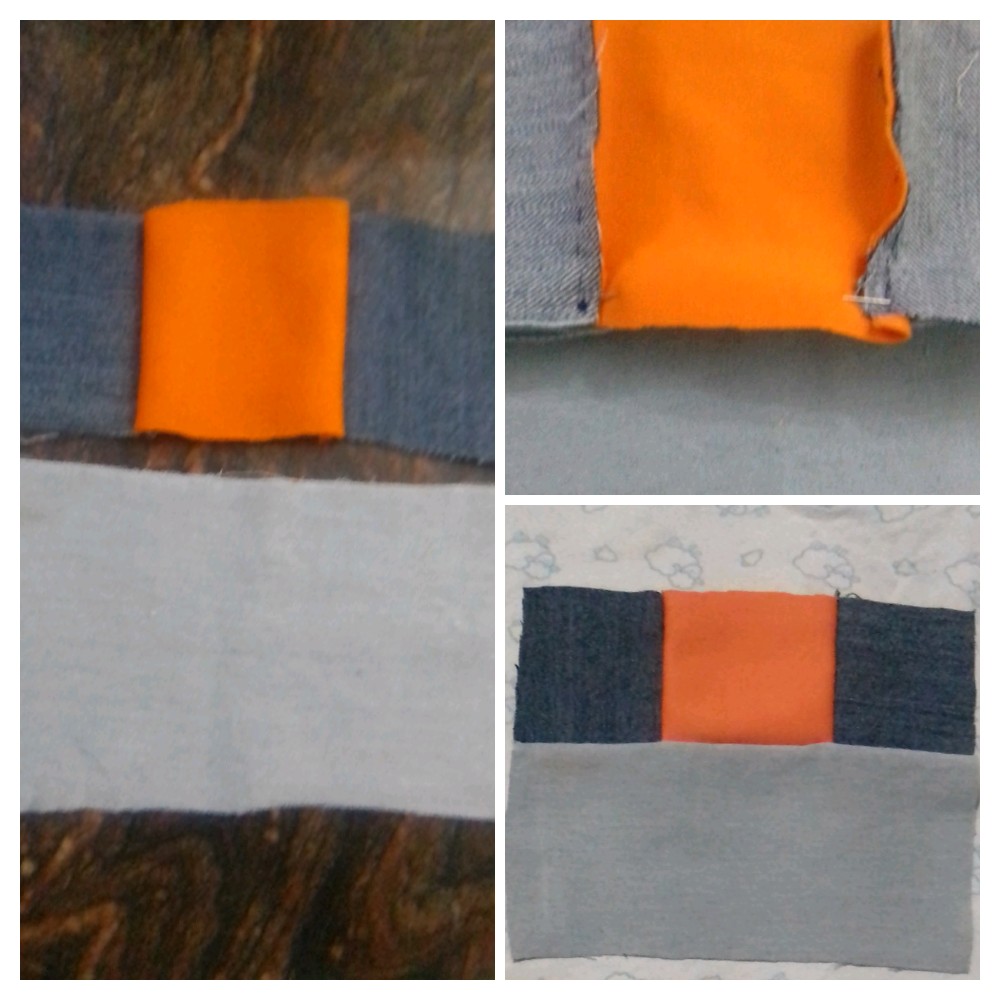
For the back I cut a piece of orange fabric 20x6 cm and a piece of light blue jeans 8x20 cm, I sewed them by hand and then attached it to the front. Thus obtaining a unique piece.
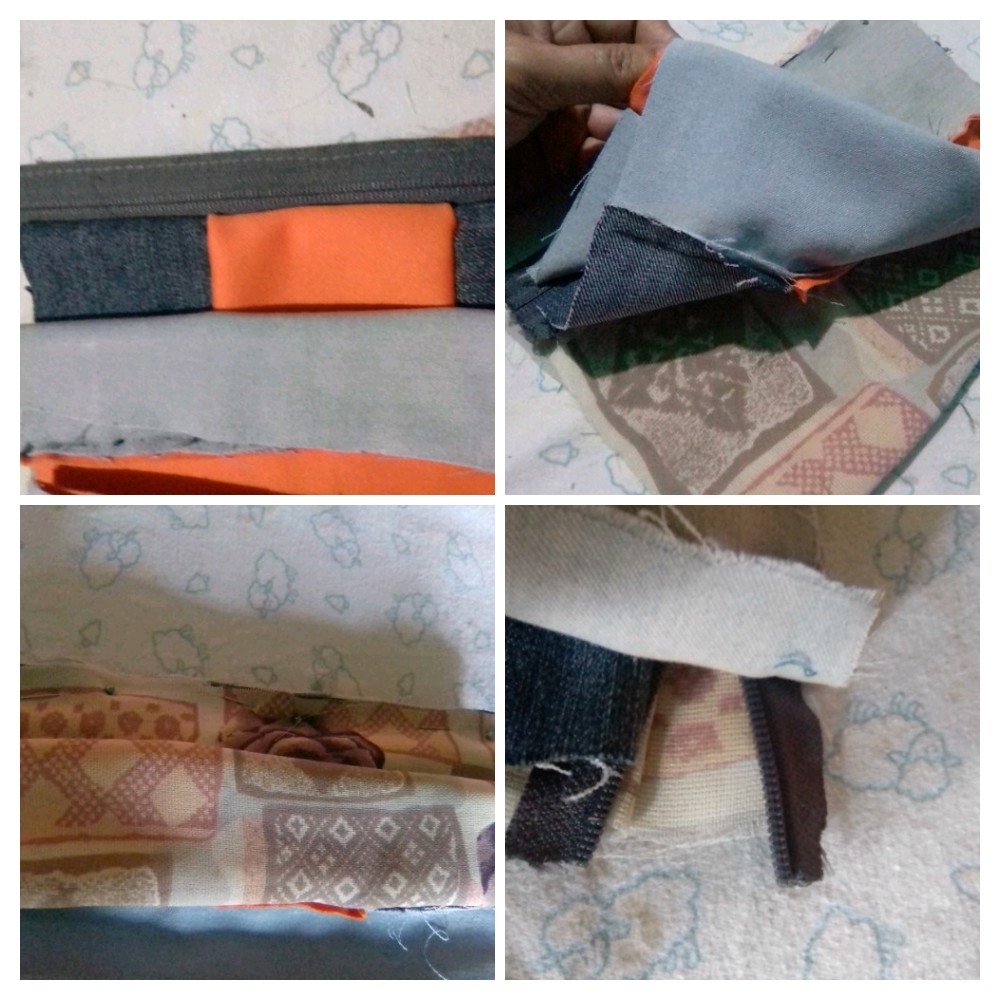
I extend the single piece of the holster, and with the printed fabric I take the measurement for the lining. I cut the piece of the lining and thus I have the internal and external pieces of the holster. I take advantage and cut a strip of orange color of 7x3 cm I sew it and this will be the pendant of the holster.

It's time to assemble the holster, sew the zipper and the lining. For friends who are already experts at sewing closures, this is very simple, but for me it is still a bit complicated, but I don't stop, if it doesn't work out the first time, I correct it and continue. This step is two simultaneous moments, I extend the fabric on the right side of the outer fabric, I place the zipper on the wrong side, so that the upper end is dotted with that of the outer fabric and that is when I place the fabric of the lining with the wrong side facing up. I fix with some pins and proceed to sew by hand.
To sew the other end of the zipper, I place the fabric in the same position, but I fold each one to each side of the zipper side, the fabrics take the shape of a bag and I fix with pins, I open the zipper and sew this part of the zipper. closing.
I keep the holster as it was, I fold it in half, I place the half-folded handle 2.5 centimeters from the closure and
towards the inside, I fix the sides and the handle with pins to then sew, I cut the excess of the closure and finish off well at each end with a needle and thread.
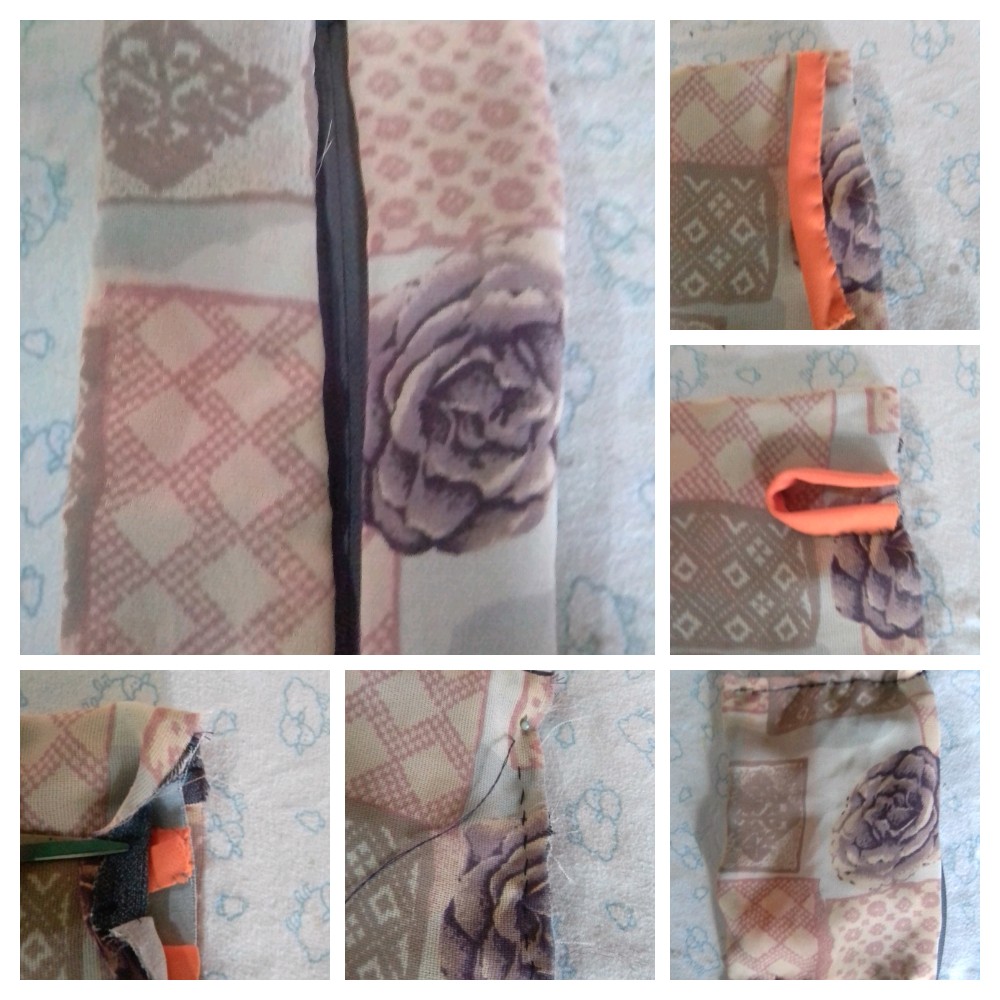
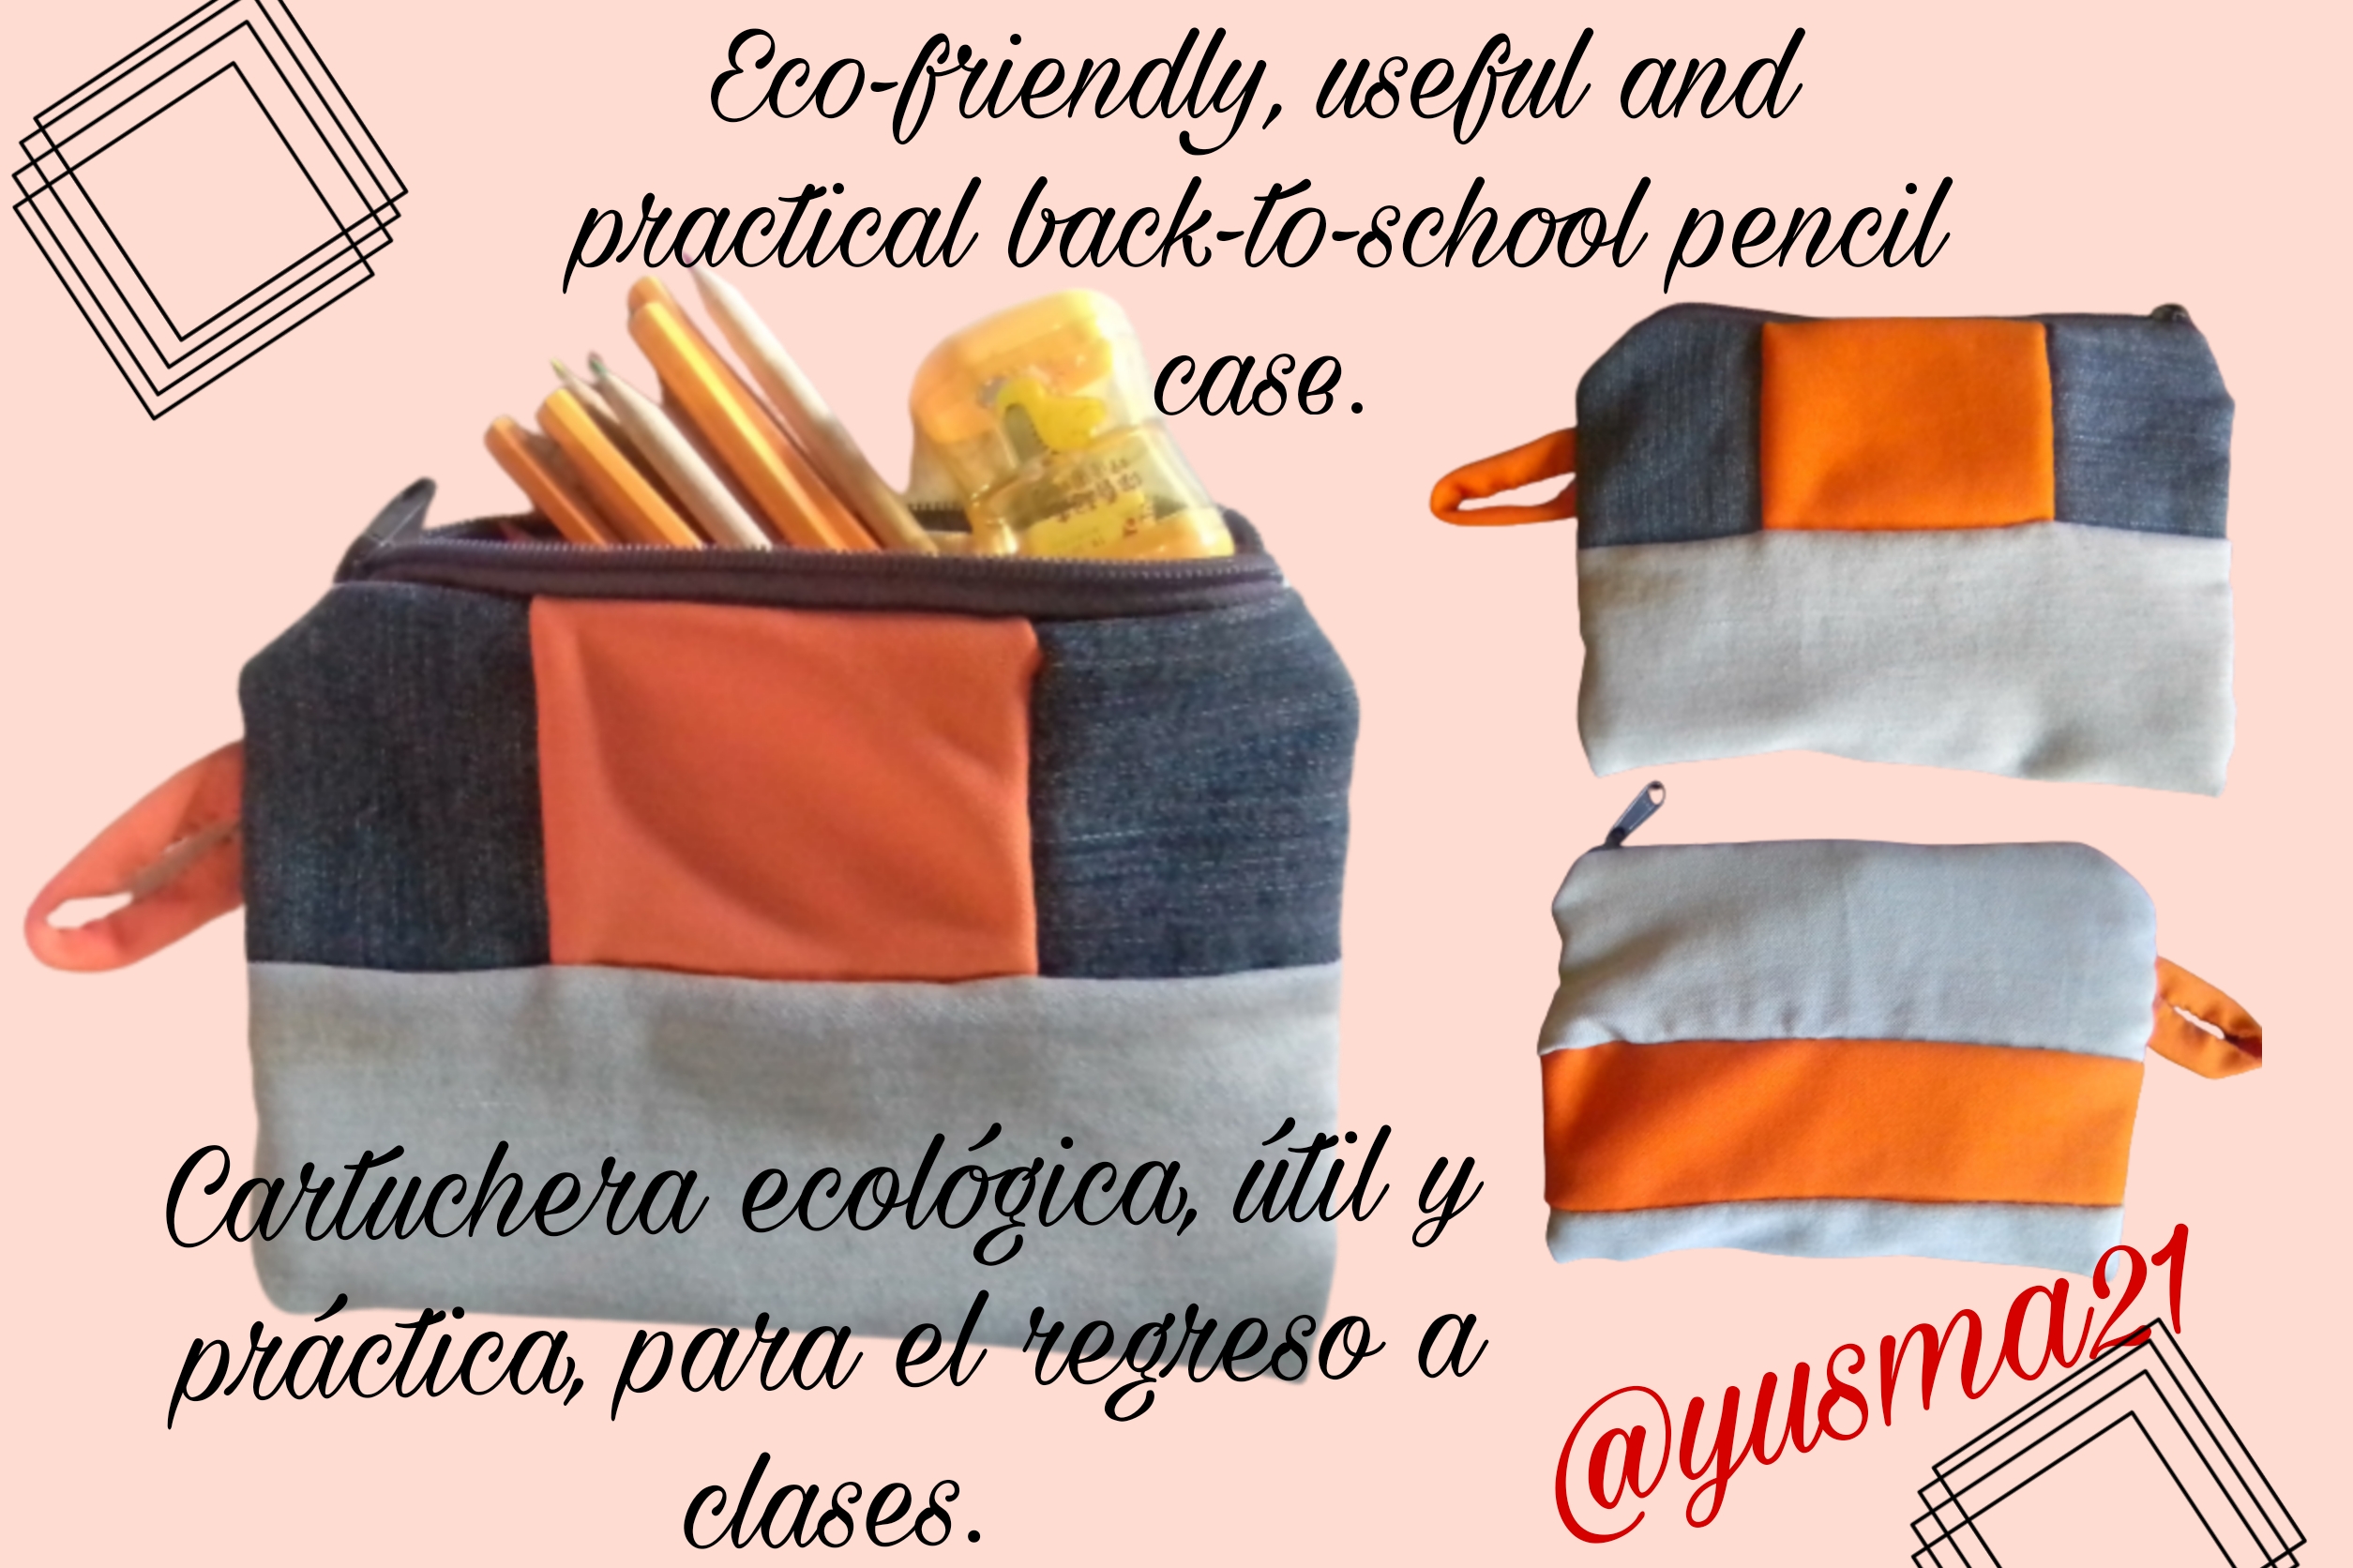
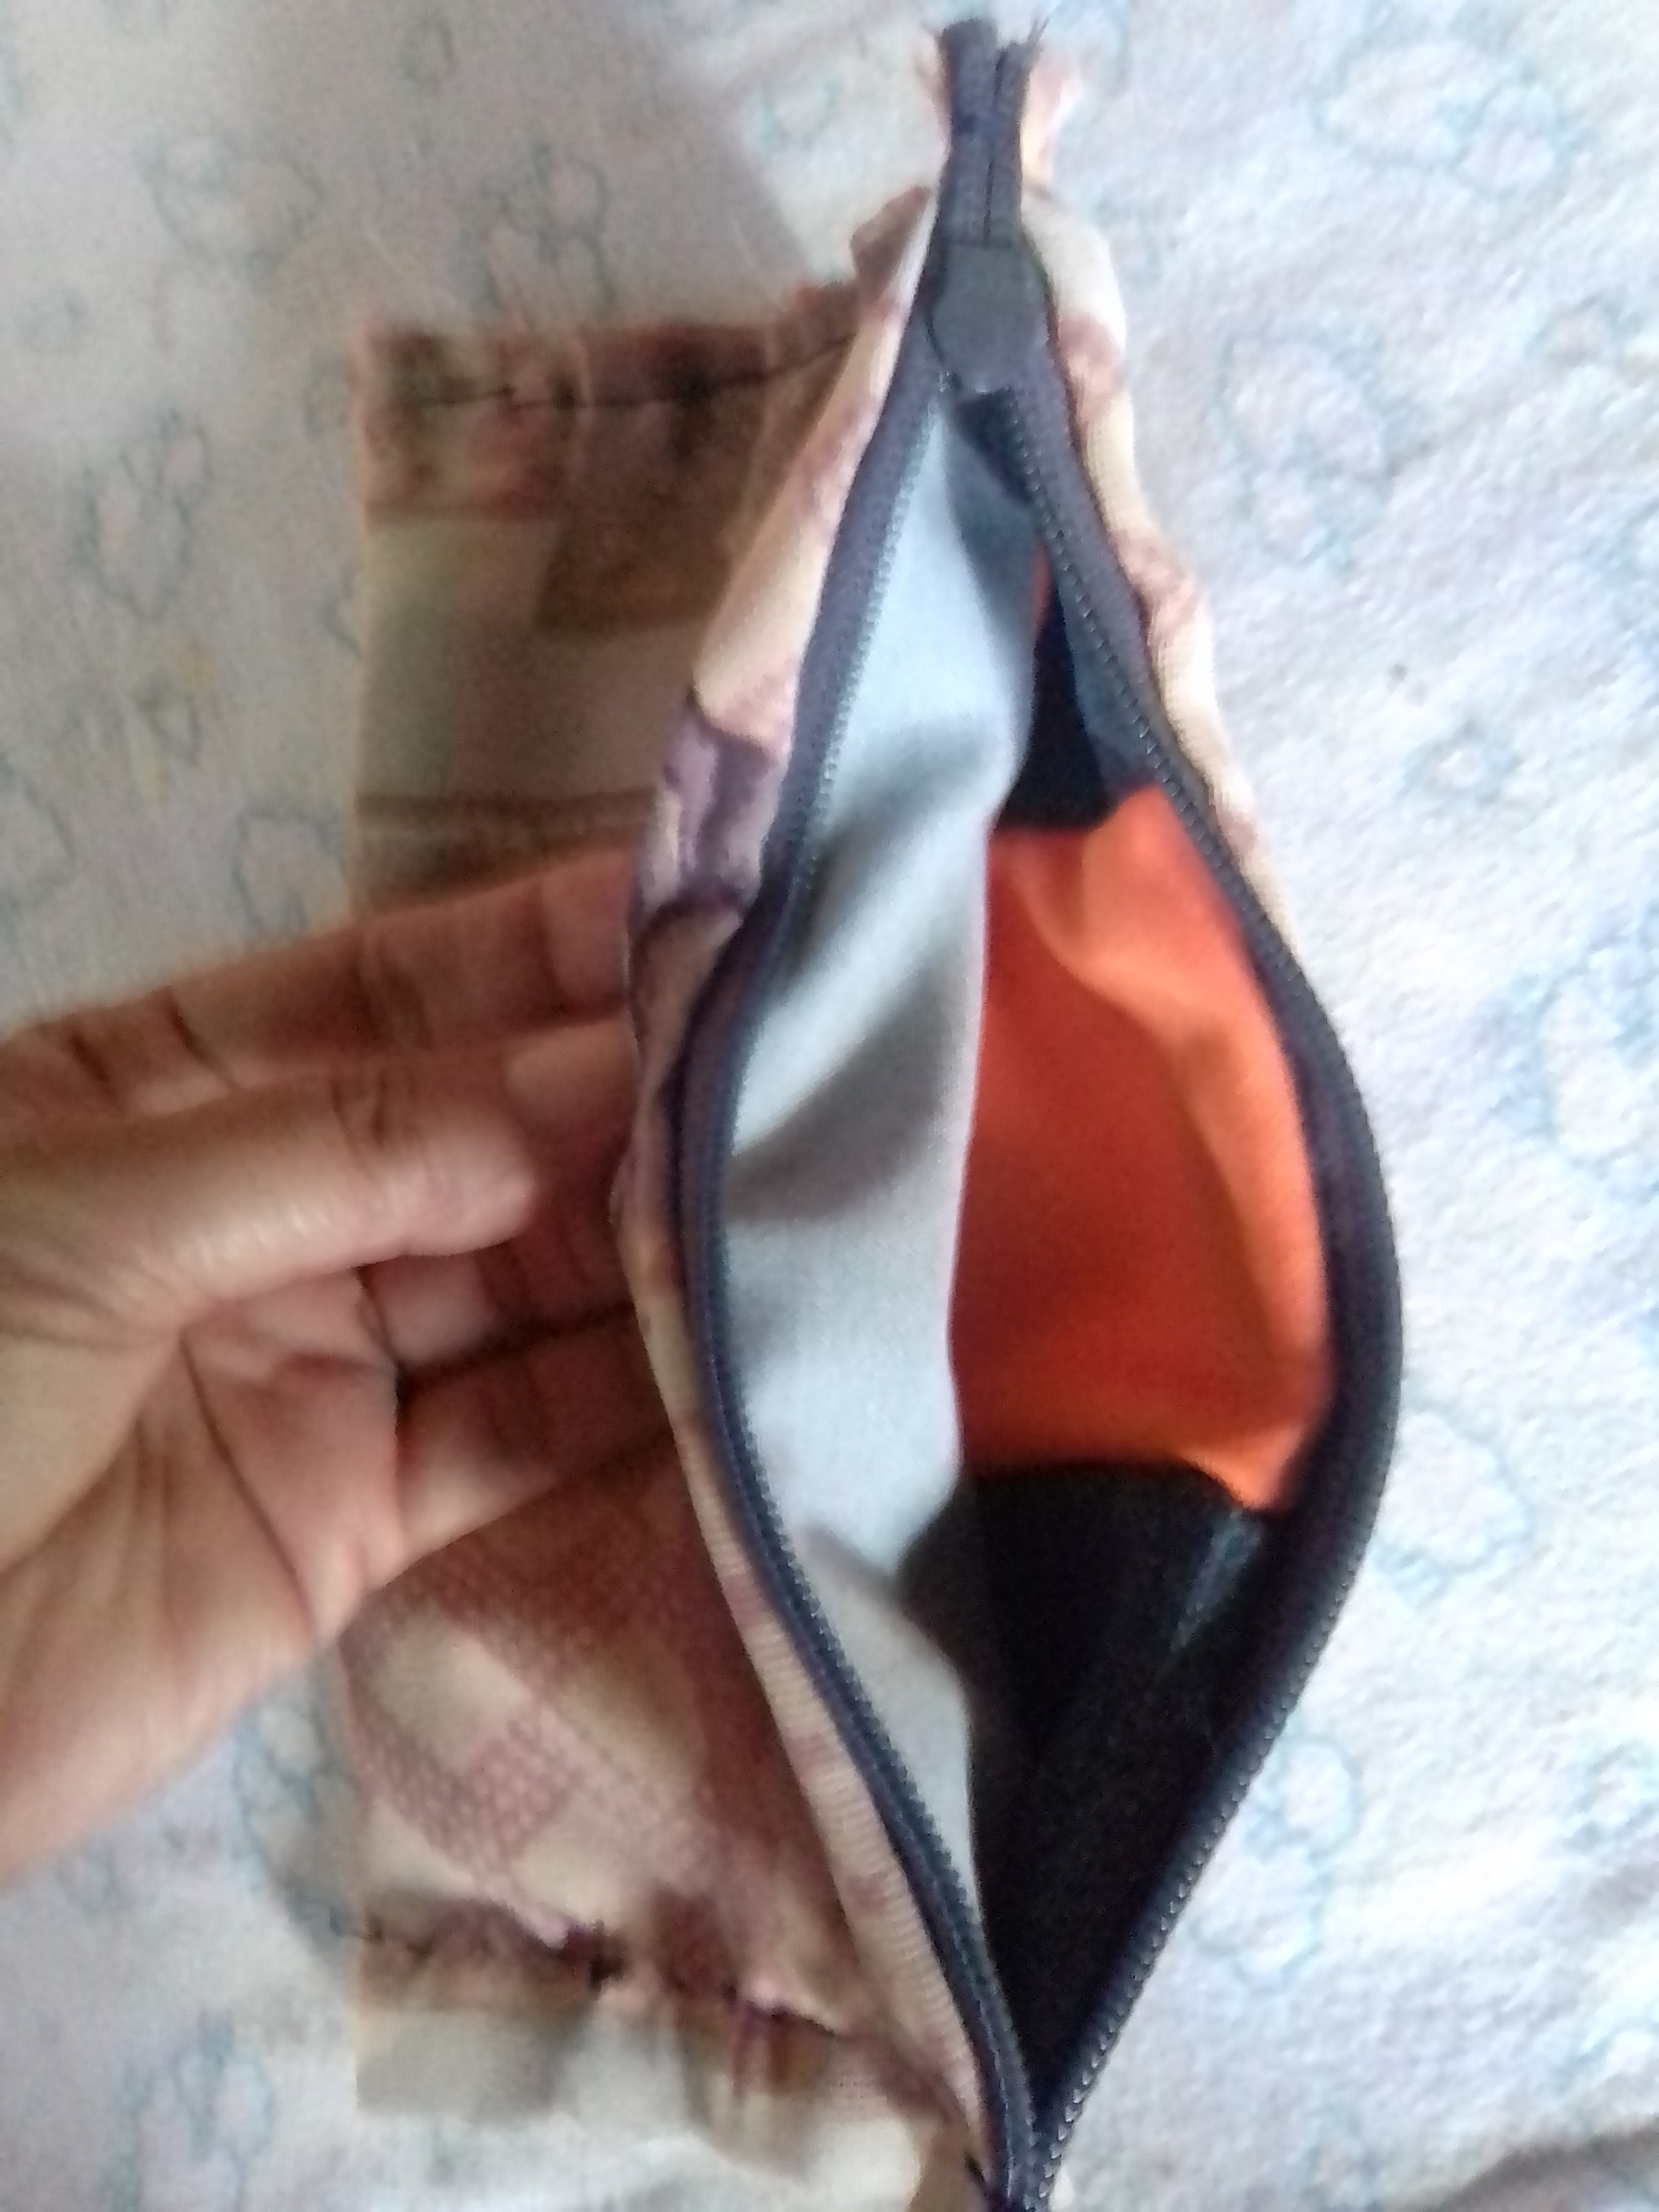
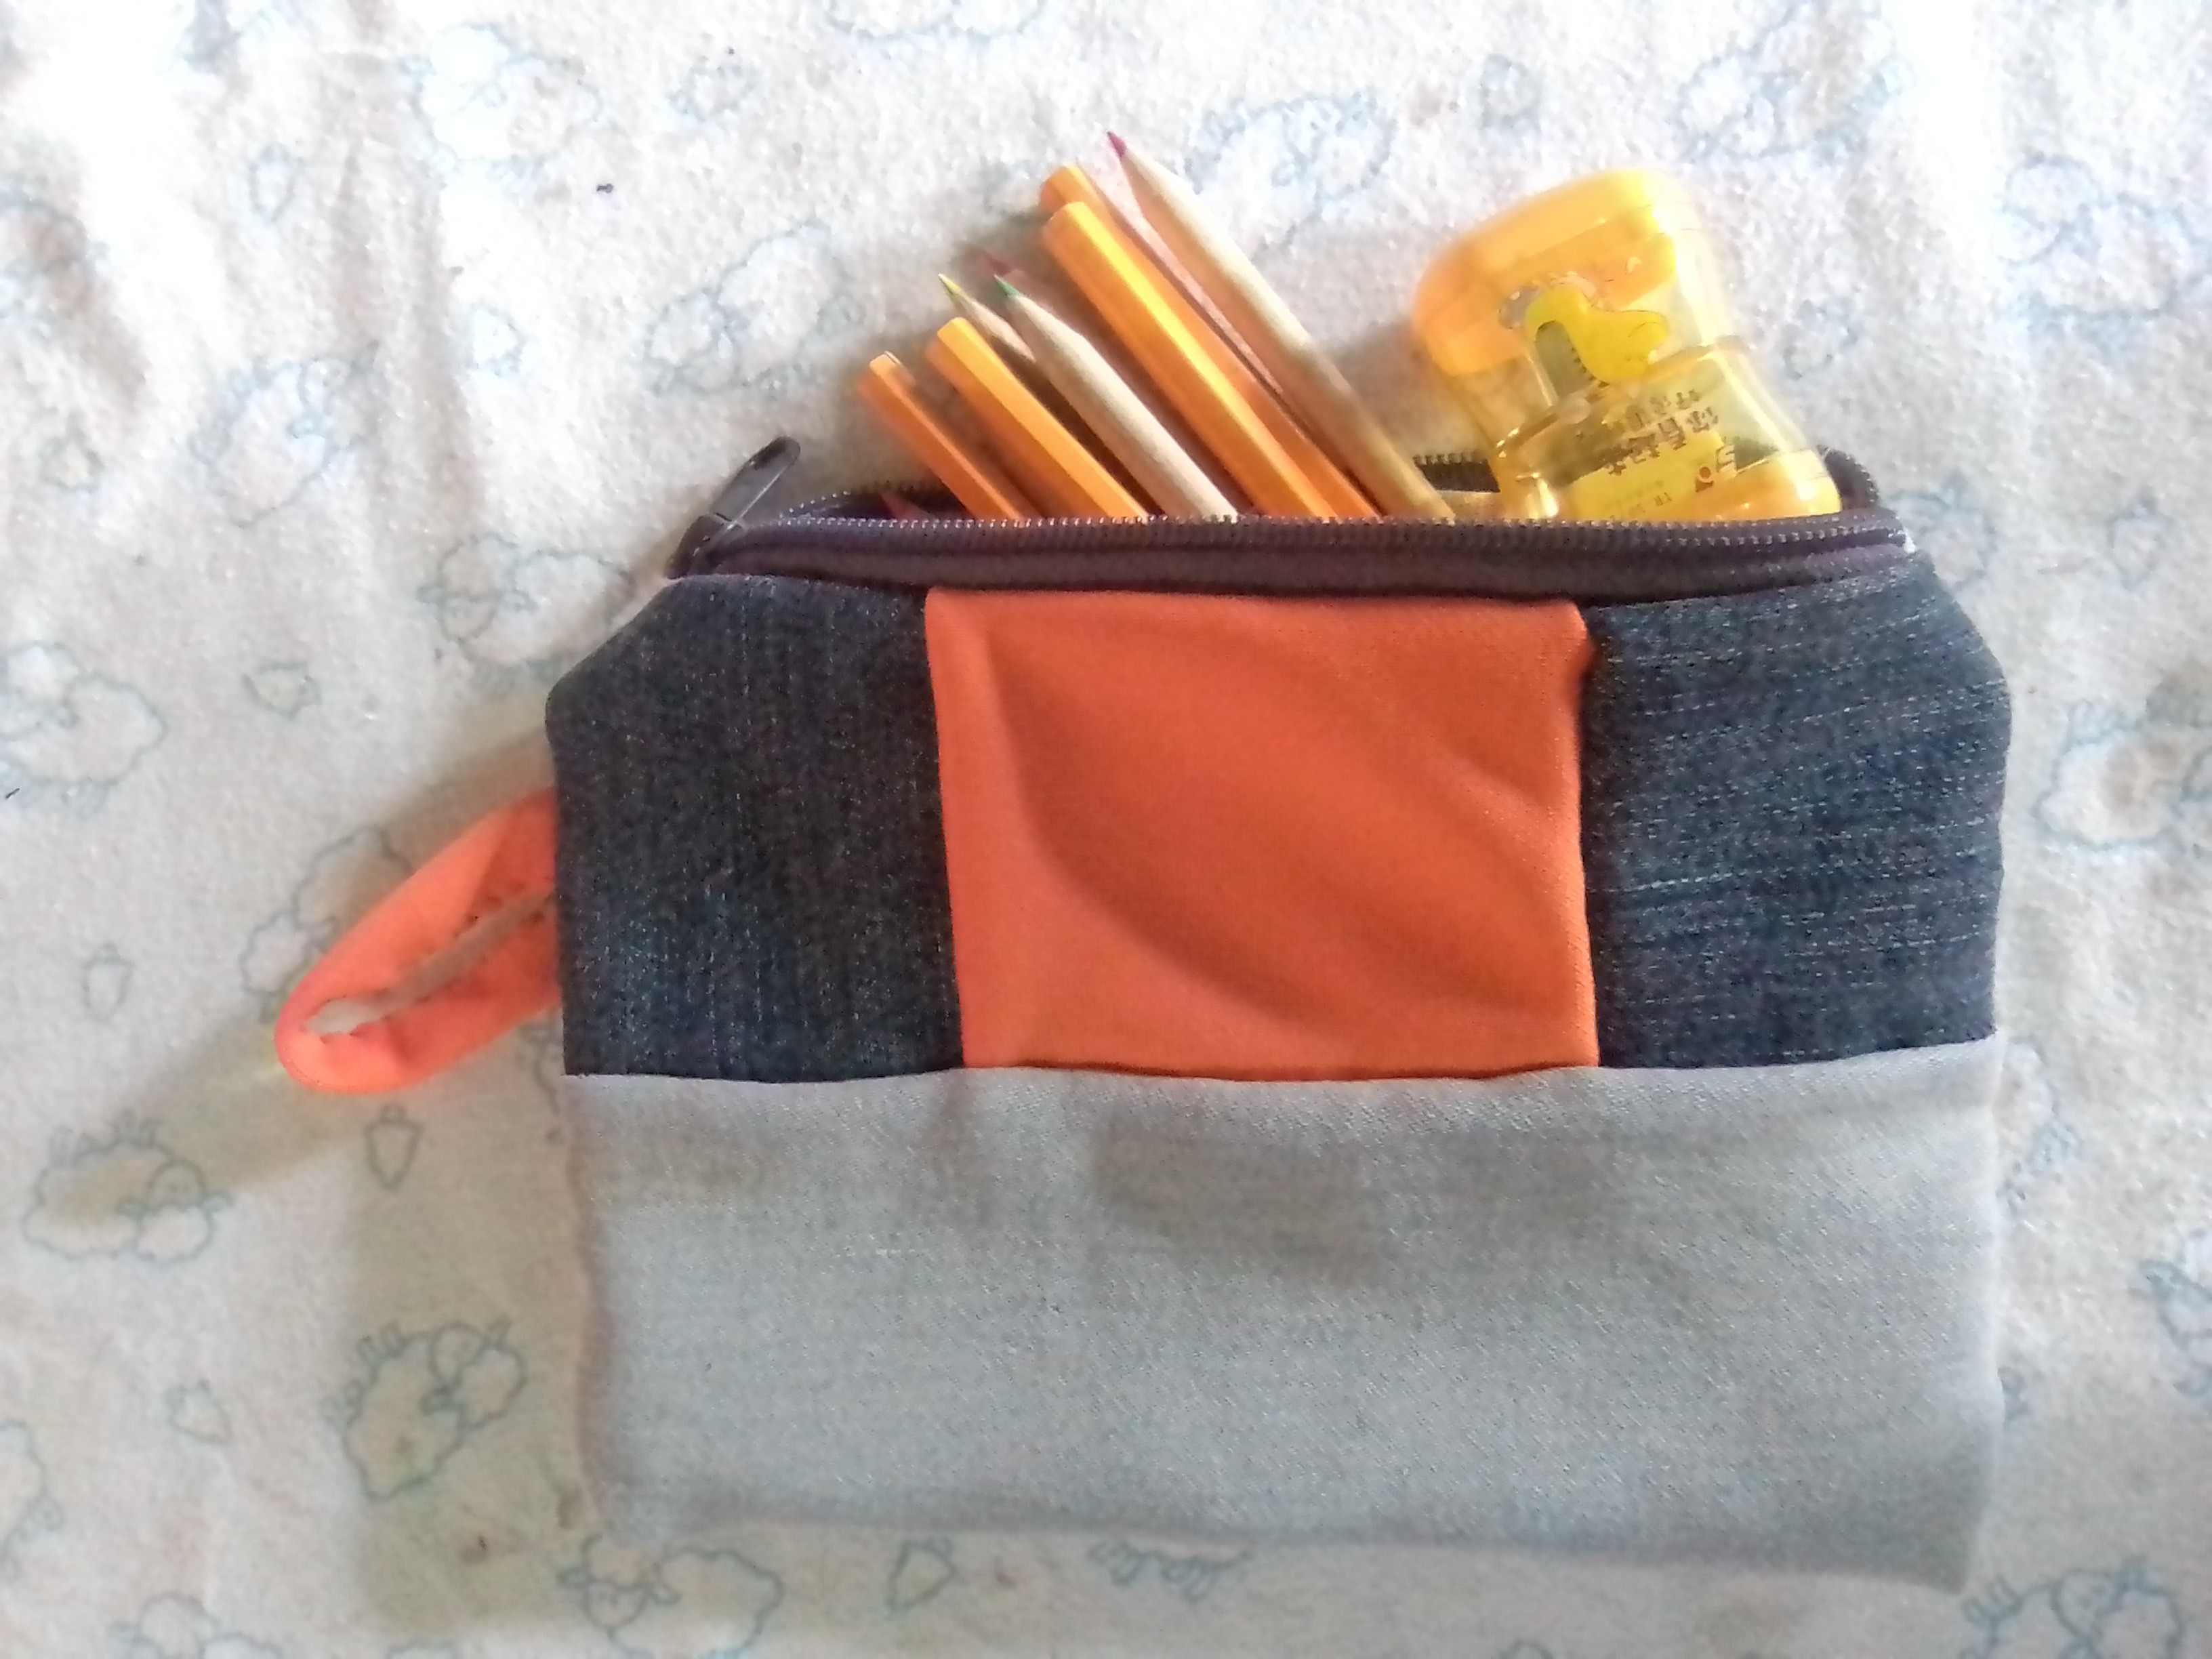
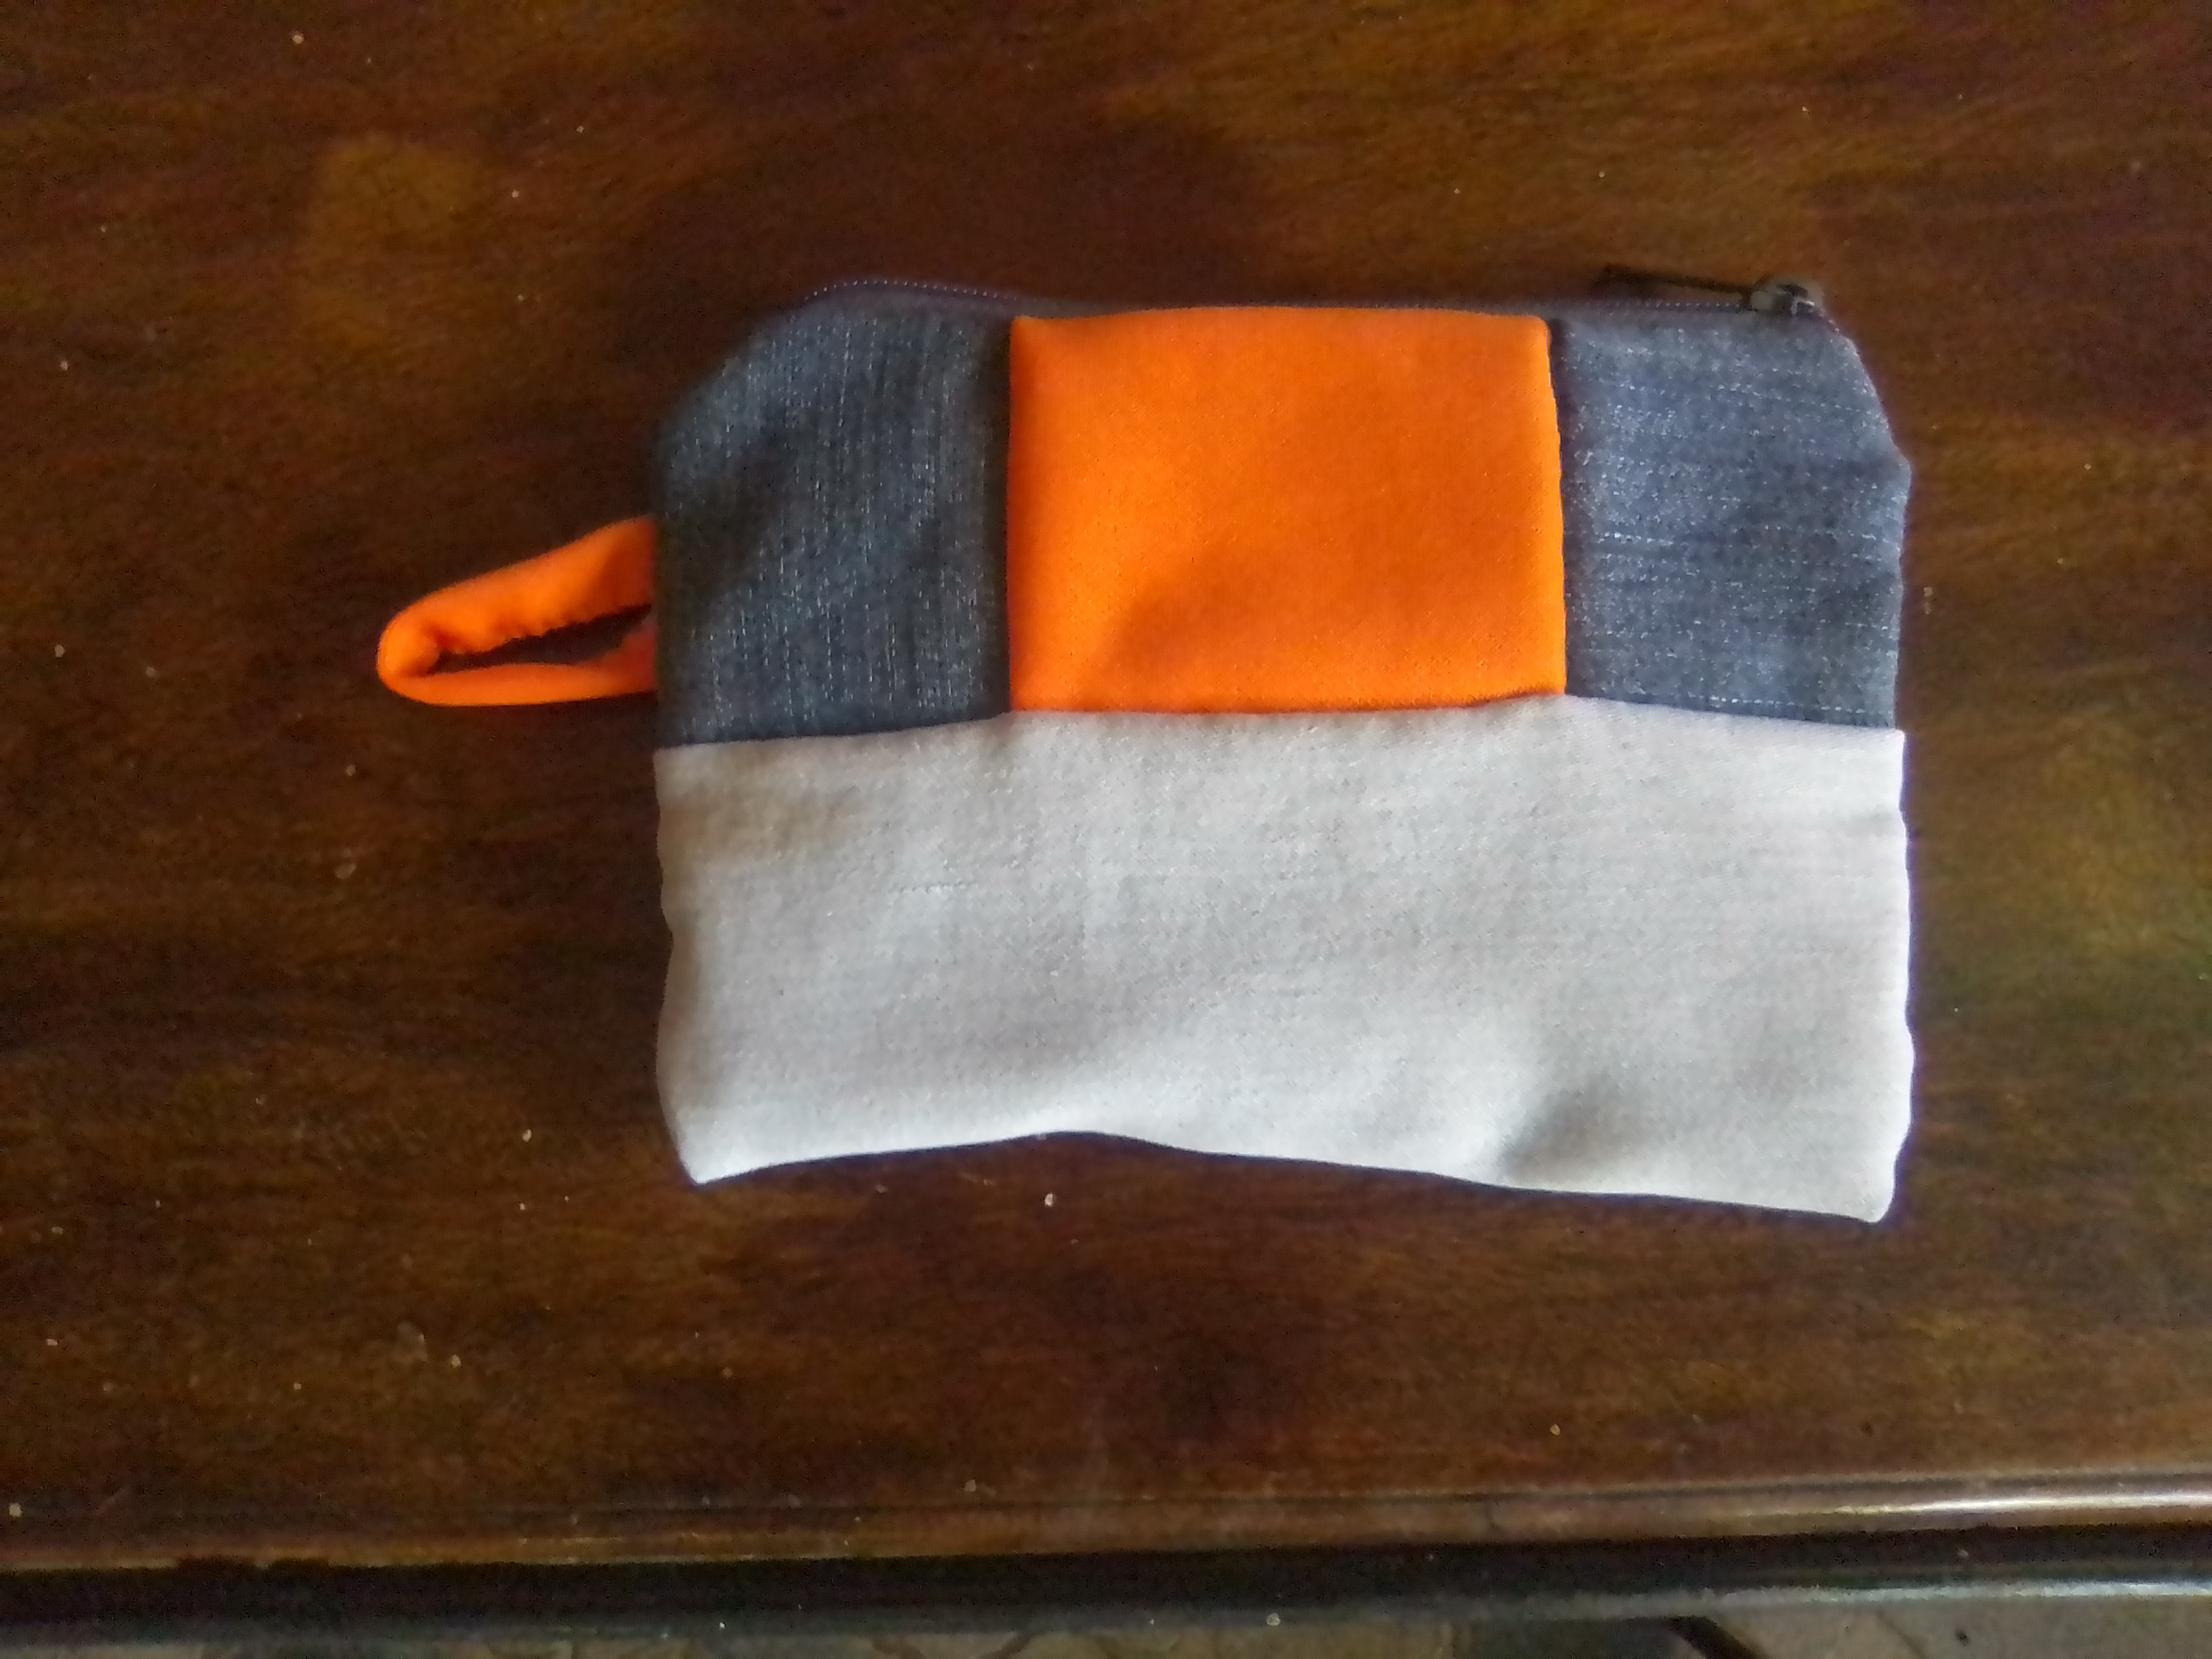
Once the pencil case is sewn on both sides, I turn it over and the school pencil case is ready, to give to my daughter for the beginning of this new school year.
I hope you liked this idea, it is useful, practical and ecological, ideal to make at home with a few scraps of fabric, and adjust them to the size and design of our preference.
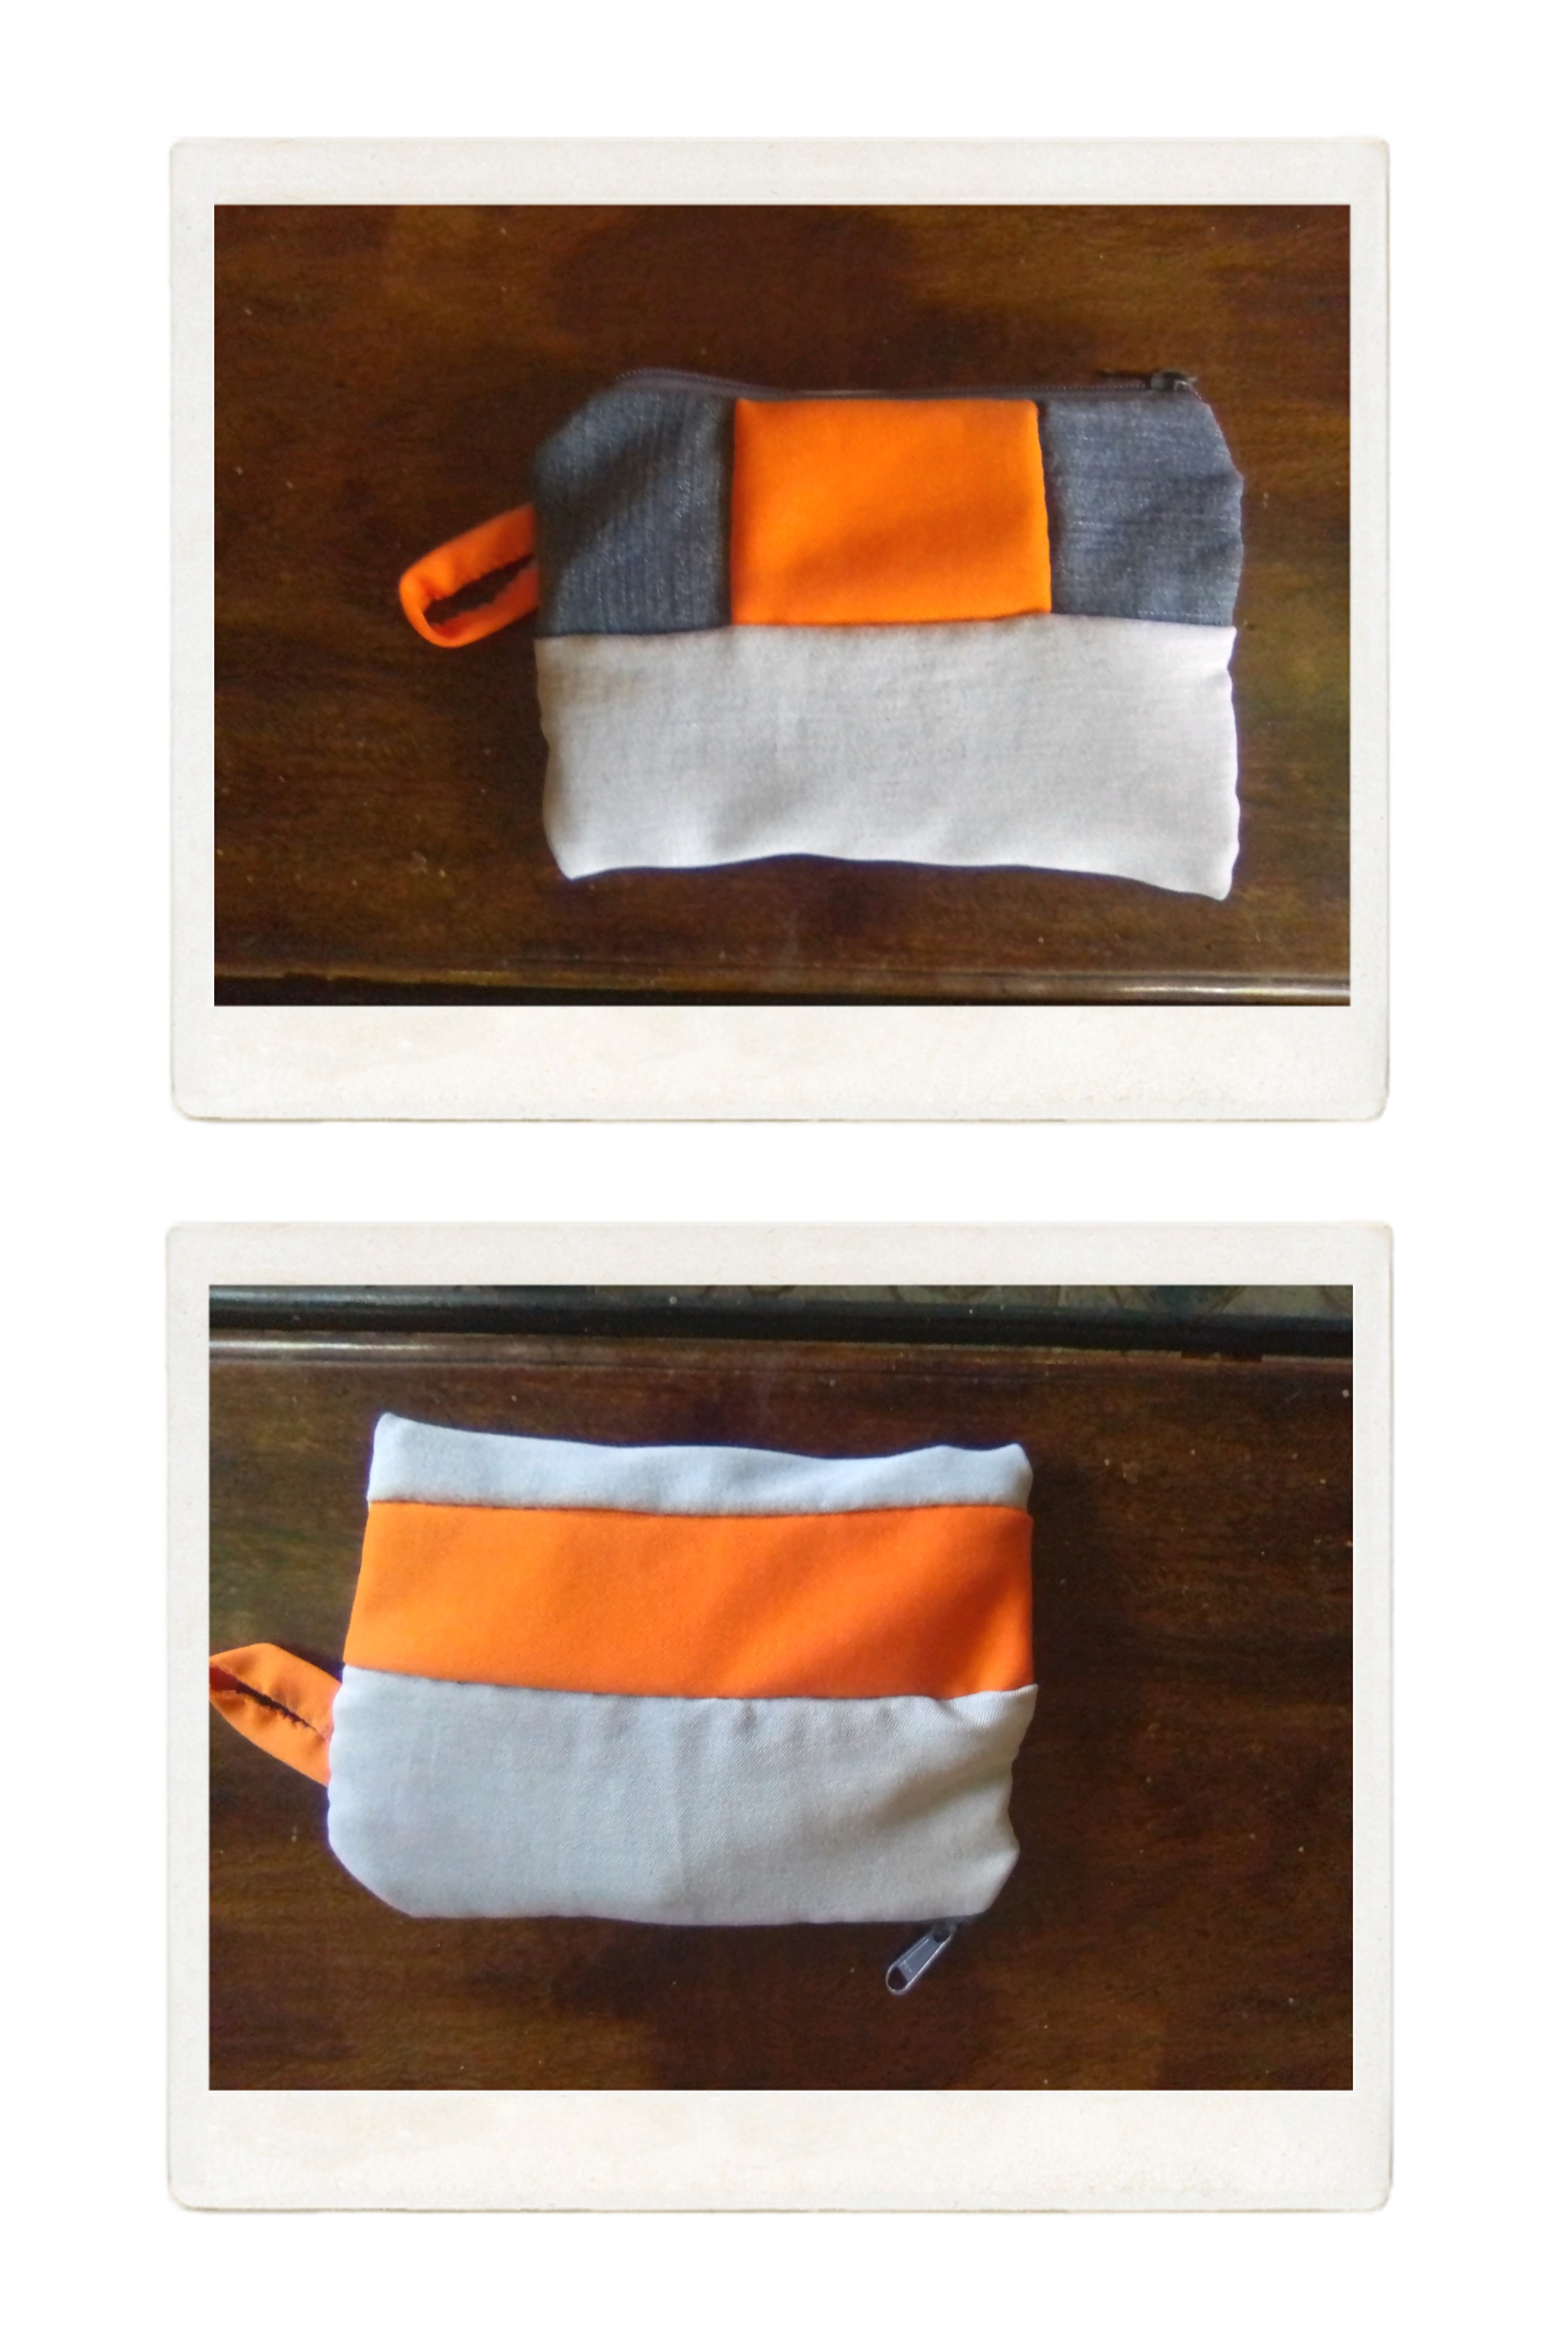
Result
K
The photos are my property taken exclusively in this project.
The collages of the procedure were made with the tool of my Blue C6 and the main one in Canva
The dividers and the banners were edited by me in Canva
The translation was made with
DeepL Translator

Materiales
✓ Cierre de 20 cm
✓ Retazos de tela de jeans azul oscuro y azul claro
✓ Retazos de tela color naranja
✓ Retazos de tela estampada
✓ Hilo y aguja
✓ Cinta métrica
✓ Tijera
Paso a paso
La tela de jeans es muy versátil, por ello decidí usarla en esta cartuchera escolar. Para la parte frontal, corte 2 cuadrados de tela de jeans oscuro de 7x7 centímetros, y 1 rectángulo de color naranja de 9x7 centímetros, para la parte inferior, una pieza de jeans azul claro de 20x 10 centímetro. Es importarte señalar que, para todas las medidas ya he considerado el centímetro de costura.
Cosi a mano, para formar una sola pieza, uniendo los cuadrados oscuros a cada lado del rectángulo de tela naranja. Lista está pieza, entonces cosi el rectángulo de tela clara para formar el frente de la cartuchera.
Para la parte posterior corte un retazo de tela naranja de 20x6 cm y un retazo de jeans claro de 8x20 cm, los cosi a mano y luego lo uni a la parte delantera. Obteniendo así una pieza única.
Extiendo la pieza única de la cartuchera, y con la tela estampada tomo la medida para el forro. Corto la pieza del forro y así tengo la piezas interna y externa de la cartuchera. Aprovecho y corto una tira de color naranja de 7x3 cm lo cosi y este será el colgante de la cartuchera.
Es el momento de ensamblar la cartuchera, coser el cierre y el forro. Para las amigas que ya son expertas cosiendo cierres esto es muy sencillo, pero para mí todavía es un poco complicado, pero no me detengo, si no me sale a la primera corrijo y continuo. Este paso, son dos momentos simultáneos, extiendo la tela por la partes derecha de la tela del exterior, coloco el cierre por la parte al revés, que quede punteando con el extremo superior con el de la tela externa y es entonces cuando coloco la tela del forro con la parte al revés hacia arriba. Fijo con unos alfileres y procedo a coser a mano.
Para coser el otro extremo del cierre, coloco la tela en la misma posición, pero cada una la doblo hacia cada cara del lado del cierre, las telas toman la forma de un bolso y fijo con alfileres, abro el cierre y coso está parte del cierre.
Mantengo la cartuchera como quedó, doblo a la mitad coloco el asa doblada a la mitad a 2,5 centímetros del cierre y
hacia la parte de adentro, fijo los lados y el asa con alfileres para después coser, corto el excedente del cierre y remato bien a cada extremo con hilo y aguja.
Ya cosida la cartuchera por ambos lados doy vuelta y ya está lista la cartuchera escolar, para regalar a mi hija por su inicio a este nuevo año escolar.
Espero que les haya gustado está idea, es útil, práctica y ecológica, ideal para hacer en casa con pocos retazos de tela, y ajustarlos al tamaño y diseño de nuestra preferencia.
Resultado
Las fotos son de mi propiedad tomadas exclusivamente en este proyecto.
Los collages del procedimiento los hice con la herramienta de mi Blue C6 y el principal en Canva
Lo separadores y el banners fueron editados por mi en Canva
La traducción fue realizada con
DeepL Traductor
Durable cartuchera ecológica me encanta los colores que has combinados para lograr una fascinante cartuchera.
Si amiga, hoy en día tenemos que pensar en cosas duraderas. La combinación de colores es muy divertida.
Se ve muy resistente esta cartuchera, es lo que necesitan lo pequeños al estudiar al ser de jeans durará muchisimo.
Si para los niños es lo mejor, hecho en casa y con materiales reciclados. Gracias por visitar mi blog
Excelente propuesta sobretodo para esos niños que están por iniciar o los que ya iniciaron las actividades académicas me gusta la idea del reciclaje.
!discovery 25
Gracias por tu comentario, reciclando y creando, para nuestras actividades de vida diaria
This post was shared and voted inside the discord by the curators team of discovery-it
Join our community! hive-193212
Discovery-it is also a Witness, vote for us here
Delegate to us for passive income. Check our 80% fee-back Program
Gracias por el apoyo
Your content has been voted as a part of Encouragement program. Keep up the good work!
Use Ecency daily to boost your growth on platform!
Support Ecency
Vote for new Proposal
Delegate HP and earn more
Thank you for sharing this amazing post on HIVE!
Your content got selected by our fellow curator tibfox & you just received a little thank you upvote from our non-profit curation initiative!
You will be featured in one of our recurring curation compilations which is aiming to offer you a stage to widen your audience within the DIY scene of Hive.
Make sure to always post / cross-post your creations within the DIYHub community on HIVE so we never miss your content. We also have a discord server where you can connect with us and other DIYers. If you want to support our goal to motivate other DIY/art/music/gardening/... creators just delegate to us and earn 100% of your curation rewards!
Stay creative & hive on!
Gracias por su constante apoyo
Te quedó muy bonito, lo mejor de todo es que solo utilizaste materiales de reciclaje y el resultado fue muy bueno, es muy util y necesario para guardar cosas y mantener un orden, me encantó, saludos!
Gracias, de hecho quiero hacer uno para los cosméticos, también con materiales reciclados. 🤗
Esa es una buena idea 😉