

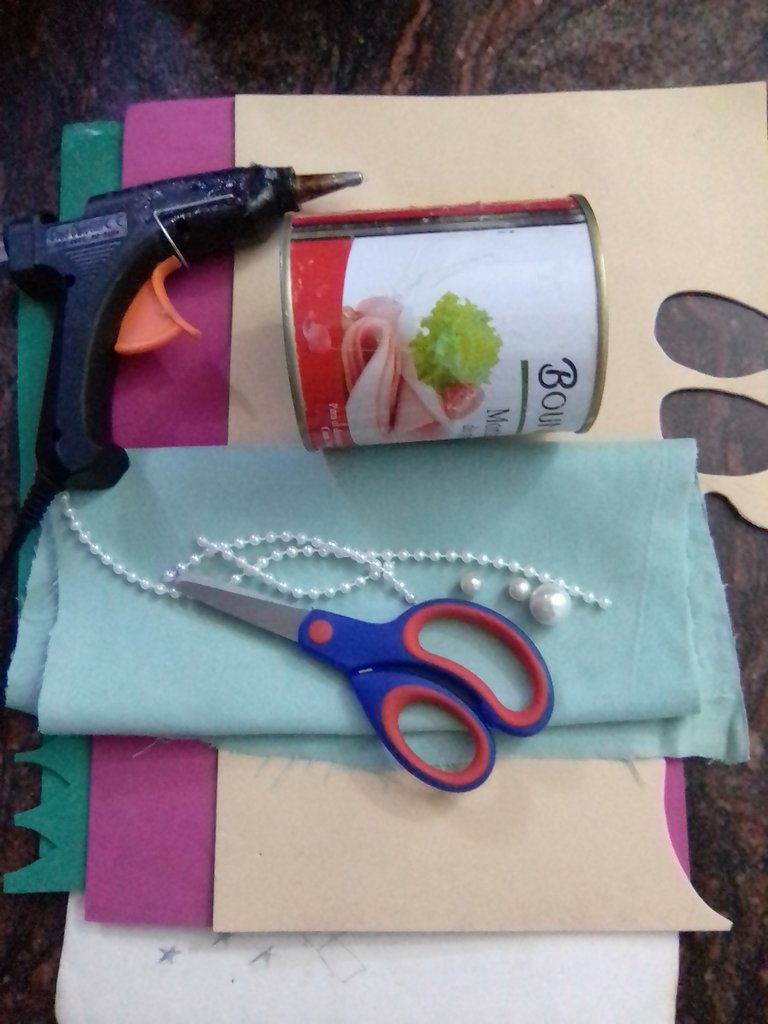
Materials
✓ Can
✓ Green fabric scraps
✓ Colored foami: fuchsia, green, cream and frosted pink.
✓ White and running pearls.
✓ Silicone gun and silicone stick.
✓ Cardboard.
✓ Scissors and pencil.
Step by step.
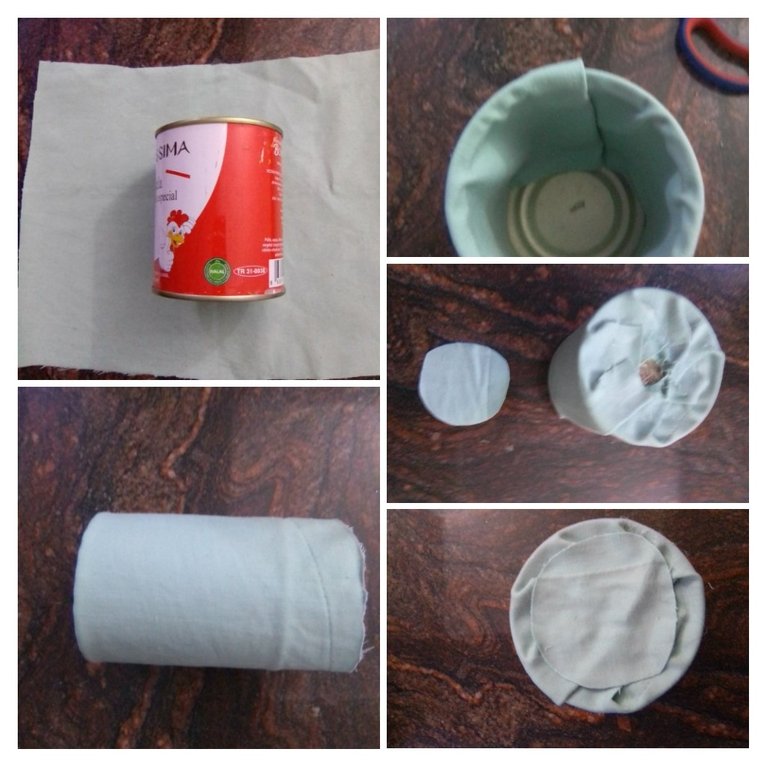
To make this beautiful jewelry box, start by cutting out a piece of fabric to cover the can both outside and inside, using hot silicone to glue. In addition to covering the bottom of the can.
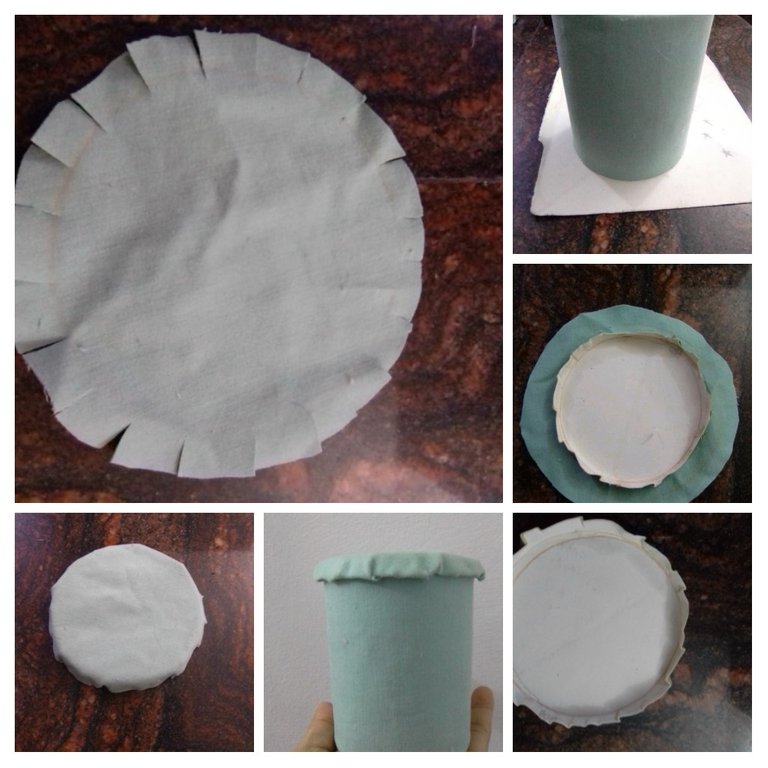
The next step is to make the lid of the jewelry box, for this I took the measure of the can already covered and left approximately 1.5 centimeters extra for the border of the lid. Cut with this same measure, a circle of fabric to cover it.
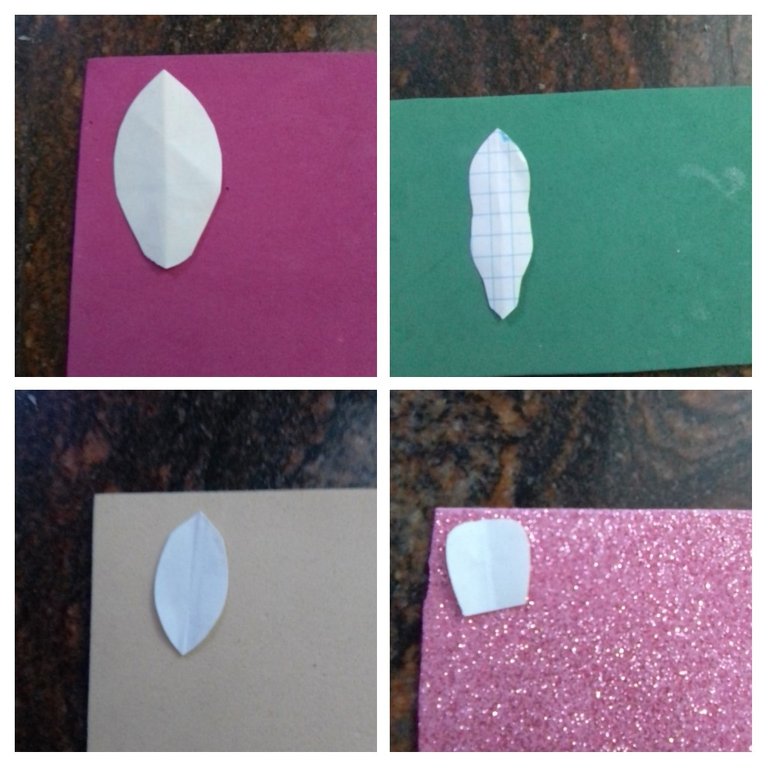
Once the can and the cardboard have been transformed into a jewelry box with a lid, I proceed to make the decorative elements. I start designing the molds of the different petals to be used, as well as the type of leaf.

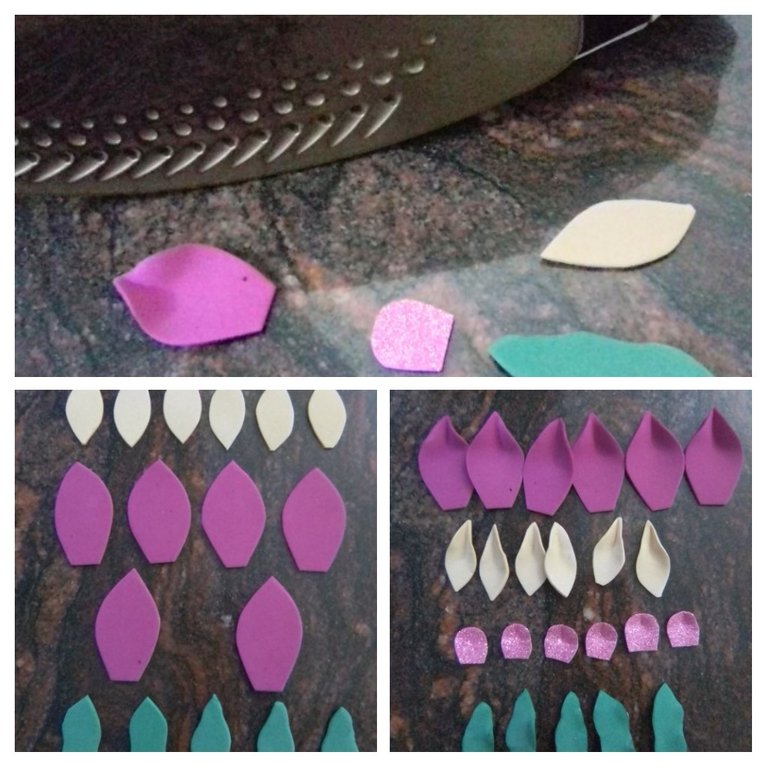
I transfer the molds to the different colors of the foami, and cut them out to then apply heat with the clothes iron and mold the tips of the petals and leaves to give naturalness and movement.
Next I begin to assemble the main flower that will adorn the lid, I started by gluing two cream petals on the base of each fuchsia petal.
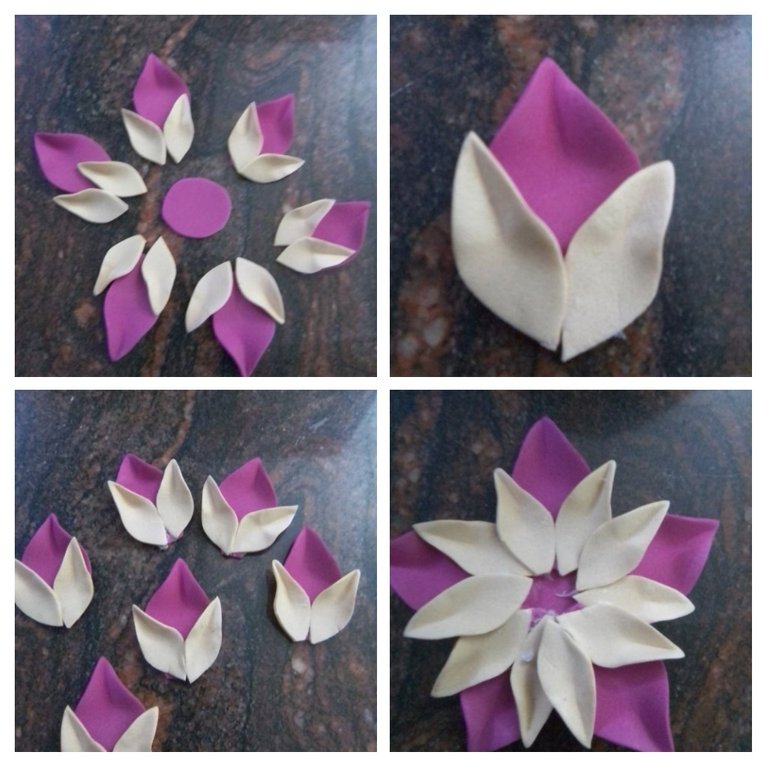
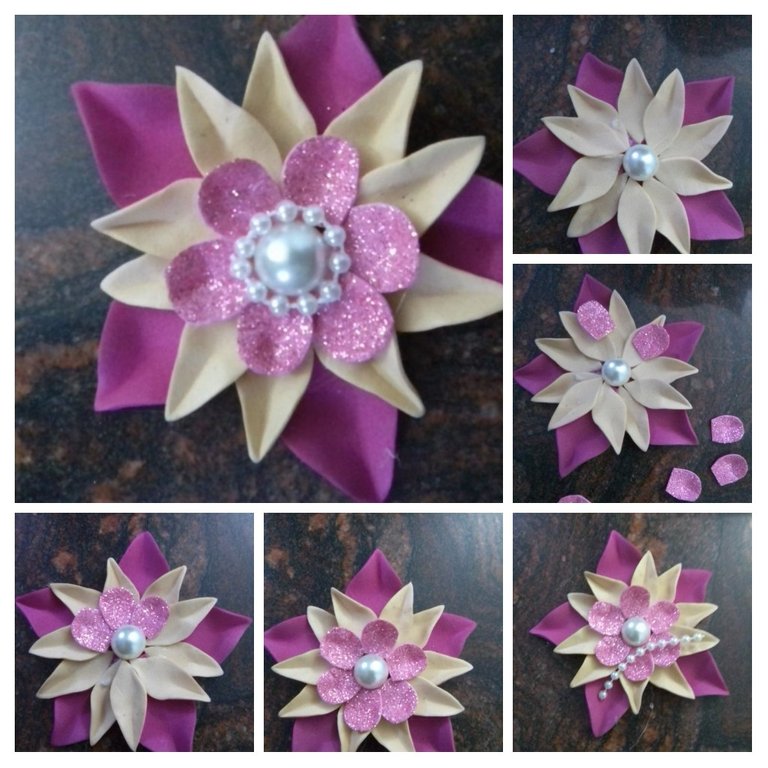
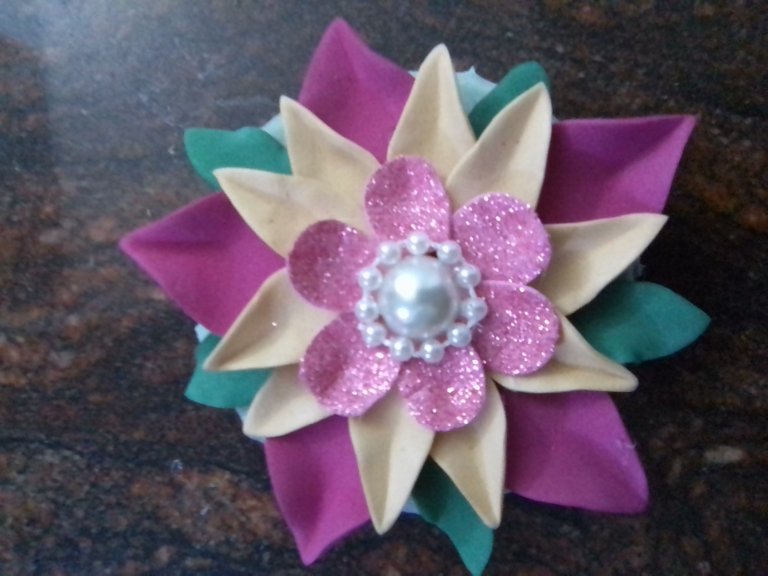
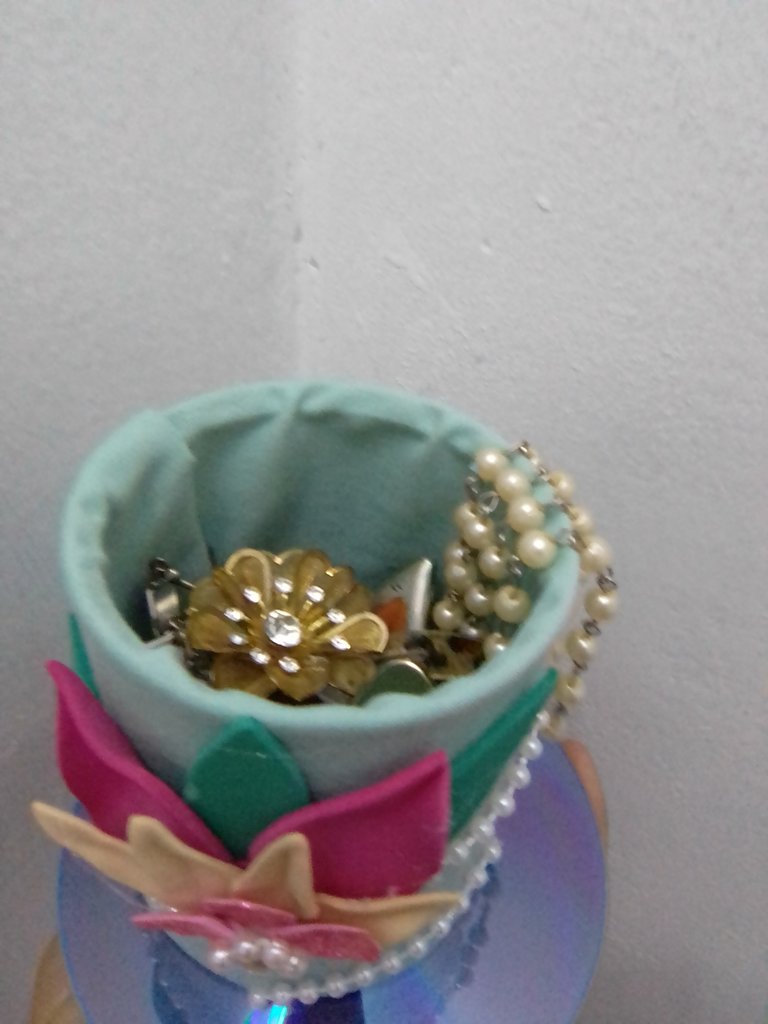
Assemble the base of the flower with these fuchsia and cream petals on a circle of fuchsia foami, in the center of the flower place a white pearl, then continue with the frosted pink petals and culminate with pearls running around the large pearl and to finish I place the leaves at the junctions of the fuchsia petals.
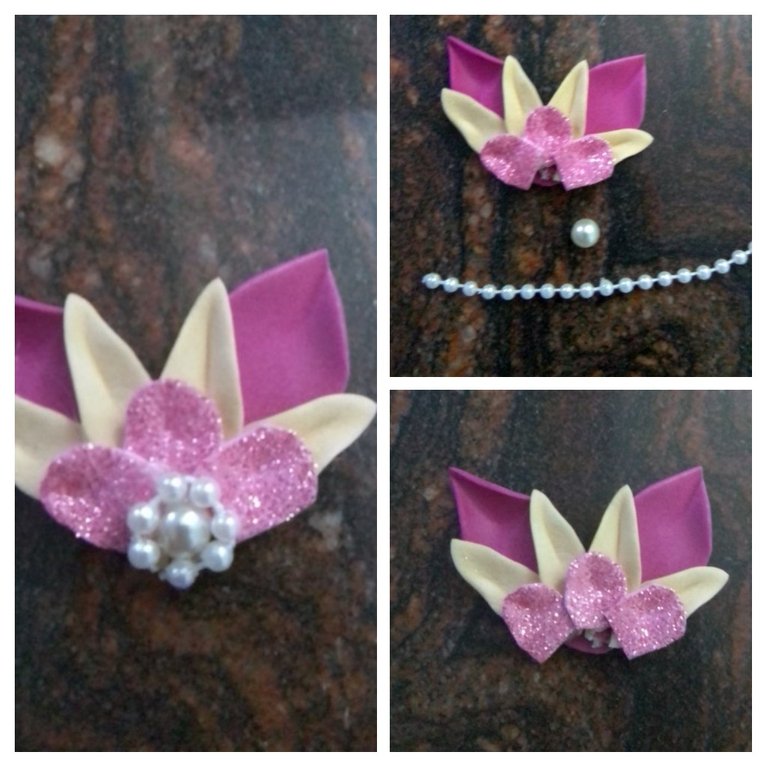
Once the lid is decorated, continue with the jewelry box, place a ribbon of white pearls from the lower end to a point at the upper end, crossing the jewelry box transversely and make a half flower, that is to say, assemble two fuchsia petals with their respective cream petals and three pink petals and in the center the white pearl surrounded by more small pearls.
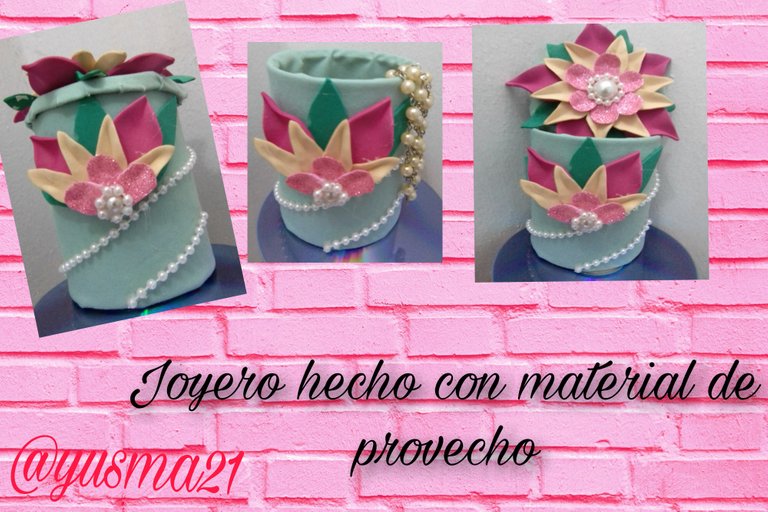
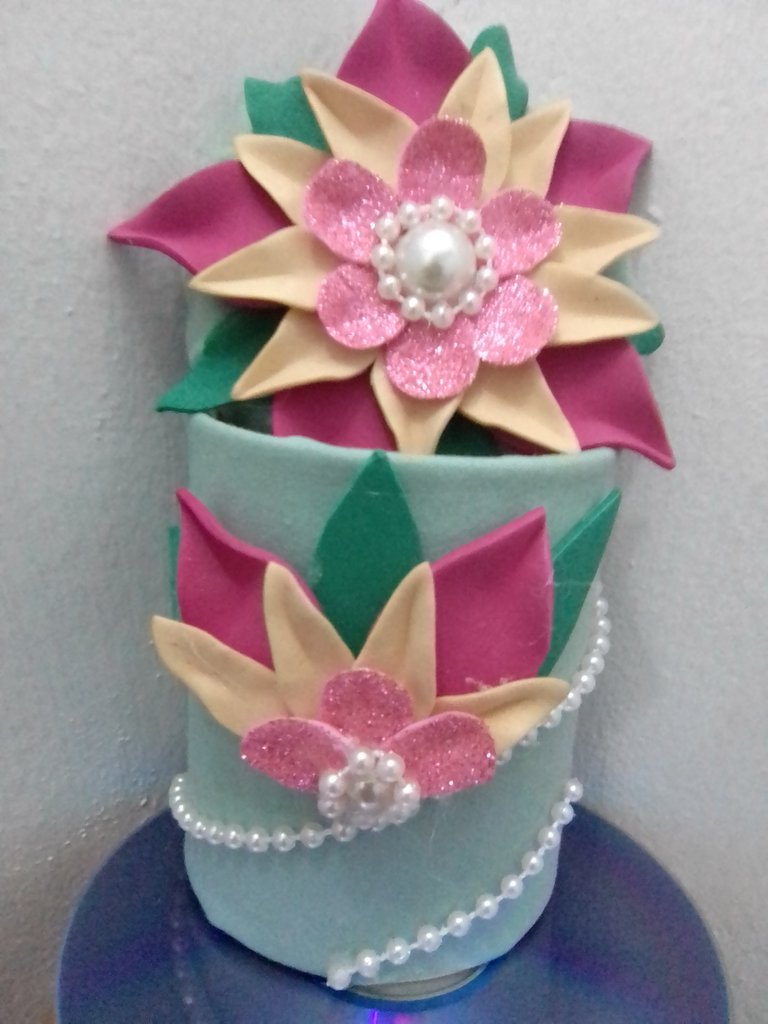
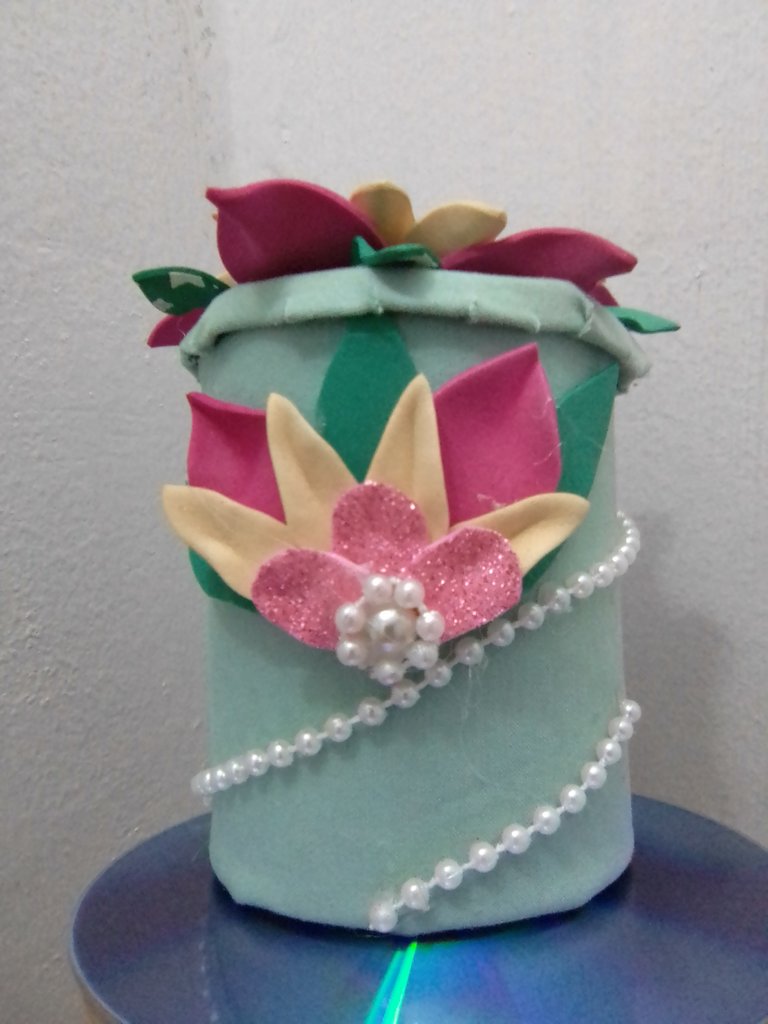
Glue this half flower on top of the ribbon of pearls and thus, I have my beautiful jewelry box ready, cheerful, elegant and very useful, it is even a nice decoration for our chest of drawers.

In this way, in simple steps and recycling some materials we can make a nice jewelry box at home.
Result

The photos are my property taken exclusively for this project.
The collages of the procedure were made with my Blue C6 tool and the main one in Canva.
The separators and the banners were edited by me in Canva.
The translation was done with
DeepL Translator


Materiales
✓ Lata
✓ Retazo de tela verde
✓ Foami de colores: fucsia, verde, crema y rosado escarchado.
✓ Perlas blanca y corridas.
✓ Pistola y barra de silicona.
✓ Cartón.
✓ Tijeras y lápiz.
Paso a paso
Para realizar este hermoso joyero, inicie recortando un trozo tela para cubrir la lata tanto por fuera como por dentro, usando silicona caliente para pegar. Además de cubrir la lata por debajo.
El siguiente paso es realizar la tapa del joyero, para ello tome la medida de la lata ya cubierta y dejé aproximadamente 1,5 centímetros adicional para la cenefa de la tapa. Corte con esta misma medida, un círculo de tela para cubrirlo.
Ya transformada la lata y el cartón en un joyero con tapa, procedo a realizar los elementos decorativos. Comienzo diseñando los moldes de los distintos pétalos a usar, además del tipo de hoja.
Transfiero los moldes a los diferentes colores del foami, y los recorte para luego aplicar calor con la plancha de ropa y moldear las puntas de los pétalos y hojas para dar naturalidad y movimiento.
Seguidamente comienzo a ensamblar la flor principal que adornara la tapa, inicie pegando dos pétalos color crema sobre la base de cada pétalo fucsia.
Arme la base de la flor con estos pétalos fucsia y crema sobre un círculo de foami fucsia, en el centro de la flor coloque una perla blanca, para luego continúan con los pétalos rosados escarchados y culmine con perlas corridas alrededor de la perla grande y para culminar coloco las hojas en las uniones de los pétalos fucsia.
Ya decorada la tapa, continúe entonces con el joyero, para ello coloque una cinta de perlas corridas blancas, l el extremo inferior hasta un punto del extremo superior atravesado el joyero transversalmente y realice media flor, es decir arme dos pétalos fucsia con sus respectivos pétalos cremas y tres pétalos rosados y en el centro la perla blanca rodeada de más perlas pequeñas.
Pegue está media flor por encima de la cinta de perlas corridas y así, tengo ya listo mi hermoso joyero, alegre, elegante y muy útil, incluso es un lindo adorno para nuestra cómoda.
De esta manera, en pasos sencillos y reciclando algunos materiales podemos realizar un lindo joyero en casa.
Resultado
Las fotos son de mi propiedad tomadas exclusivamente en este proyecto.
Los collages del procedimiento los hice con la herramienta de mi Blue C6 y el principal en Canva
Lo separadores y el banners fueron editados por mi en Canva
La traducción fue realizada con
DeepL Traductor
The rewards earned on this comment will go directly to the people( @dayadam ) sharing the post on Twitter as long as they are registered with @poshtoken. Sign up at https://hiveposh.com.
Muy bonito
Grscy por visitar mi blog
Amiga te quedó precioso tu joyero, me gustaron los colores, la técnica usada, los apliques y materiales. Gracias por compartir tu bonito trabajo. Suerte y que tengas un hermoso día @yusma21 😘☺️🥰
Gracias @dayadam . Tu siempre tan amable gracias por constante apoyo
Quedó super lindo, y atuda a sacar de un apuro para un regalito de emergencia! Ademas de reusar y reciclar
Claro amiga, también puede ser una linda caja de regalos, como tú dices para una emergencia. A reciclar.
Las flores que hizo usted en su joyero lucen muy bien, es un bonito trabajo de reciclaje. Le deseo mucha suerte y siga creando más cosas con buen ánimo.
Gracias amigo @soltecno , aprecio tu apoyo y el tiempo de leer mi blog.