
Happy day to all the creatives at Hive Diy, grateful to be able to enjoy the talent and skills that are expressed daily in this community, and that have remained throughout this year. Already on the eve of Christmas night, when the excitement and joy of reunion with family and friends is on the surface, I want to share how to make a simple but beautiful paper shade for a candle, and light and decorate our house. , when we are celebrating the birth of baby Jesus. The materials are very common and cheap, I am sure that the result will be to your liking, I invite you to learn the step by step.

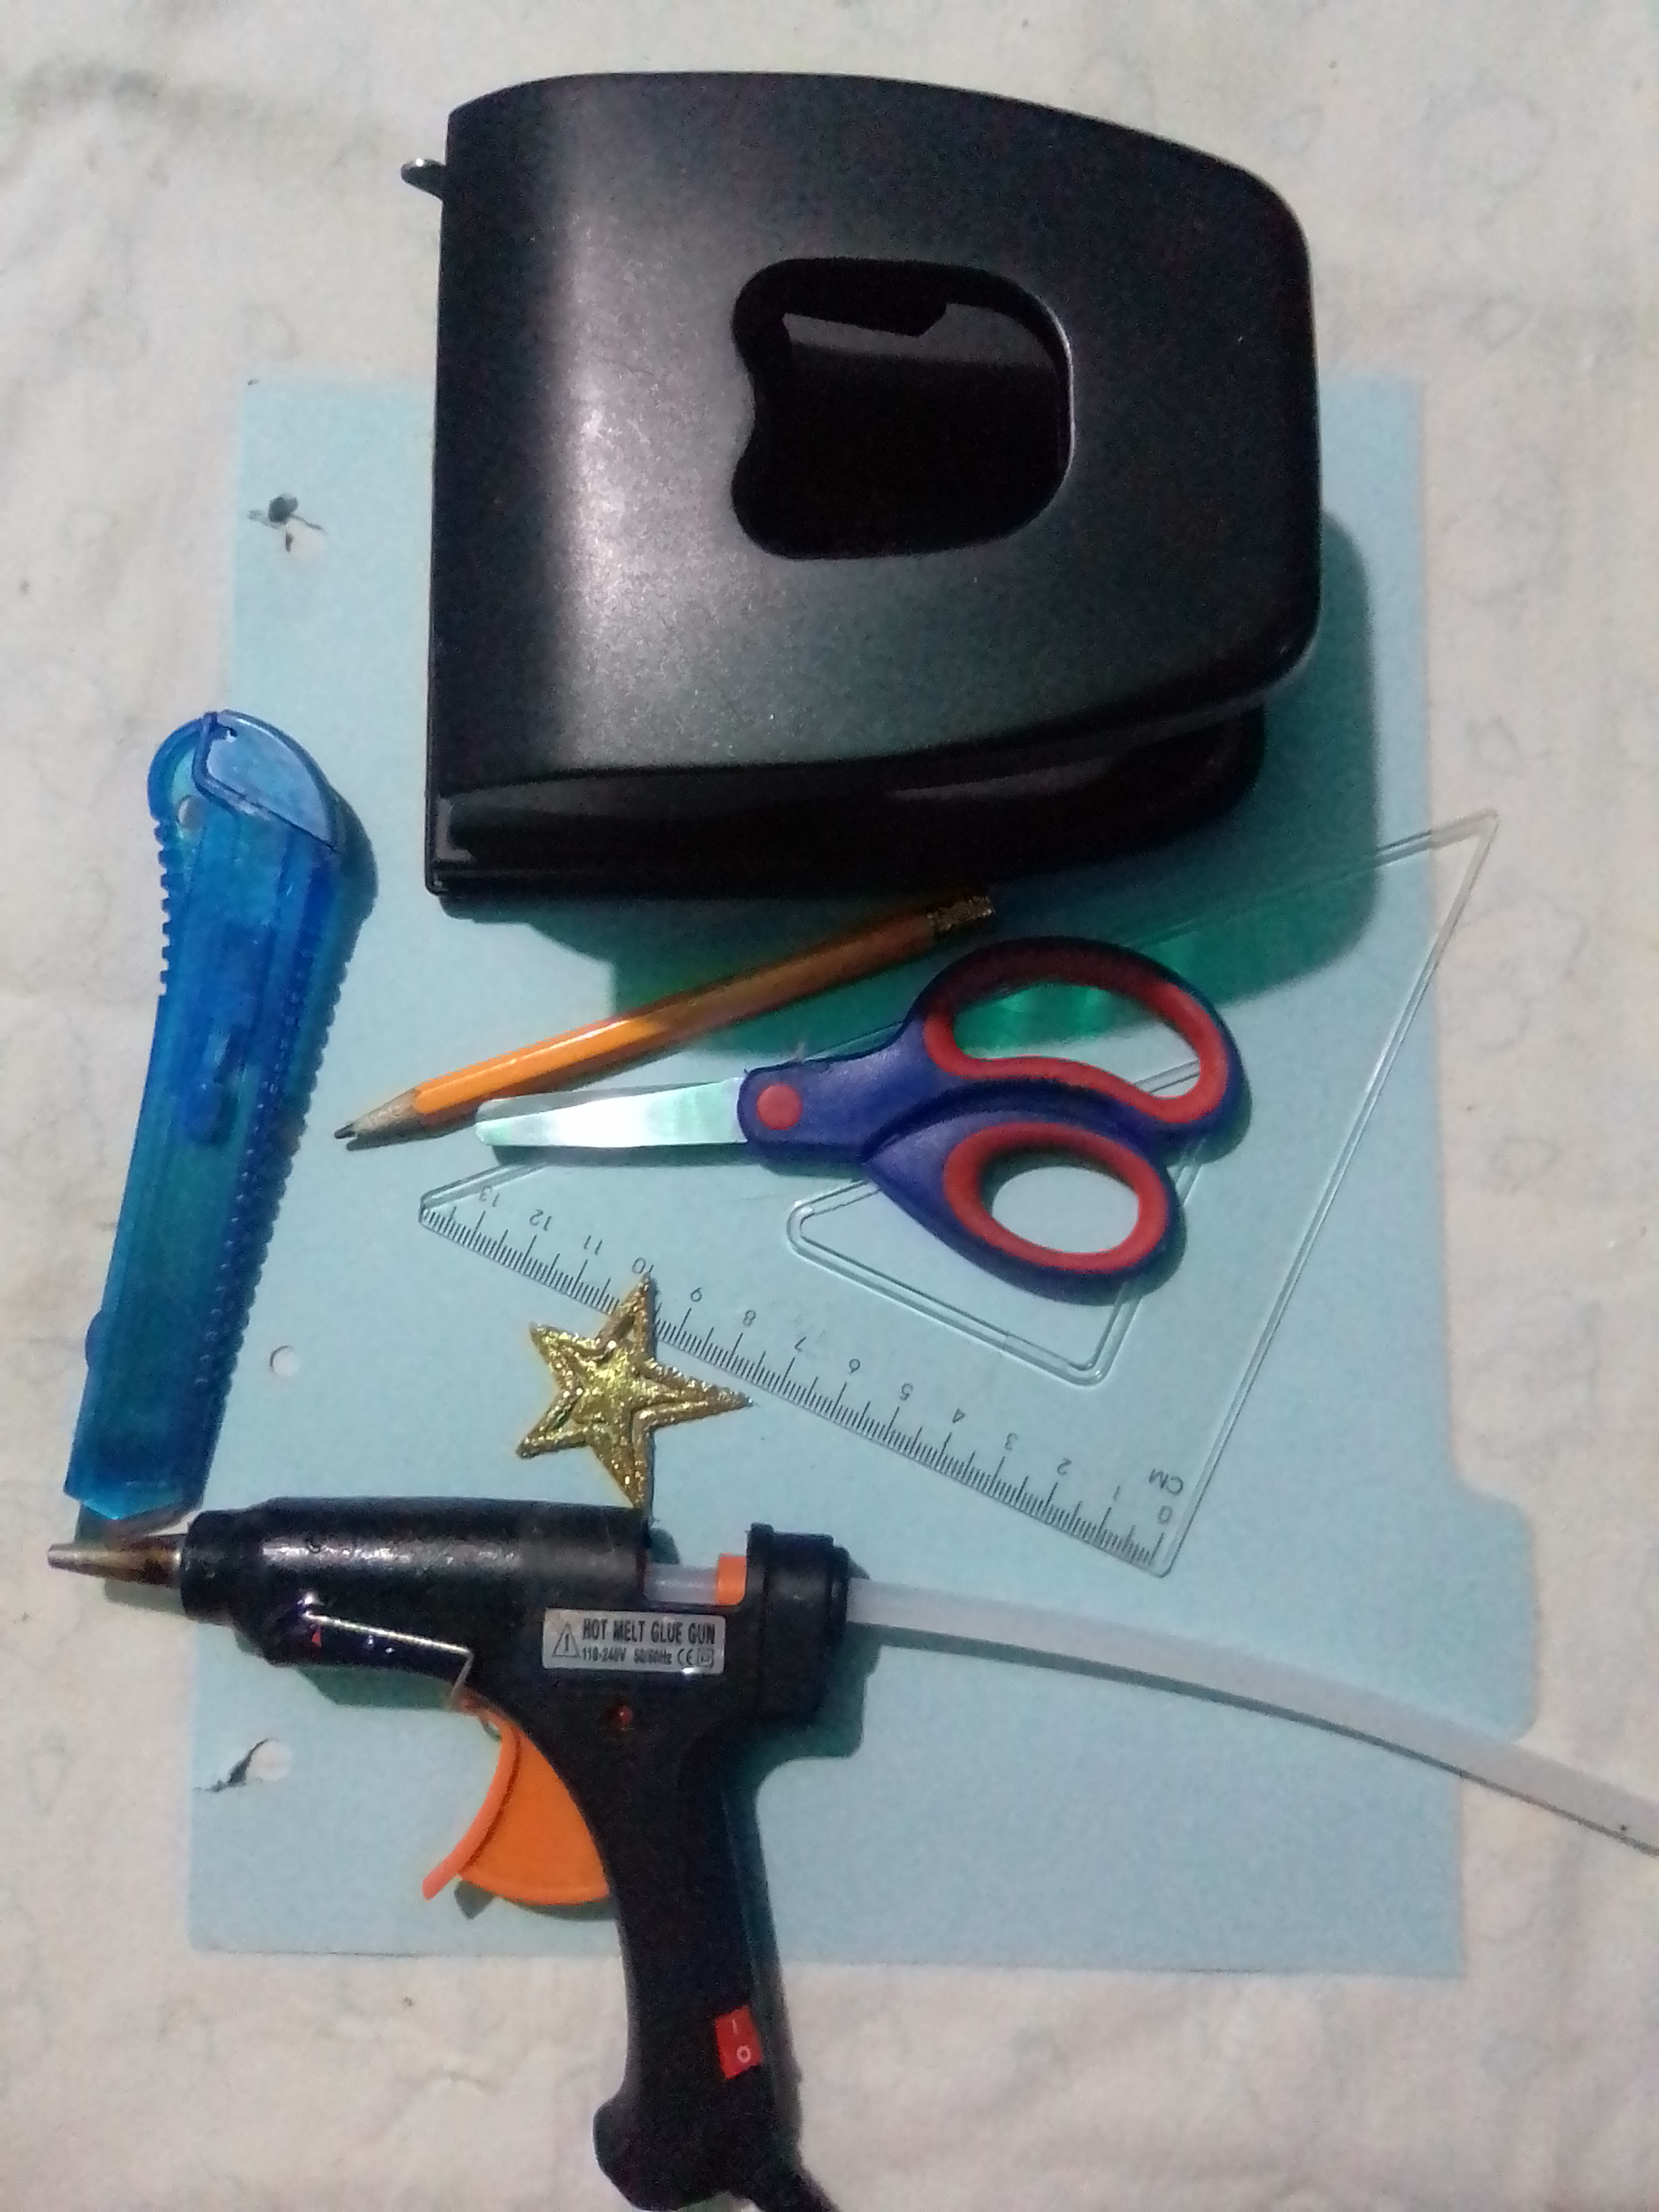
MATERIALS
✓ Light blue cardstock
✓ Scissors, pencil and ruler
✓ Gun and glue stick
✓ Toilet paper sheets
✓ Star mold
✓ Drill
✓ CD
✓ Sail
✓ Cuter
✓ Glue stick
STEP BY STEP
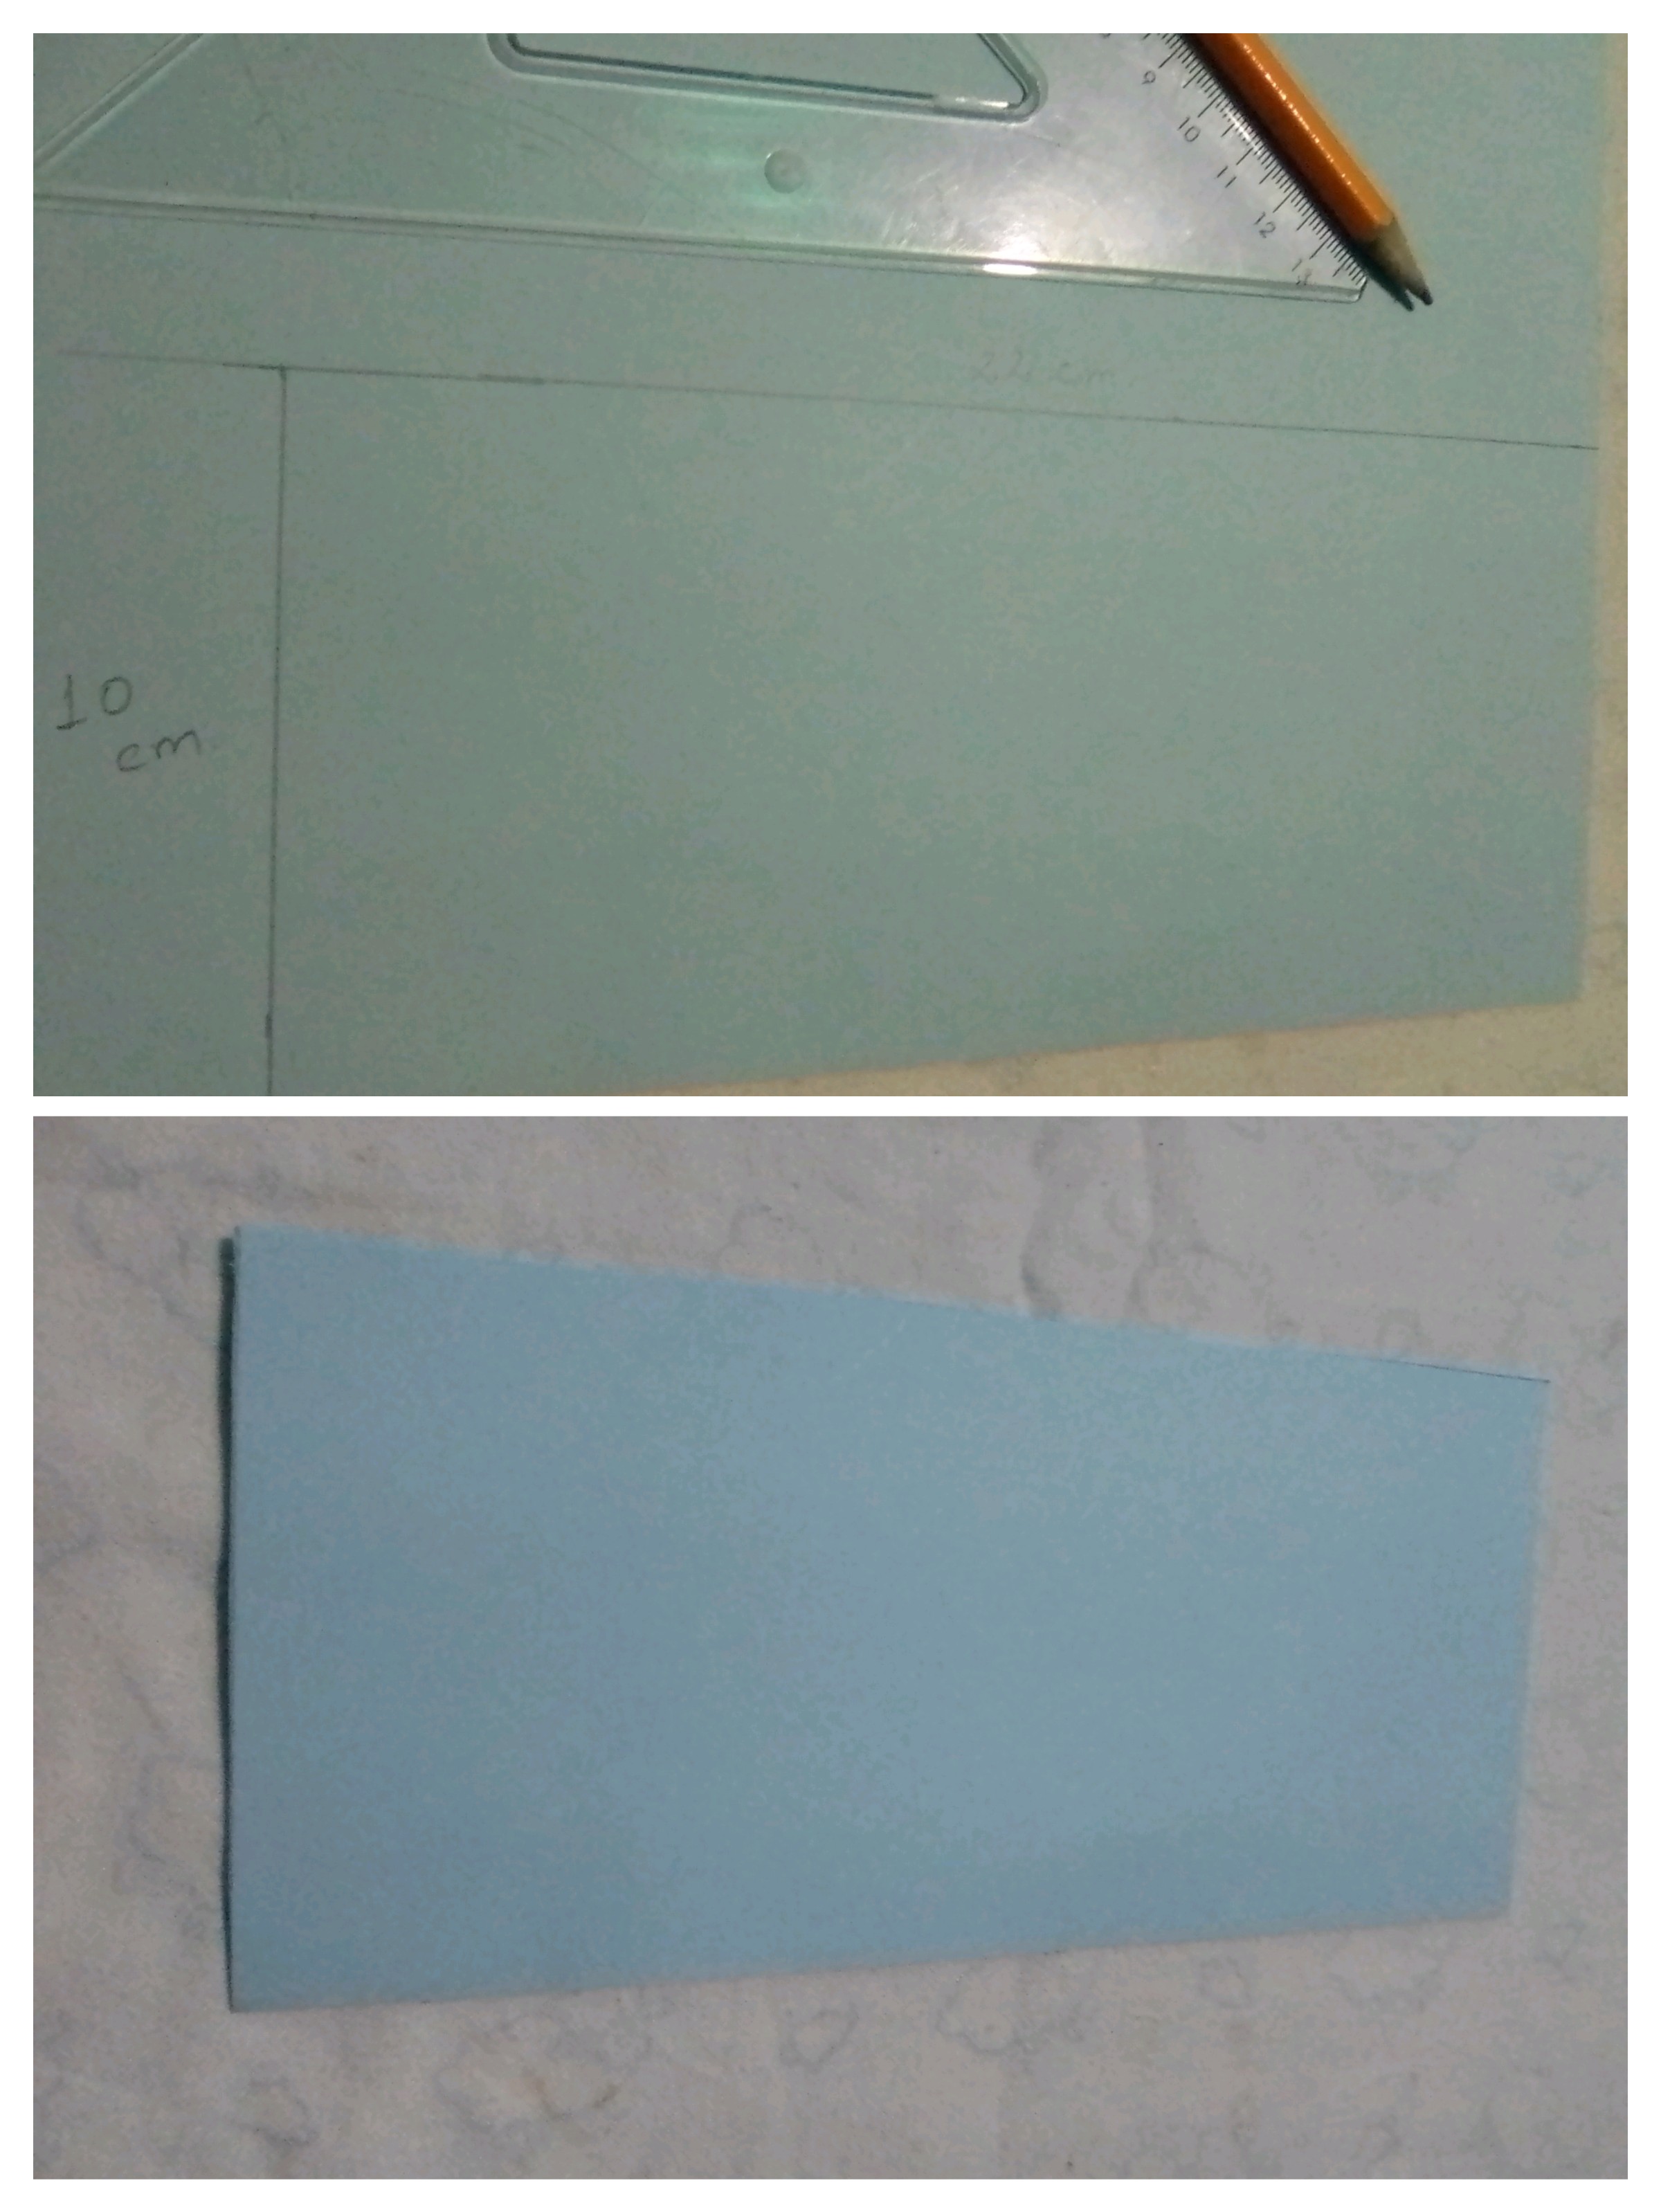
To make this simple and beautiful paper screen, only a few steps are necessary. The first thing is to cut a piece of cardboard of the color that we like the most or that we have available, in my case I used a light blue color, with measurements of 22 x 10 centimeters, I decided not to make it very high, because it seems to me that this is how it gets lost. the projection of light.
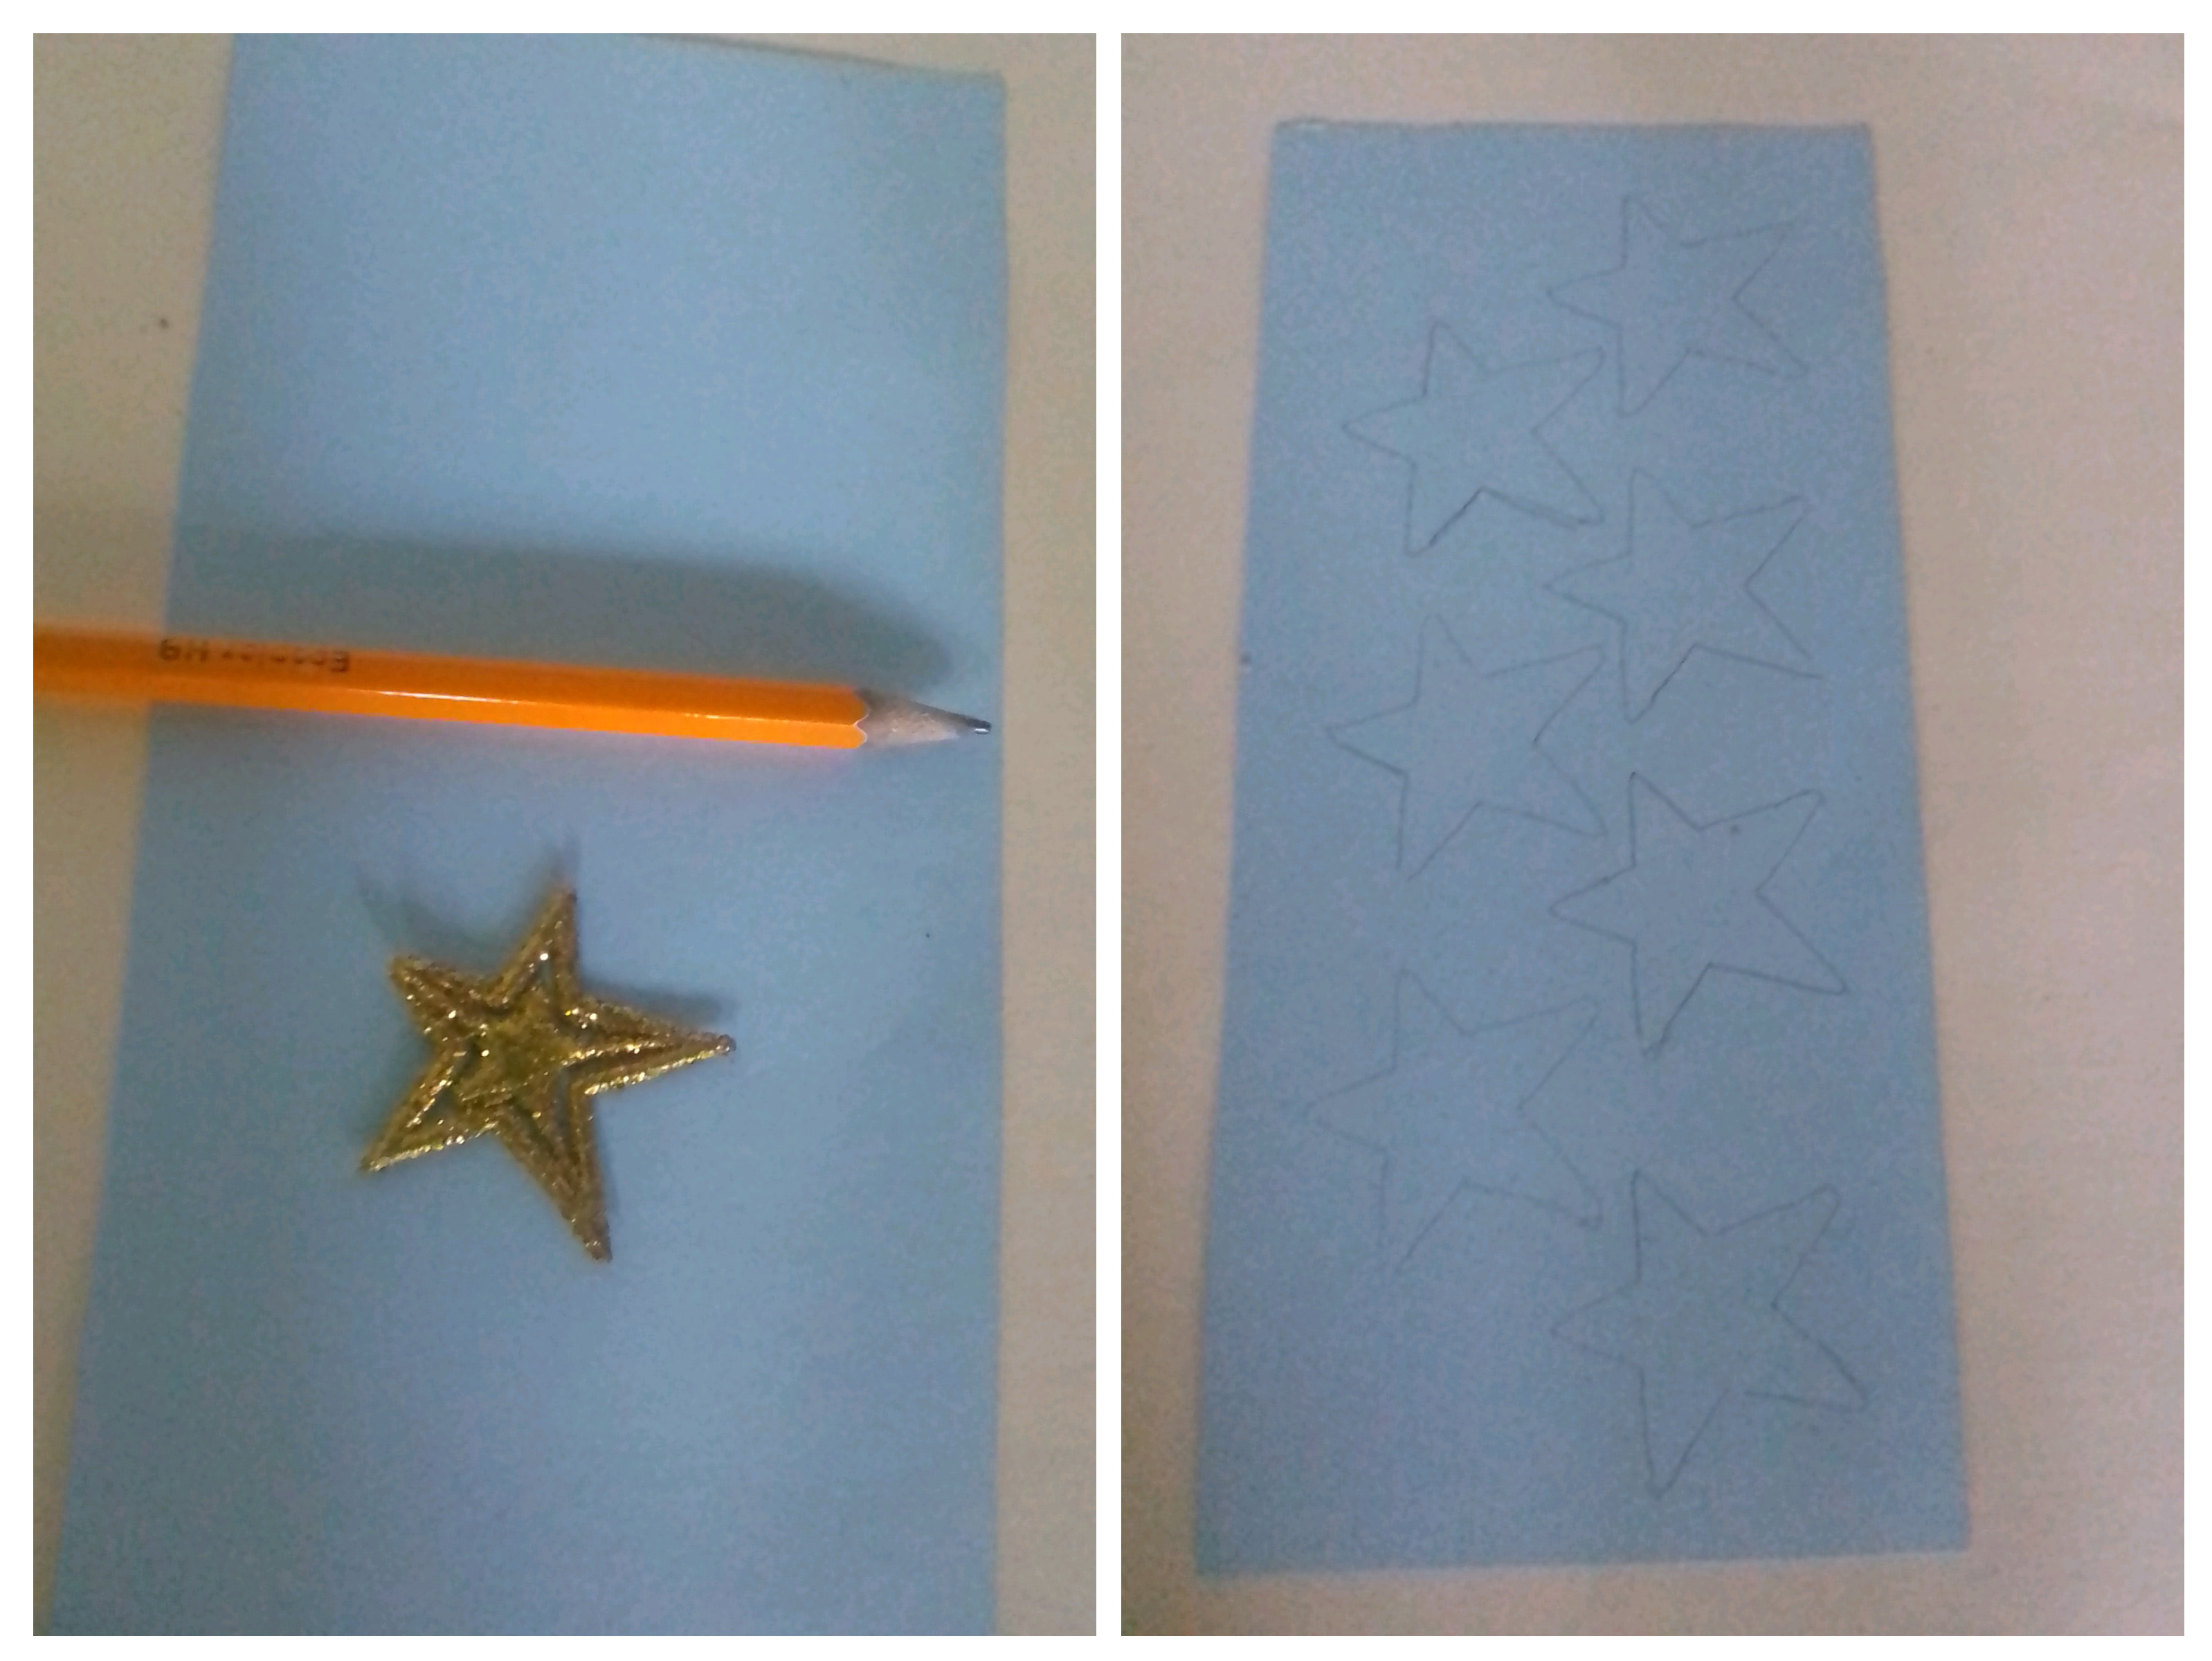
The next step is to make the design on the cardboard, for this screen and for Christmas, I made several stars, which I transferred to the cardboard with the help of a mold.
Using a cutter, I removed the stars and then proceeded to pierce both the upper and lower ends, so that the light from the candle is projected through all the openings in the shade.
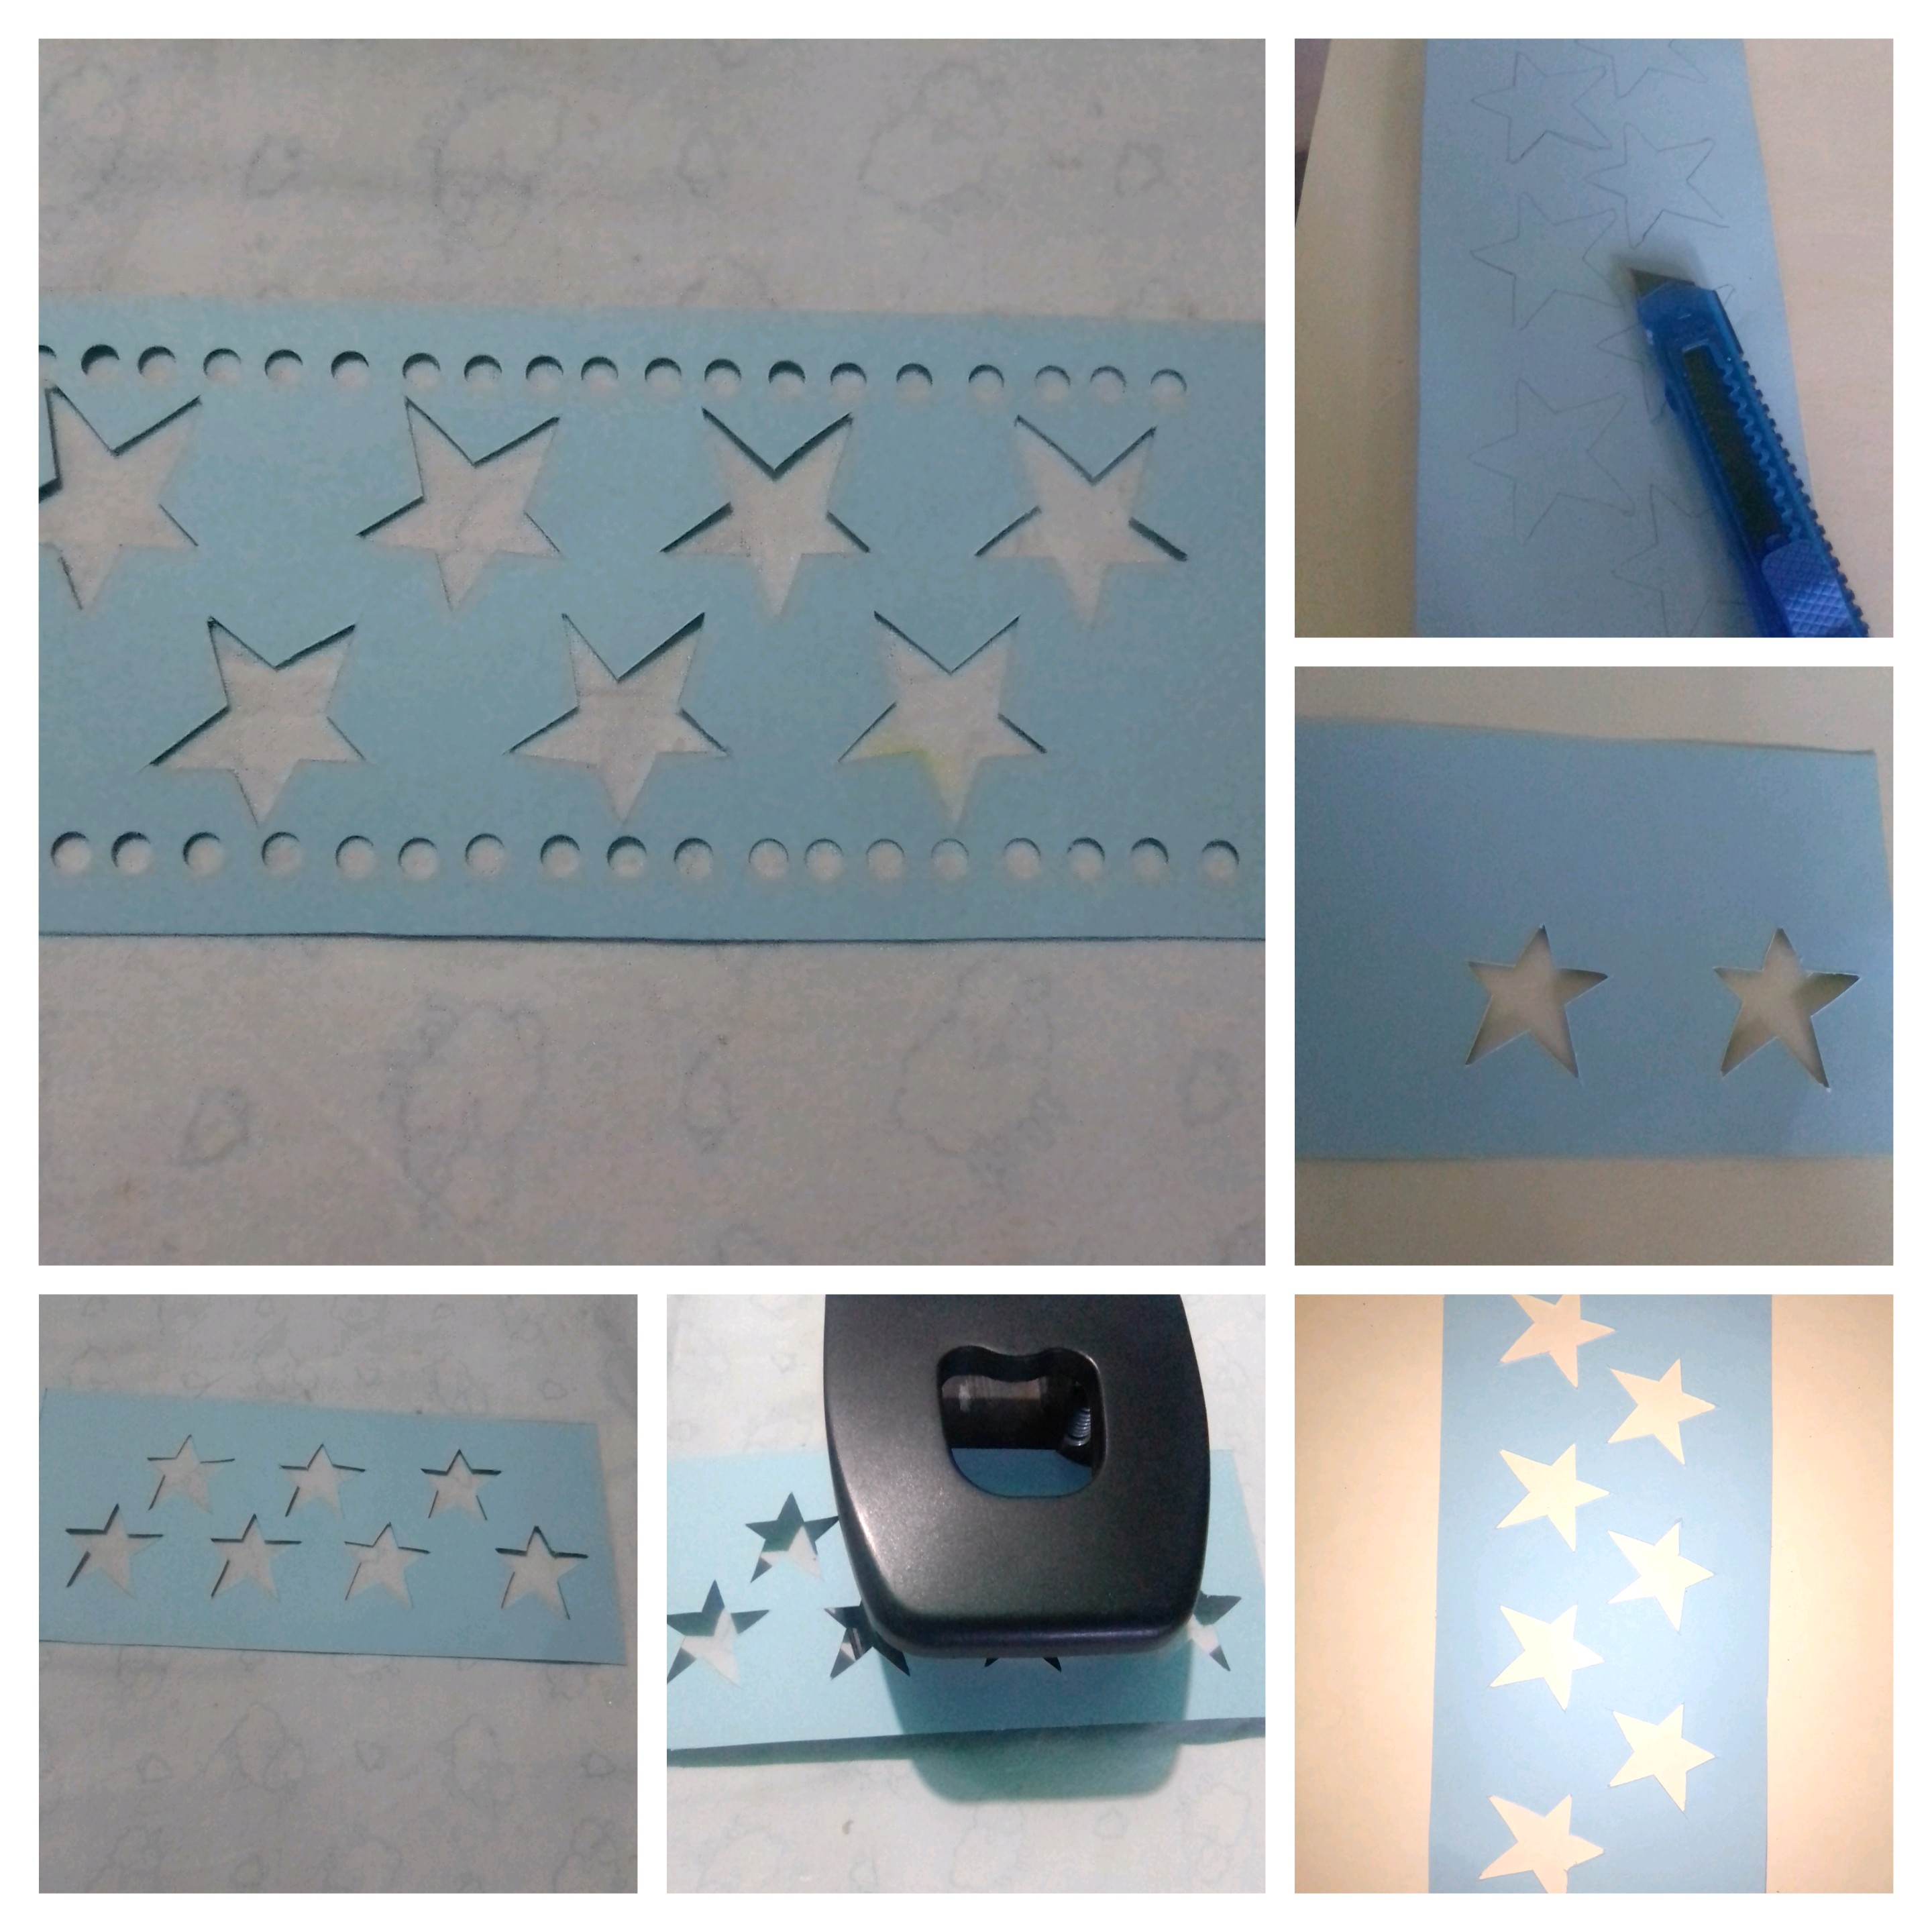
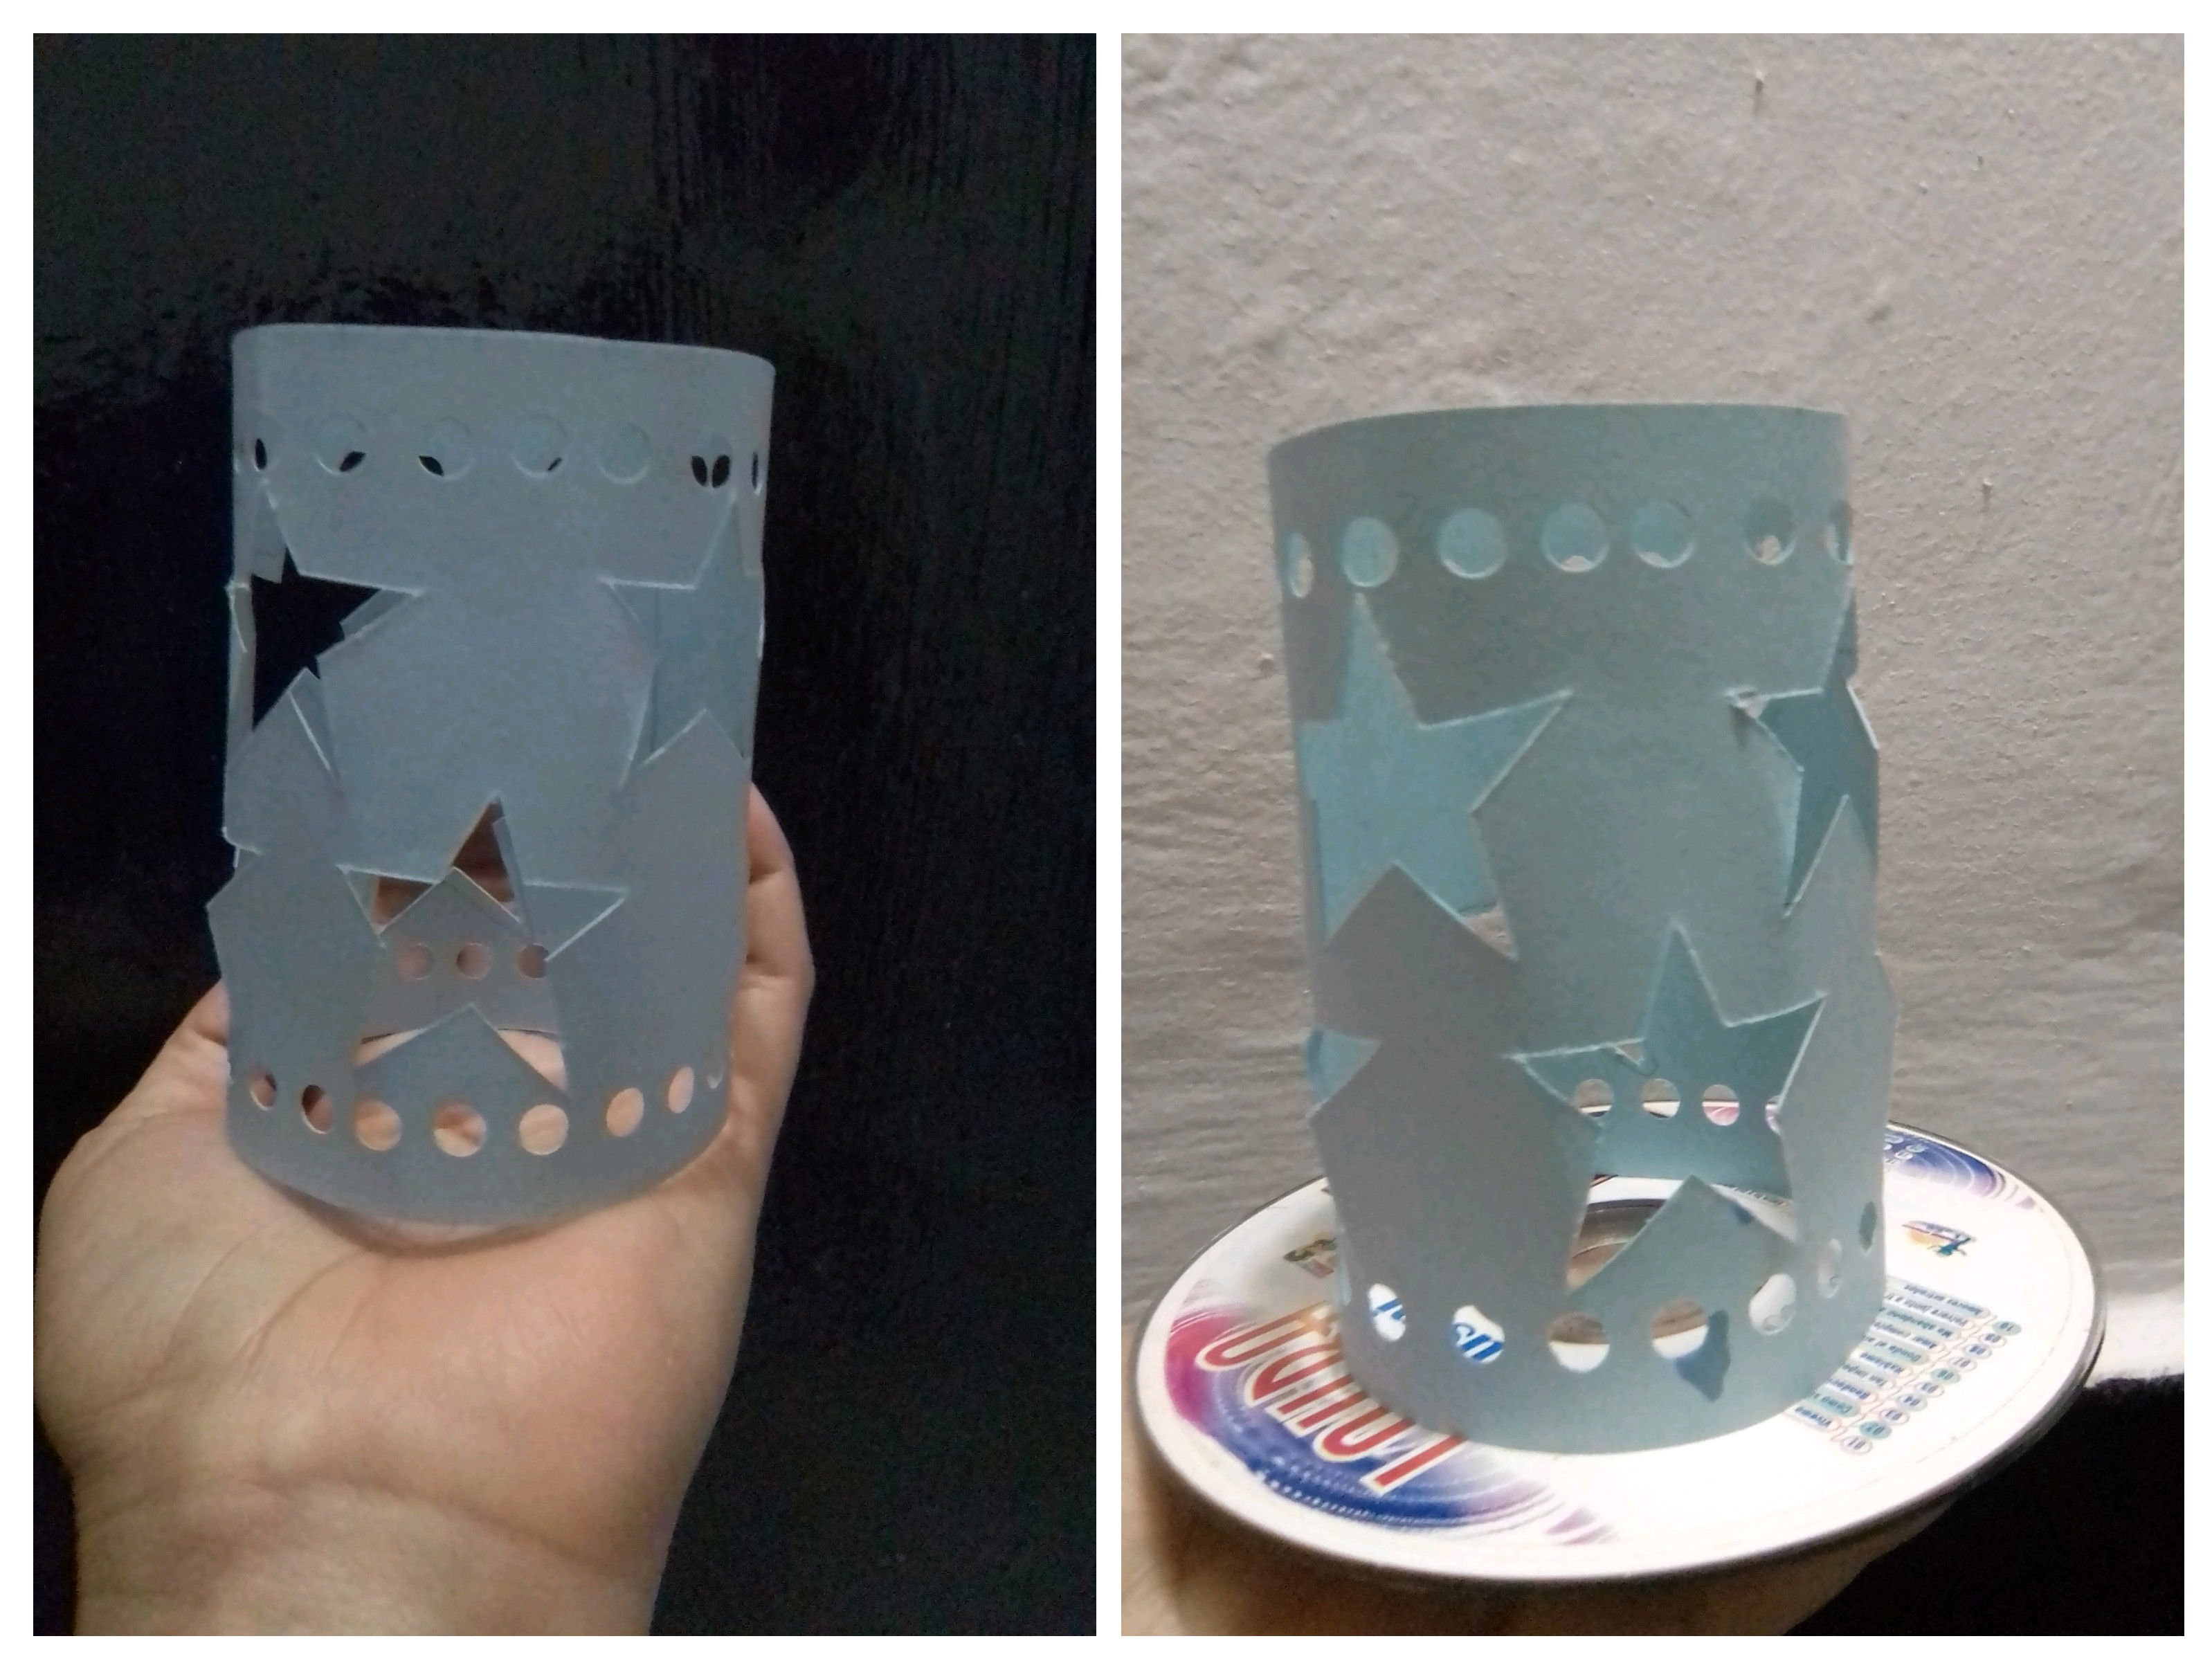
Next, I process to form a cylinder with the piece of cardboard and glue it with hot silicone to the sides, it is important to bend very gently without marking the cardboard, the tips of those stars that protrude a little.
It is time to place a lining or the real screen, this can be done with parchment paper, but since I did not have it, it occurred to me to do it with sheets of toilet paper, separating its sheets and using only a simple sheet, which I glued with glue stick.
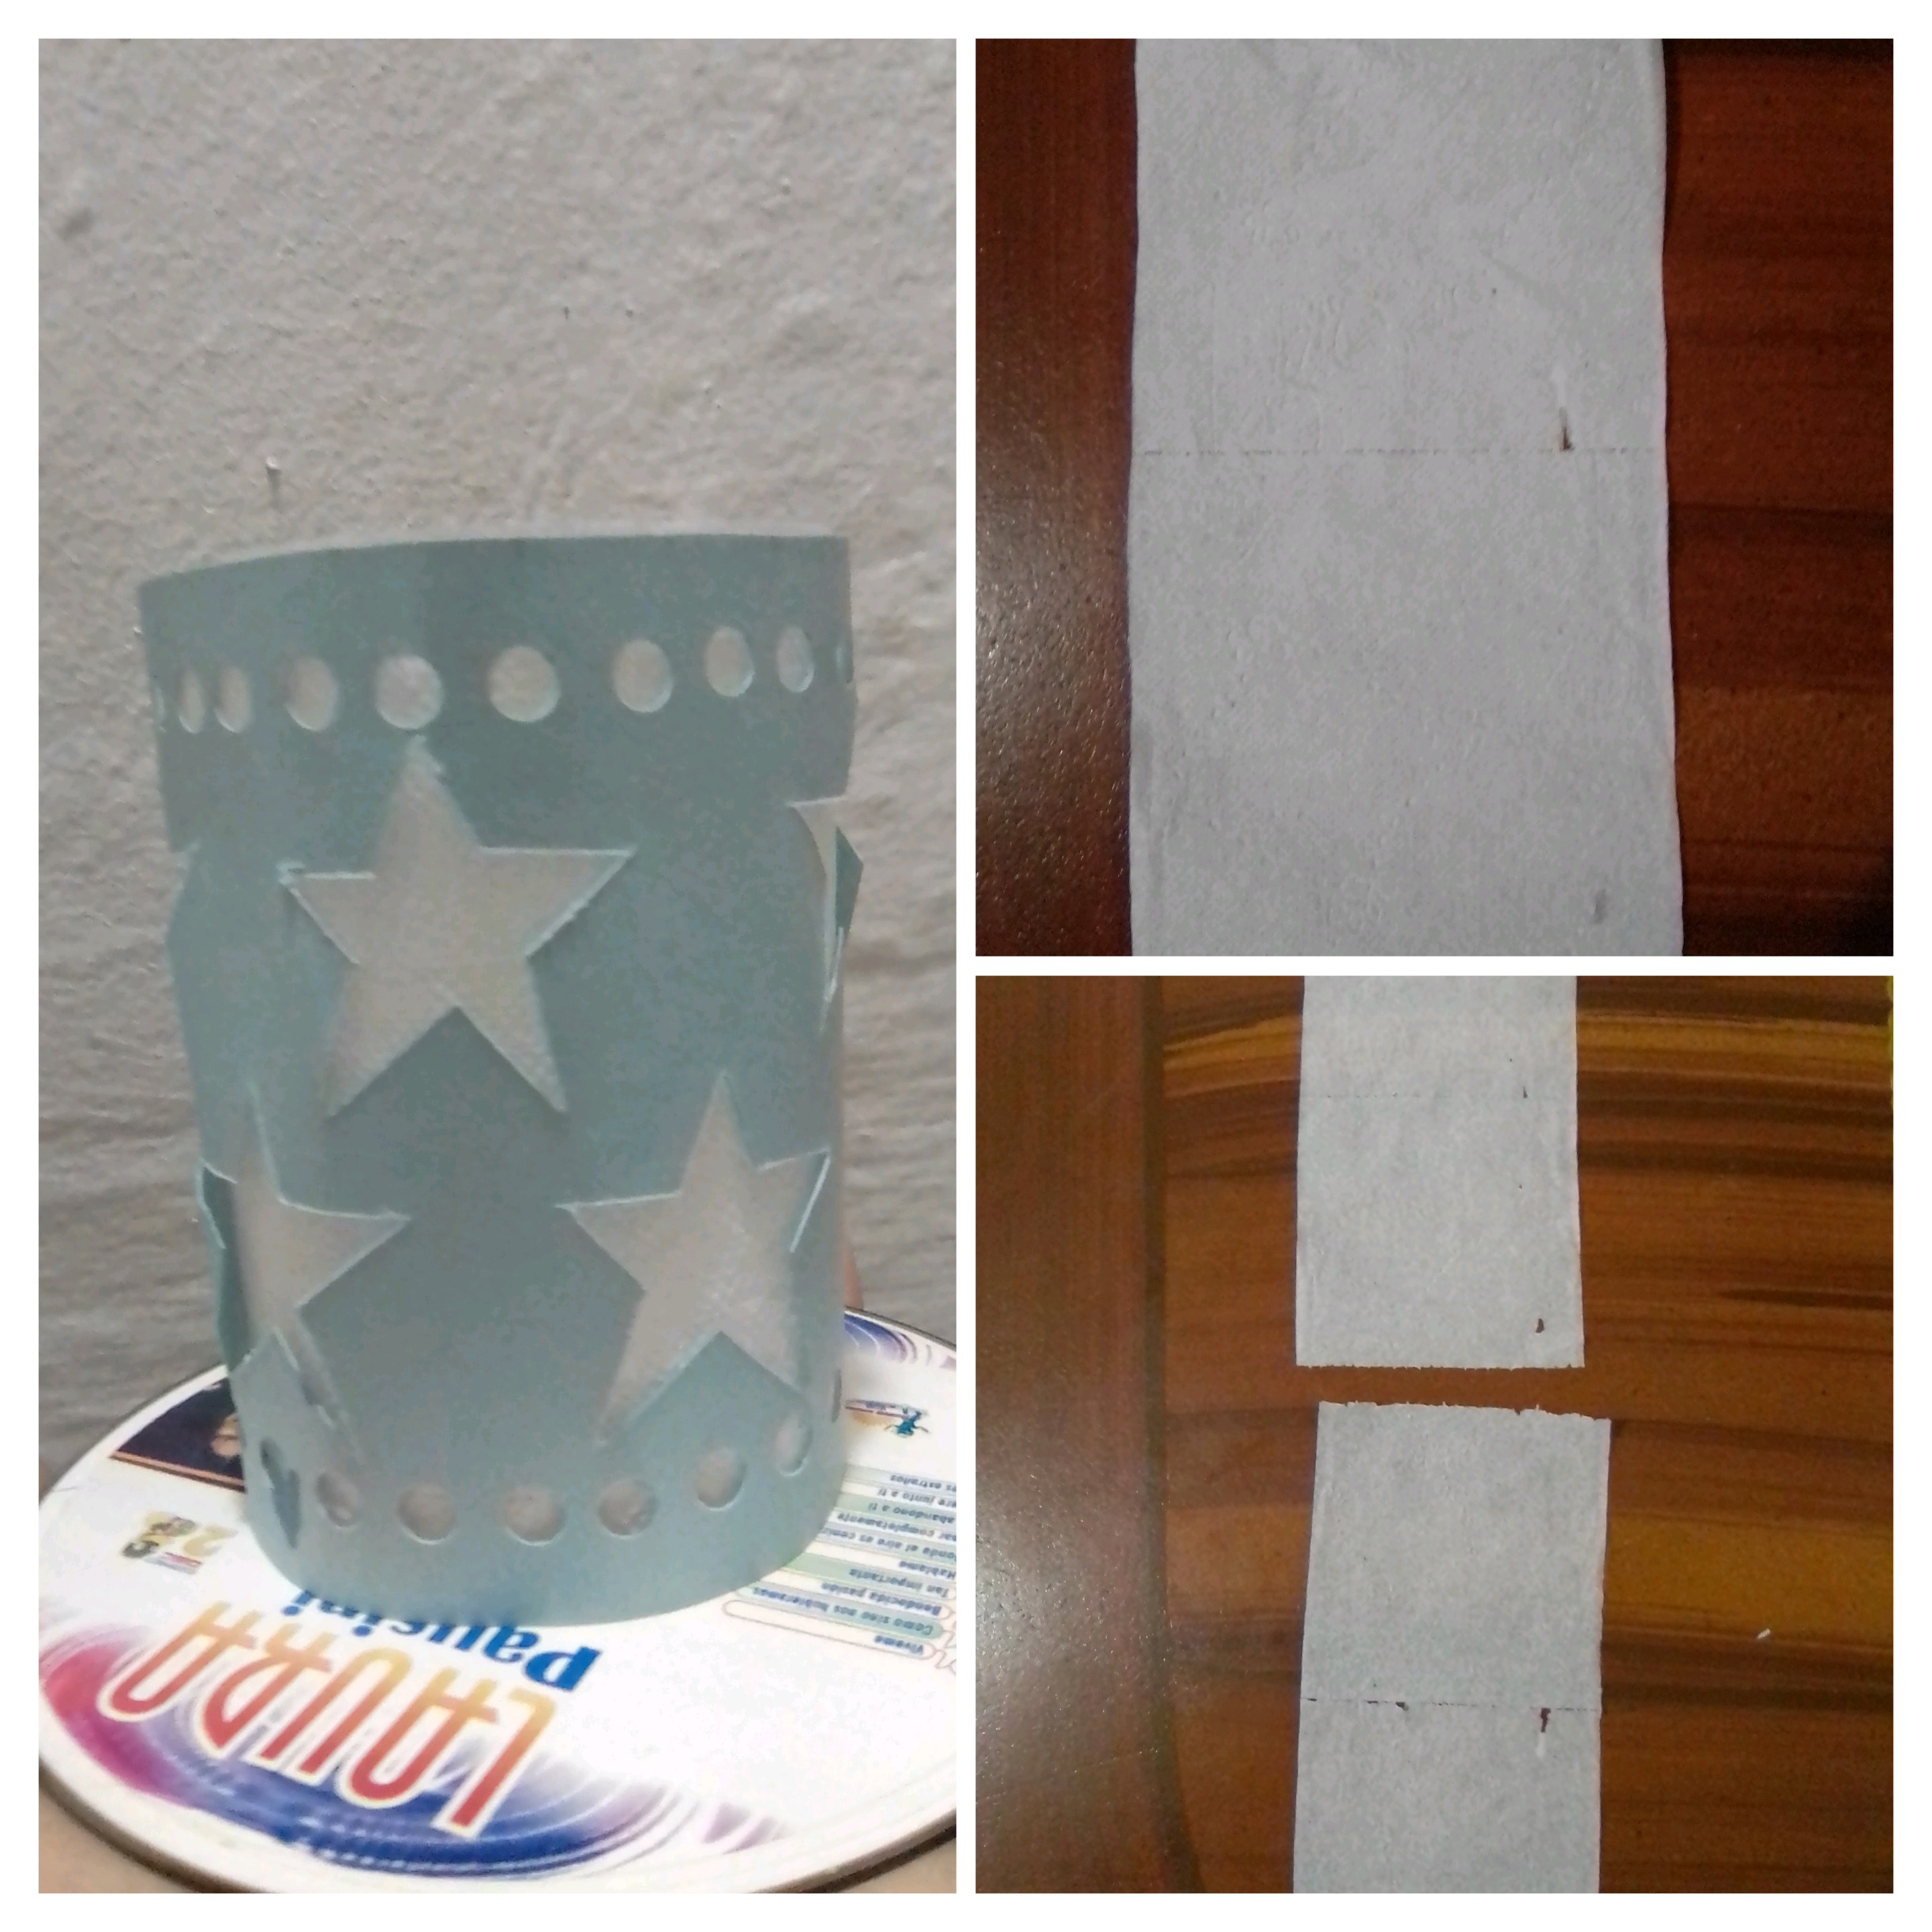
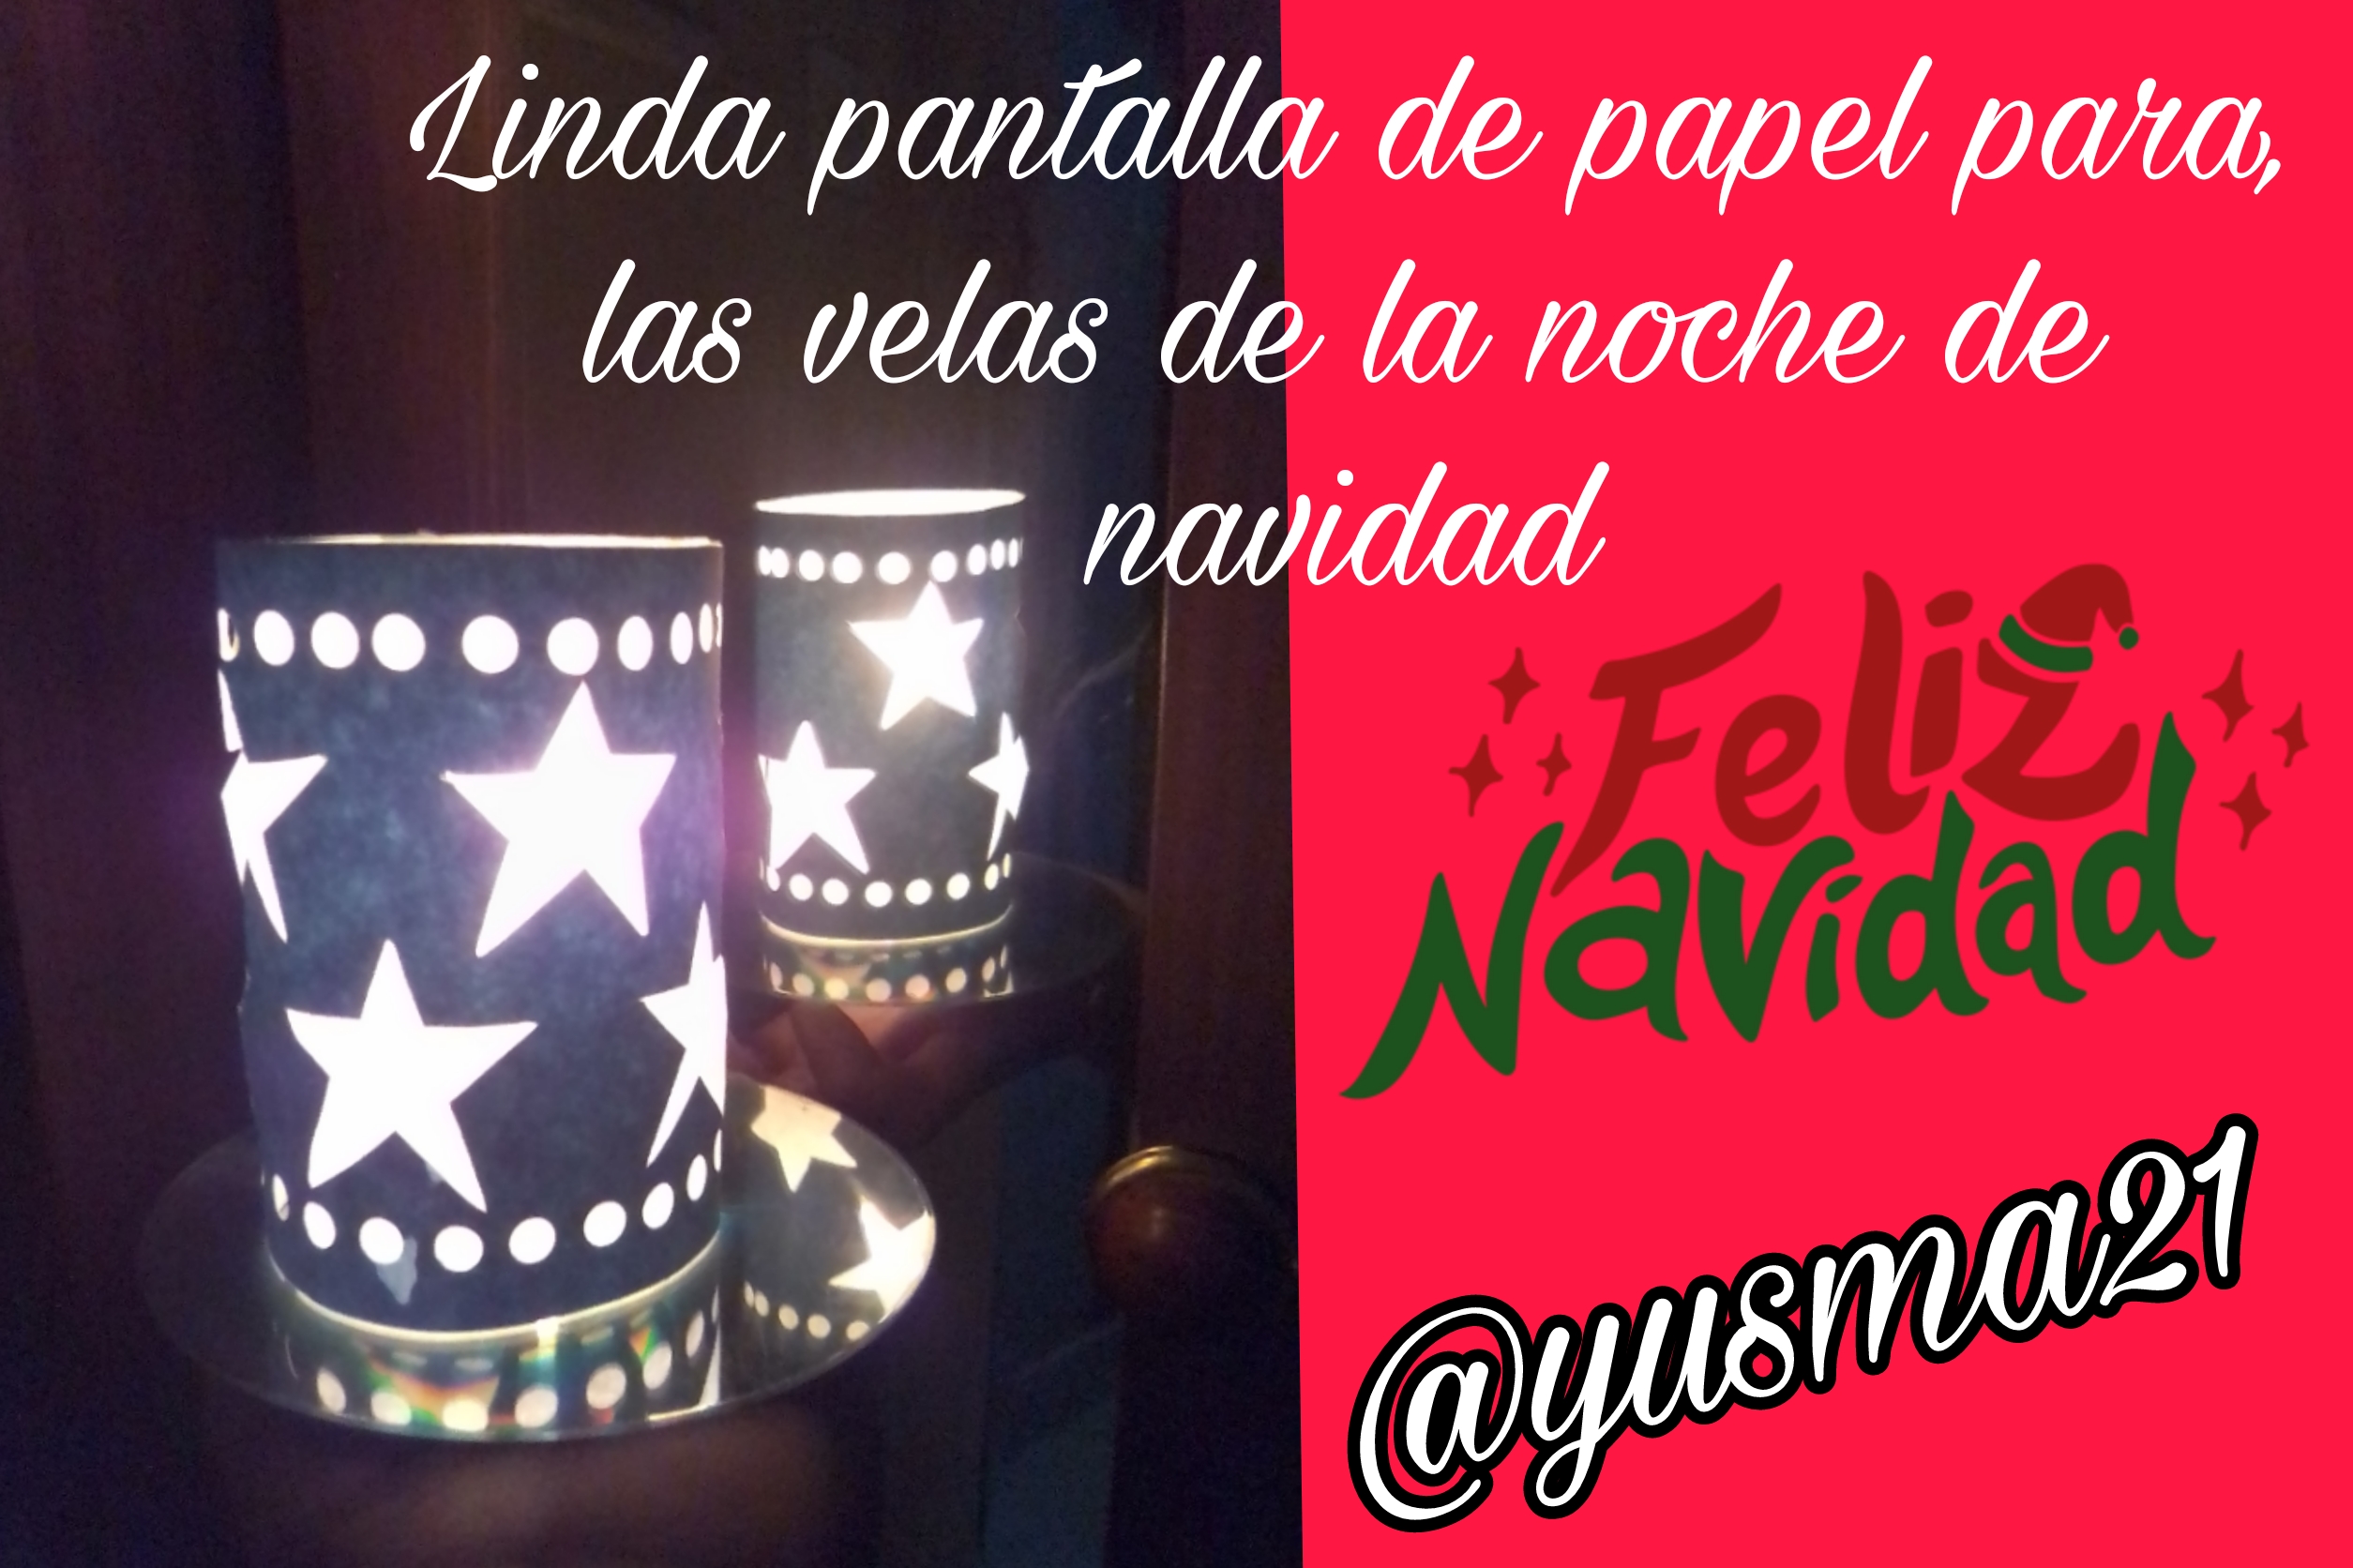
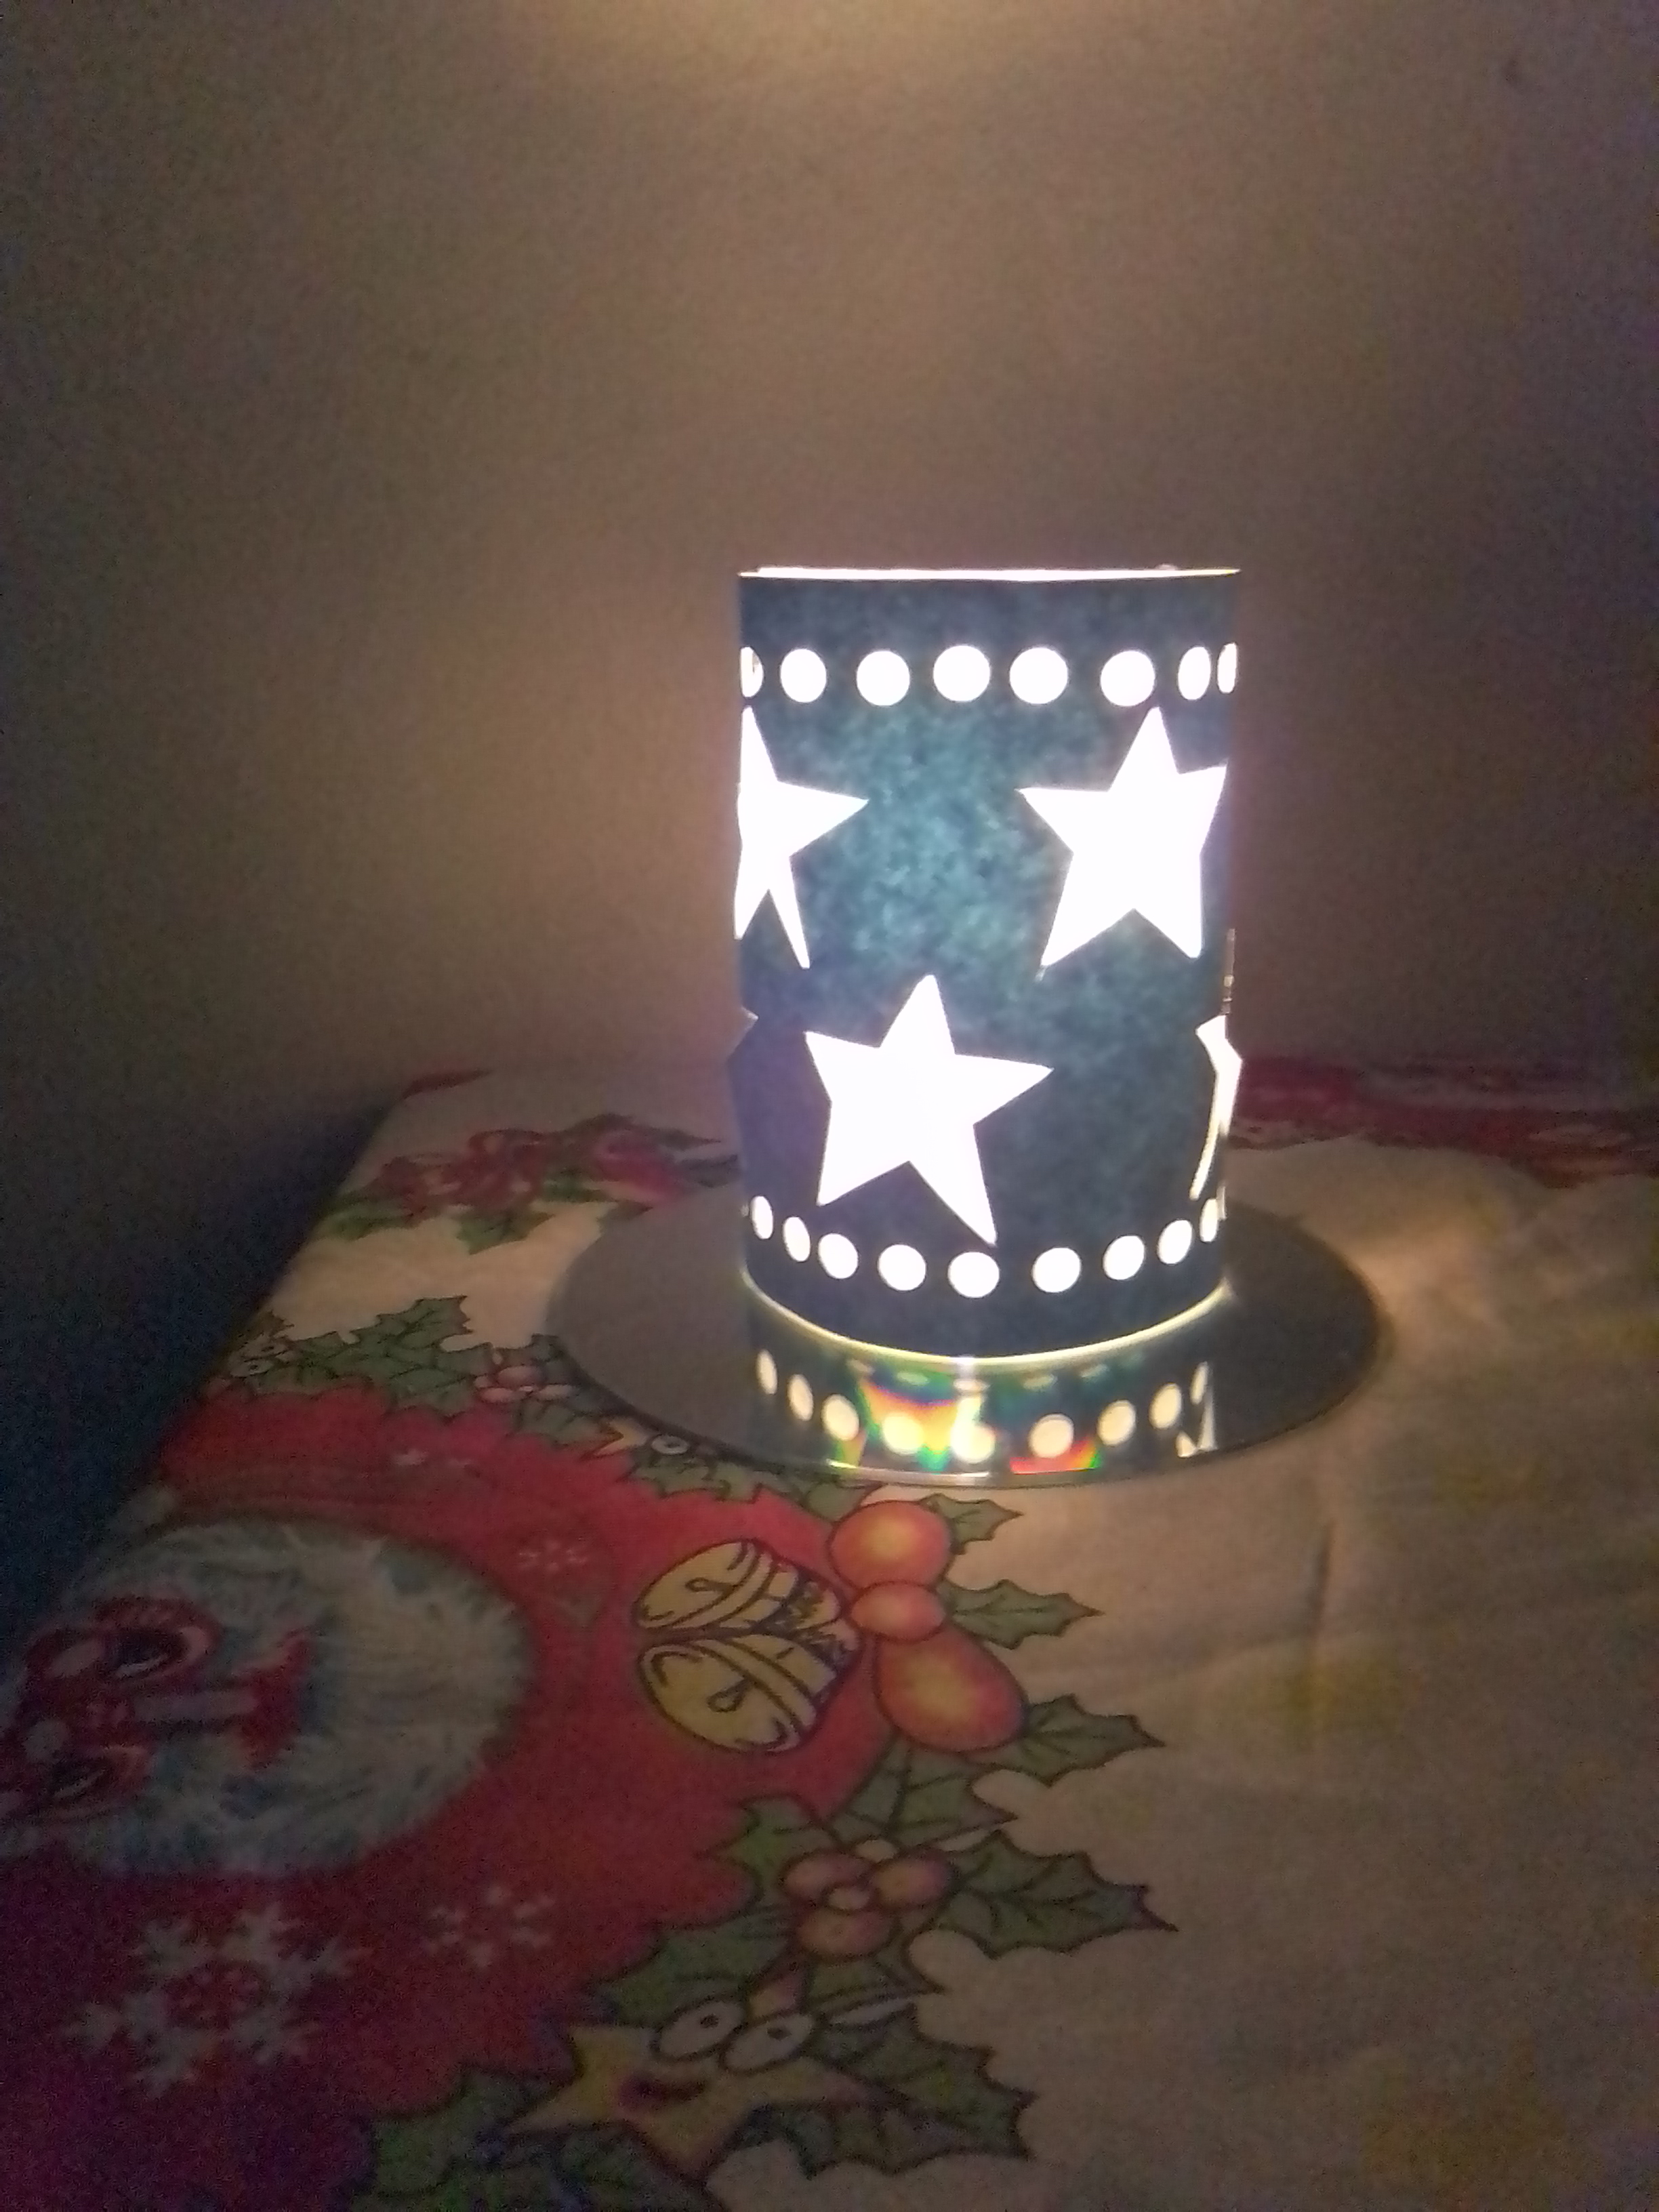
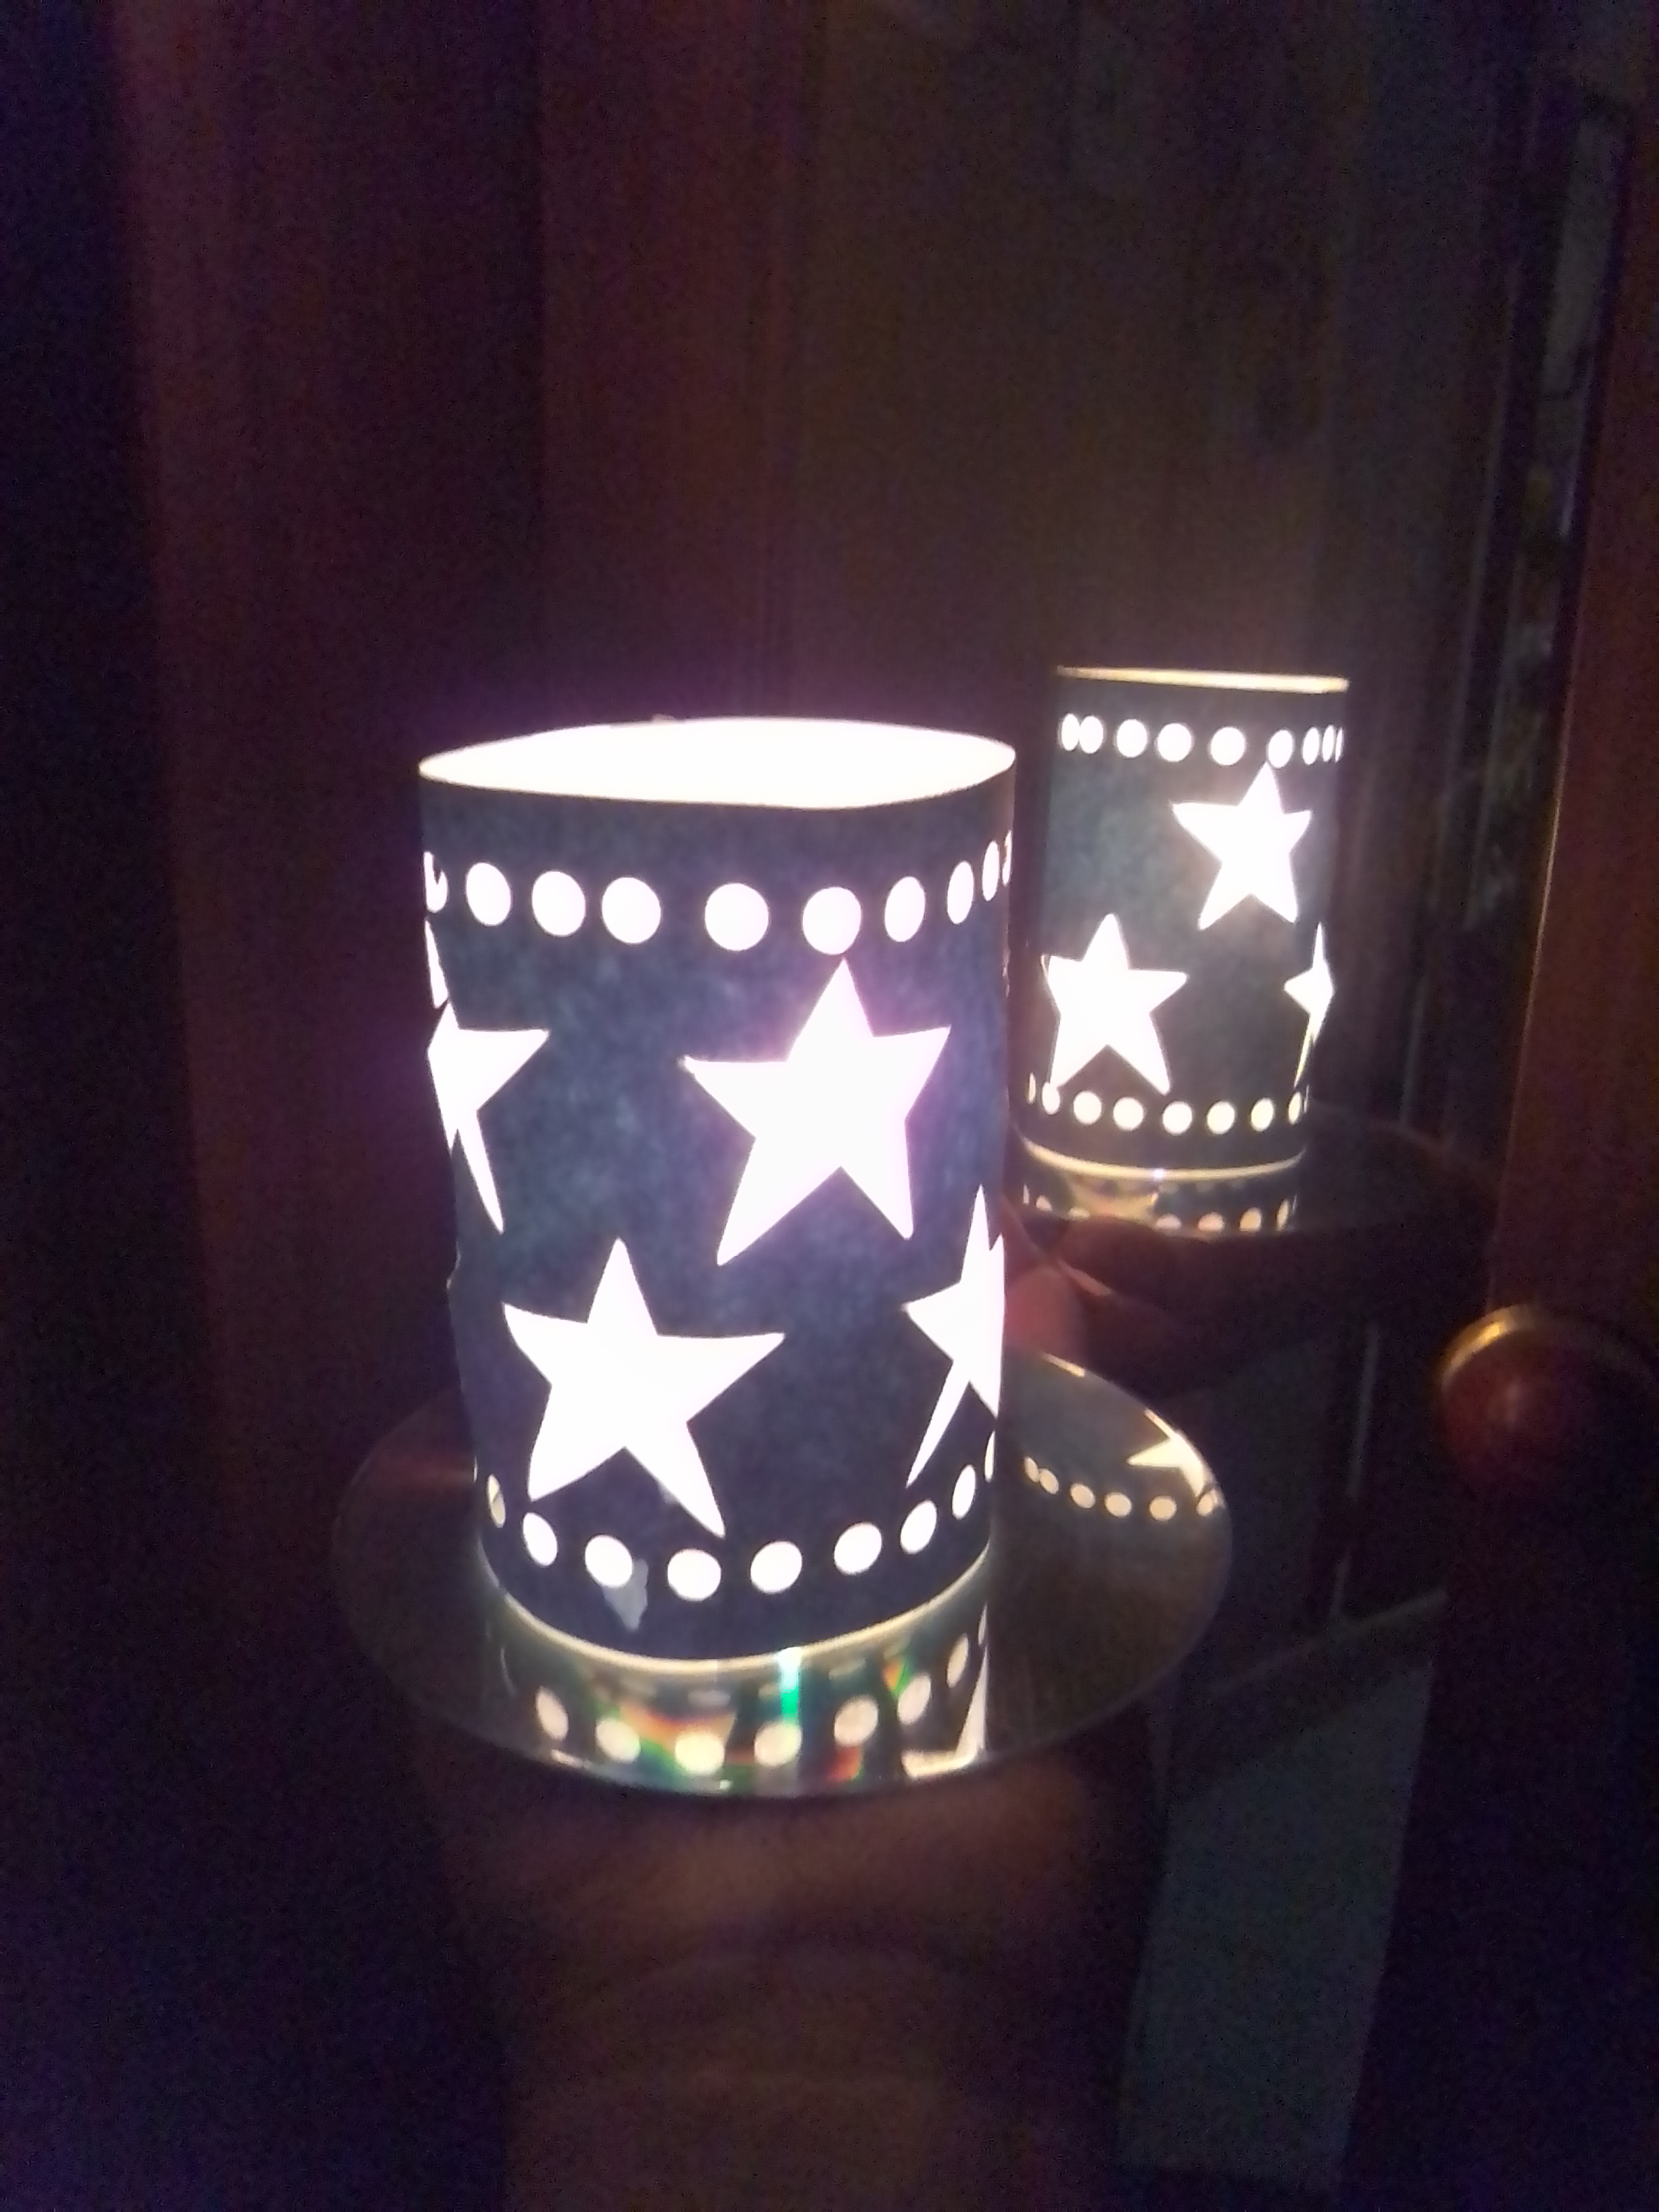
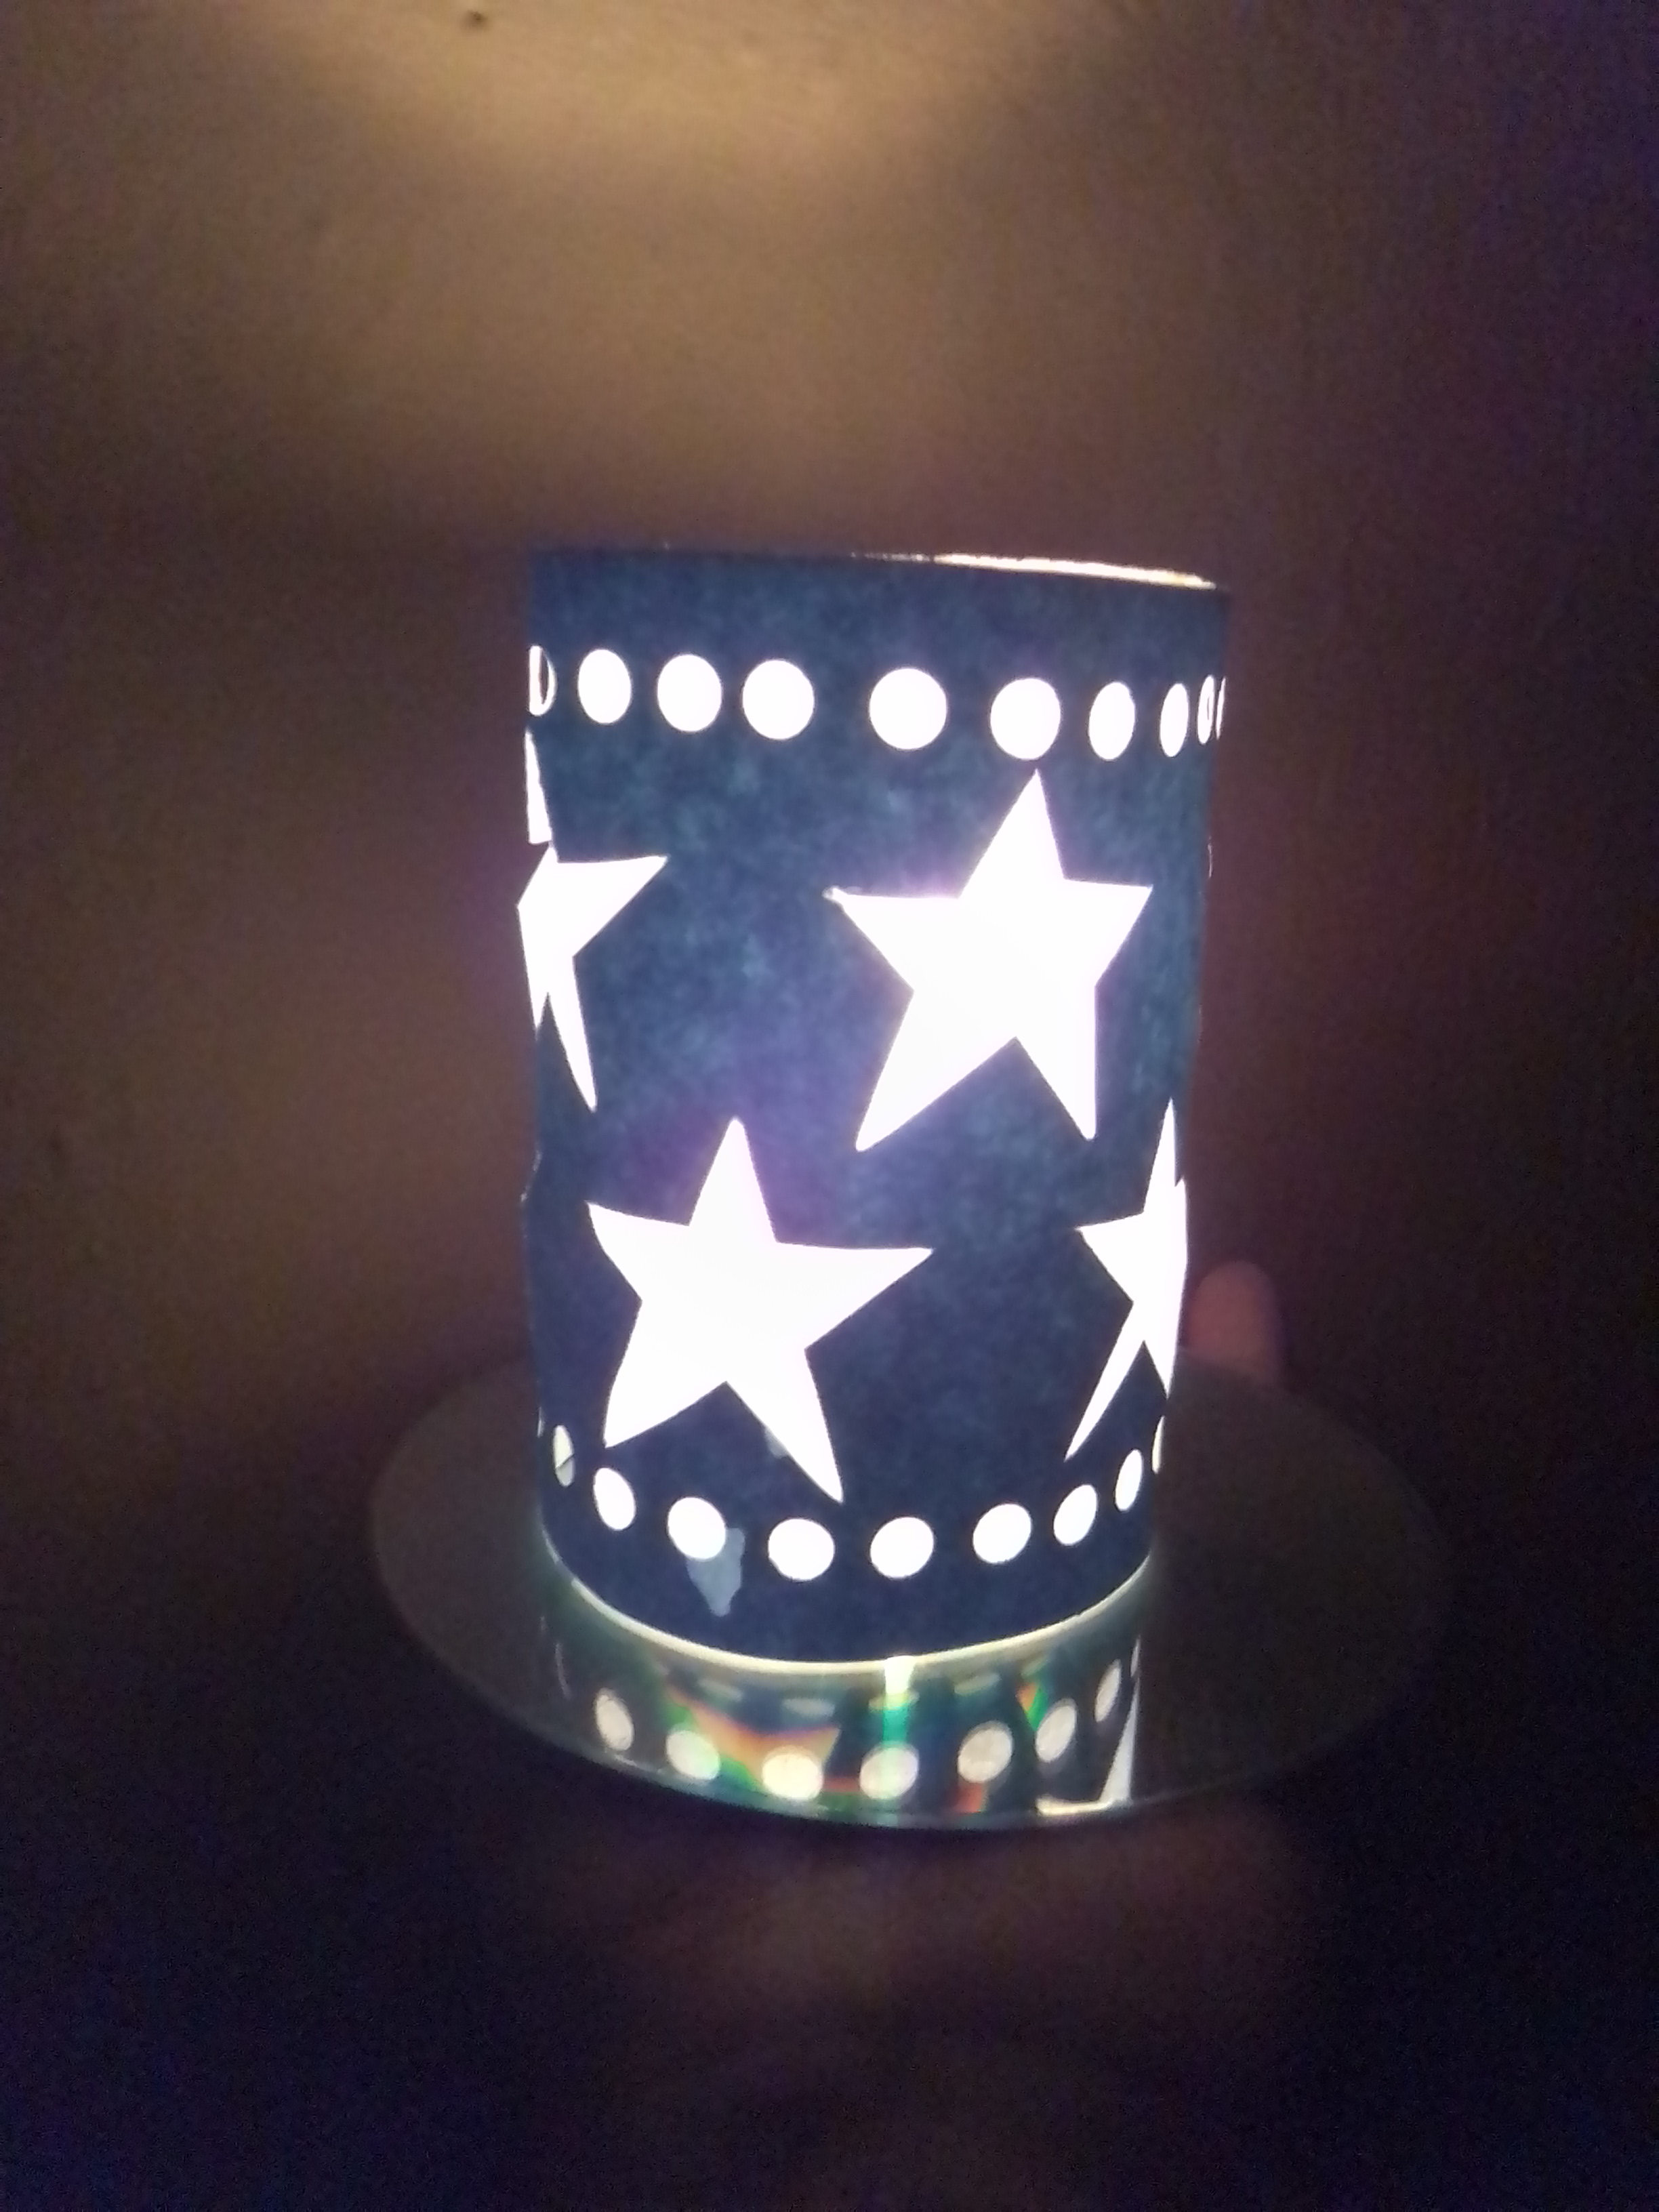
I already have my screen ready, all that remains is to place it around a candle. To make this screen brighter I placed my candle on a CD and then added the screen. I loved the result, I hope you do too.
Merry Christmas to all.
RESULT
The photos are my property, taken exclusively in this project.
The collages of the procedure were made with the tool of my Blue C6 and the main one in Canva
The separators and the banners were edited by me in Canva
The translation was made with
DeepL Translator


Feliz día para todos los creativos de Hive Diy, agradecida de poder disfrutar del talento y las habilidades que se expresan a diario en esta comunidad, y que ha permanecido a lo largo de este año. Ya en la víspera de la noche de navidad, cuando la emoción y la alegría del reencuentro con familiares y amigos está a flor de piel, quiero compartir cómo hacer una sencilla pero hermosa pantalla de papel, para una vela, y alumbrar y decorar nuestra casa, cuando estemos festejando el nacimiento del niño Jesús. Los materiales son muy comunes y económicos , estoy segura que el resultado será de su agrado, los invito a conocer el paso a paso.
MATERIALES
✓ Cartulina azul claro
✓ Tijera, lápiz y regla
✓ Pistola y barra de silicona
✓ Hojas de papel higiénico
✓ Molde de estrella
✓ Perforadora
✓ CD
✓ Vela
✓ Cuter
✓ Pegamento de barra
PASO A PASO
Para realizar esta sencilla y hermosa pantalla de papel, solo es necesario muy pocos pasos. Lo primero es cortar una pieza de cartulina del color que más nos guste o que tengamos disponible, en mi caso use de color azul claro, con unas medidas de 22 x 10 centímetros, decidí no hacerlo muy alto, pues me parece que así se pierde la proyección de la luz.
El paso siguiente, es realizar el diseño sobre la cartulina , para esta pantalla y con motivo de la navidad, yo realice varios estrellas, que transferí a la cartulina con ayuda de un molde .
Utilizando un Cuter , retire las estrellas y luego procedí a perforar tanto el extremo superior como inferior, de manera tal que , la luz de la vela se proyecte a través de todas las aberturas de la pantalla.
Seguidamente proceso a formar un cilindro con la pieza de cartulina y pegarlo con silicón caliente a los lados, es importante ir doblando muy suavemente sin marcar la cartulina, las puntas de aquellas estrellas que sobresalen un poco.
Es el momento de colocar un forro o la verdadera pantalla , está se puede hacer con papel de pergamino, pero como yo no tenía se me ocurrió realizarla con las hojas de papel higiénico, separando sus hojas y utilizando solo una lámina sencilla, la cual pegue con pegamento de barra.
Ya tengo lista mi pantalla, solo queda colocarla alrededor de una vela. Para hacerla está pantalla más luminosa yo coloque mi vela sobre un CD y luego agregué la pantalla. Me encantó el resultado espero que también a ustedes.
Feliz navidad para todos.
RESULTADO
Las fotos son de mi propiedad tomadas exclusivamente en este proyecto.
Los collages del procedimiento los hice con la herramienta de mi Blue C6 y el principal en Canva
Lo separadores y el banners fueron editados por mi en Canva
La traducción fue realizada con
DeepL Traductor

Thank you for sharing this post on HIVE!
Your content got selected by our fellow curator ashikstd & you just received a little thank you upvote from us for your great work! Your post will be featured in one of our recurring compilations which are aiming to offer you a stage to widen your audience within the DIY scene of Hive. Stay creative & HIVE ON!
Please vote for our hive witness <3
Muchas gracias por su tiempo y su apoyo.
Se ve muy lindo. Me gustó tu idea, la pondré en práctica. Fue un gusto pasar por aquí y ver tu talento. Gracias por compartir.
Gracias @ramisey apreciado tu lindo comentario y tú visita. Esta idea es genial y puedes realizar los diseños que más te gusten.
Qué idea tan bonita amiga la felicito de verdad le quedaron muy hermosas, saludos 🤗
Gracias amiga por su visita a mi blog. Feliz Navidad
oh wow! this is very cute to have in the room with all the lights out for sure, will even look good during the new year's with our indoor light turned off to better see the fireworks outside 😄 thank you for sharing your creation of this!
https://d.buzz
!ALIVE
It is a nice and useful ornament, to use with the lights off to enjoy the details we choose to make on the screens. Thank you for your visit and your support. Happy 2023
Did you know you can win 10$ hive by competing in our Monday Challenge? Its Every Monday, just go here.☜(゚ヮ゚☜)
@yusma21! You Are Alive so I just staked 0.1 $ALIVE to your account on behalf of @ilovewintergem. (3/10)
The tip has been paid for by the We Are Alive Tribe through the earnings on @alive.chat, feel free to swing by our daily chat any time you want.

Thank you very much for such a valuable contribution. Thank you very much. Happy 2023
Happy new year to you as well.