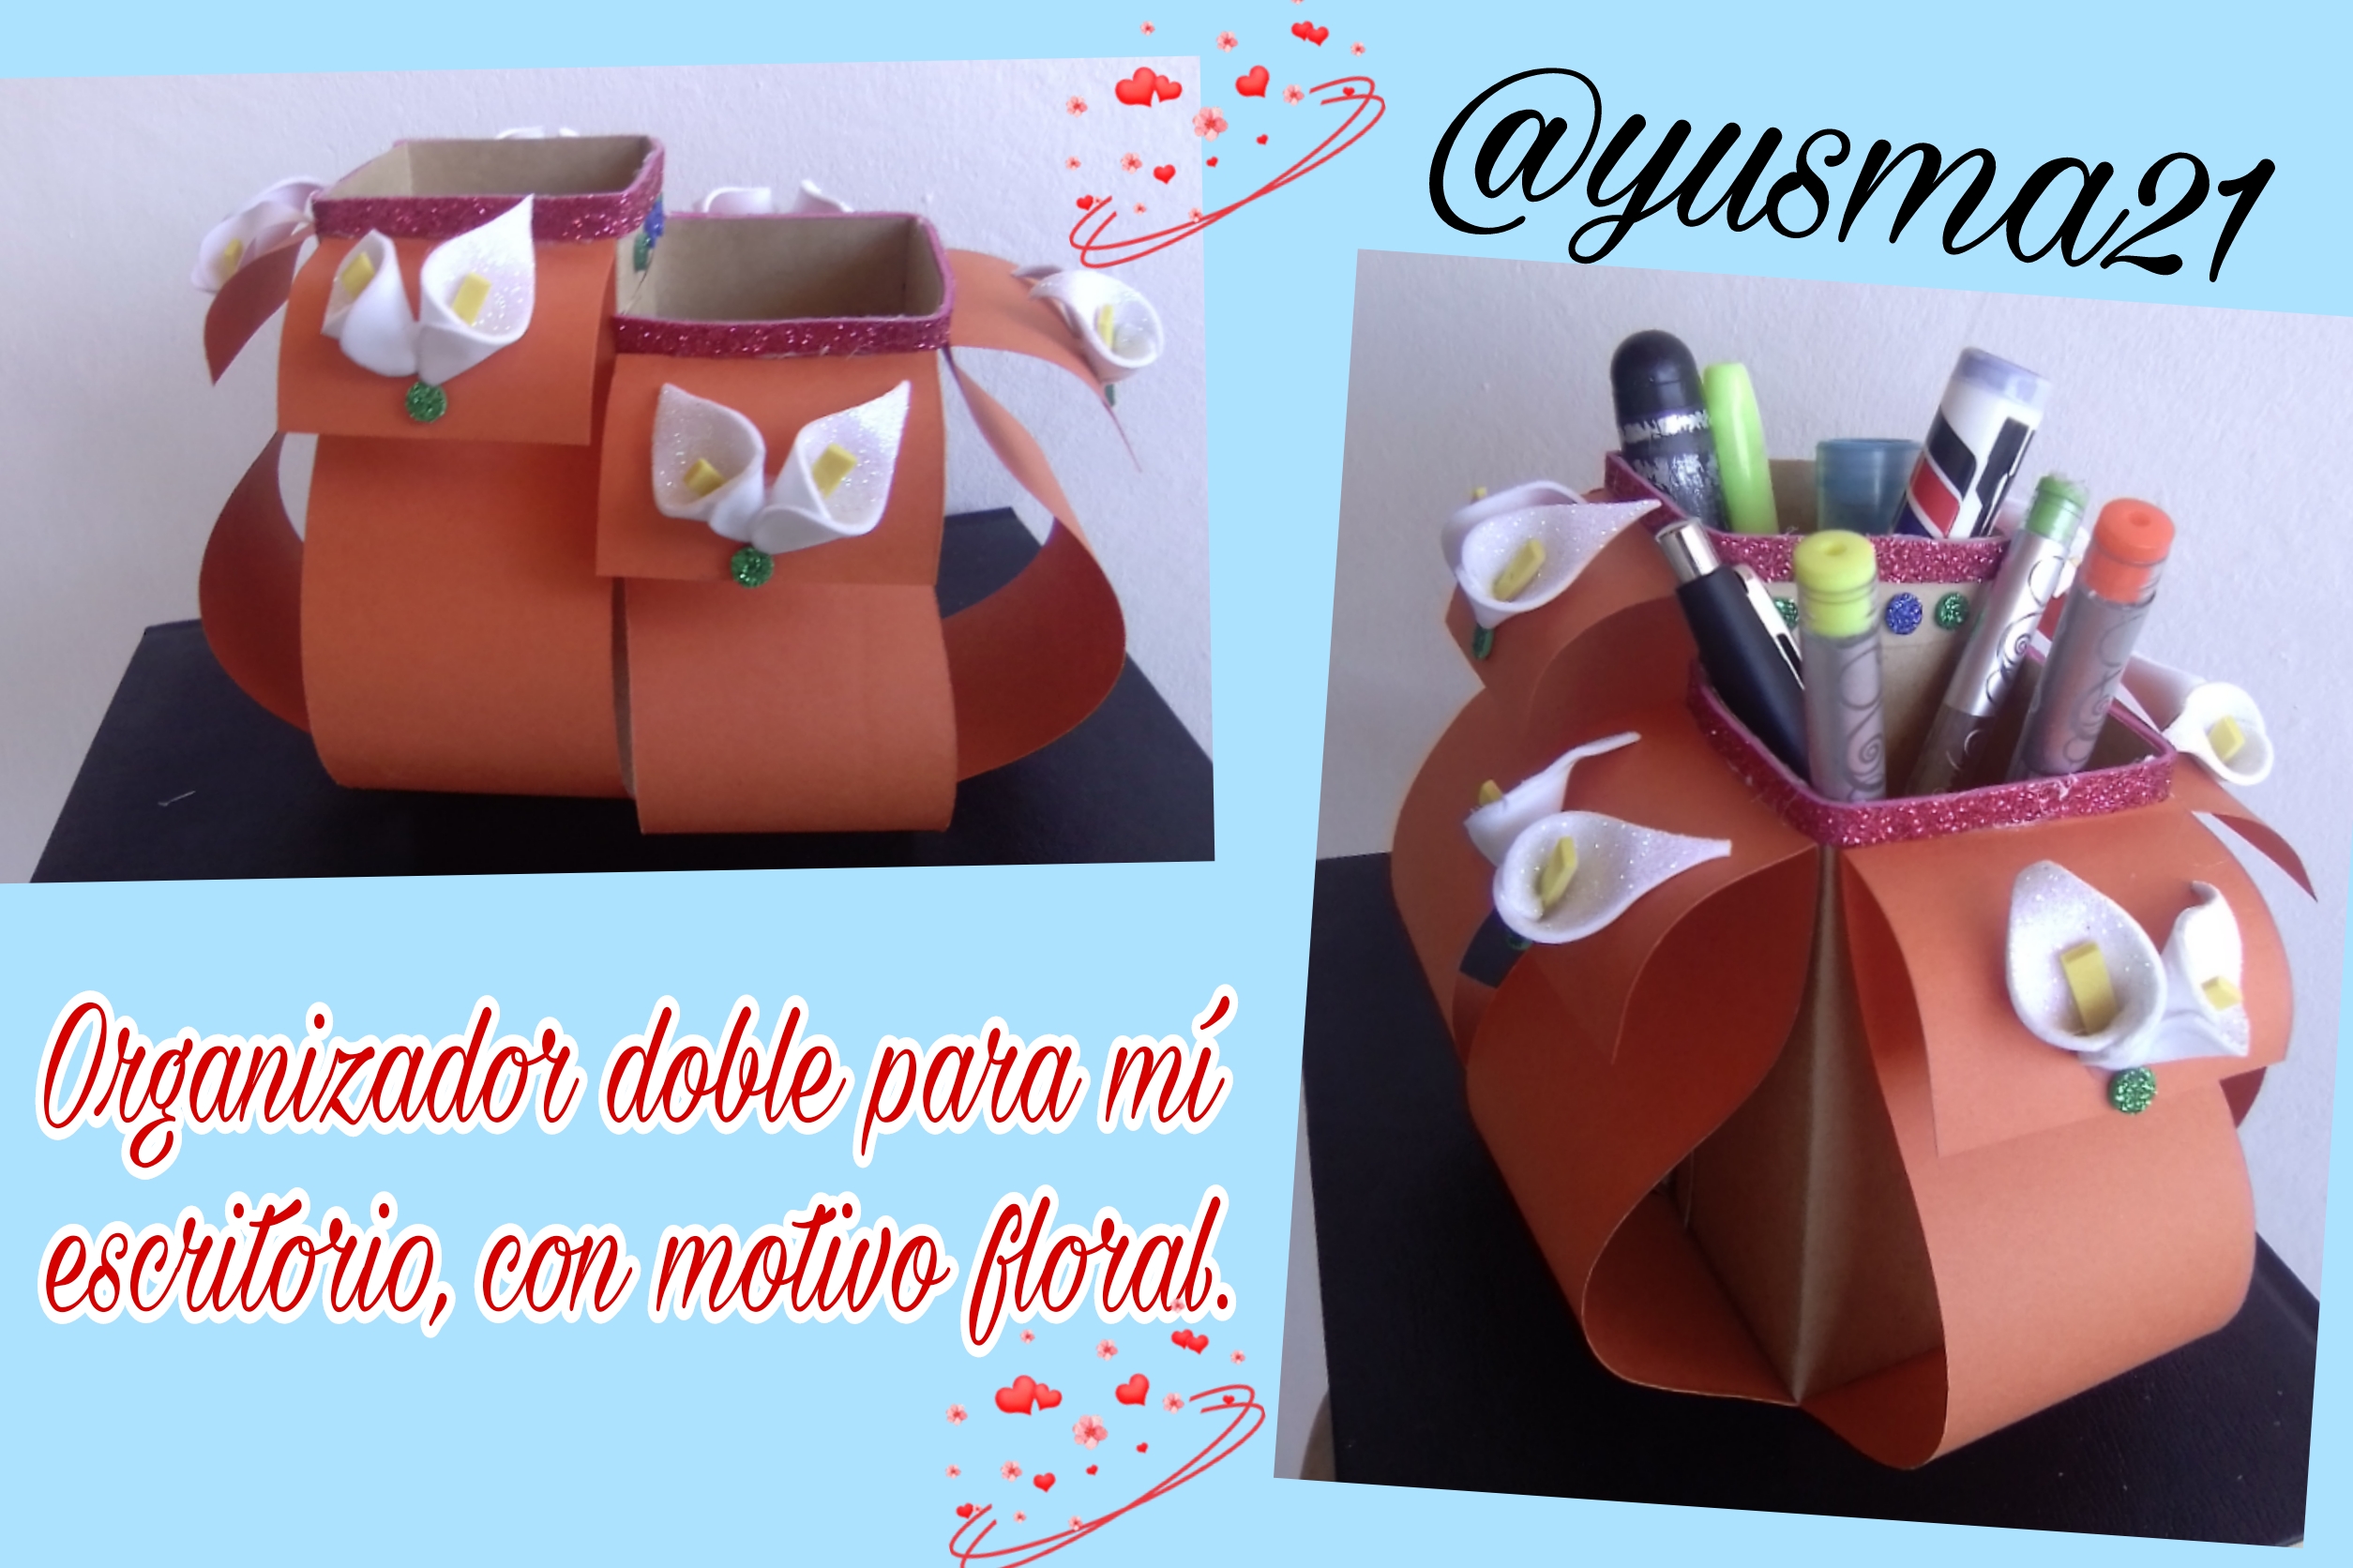

A happy and successful year 2023 for the great platform Hive blog, especially to the creatives of the Hive Diy community. At the beginning of a new year, we always take into account the resolutions we wish to fulfill and what we want to change, but it is also true that we have a particular interest in renovating some aspects of the house or our workplace, which is why for the beginning of This year, I wanted to make a cute, useful and elegant pencil organizer to decorate and renew my desk. I will tell you below how I did it and the materials I used.

MATERIALS
✓ Manila folder
✓ Scissors, pencil and ruler
✓ Gun and glue stick
✓ Fuchsia, white and green frosted foami
✓ Yellow foam
✓ Orange Bond paper.
✓ Recycling flowers, leaves and ornaments
✓ Cuter

STEP BY STEP
For this new year I wanted a very nice pencil organizer, one of those that attract looks and also that was unusual. That's why I dared to make a double organizer with a floral motif.
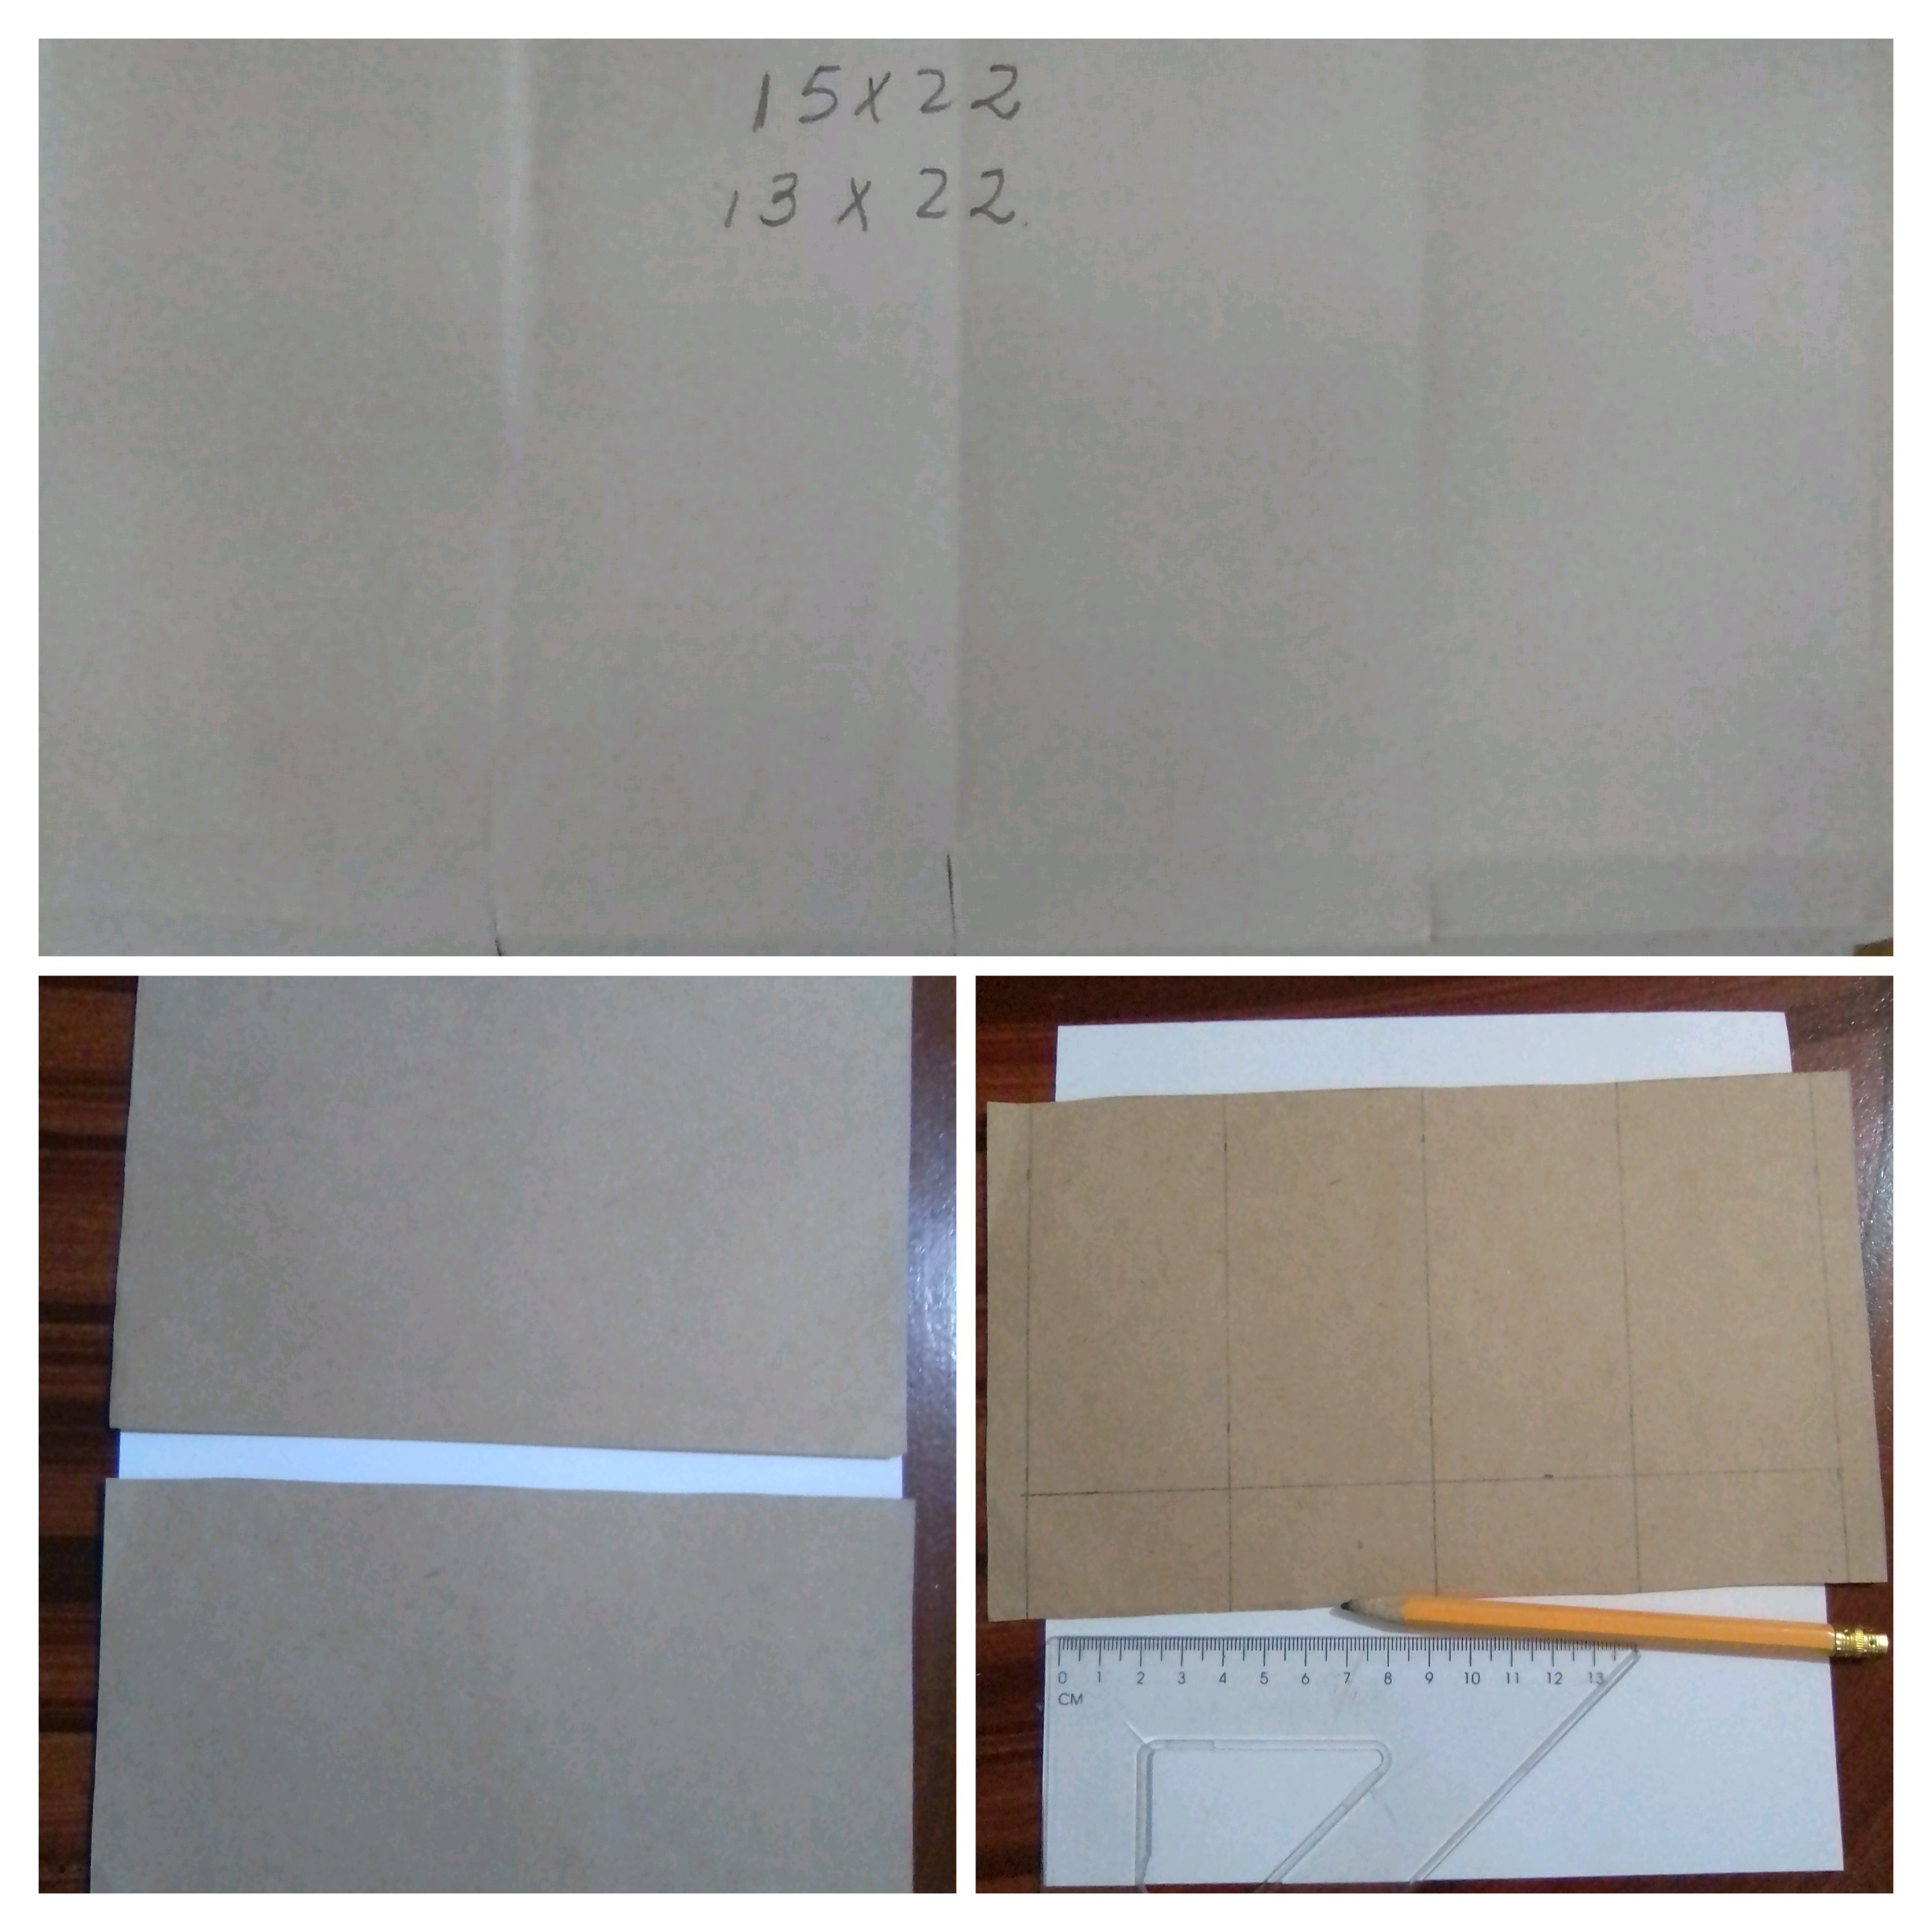
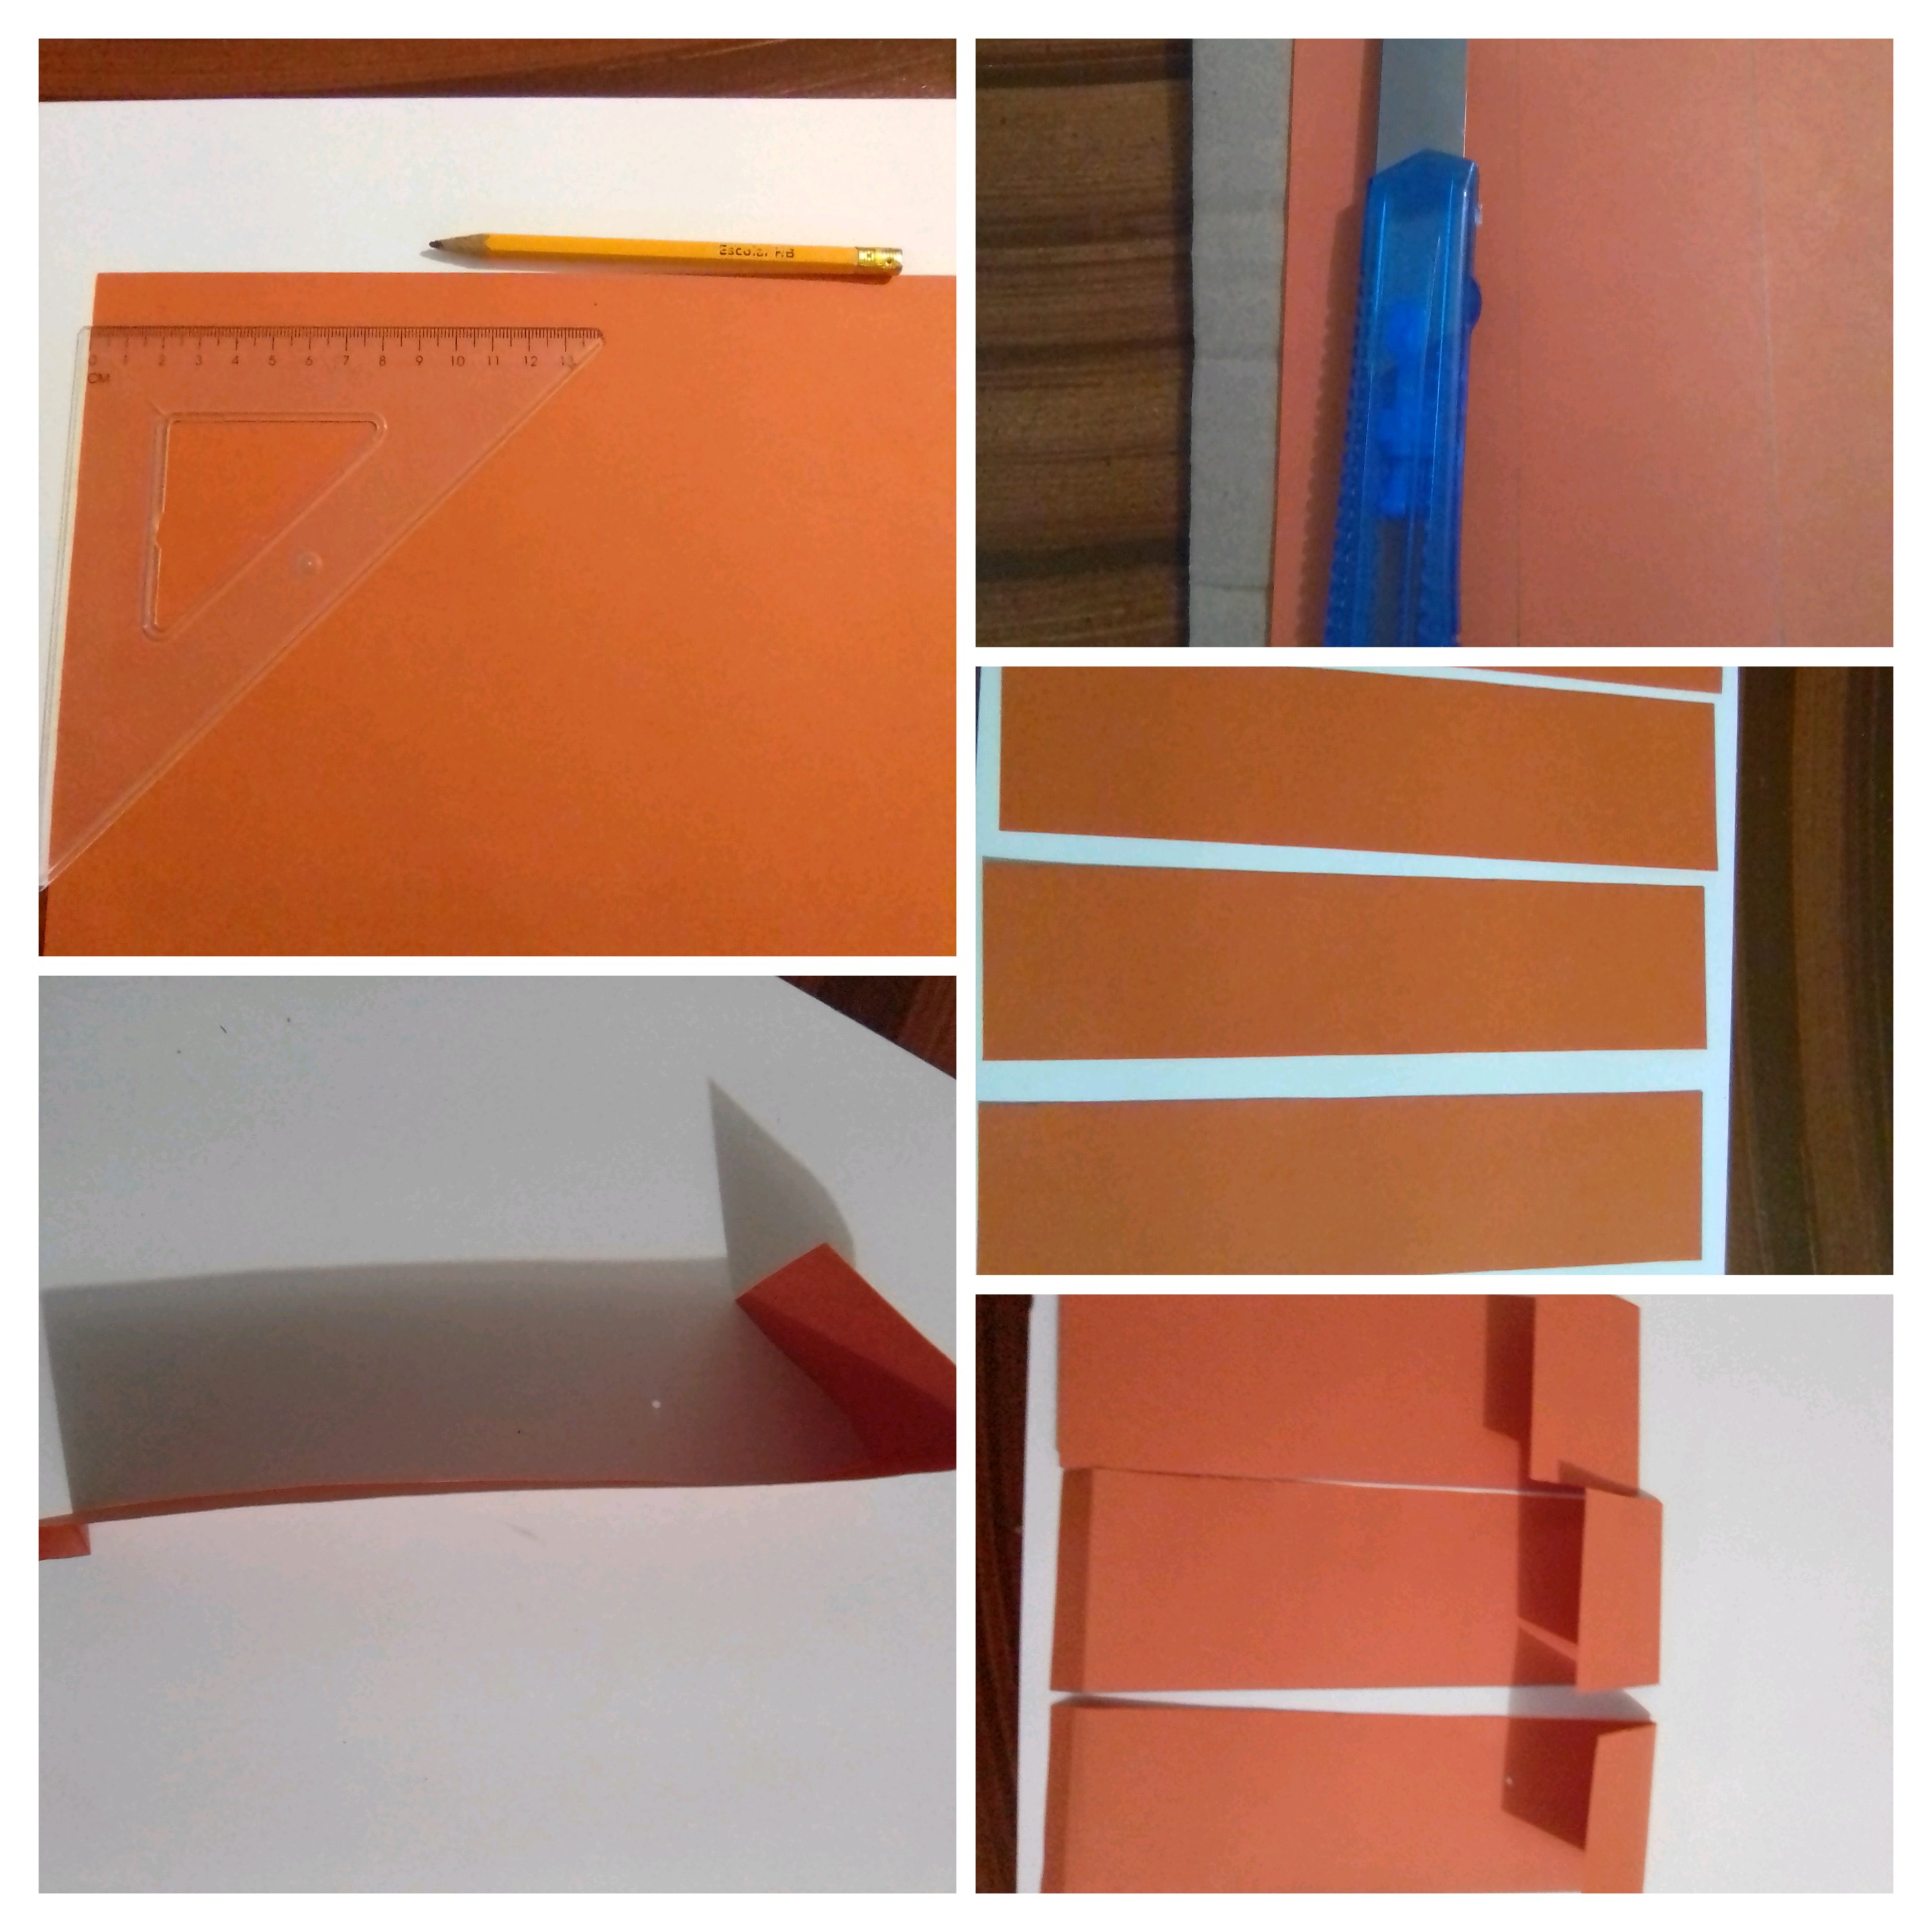
The initial step is to cut two pieces, one 15 x 22 centimeters and the other 13 x 22 centimeters. I measured 1 centimeters on each side and 3 centimeters on each piece at the top, likewise I measured 5 centimeters across, to obtain the four sides of the organizer.
To start shaping the organizer, I cut the lower lines with scissors, and then I proceed to fold all the previously made lines with the help of a ruler.

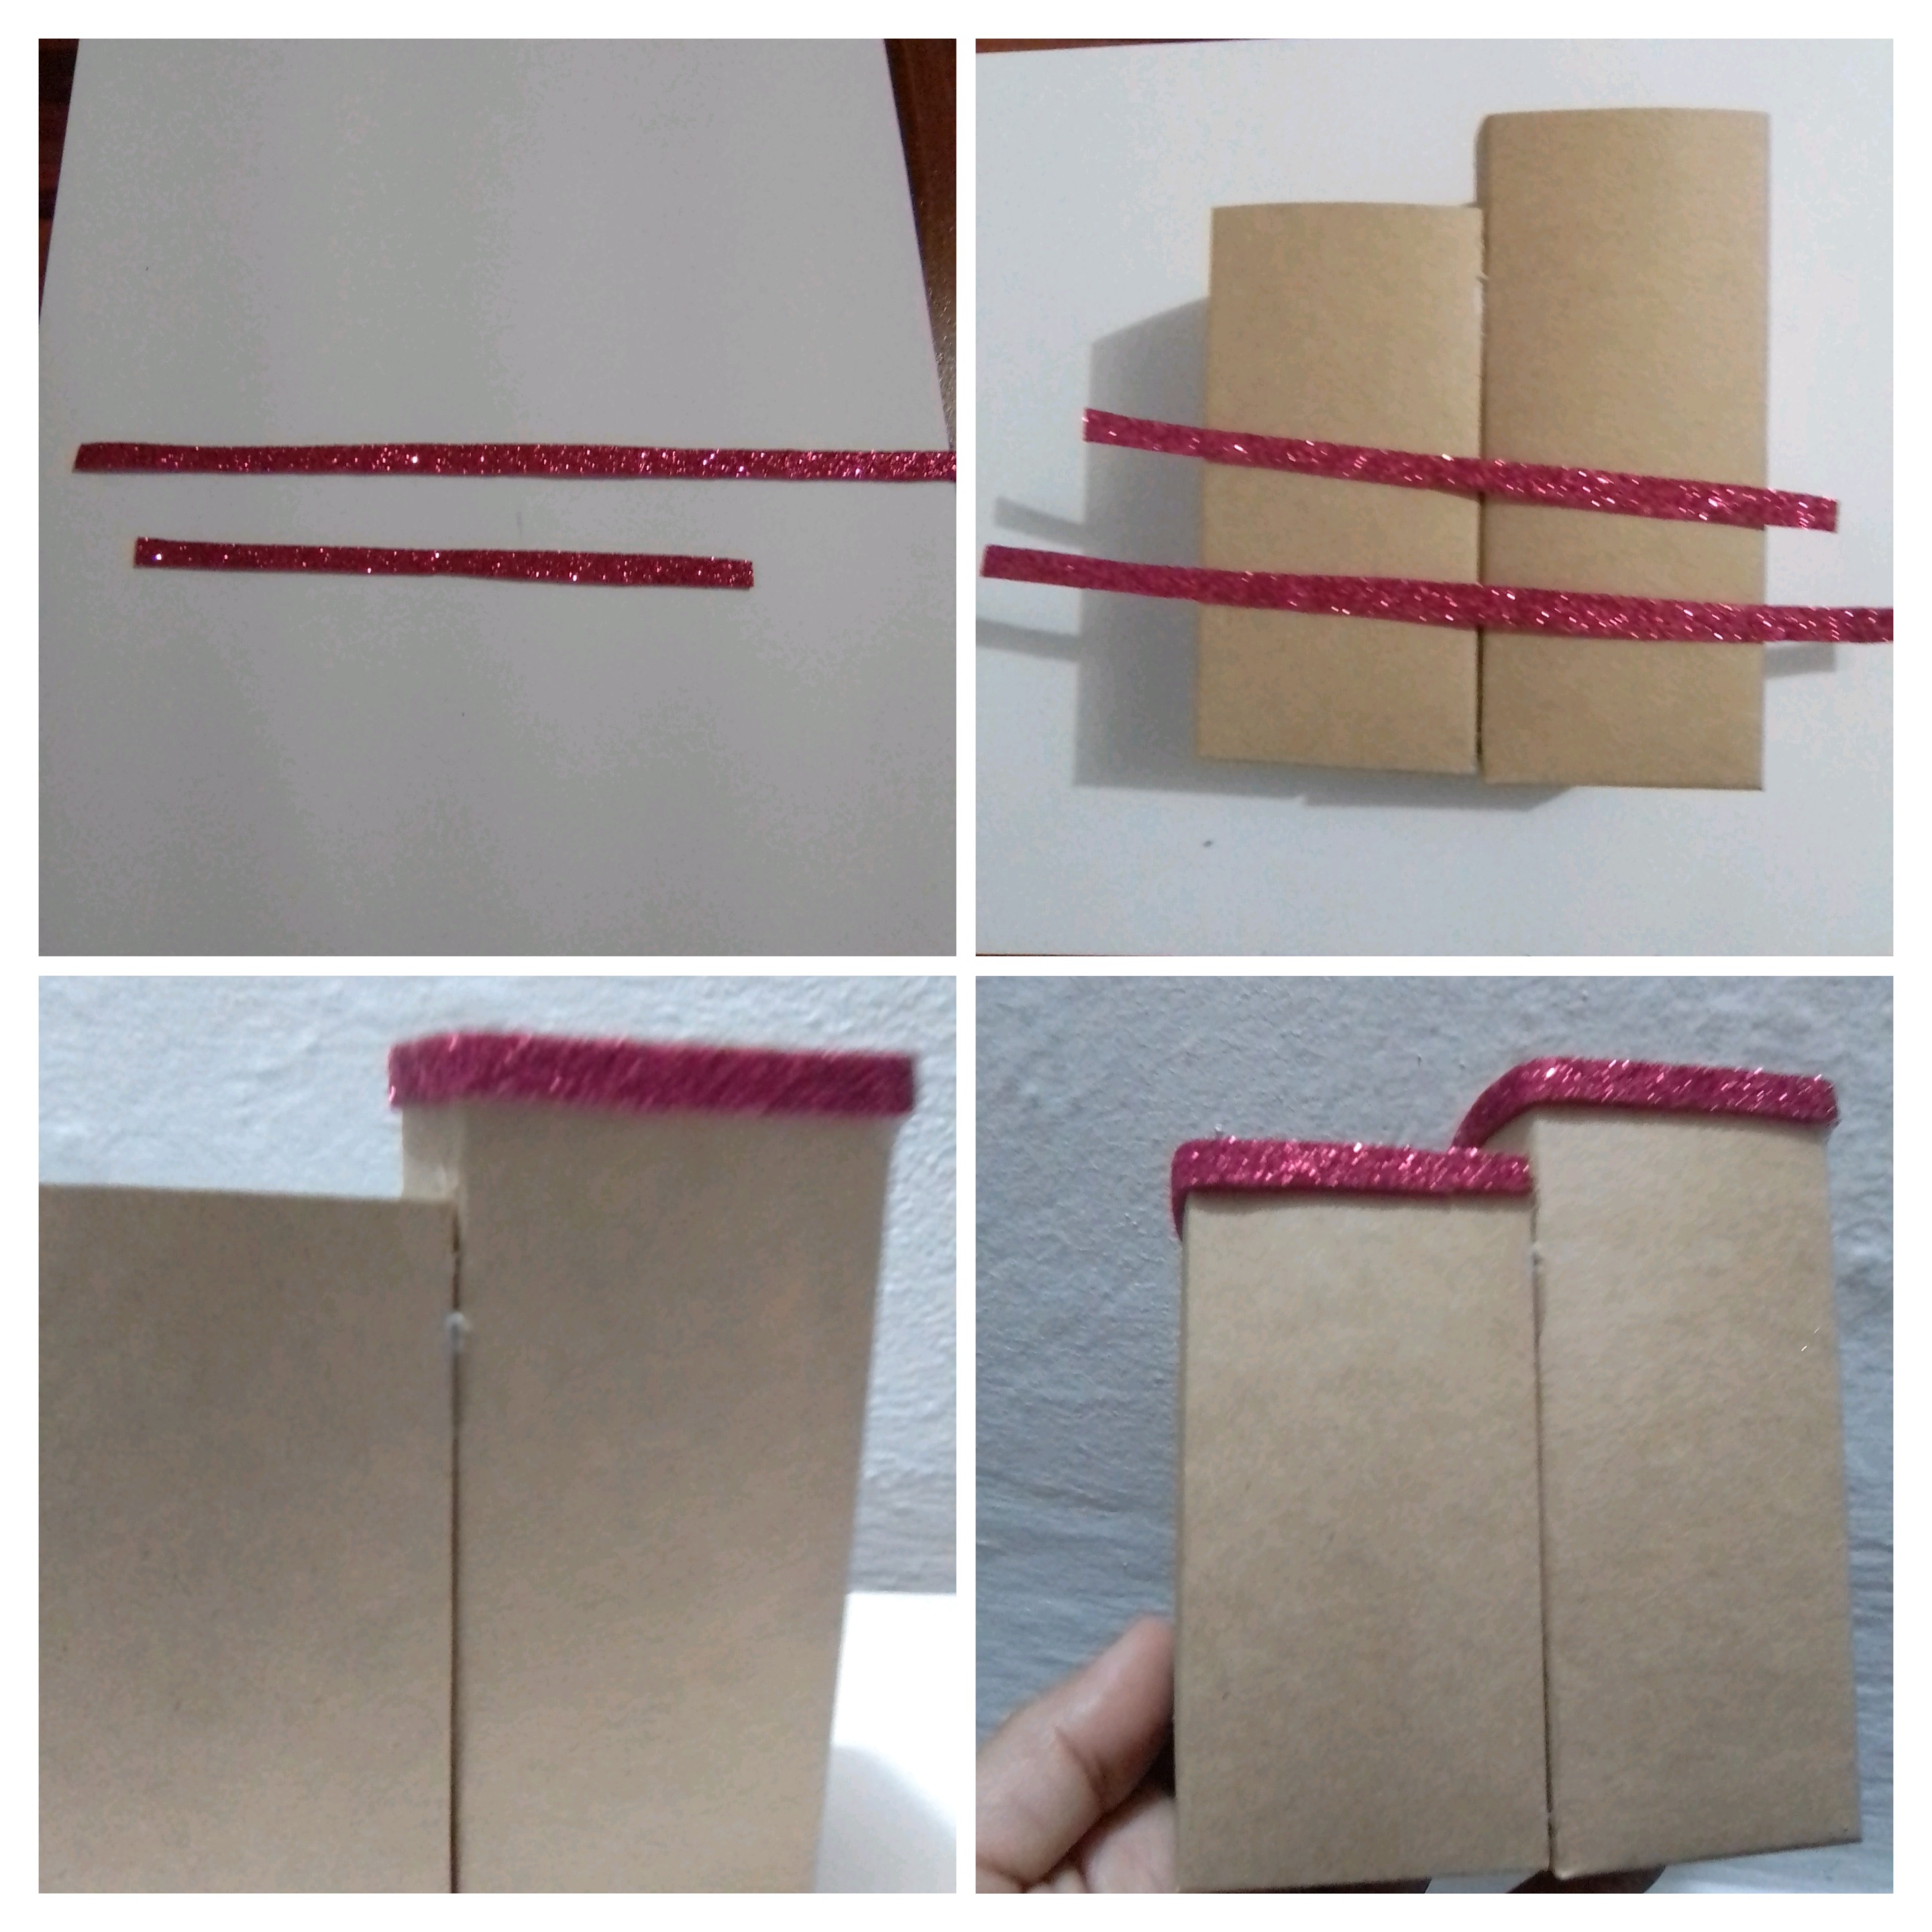
Next, I joined with hot Silicon, the sides and then the lower lashes, although I would have liked to be able to use the liquid, since it allows me to correct.
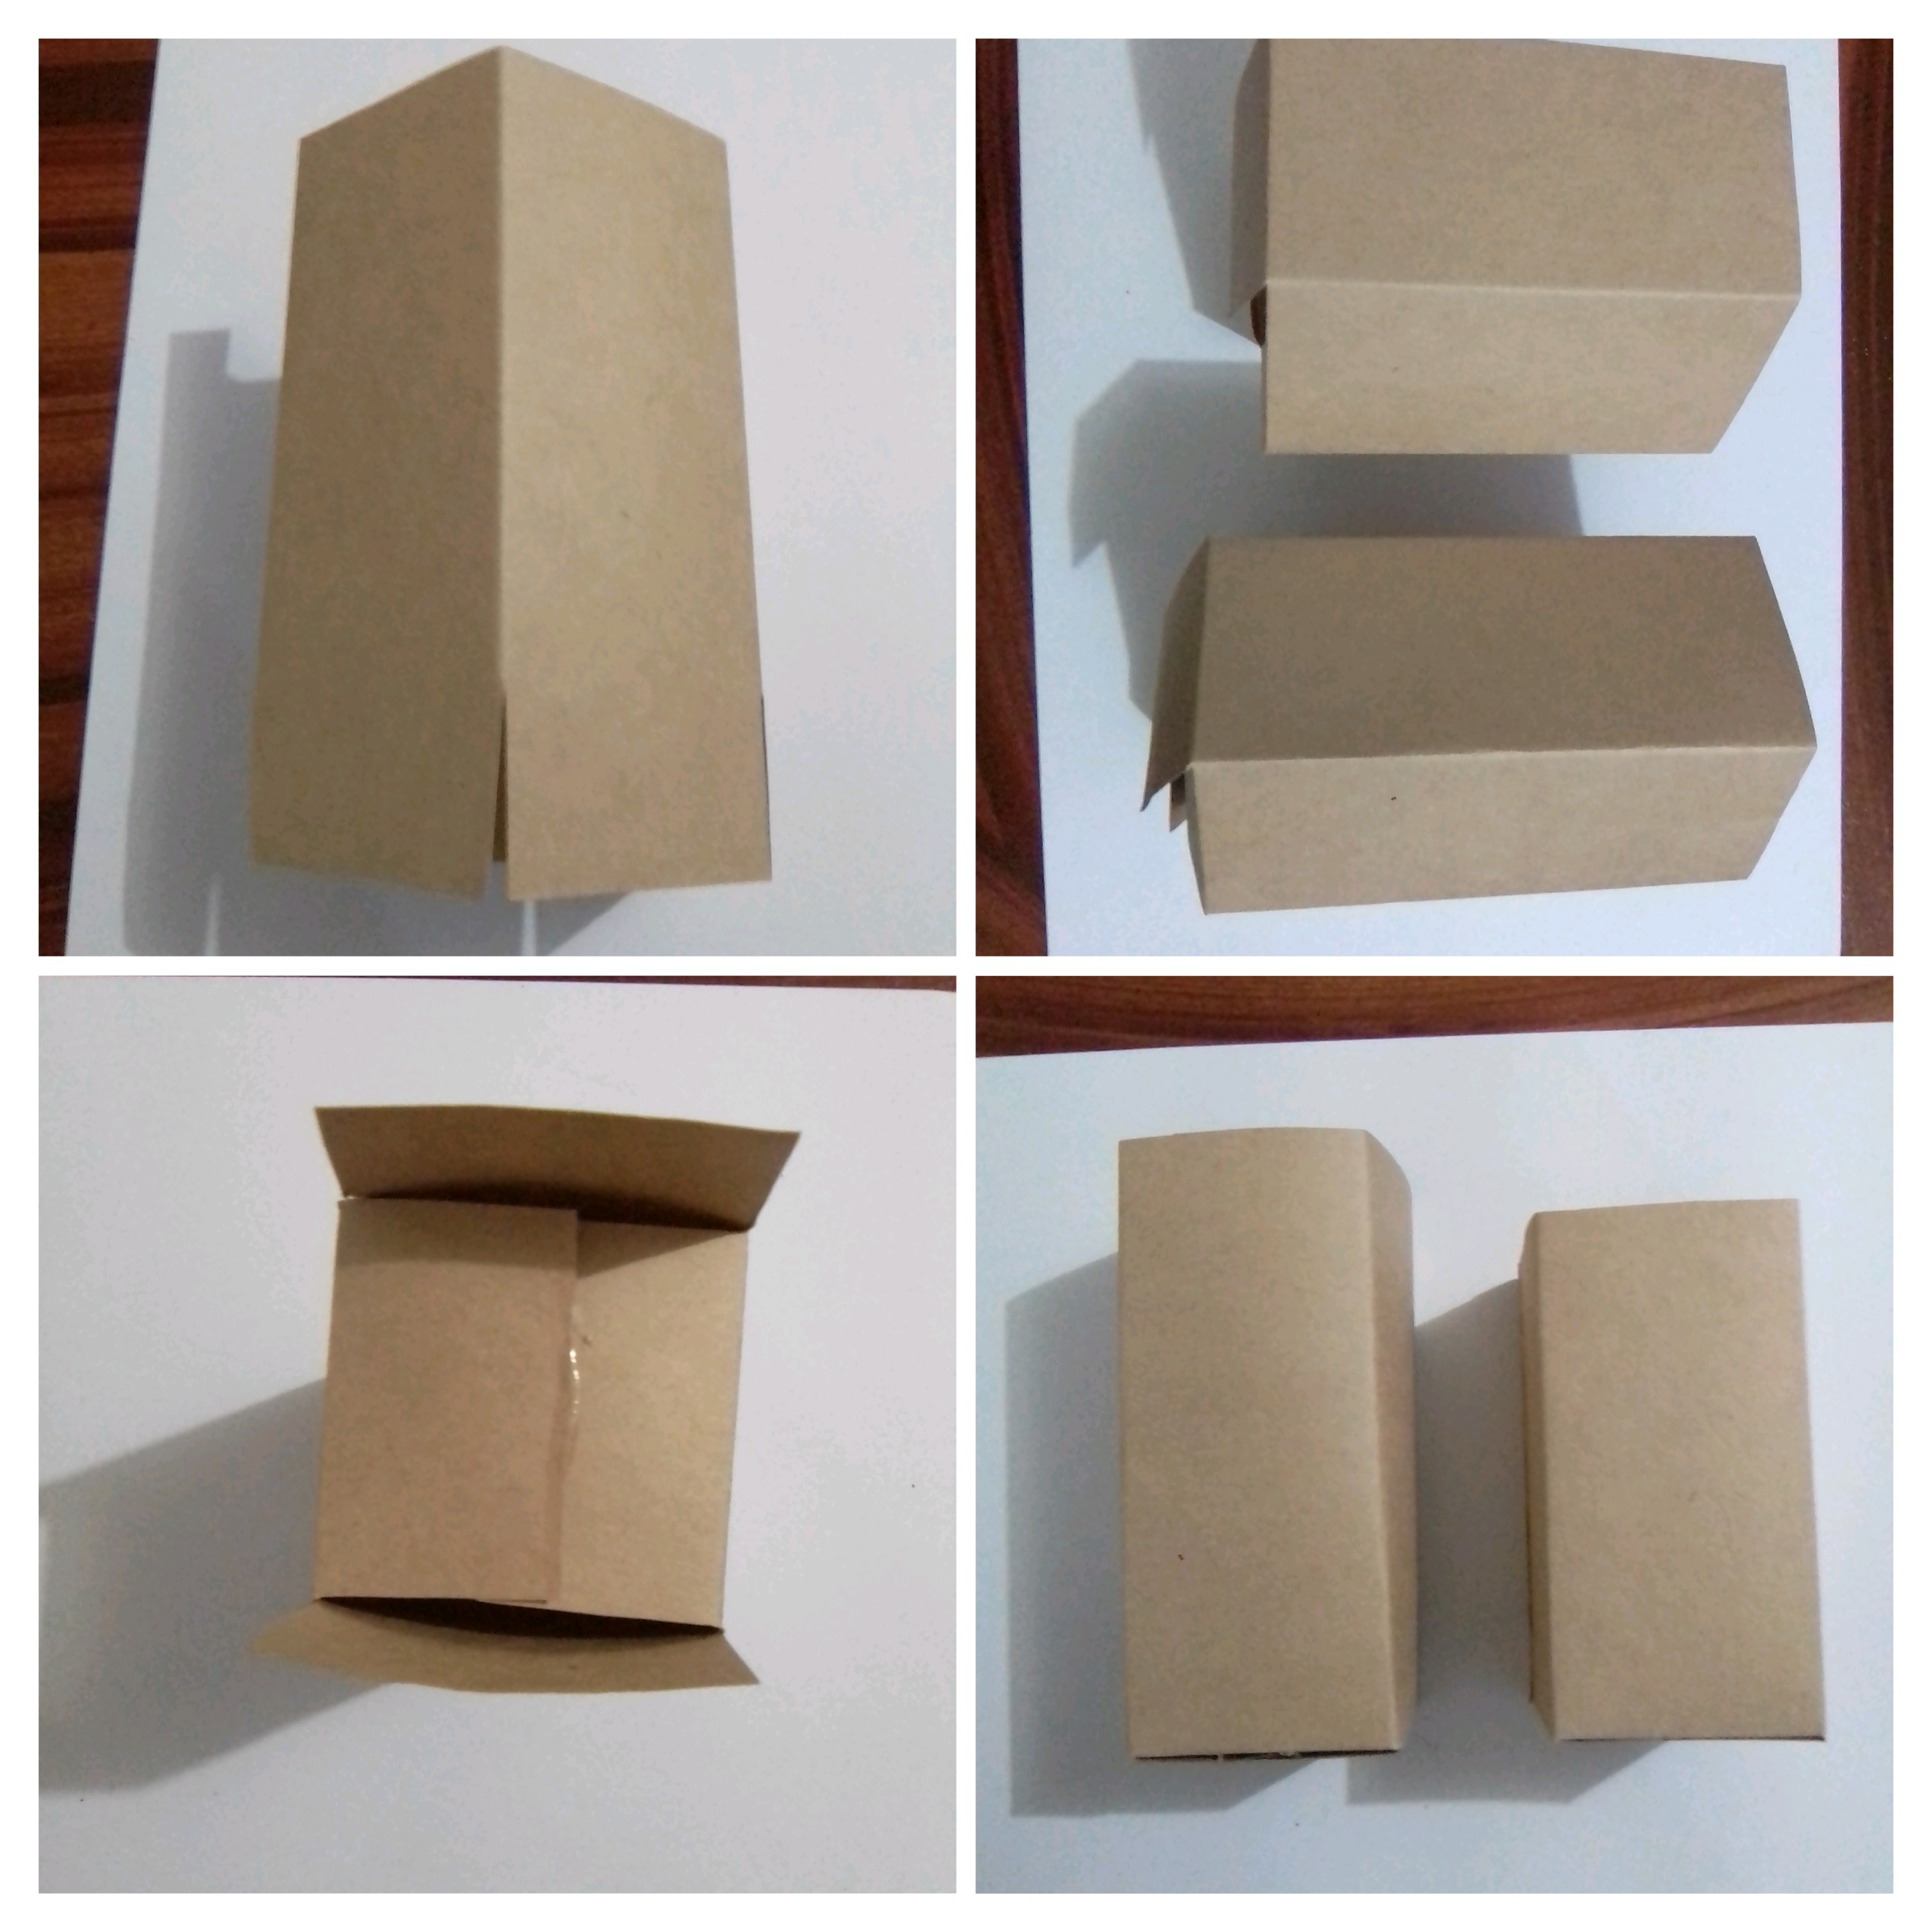
Next I am going to join the two organizers, I used hot silicone, but if you have it, it is preferable in this step to use liquid silicone, so that you can adjust the base of the organizers and that they are at the same level, like the walls of the organizers. themselves.
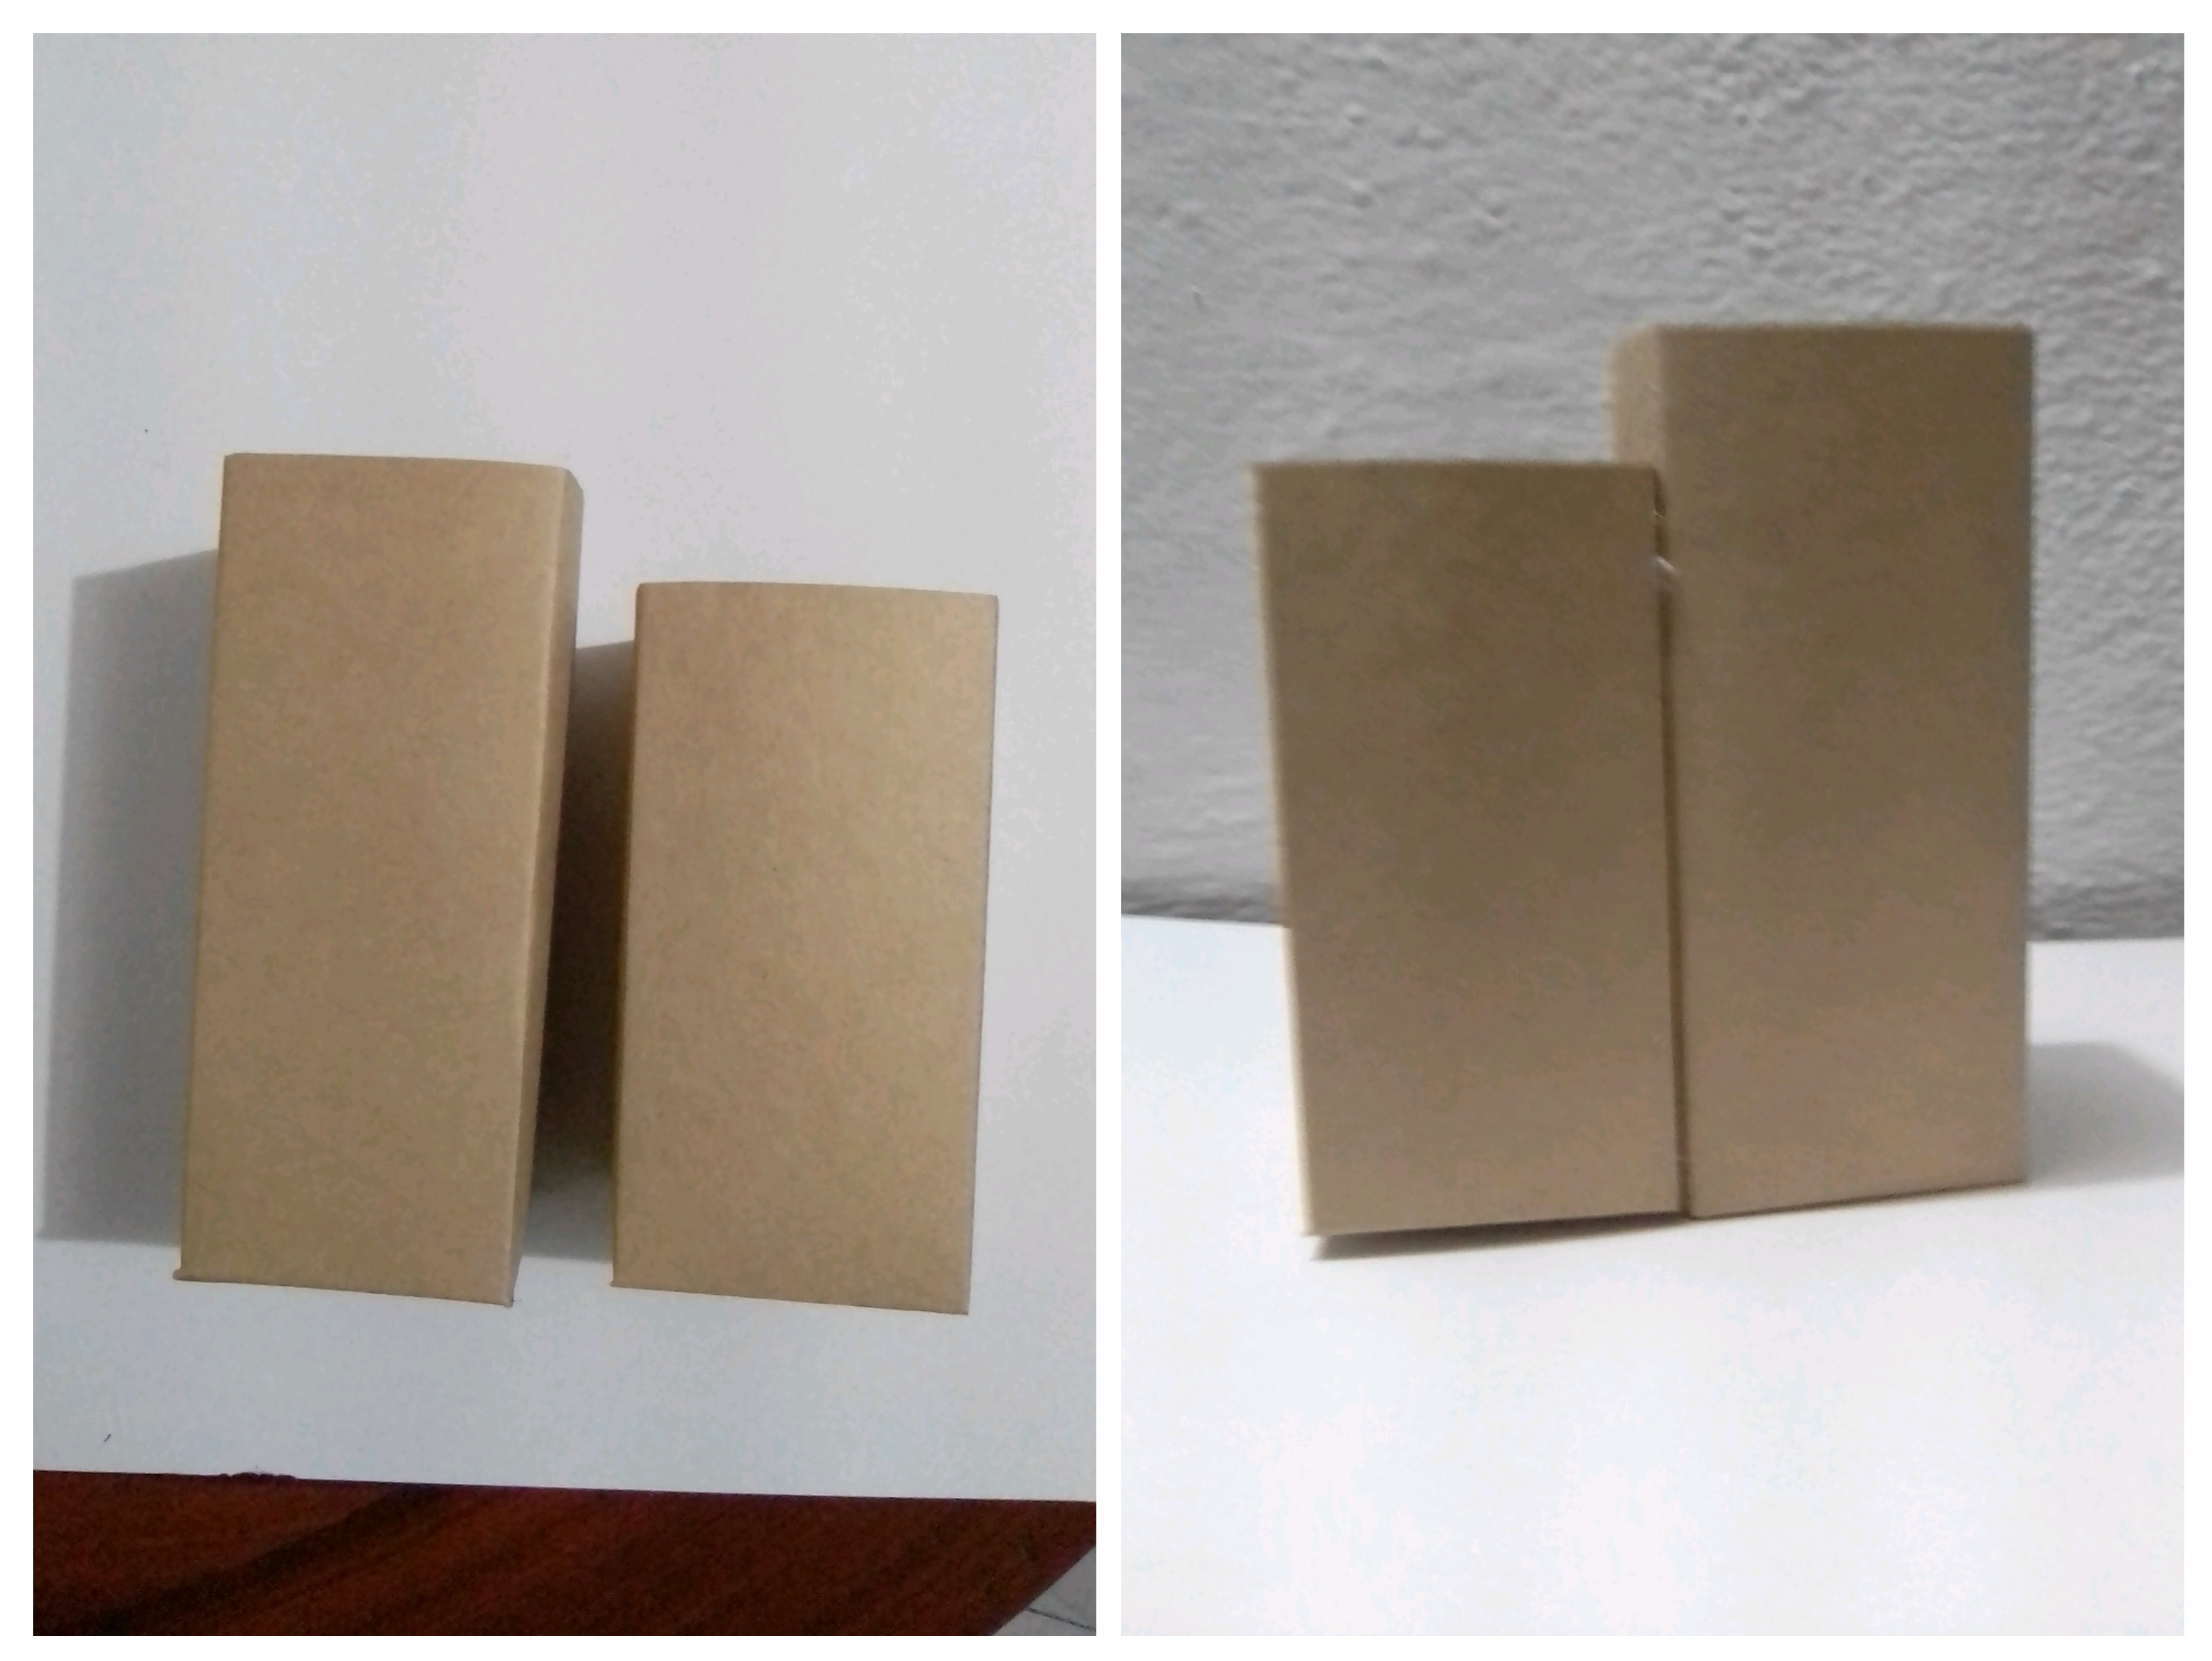
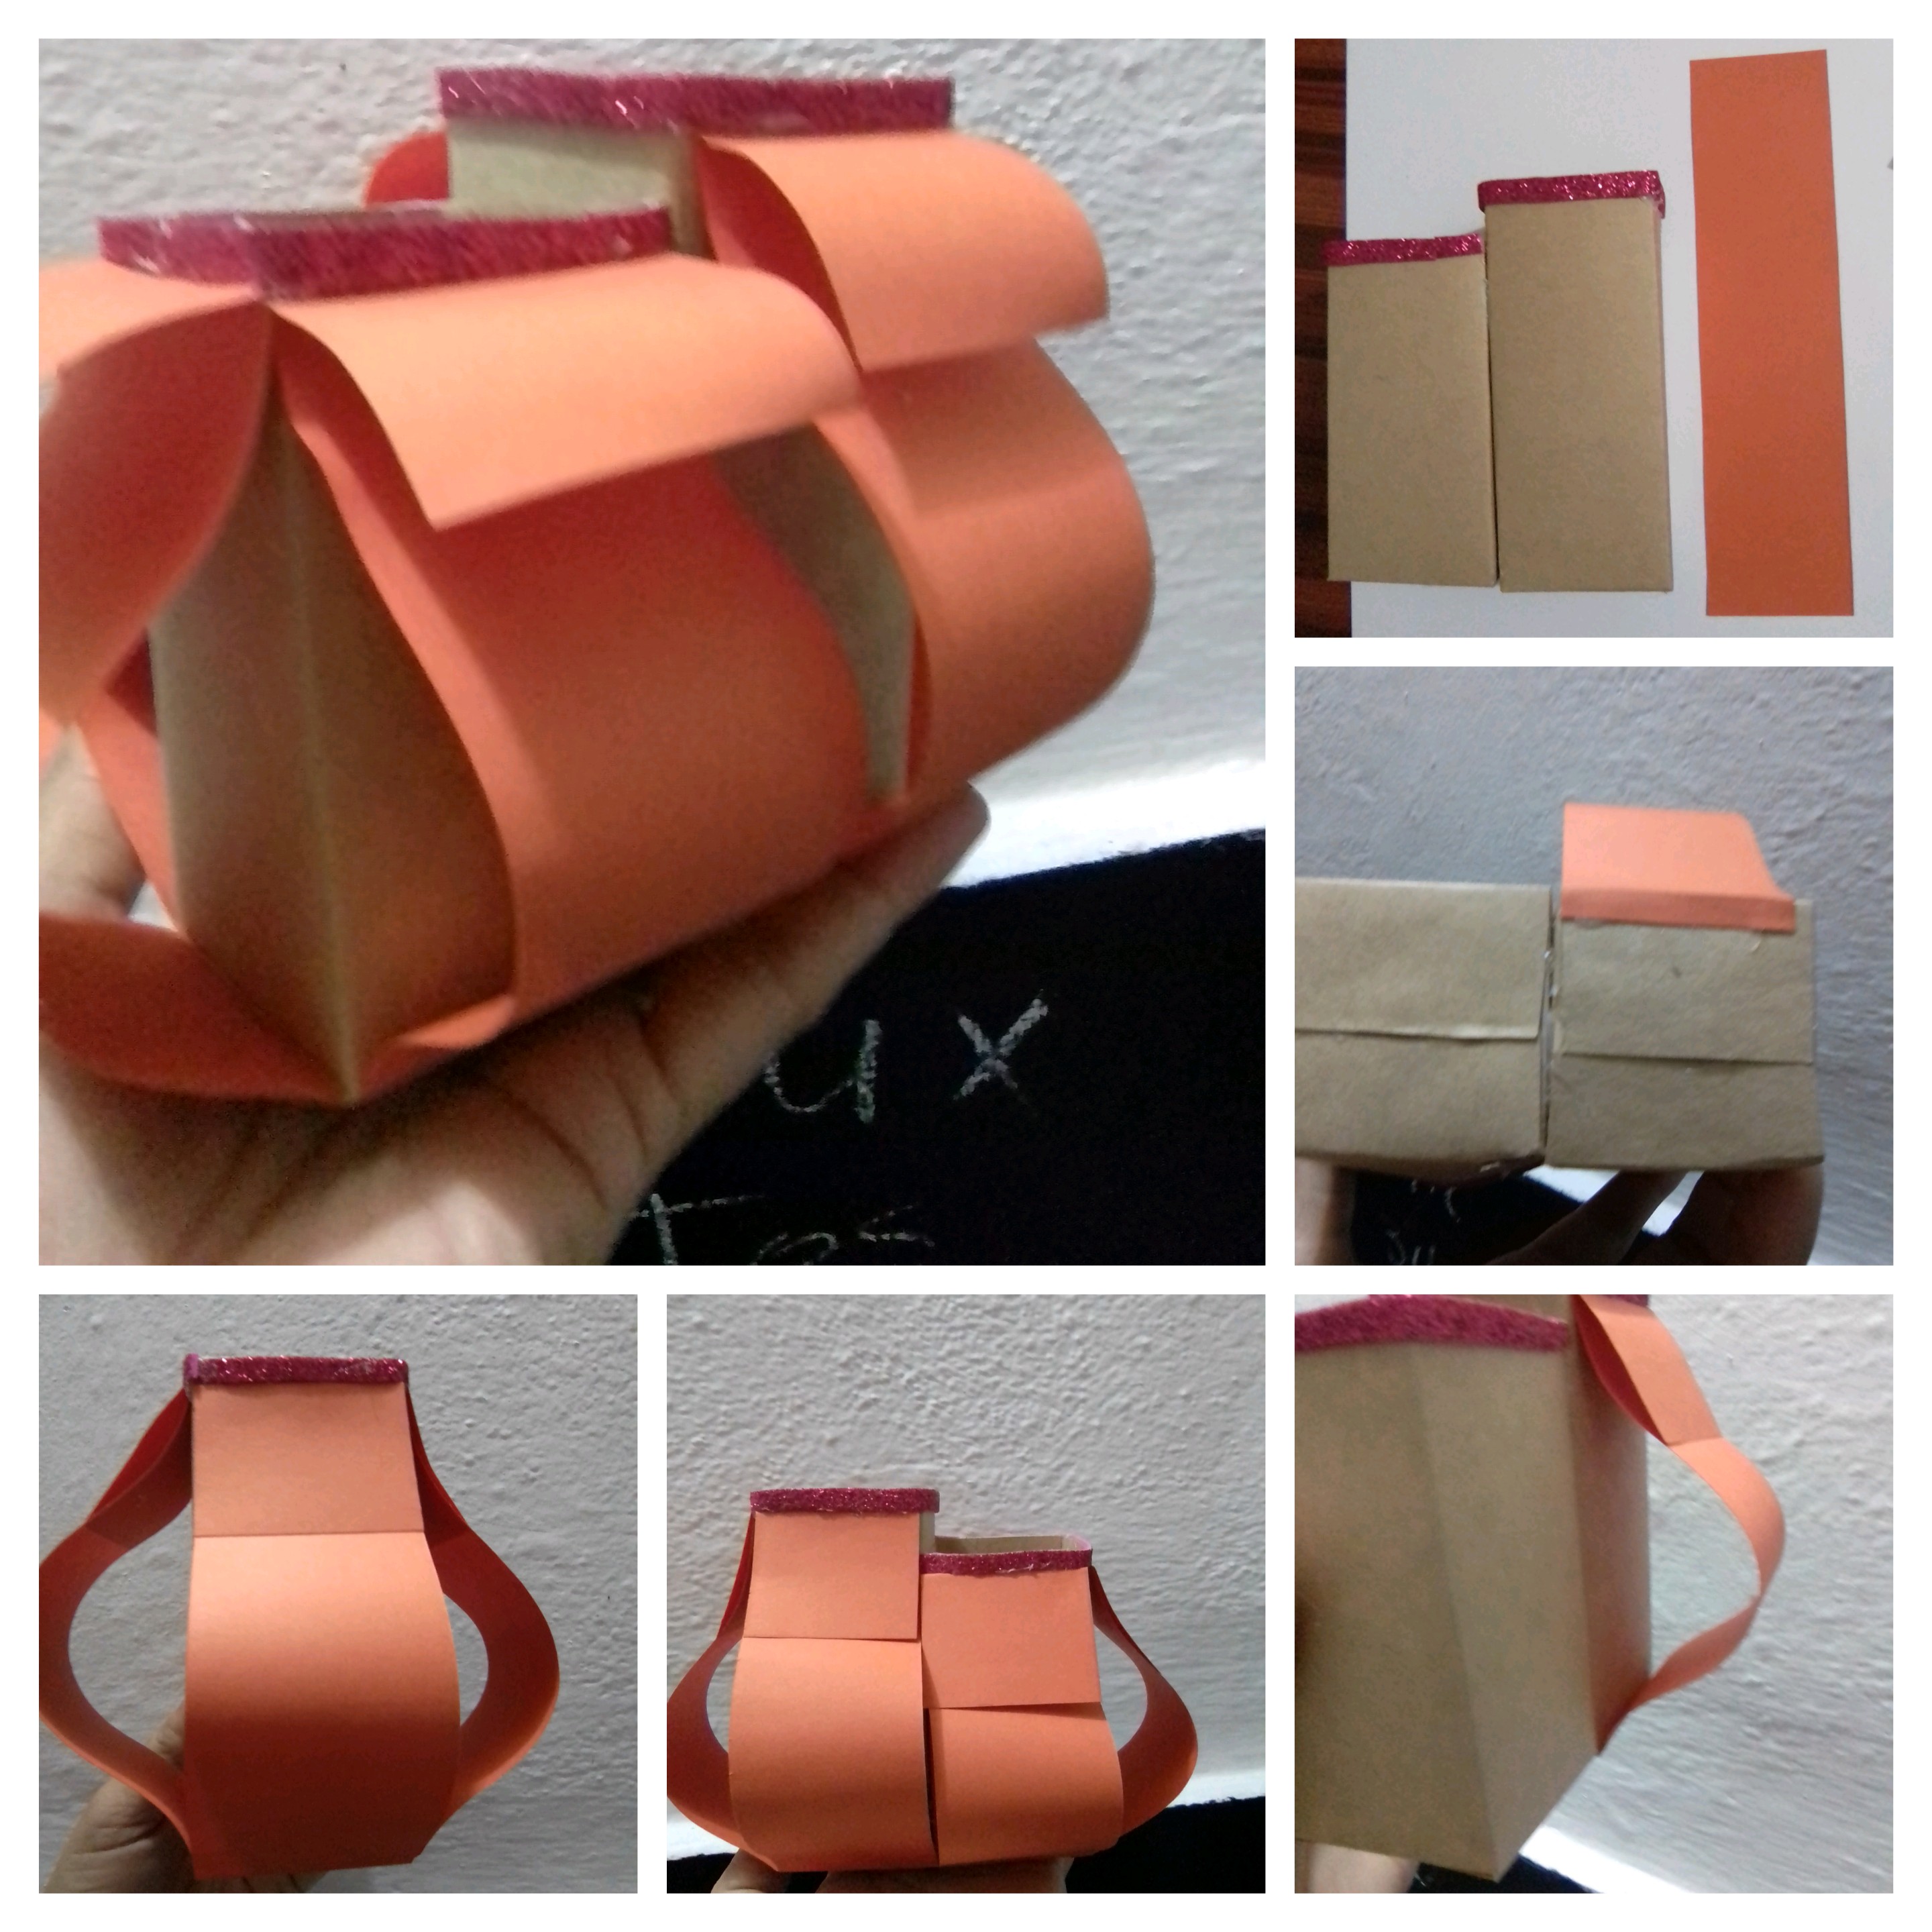
With the organizer pieces ready, I am now going to cut 6 pieces of orange paper, all with a width of 5 centimeters, and the length of 17 and 19 centimeters for each three sides of each organizer. Each of the pieces fold 4 centimeters from one end and half a centimeter from the other.
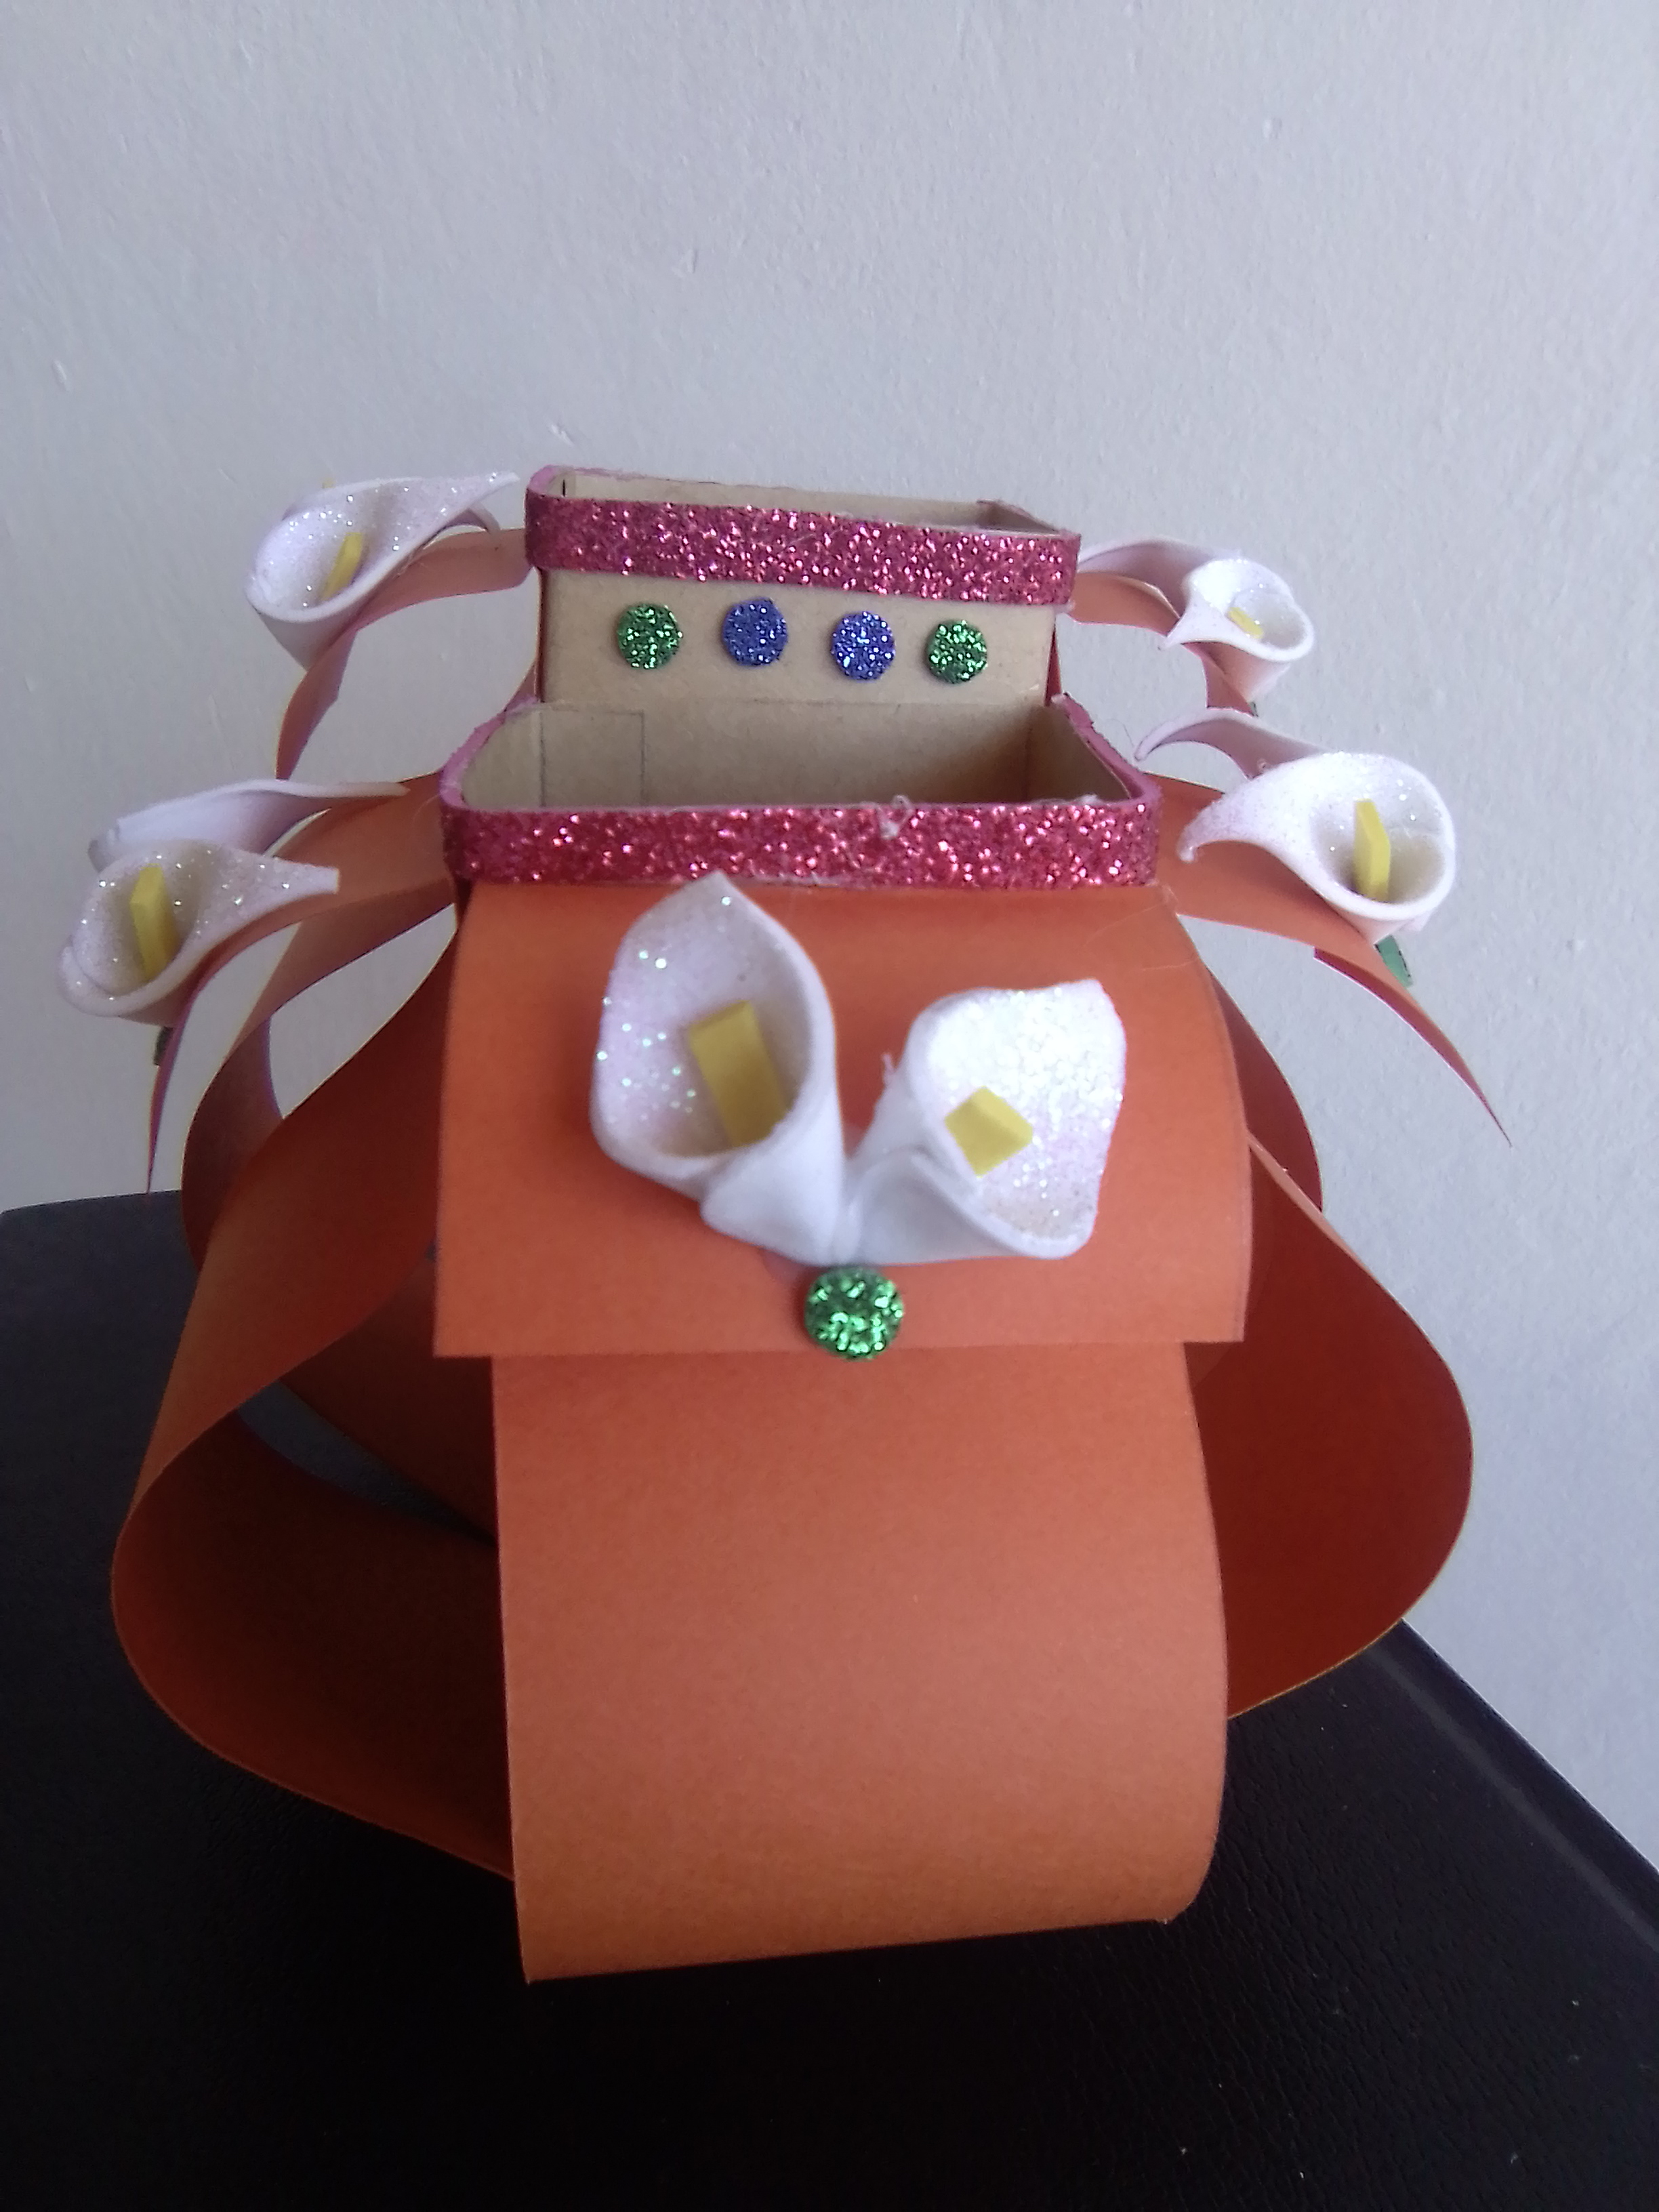
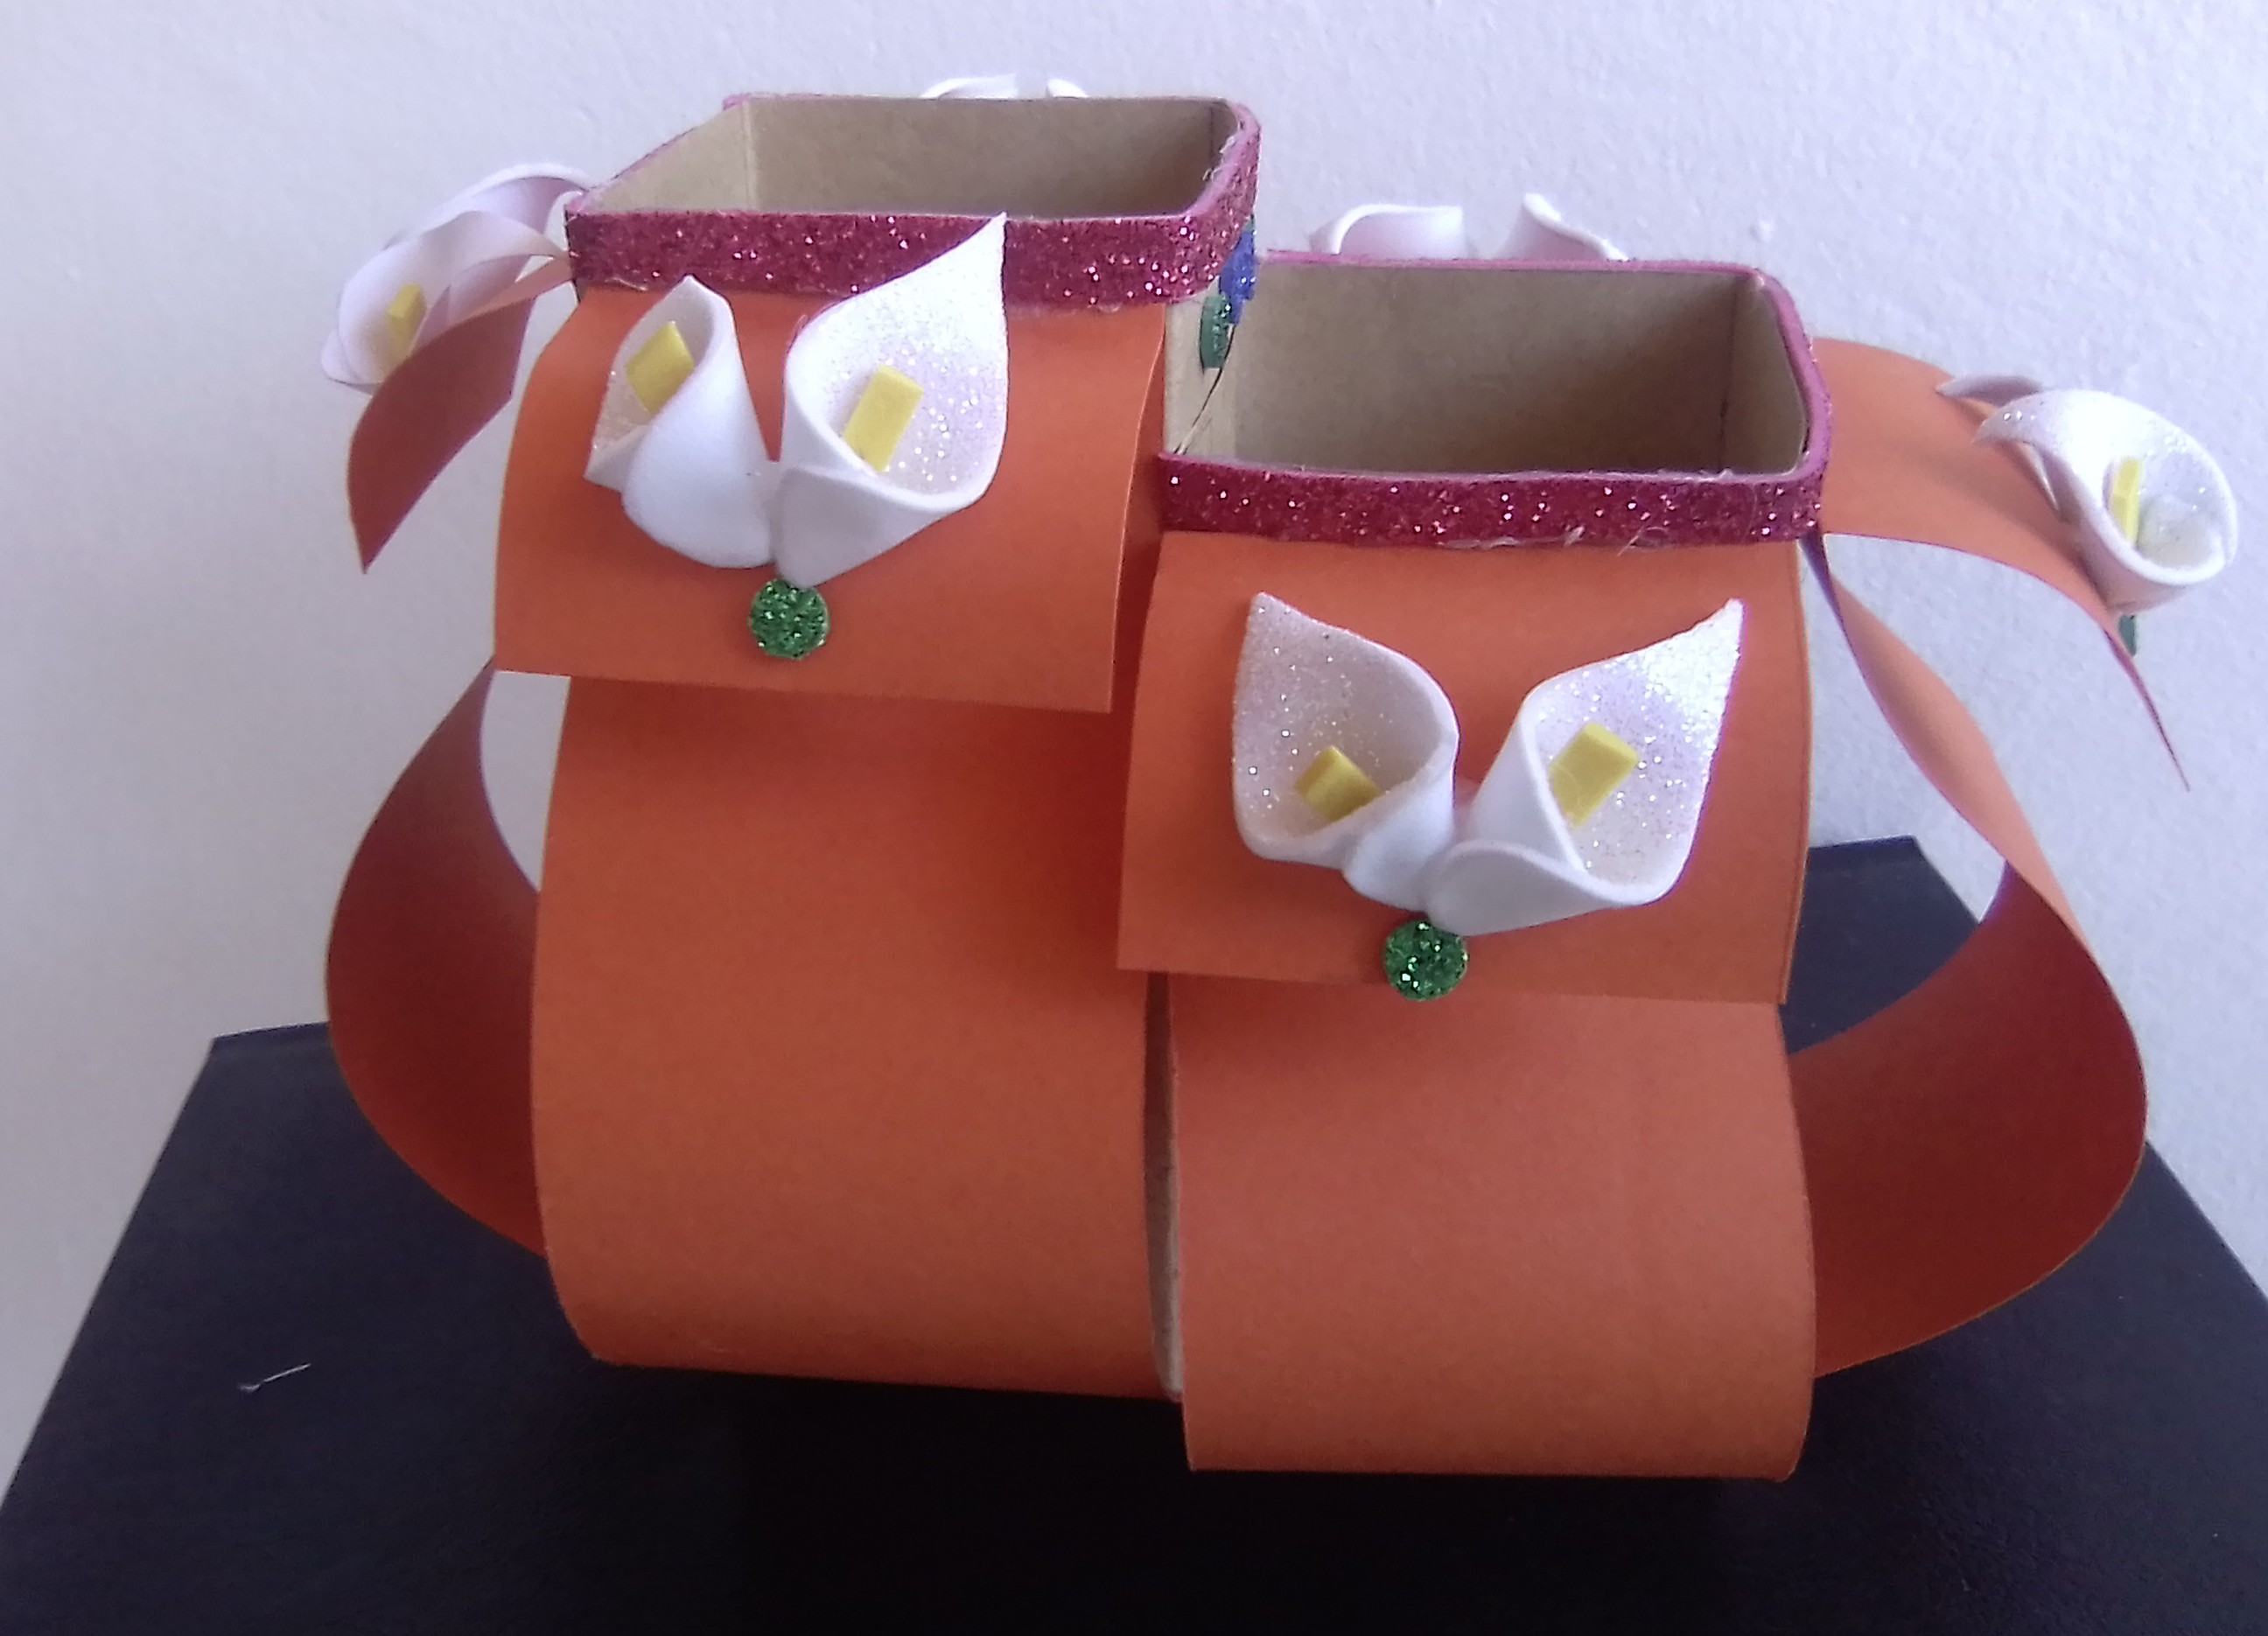
It is time to cut two 0.5 centimeter ribbons of fuchsia foam, and place them around the top of the organizers.
It is now the turn to fix the orange paper lists, adhering the half centimeter below the base and the other end just below the fuchsia ribbon, taking into account that the 4 centimeters must remain on the outside, since it is tabs I'll give them a little wavy, sliding a pencil through their inner part, and lifting from their origin, to create movement in the organizers. As the tape exceeds the height of the organizer, it is left with a domed shape.
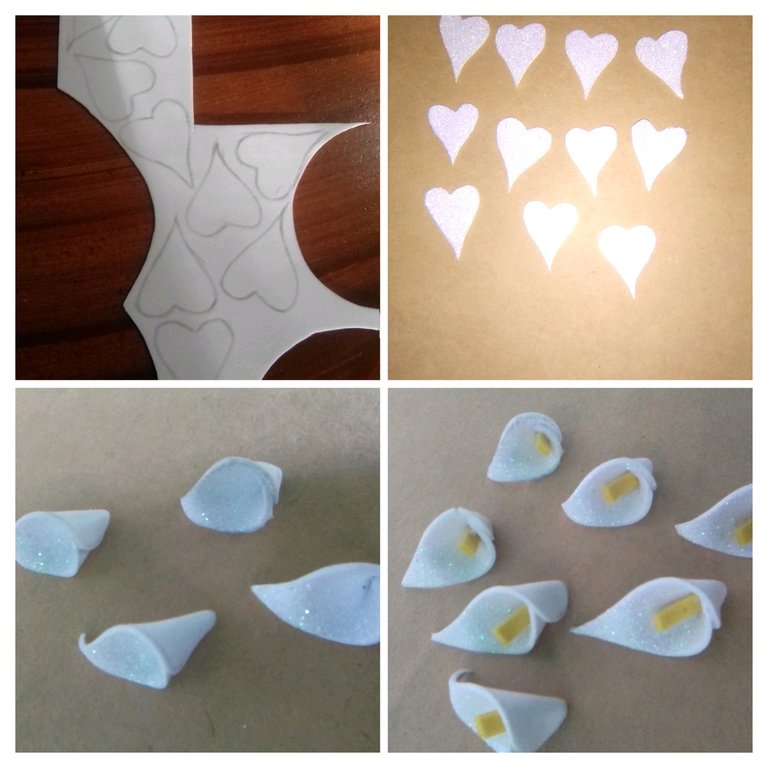
To recreate a floral motif, make small hearts out of frosty white foam, join them with the shiny part inwards, apply heat to the ends and curl a little. In order to form 12 beautiful Cala flowers, to which I placed their respective yellow foami in the center of each flower.

I joined the flowers in six pairs and then placed them on each wavy tab, placed a frosty green foam dot under each pair of flowers, and a few dots, in the space between the organizers.
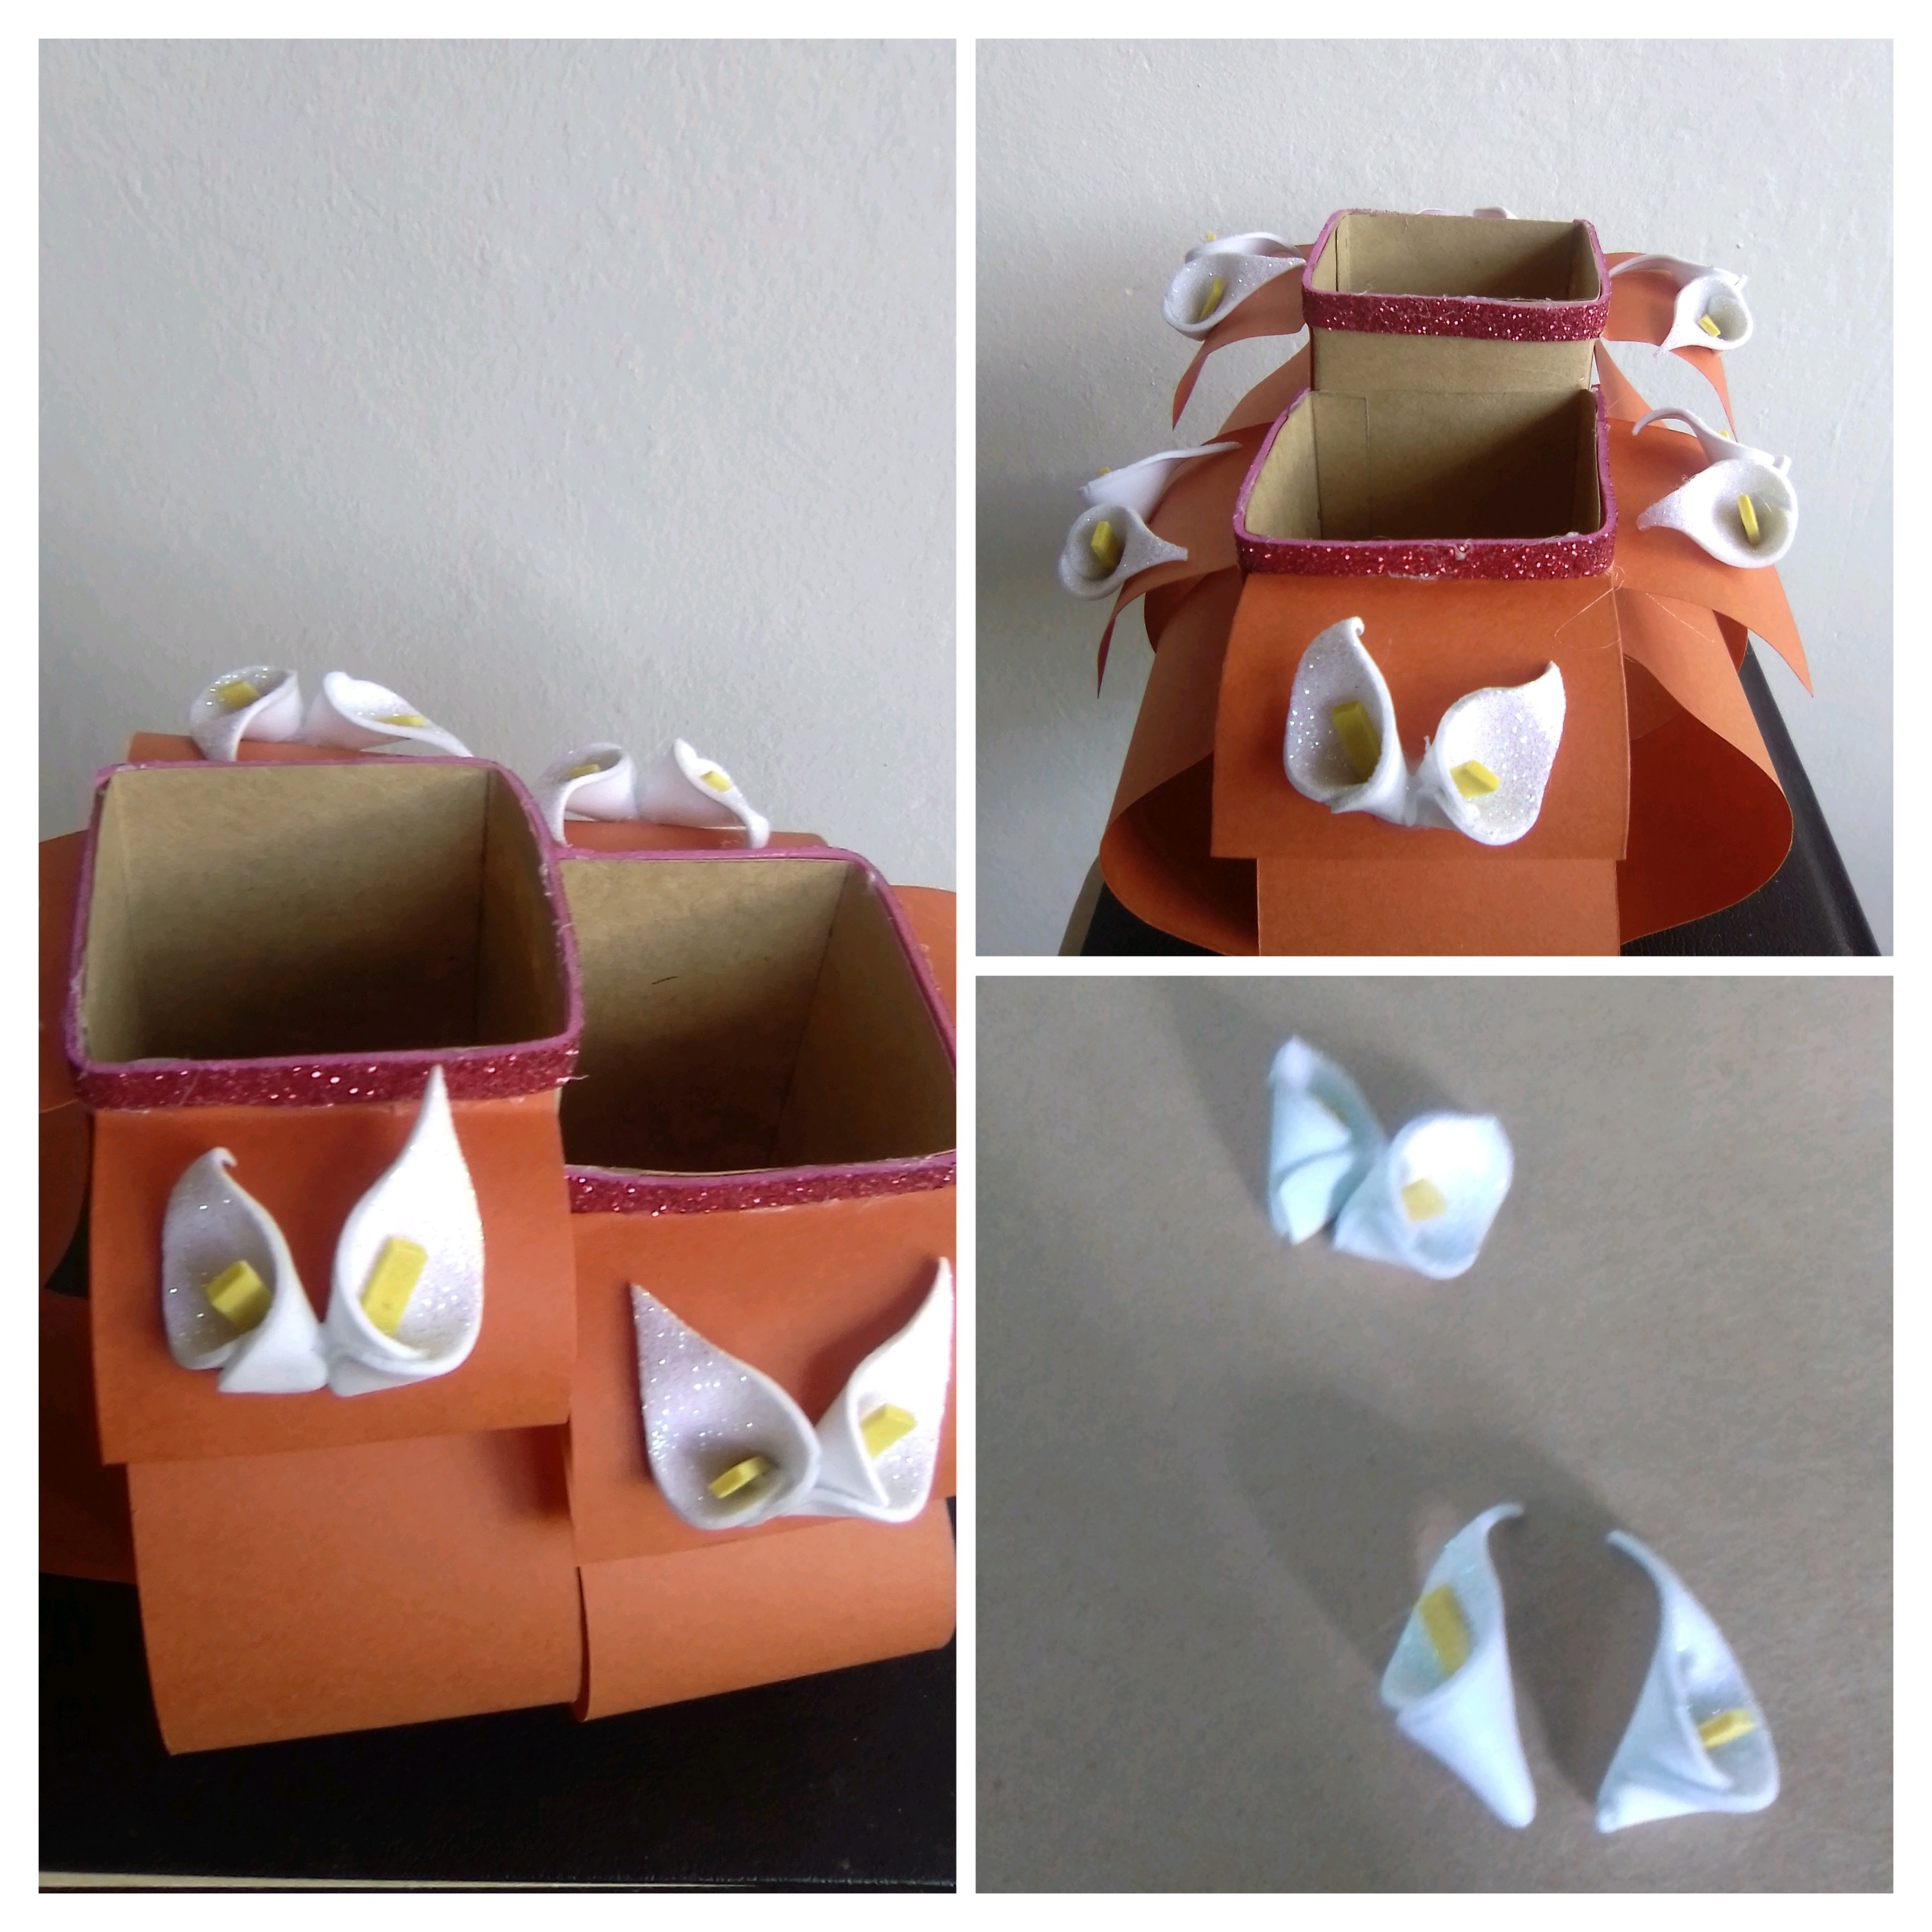
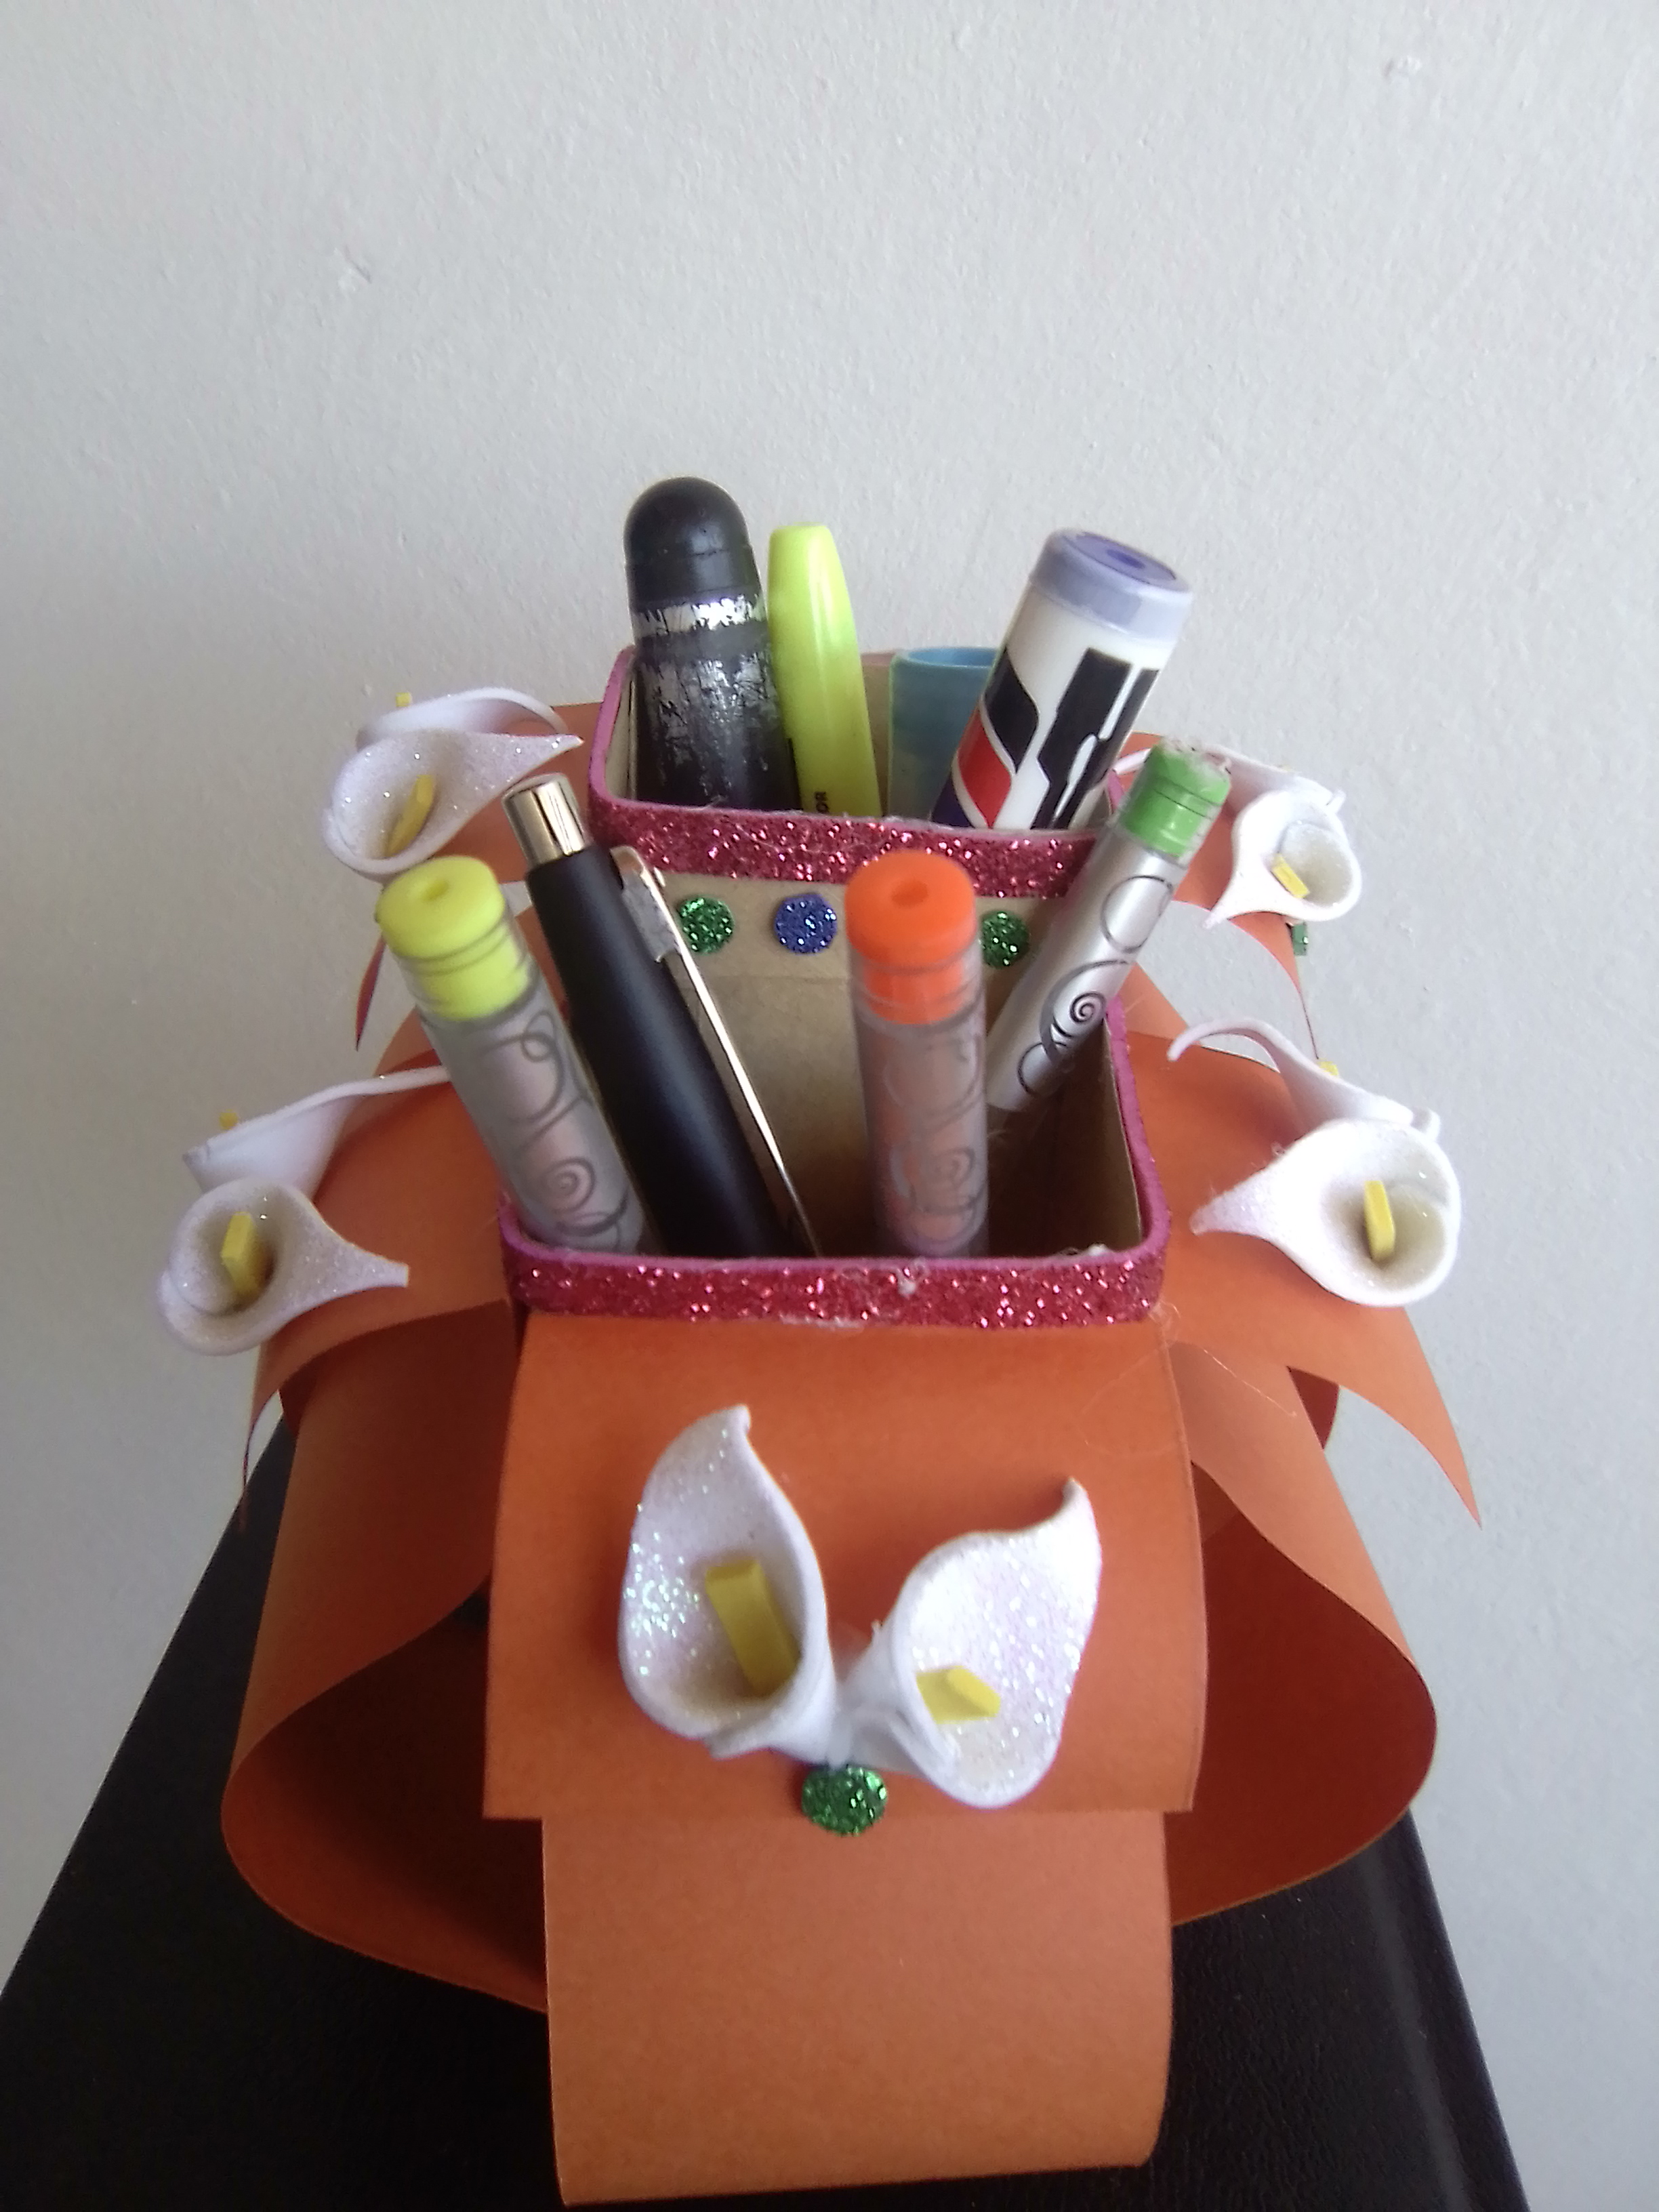
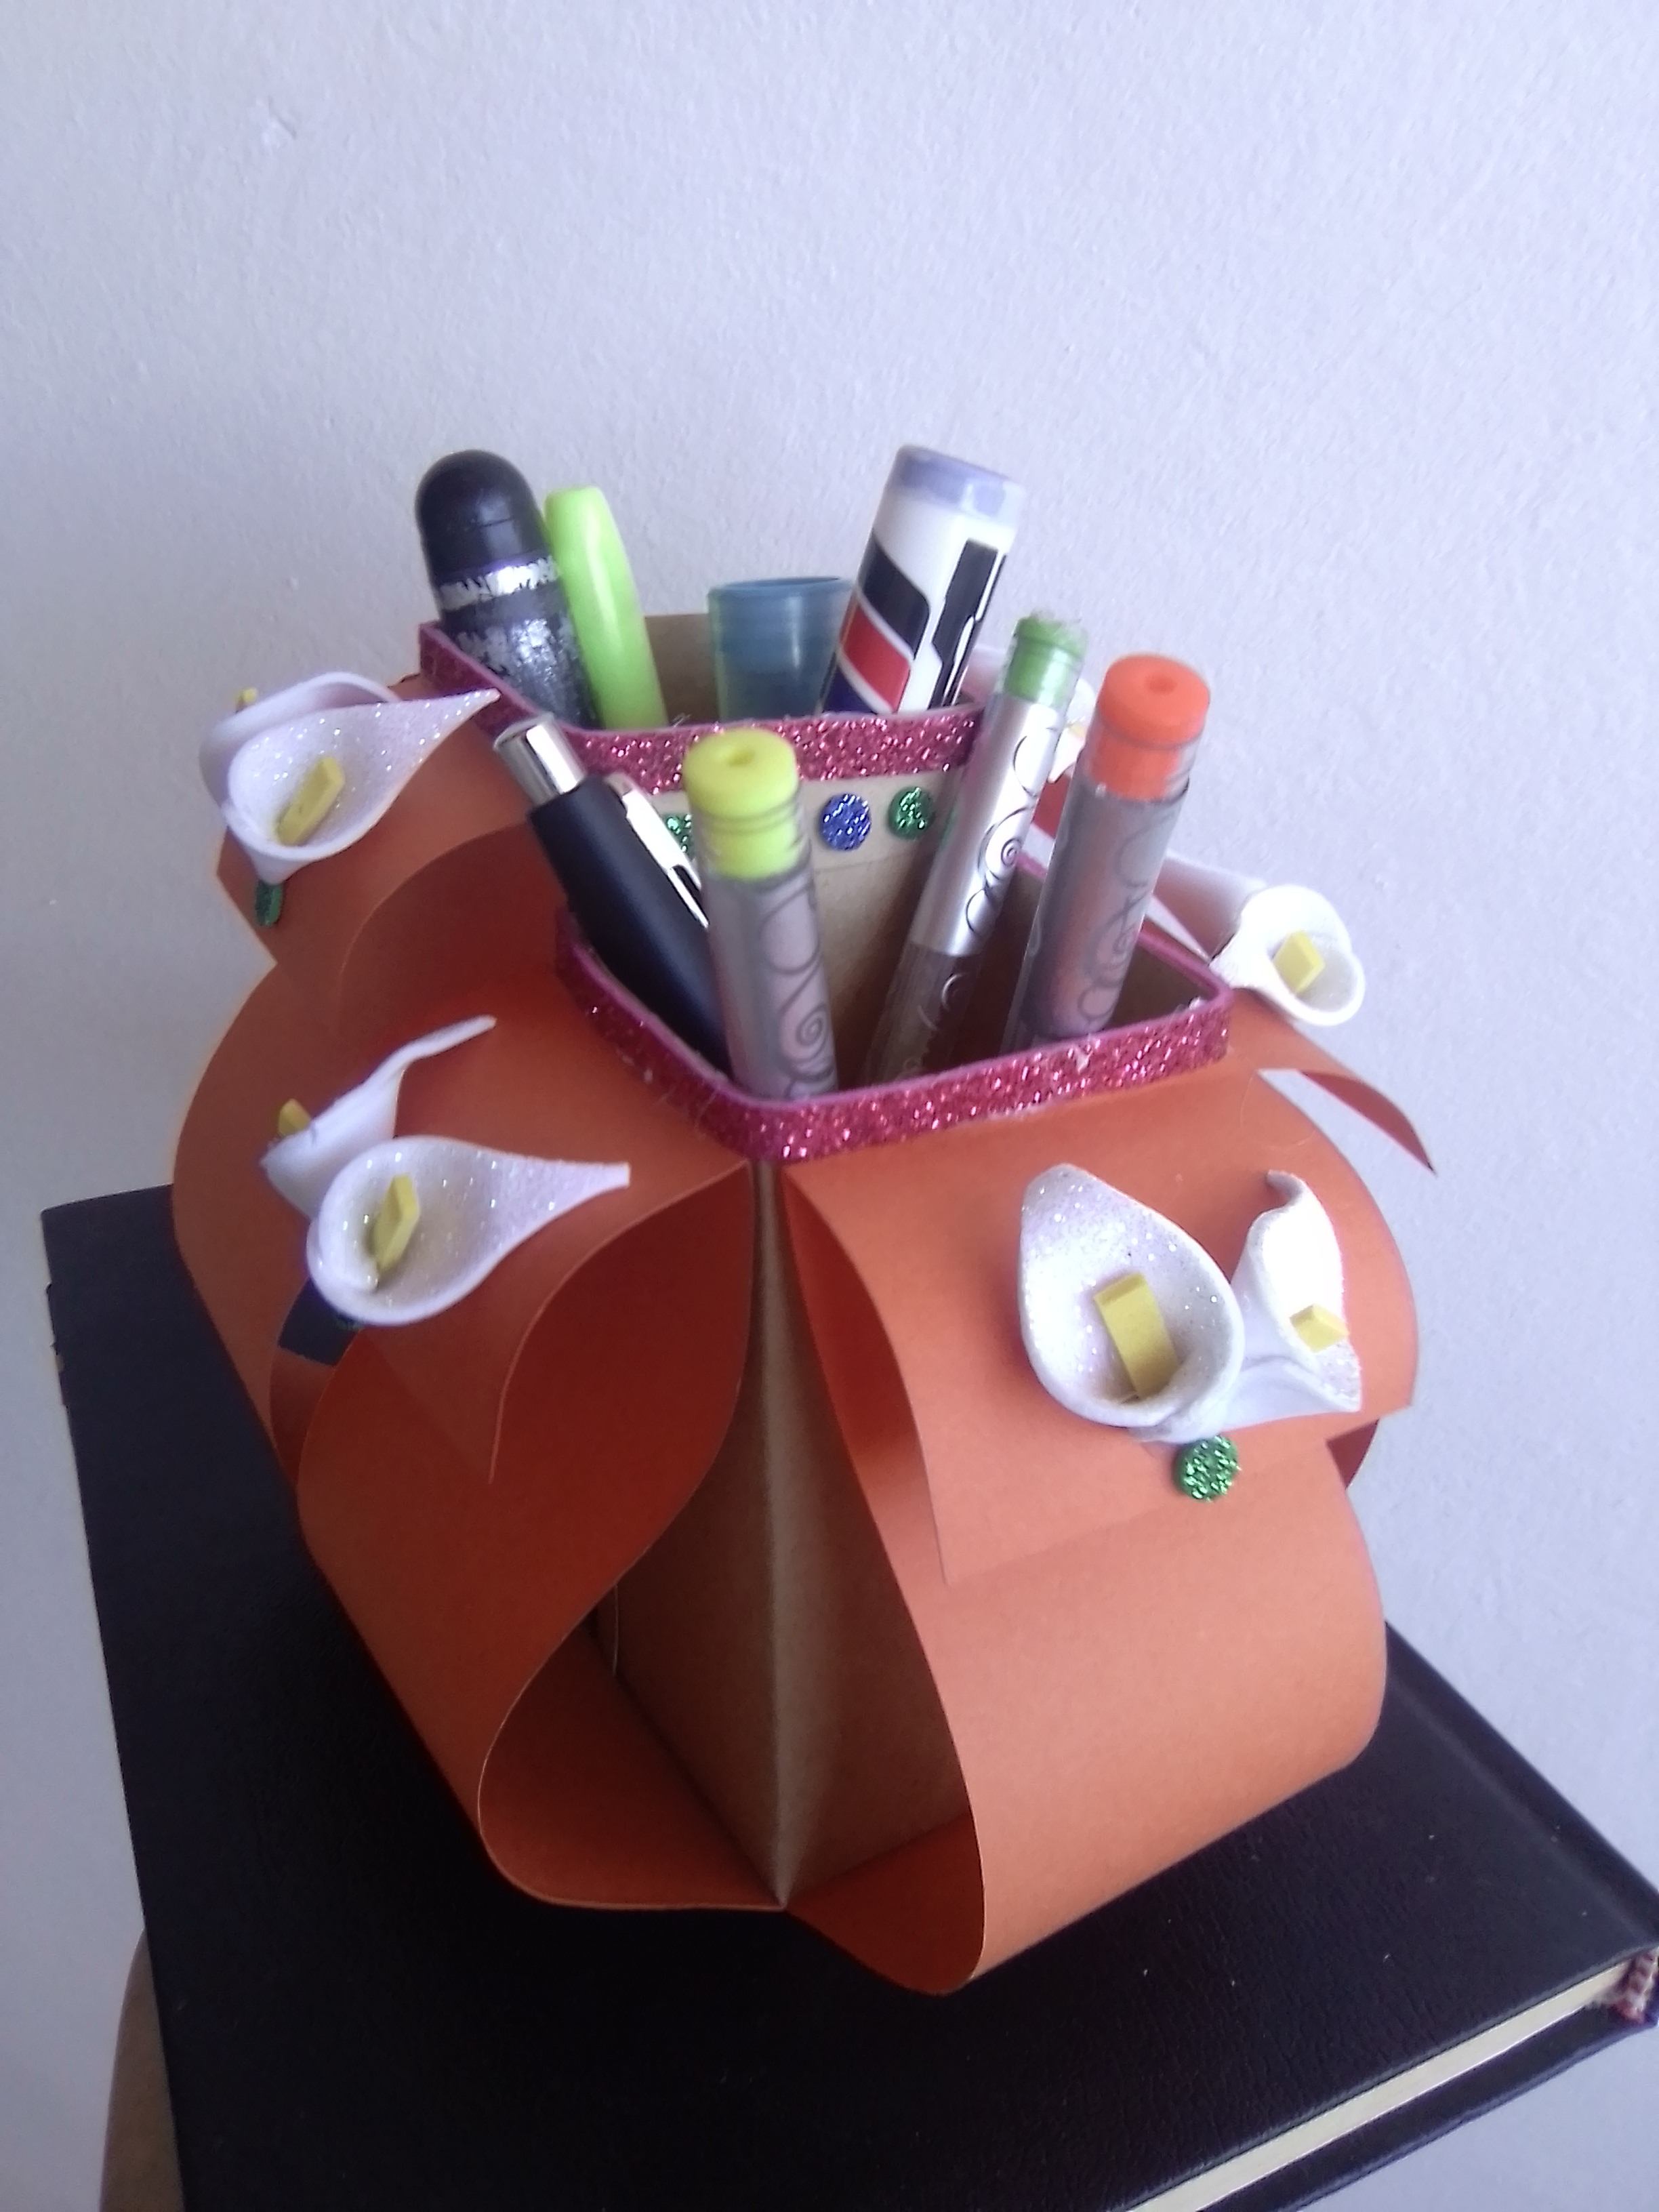
I have already finished my double organizer, for my desk, I love the result, because it seems to me that it was quite sophisticated and at the same time simple, with those beautiful floral details. I hope this craft is to your liking and you are encouraged to do it at home.
Happy and blessed year 2023.
RESULT
The photos are my property, taken exclusively in this project.
The collages of the procedure were made with the tool of my Blue C6 and the main one in Canva
The separators and the banners were edited by me in Canva
The translation was made with
Google translator

Un feliz y venturoso año 2023 para la gran plataforma Hive blog, en especial a los creativos de la comunidad de Hive Diy. Al comenzar un nuevo año, siempre tenemos en cuenta los propósitos que deseamos cumplir y lo que queremos cambiar, pero también es cierto un particular interés por renovar algunos aspectos de la casa o de nuestro sitio de trabajo, es por ello que para el inicio de este año, quise realizar un lindo, útil y elegante organizador de lápices, para adornar y renovar mi escritorio. Les contaré a continuación como lo realice y los materiales que utilicé.
MATERIALES
✓ Carpeta manila
✓ Tijera, lápiz y regla
✓ Pistola y barra de silicona
✓ Foami escarchado fucsia, blanco y verde
✓ Foami amarillo
✓ Papel Bond naranja.
✓ Flores, hojas y ornamentos de reciclaje
✓ Cuter
PASO A PASO
Para este nuevo año quería un organizador de lápices muy bonito, de esos que atraen miradas y además que fuese poco común. Por eso me atreví a realizar un organizador doble con un motivo floral.
El paso inicial es cortar dos piezas, una de 15 x 22 centímetros y otra de 13 x 22 centímetros. Medi en cada pieza 1 centímetros a cada lado y 3 centímetros en la parte superior, así mismo medi 5 centímetros a lo ancho, para obtener los cuatro lados del organizador.
Para comenzar a dar forma al organizador, corte con tijera las líneas inferiores, y luego procedo a doblar con ayuda de una regla todos los trazos realizados anteriormente.
Seguidamente uni con Silicon caliente, los lados y luego las pestañas inferiores, aunque me hubieses gustado poder usar el líquido, ya que me permite corregir.
A continuación voy a unir los dos organizadores, yo use silicona caliente, pero si tienes es preferible en este paso usar silicona líquida, para que poder ajustar la base de los organizadores y que estos queden al mismo nivel, al igual que las paredes de los mismos.
Con los piezas organizadoras listas, voy a cortar ahora 6 piezas de papel naranja , todas con un ancho de 5 centímetros , y el largo de 17 y 19 centímetros por cada tres lados de cada organizador. A cada una de las piezas le doble 4 centímetros de un extremo y medio centímetro del otro.
Es el momento de recorta dos cintas de 0,5 centímetros de foami fucsia, y colocarlos alrededor de la parte superior de los organizadores.
Es ahora, el turno de fijar las listas de papel naranja, adhiriendo el medio centímetro por debajo de la base y el otro extremo justo debajo de la cinta fucsia, tomando en cuenta que los 4 centímetros deben quedar del lado exterior, ya que está pestañas les daré un poco de ondulado, deslizando un lápiz por su parte interna, y levantando desde su origen, para crear movimiento en los organizadores. Como la cinta excede la altura del organizador queda con una forma abombada.
Para recrear un motivo floral, elabore corazones pequeños de foami blanco escarchado, los uni con la parte brillante hacia adentro, aplique calor en las puntas y ondule un poco. Para así formar 12 lindas flores de Cala, a las cuales les coloque su respectivo foami amarillo en el centro de cada flor.
Uni las flores en seis parejas y luego las ubique sobre cada pestaña ondulada, coloque un punto de foami verde escarchado debajo de cada par de flores, y unos puntos, en el espacio entre los organizadores.
Ya he terminado mi organizador doble , para mí escritorio, el resultado me encanta, pues me parece que quedó bastante sofisticado y la vez sencillo con esos hermosos detalles florales. Espero esta manualidad sea de su agrado y se animen a realizar en casa.
Feliz y bendecido año 2023.
RESULTADO
Las fotos son de mi propiedad tomadas exclusivamente en este proyecto.
Los collages del procedimiento los hice con la herramienta de mi Blue C6 y el principal en Canva
Lo separadores y el banners fueron editados por mi en Canva
La traducción fue realizada con
Traductor Google
Thank you for sharing this post on HIVE!
Your content got selected by our fellow curator stevenson7 & you just received a little thank you upvote from us for your great work! Your post will be featured in one of our recurring compilations which are aiming to offer you a stage to widen your audience within the DIY scene of Hive. Stay creative & HIVE ON!
Please vote for our hive witness <3
Que preciosa manualidad querida amiga, se me hace muy útil y de verdad que atrapa miradas jsksjsk, oye me encanto la tecnica para realizar esas asombrosas flores, nunca me hubiera imaginado que se realizaban de esa manera, me encanto el resultado está lindo y utilizable jsksjdkd. Gracias por compartir tu post.
¡Saludos!<3
Muchas gracias por tu visita, esa flor es muy sencilla un corazón. Siempre es bueno tener algo y que se detengan a verlo detalladamente, aunque sea por curiosidad. Jajaja. 🤗
Su presentación grafica es bastante agradable. En algun momento debo aprender a hacer algo asi de bien. Muy sencillo y practico su trabajo felicitaciones.
Que halago tan bonito, gracias por tu visita, inténtalo es bastante sencillo. Todos tenemos talentos sin descubrir.
Sí, tengo que aplicarme con la presentación del trabajo. Es muy importante.
Dear @yusma21,
Our previous proposal expired end of December and the Hivebuzz project is not funded anymore. May we ask you to review and support our new proposal (https://peakd.com/me/proposals/248)?
Thank you for your help!