

Materials
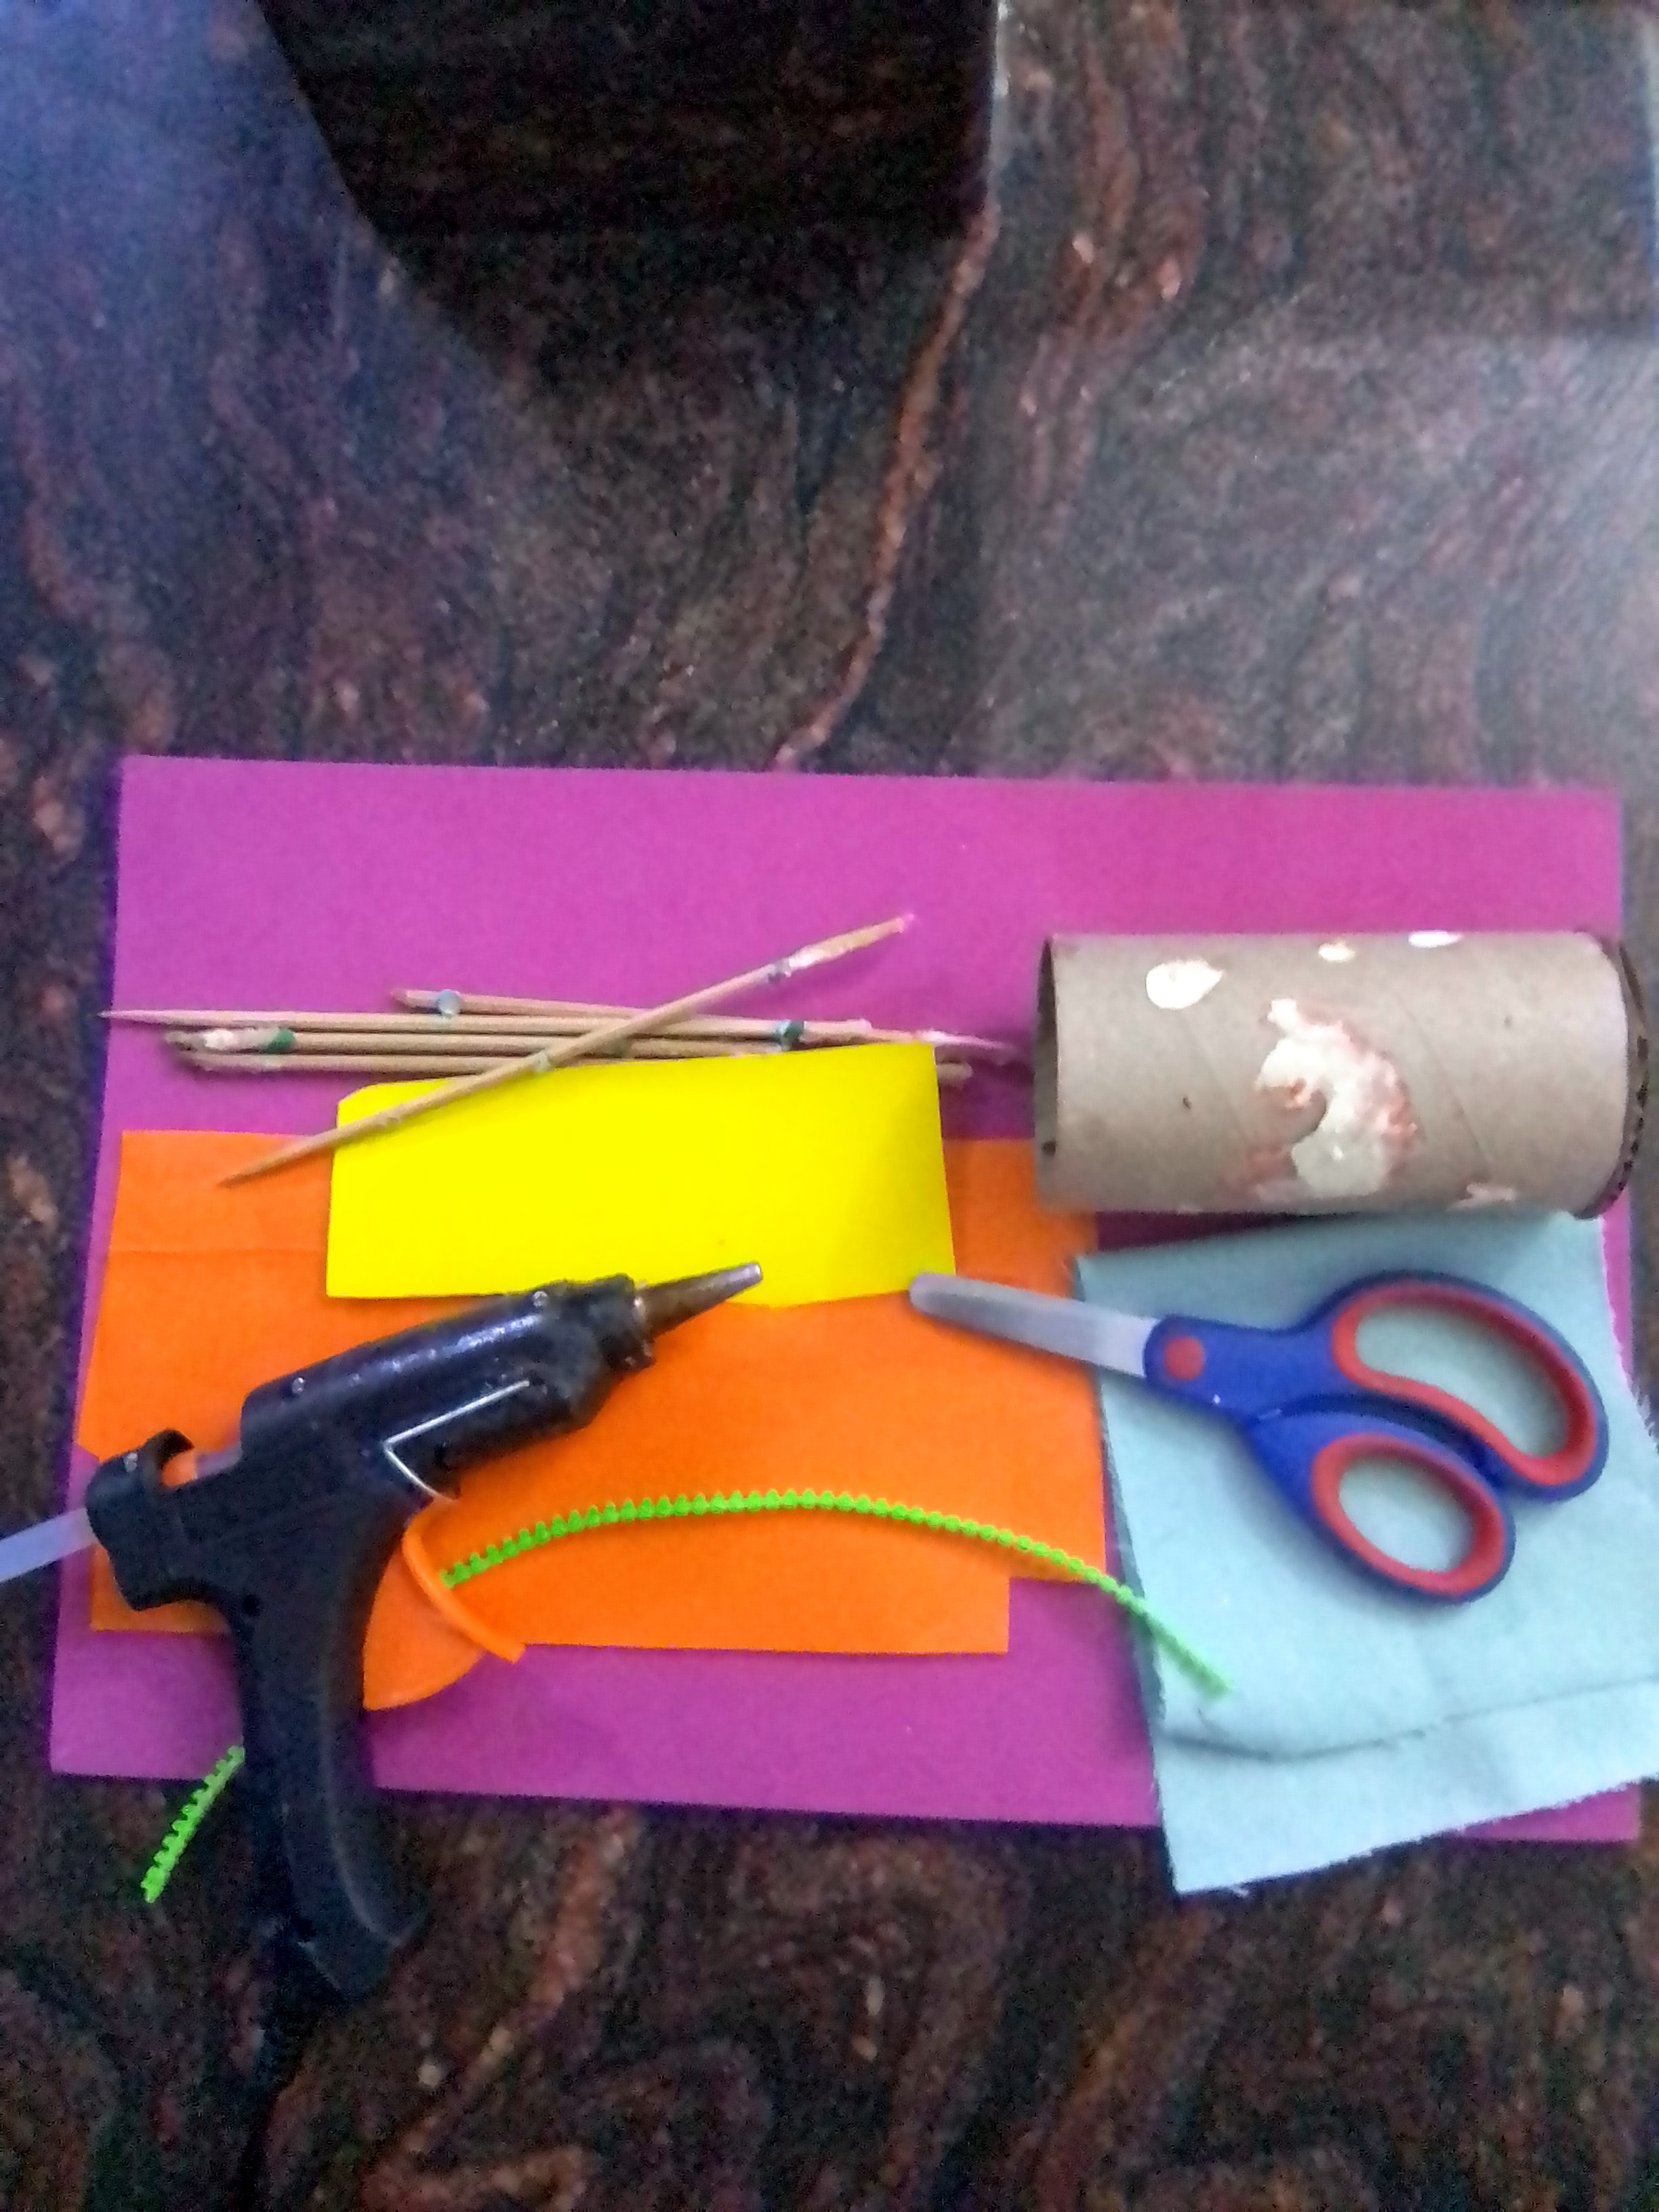
✓ Paper tube.
✓ Colored foami, fuchsia, orange, green and black frosted.
✓ Wooden sticks and scissors.
✓ Yellow and orange cardstock.
✓ Piece of green fabric.
✓ Neon green plastic zipper.
✓ Clothes iron.
✓ White stones.
Step by step
To start making this pretty floral centerpiece, I start decorating what will be the vase, for this I used a toilet paper tube from an old craft and therefore already had the base cover, so I proceed to cut the orange cardboard into two pieces so that I can cover the tube. So I cover the top part and then with the leftover strip I finish covering the bottom part.
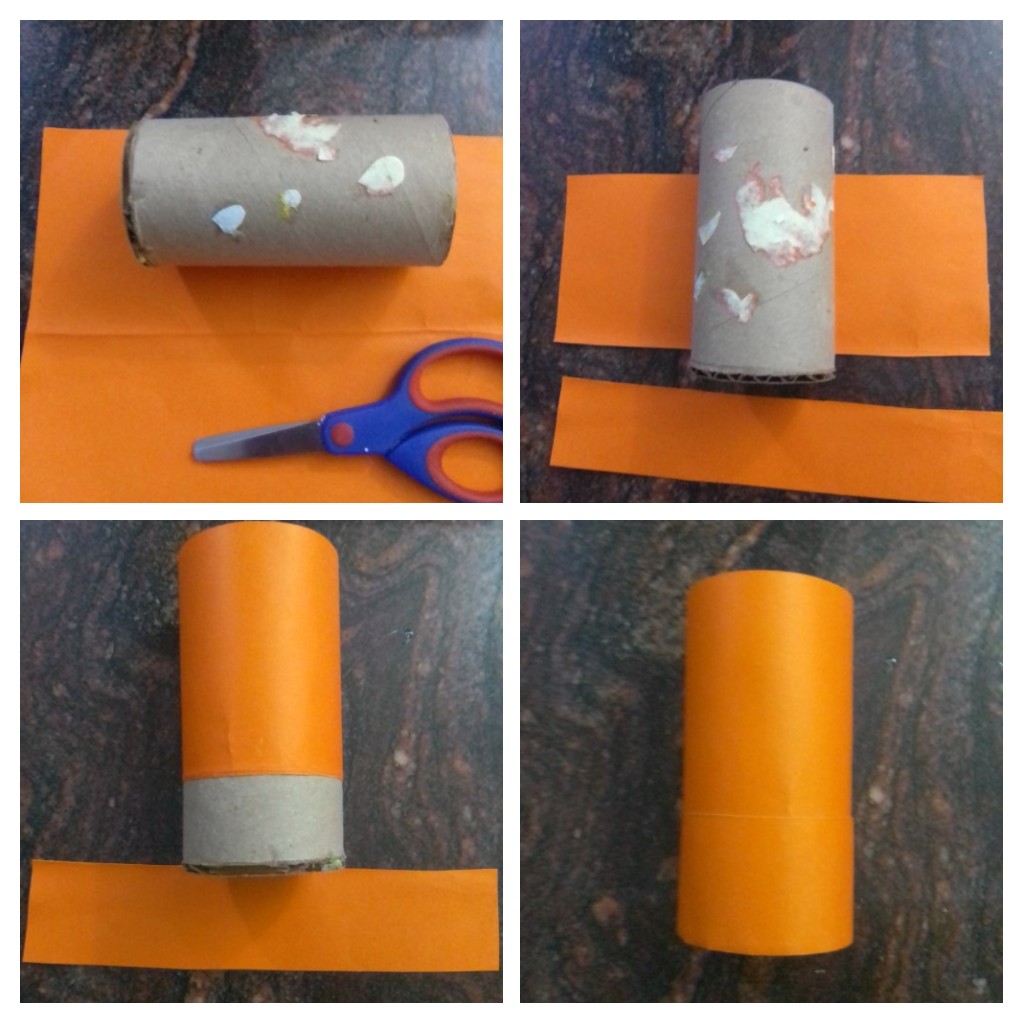
Next, I cut out two 0.5 centimeter strips of frosted black foami, and attached them with hot silicone, around each end of the already covered paper tube, to give a fancier look, and bring out the color even more. I then attached a part of a neon green plastic zipper to hide the junction of the orange cardstock. I really liked this color combination, it is very cheerful and fun.

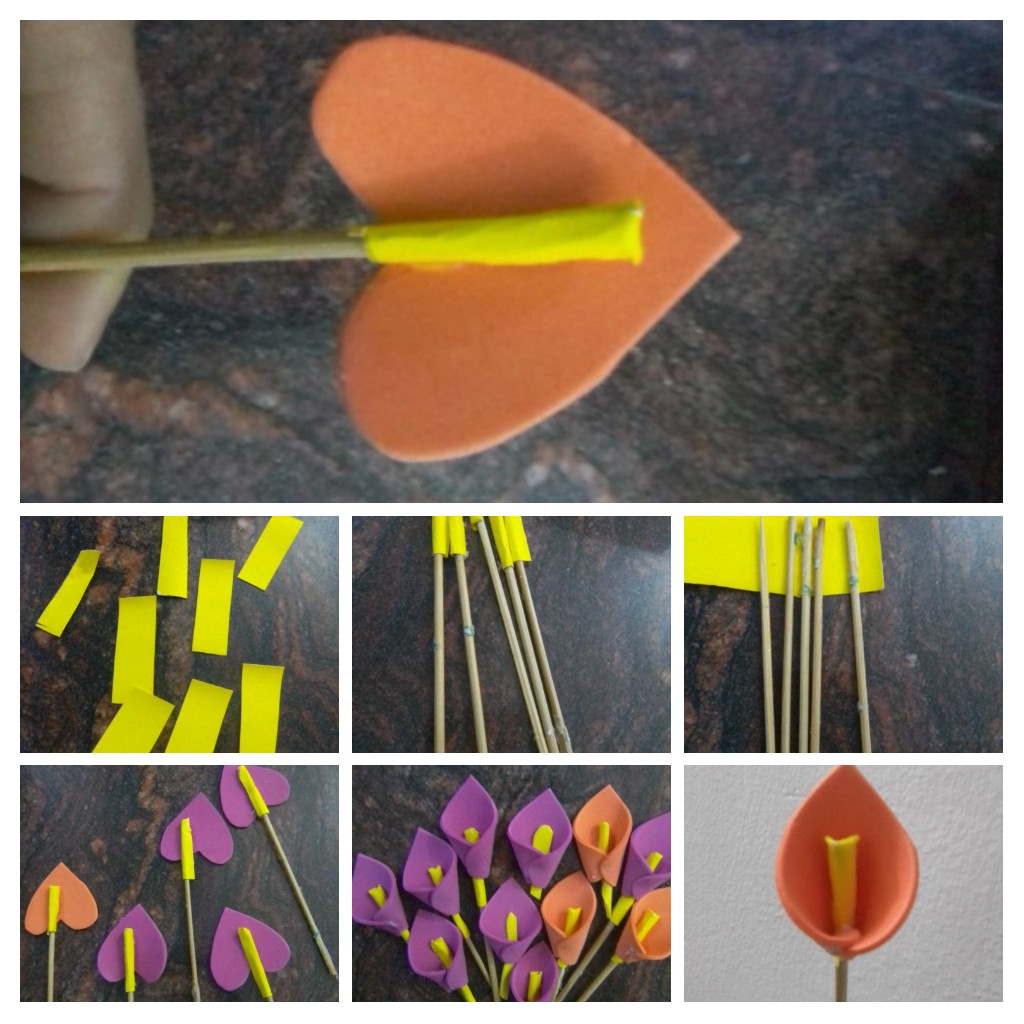
I have the vase or base for the centerpiece ready, now I will continue with the flowers, I decided to make Cala flowers, because I find them simply beautiful and I could play with the colors of foami I had. I made a mold of a small heart and transferred it to the fuchsia and orange foami.
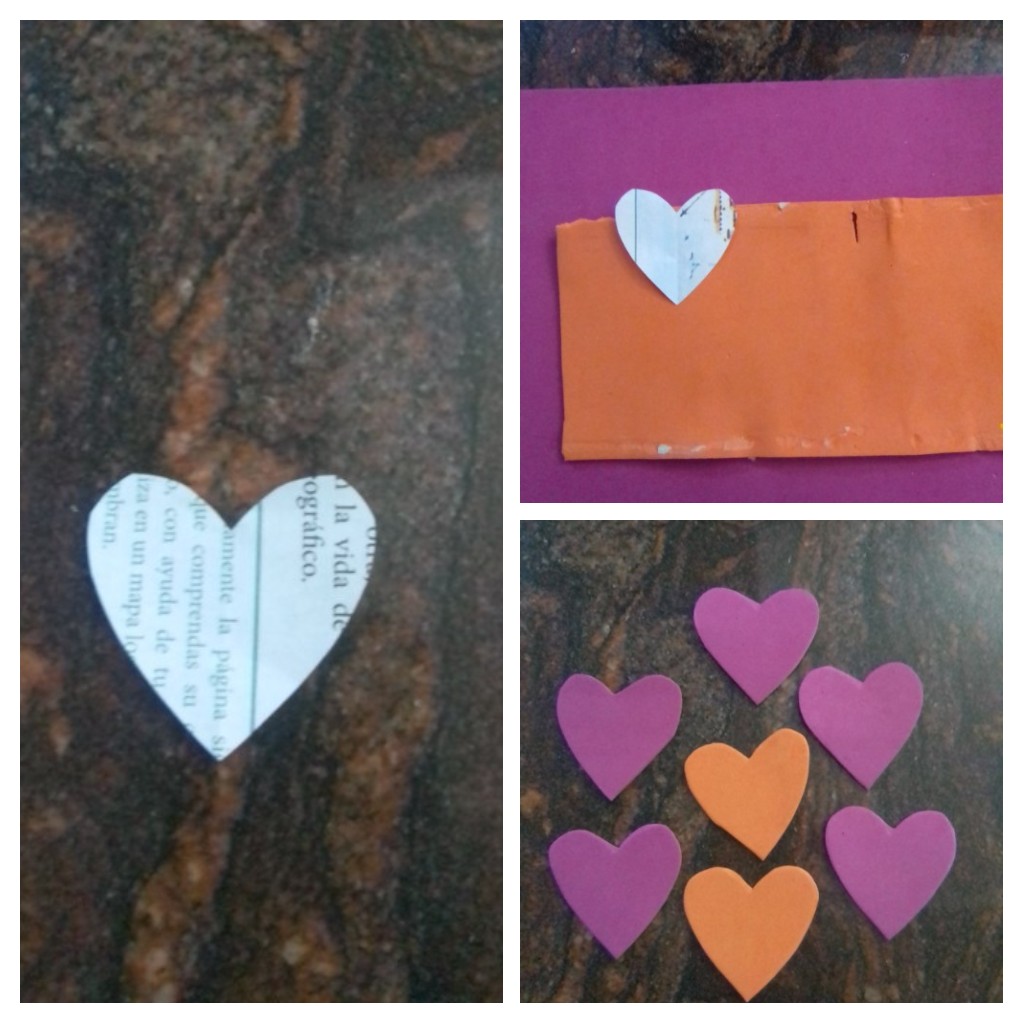
As I wanted to have a nourished bouquet of flowers, I made 8 fuchsia hearts and 3 orange hearts, so that the latter stand out in the bouquet of lilies.
Now it's time to prepare the wooden sticks to assemble the flower, cut out pieces of yellow cardboard 1x2.5 centimeters for as many foami hearts as I have. I covered one end of the wooden sticks with the yellow cardboard and then proceeded to make each flower. Place hot silicone in the opening of the heart and glue the stick on the yellow side, then cross and glue the wings of the heart to form the flower.
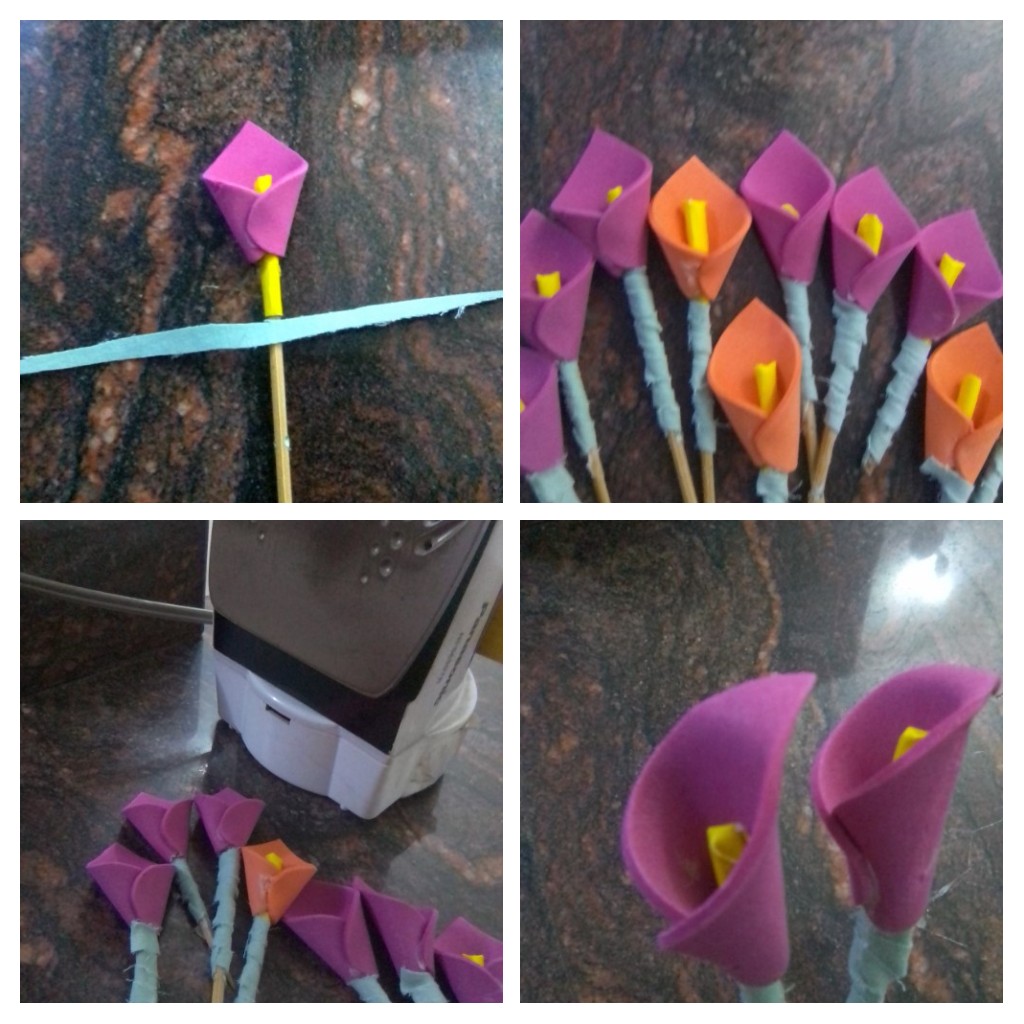
With all the flowers ready, I then proceed to line the wooden sticks with green fabric.
Now I am going to perfect the shape of the flower, for this I apply heat on the tip of the flower and give a slight downward curvature, so that it takes the real shape of the cove.
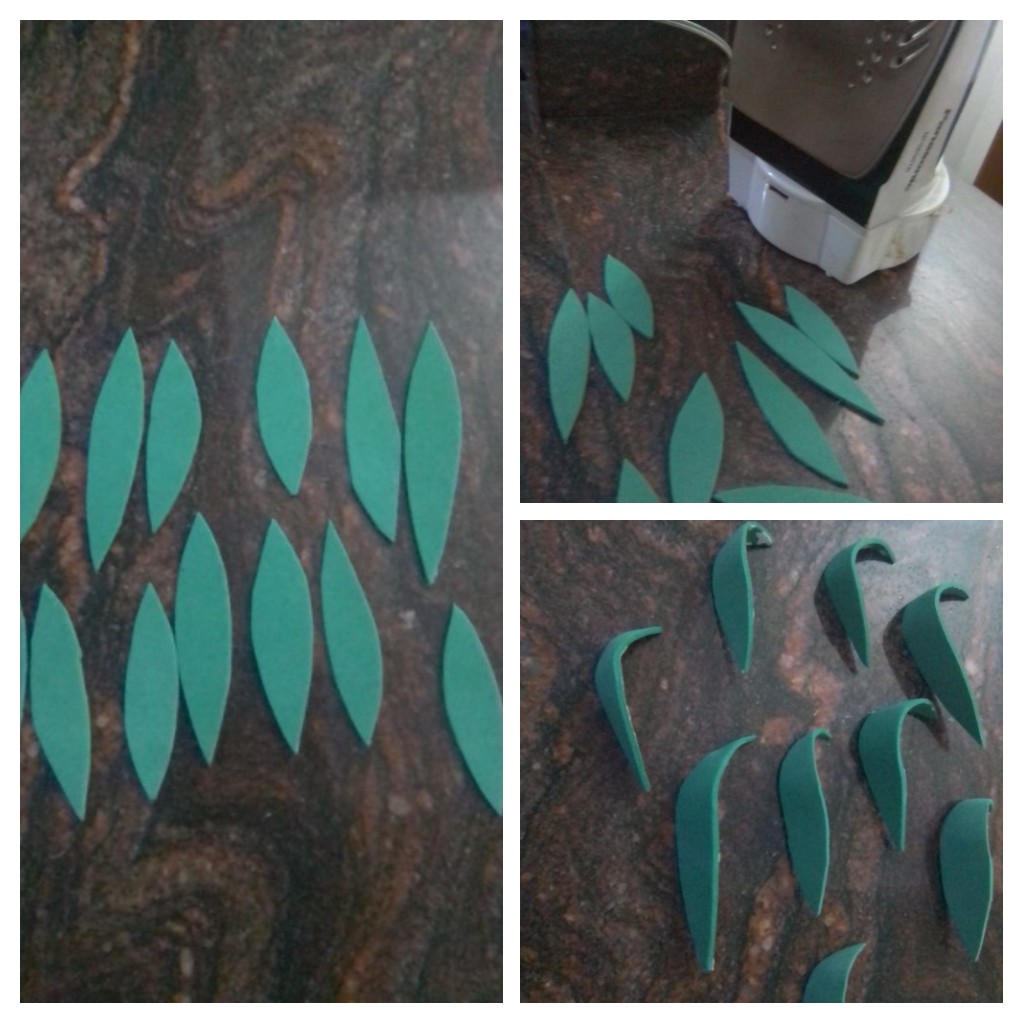
Almost all the elements are ready, now it is the turn of the leaves, for this I cut directly from the green foami, several long leaves and apply heat with the iron, to give movement.
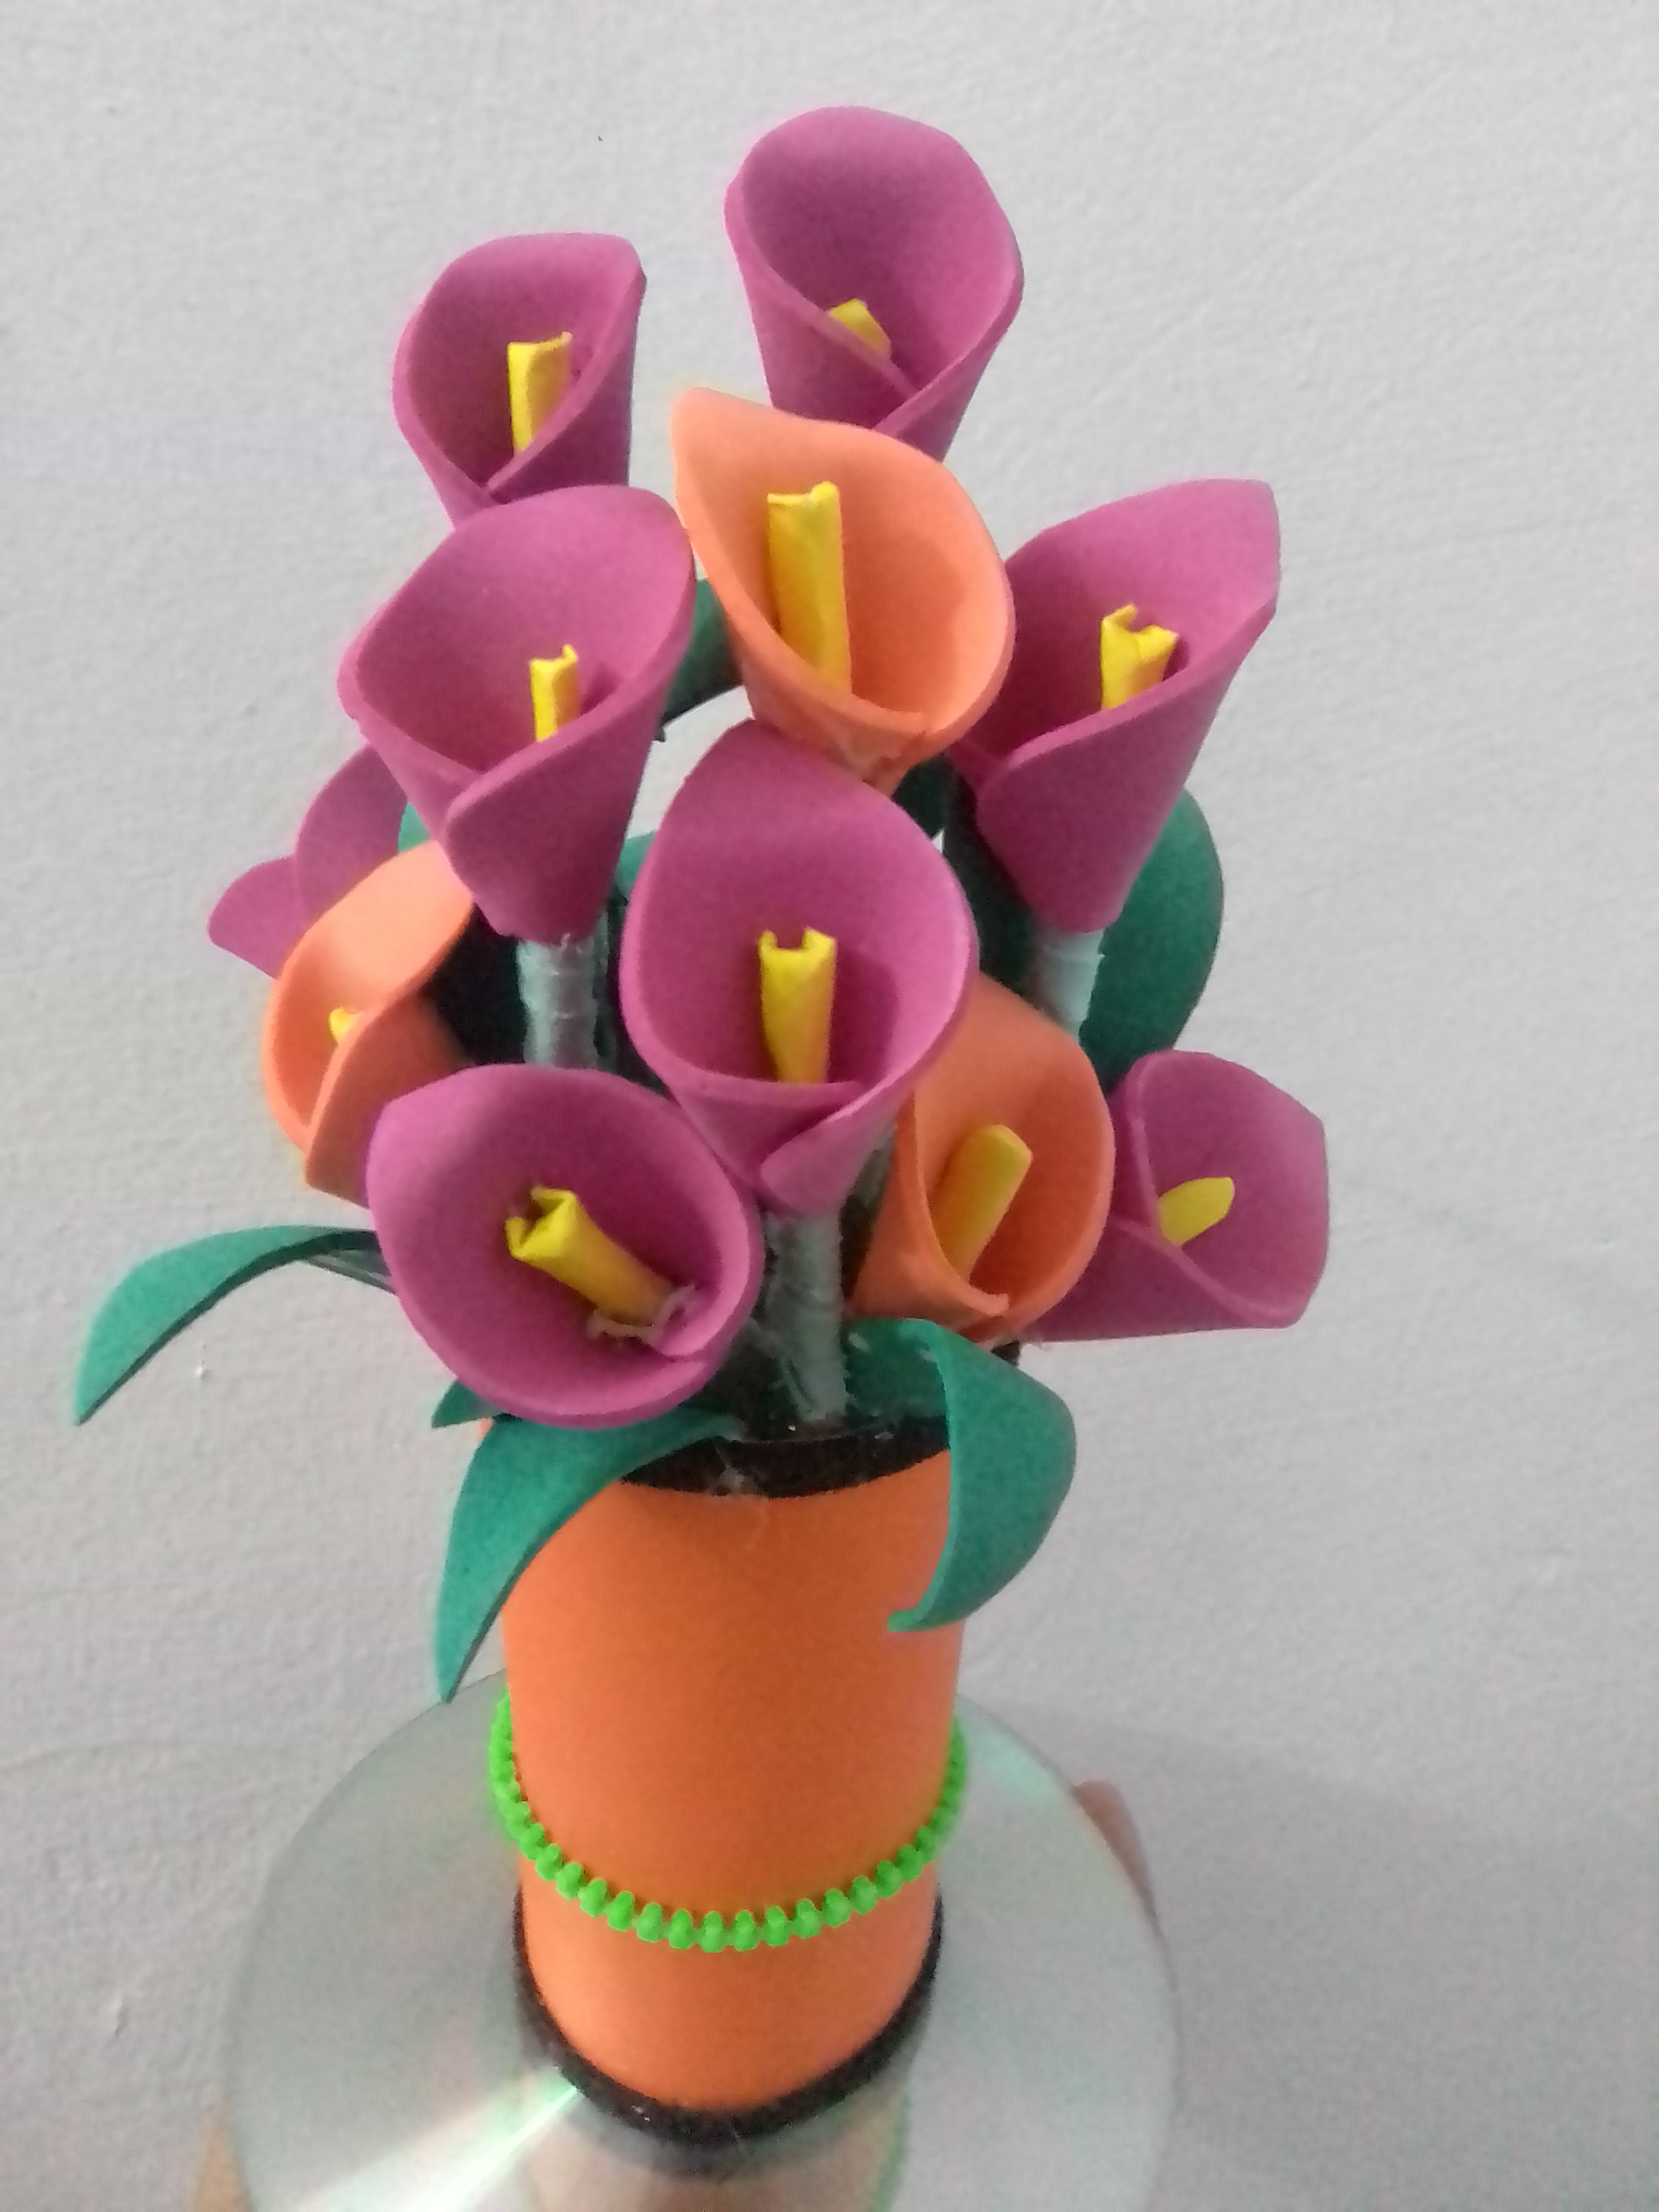
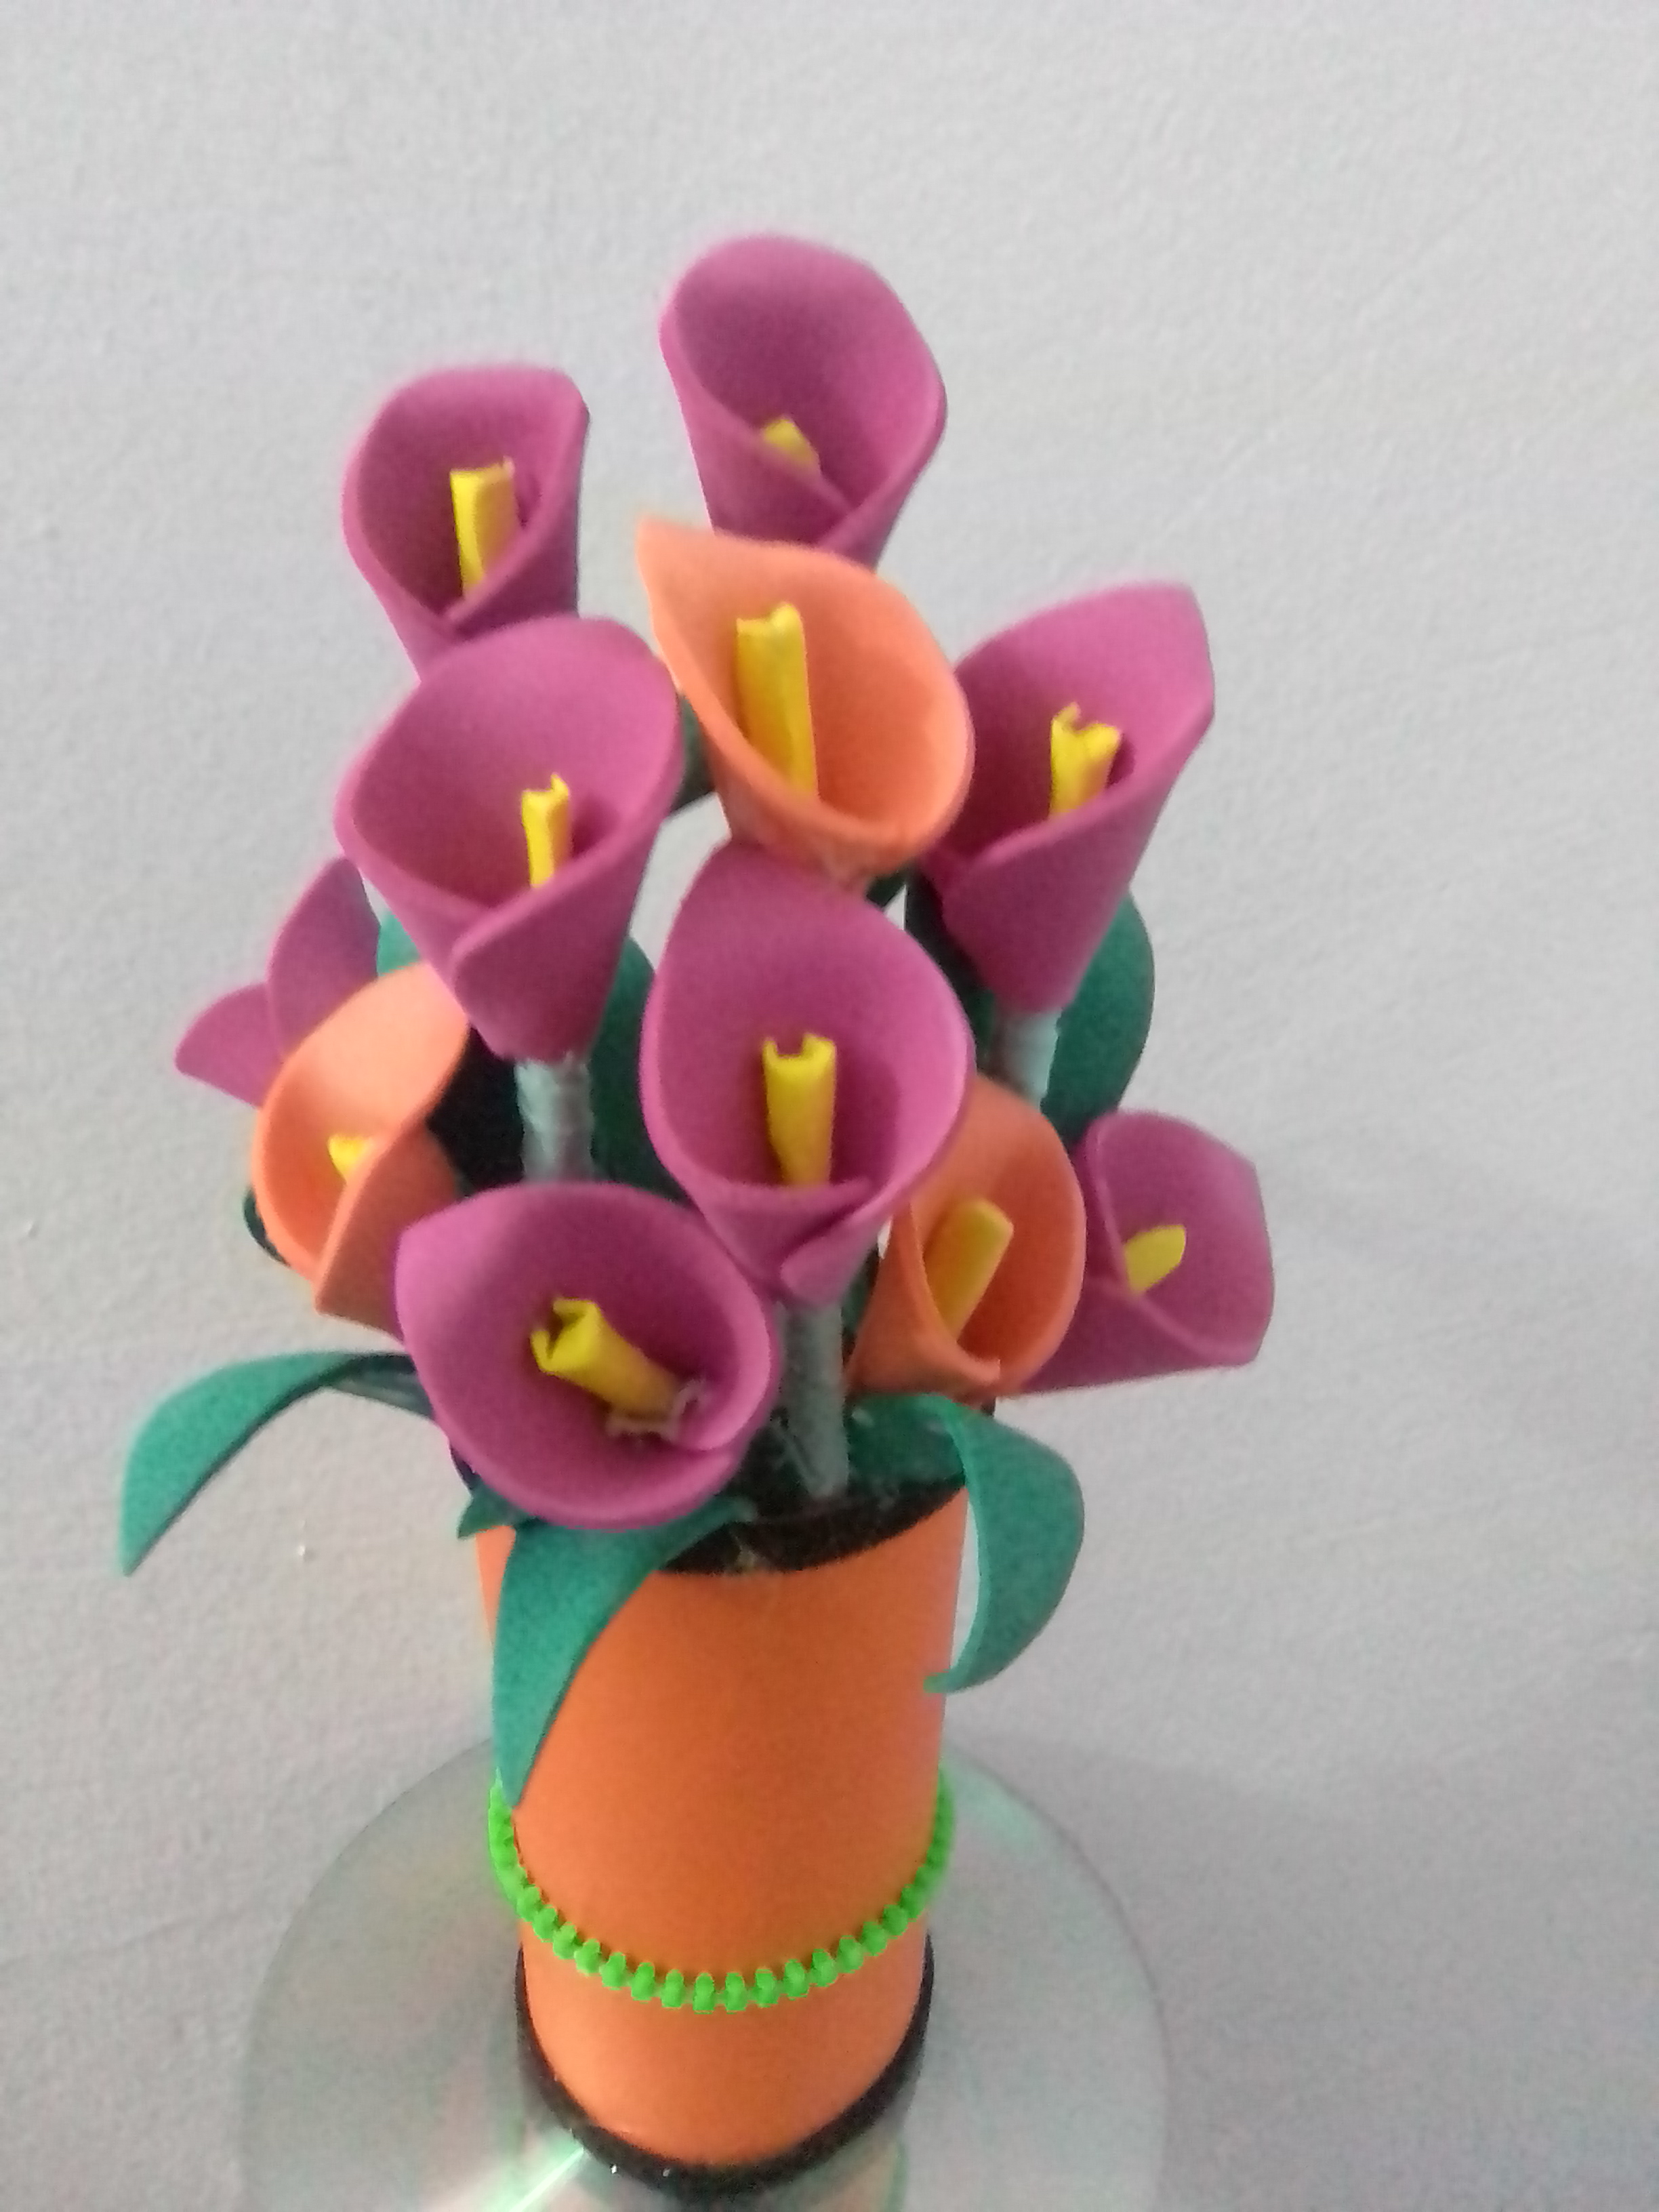
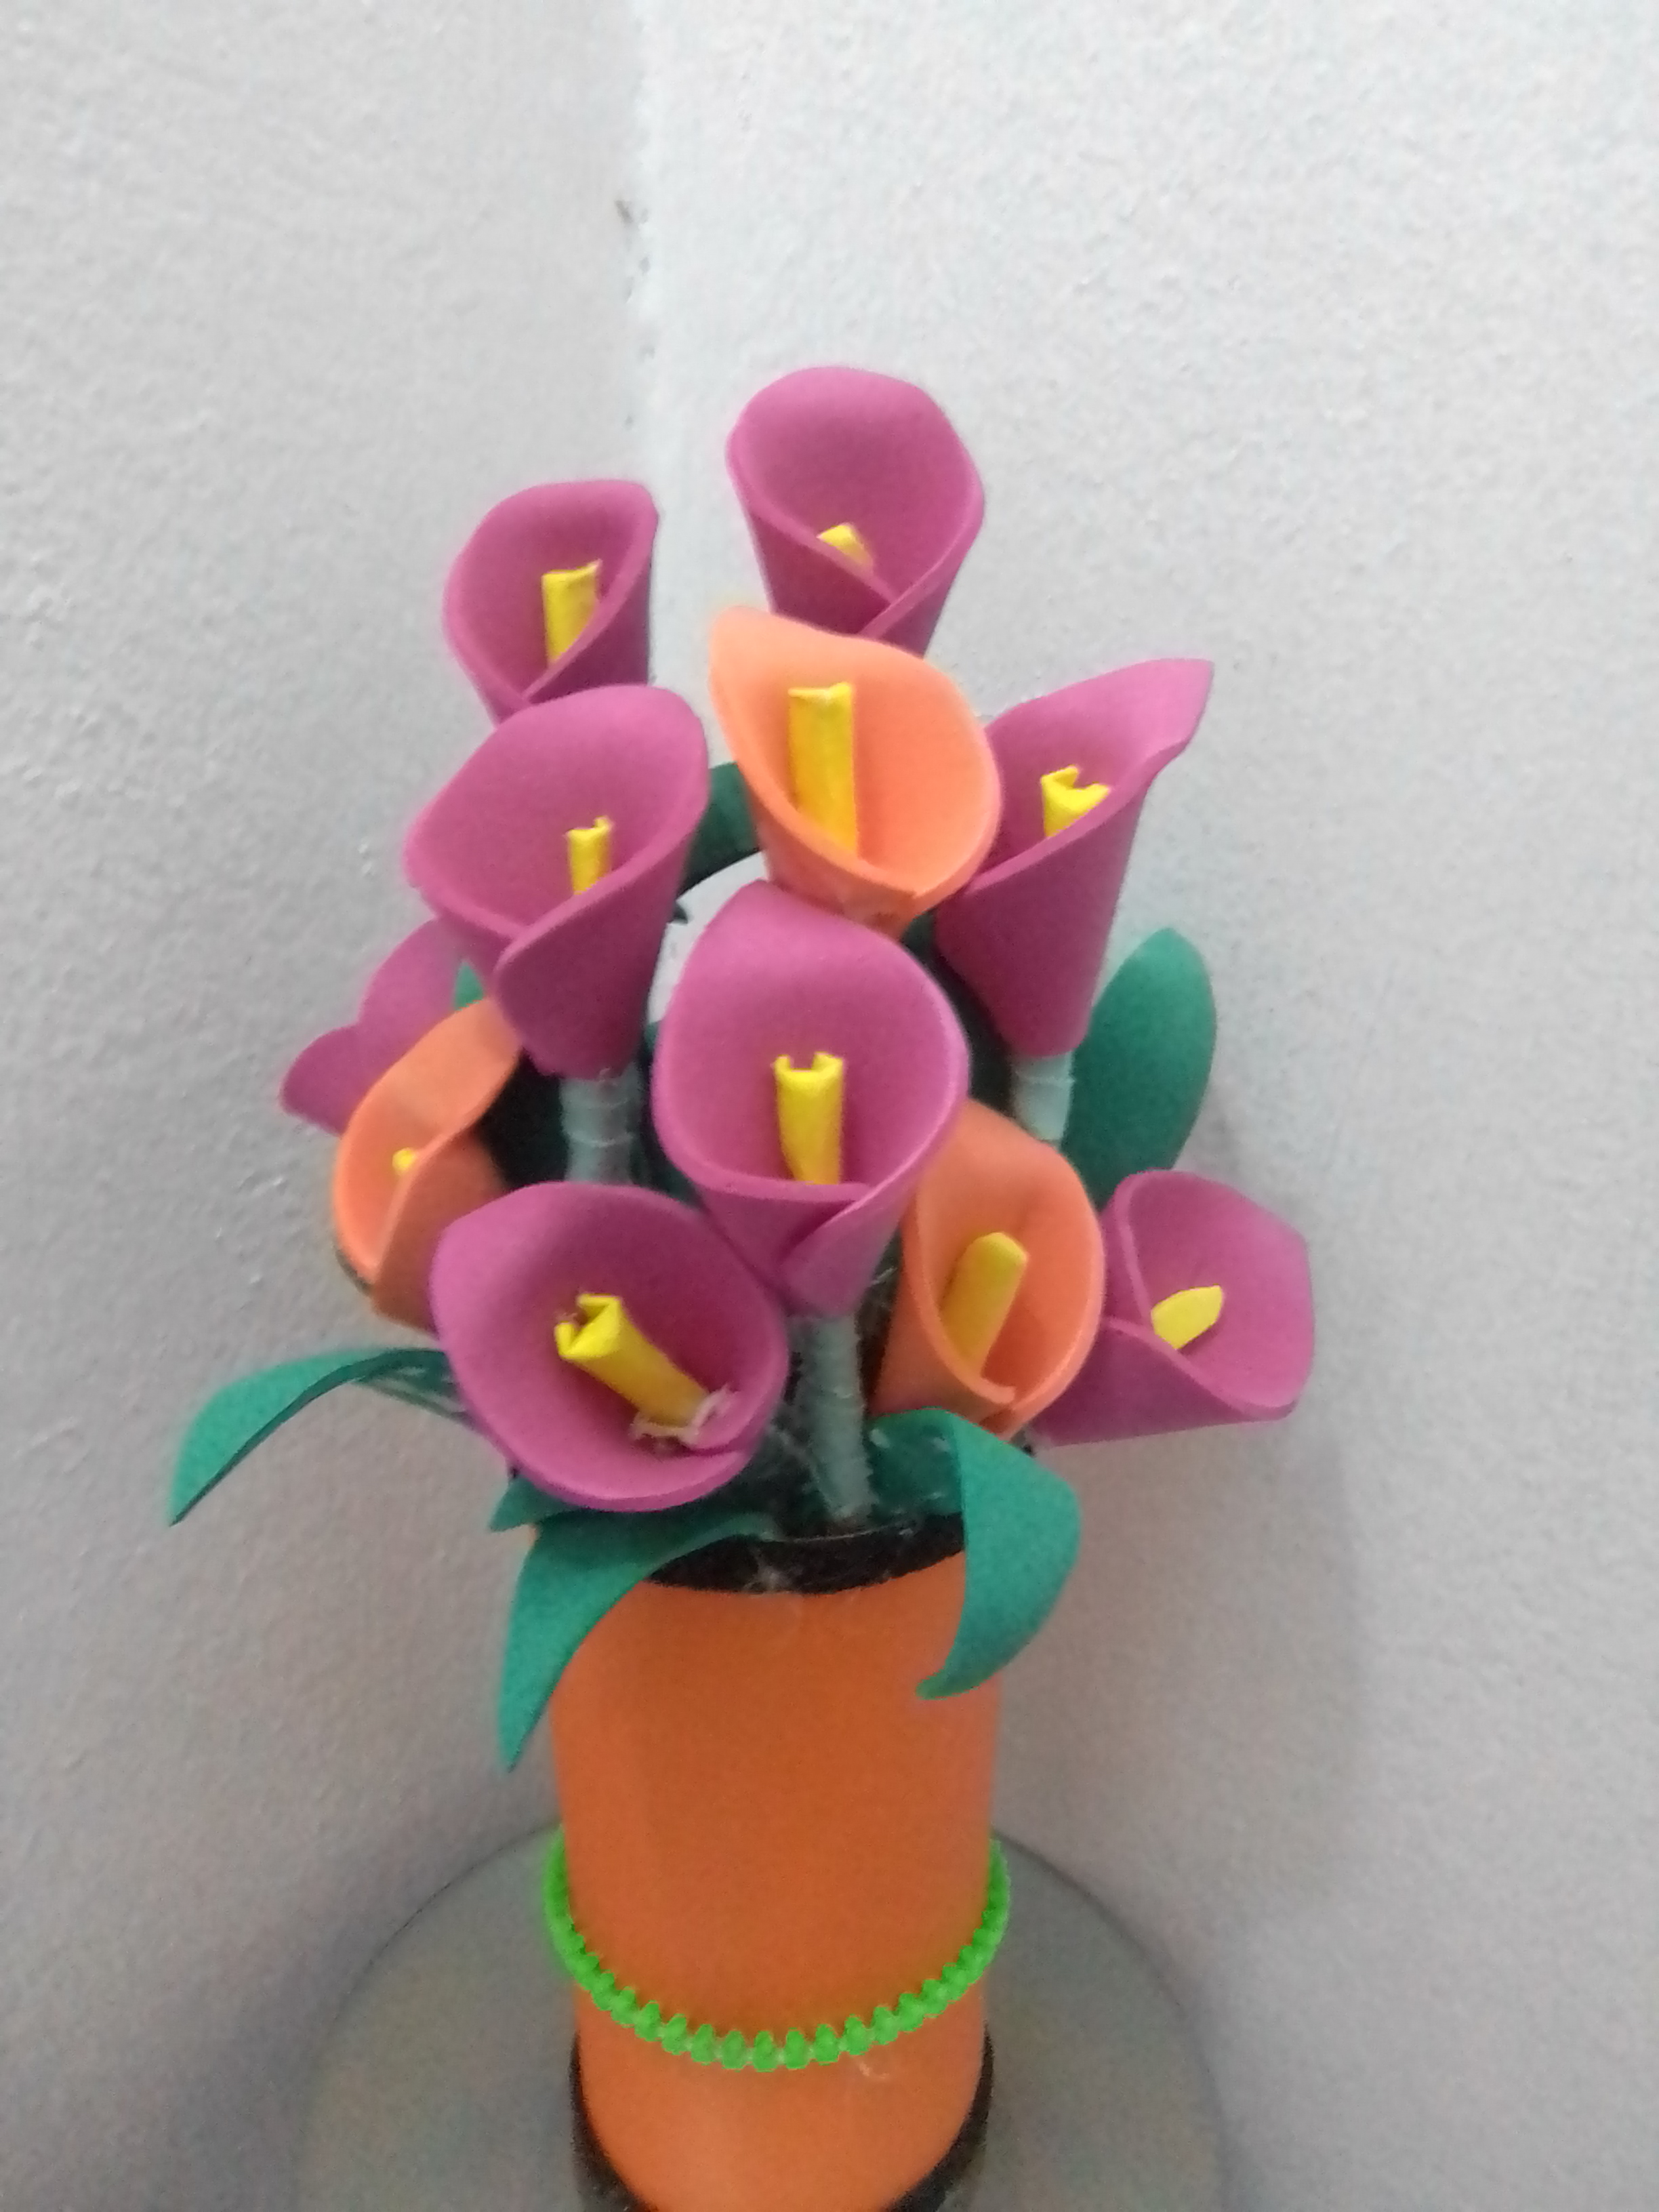
To fill out the base a bit, place some recycled paper balls and some white stones to give it a little weight, and so I begin to place the flowers, giving harmony to the bouquet, and then the leaves to fill in the spaces and harmonize with the flowers. . And so I achieved a beautiful and nourished bouquet.
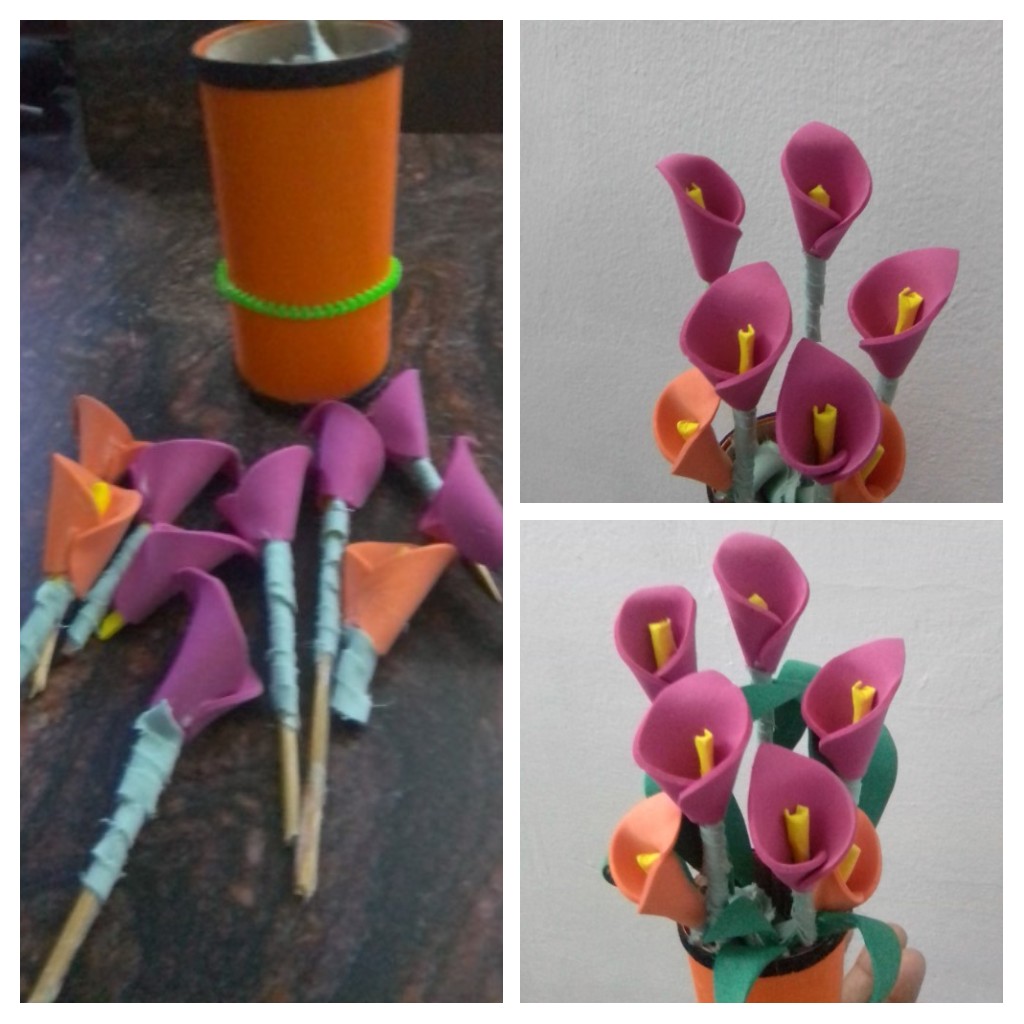
This is how I have finished my flower-themed centerpiece, although it can also be a nice decoration for a desk or a shelf. The truth was as I imagined, elegant, cheerful and fun colors.
I hope you are encouraged to perform at home, recycling materials.
Result
The photos are my property taken exclusively in this project.
The collages of the procedure were made with the tool of my Blue C6 and the main one in Canva
The dividers and the banners were edited by me in Canva
The translation was made with
DeepL Translator

Materiales
✓ Tubo de papel.
✓ Foami de colores, fucsia, naranja, verde y negro escarchado.
✓ Palitos de madera y tijeraj
✓ Cartulina amarillo y naranja
✓ Retazo de tela de color verde
✓ Cremallera plástica verde neón.
✓ Plancha de ropa.
✓ Piedras blancas
Paso a paso
Para comenzar a realizar este lindo centro de mesa floral, inicio decorando lo que va ser el jarrón, para ello utilice un tubo de papel higiénico de una antigua manualidad y por ende ya tenía la tapa de base, así que procedo a cortar la cartulina naranja en dos piezas para que me alcance para cubrir el tubo. Así que cubro la parte de arriba y luego con la tira sobrante termine de cubrir la parte inferior.
A continuación, recorte dos tiras de 0,5 centímetros de foami negro escarchado, y los fijé con silicona caliente, alrededor de cada extremo del tubo de papel ya cubierto, para dar un aspecto más elegante, y resaltar aún más el color. Luego coloque una parte de una cremallera verde neón, de plástico, para disimular la unión de las cartulinas naranja. Me gustó mucho esta combinación de colores es muy alegre y divertida.
Ya tengo listo el jarrón o base para el centro de mesa, ahora voy a continuar con las flores, decidí realizar flores de Cala, porque me parecen sencillamente hermosa y podía jugar con los colores de foami que tenía. Realice un molde de un corazón pequeño y lo transferí al foami fucsia y naranja.
Cómo quería tener un ramo de flores nutrido, realice 8 corazones fucsia y 3 corazones naranja, para que estos últimos destaquen en el ramo de lirios.
Es el momento de preparar los palitos de madera, para luego ensamblar la flor, recorte trozos de cartulina amarilla de 1x2,5 centímetros por tantos corazones de foami tengo. Cubri un extremo de los palitos de madera con la cartulina amarilla y procedi entonces a elaborar cada flor. Coloque silicona caliente en la abertura del corazón y pegue el palito en por la parte amarilla, luego cruce y pegue las alas del corazón para formar la flor.
Con todas las flores listas, procedo entonces a forrar con tela verde los palitos de madera, ahora voy a
perfeccionar la forma de la flor, para ello aplique calor en la punta de la flor y di una curvatura ligera hacia abajo, para que tome la forma real de la cala.
Casi todos los elementos, estás listos, ahora es el turno de las hojas, para ello recorte directamente del foami verde, varias hojas largas y les aplique calor con la plancha, para dar movimiento.
Para rellenar un poco la base, coloque bolitas de papel de reciclaje y algunas piedras blancas para dar un poco de peso, y así comienzo a colocar las flores, dando armonía al ramo, y luego las hojas para rellenar los espacios y armonizar con las flores. Y así logré un bonito y nutrido ramo.
Así tengo terminado mi centro mesa con temática floral, aunque también puede ser un lindo adorno para un escritorio o una repisa. La verdad quedó como lo imaginaba, elegante, alegre y de colores muy divertidos.
Espero se animen a realizar en casa, reciclando materiales.
Resultado
Las fotos son de mi propiedad tomadas exclusivamente en este proyecto.
Los collages del procedimiento los hice con la herramienta de mi Blue C6 y el principal en Canva
Lo separadores y el banners fueron editados por mi en Canva
La traducción fue realizada con
DeepL Traductor
~~~ embed:1572749380209213440 twitter metadata:eW9saW1hcmFnfHxodHRwczovL3R3aXR0ZXIuY29tL3lvbGltYXJhZy9zdGF0dXMvMTU3Mjc0OTM4MDIwOTIxMzQ0MHw= ~~~
The rewards earned on this comment will go directly to the people( @yolimarag ) sharing the post on Twitter as long as they are registered with @poshtoken. Sign up at https://hiveposh.com.
Nice
💐💐💐💃🏽💃🏽
Muy hermoso trabajo!! Me encantan las decoraciones con temática floral, y estas te quedaron muy bonitas. Te felicito!!🌹🌺🌼
La verdad es un arreglo muy bonito y alegre . Gracias por apreciar mi trabajo y por tomarte un tiempo en leer el post. 🤗🤗
Te ha quedado precioso amiga y los materiales muy sencillos, excelente post.
Muchas gracias amiga por tu apoyo, cierto que con material sencillos se pueden crear cosas muy hermosa. A reciclar. 💐💐🤗
Te ha quedado muy lindo @yusma21, felicidades y mucha suerte en tu publicación.
Gracias por el apoyo y el tiempo para visitar mi blog, se te aprecia. 💐💐💐