A big hello to my fellow Hive Diy creatives, I want to show you how to make a beautiful decorative painting of a ladybug perched on a flower.
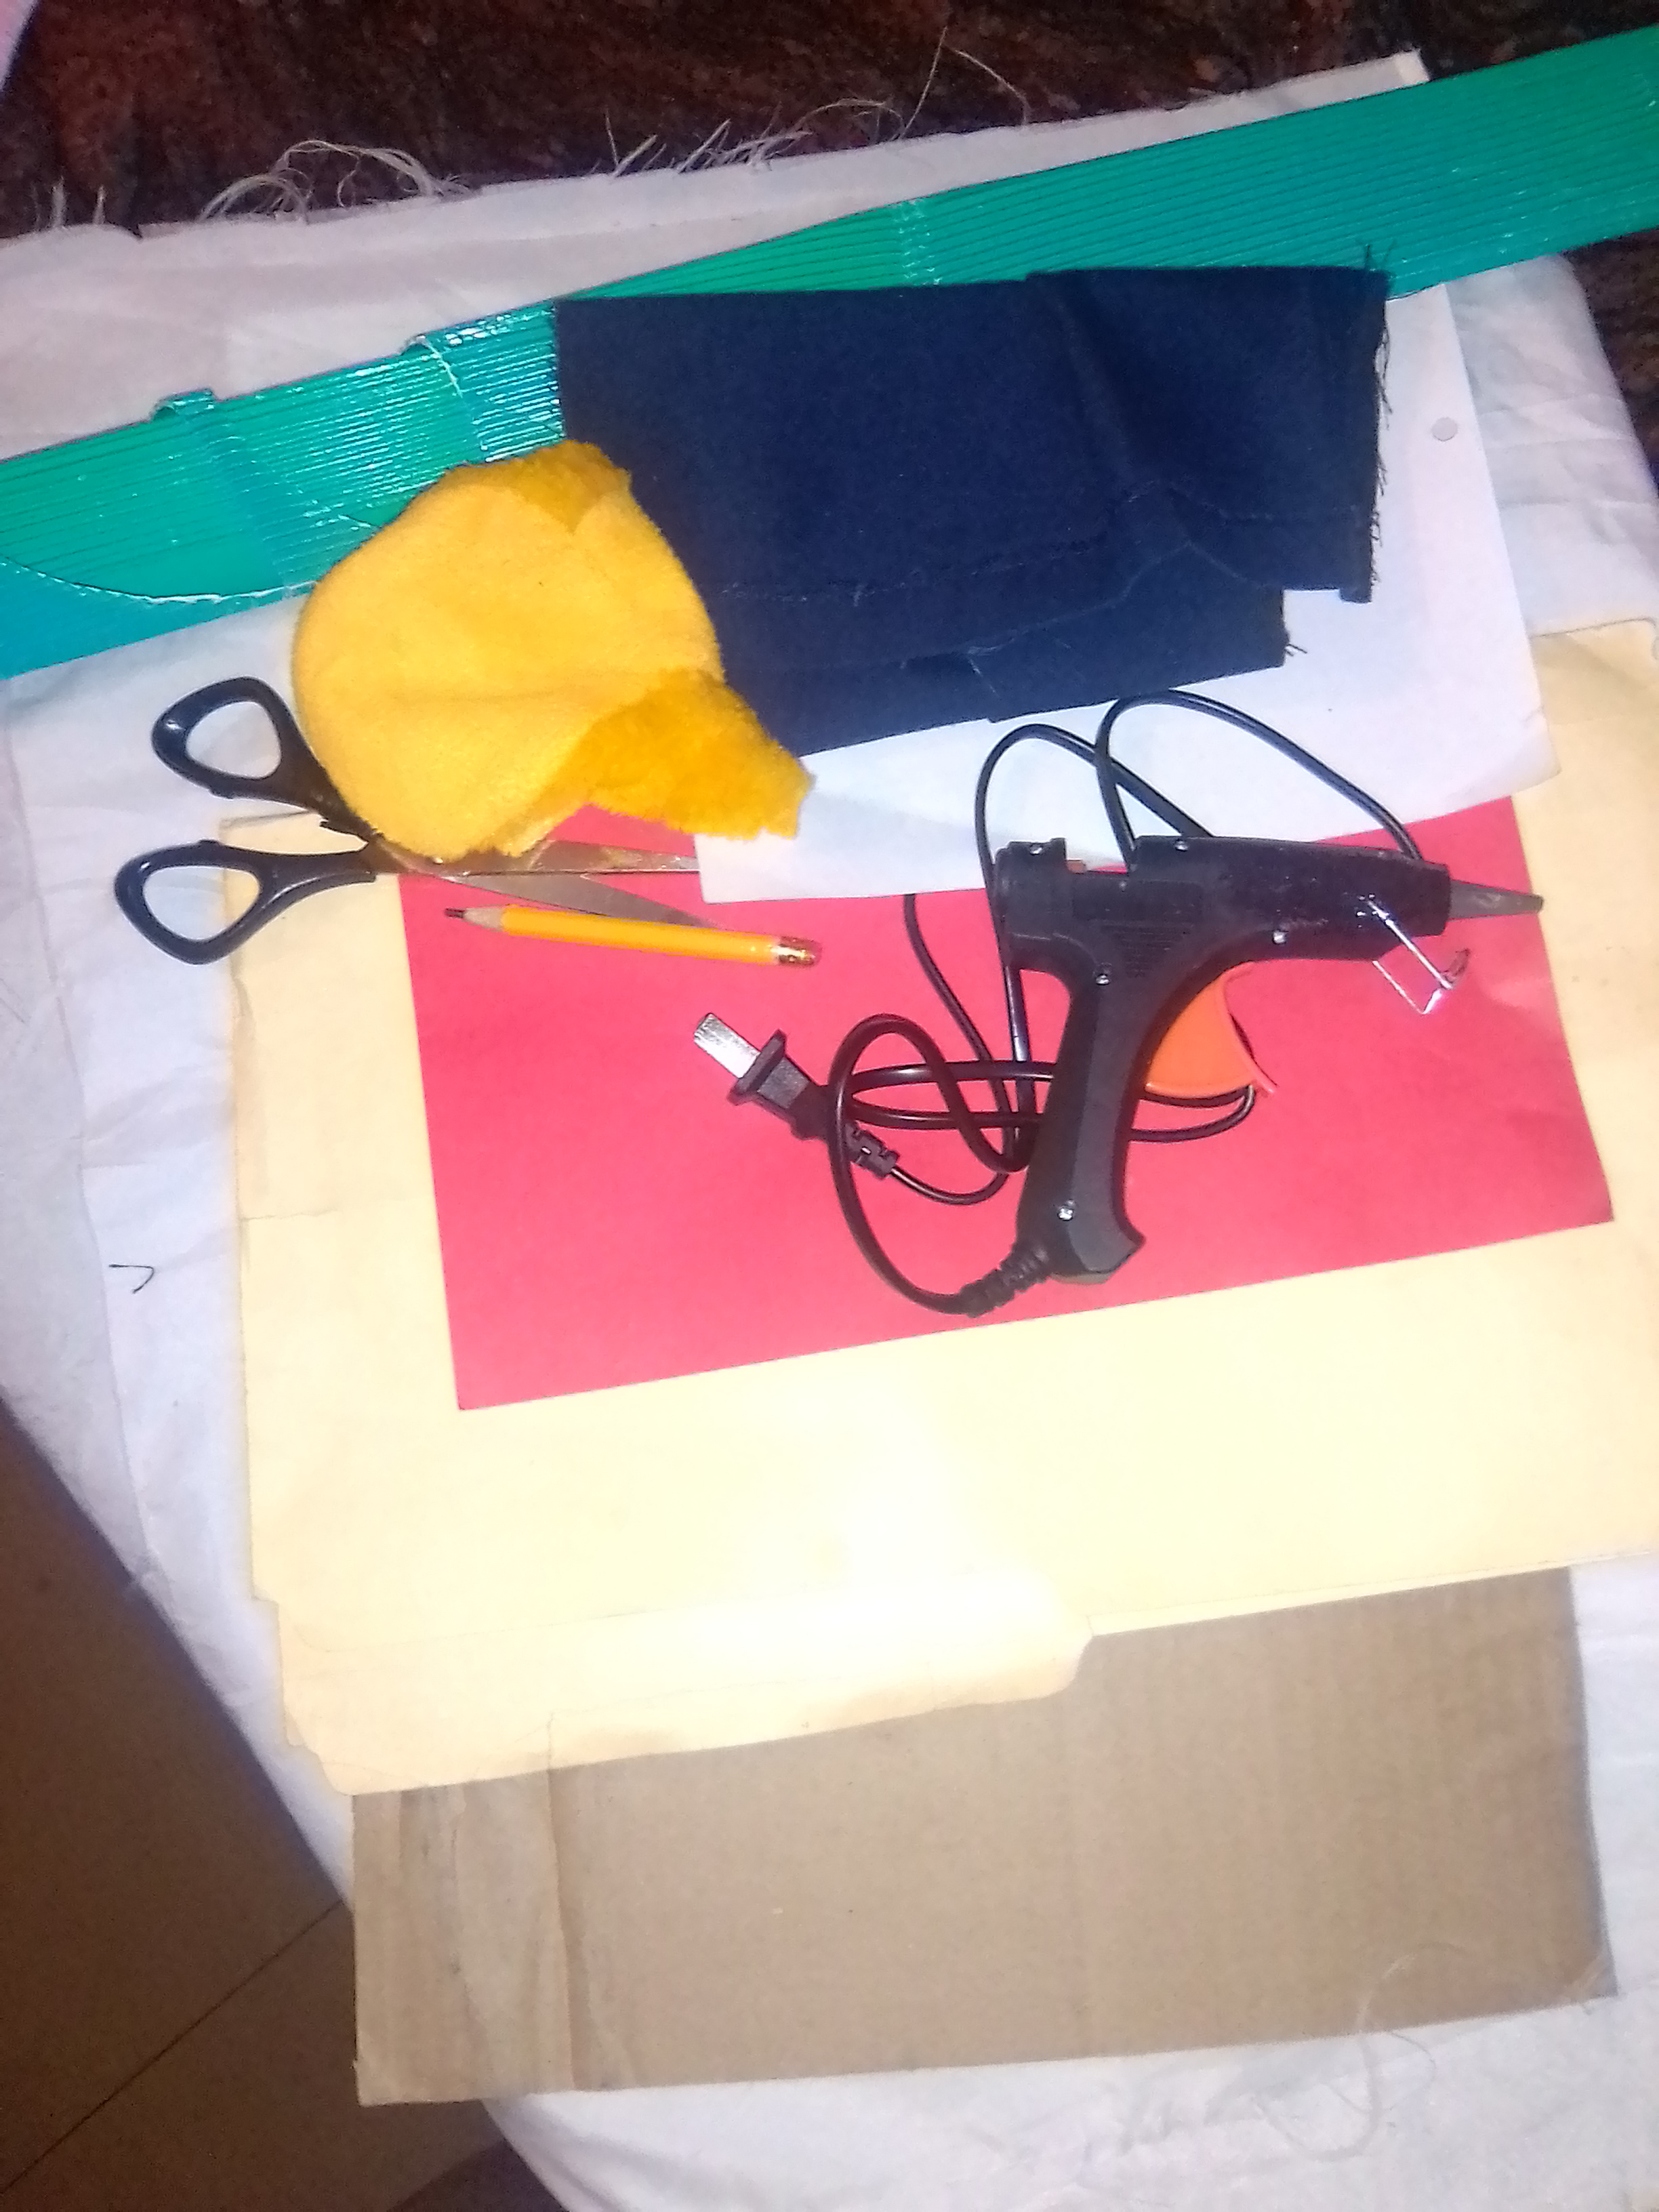
Materiales / Materials
- Cartón liso
- Cartón corrugado verde
- Pistola de silicon
- Tijera
- Barra de silicon
- Cartulina rojo
- Hoja blanca
- Tela negra
- Tela de peluche amarillo
- Hojas blancas de reciclaje
- Cartulina negra
- Plain cardboard
- Green corrugated cardboard
- Silicone gun
- Scissors
- Silicone stick
- Red cardboard
- White sheet
- Black cloth
- Yellow stuffed cloth
- White recycling sheets
- Black cardboard
Paso a Paso / Step by Step
Primer paso/First step
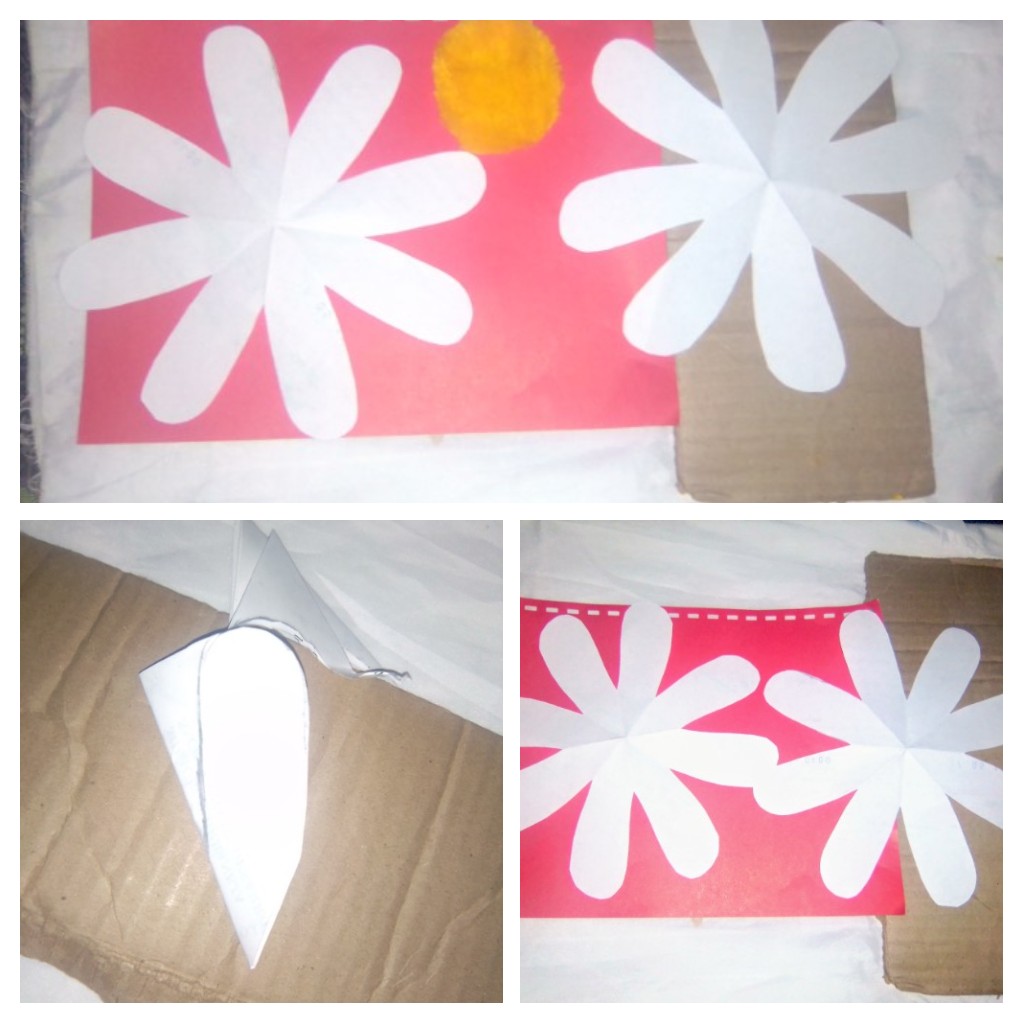
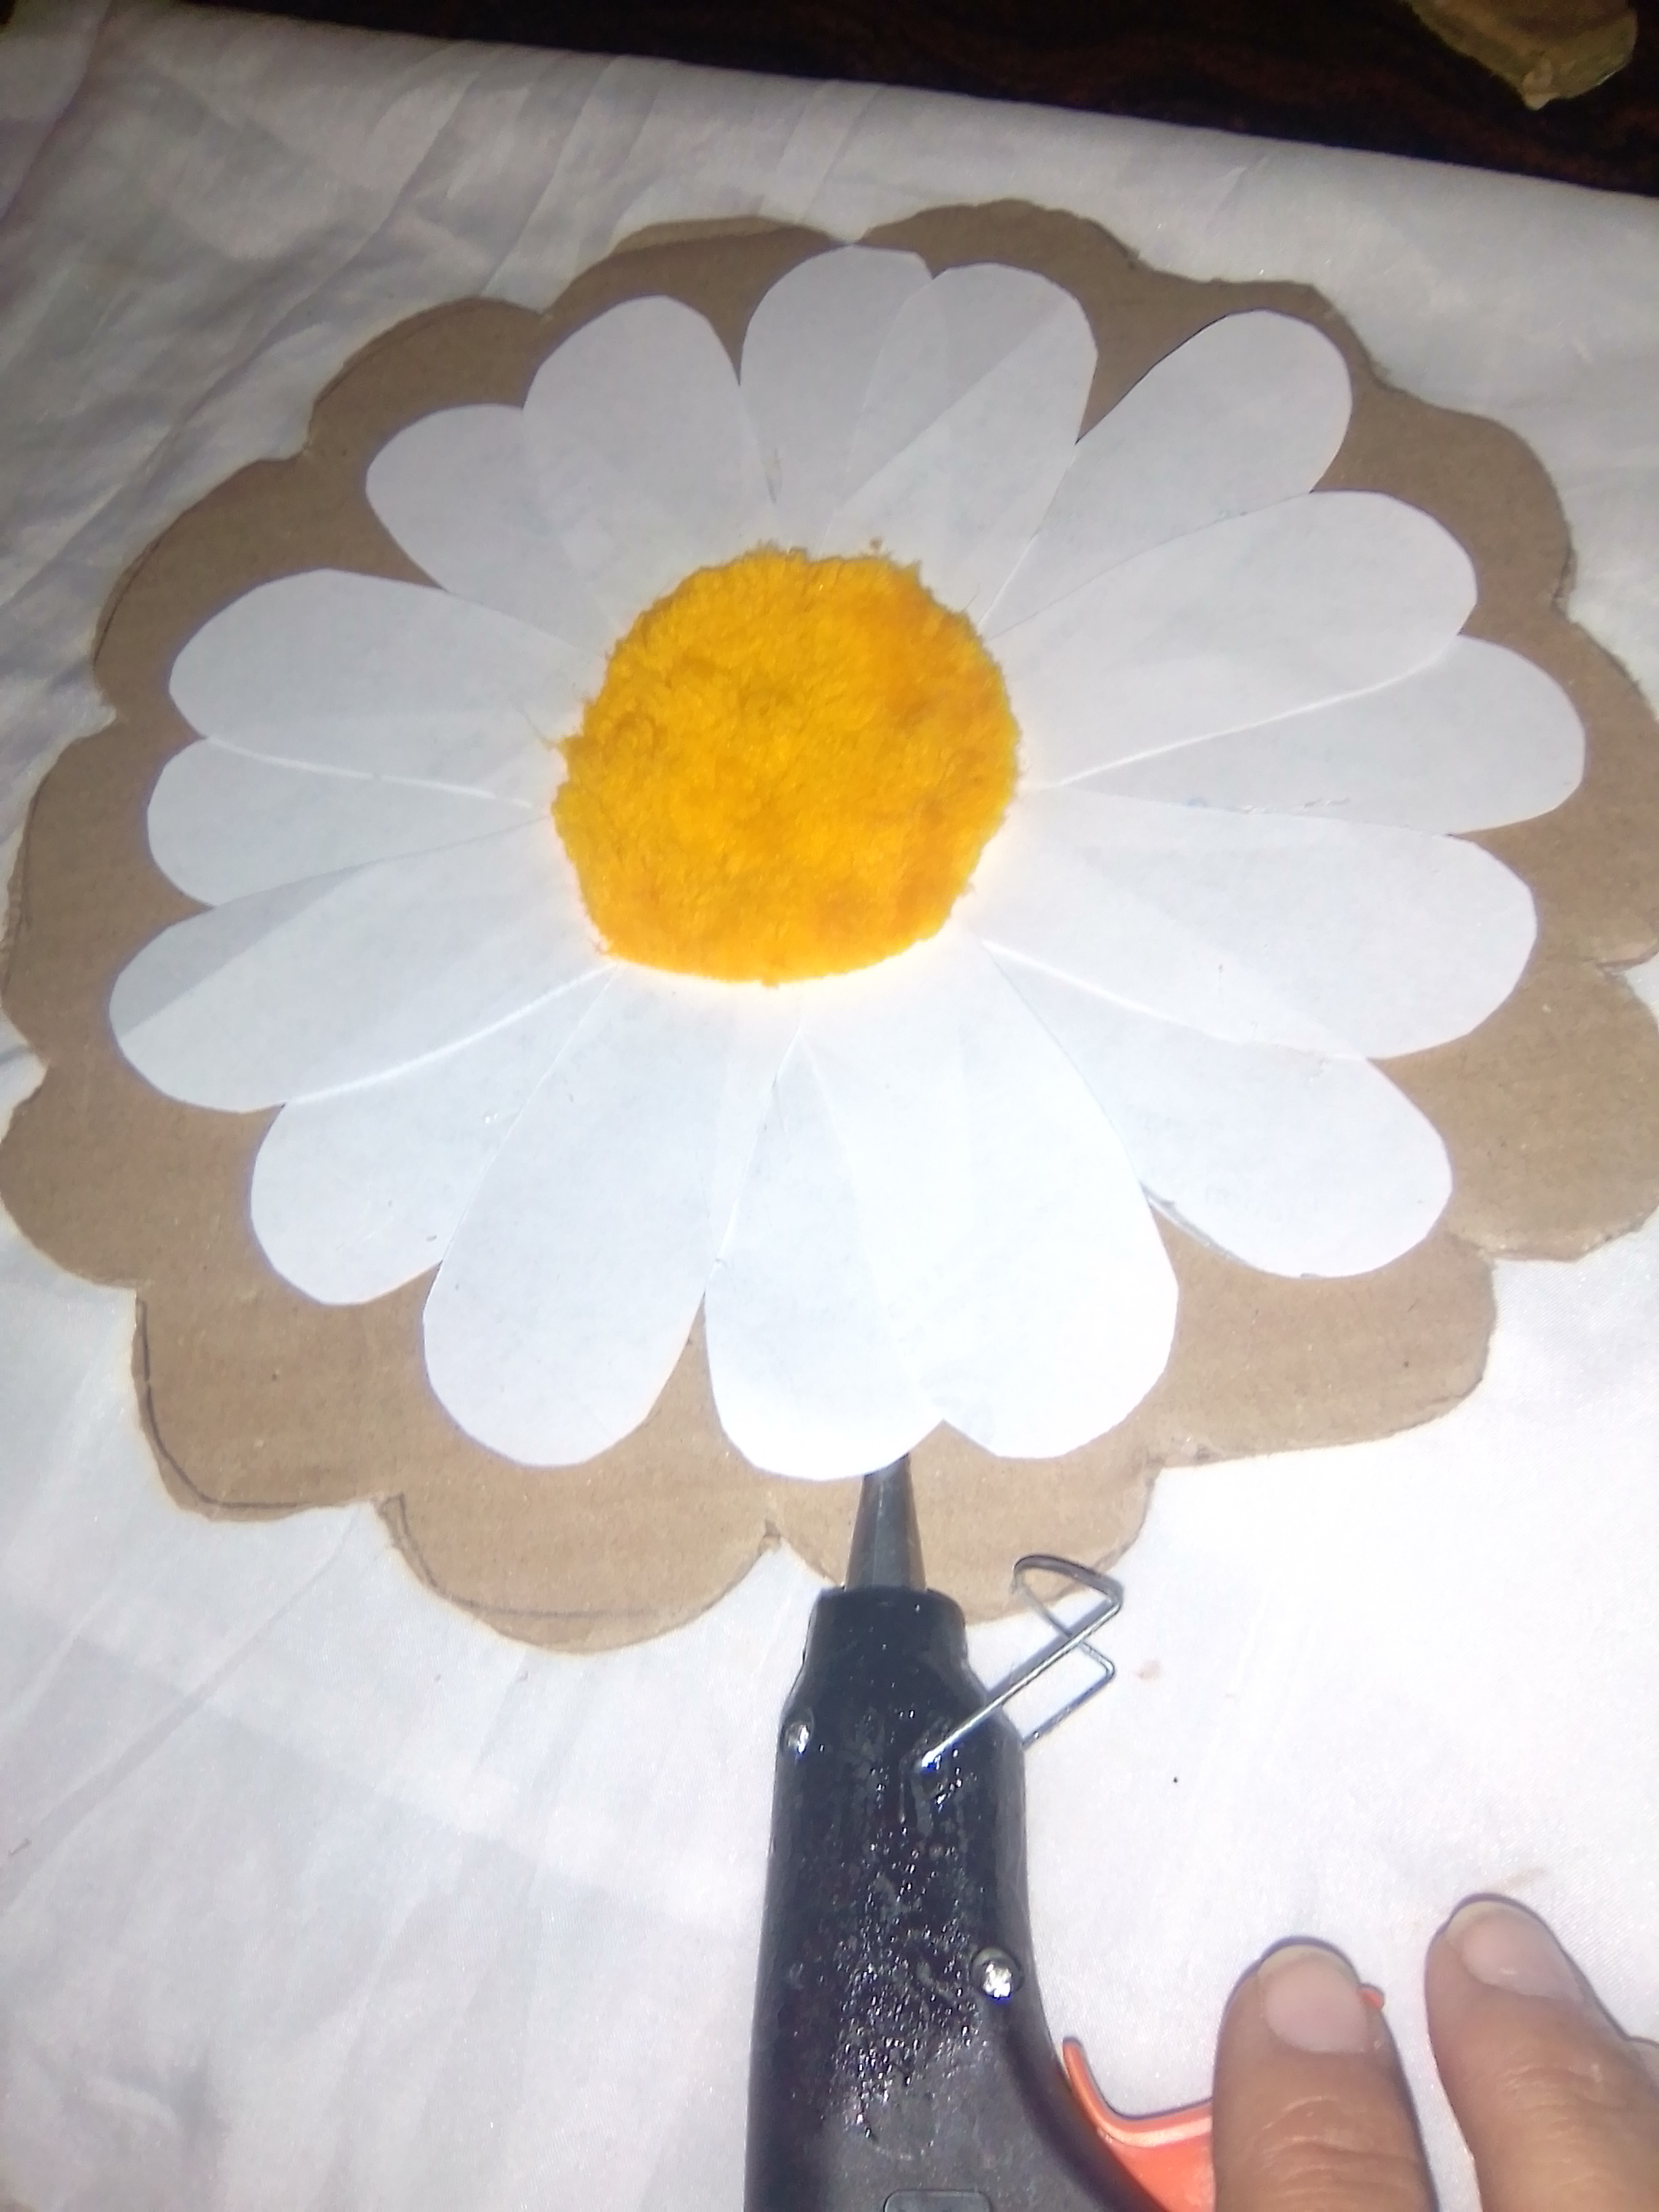
The first thing I did was to take my sheets of white paper and take a square of 19 centimeters, which I folded in the shape of a triangle making it point to point, fold it four times and mark with a pencil the shape I wanted, not so rounded on the sides, but with the shape well pronounced down, to get a flower with long petals, so I made two shapes and cut them out, then cut a circle of yellow teddy fabric of 5.5 centimeters in diameter.
Segundo paso / Second step
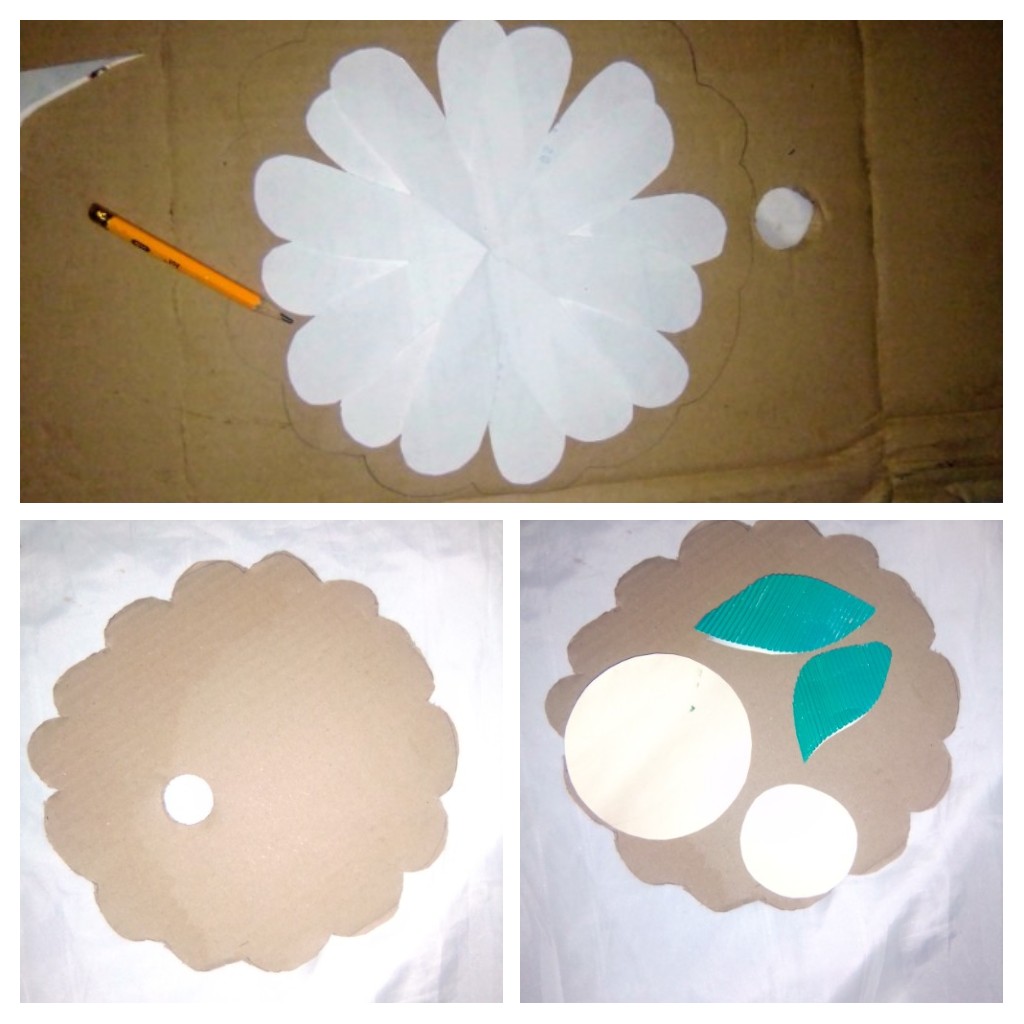
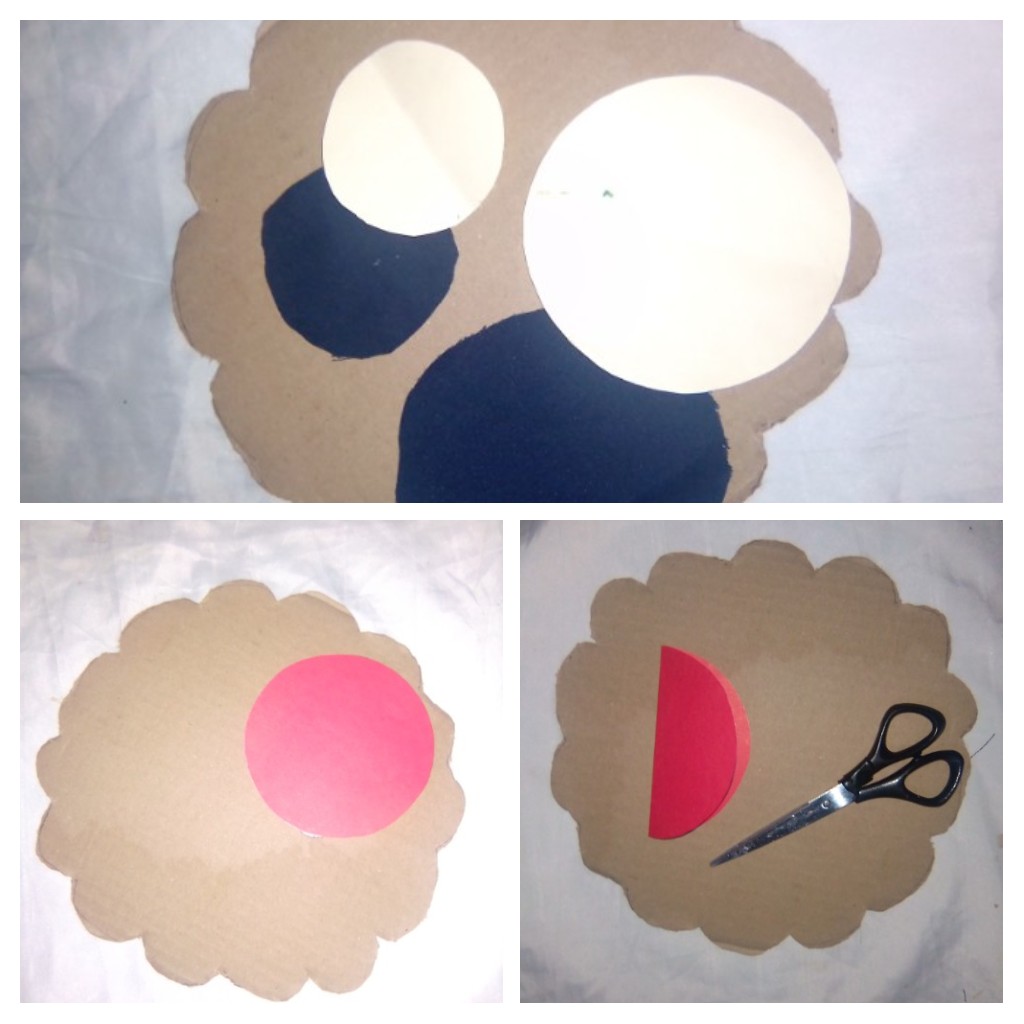
Place my flowers on a piece of cardboard and mark with a pencil approximately 1.5 centimeters from the flower a rounded shape resembling a flower, then cut out the cardboard. Then make two circles in thin cardboard, one of 11 centimeters in diameter and the other of 7 centimeters. Take advantage and cut out a few sheets of green corrugated cardboard.
Tercer paso / Third step
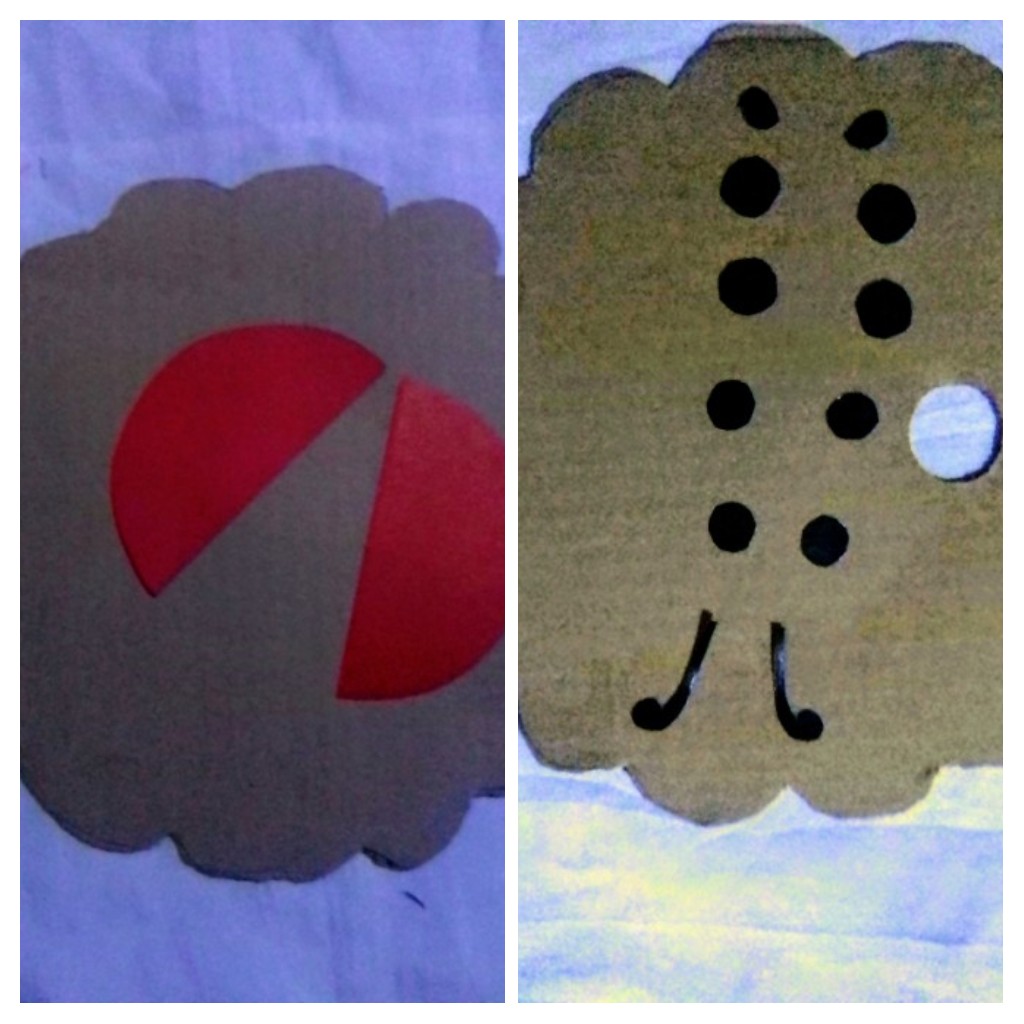
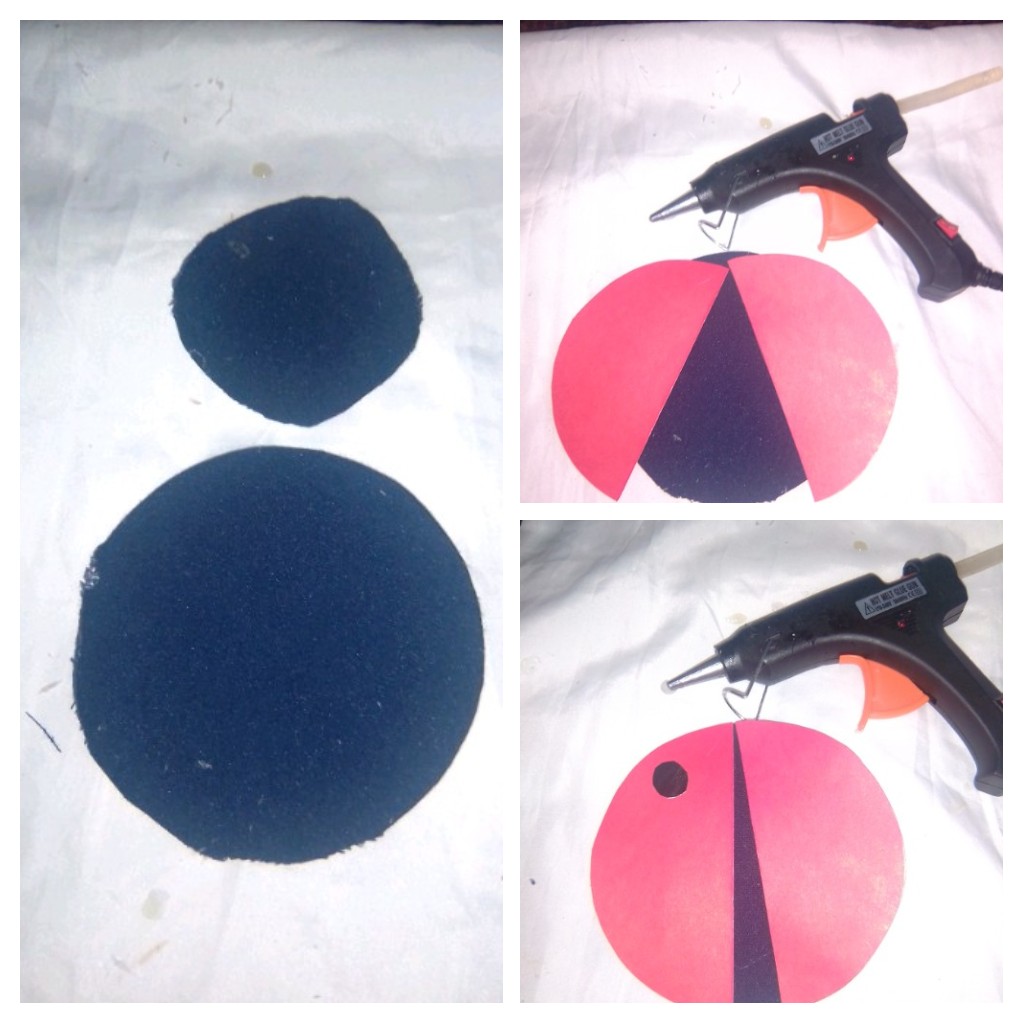
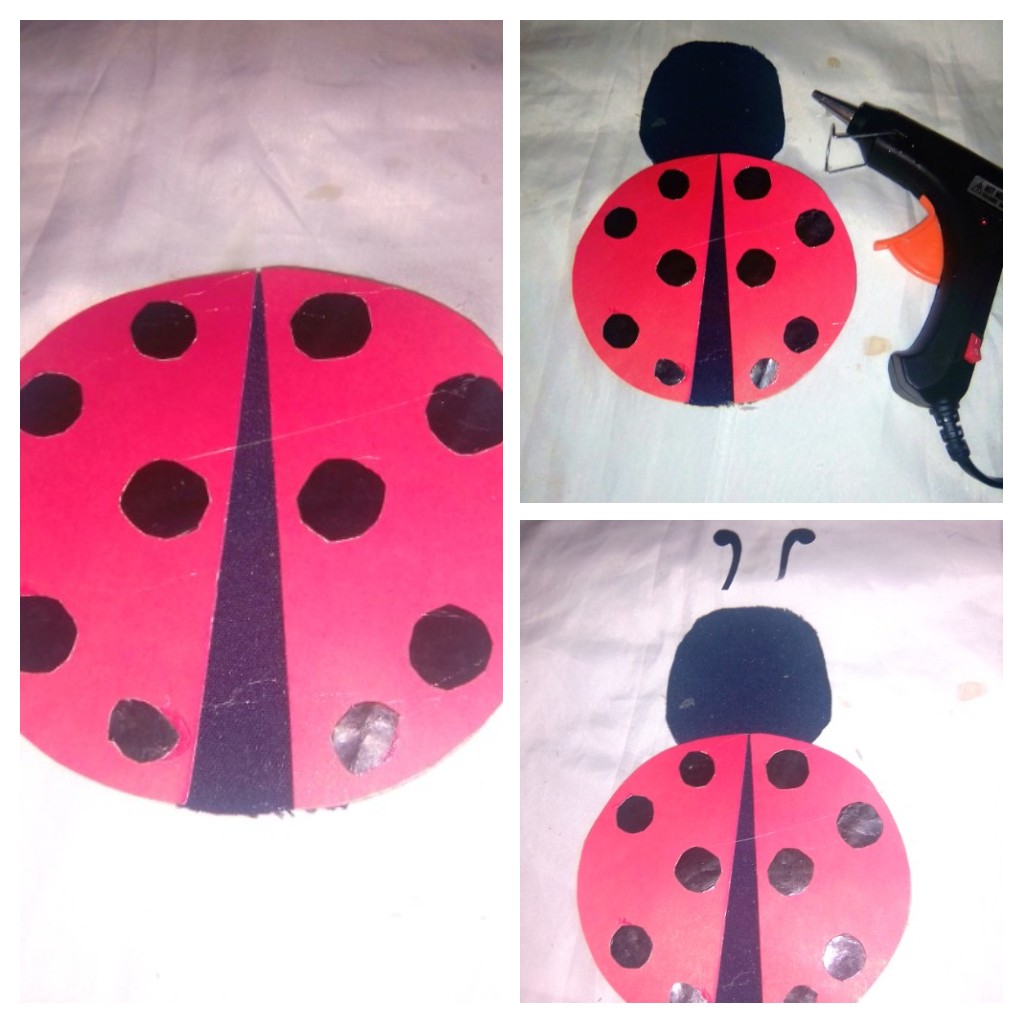
The next step was to cut out circles of black fabric based on the cardboard circles. I cut out a red cardboard circle based on the big circle, this red circle was folded in half and I got my two crescents. With the black cardboard I cut out 10 small circles and made the shapes of the antennae.
Cuarto paso / Fourth step
Once all the shapes are ready I start to assemble my picture, the first thing is to glue my flowers, I place one flower on top of the other, trying to cover with its petals the spaces of the flower below and glue it with silicon, then I fix the flower to the cardboard with the help of the silicon leaving a space without glue where the leaves will be located and I place its yellow circle in the center.
Quinto paso /
I started to assemble my ladybug, first I glued the black fabric to the cardboard circles, to the largest circle I placed the red crescent moon leaving a separation, so that the ladybug has open wings, then I glued the small black circles on the wings. Then I attached the head to the body with silicone and finally I placed the antennae. Then I glued my ladybug to the side of the flower, and finally I placed my two green leaves.
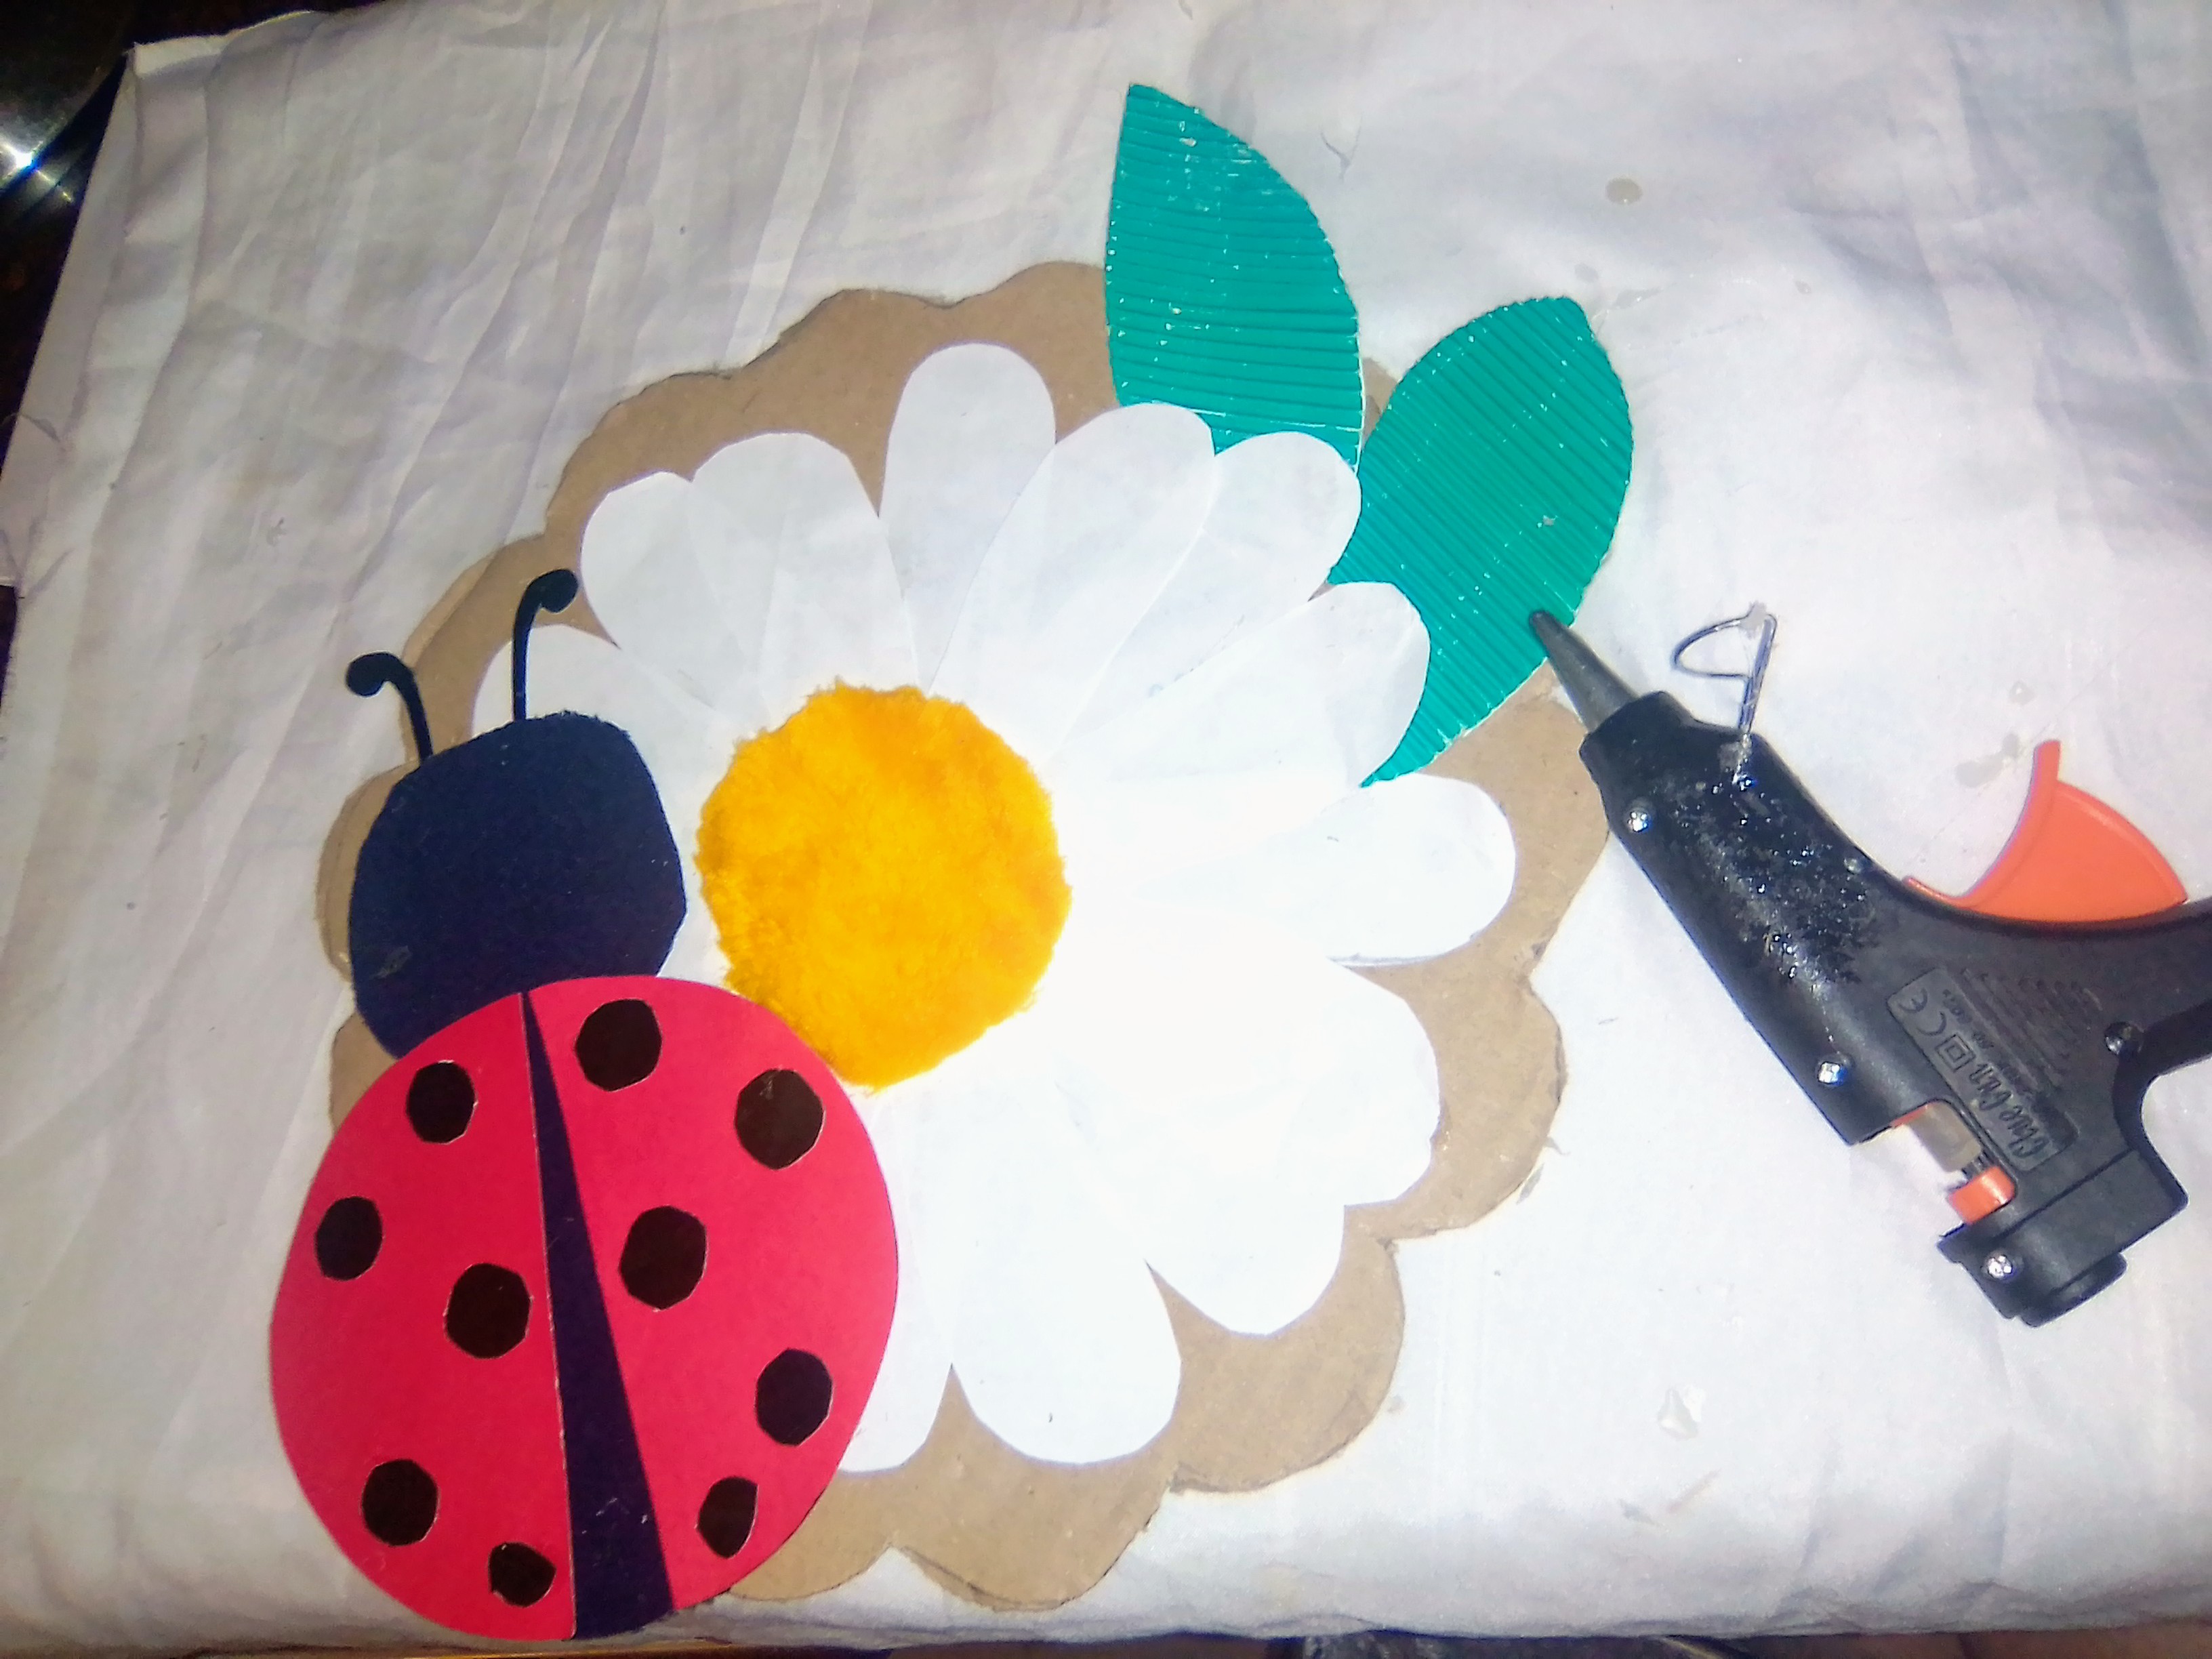
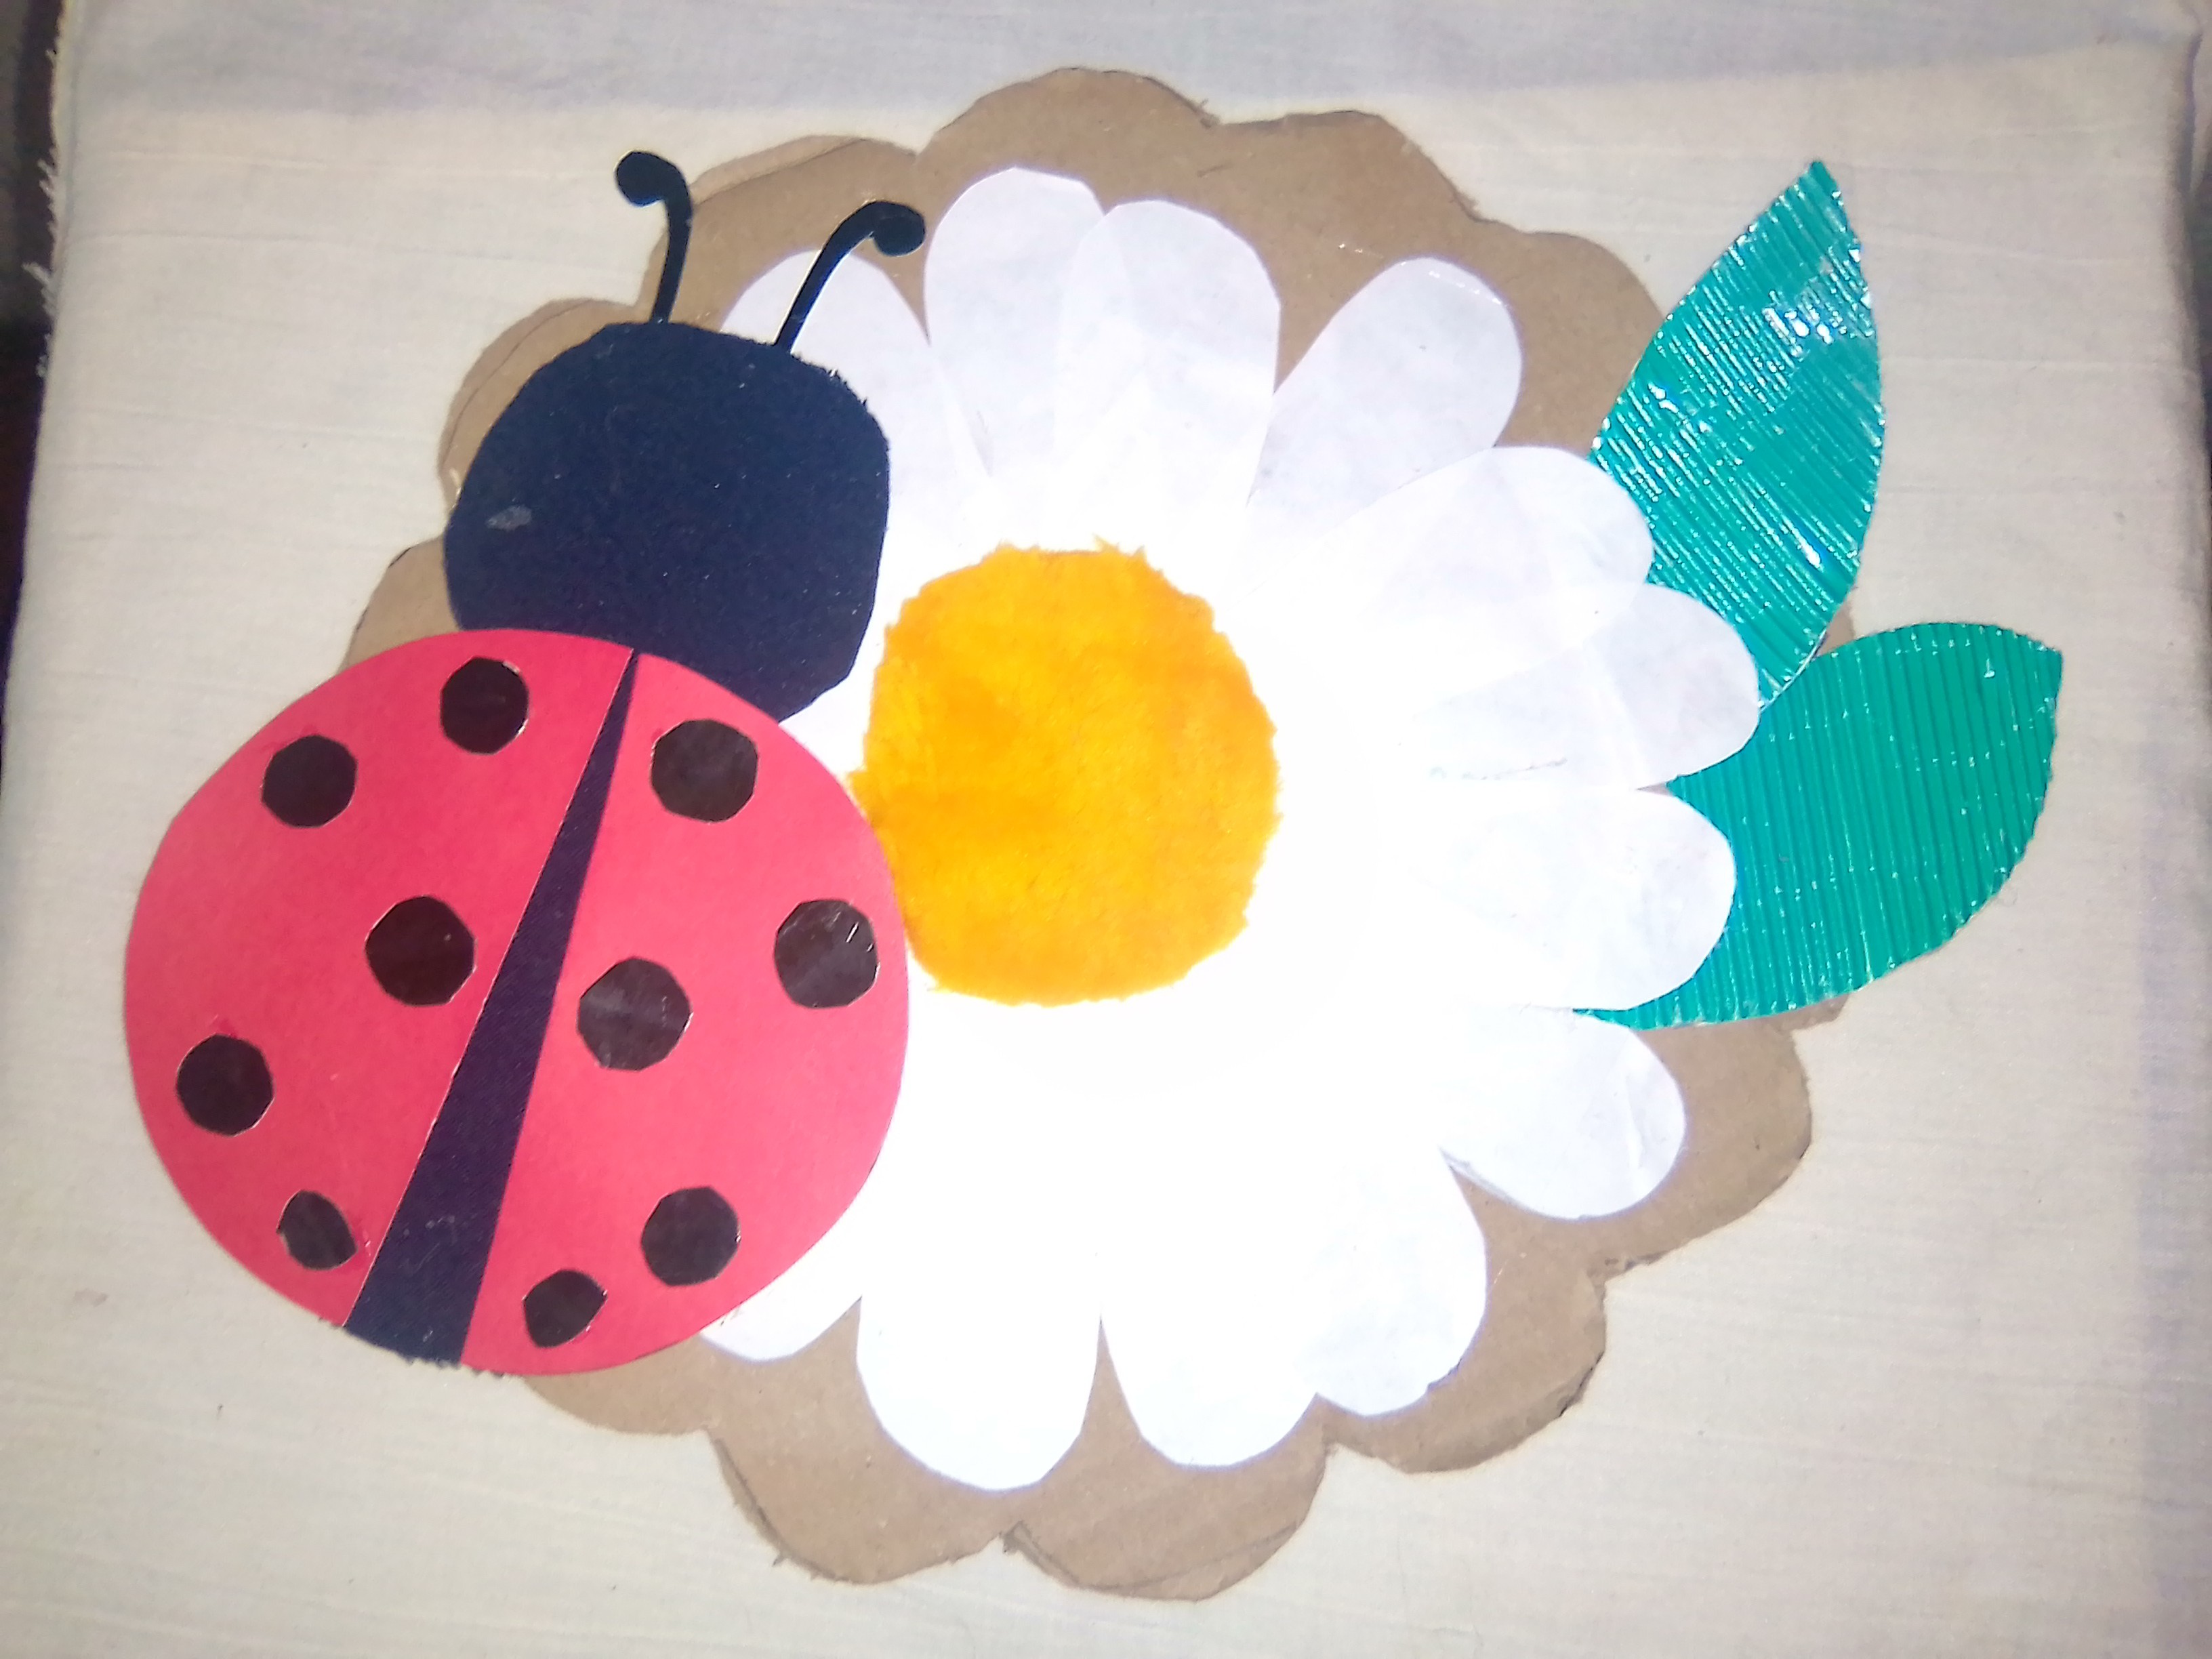
Resultado / Result
And here is my decorative painting, simple and colorful with this beautiful ladybug.
Gracias por leer mi blog
Thanks for reading my blog
Congratulations @yusma21! You have completed the following achievement on the Hive blockchain and have been rewarded with new badge(s) :
Your next target is to reach 60 posts.
You can view your badges on your board and compare yourself to others in the Ranking
If you no longer want to receive notifications, reply to this comment with the word
STOPTo support your work, I also upvoted your post!
Check out the last post from @hivebuzz: