👩🏫✏️BIENVENIDOS A MI BLOG 🖍📝
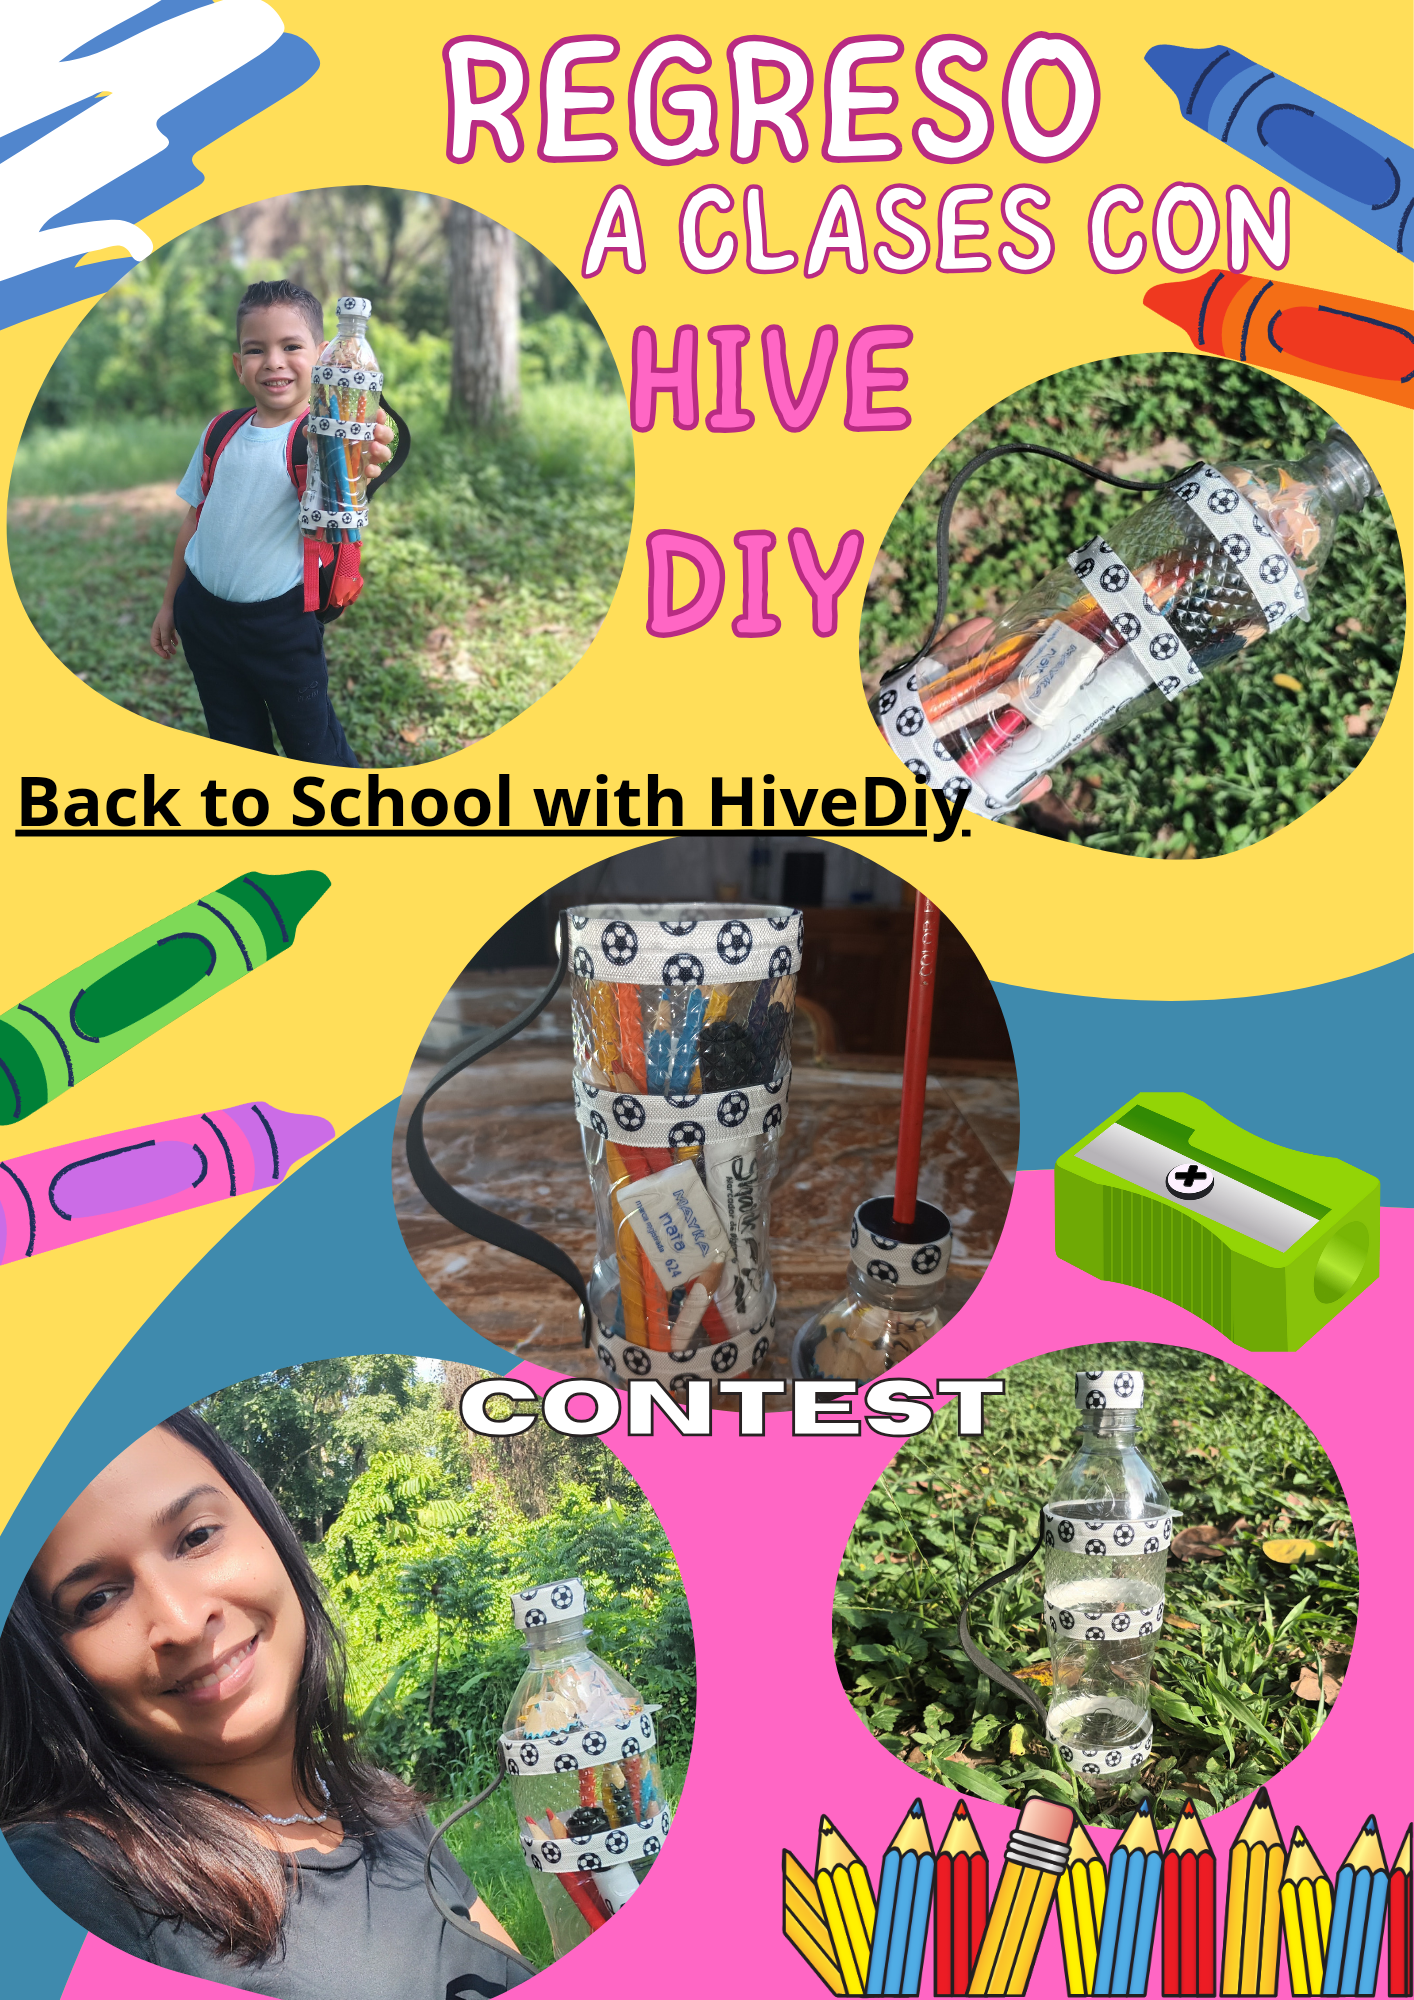
Hola queridos amigos creativos Feliz fin de semana para Todas y Todos, para el día de hoy les traigo mi participación en el concurso regreso a clases con HiveDiy en la Creación y elaboración de una cartuchera escolar para los mas pequeños de la casa, y este es mi proyecto creativo hecho fácilmente y con material de provecho que en este caso fue una botella plastica y una tapa de plastico, esta idea me surgió en mis noches de insomnios pensé mucho porque quería que fuese algo distinto a lo que estamos acostumbrados a ver asi que espero mes guste tanto como a mi y a mi hijo.
De mi tiempo en la escuela son pocas las cosas que recuerdo como cuando nos daban desayuno que era arepa rellena de diablitos o de salmón guisado y Leche liquida, una amiga y yo nos juntábamos en la papelera a sacar punta solo para hablar (y decíamos no soples el Sacapuntas porque después no sirve😅) nos quedabamos hablando ahi hasta que un dia me dieron un reglazo en las piernas (la maestra) eso no lo he olvidado, un día que salí a la escuela y me secuestraron durante las horas de clases (un hombre) eso jamás lo olvide😕 pero gracias a Dios y a que llore mucho no me hizo nada malo, ahh me acuerdo también que siempre me elegían de candidata en el salón pero nunca fui coronada como la reina de la escuela 🥲😄, esas son pocas de las cosas que recuerdo. Y mi inspiración para hacer esta cartuchera simplemente que mis hijos que les encanta el fútbol y todo lo que hago😁🥰.
👩🏫✏️WELCOME TO MY BLOG 🖍📝
Hello dear creative friends, Happy weekend to All, today I bring you my participation in the back to school contest with HiveDiy in the Creation and preparation of a school pencil bag for the little ones in the house, and this is my creative project done easily and with useful material which in this case was a plastic bottle and a plastic lid, this idea came to me during my sleepless nights I thought a lot because I wanted it to be something different from what we are used to seeing so I hope you like it as much as I and my son do.
From my time at school there are few things that I remember like when they gave us breakfast, which was arepa stuffed with devils or stewed salmon and liquid milk, a friend and I would get together at the trash can to sharpen just to talk (and we said no blow on the pencil sharpener because it doesn't work later😅) we stayed there talking until one day they gave me a blow on my legs (the teacher) I haven't forgotten that, one day I went to school and they kidnapped me during class hours ( a man) I never forgot that😕 but thank God and the fact that I cried a lot it didn't do anything bad to me, ahh I also remember that they always chose me as a candidate in the classroom but I was never crowned as the queen of the school 😄, those are Few of the things I remember. And my inspiration to make this pencil case is simply that my children love football and everything I do😁 .
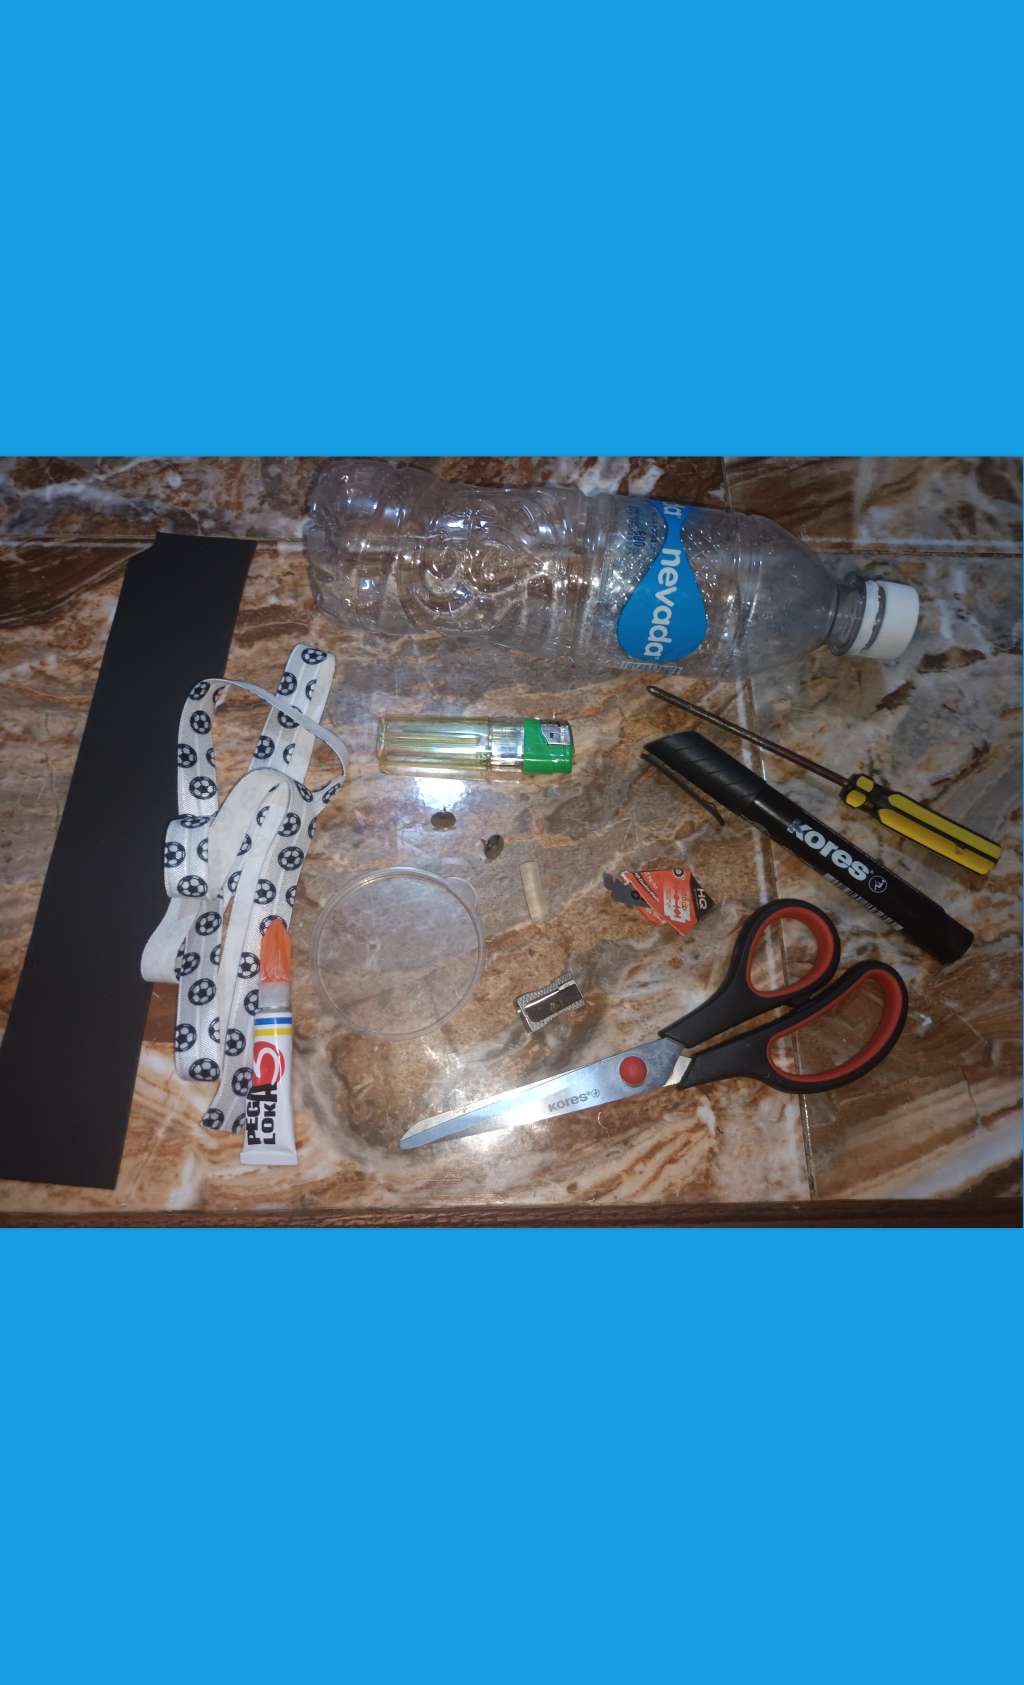
👩🏫 NECESITARAS :
• 1 botella de plastico 500ml
• Tapa pequeña de plástico
• 1 Sacapuntas
• Foami Negro
• Tachuelas
• Marcador
• Cinta de pelotas
• Foami
• Encendedor
• Pega Resistente
• Tijera
• Destornillador de estría
Nota: El destornillador es opcional si posees una pistola de calor es más fácil abrir el agujero.
👩🏫 YOU WILL NEED:
• 1 plastic bottle 500ml
• Small plastic lid
• 1 pencil sharpener
• Black Foami
• Studs
• Marker
• Ball tape
• Foam
• Lighter
• Strong Paste
• Scissors
• Spline screwdriver
Note: The screwdriver is optional if you have a heat gun it is easier to open the hole.
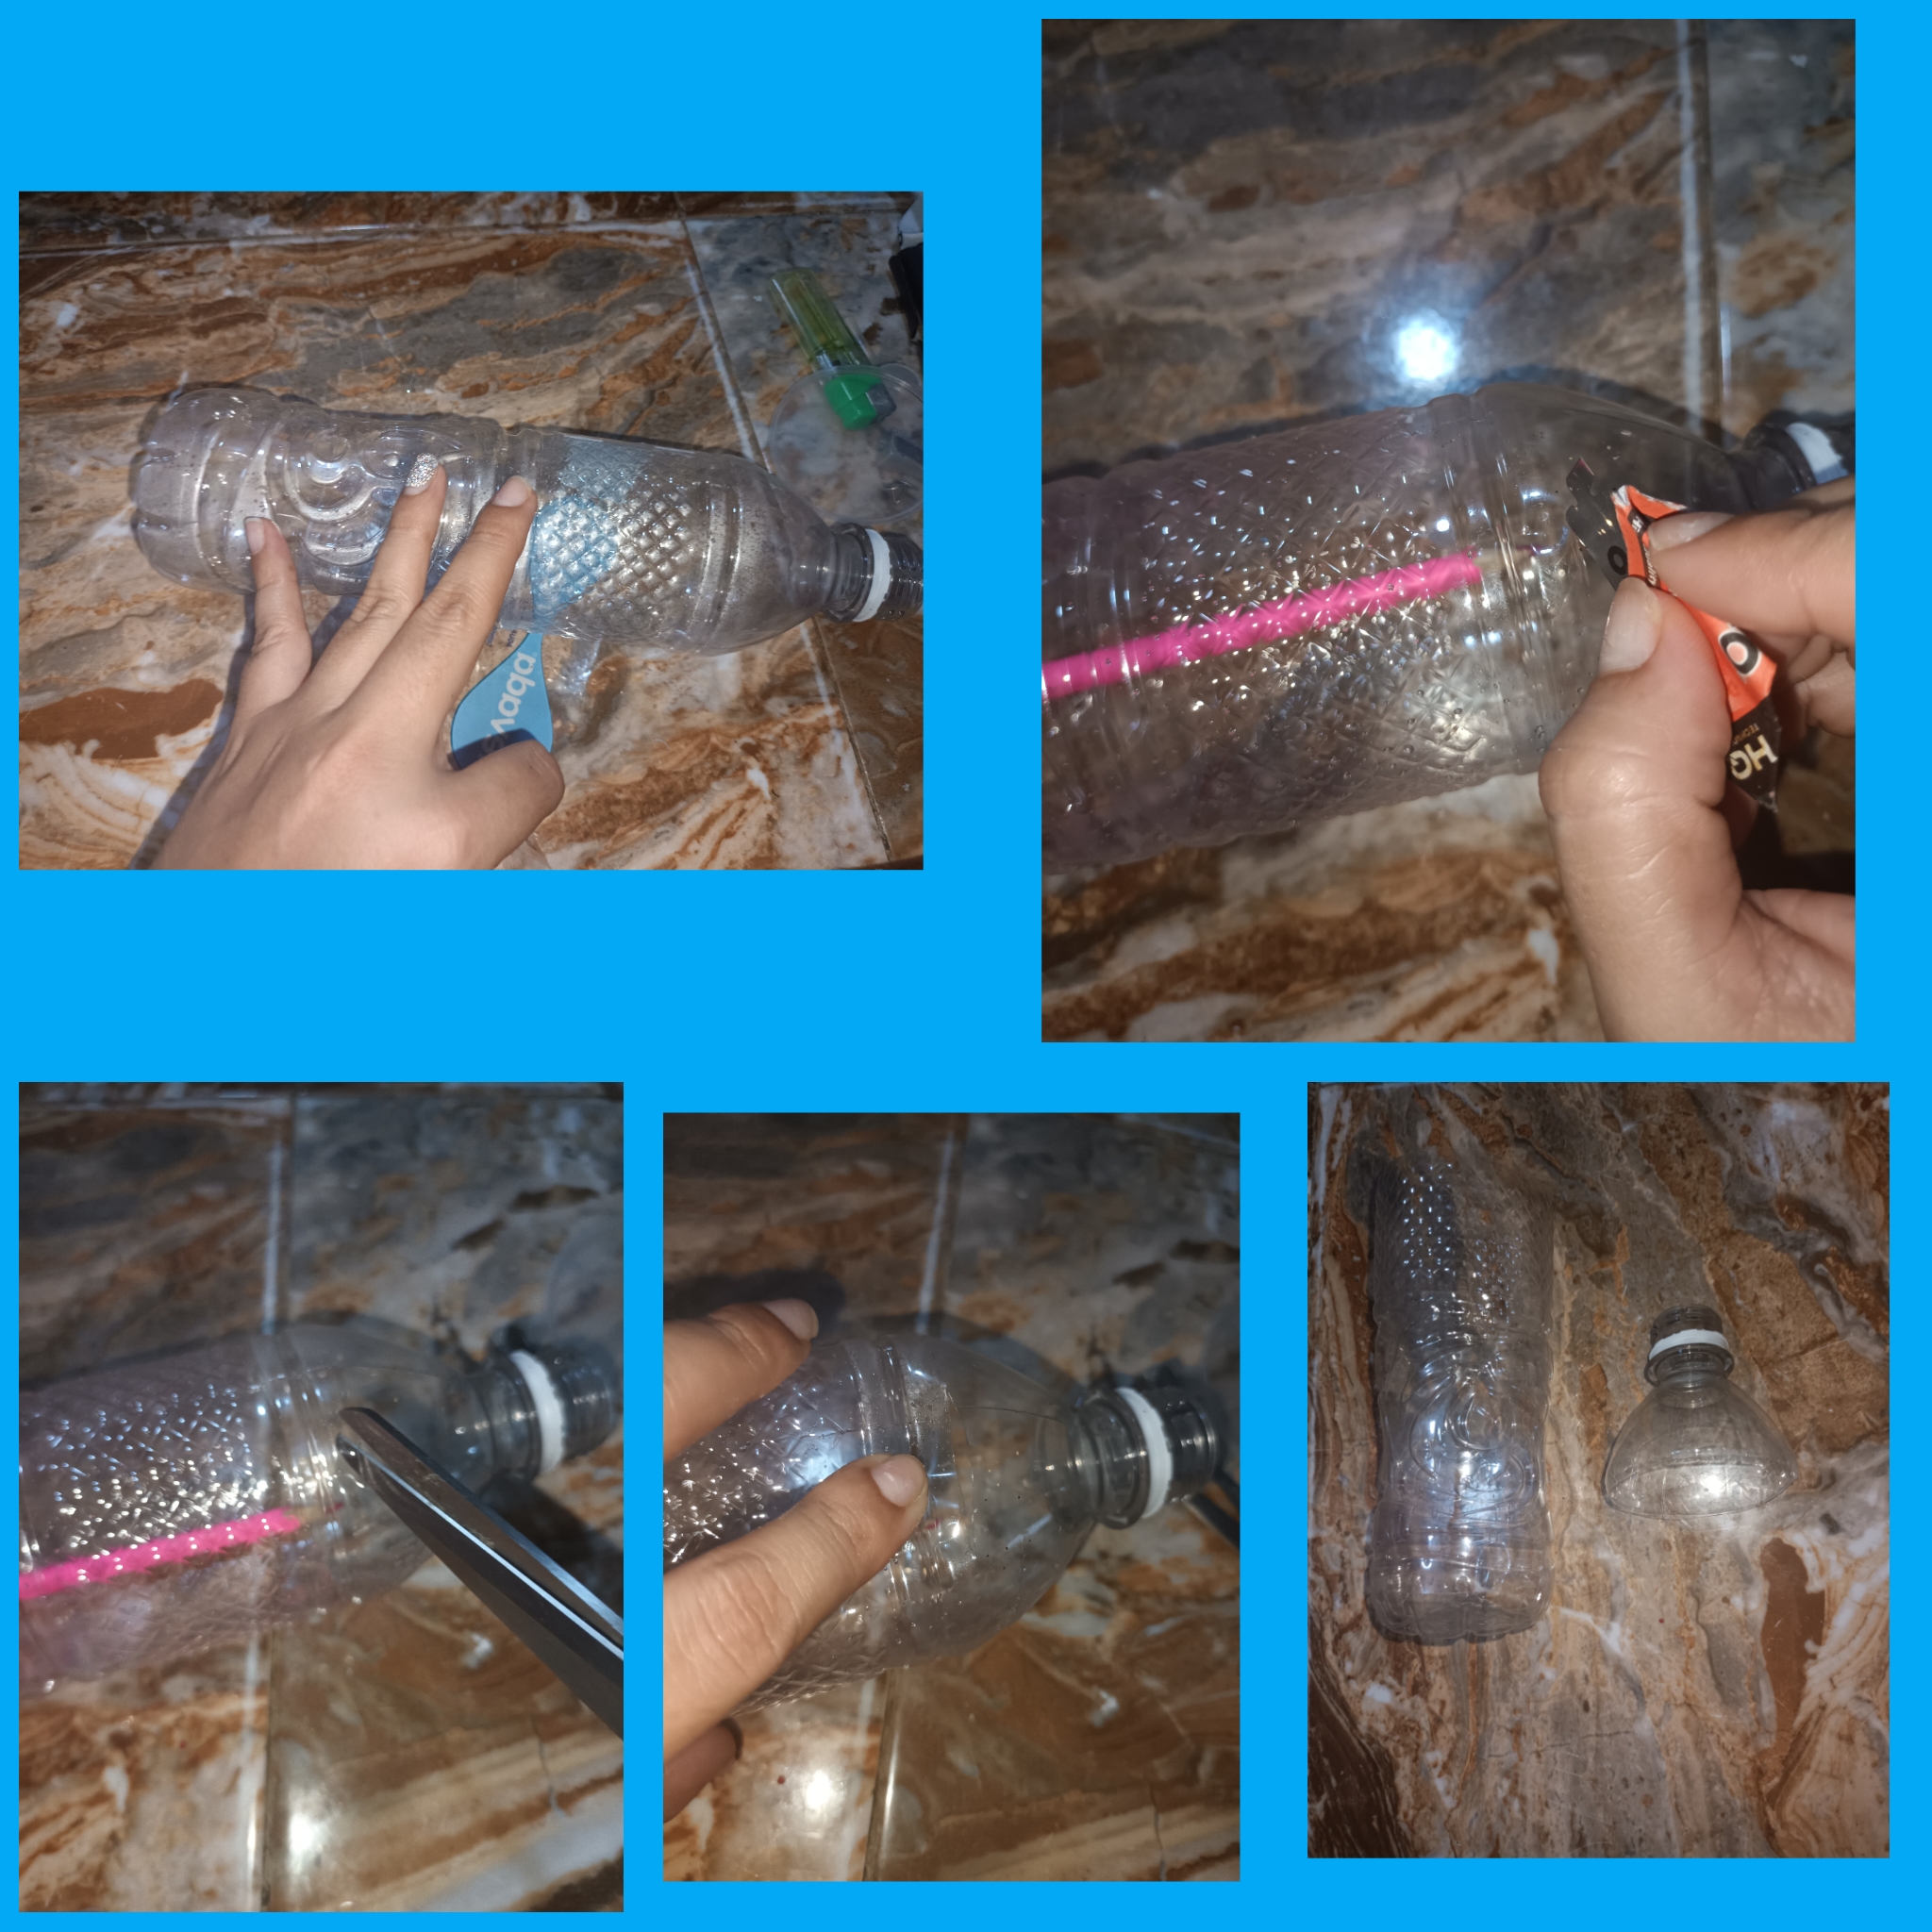
• Lo primero que hacemos es quitar la respectiva etiqueta que trae la botella, le coloque un de color dentro de la botella para guiarme y marcar por donde debo cortar lo que sera la cartuchera, con la hojilla le hago una pequeña ranura para poder introducir la tijera y sea más fácil realizar el corte para separar las donde partes que vamos a usar.
• The first thing we do is remove the respective label that comes with the bottle, I place a colored one inside the bottle to guide me and mark where I should cut what will be the cartridge case, with the blade I make a small slot to be able to insert the cartridge. scissors and it is easier to make the cut to separate the parts that we are going to use.
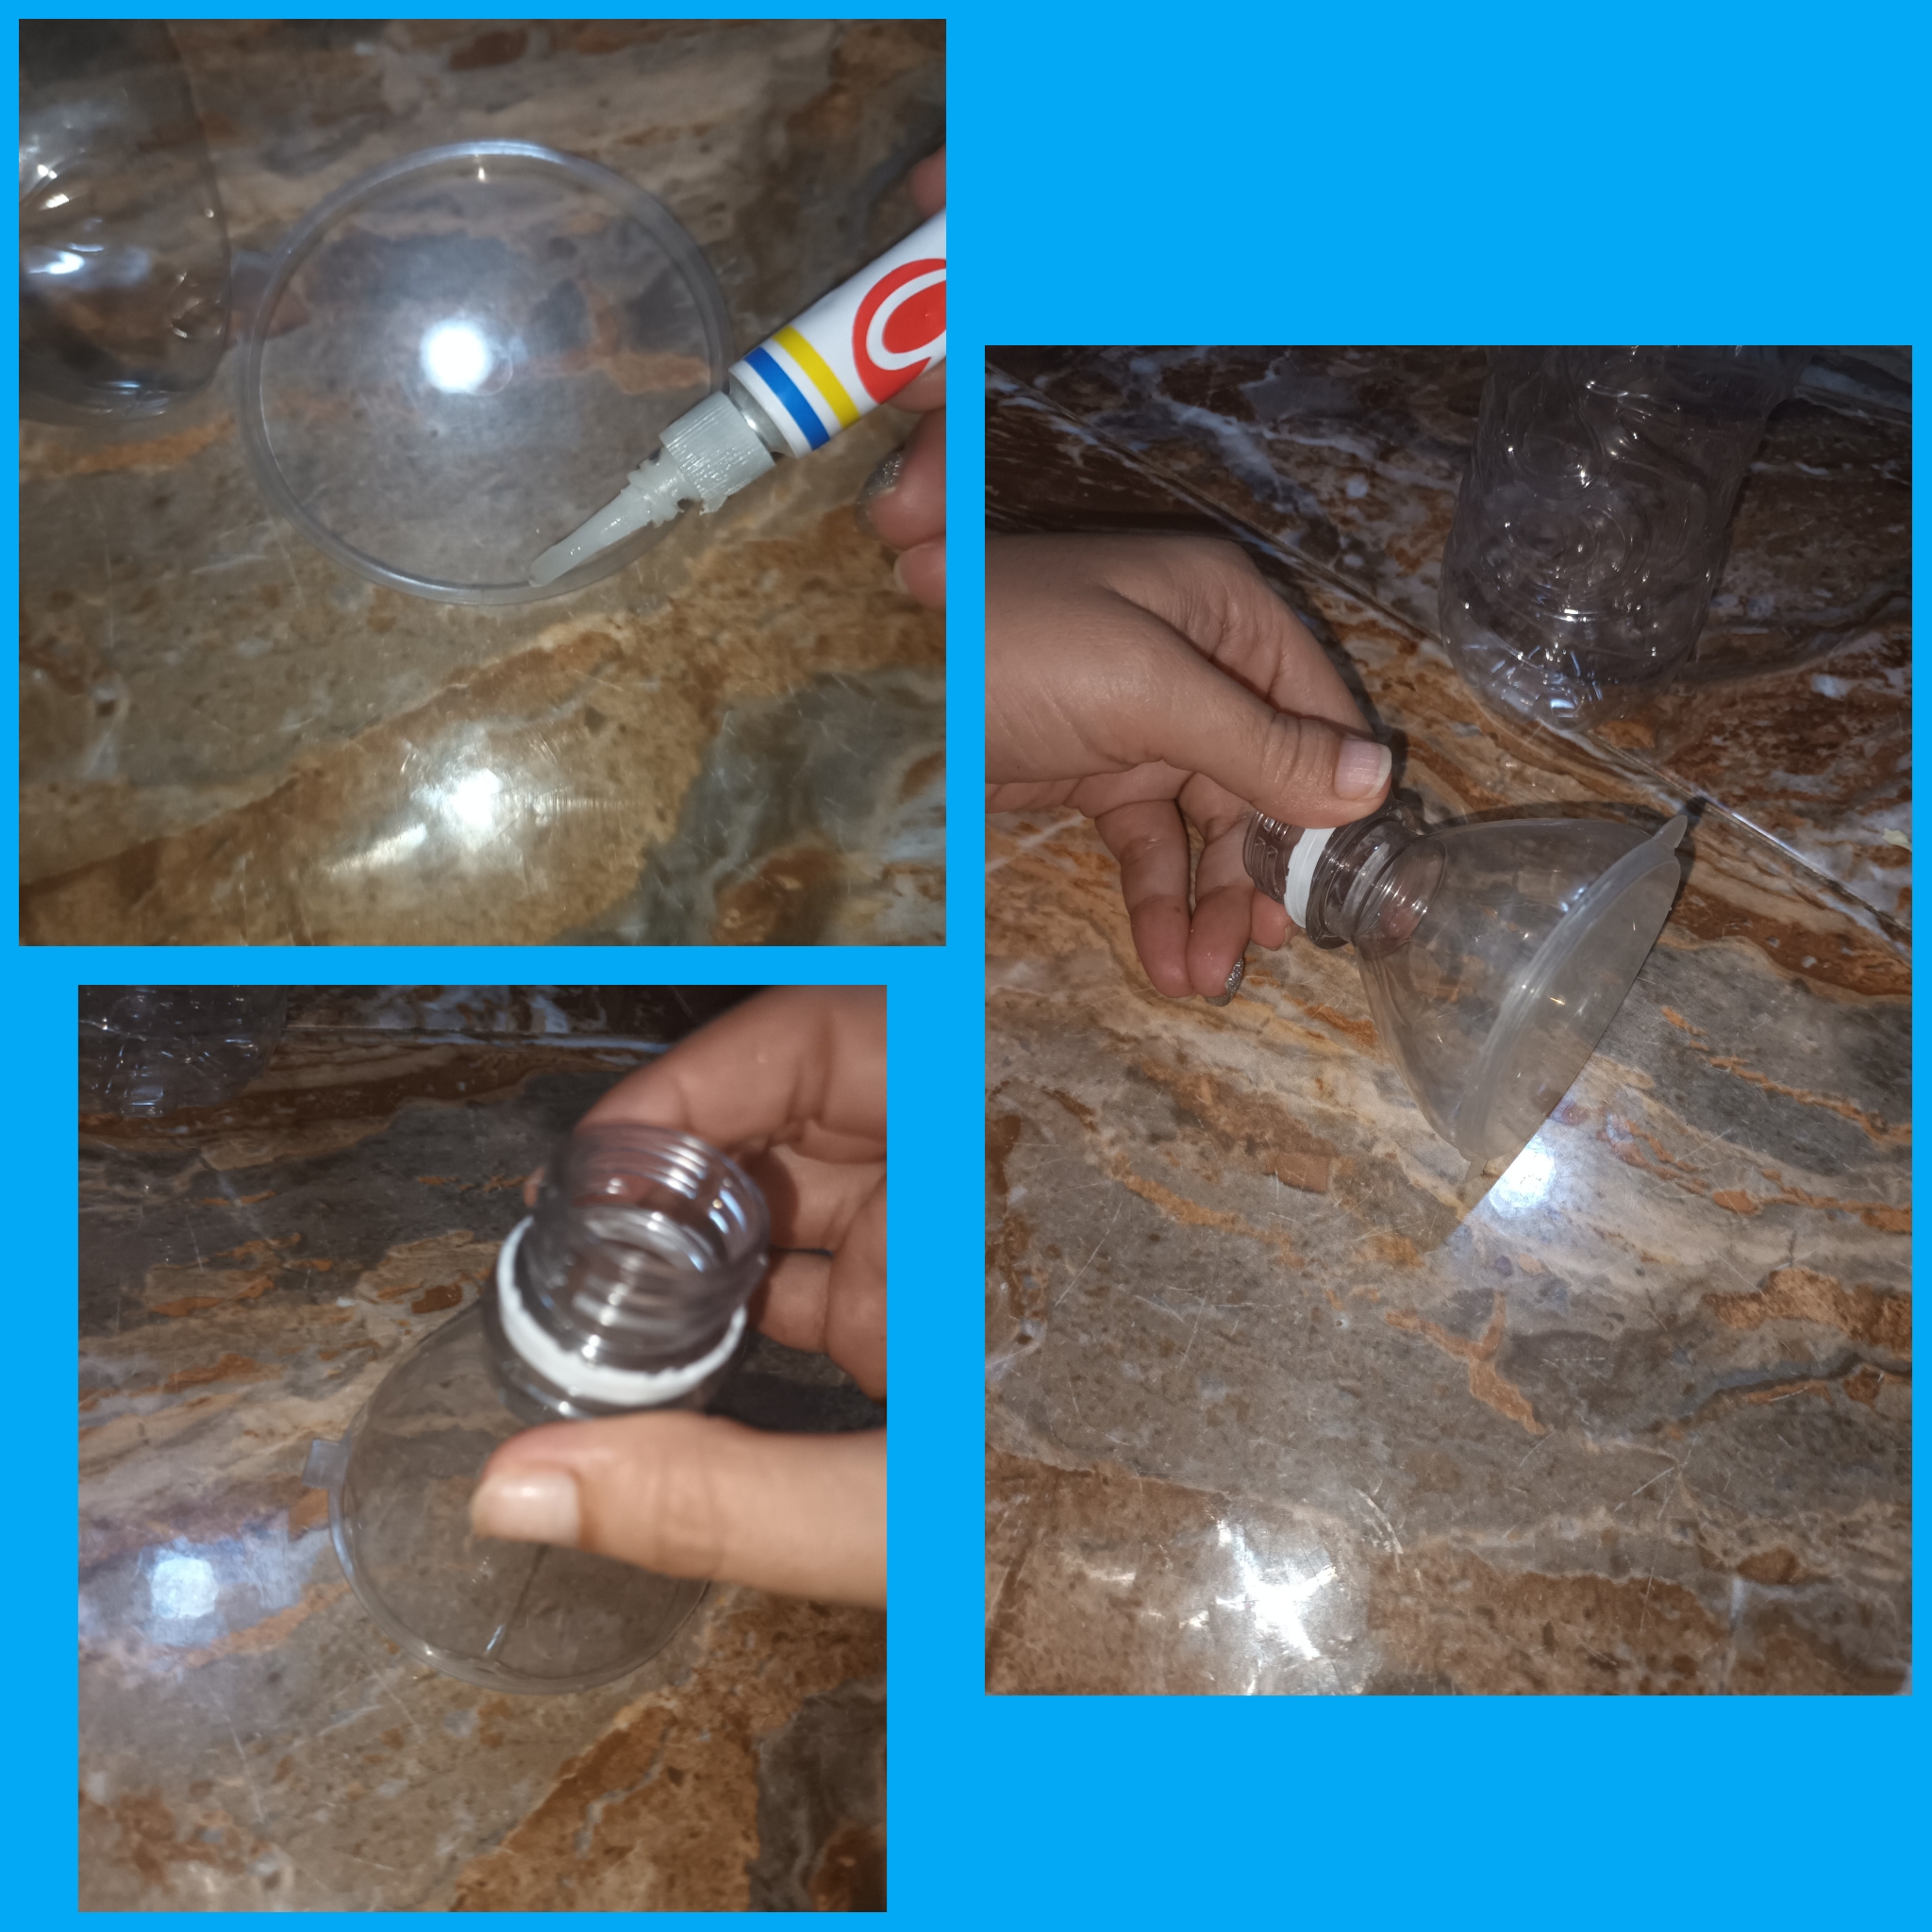
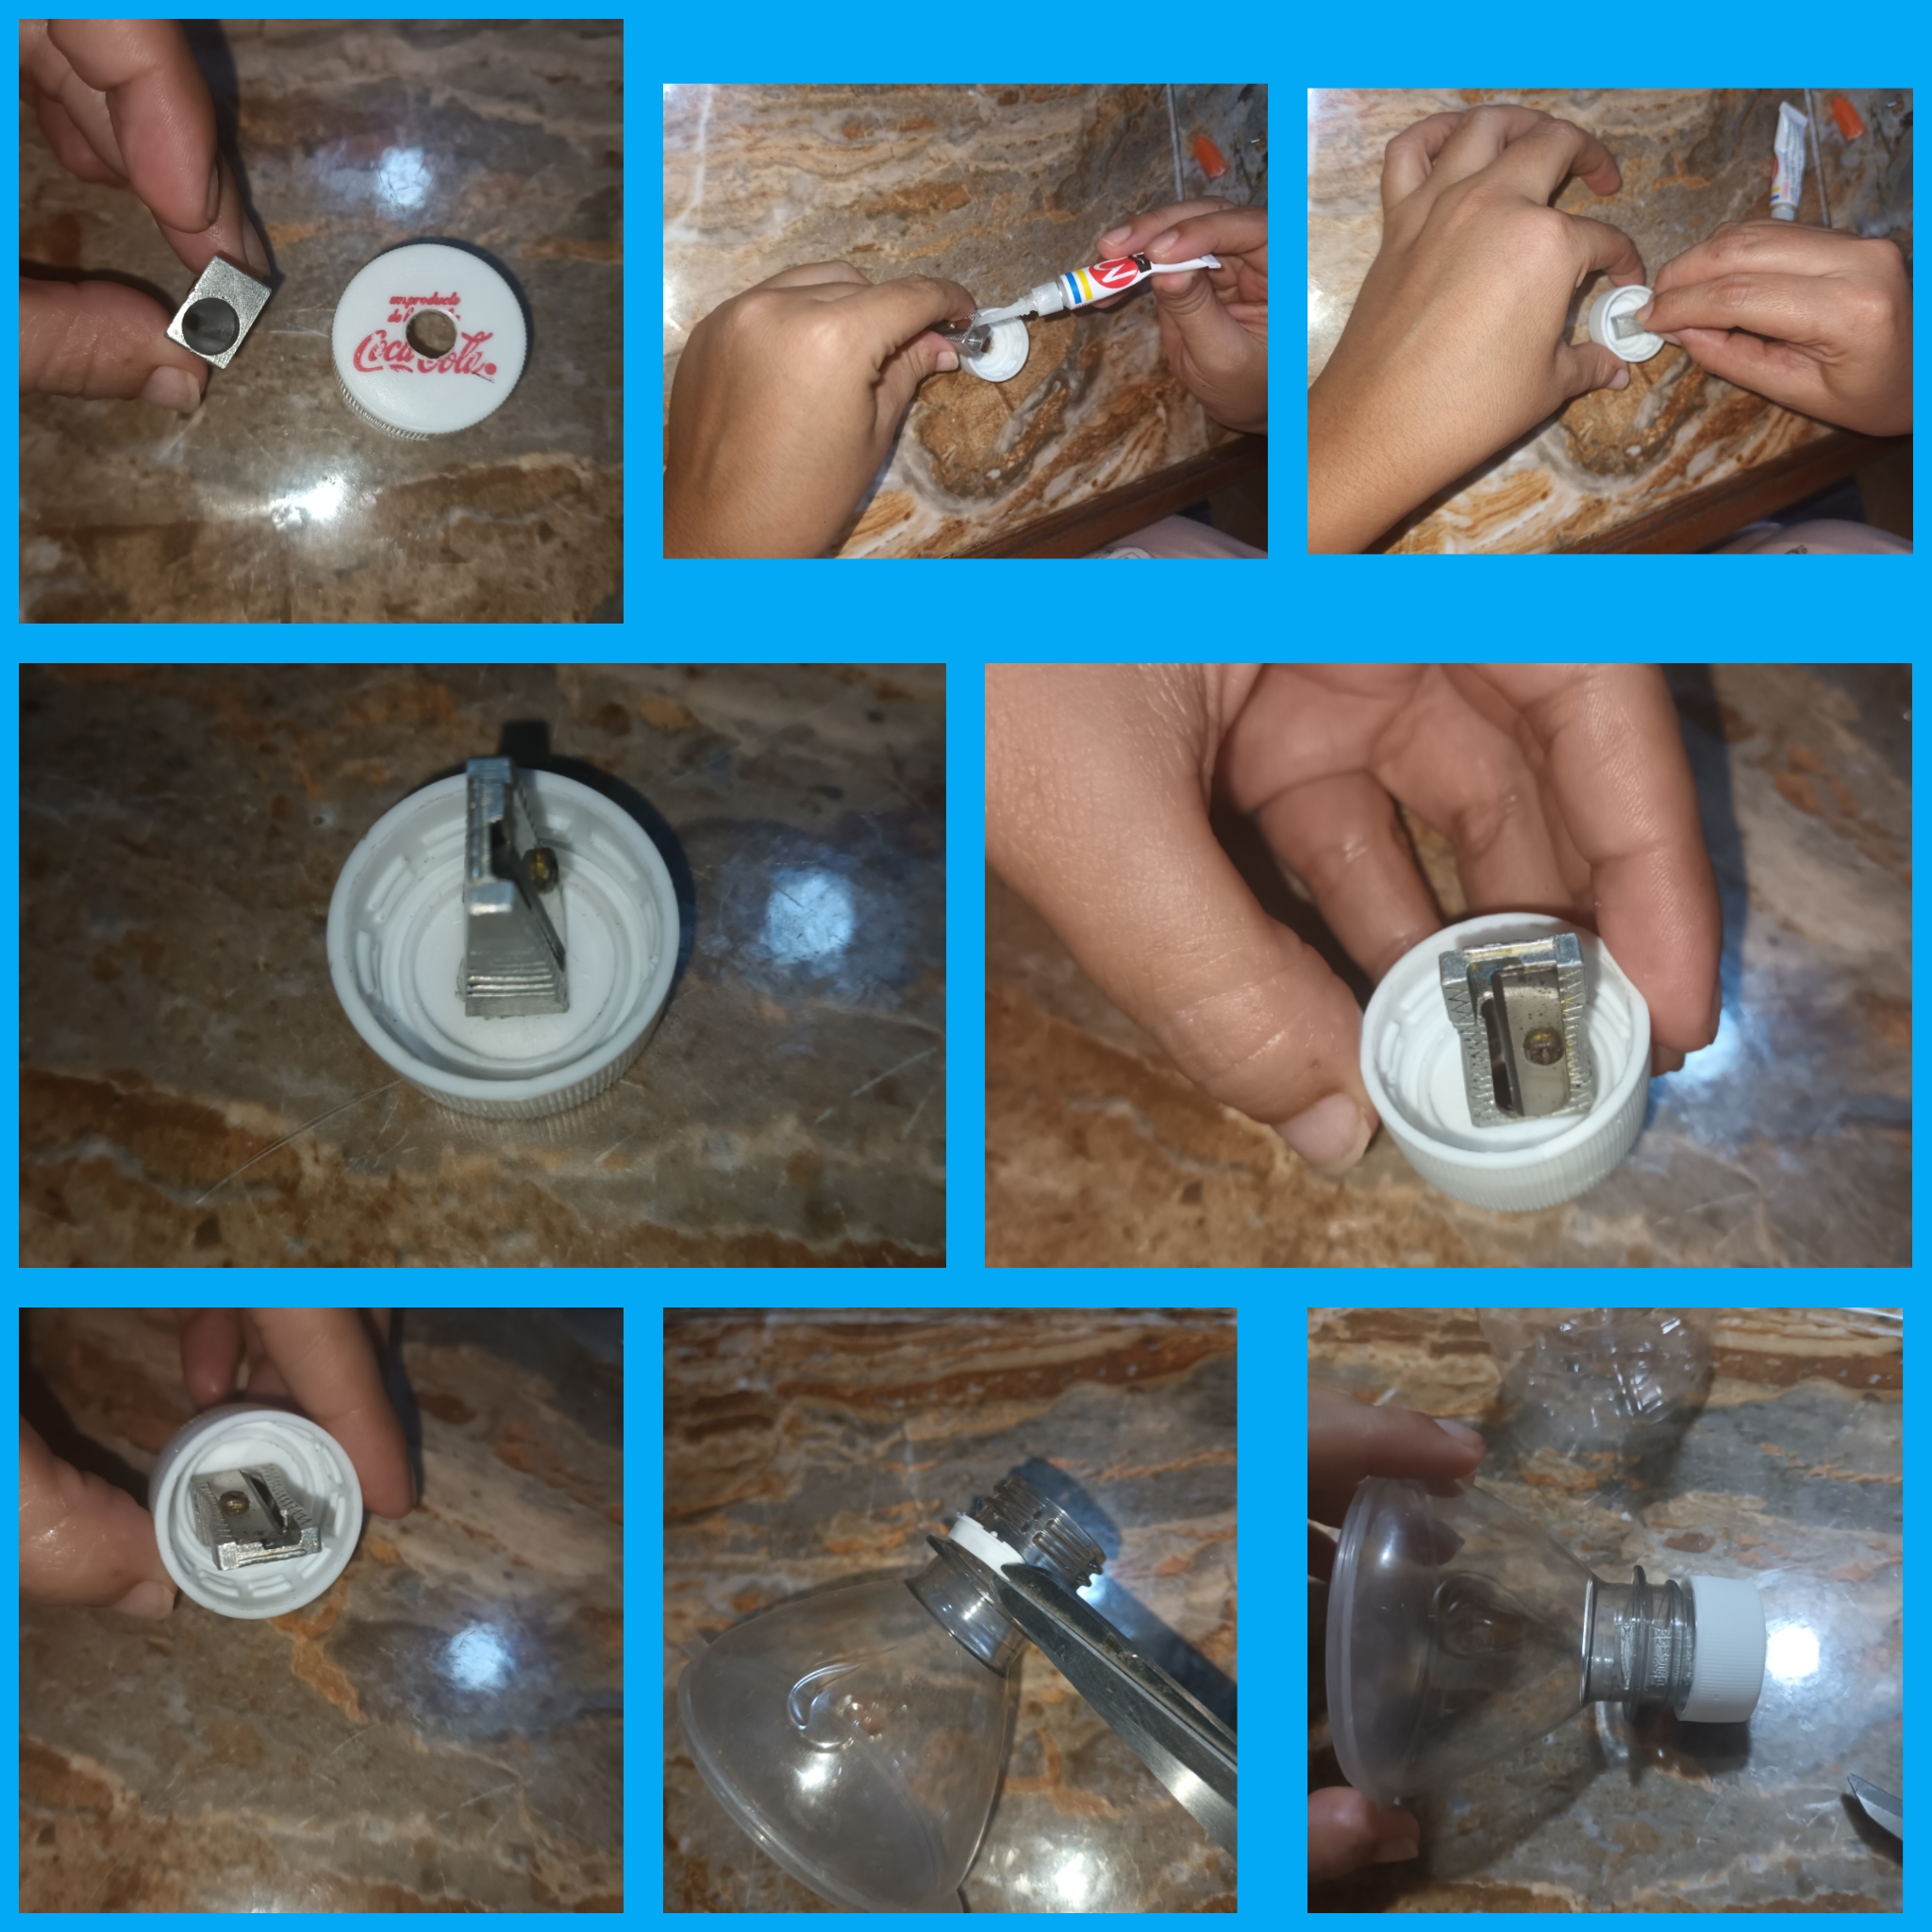
• Luego empezamos a trabajar con la parte del pico de la botella, le colocamos Pega resistente en toda la orilla de esta tapita plastica específicamente en la parte superior y pegamos la parte del pico que tenemos, como te muestro en las imagenes. Esta tapita de plastico es de los envases esos pequeños donde nos echan salsas para las comidas chatarras, esta tapita casualmente tiene el mismo tamaño de la botella y le calza perfectamente.
• Then we started to work with the spout part of the bottle, we placed resistant glue on the entire edge of this plastic cap, specifically on the upper part, and we glued the part of the spout that we have, as I show you in the images. This little plastic cap is one of those small containers where they add sauces for junk foods. This little cap happens to be the same size as the bottle and fits perfectly.
• Seguidamente tomamos el encendedor y empezamos a calentar bien pero bien caliente la punta del destornillador y vamos abriendo un agujero a la tapa de la botella poco a poco y con mucha paciencia para que nos quede en todo el centro y lo más redonde posible, si tienen una pistola de calor facilita más el trabajo.
• Next we take the lighter and begin to heat the tip of the screwdriver well but very hot and we open a hole in the bottle cap little by little and with great patience so that it remains in the entire center and as round as possible, yes. They have a heat gun that makes the job easier.
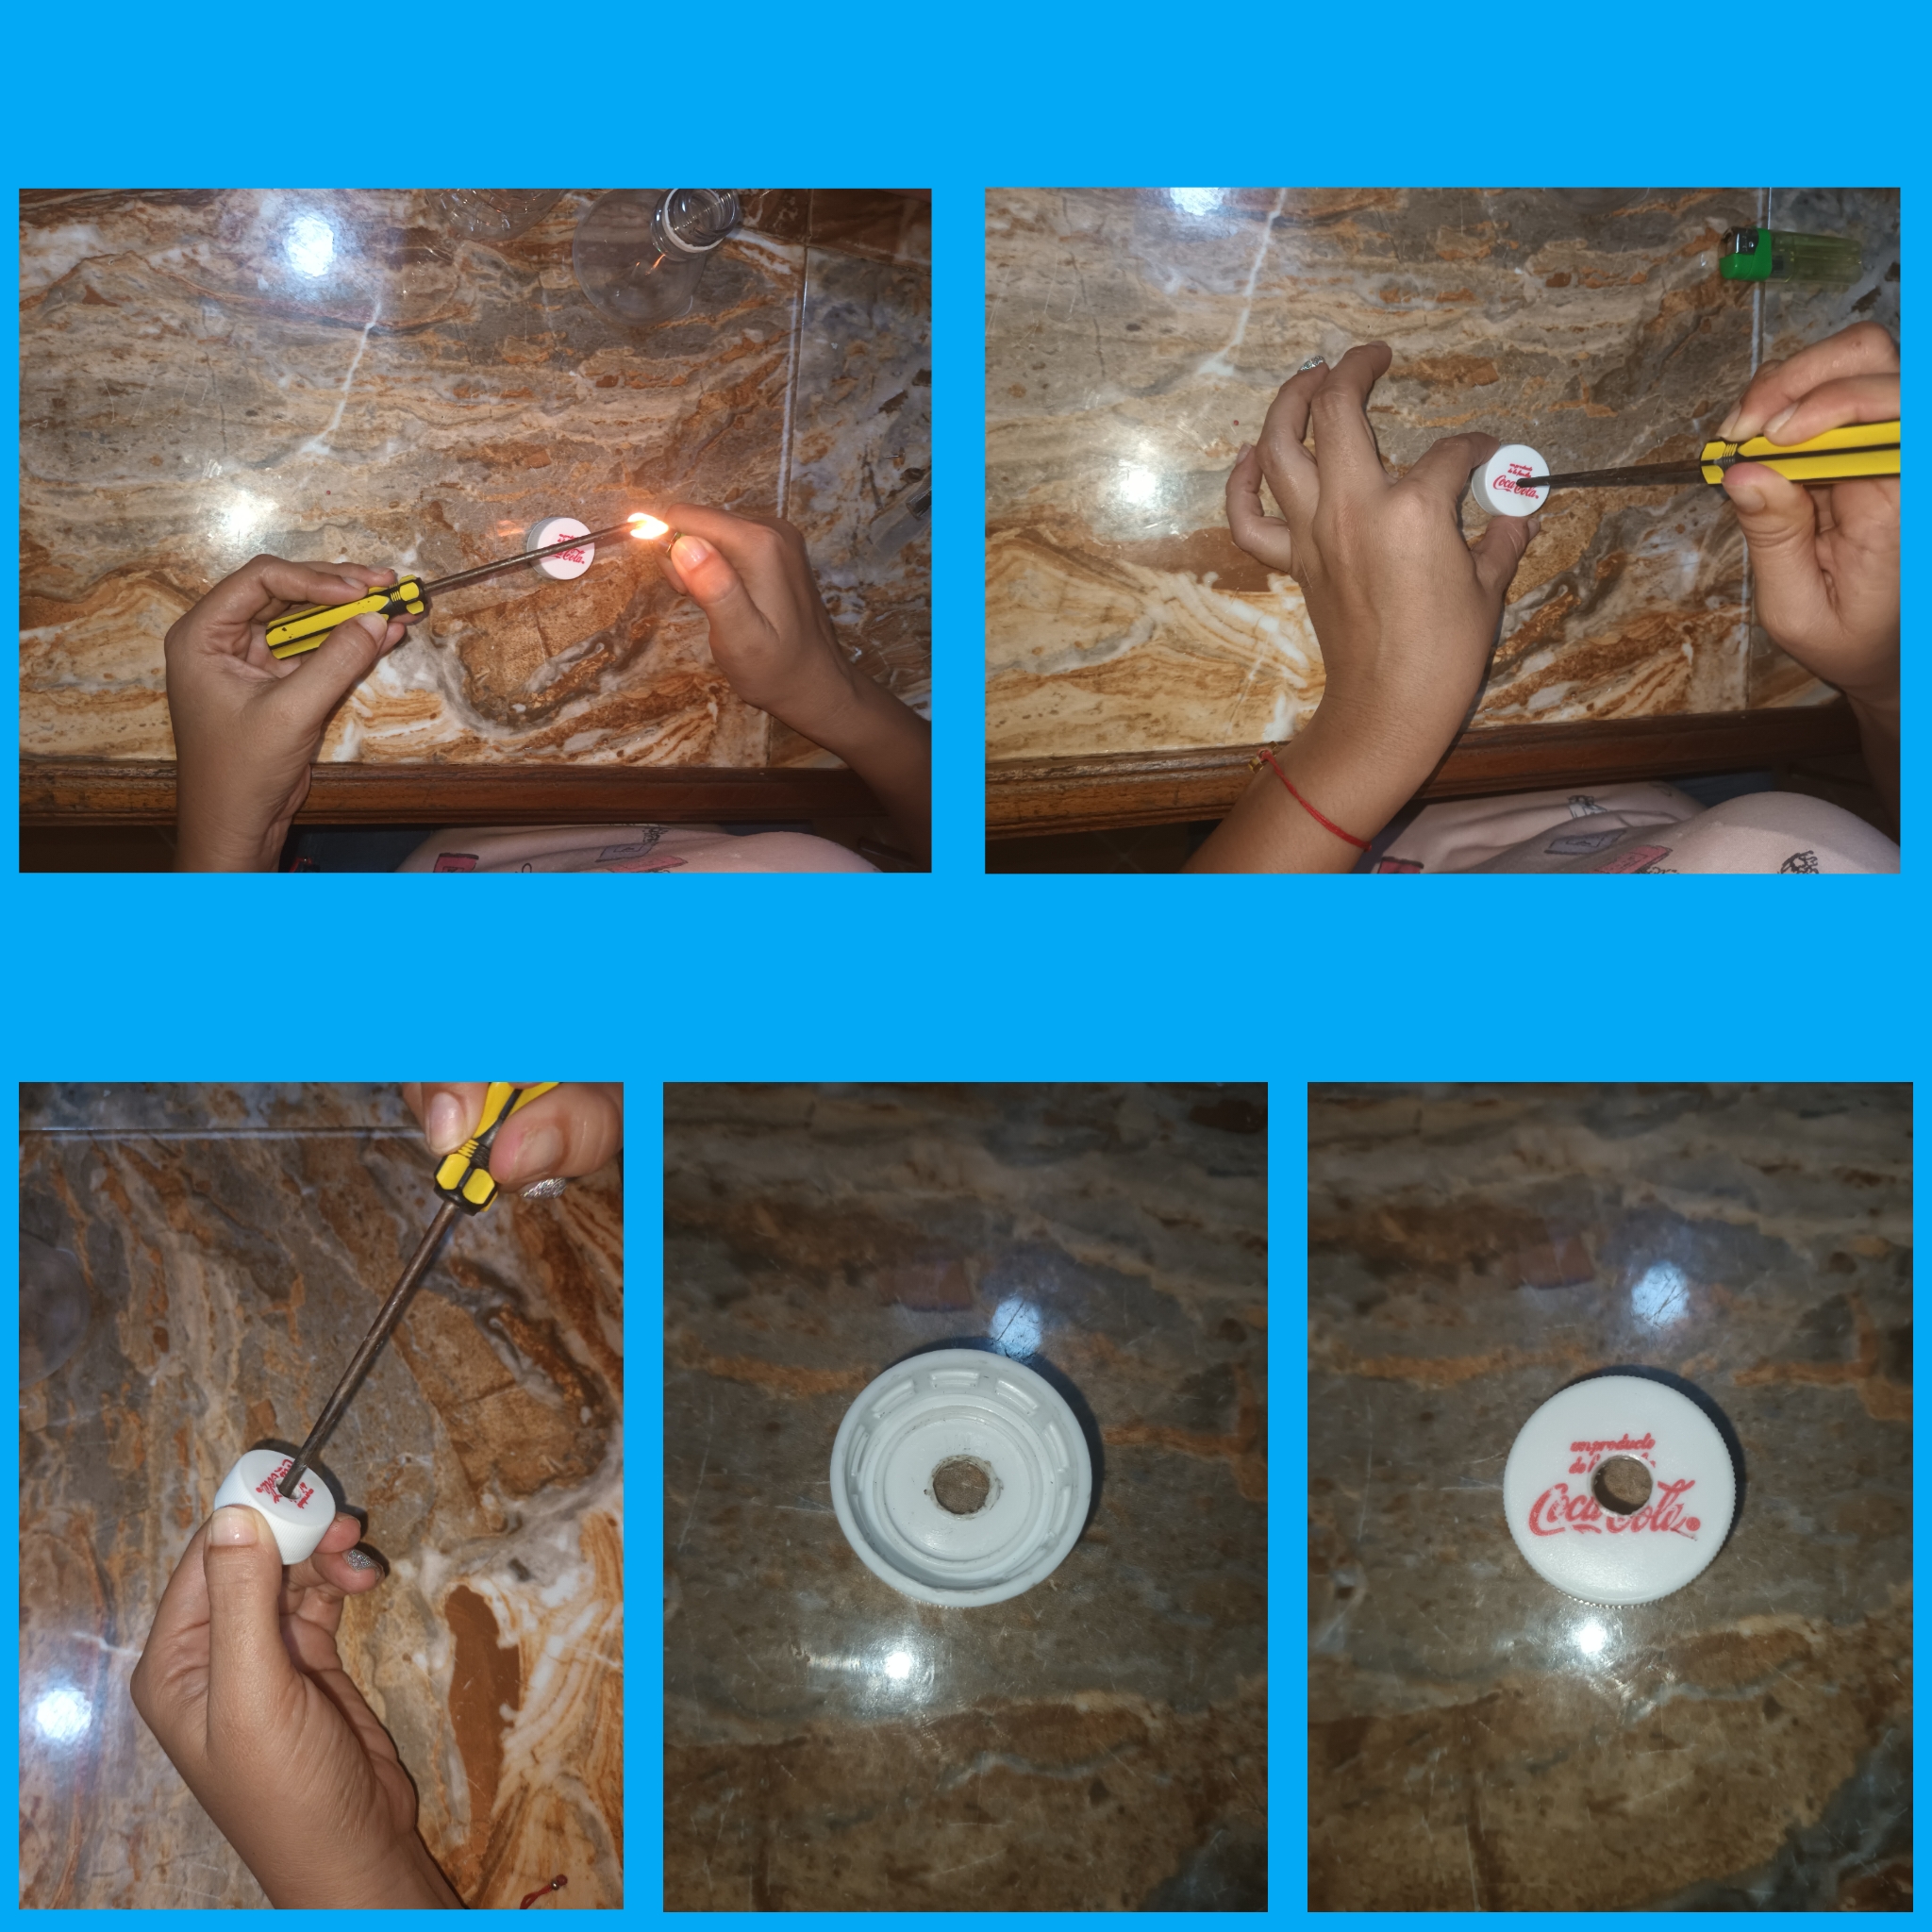
• Tomamos el Sacapuntas metálico y lo vamos comparando con el agujero que hicimos en la tapa para que queden del mismo tamaño, le echamos Pega y lo colocamos en la parte interna de la tapa tratando de que quede con el agujero de la tapa y le hacemos presión para que quede bien pegado.
• We take the metal pencil sharpener and compare it with the hole we made in the lid so that they are the same size, we add Glue and place it on the inside of the lid trying to make it fit with the hole in the lid and we make pressure so that it sticks well.
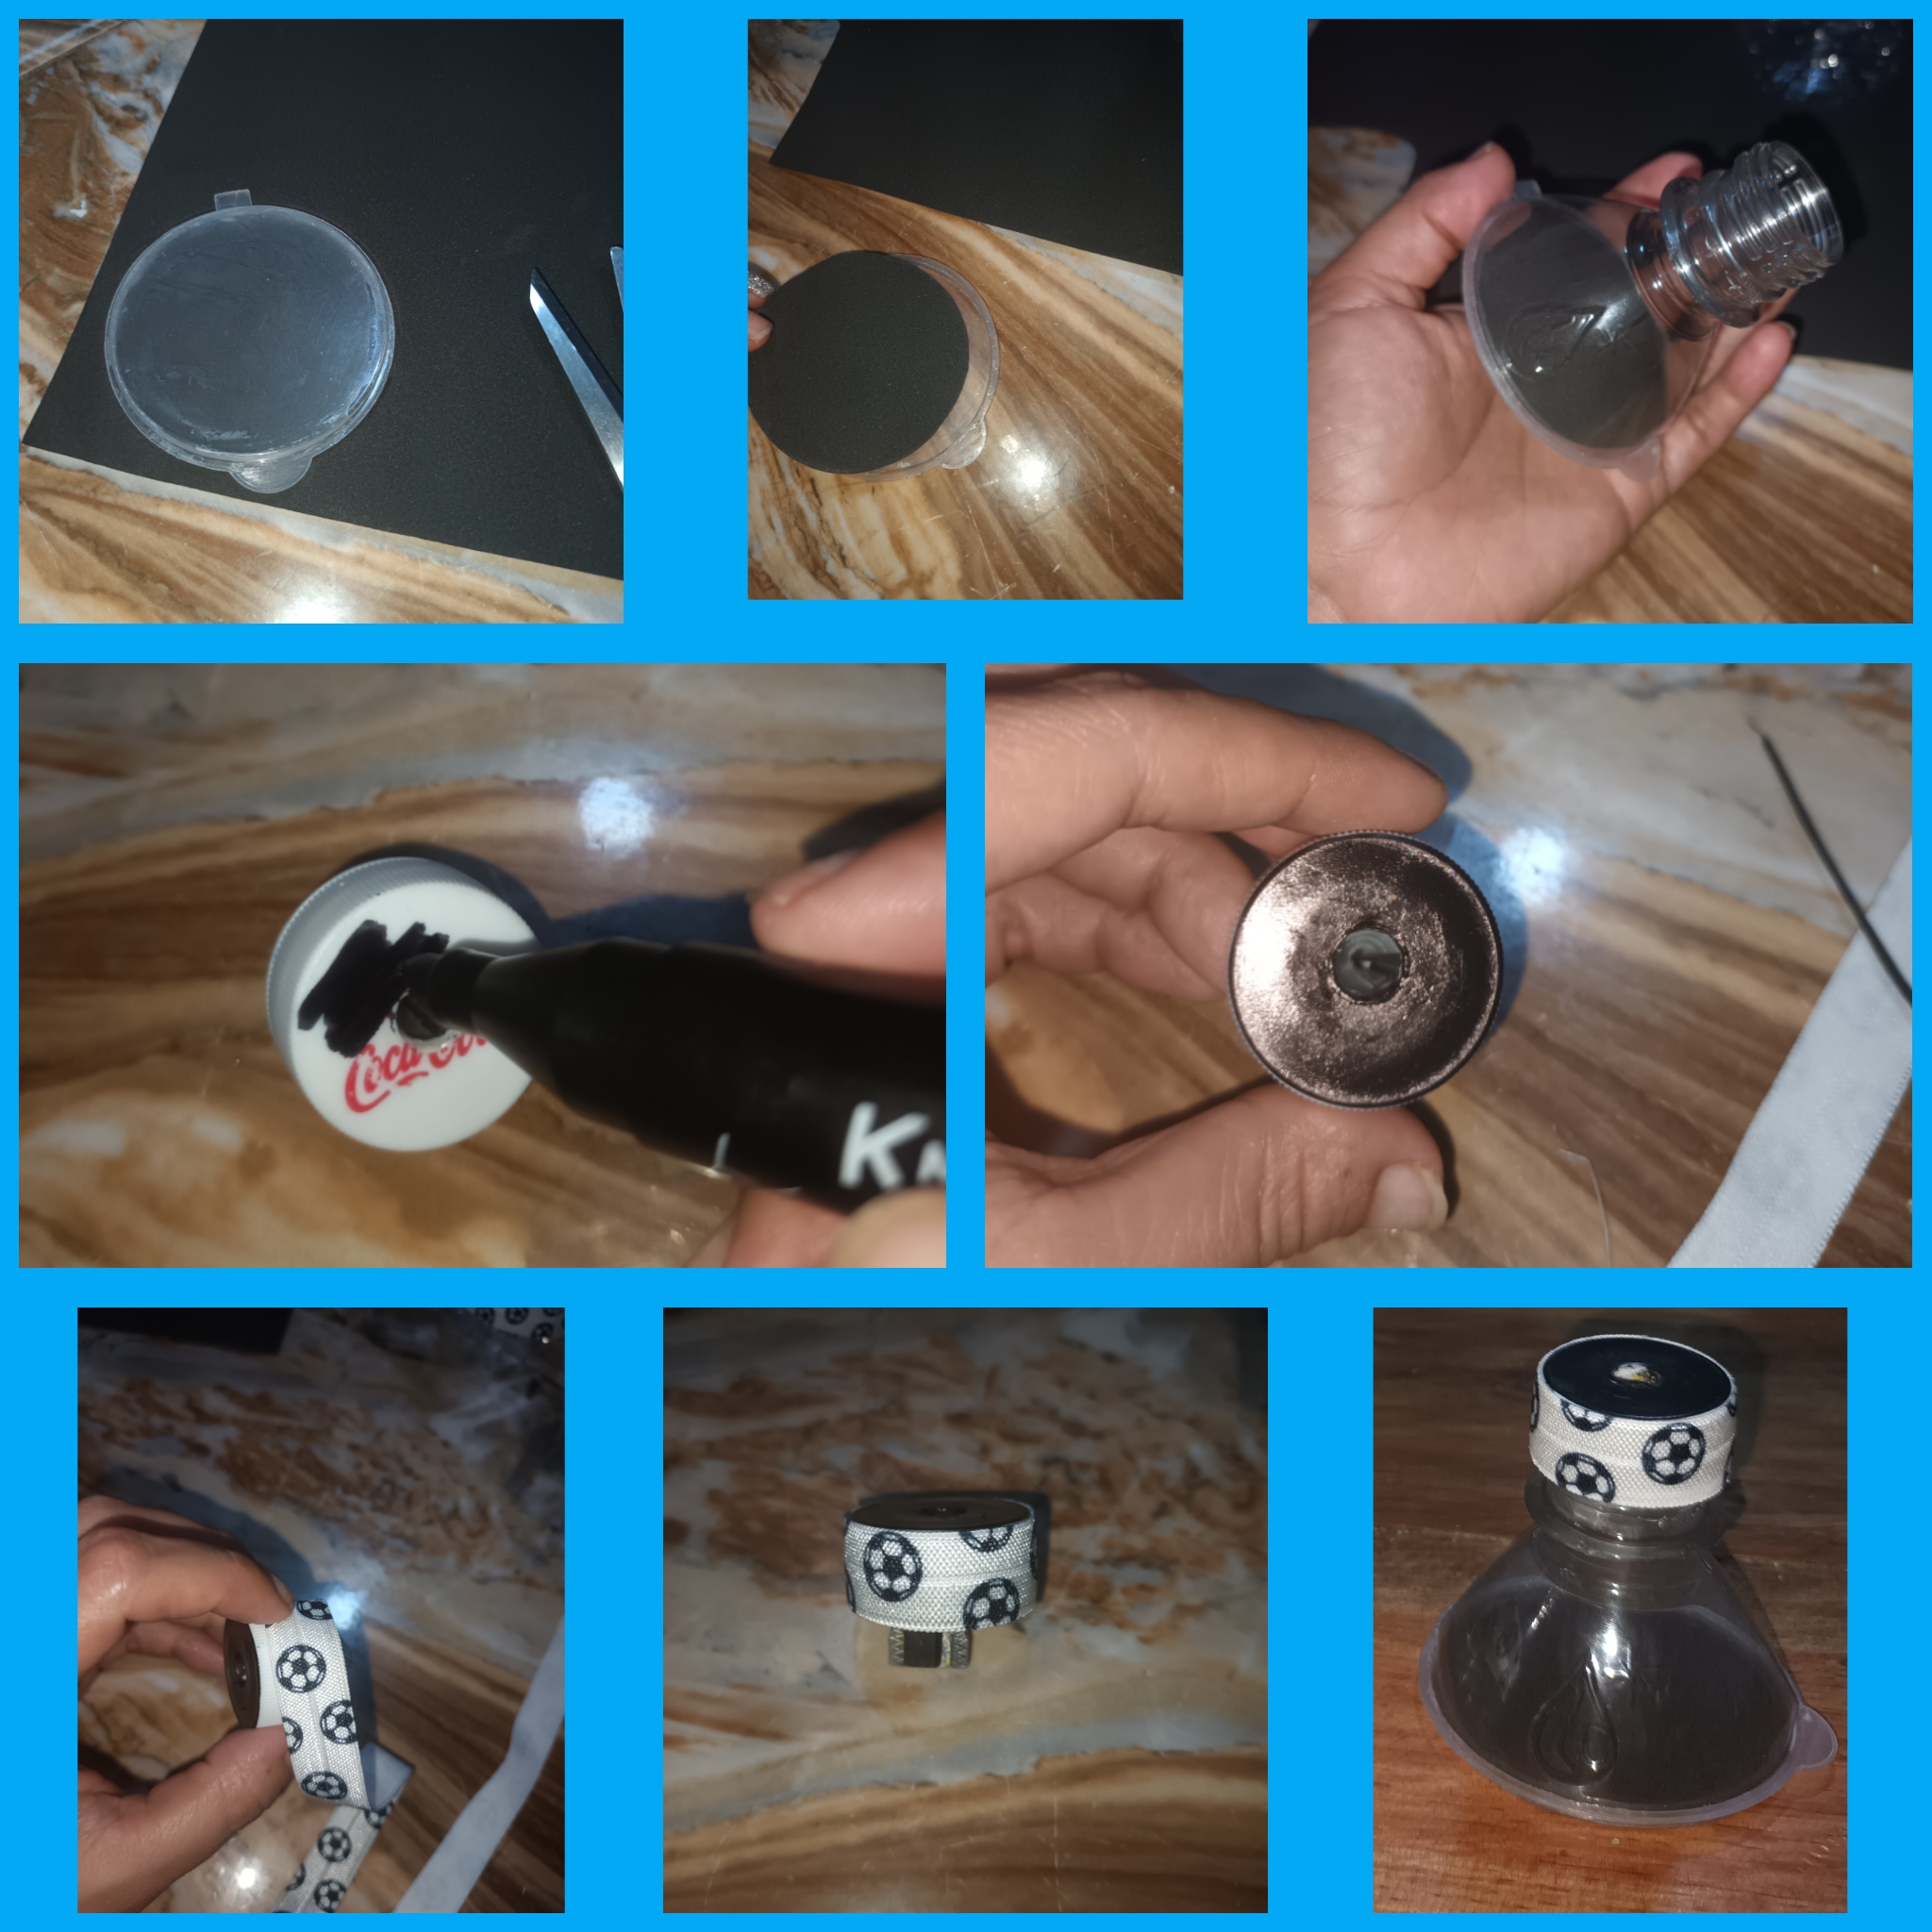
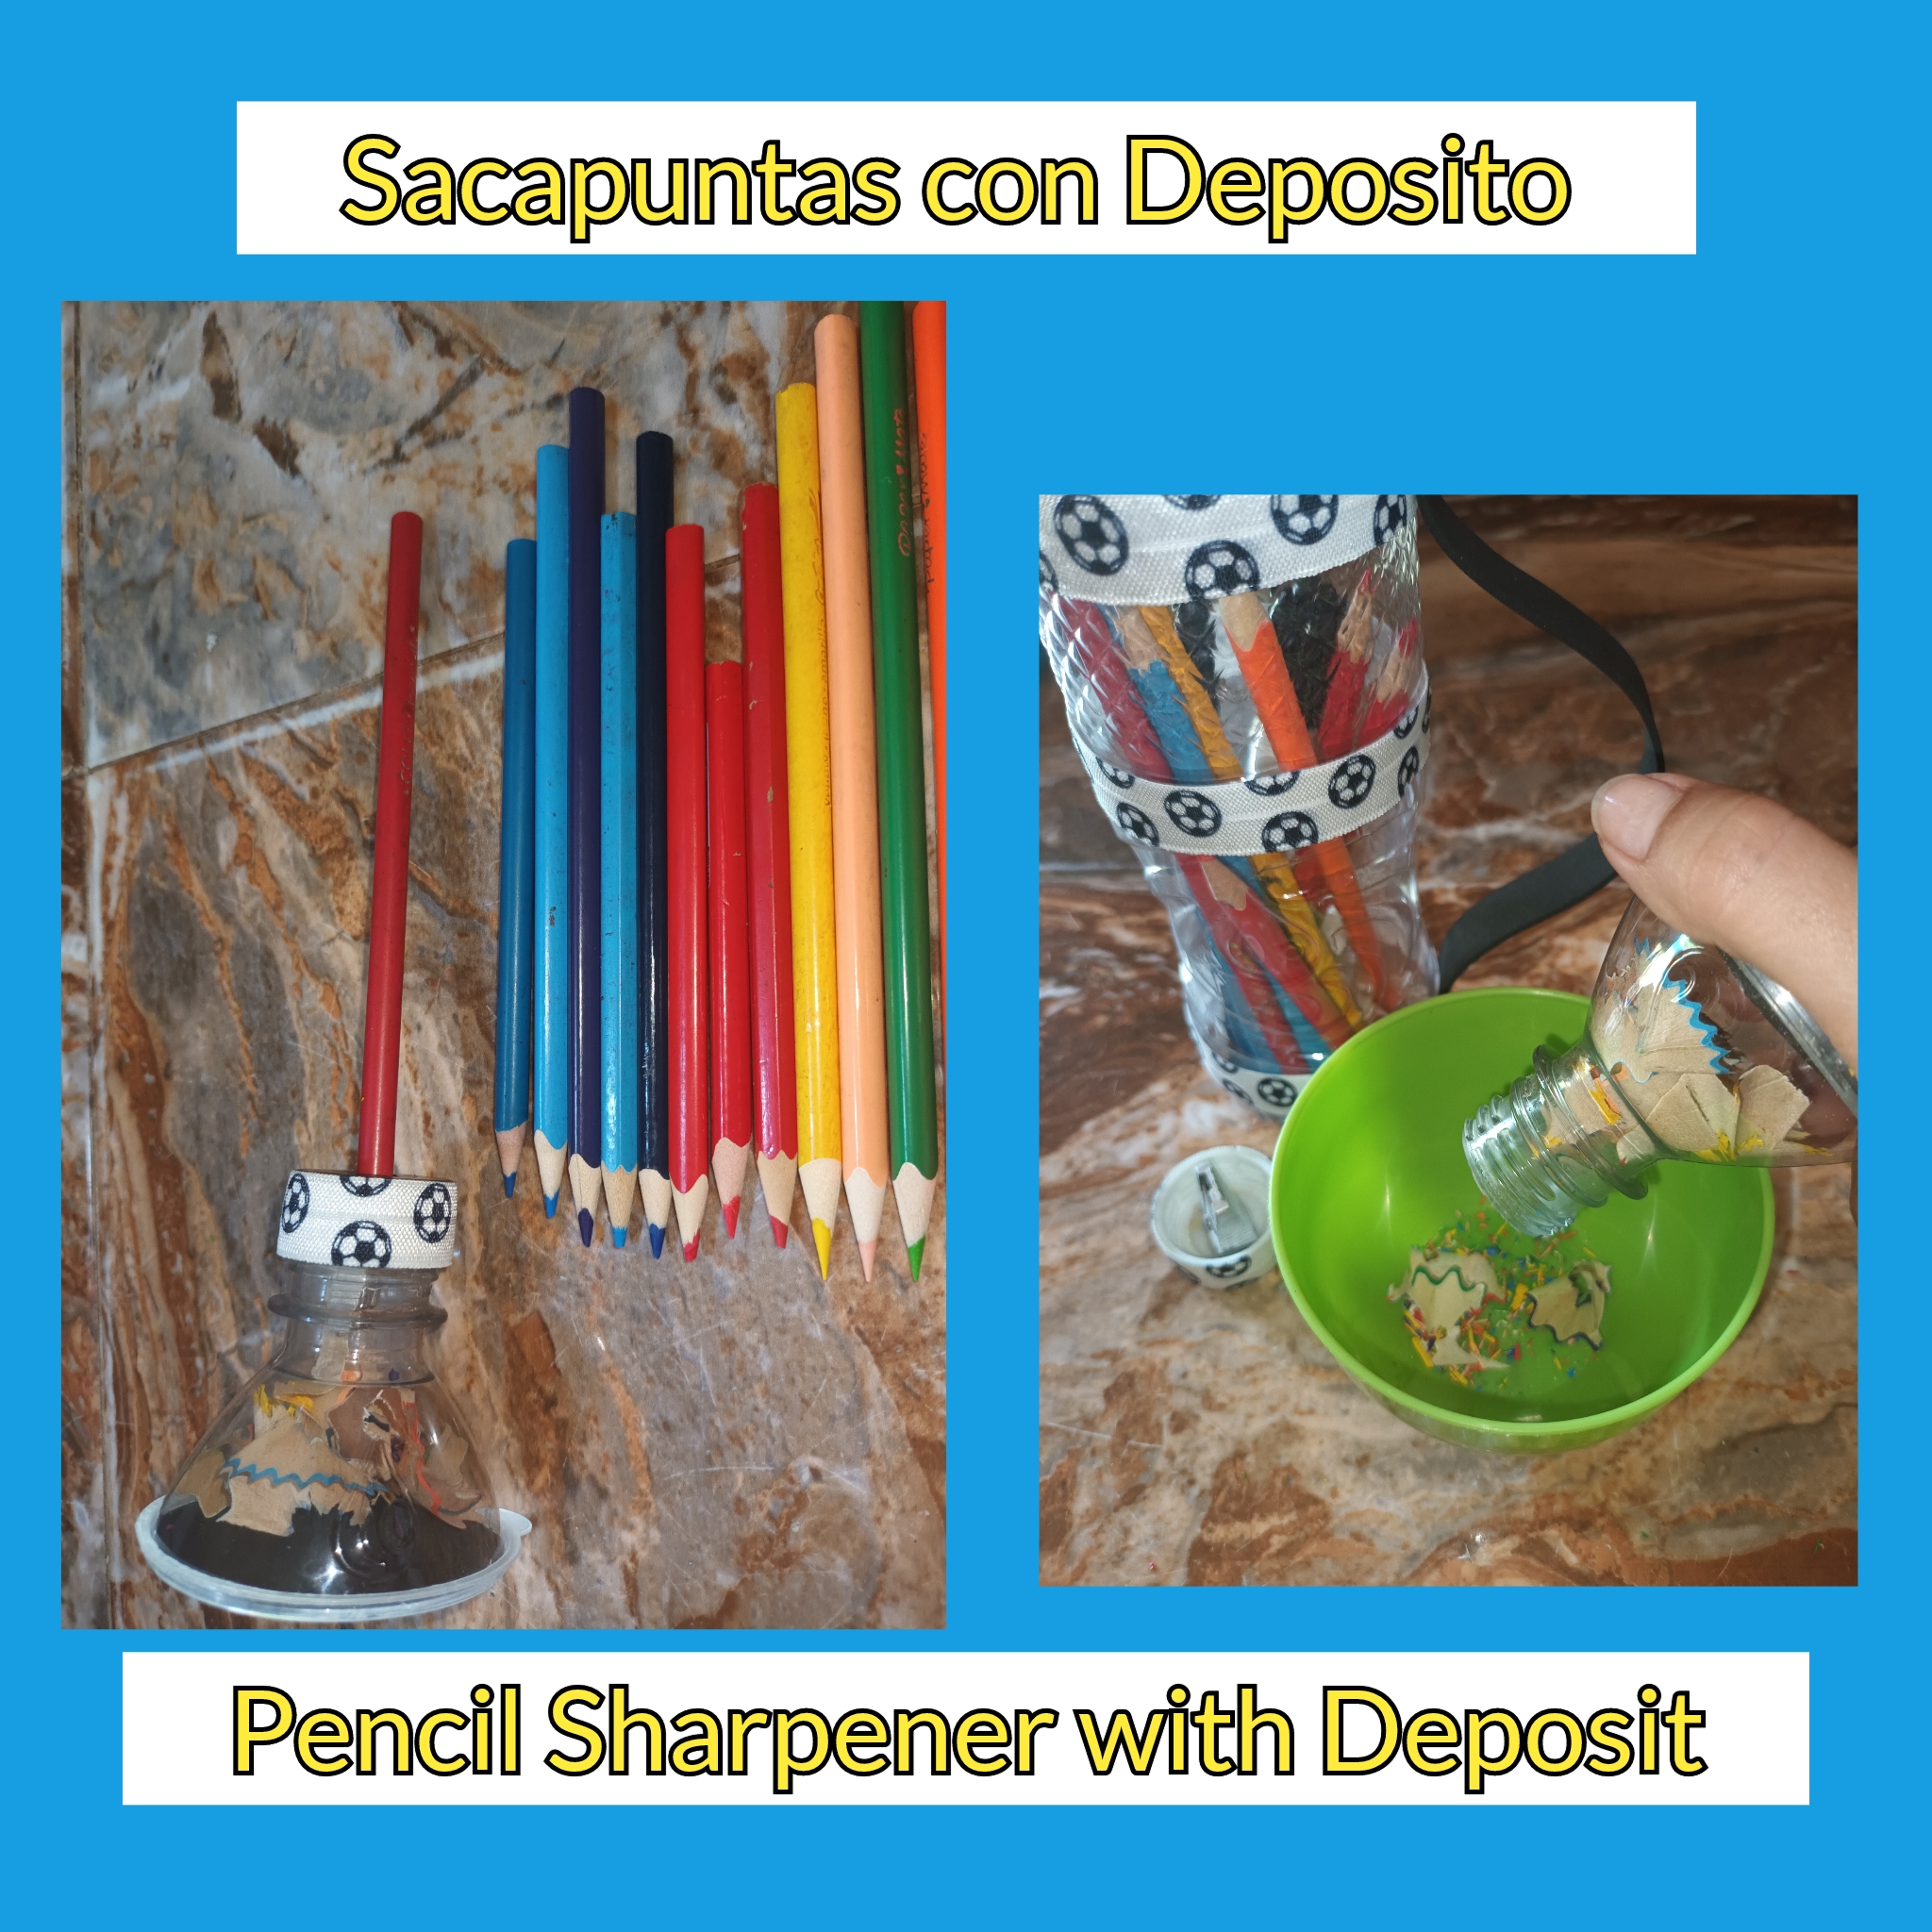
• Después que había pegado la tapita al pico me dio por ponerle en la parte interna un circulo negro, así que pues tuve suerte de que la pega no lo había pegado muy bien y con la misma tapa marque el circulo en el foami, recorte y lo pegue de manera que quedara en la parte interna del Sacapuntas, pegue nuevamente el pico de la botella a la tapita y esta vez me asegure de que quedara bien pegado, pinte la parte superior de la tapa del sacapuntas con marcador negro y la forre con en los lados con cinta de balones y así quedó el sacapuntas con deposito que será la tapa de la cartuchera.
• After I had glued the lid to the spout I decided to put a black circle on the inside, so I was lucky that the glue had not stuck it very well and with the same lid I marked the circle on the foam, cut out and I glued it so that it would be on the inside of the pencil sharpener, I glued the spout of the bottle to the cap again and this time I made sure that it was well glued, I painted the top part of the pencil sharpener cap with black marker and lined it with on the sides with ball tape and this is how the pencil sharpener with a reservoir that will be the cover of the pencil case was left.
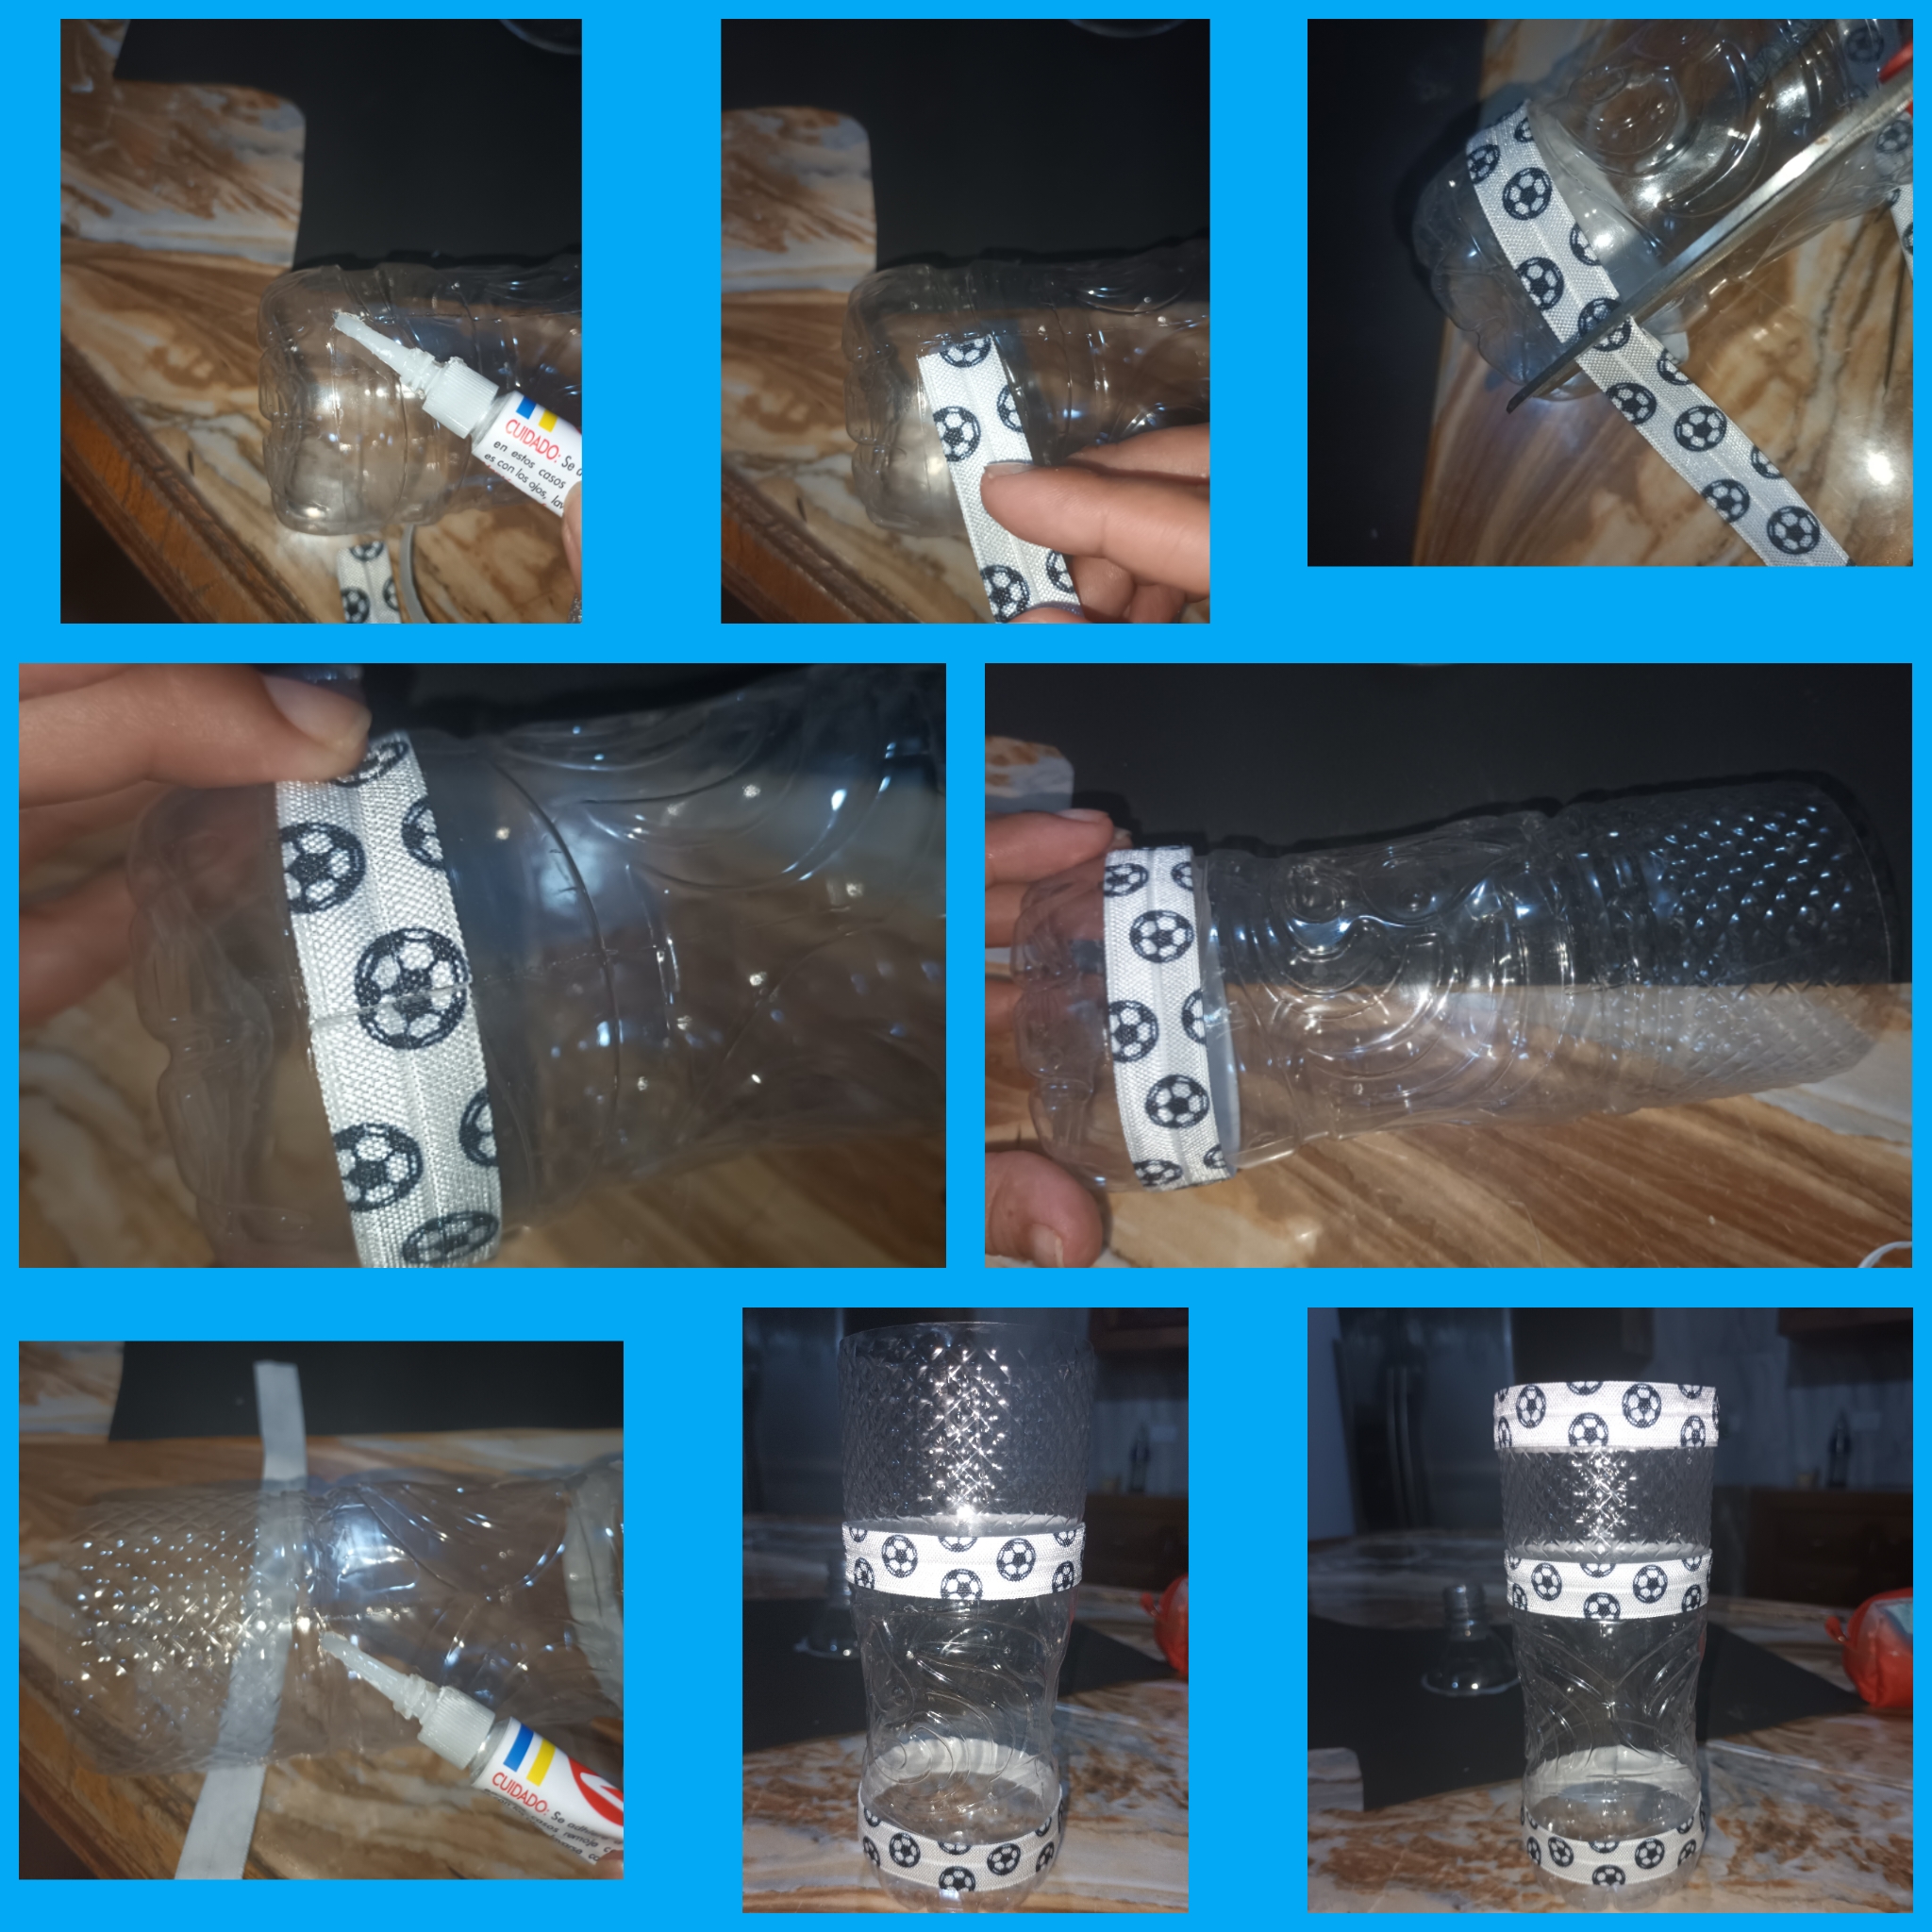
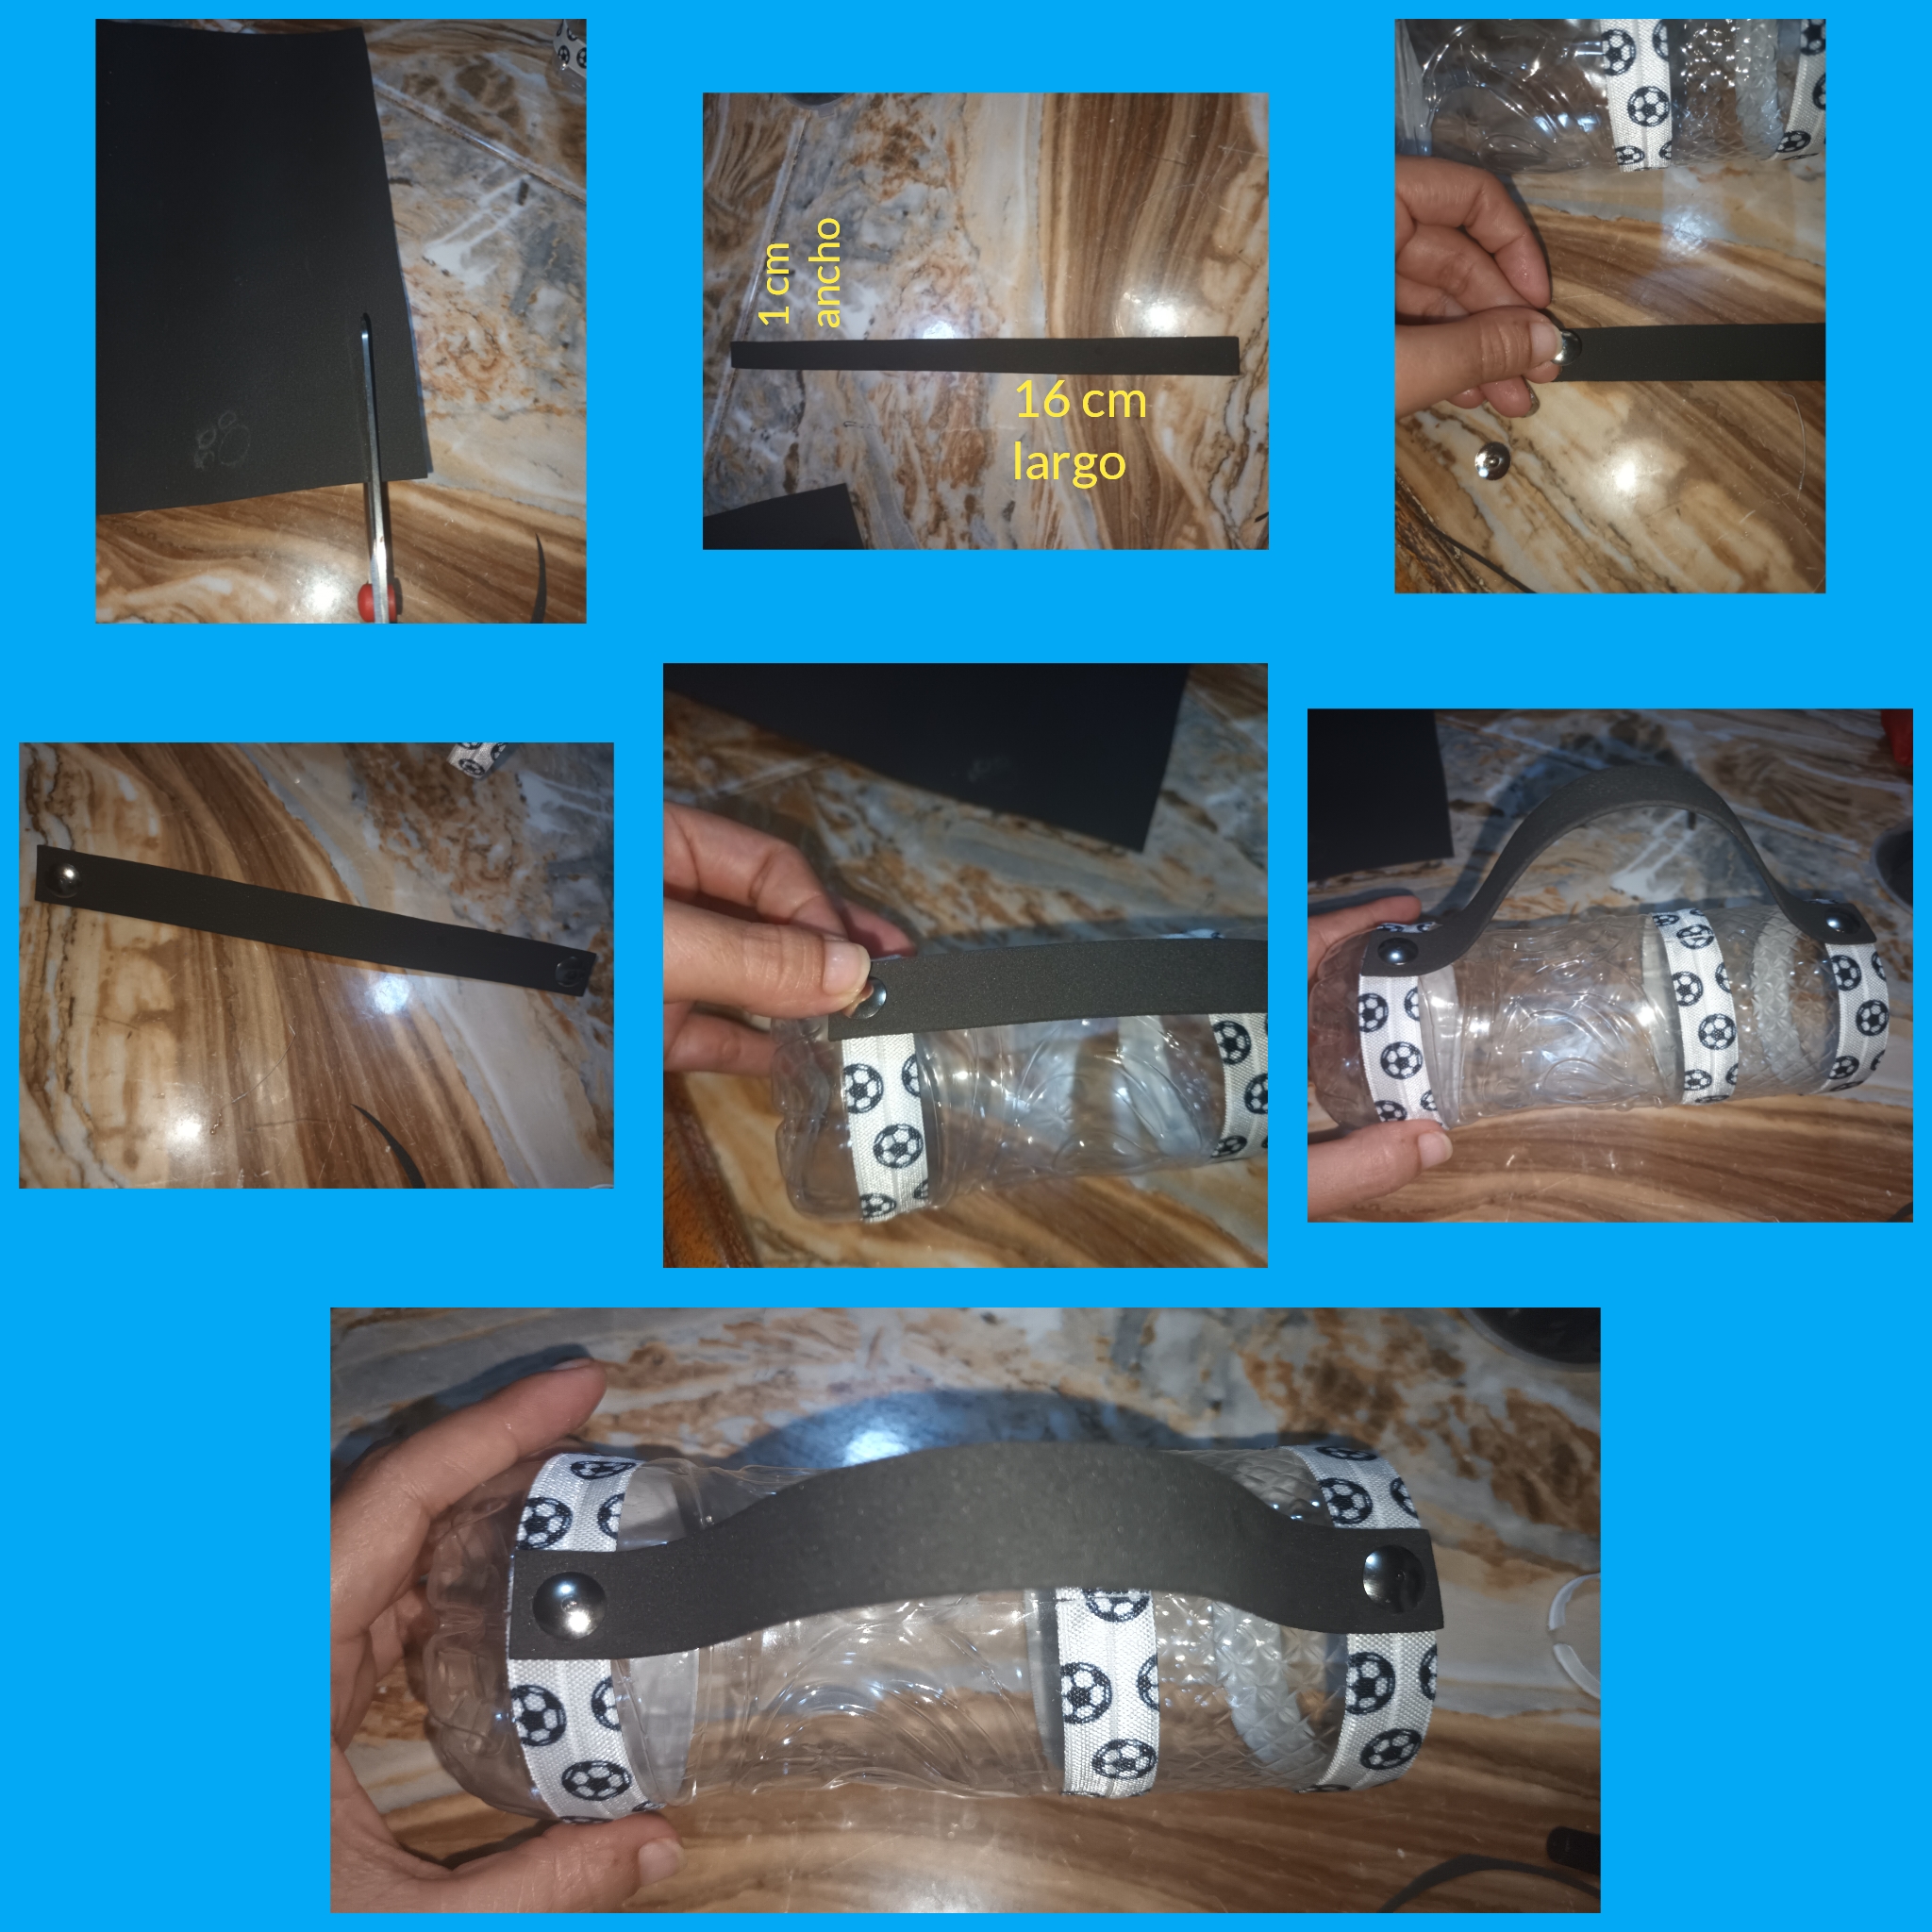
• Ahora tomamos el resto de la botella plastica para decorarla, le pegamos en la parte inferior de la botella la cinta, la cortamos de manera que el dibujo de la pelota coincida de un lado y del otro para que forme la pelota y quede un mejor acabado, hacemos lo mismo a la mitad de la botella y en la parte superior, como les muestro en las imágenes.
• Now we take the rest of the plastic bottle to decorate it, we stick the tape on the bottom of the bottle, we cut it so that the drawing of the ball coincides on one side and the other so that it forms the ball and looks better. finished, we do the same to the middle of the bottle and to the top, as I show you in the images.
• Del foami negro sacamos una tira de 1 centímetro ancho por 16 centímetros de largo, le pegamos un chinche en un extremo y uno en el otro, lo llevamos a un lado de la botella y lo ensartamos justo donde unimos la cinta en la parte inferior de la botella y en la parte superior para obtener el asa de la cartuchera.
• From the black foam we take a strip 1 centimeter wide by 16 centimeters long, we stick a thumbtack on one end and one on the other, we take it to one side of the bottle and thread it right where we join the tape at the bottom of the bottle and at the top to obtain the handle of the holster.
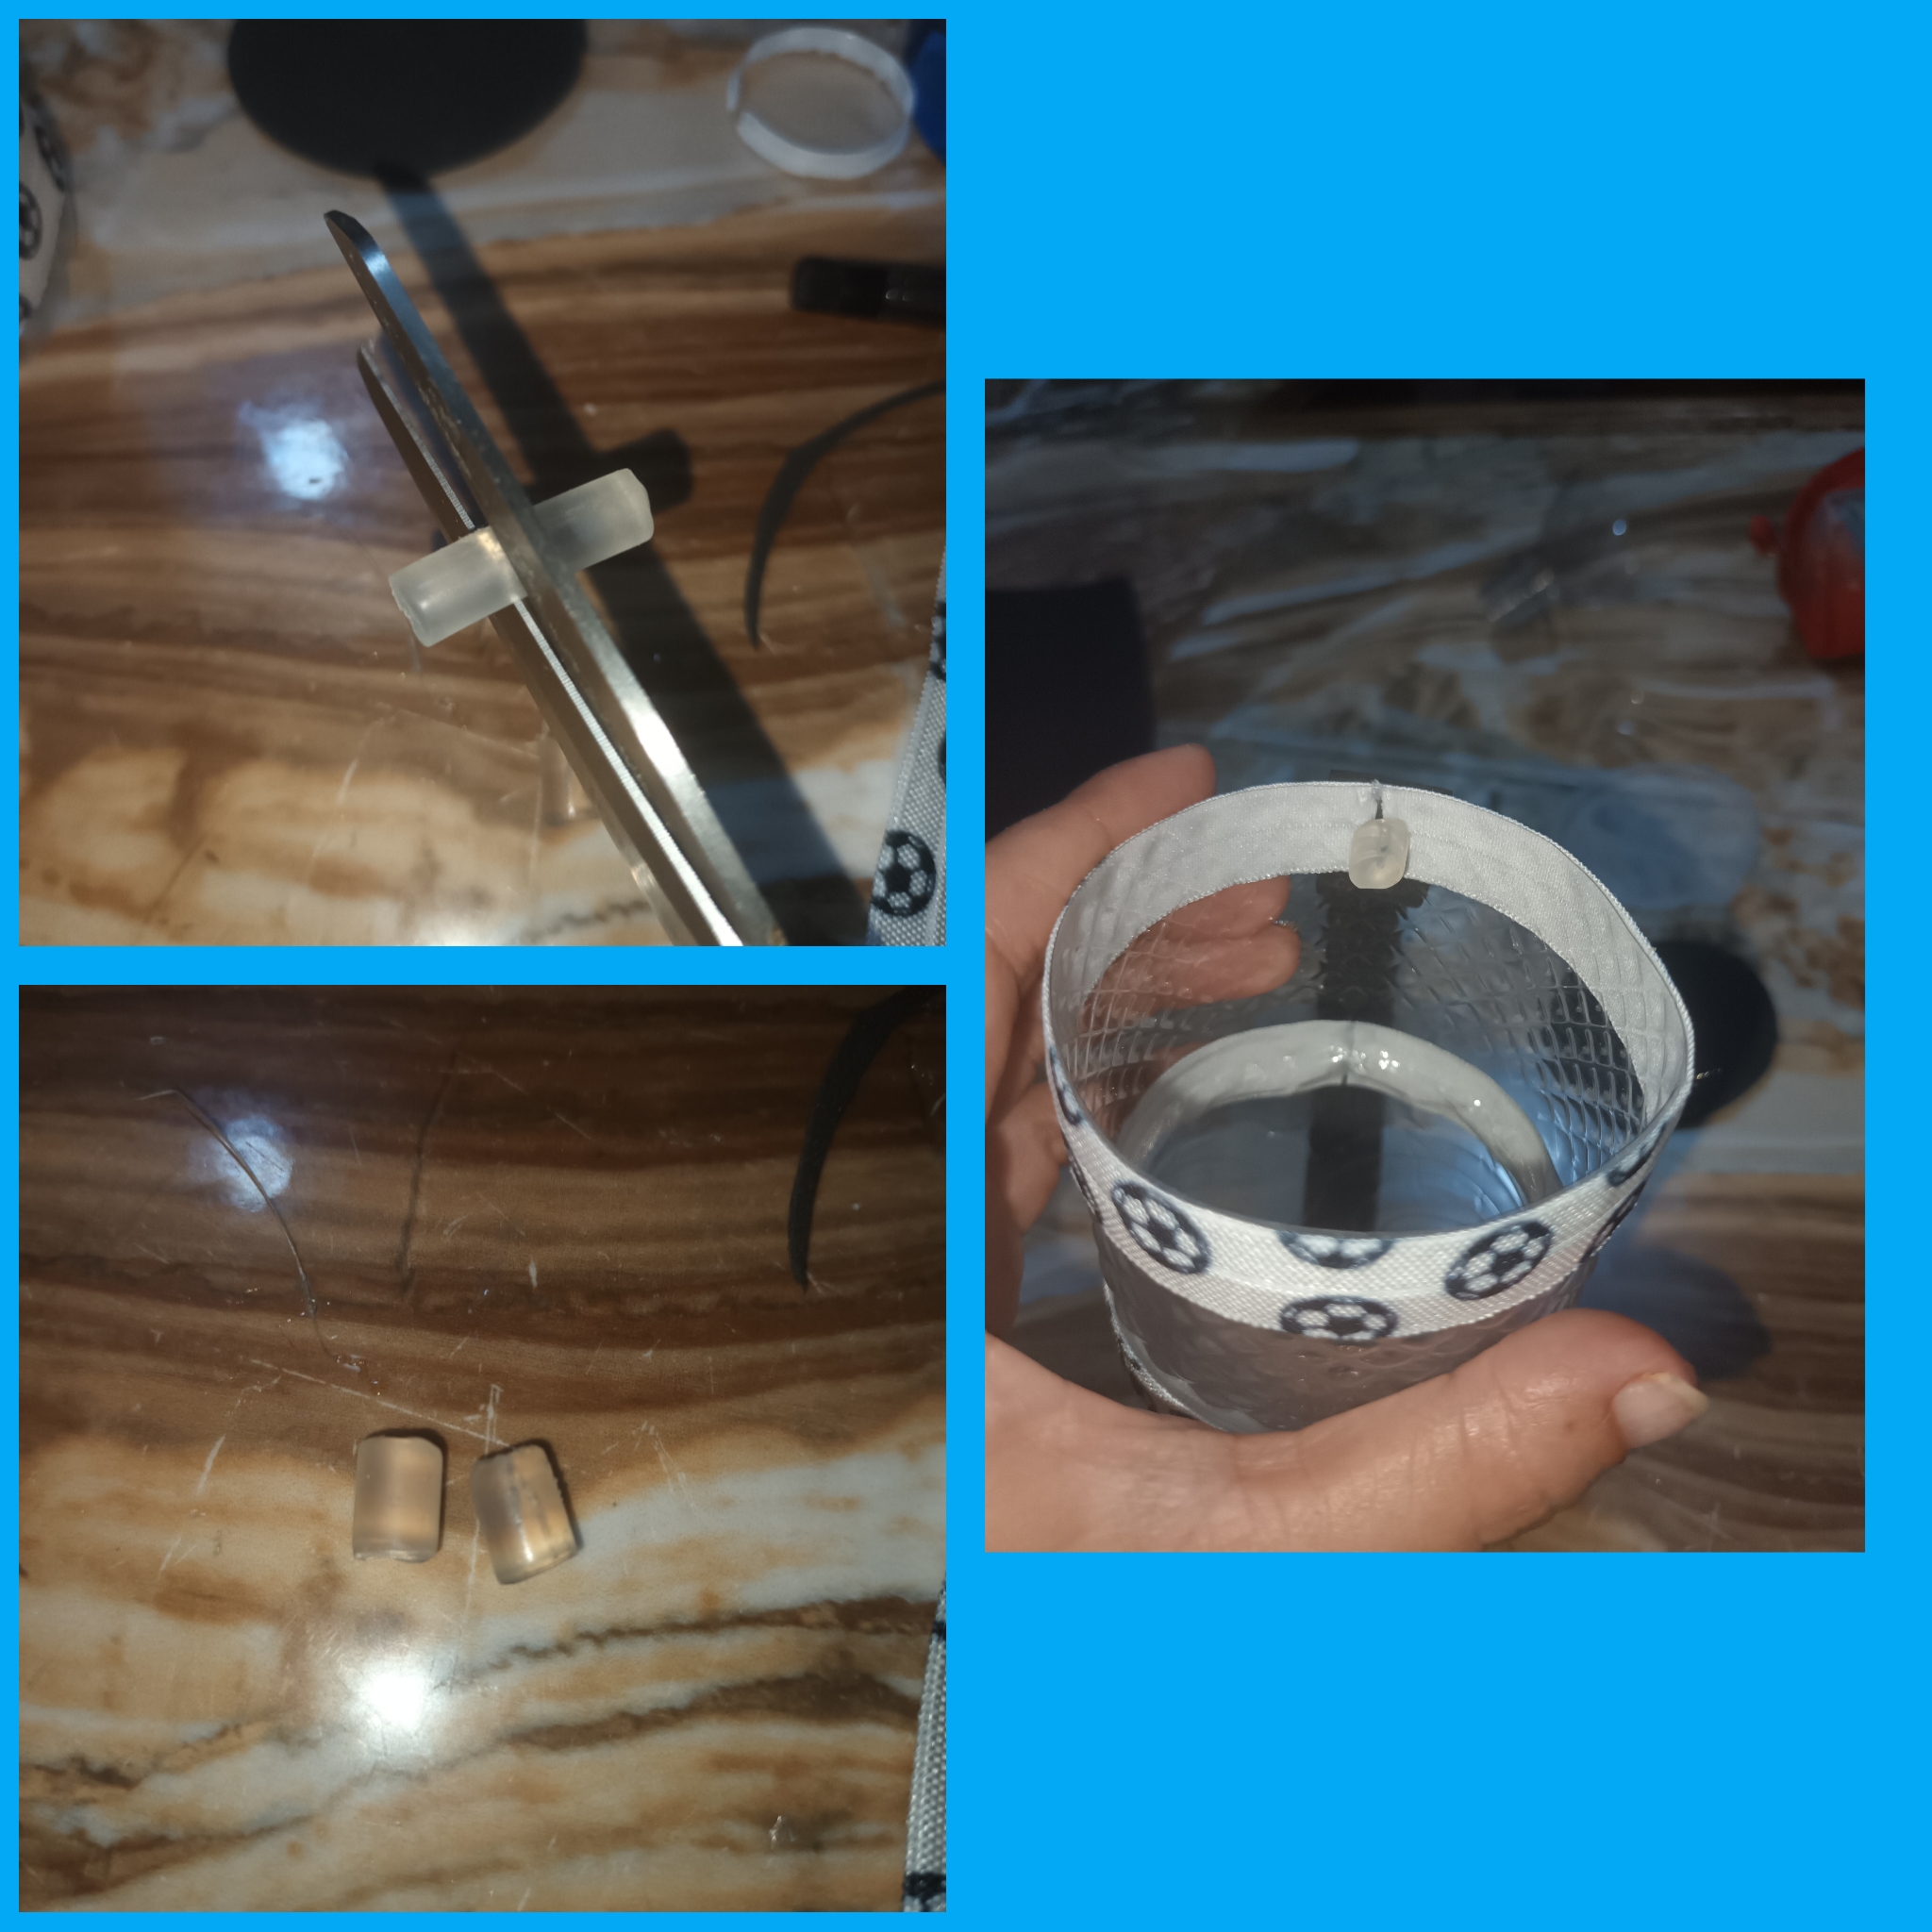
• Luego tome un pedacito de silicon en barra y lo pique en 2 pedacitos más pequeños y se lo coloque a las puntas afiladas de los chinches por seguridad.
• Then take a piece of silicone stick and chop it into 2 smaller pieces and place it on the sharp tips of the bed bugs for safety.
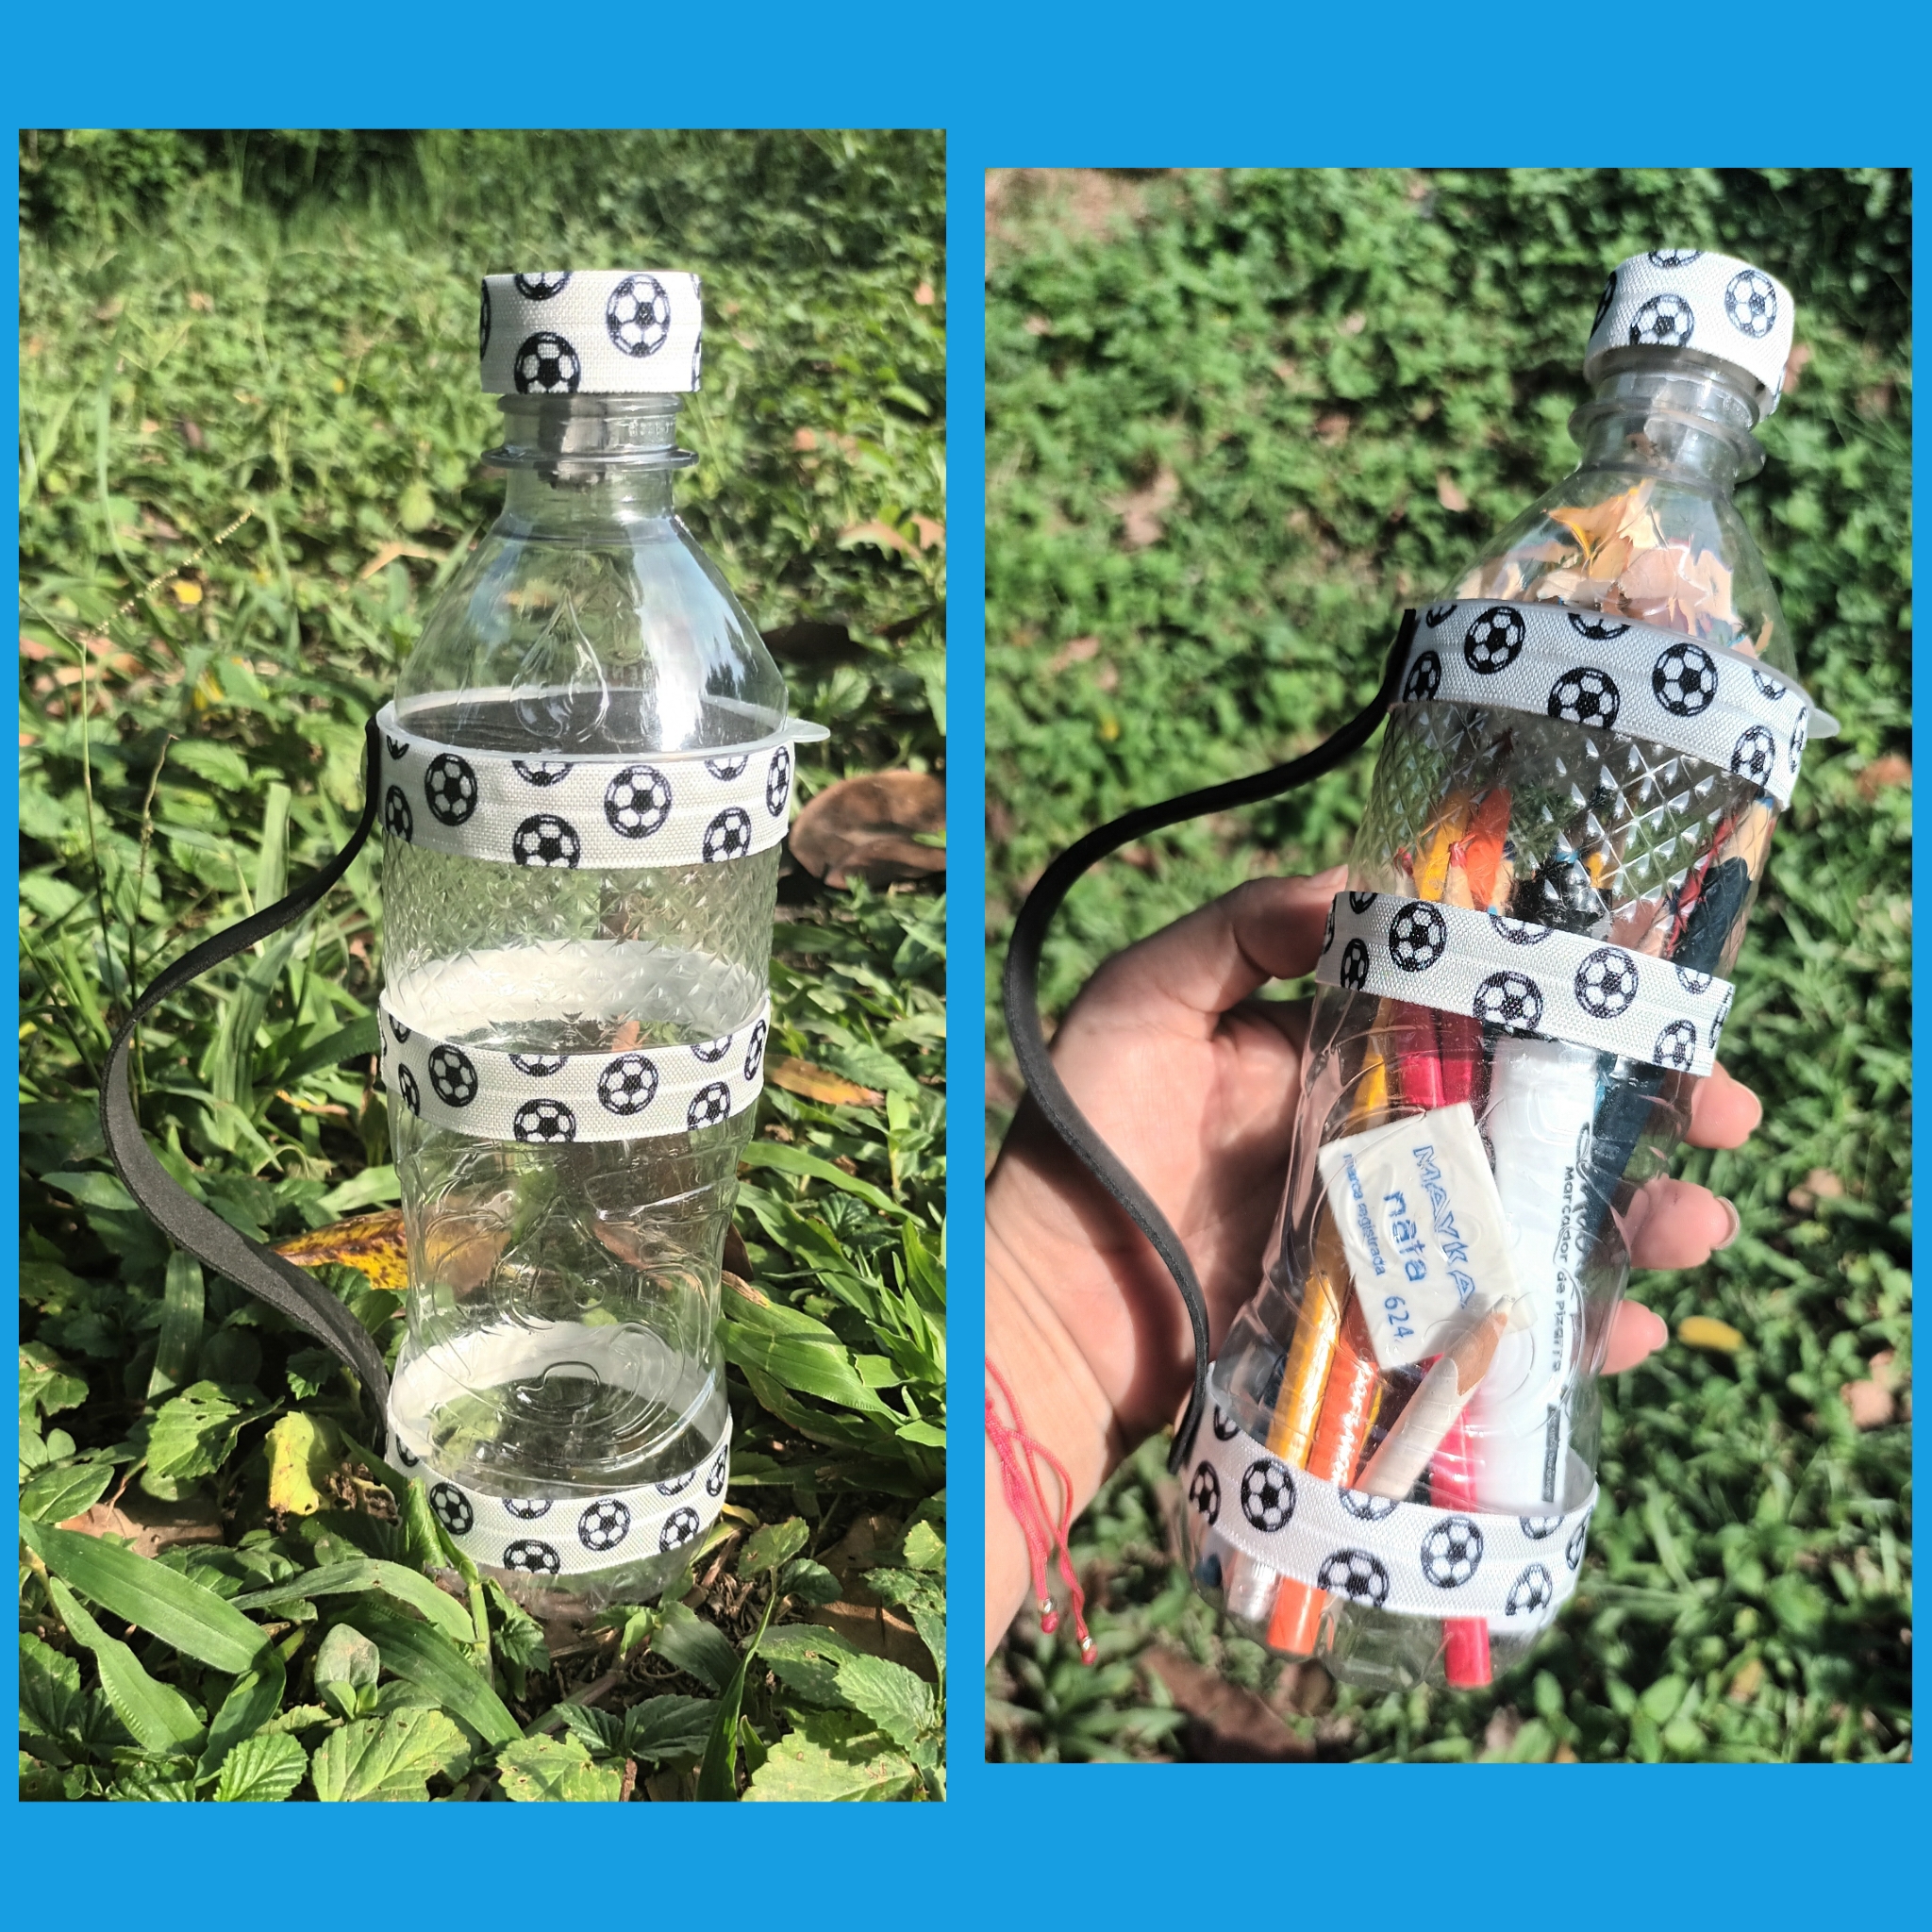
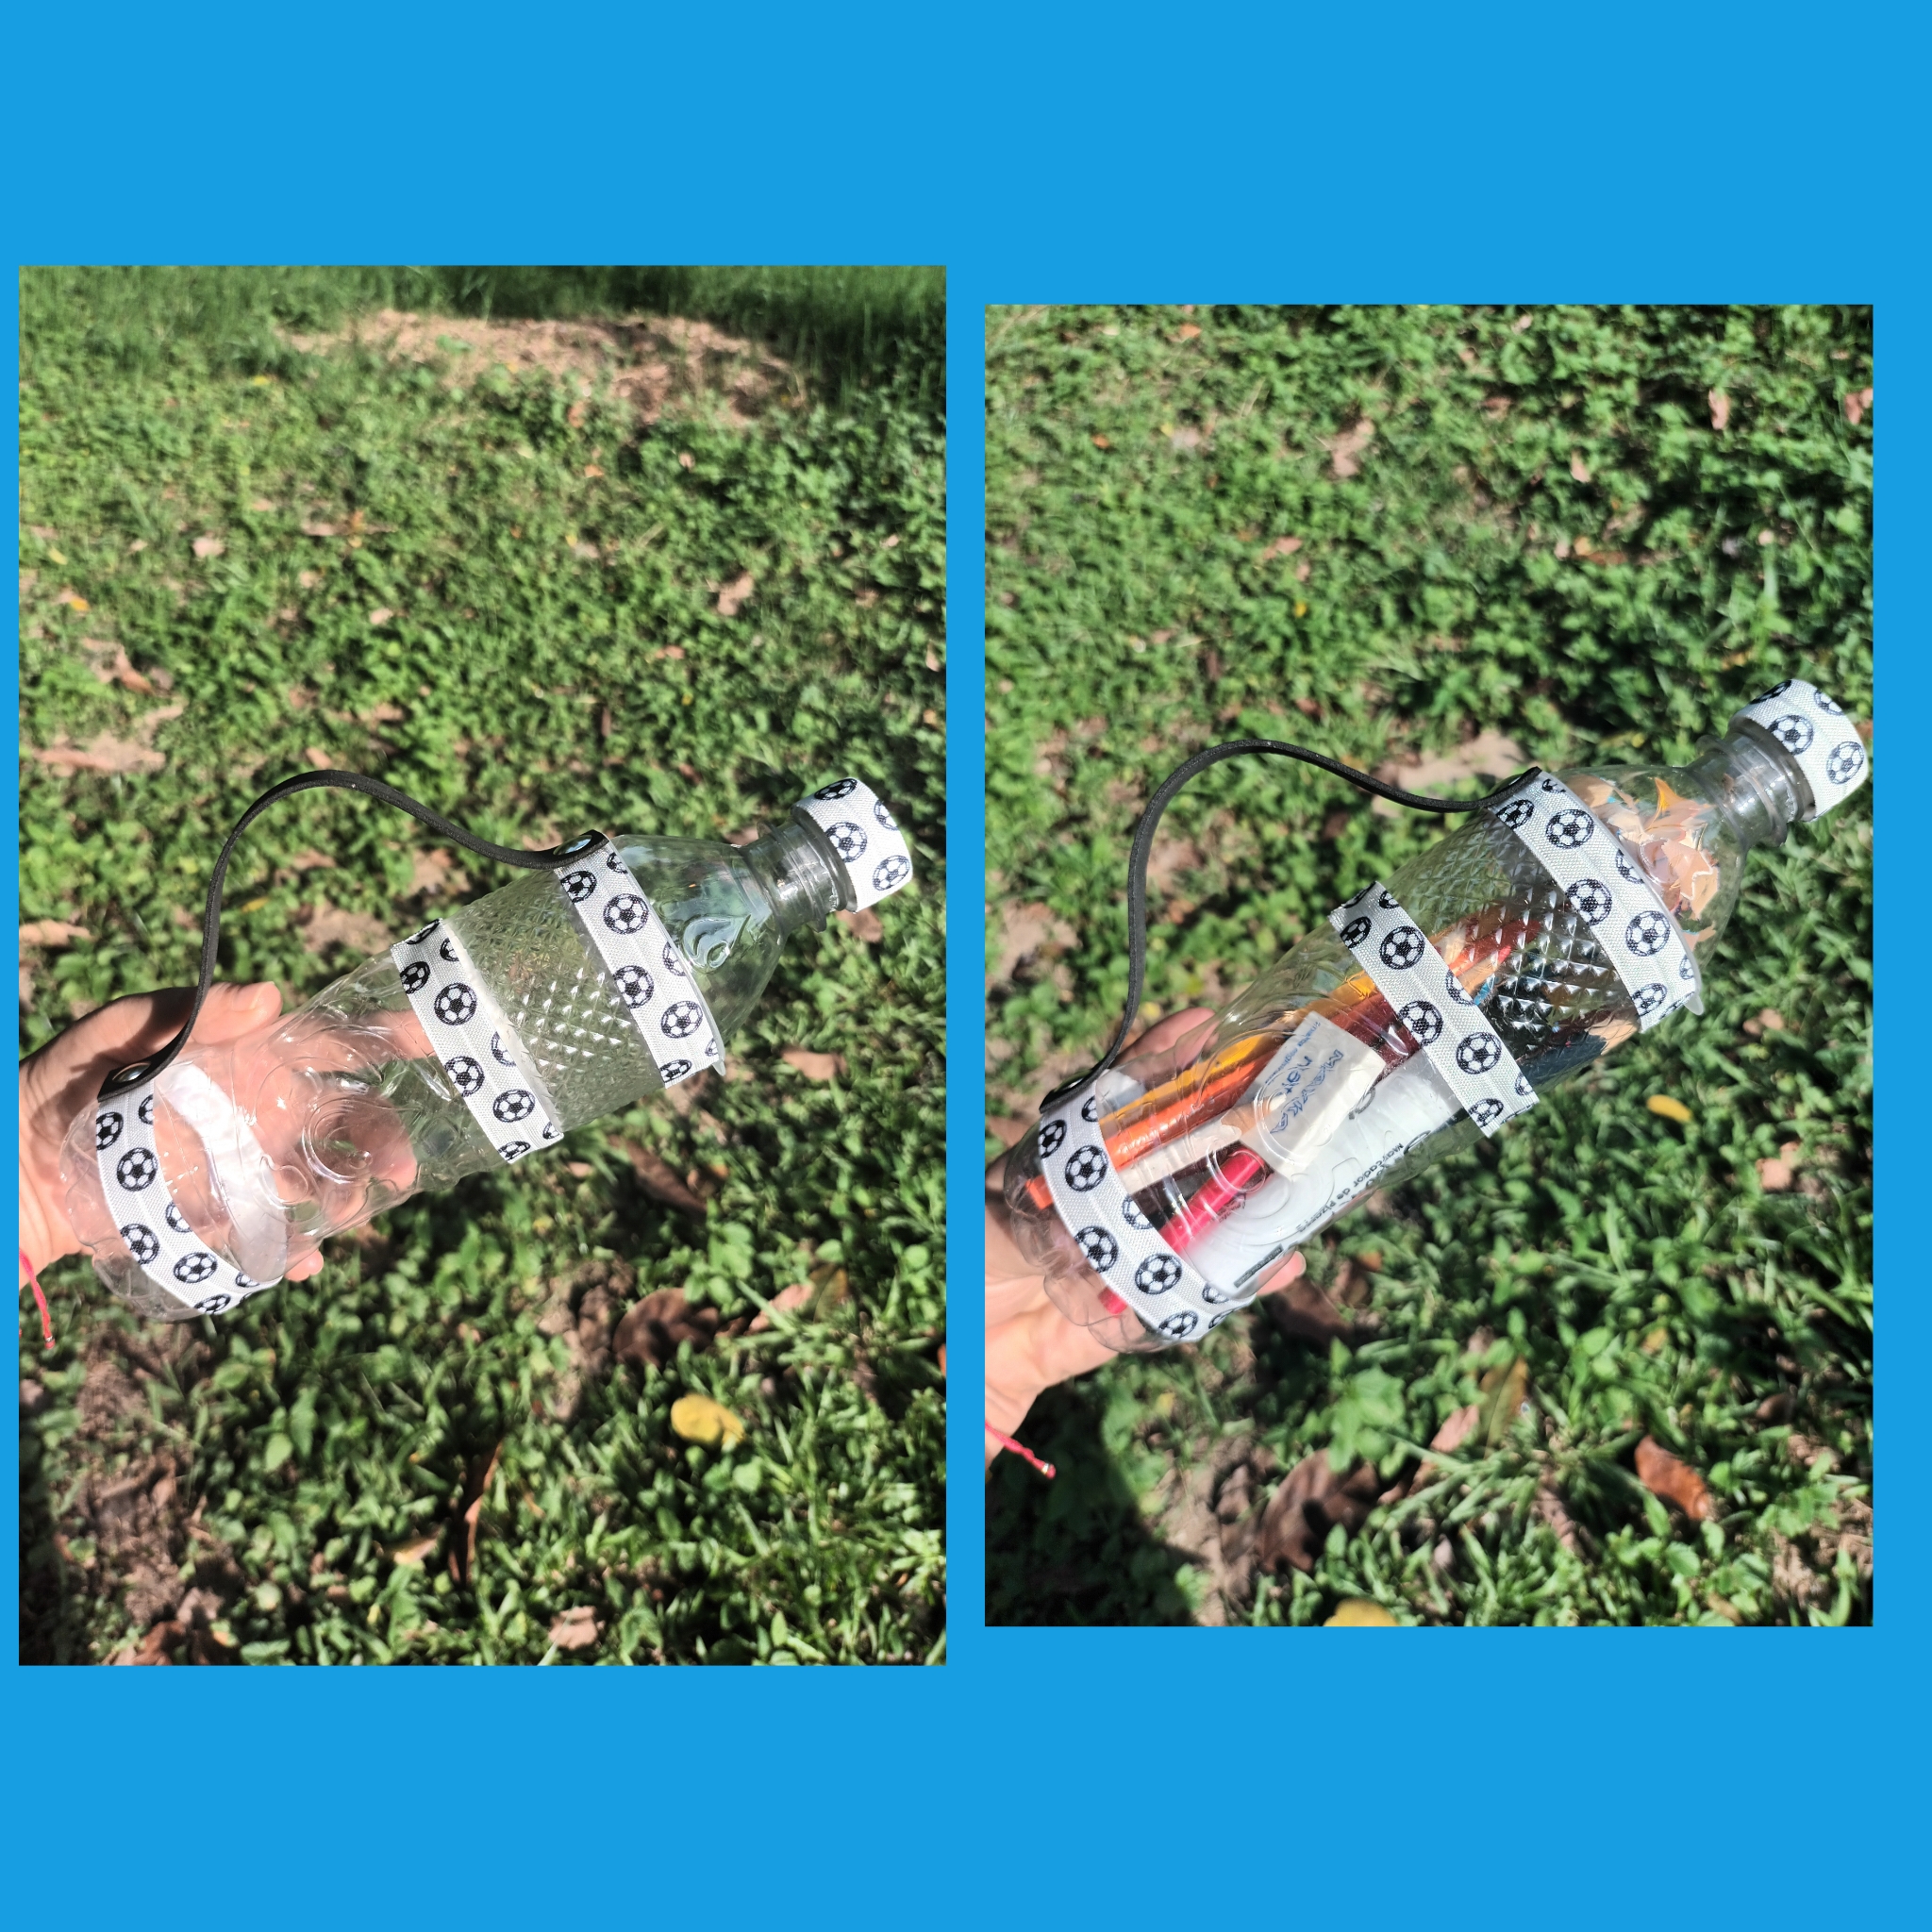
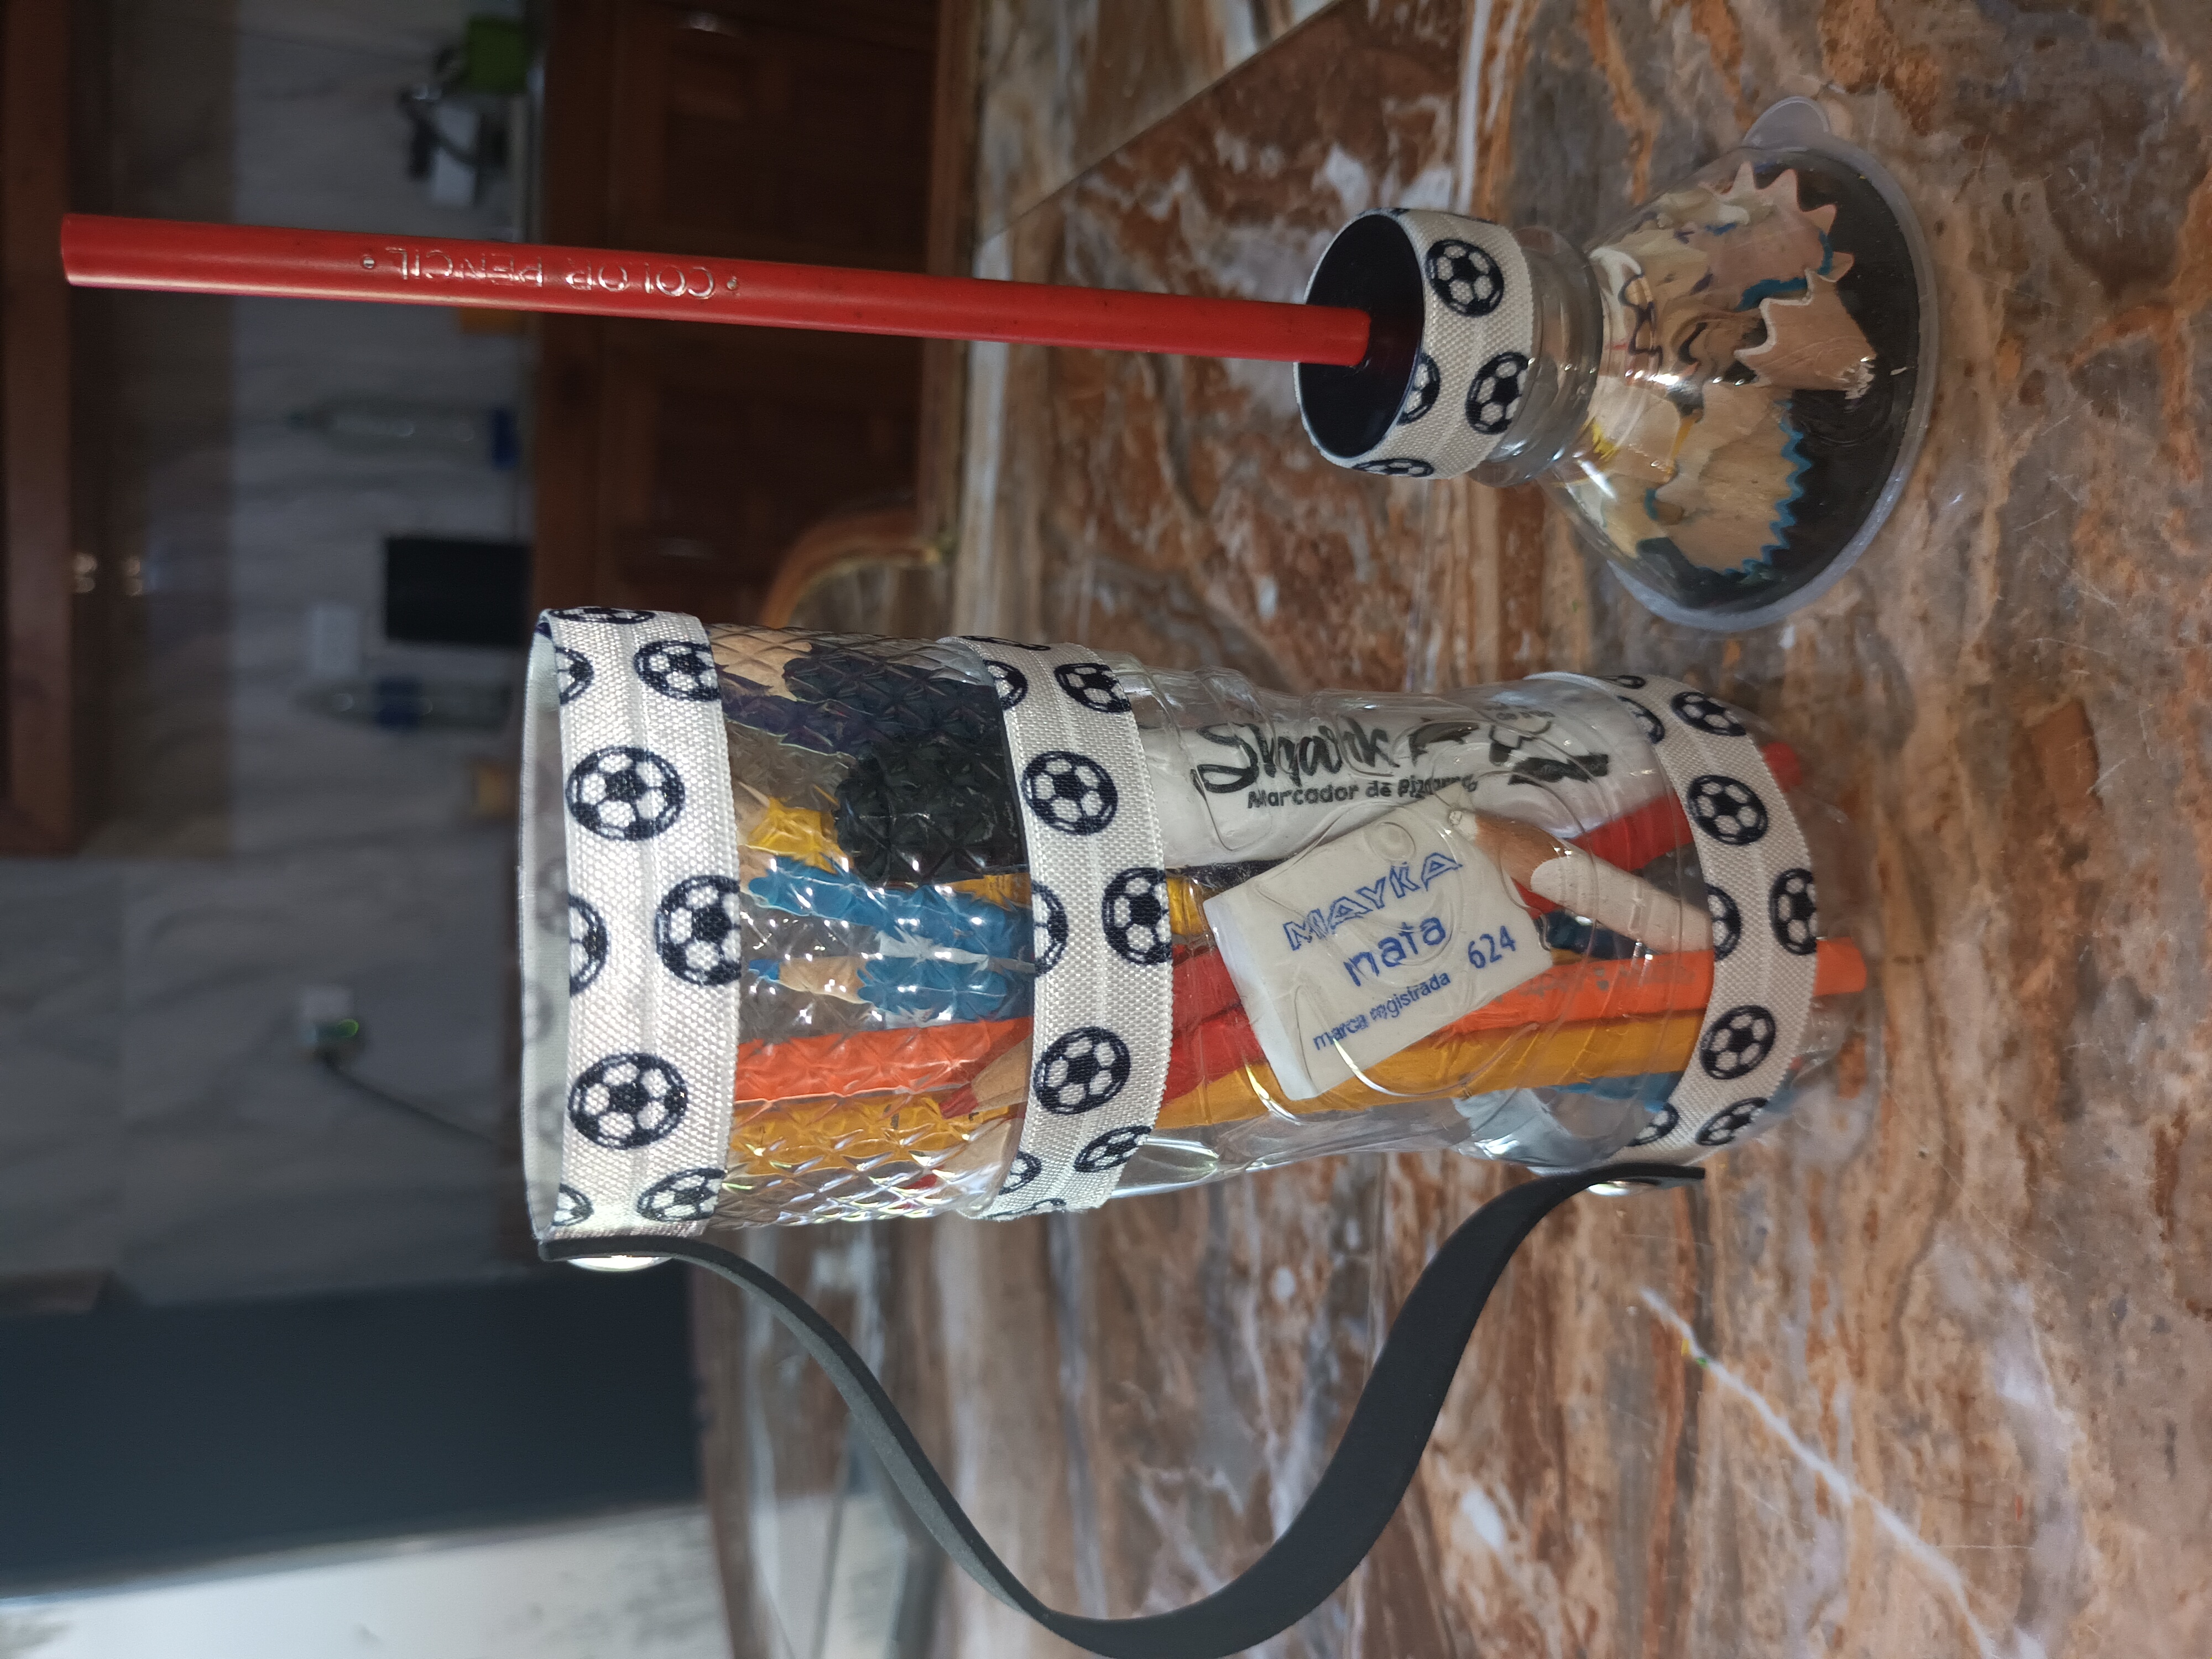
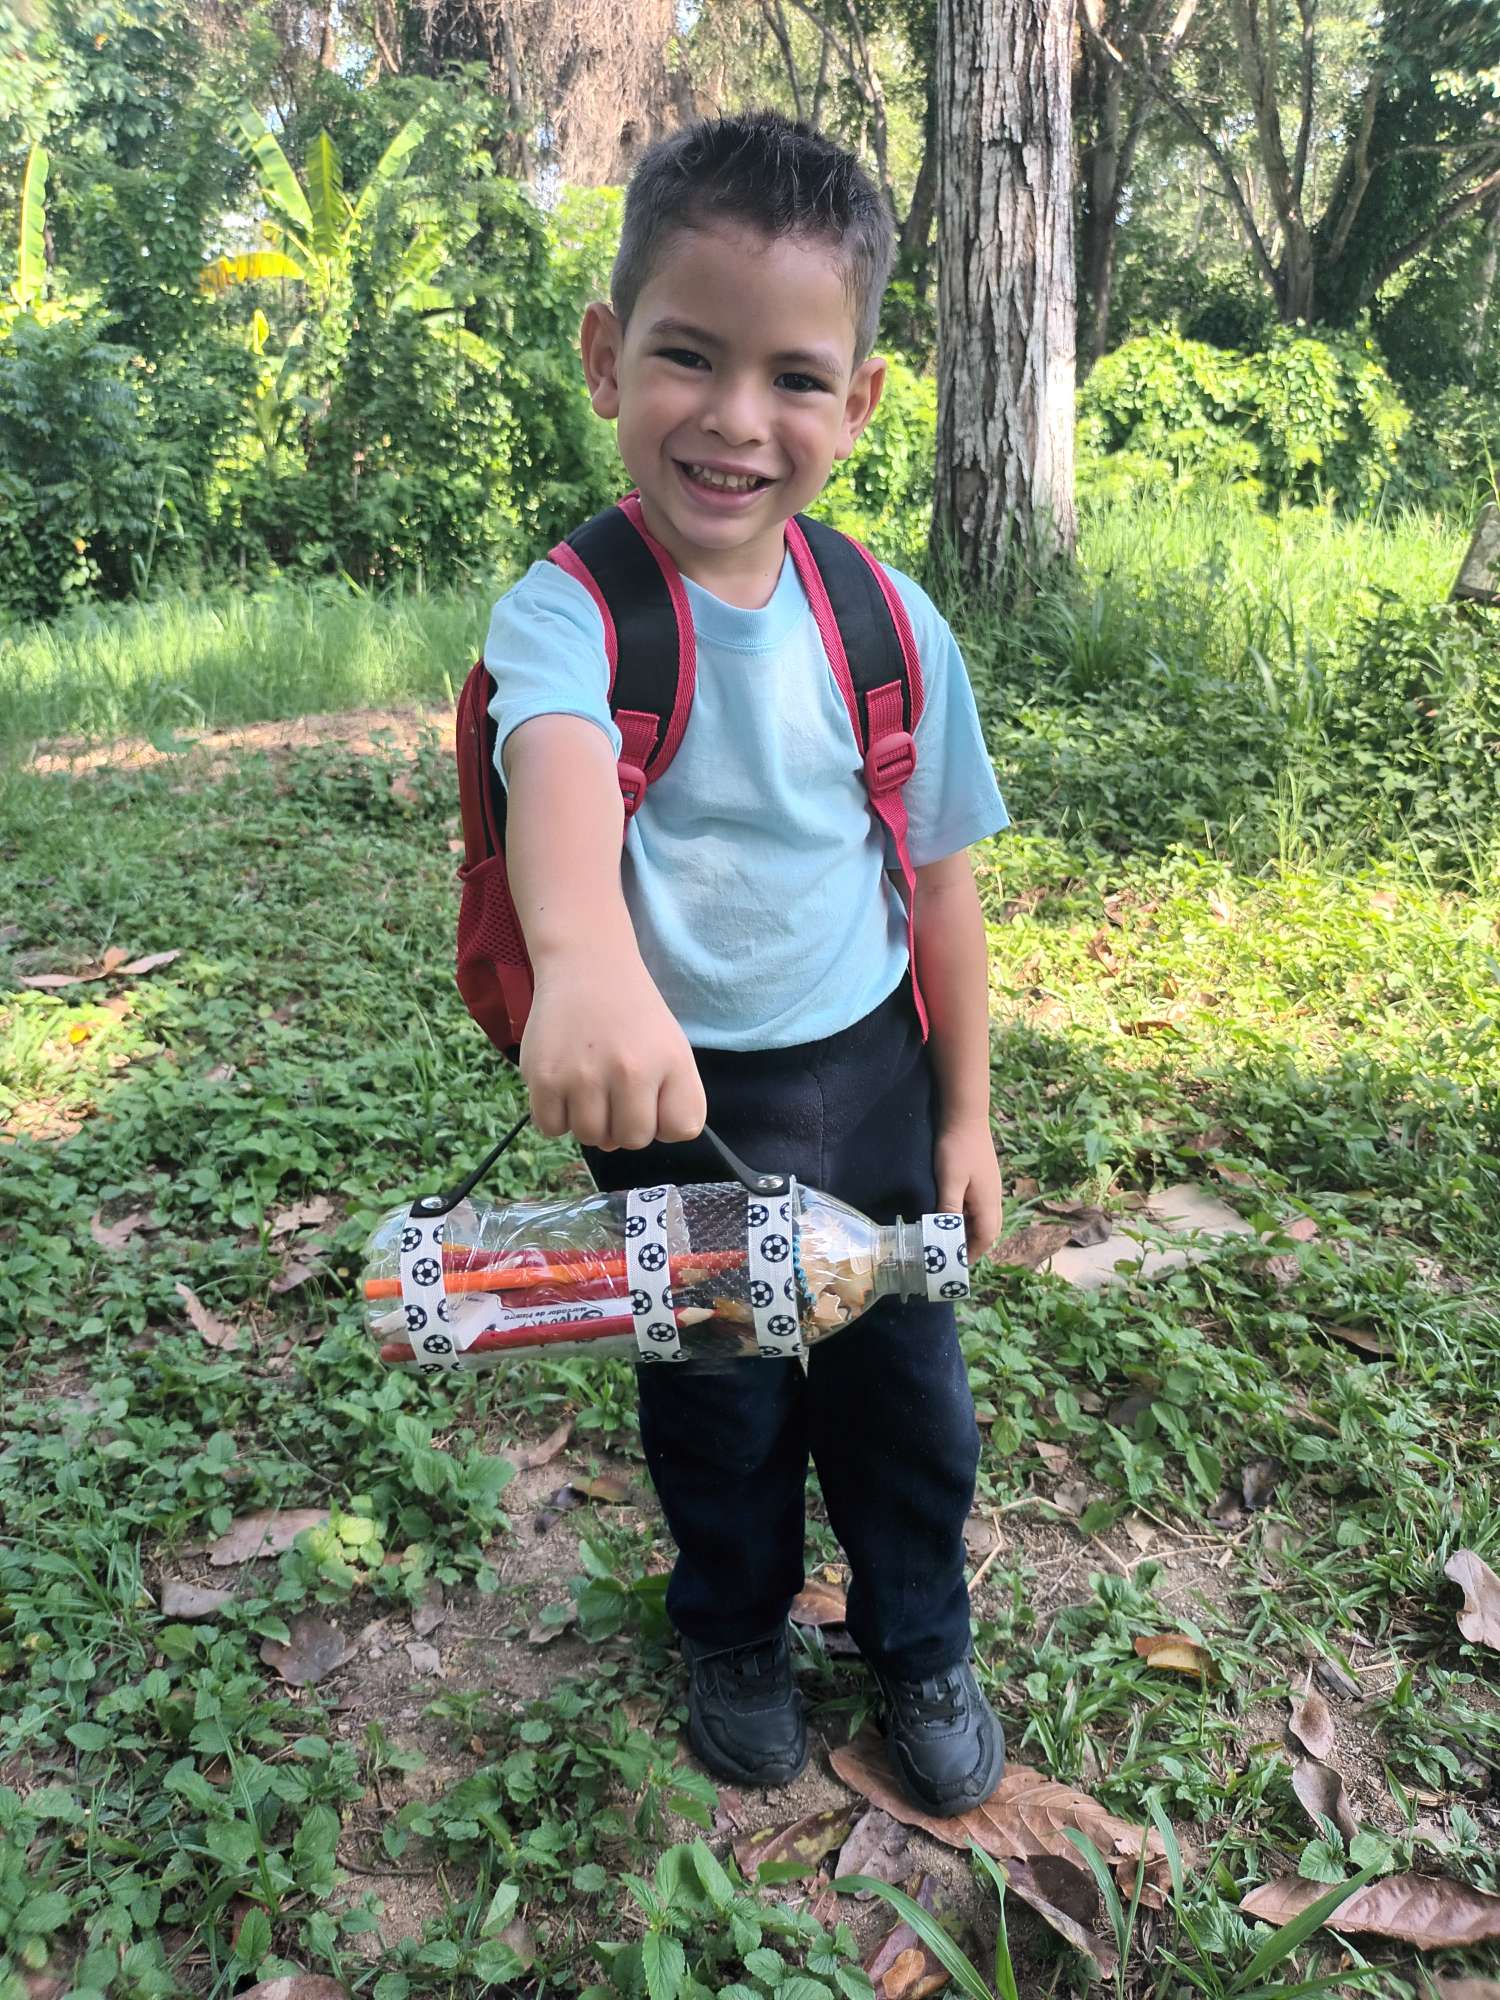
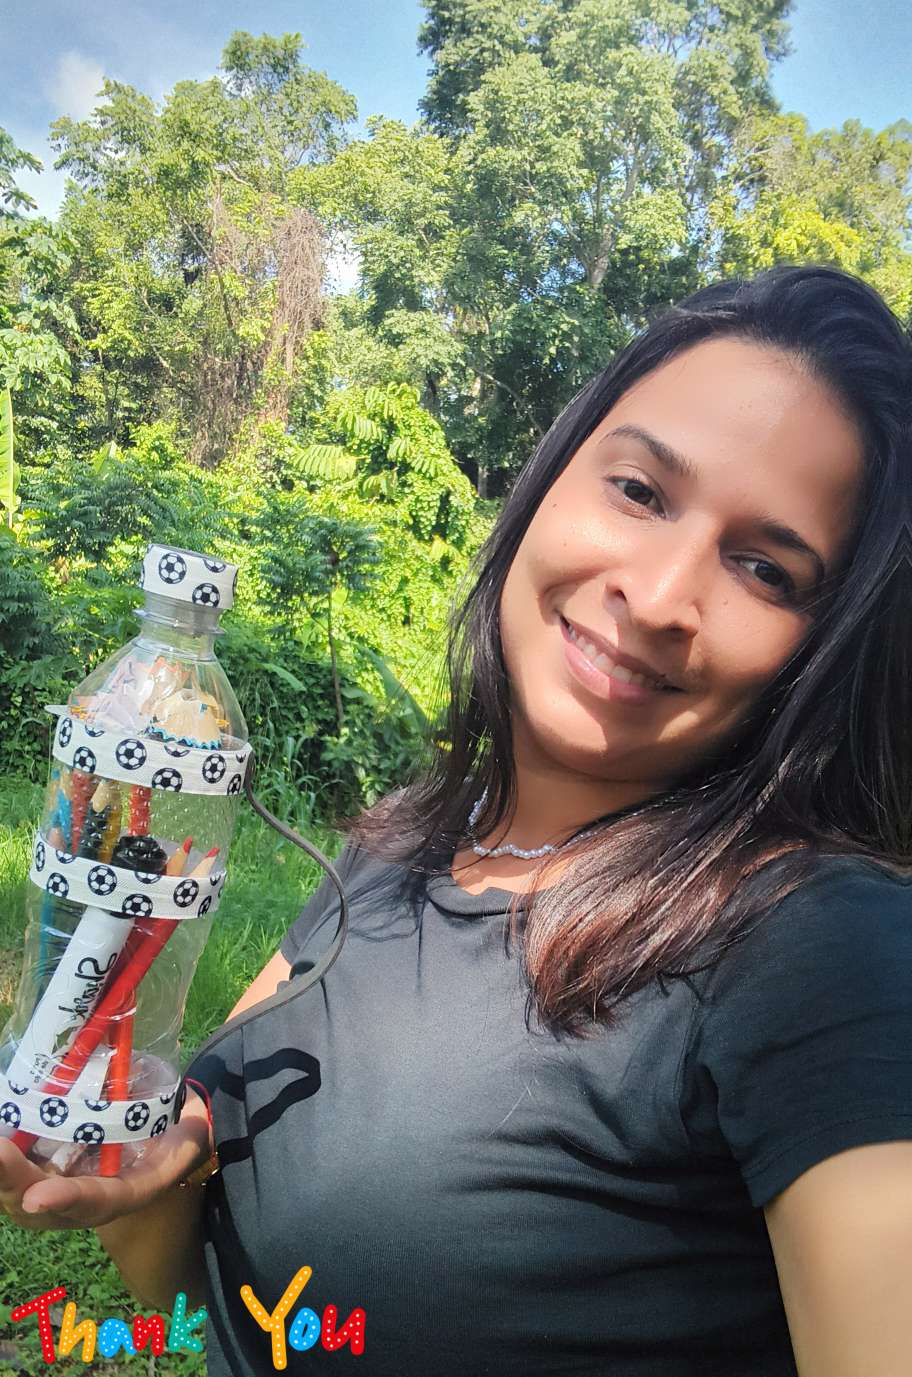
Y listo! Aqui esta el resultado de mi manualidad Una Bella Cartuchera Escolar Hecha con materiales de provecho ideal para los pequeños de la casa, aprovecho para invitar a mis amigos @desileal y a @leomontagg a participar en este concurso creativo.
And ready! Here is the result of my craft A Beautiful School Pencil Case Made with useful materials ideal for the little ones in the house, I take this opportunity to invite my friends @desileal and @leomontagg to participate in this creative contest.
Sacando provecho de las cosas u objetos que tengo en casa, siempre he dicho que el que guarda siempre tiene.
Taking advantage of the things or objects that I have at home, I have always said that he who saves always has.

GRACIAS POR VISITAR MI BLOG ❤️🖤🤍
Es un gusto compartir con ustedes mis ideas💡
It is a pleasure to share my ideas with you💡
Dios les bendiga 😇
God bless you 😇
Estuvo muy bueno me encantó el material usado muy original, tu presentación fue estupenda. Con alegría, entusiasmo y mucho orden.
Os dejé un comentario en el link de la comunidad. Un abrazo para ti, gracias por participar.
Hola muchas gracias🥰😘
Muy linda tu creación, saludos amiga . exitos!
Muchas gracias 🥰
@zarethg https://inleo.io/threads/view/hive-130560/re-leothreads-lkkywjrk