Español
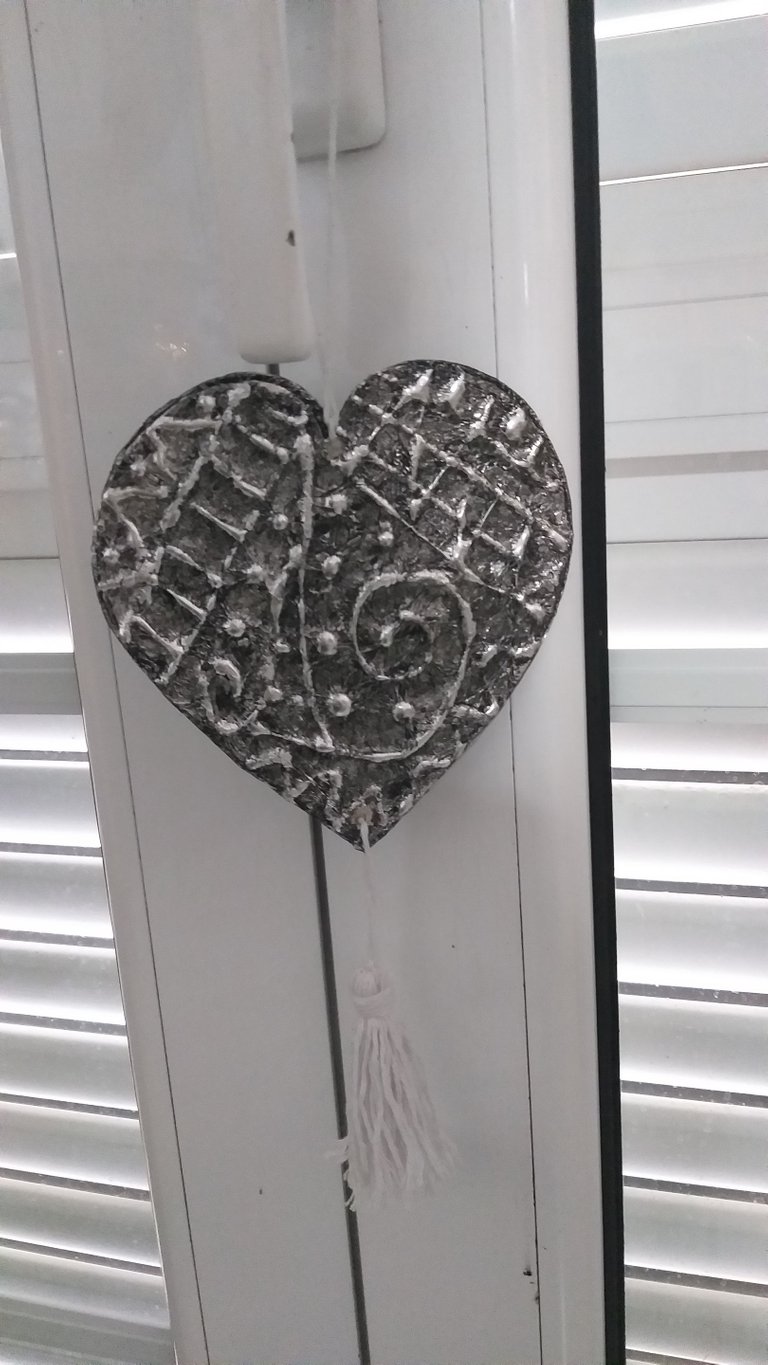
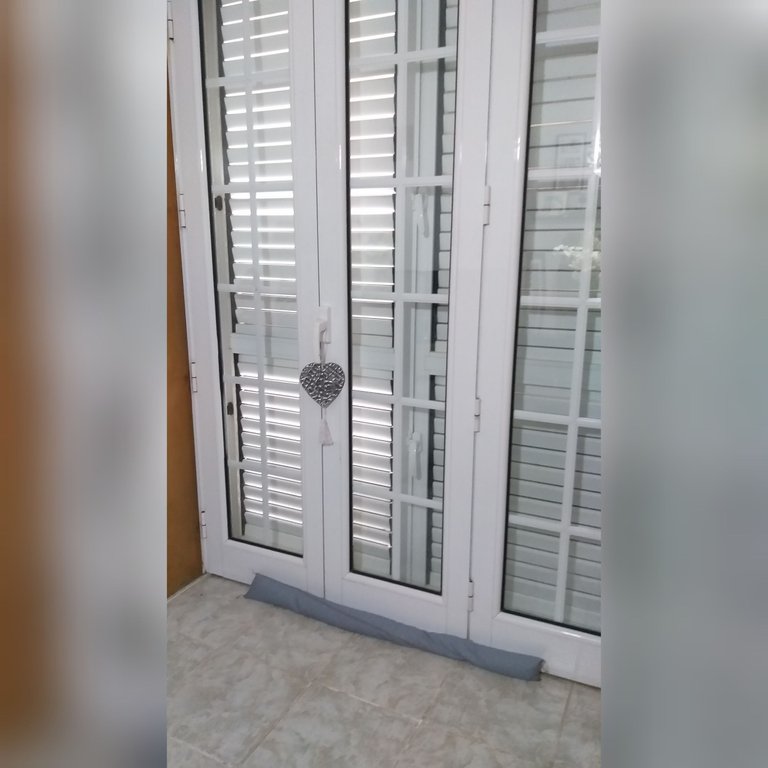
Reciban un gran saludo mis queridos amigos de ésta gran colmena Hive y todas los miembros de las distintas comunidades que la integran, que tengan un día lleno de Bendiciones y éxitos en sus creaciones. Quiero enseñarles a reciclar el cartón de una manera diferente y con un resultado muy lindo, vamos hacer un adorno para colgar en las puertas y también sirve para decorar cualquier caja, sobre entre otros.
El trabajo de hoy es muy fácil,práctico y bonito, podrán ver como el resultado queda como la técnica del metal o plata, así aprovechamos a reciclar el cartón.Quiero agradecer a todas las personas que dejan un lindo comentario y me apoyan en mis trabajos que los hago con mucho amor❤ al igual agradezco a las distintas comunidades que también me apoyan. Los invito a que me acompañen a realizar esta hermosa manualidad.
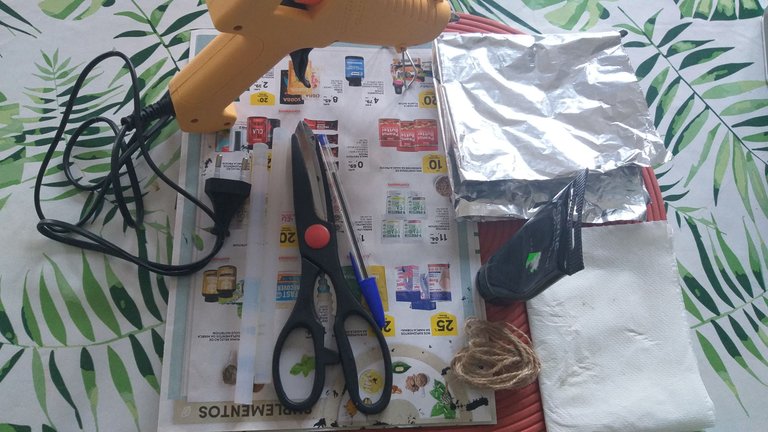
Los materiales que utilizaremos en este colgante para la puerta o adorno decorativo son:
Cartón fino ( caja de cereal)
Papel de aluminio no muy fino
Bolígrafo o marcador
Tijera
Pistola de silicona y barras de silicona
Hilo de lienzo o el de su preferencia
Mecatillo 60 cm
Un sobre de cartón
Papel contact
Servilletas o papel higiénico
Revista vieja
Pegamento universal
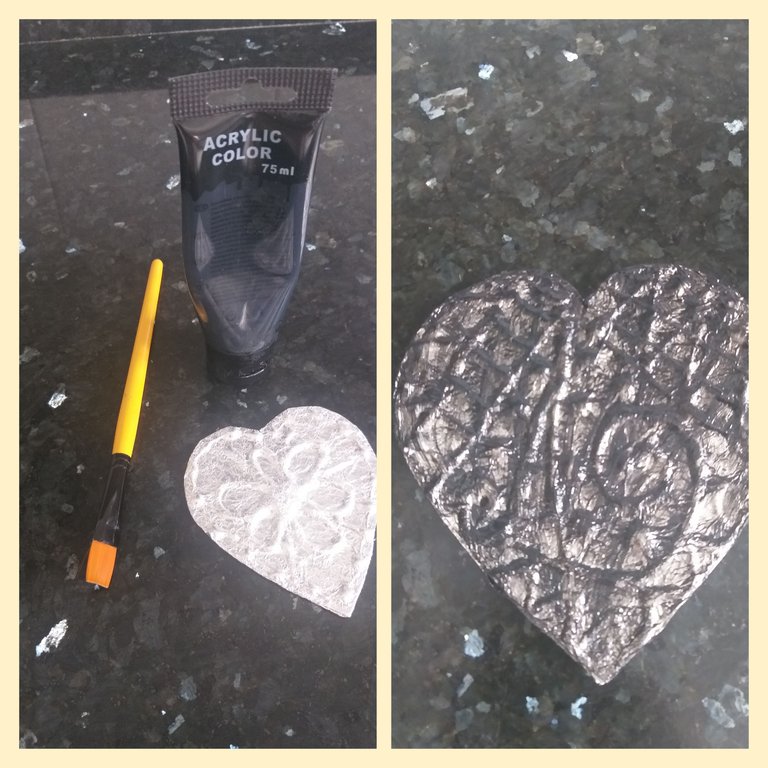
Pintura acrílica de color negro
Pincel grueso o brocha fina
Pasos para realizar el adorno decorativo, colgante para las puertas:
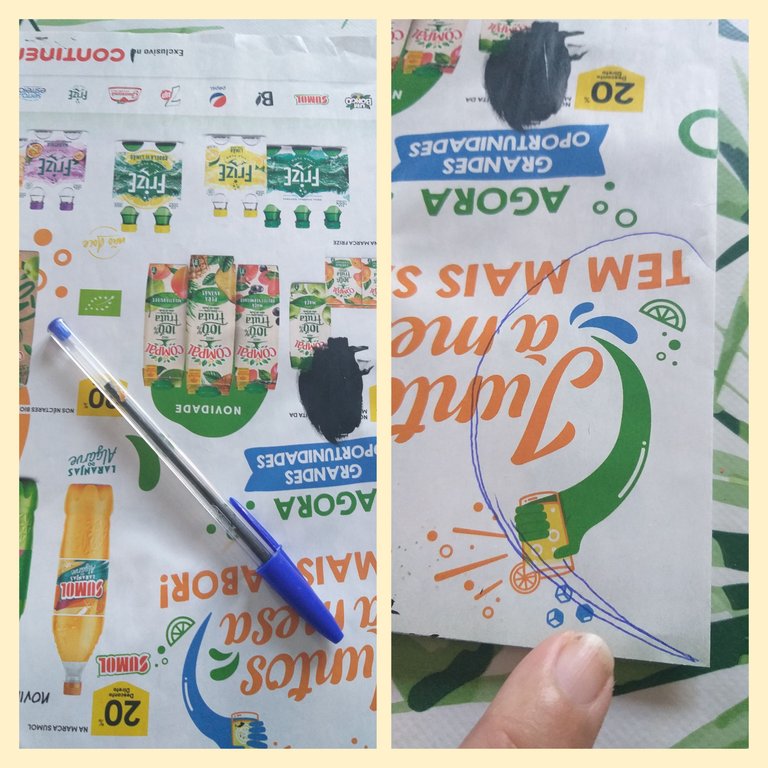
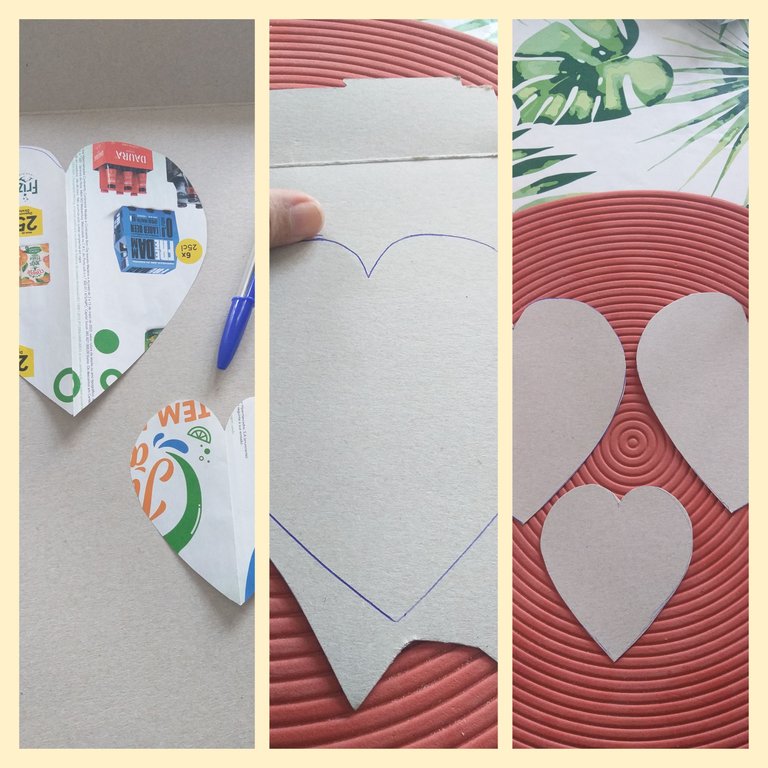
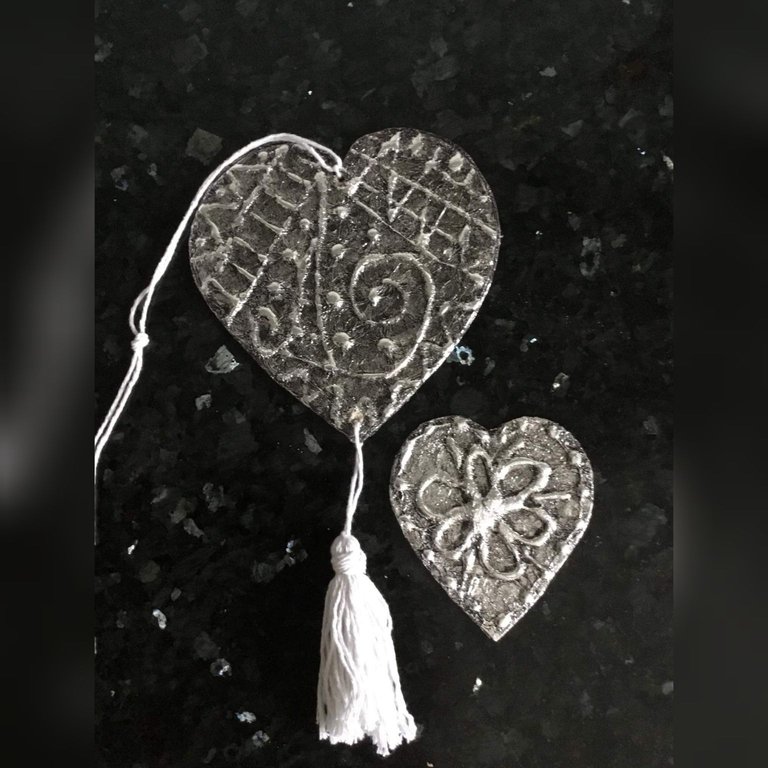
1👣. Lo primero que debemos hacer es el diseño que vamos a utilizar; en éste caso haremos dos corazones una más grande que él otro y para esto utilizaremos una hoja de revista vieja para dibujar el corazón grande y el pequeño y luego recortamos ambos.
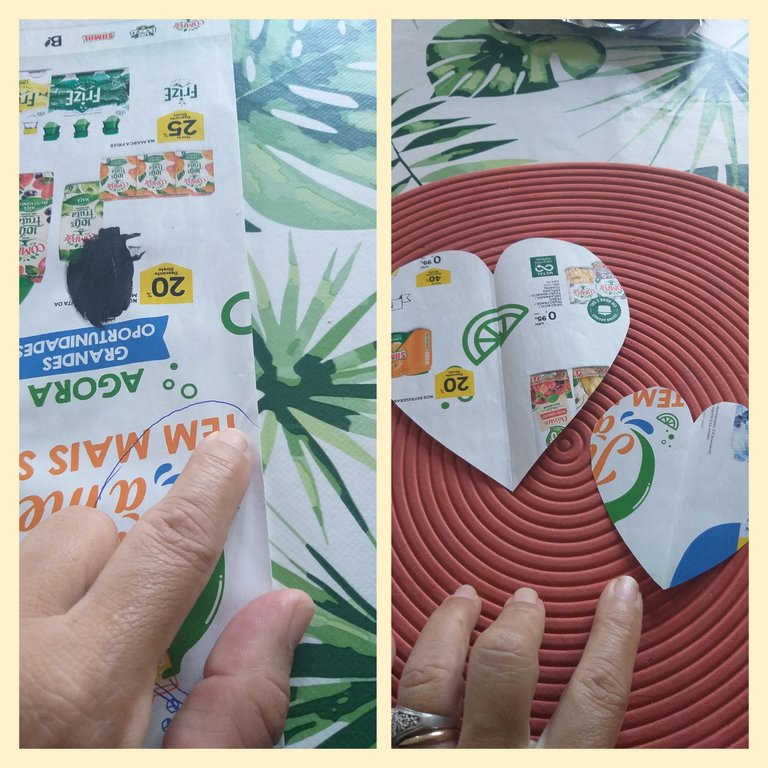
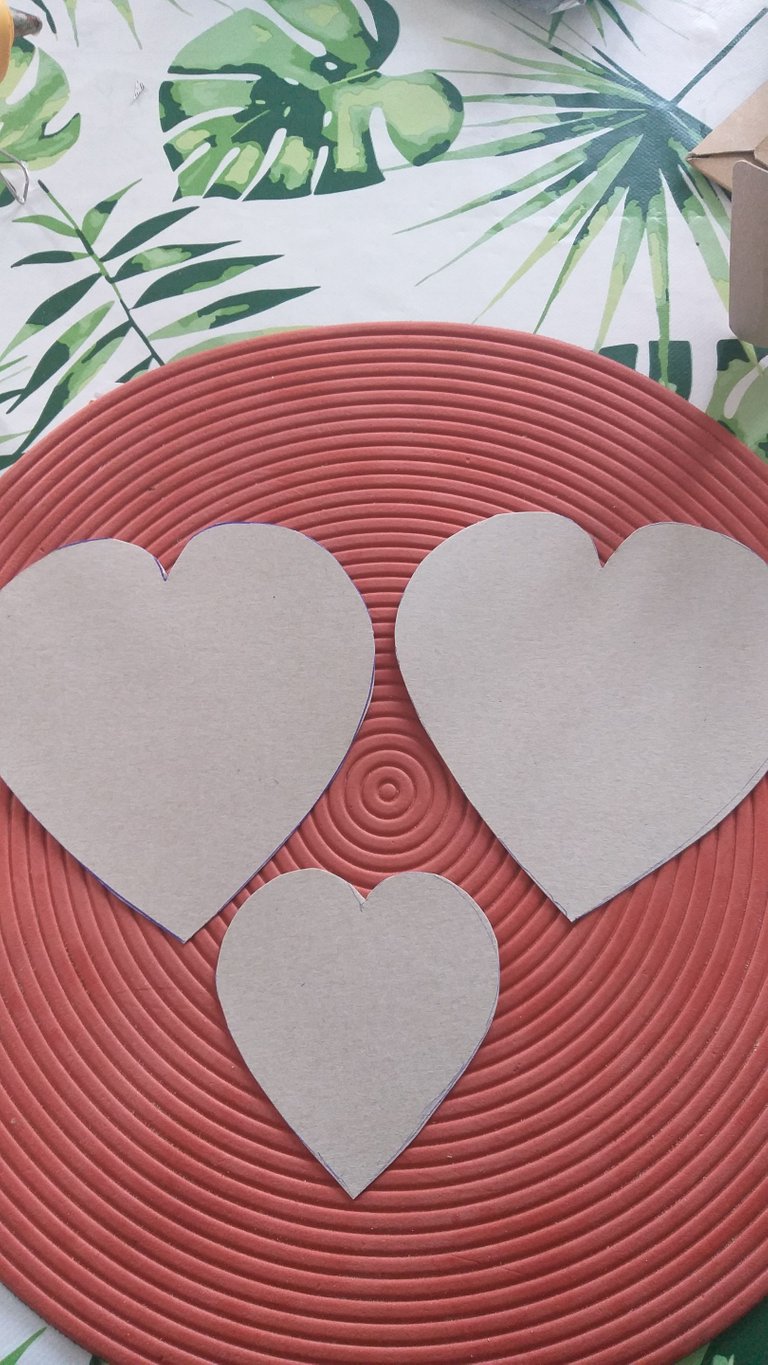
2👣. Luego que tengamos recortado los dos moldes de corazón vamos a transferirlos al cartón( caja de cereal) y luego los recortamos, para el corazón grande tendremos que hacer dos piezas iguales. Fíjense en las imágenes.
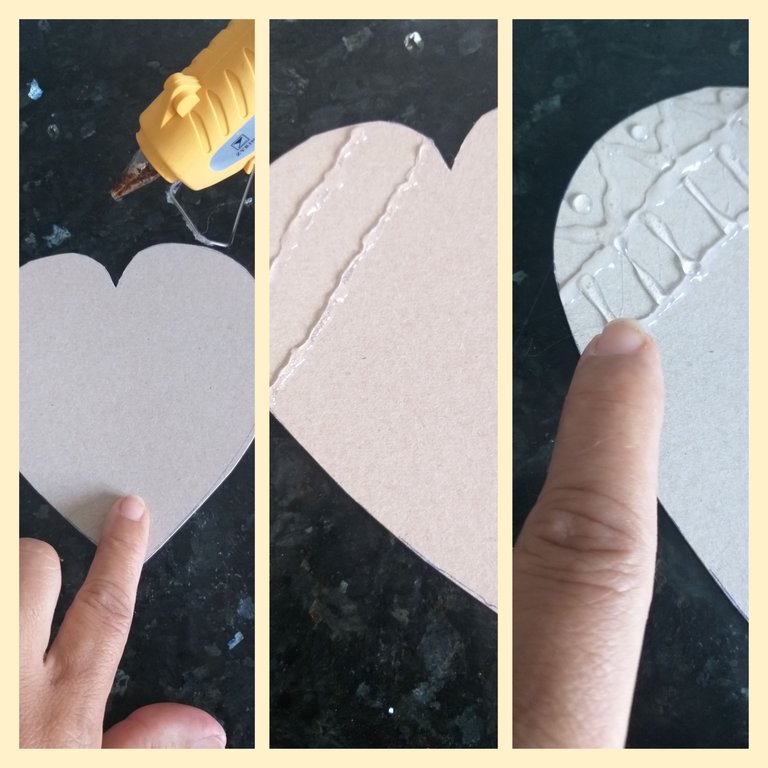
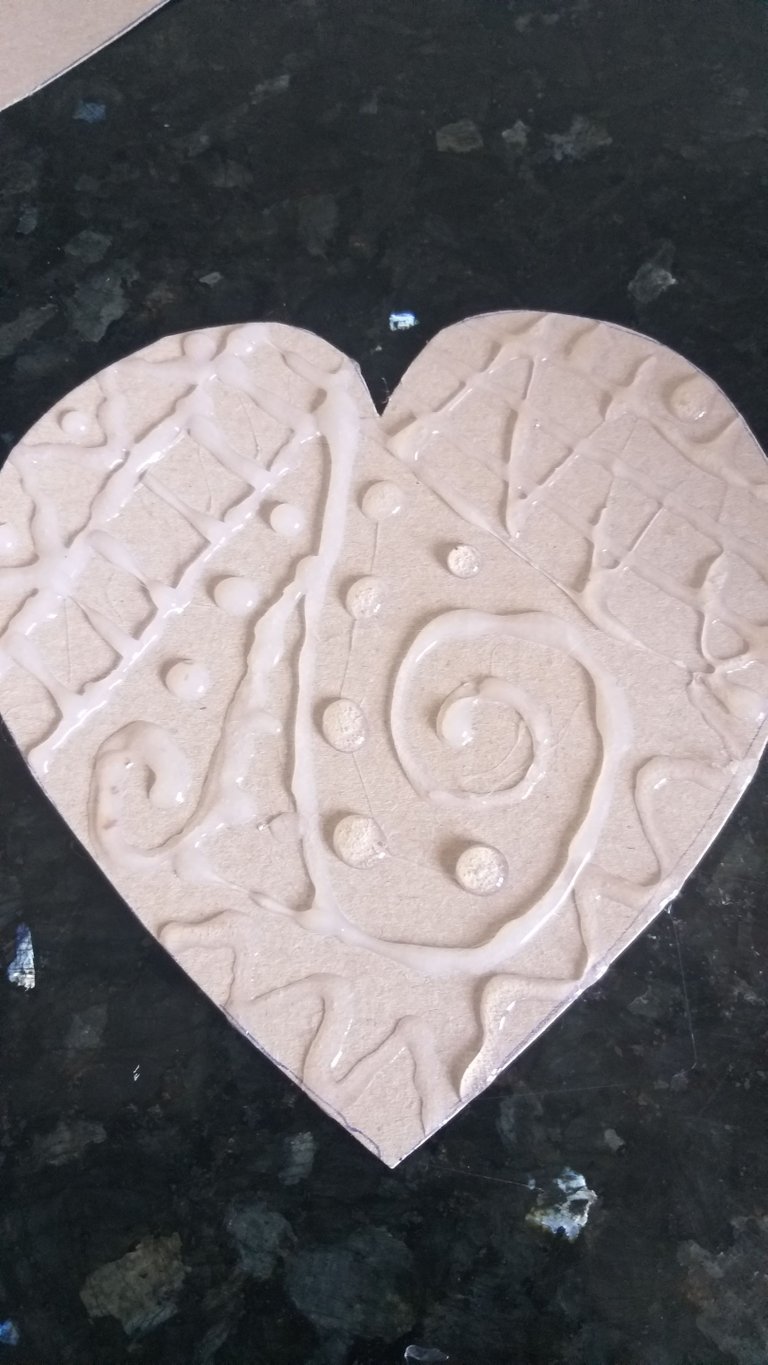
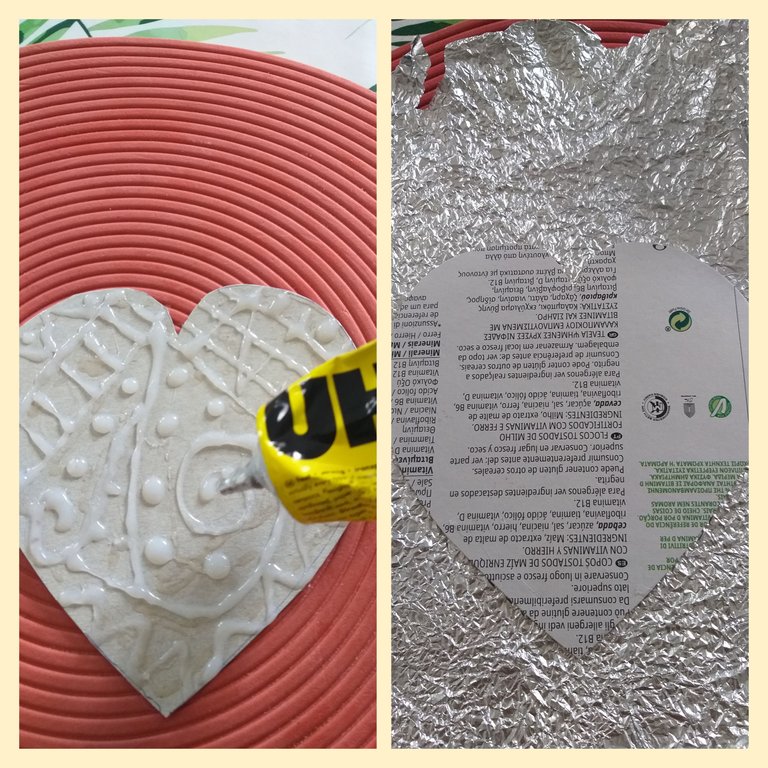
3👣. Colocamos a calentar la pistola de silicona caliente y cuando esté bien caliente procedemos a realizar un diseño al corazón; como pueden observar en las imágenes realicé rayas, puntos, espirales; ya que me gusta lo abstracto, pero el diseño ustedes lo hacen a su gusto. El silicon debe quedar un poquito grueso en caso que le quede fino en algunas partes coloque otra vez silicon por encima.
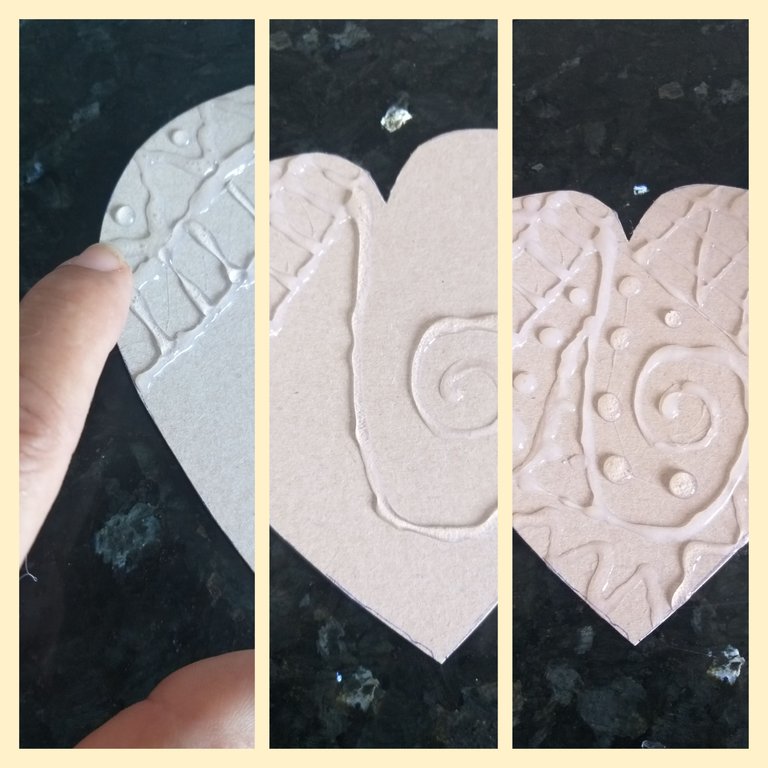
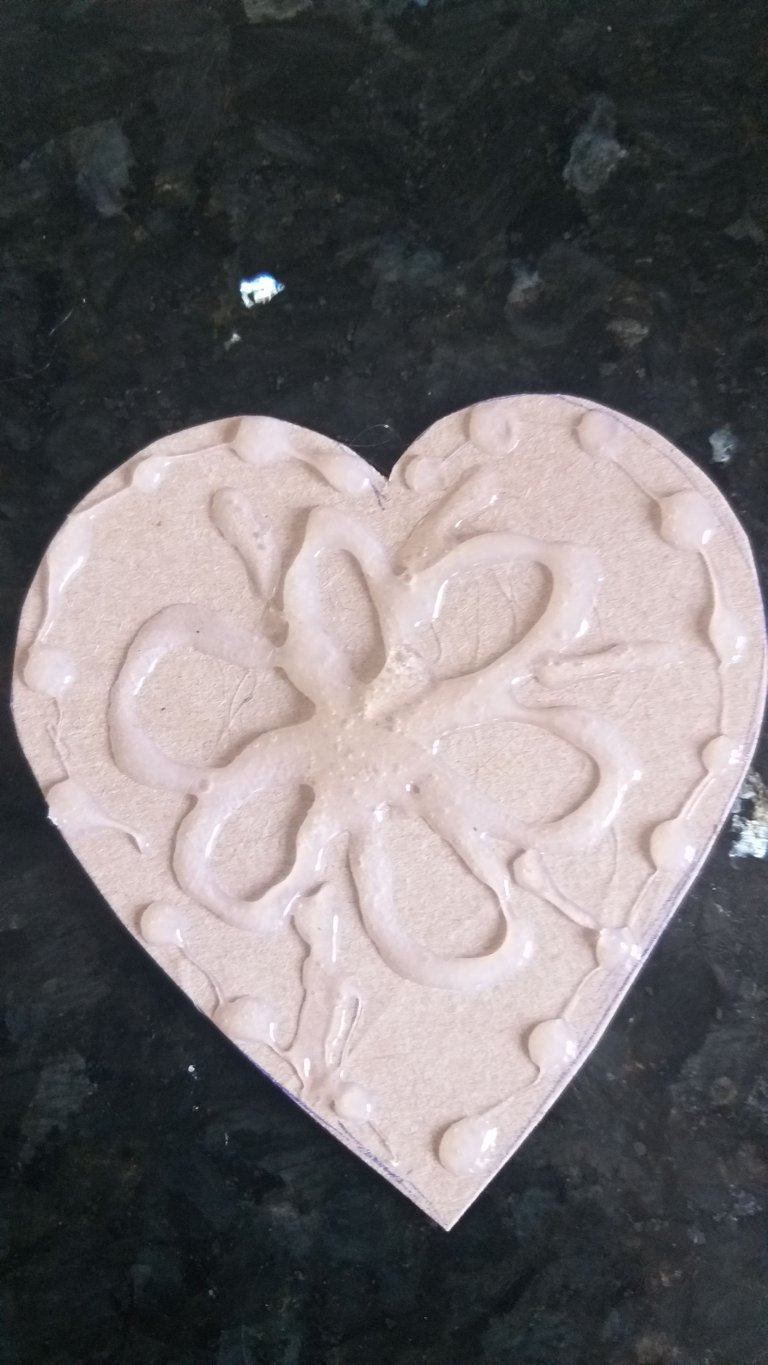
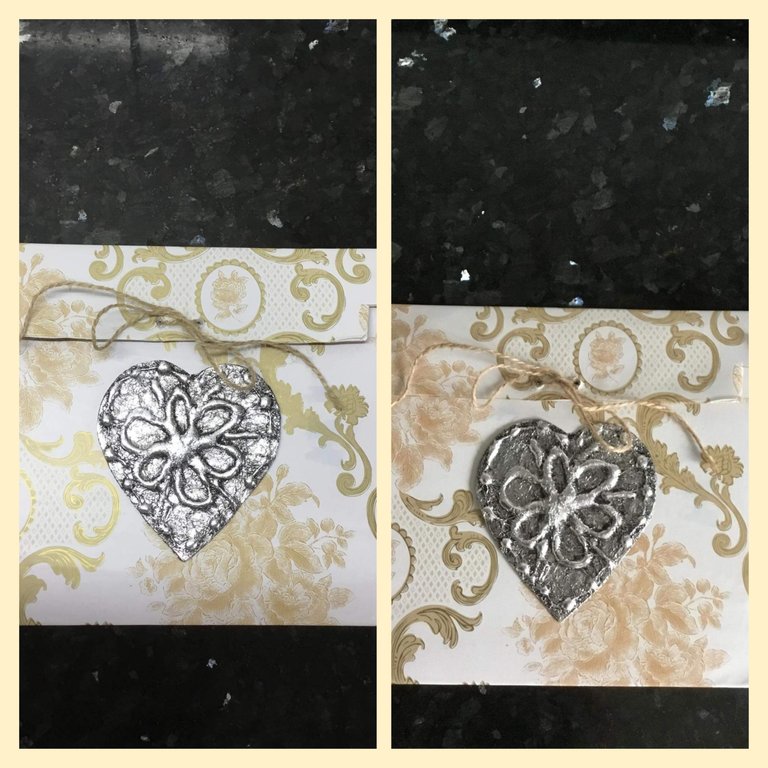
4👣. Al igual que hicimos con el corazón grande también le realizamos un diseño al corazón pequeño acá como pueden ver se le realizó una flor con otros detalles; rayas y punto.
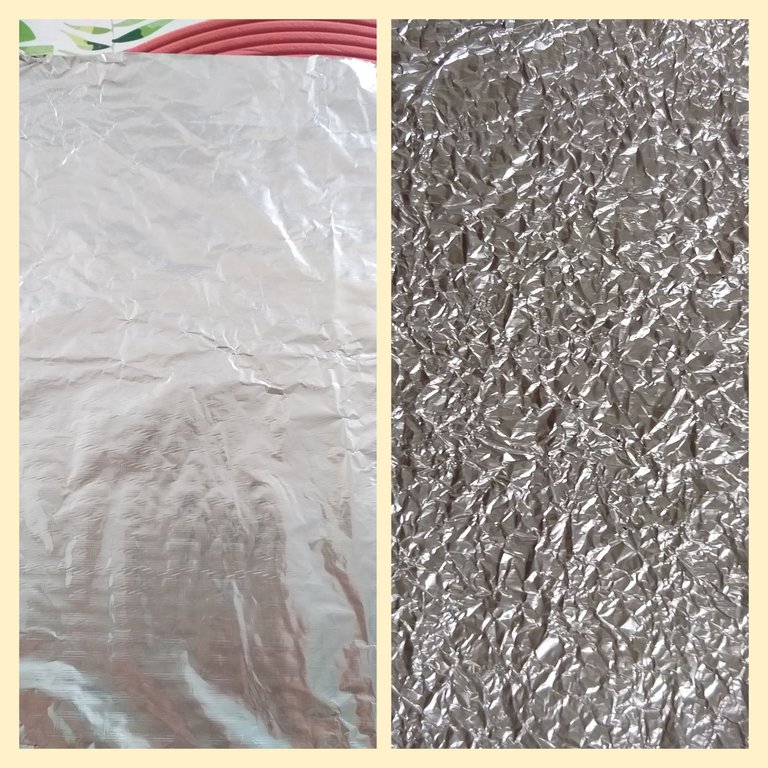
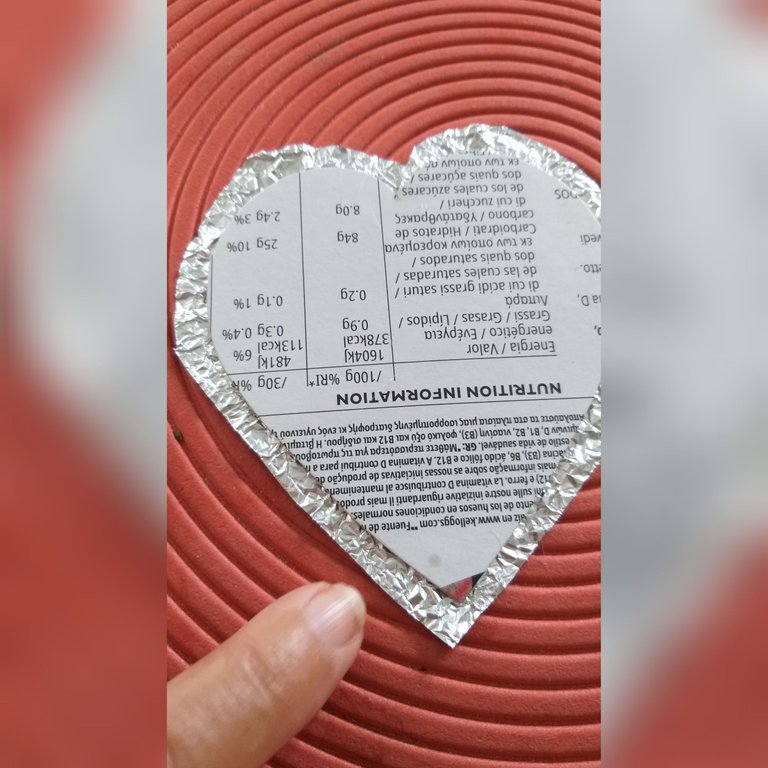
5👣. En este paso vamos a recortar un pedazo de papel de aluminio más grande que la pieza y luego arrugamos al papel de aluminio y por último abrimos de nuevo, hágalo con cuidado para que no se rompa.
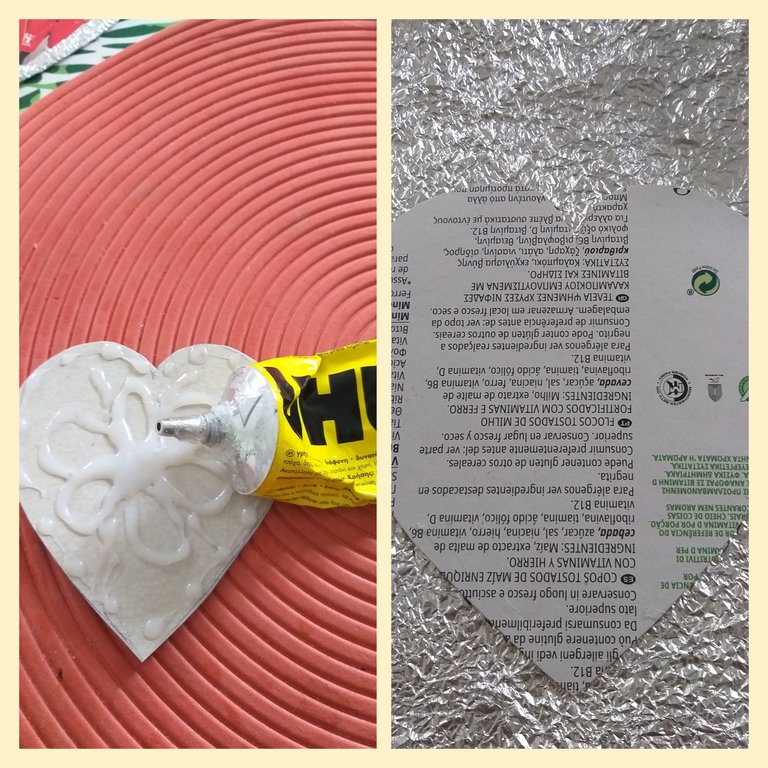
6👣. Ya que tengamos todos los corazones con el diseño con el silicon caliente, con el pegamento universal le colocamos por encima de todo el corazón y alrededor de las orillas y lo pegamos al papel de aluminio que arrugamos.
7👣. Dejamos secar unos minutos y luego con la tijera recortamos por todo alrededor del corazón dejando dos centímetros del papel de aluminio y después colocamos pegamento por el otro lado y doblamos el papel de aluminio que sobró y lo pegamos.
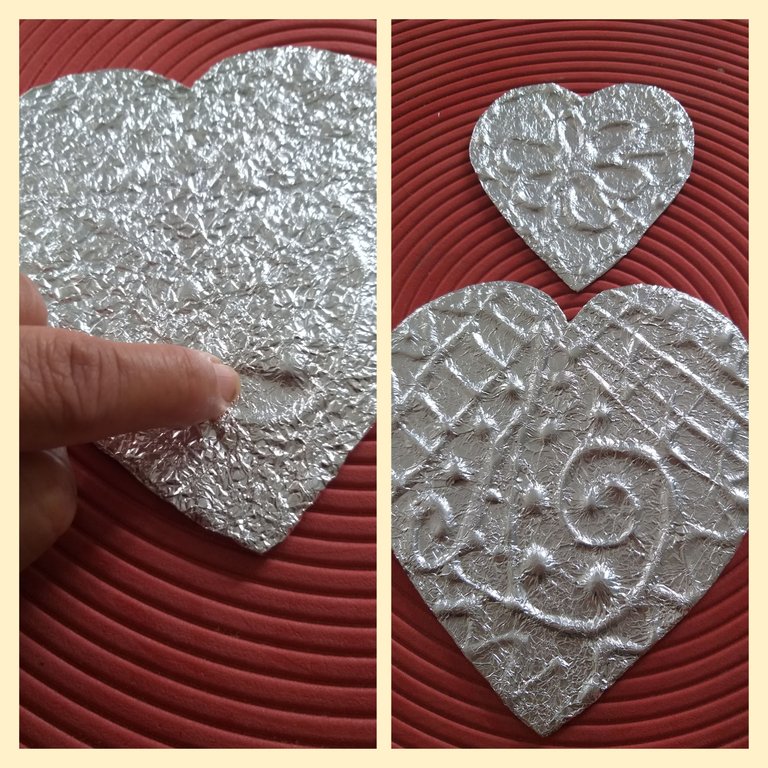
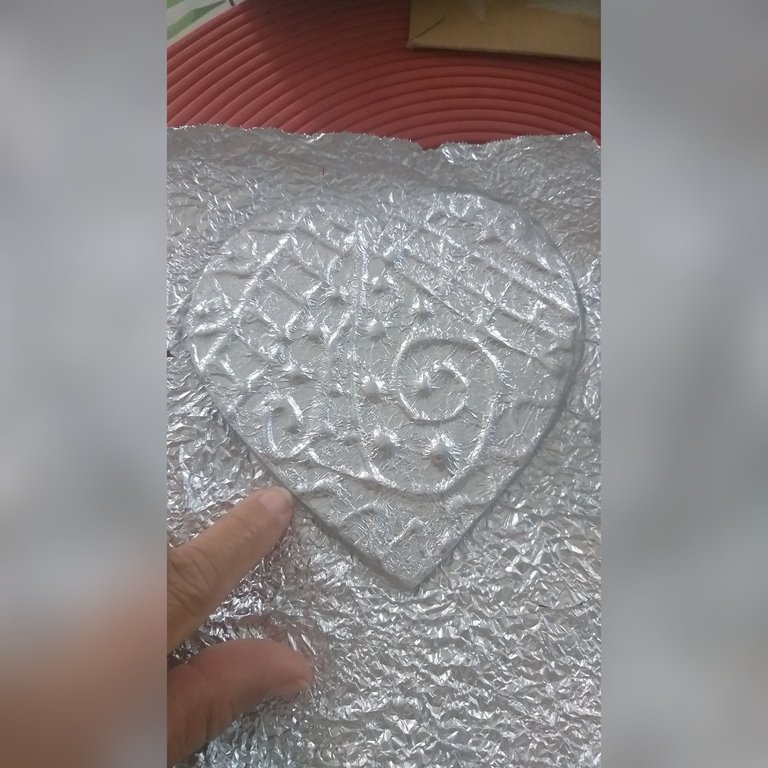
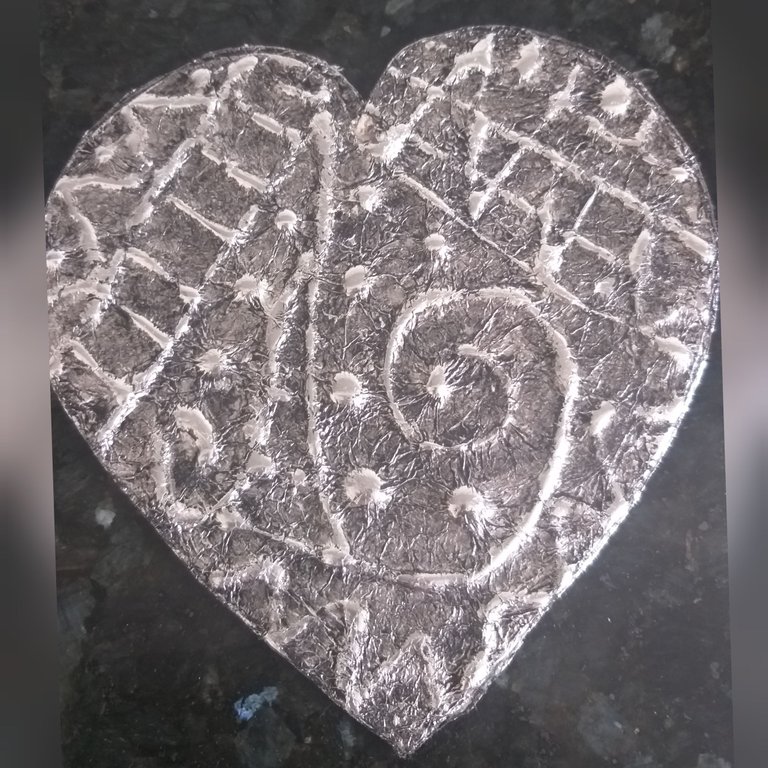
8👣. En este paso con los dedos vamos a darle masajes por toda la pieza para que el diseño que hicimos con el silicon caliente resalte. El proceso lo realiza en las dos piezas.
9👣. Luego que nuestros diseños resalten que es la idea; colocamos pegamento universal por la parte de atrás y al igual le colocamos papel de aluminio arrugado. Solamente coloque papel de aluminio al corazón grande.
10👣. En este siguiente paso con la pintura acrílica de color negro y el pincel o brocha pintamos ambas piezas dejando entre las ranuras más pintura; después retiramos con el papel higiénico o servilleta la pintura hágalo con cuidado.
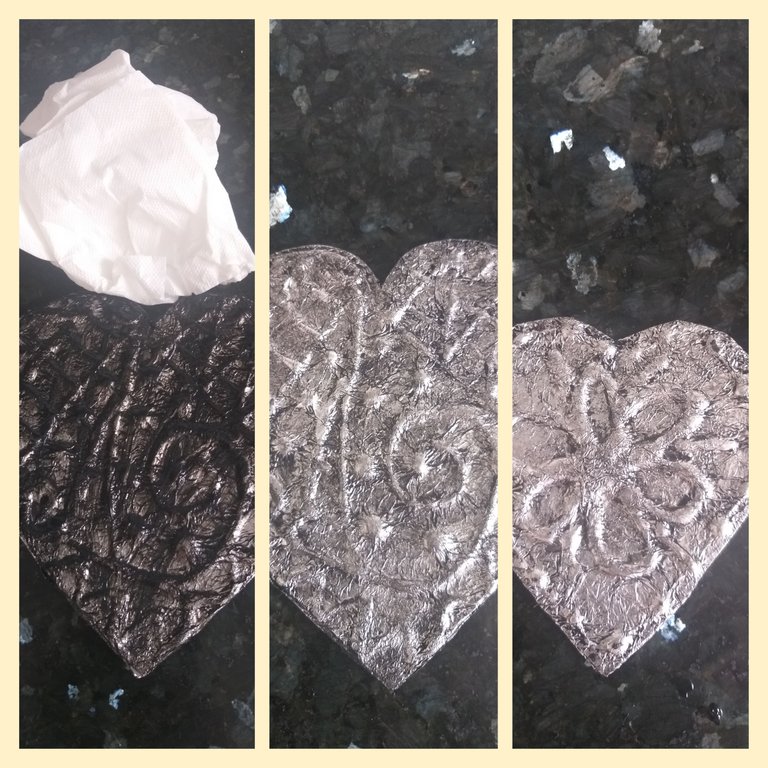
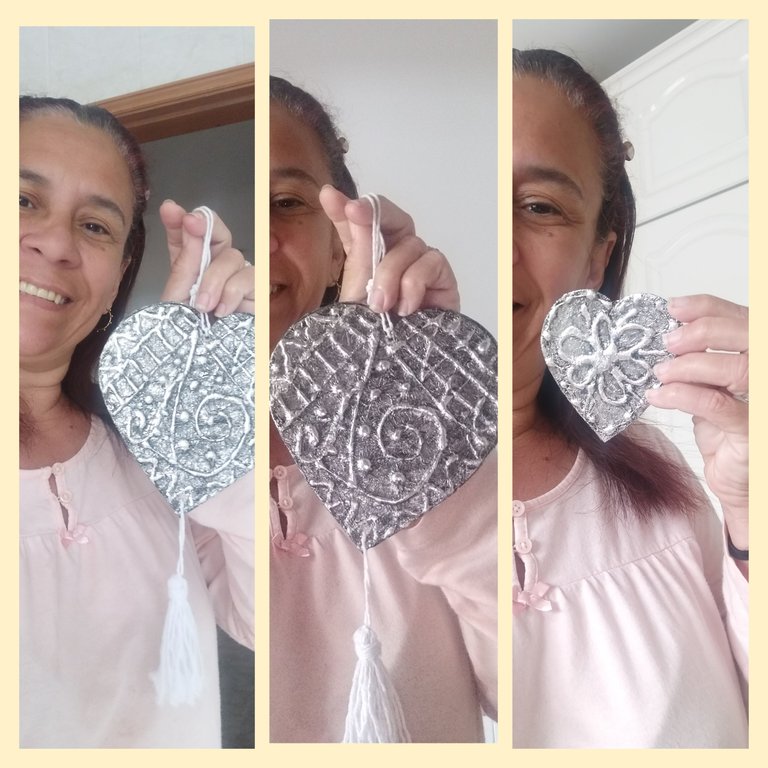
11👣. Si gusta que la pieza de corazón le quede más oscura deberá repetir el mismo procedimiento y luego pasar con cuidado por todo lo que resalta del silicon, como si tuviera puliendo la pieza y así quedará como si fuese metal.
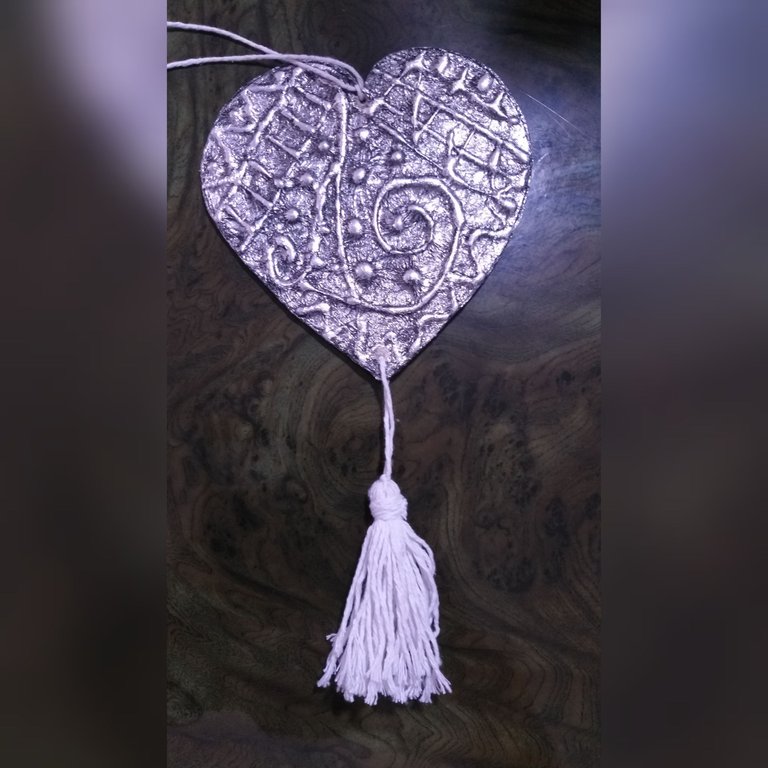
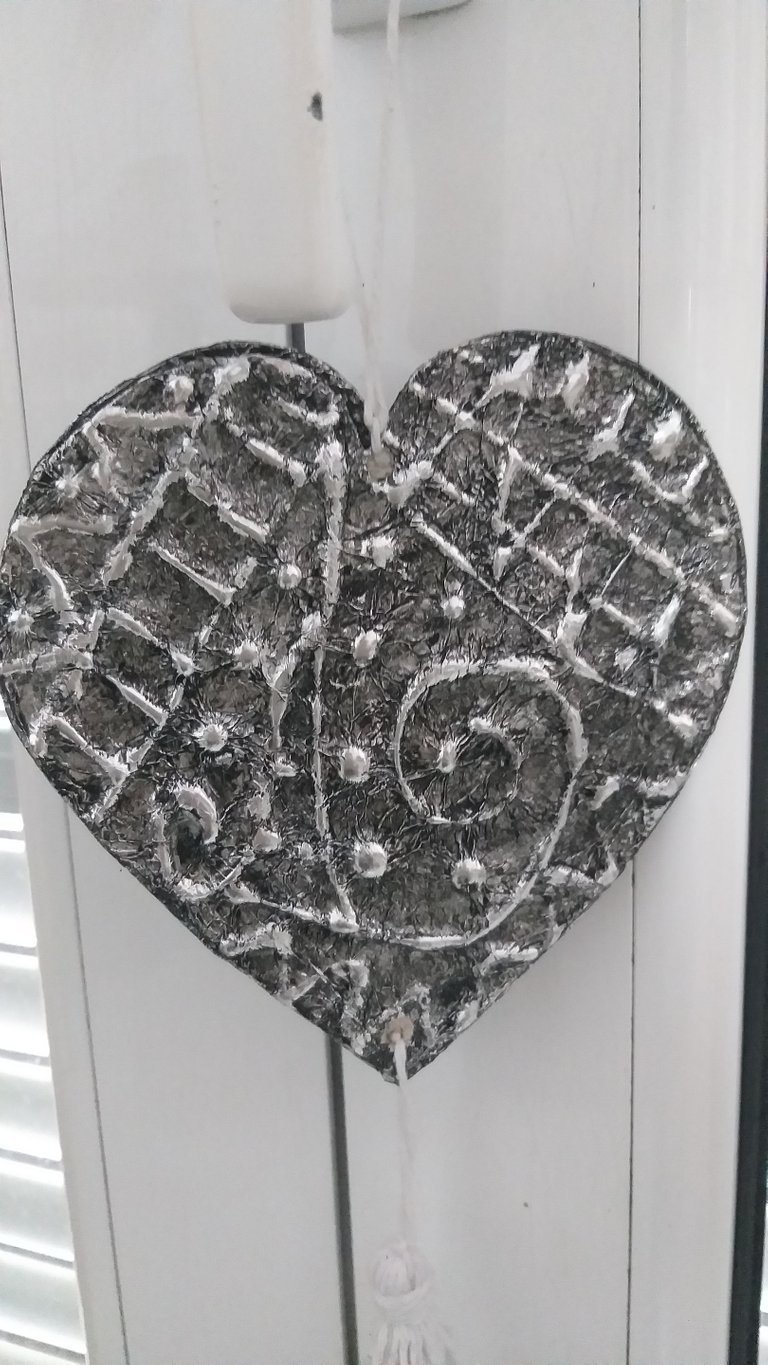
12👣. En éste último paso vamos a realizar un orificio con la punta de la tijera en la parte de encima del medio del corazón y en la punta de abajo; esto va a servir para colocar la cinta,hilo grueso o cordón y el pompón. El pompón lo mostre en otro tutorial como hacerlos.
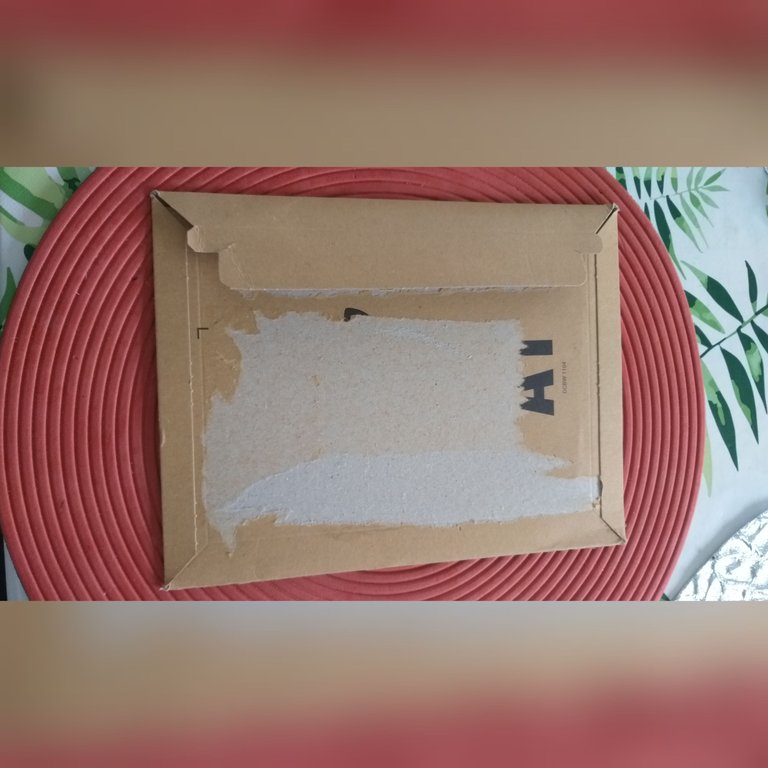
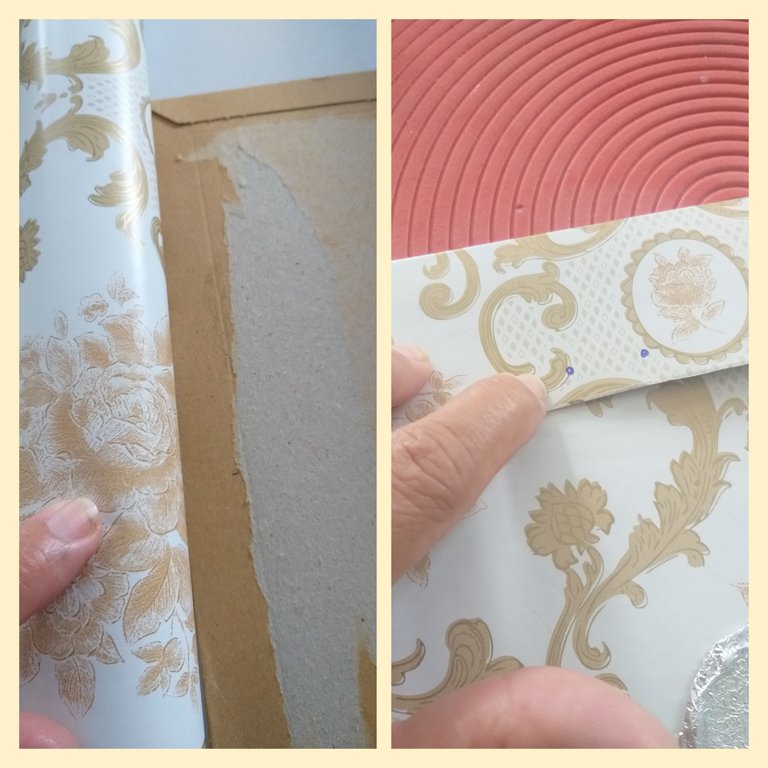
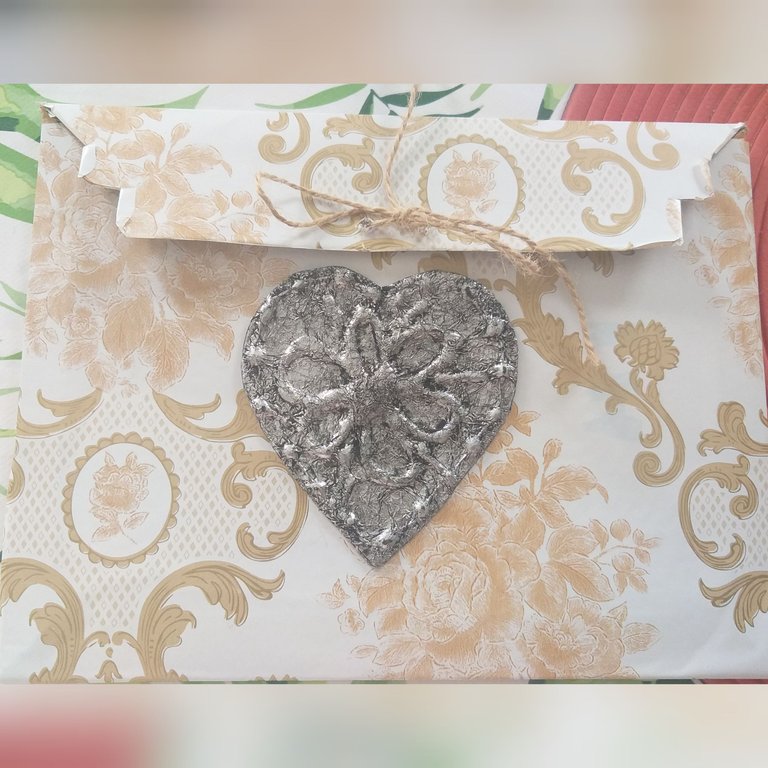
13👣. El corazón más pequeño lo utilicé para decorar un sobre de correo, el cual lo forre con papel contact y le realicé dos orificios donde le coloqué el mecatillo que servirá para cerrar y el corazón lo pegué en el medio. Este sobre además que lo estamos reciclando lo podrá usar para regalar o para guardar los recibos. El sobre lo utilizaré para guardar mis recibos de pagos😉.
Que les pareció la propuesta que les traje hoy; realizando esta manualidad se me ocurrió aplicar ésta técnica de otra manera; luego se lo mostraré en otro tutorial. Espero que le haya gustado y le sirva para que puedan decorar sus puertas o cualquier caja, sobre o cualquier objeto. Feliz y Bendecido día
Las fotos fueron tomadas por mi teléfono móvil Samsung Galaxy A6 y organizadas por la aplicación GridArt.
English
Receive a big greeting my dear friends of this great Hive hive and all the members of the different communities that make it up, may you have a day full of Blessings and success in your creations. I want to teach you to recycle cardboard in a different way and with a very nice result, we are going to make an ornament to hang on the doors and it can also be used to decorate any box, among others.
Today's work is very easy, practical and beautiful, you can see how the result is like the technique of metal or silver, so we take advantage of recycling cardboard. I want to thank all the people who leave a nice comment and support me in my work I do them with a lot of love❤ I also thank the different communities that also support me. I invite you to join me in making this beautiful craft.
The materials that we will use in this door hanger or decorative ornament are:
Thin cardboard (cereal box)
Aluminum foil not very thin
Pen or marker
Scissors
Silicone gun and silicone bars
Canvas thread or the one of your preference
String 60 cm
A cardboard envelope
contact paper
Napkins or toilet paper
Old magazine
*Universal glue
Black acrylic paint
Thick brush or fine brush
Steps to make the decorative ornament, hanging for the doors:
1👣. The first thing we must do is the design that we are going to use; In this case we will make two hearts, one bigger than the other and for this we will use an old magazine sheet to draw the big heart and the small one and then we will cut out both.
2👣. After we have cut out the two heart molds we are going to transfer them to the cardboard (cereal box) and then we cut them out, for the big heart we will have to make two equal pieces. Look at the images.
3👣. We place the hot silicone gun to heat and when it is very hot we proceed to make a design to the heart; As you can see in the images I made stripes, dots, spirals; since I like the abstract, but you do the design to your liking. The silicone should be a little thick, in case it is thin in some parts, place the silicone on top again.
4👣. As we did with the big heart, we also made a design for the small heart here, as you can see, a flower was made with other details; stripes and dot.
5👣. In this step we are going to cut a piece of aluminum foil larger than the piece and then we will crumple the aluminum foil and finally we will open it again, do it carefully so that it does not break.
6👣. Once we have all the hearts with the design with the hot silicone, with the universal glue we place it above the entire heart and around the edges and stick it to the aluminum foil that we wrinkled.
7👣. Let it dry for a few minutes and then with the scissors we cut all around the heart leaving two centimeters of aluminum foil and then we put glue on the other side and fold the remaining aluminum foil and glue it.
8👣. In this step, we are going to massage the entire piece with our fingers so that the design we made with the hot silicone stands out. The process is carried out in both pieces.
9👣. After our designs highlight what the idea is; We put universal glue on the back and we also put wrinkled aluminum foil on it. Just put foil on the big heart.
10👣. In this next step with the black acrylic paint and the brush we paint both pieces leaving more paint between the slots; Then we remove the paint with toilet paper or a napkin. Do it carefully.
11👣. If you like the heart piece to be darker, you should repeat the same procedure and then carefully go through everything that stands out from the silicone, as if you were polishing the piece and it will look like metal.
12👣. In this last step we are going to make a hole with the tip of the scissors in the upper part of the middle of the heart and in the lower tip; This will serve to place the ribbon, thick thread or cord and the pompom. I showed the pompom in another tutorial how to make them.
13👣. I used the smallest heart to decorate a mail envelope, which I lined with contact paper and made two holes where I placed the mecatillo that will serve to close and I glued the heart in the middle. This envelope, in addition to being recycled, can be used as a gift or to store receipts. I will use the envelope to store my payment receipts😉.
What did you think of the proposal that I brought you today; Making this craft, it occurred to me to apply this technique in another way; I'll show it to you later in another tutorial. I hope you liked it and it helps you to decorate your doors or any box, envelope or any object. Happy and blessed day
The photos were taken by my Samsung Galaxy A6 mobile phone and organized by the GridArt app.
Siempre yo aquí admirando tu creatividad amiga @zullyarte. Te quedaron muy bonitos. Me imagino una pieza así miniatura, para unos zarcillos y medallón, debe quedar genial.
Saludos y bendiciones...💖
Muy buena técnica....me gustó mucho... realmente lo voy a poner en práctica 😊.
Gracias por compartir.
🎆🎇🎉🎊🌧️💐✨🌾🌱🌹🌙🌿🍃🥀⚡🌺☘️🍀🌈🌷⭐🪴🌵🌸🌟💮🌴🌳💫☀️💮☔🌲🌳🌍🌌🌠☄️🏵️🐝🌻🌼🍄🐞🦋💙☕💜🍍🎆🎇🎉🎊