Español
Saludos mi gente bella y creativa de esta gran comunidad de Hive; que el padre todopoderoso los bendiga dándole mucha salud y éxitos en sus metas👏💯. Me siento grata de pertenecer a esta maravillosa colmena y conocer personas humildes y con unas cualidades y aptitudes diferentes que con poca cosa construyen maravillas, son unos verdaderos artistas.
No está demás decirle que procuro sacarle provecho al máximo a los objetos; no es por ser tacaña☺😋, sino que le doy valor a cada cosa que tengo. Así como también tenemos que aprovechar al máximo a esas personas que pasan por nuestras vidas y quererlas y apreciarlas al máximo. Yo voy guardando las velas de aniversario como las velas o velones que uso en casa. Hoy les traigo tres opciones para reciclar o reutilizar esas velas y también como teñirlas. Acompañenme a hacer velas de varios colores y unos lindos ramos para decorar cualquier rincón de su hogar.

Los materiales a utilizar
Pedazos de velas o velones, también puede comprar si lo quiere hacer y no tiene velas parafina.
Un cuchillo
Una olla más grande que la otra
Ramas secas
Pintura acrílica de color negro o spray de color negro
Una base donde colocar las ramas
Frasco o vasos de vidrios
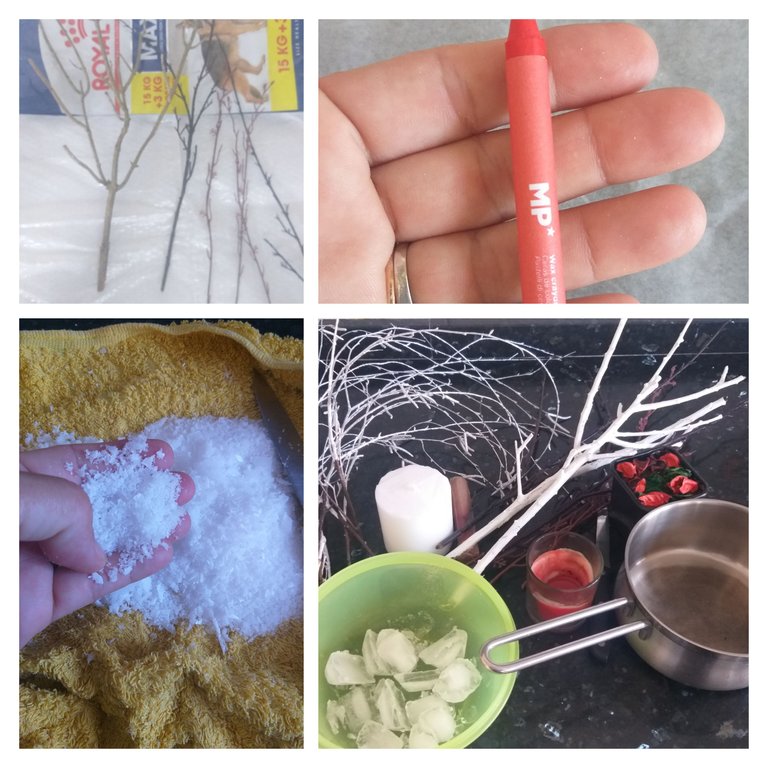
Creyones de cera del color al gusto
Una taza con hielo y un poquito de agua
Molde de galletas en este caso de flor
Dos pajaritos
Piedras blancas
Aceite aromatizador
Palo de parrilla
Tazas pequeñas
Papel vegetal
Aceite de cocina
Una arita de lata
Pasos a seguir para hacer los ramos con flores de cera
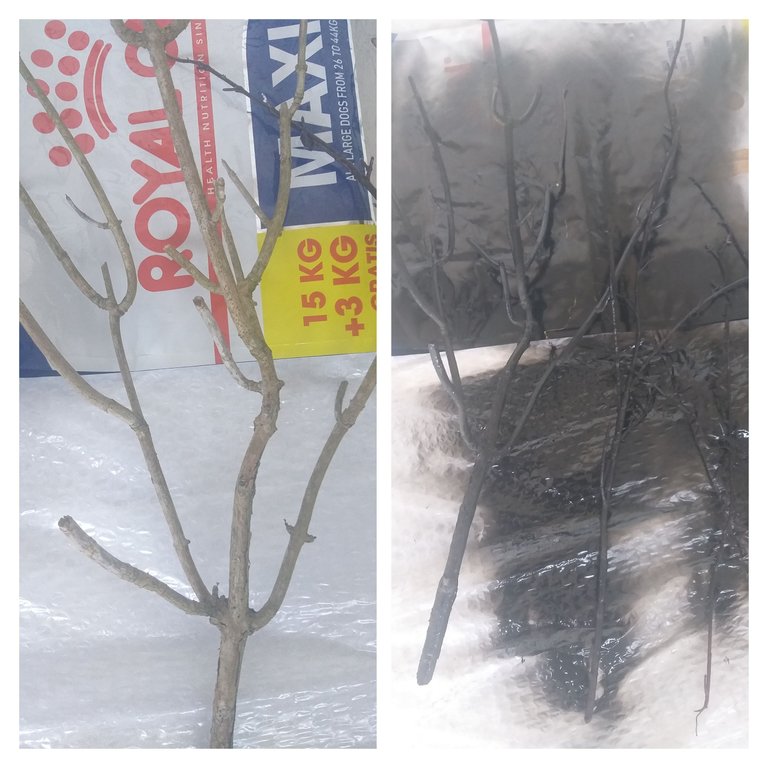
1👣. Vamos a limpiar las ramas para después pintarlas con la pintura acrílica o como éste caso utilicé spray que tiene un secado mas rápido. Coloque debajo bolsas y luego bati varias veces la lata de pintura para después pintar y por último dejarlo secar.
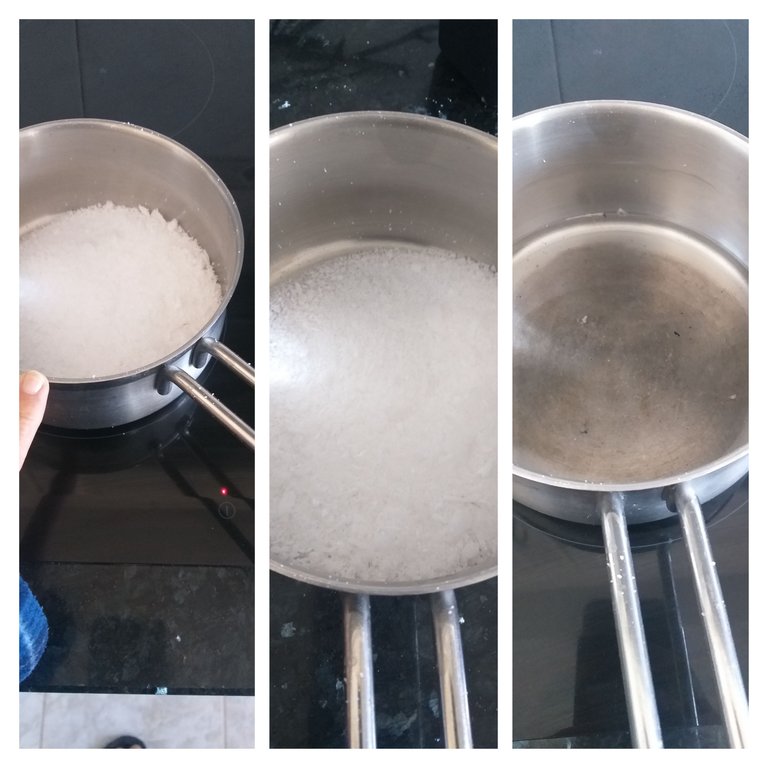
2👣. Luego de estar secas todas las ramas que pintó; vamos a preparar los pedazos de velas o velones y picarlos con el cuchillo pedazos bien pequeños. Lo primero que tenemos que hacer es colocar agua el la olla más grande agua y en la más pequeña los pedazos de velas; acá utilicé velones de color blanco,luego de hervir el agua y derretida apagar el fuego. También puedes derretir la velas o velones directamente sin la olla con agua la ventaja de usar la olla con agua es que dura más la cera derretida y puedes trabajar las flores más tranquilamente y luego por último colocar varias gotas del aceite aromático y revólver con el palo parrillero.
3👣. En este paso prepararemos los hielos y agua colocandolos en una taza. Como ya tenemos la cera derretida comenzamos a meter los dos dedos para las ramas más pequeñas y tres para las ramas mas grande de los dedos dependen los pétalos. Introducir los dedos juntos en hielo y luego en la cera puede repetir tres veces y quedarán más grande y rápidamente presionar en las ramas y esperar un ratico hasta que vaya despegando de los dedos la cera. Observar en la imagen.
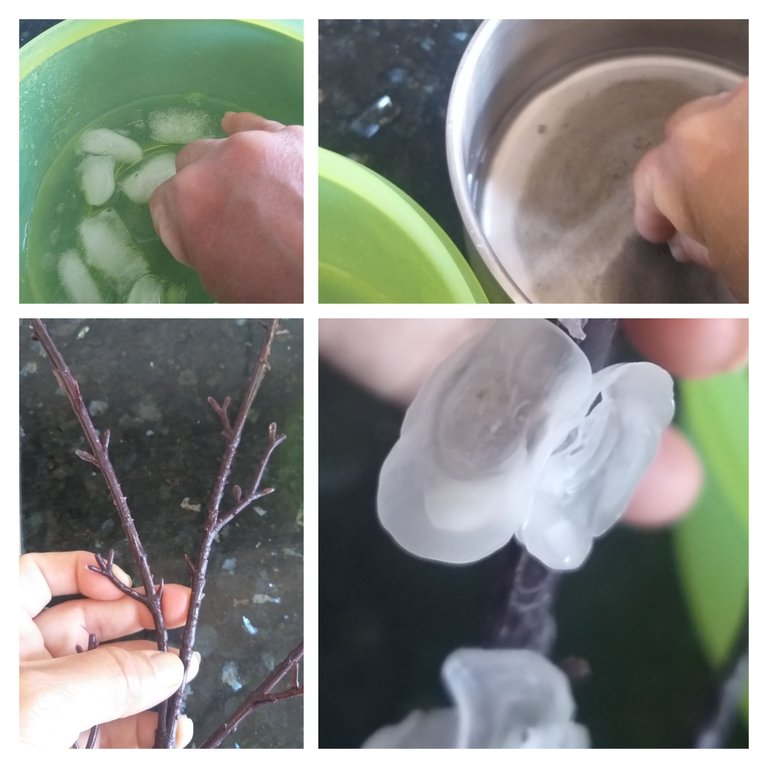
Nota: con los dos dedos juntos quedan dedos pétalos con tres quedan tres pétalos y con 4 quedan cuatro pétalos también puede hacer de un para las puntas de las ramas

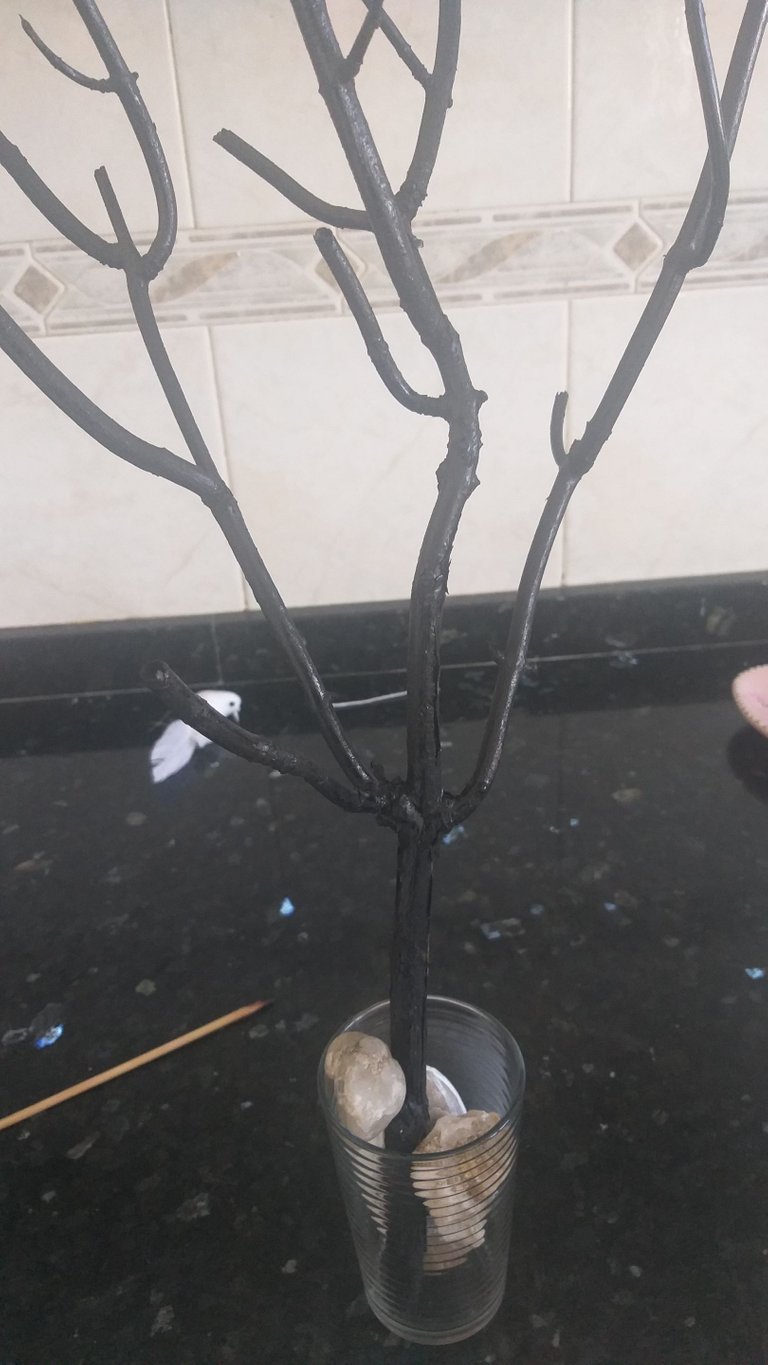
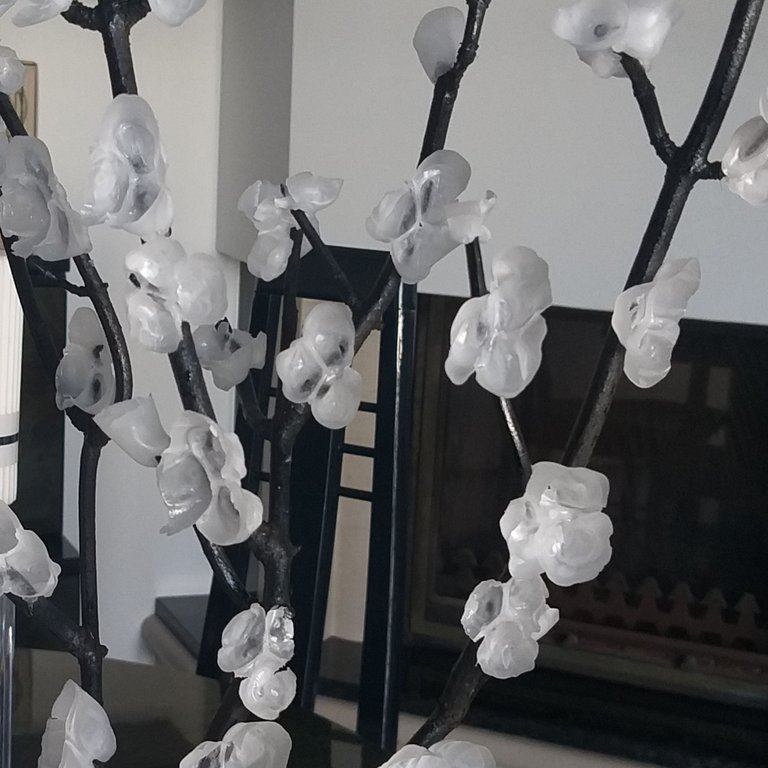
4👣. Yo utilicé ramas secas y también ramas que quedan de las flores que se las quito para decorar. El paso que le indique anteriormente debe repetirlo varios veces hasta llenar casi todo los ramos. A este ramo que es más grueso le realicé de tres pétalos y en la punta de un pétalo con el dedo. observación cuando introduzca los dedos el último sería en la cera para que éste pueda pegar. Para trabajar mejor colocar las ramas en un vaso con piedras o cualquier base.
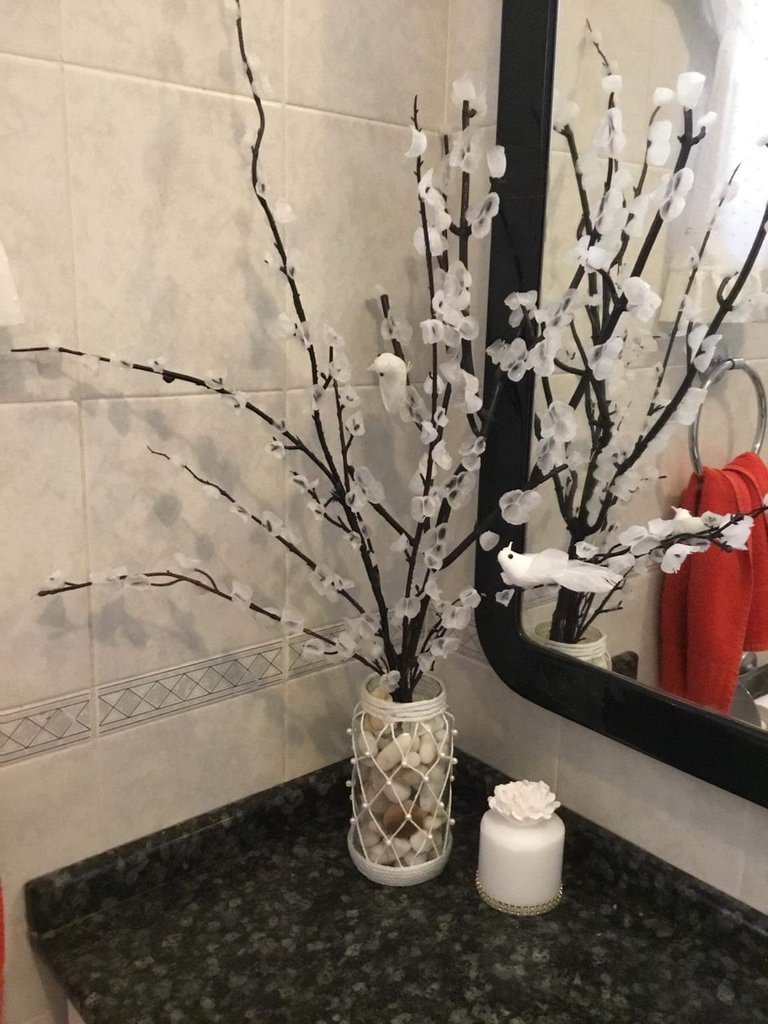
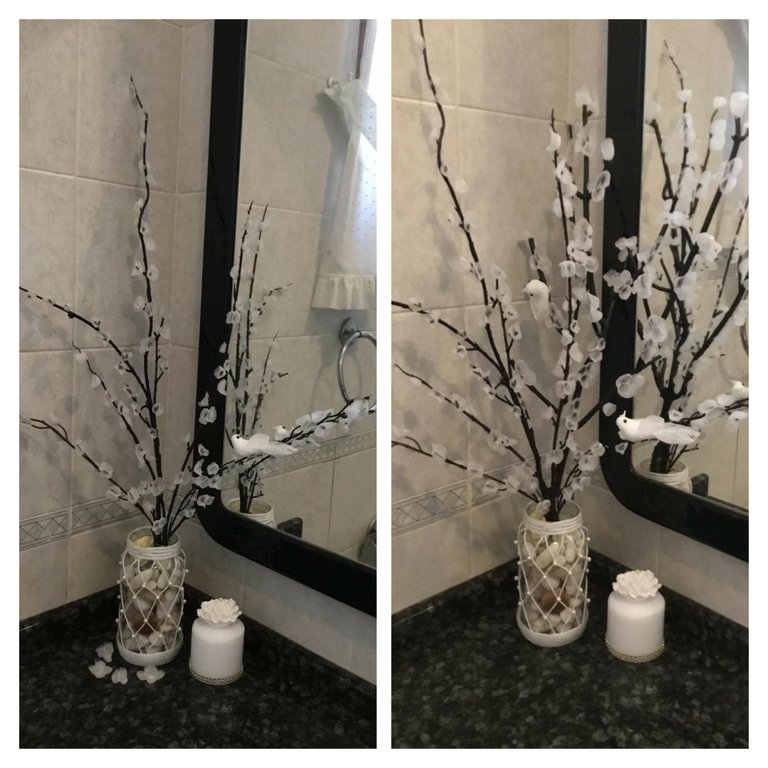
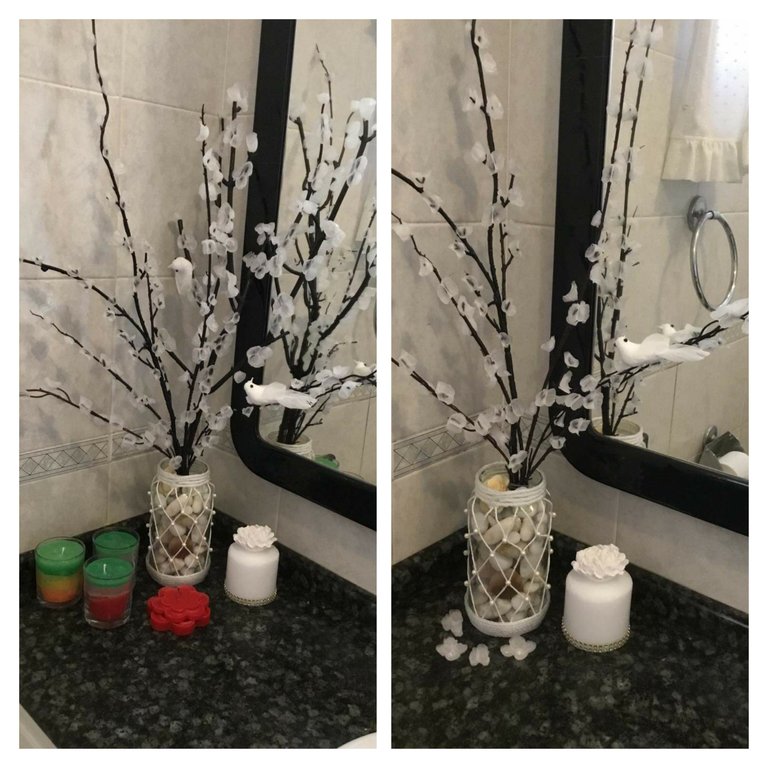
5👣. Luego que tenga todas las ramas con flores de cera colocarlas en la base que más guste, yo las coloque en un frasco de aceituna decorado en otro tutorial y con piedras blancas y les coloque dos pajaritos y listo mi arreglo para decorar el baño y mantenerlo aromatizado.No se preocupen que cuando sequen bien quedan duras.
Nota: Pueden usar cualquier aceite que se usan para las aromaterapia o colonia

Vamos ahora a realizar las velas:
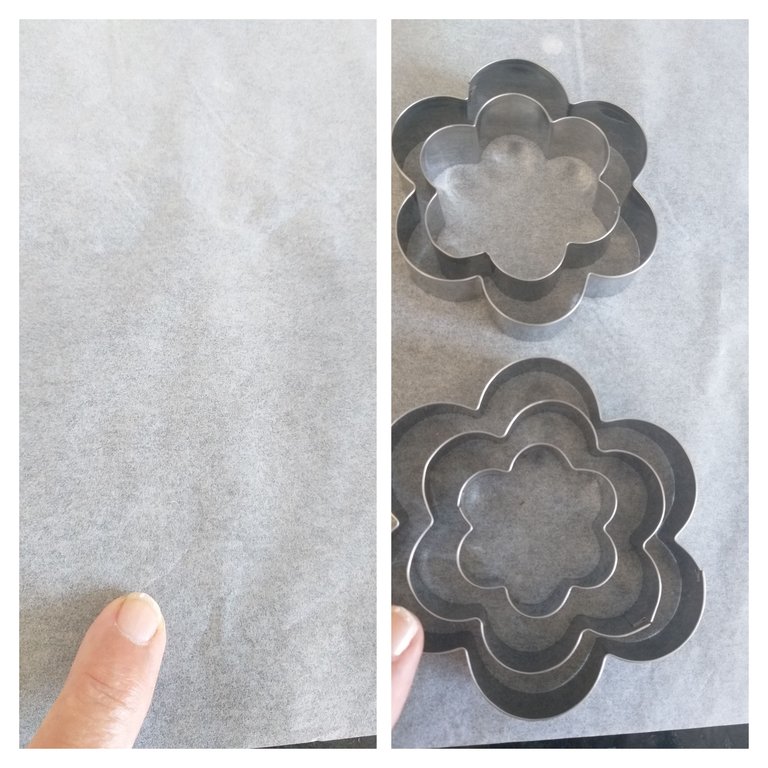
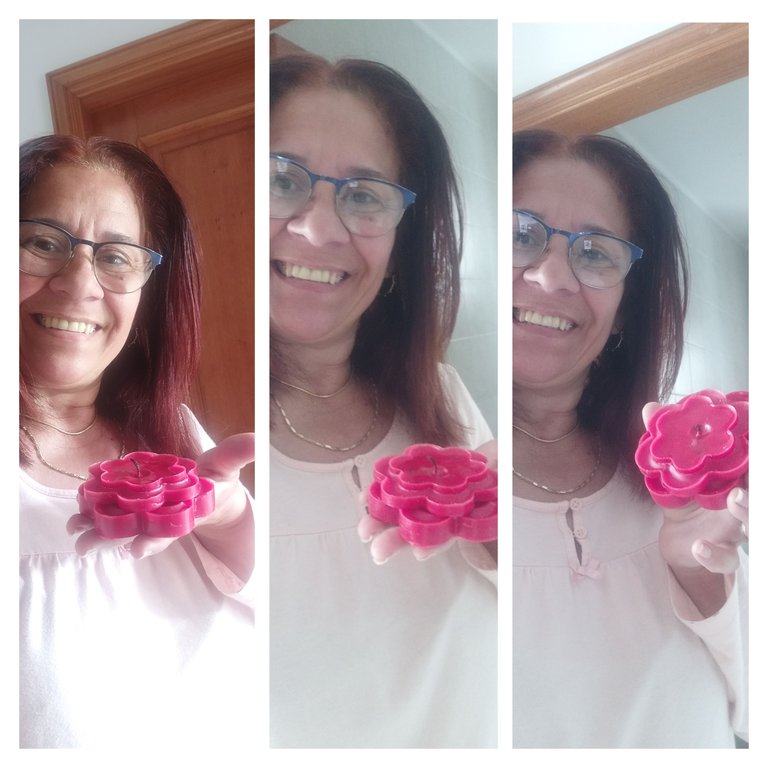
1ero. Con los moldes de cortar galletas colocar uno dentro del otro encima del papel vegetal. También les sirve moldes de silicona y con aceite de cocina y con el dedo colocar por dentro de los moldes.
2do. Con la cera derretida colocar un pedazo de crayón de cera del color que más guste y revólver con el palo de parrilla hasta que esté totalmente derretido el crayón y después echarlo a los moldes.
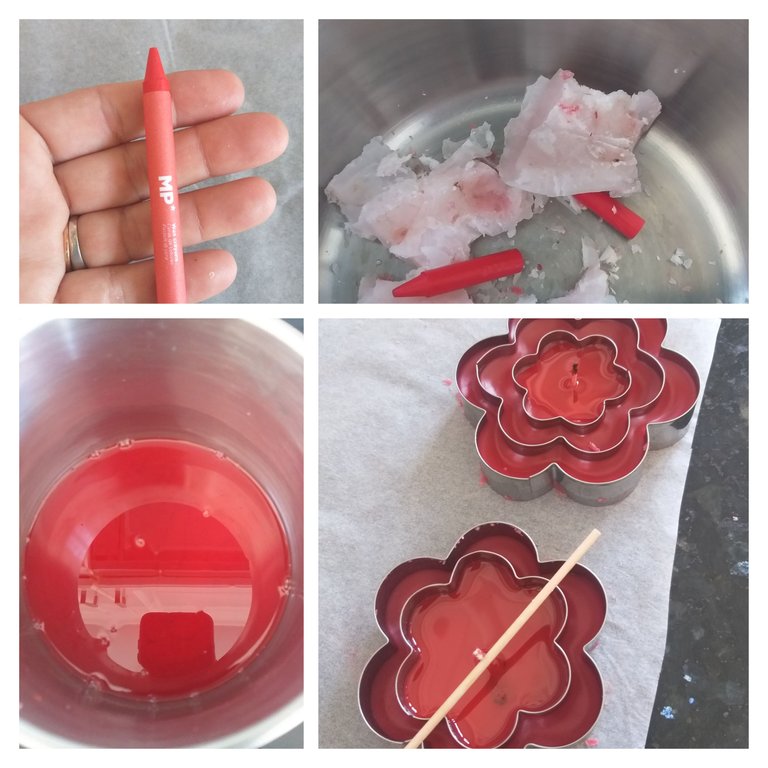
3er. Para la mecha utilicé las misma de las velas viejas y con una arita de lata la introduje en las velas. Luego dejar por un rato para retirar los moldes.
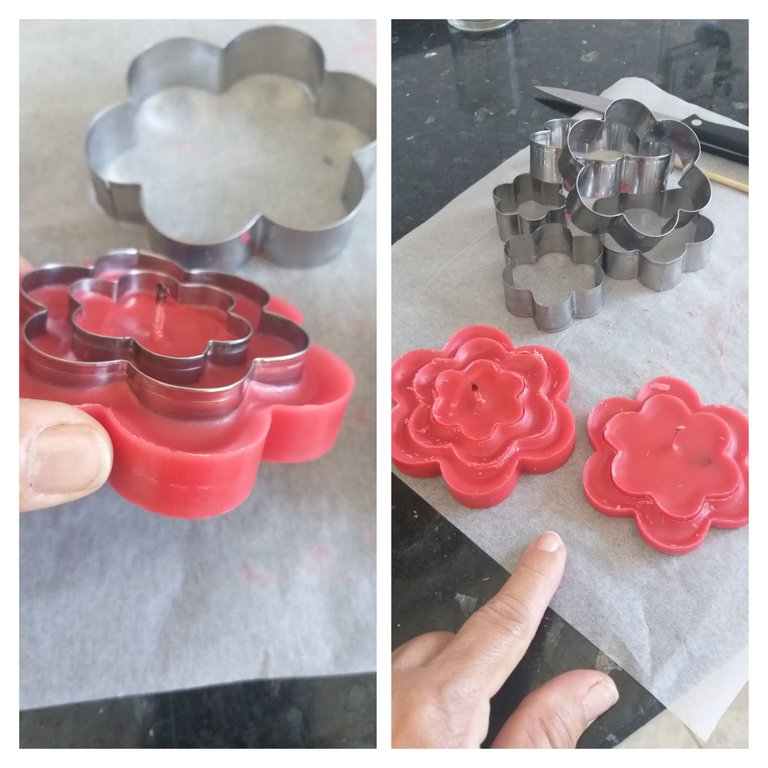
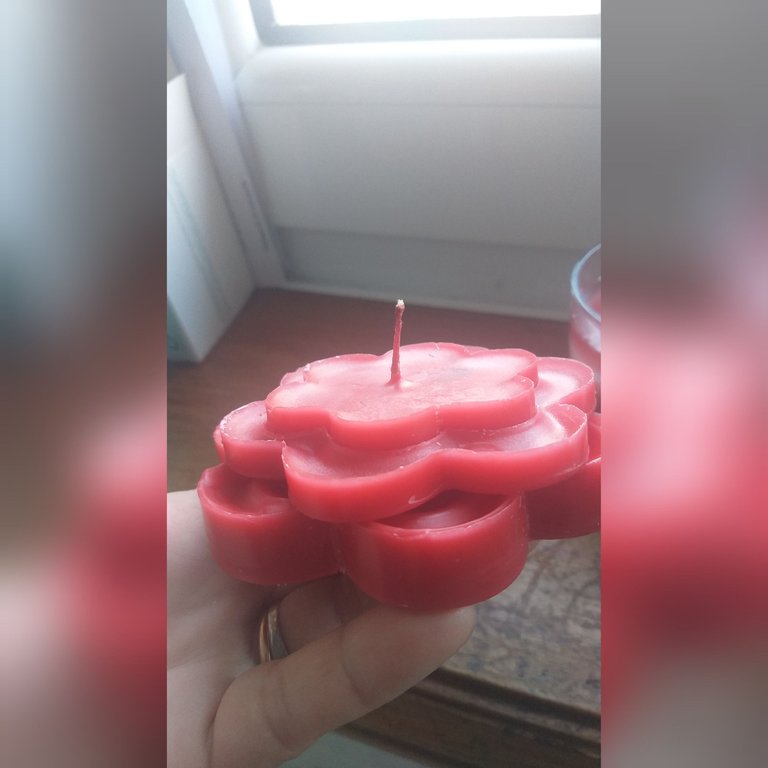
4to. Después que los saqué del molde decidí pegar uno sobre el otro introduciendo la parte de abajo y pegarlo al otro esto lo hice para darle altura eso es a su gusto. Observar las imágenes
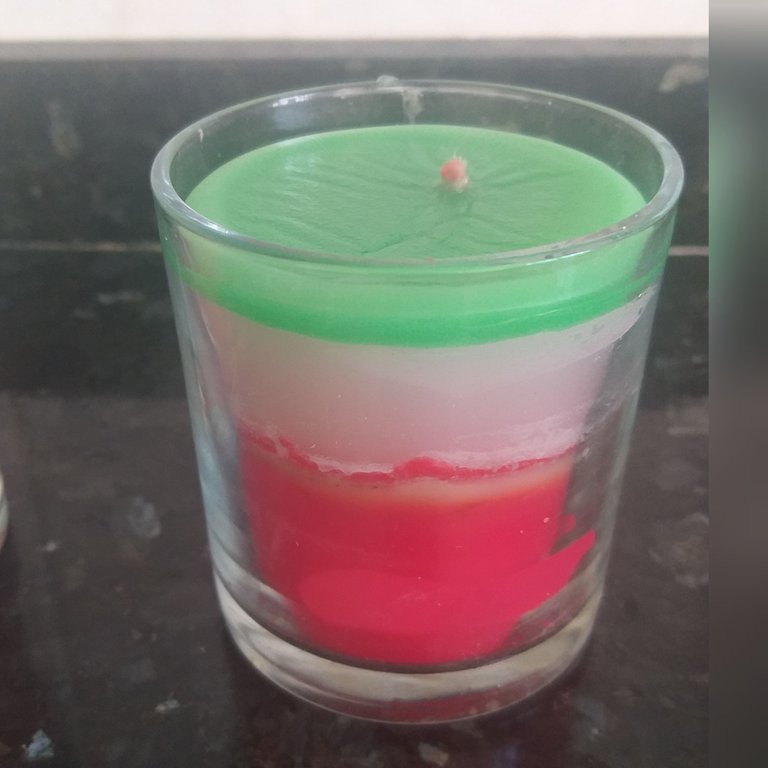
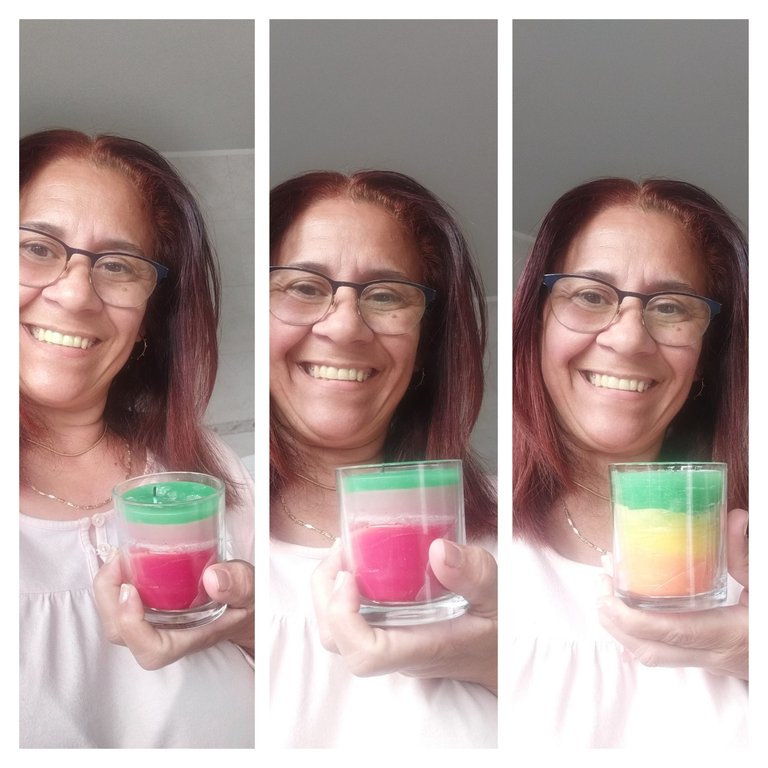
5to. Aprovechando que la cera de color roja todavía estaba derretida la eché en dos frascos y luego deje secar y coloqué por encima blanca y después la dejé poner dura y hice lo mismo con verde que el color lo hice con el crayón de cera de ese color.
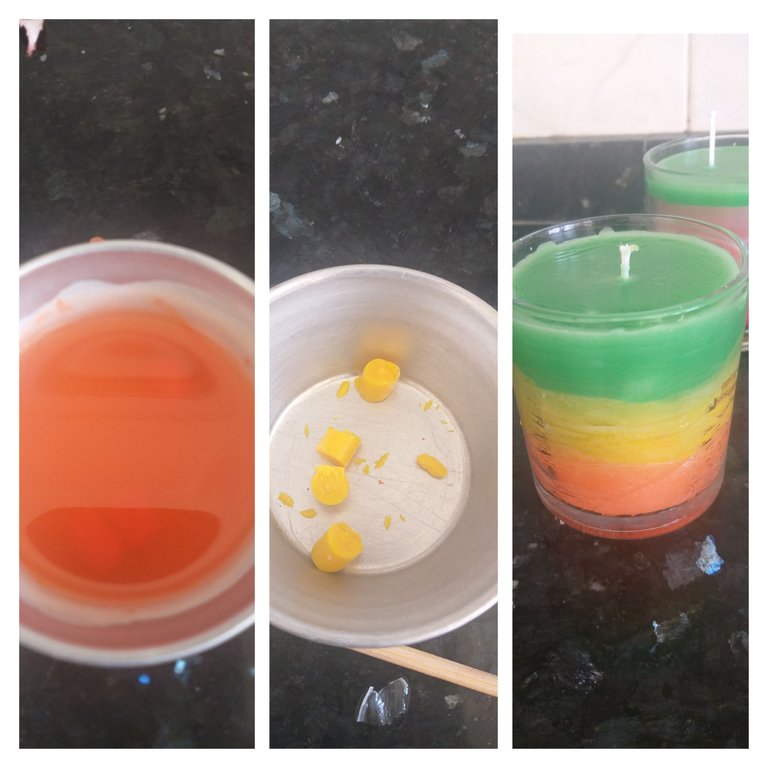
6to. También hice una con un pedazo de crayón de color naranja y amarillo y los mezclamos con la cera derretida y por último el verde. Recuerden dejar poner dura cada color antes de echarle el otro color.
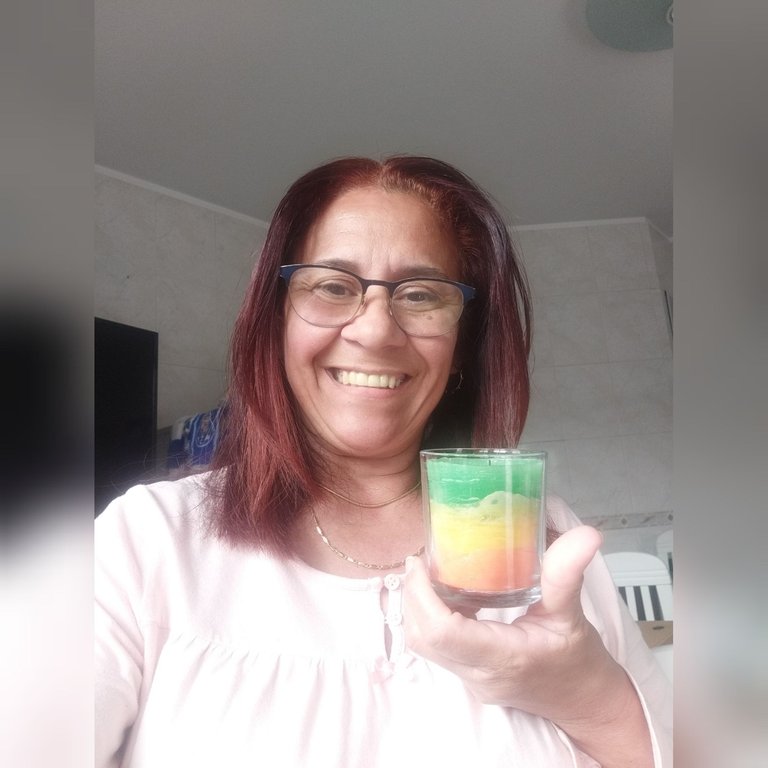
Vieron lo fácil que fue hacer velas y un ramo con los velones viejos usados. Como se reutilizaron y creando hermosos objetos decorativos.
Bueno mis queridos amigos espero que le haya sido de utilidad mi tutorial de hoy y les haya gustado. Sirve para darle a una persona especial o para el día de las madres. Gracia por el apoyo de todas las comunidades y personas que revisan mis publicaciones y le dan un me gusta o dejando un hermoso comentario.
APROVECHEN EL TIEMPO EN AMAR A CADA PERSONA QUE PASAN POR SU VIDA Y QUE DIOS LES PERMITIÓ QUE COMPARTIRÁN CON ELLAS PORQUÉ EL TIEMPO ES CORTO Y DESPUÉS SE LAMENTARÁN... BENDICIONES
Las fotos son tomadas de mi teléfono móvil Samsung Galaxy A6 y organizadas por la aplicación GridArt

English
Greetings my beautiful and creative people from this great Hive community; may the almighty father bless you by giving you good health and success in your goals👏💯. I feel pleased to belong to this wonderful hive and meet humble people with different qualities and aptitudes who build wonders with little, they are true artists.
It is worth telling you that I try to get the most out of objects; It's not because I'm stingy☺😋, but I value everything I have. Just as we also have to make the most of those people who pass through our lives and love and appreciate them to the fullest. I keep the anniversary candles like the candles or candles that I use at home. Today I bring you three options to recycle or reuse those candles and also how to dye them. Join me to make candles of various colors and some beautiful bouquets to decorate any corner of your home.
The materials to use
Pieces of candles or candles, you can also buy if you want to do it and you don't have paraffin candles.
A knife
One pot larger than the other
Dry branches
Black acrylic paint or black spray
A base where to place the branches
Jar or glass cups
Wax crayons of the color to taste
A cup with ice and a little water
Cookie mold in this flower case
Two little birds
White stones
Fragrance oil
grill stick
small cups
Vegetable paper
Cooking oil
A tin ring
Steps to follow to make the bouquets with wax flowers
1👣. We are going to clean the branches and then paint them with acrylic paint or, as in this case, I used spray that dries faster. Place bags below and then beat the can of paint several times to then paint and finally let it dry.
2👣. After all the branches that she painted were dry; We are going to prepare the pieces of candles or candles and chop them with the knife into very small pieces. The first thing we have to do is place water in the largest pot and in the smallest pot the pieces of candles; Here I used white candles, after boiling the melted water and turning off the heat. You can also melt the candles or candles directly without the pot with water. The advantage of using the pot with water is that the melted wax lasts longer and you can work the flowers more calmly and then, finally, place several drops of aromatic oil and stir with the stick. grill.
3👣. In this step we will prepare the ice and water by placing them in a cup. As we already have the melted wax we begin to put the two fingers for the smallest branches and three for the largest branches of the fingers depend on the petals. Put your fingers together in ice and then in the wax you can repeat three times and they will be bigger and quickly press on the branches and wait a while until the wax comes off the fingers. Observe in the image.
Note: with the two fingers together there are two petals, with three there are three petals and with 4 there are four petals, you can also make one for the tips of the branches
4👣. After I have all the branches with wax flowers, place them on the base that you like the most, I place them in an olive jar decorated in another tutorial and with white stones and I place two little birds on them and ready my arrangement to decorate the bathroom and keep it scented .Don't worry that when they dry well they will be hard.
5👣. After I have all the branches with wax flowers, place them on the base that you like the most, I place them in an olive jar decorated in another tutorial and with white stones and I place two little birds on them and ready my arrangement to decorate the bathroom and keep it scented .Don't worry that when they dry well they will be hard.
Note: You can use any oil used for aromatherapy or cologne.
Let's now make the candles:
1st. With the cookie cutters, place one inside the other on top of the parchment paper. It also serves silicone molds and with cooking oil and with your finger place inside the molds.
2nd. With the melted wax place a piece of wax crayon of the color you like the most and stir with the grill stick until the crayon is completely melted and then pour it into the molds.
3rd. For the wick I used the same ones from the old candles and with a tin ring I inserted it into the candles. Then leave for a while to remove the molds.
4th. After I took them out of the mold, I decided to glue one on top of the other, inserting the bottom part and glue it to the other. I did this to give it height, that is to your liking. Look at the images
5th. Taking advantage of the fact that the red wax was still melted, I poured it into two jars and then let it dry and placed white on top and then I let it harden and did the same with green as the color I did with the wax crayon of that color.
6th I also made one with a piece of orange and yellow crayon and mixed them with the melted wax and finally the green. Remember to let each color harden before adding the other color.
They saw how easy it was to make candles and a bouquet with the old used candles. How they were reused and creating beautiful decorative objects.
Well my dear friends I hope my tutorial today has been useful and you liked it. It serves to give to a special person or for mothers day. Thank you for the support of all the communities and people who review my posts and like or leave a beautiful comment.
TAKE ADVANTAGE OF THE TIME IN LOVING EVERY PERSON WHO PASSES THROUGH YOUR LIFE AND THAT GOD ALLOWED YOU TO SHARE WITH THEM BECAUSE TIME IS SHORT AND LATER YOU WILL REGRET... BLESSINGS
The photos are taken from my Samsung Galaxy A6 mobile phone and organized by the GridArt application
Very unique way to make the tree have life again. Thanks for sharing.
Thank very much
Do you use hive auto vote? https://hive.vote/
;-)
Cuanta creatividad, que hermoso😍
Gracias amiga por tu apoyo
Mi amor me encantó este trabajo 😍😍 wow! Que lindo quedaron tanto las velas como el ramo 😊 Felicidades nuevamente amiga Zully.❤️
Gracias mi linda me alegro que te haya gustado y por tu apoyo. Bendecido día