Español
Reciban un cordial saludo todas las personas que hacen vida a las diferentes comunidades de esta gran y hermosa colmena HIVE; espero que se encuentren bien y les deseo un feliz fin de semana. La comunidad #hivediy abrió un nuevo concurso y por supuesto no podía dejar de participar😛👍; y me fascinó la idea de realizar plantillas y moldes para detallar una caja, sobres personalizados y bolsa que sirva para dar un presente 🎁 a una persona querida.
Es muy emotivo y motivador recibir una persona un objeto que realizó otra persona con su propias manos; la mejor manera de expresar un aprecio, un te quiero, un te amo o un lo siento, es a través de un regalo o presente🎁.Me encanta dar obsequios a la familia y amigos, siempre tengo bolsas de regalos y cajas guardadas que las hago con tiempo y en la época de navidad; ya no tengo que comprar🎁👌😁.
El concurso tiene normas y entre ella hay una de que el diseño debe ser nuestro😳 y en el trabajo estuve dos días pensando que hacer🧐 y estonces me puse a inventar 🤯 y decidí, realizar como una caja tipo neceser pero pequeño y el material que iré a utilizar será cartulina; para pintar la cartulina urare pintura en spray para que quede como plástico y quedó un diseño que no me lo esperaba👍 y se puede mojar, para decorarla voy a utilizar unas plantillas que hice hace tiempo; son fácil de hacer si se tiene el material adecuado😘 también pensé en colocarle algo para que se pudiera cerrar no les comento más y acompañenme a realizar esta caja convertida en un mini neceser 👝 para obsequiarselo a una amiga muy especial😍.

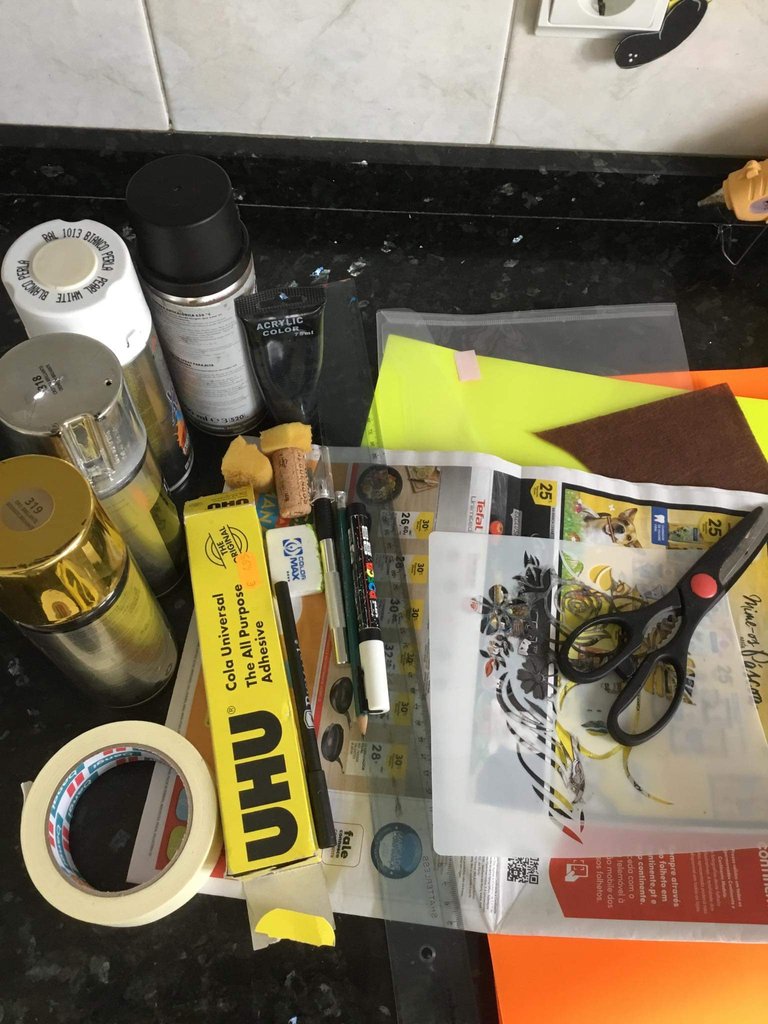
Los Materiales a utilizar
Una lámina de cartulina
Lápiz y un borrador
Tijera
Pegamento universal o silicon
Pintura en spray color plateado, blanco, dorado y negro
Una regla
Medio metro de fieltro de color marrón
Una bolsa de plástico
Dos cierres de cajas
un herraje
Tirro o cinta de construcción
Tornillos pequeños (10 unidades)
Un destornillador pequeño o cuchillo
Papel periódico o cualquier tipo de papel para elaborar el molde provisional
- 4 hojas blancas para realizar el molde
Pasos a seguir
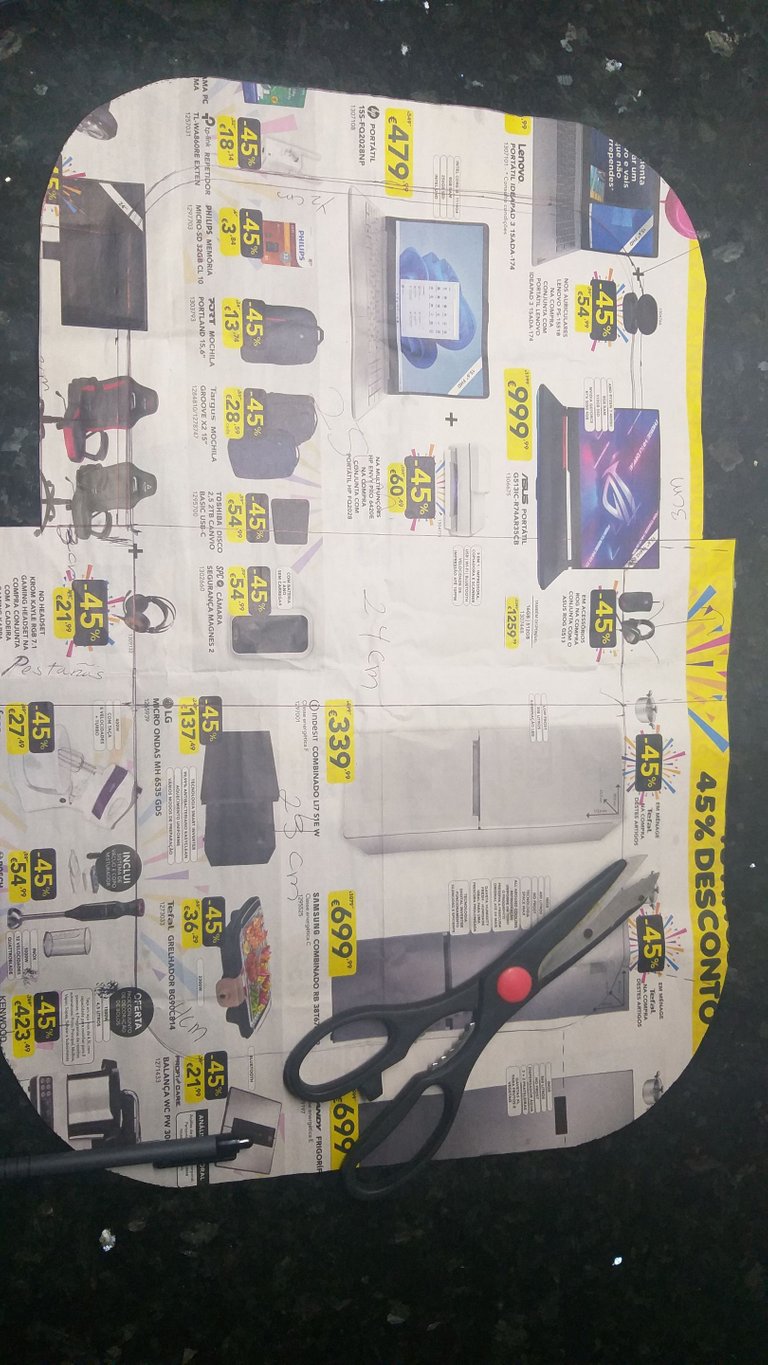
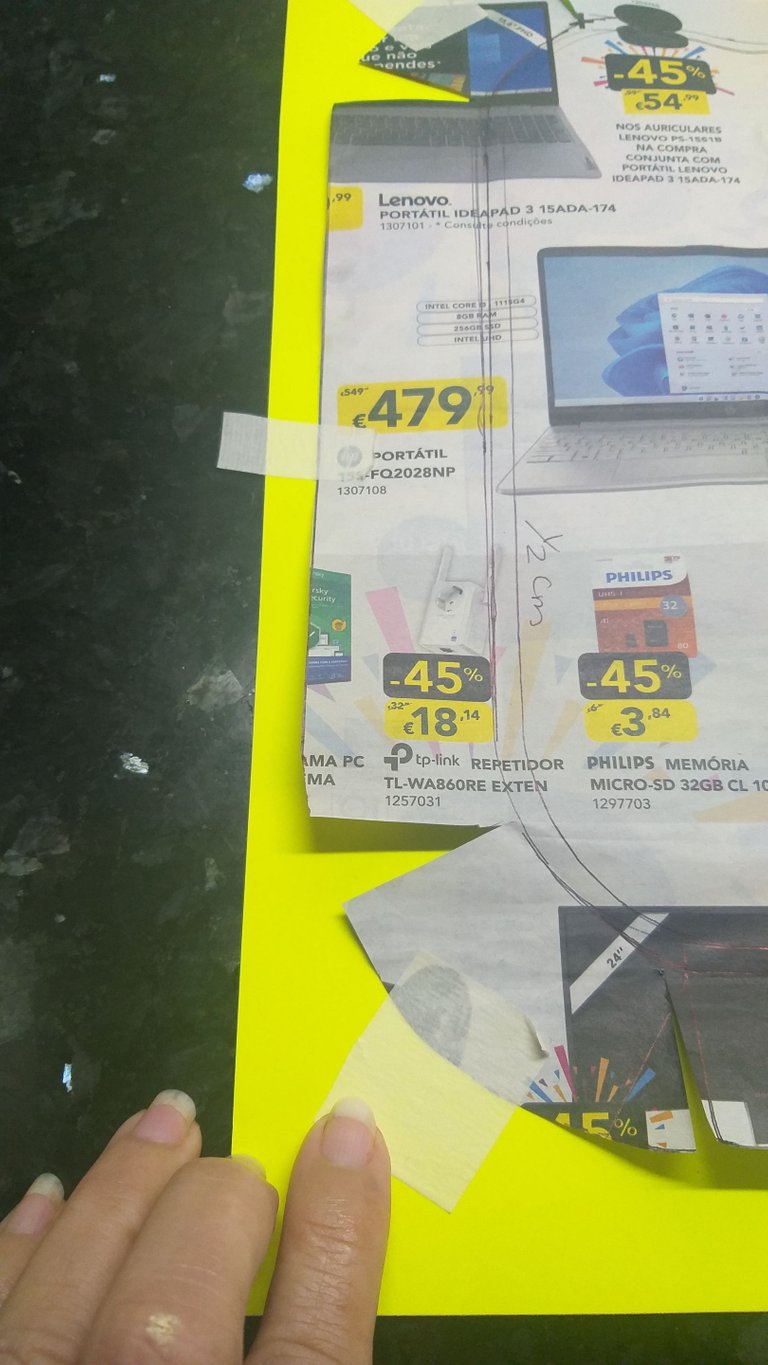
1👣🎁. Una vez pensado el diseño que vamos a crear; debemos realizar una prueba y la hice en papel periódico, luego lo transferí a hojas blancas y por último a la lámina de cartulina.
El diseño del mini neceser es ovalado en las puntas y tiene partes de forma rectangulares, me costó mucho crearlo en una sola pieza 😩😜va a llevar dos tapas una abajo y la de arriba y la une un rectángulo. Observar la imagen aunque en el periódico no se aprecia bien, más adelante la verán mejor al estar transferida a la cartulina.

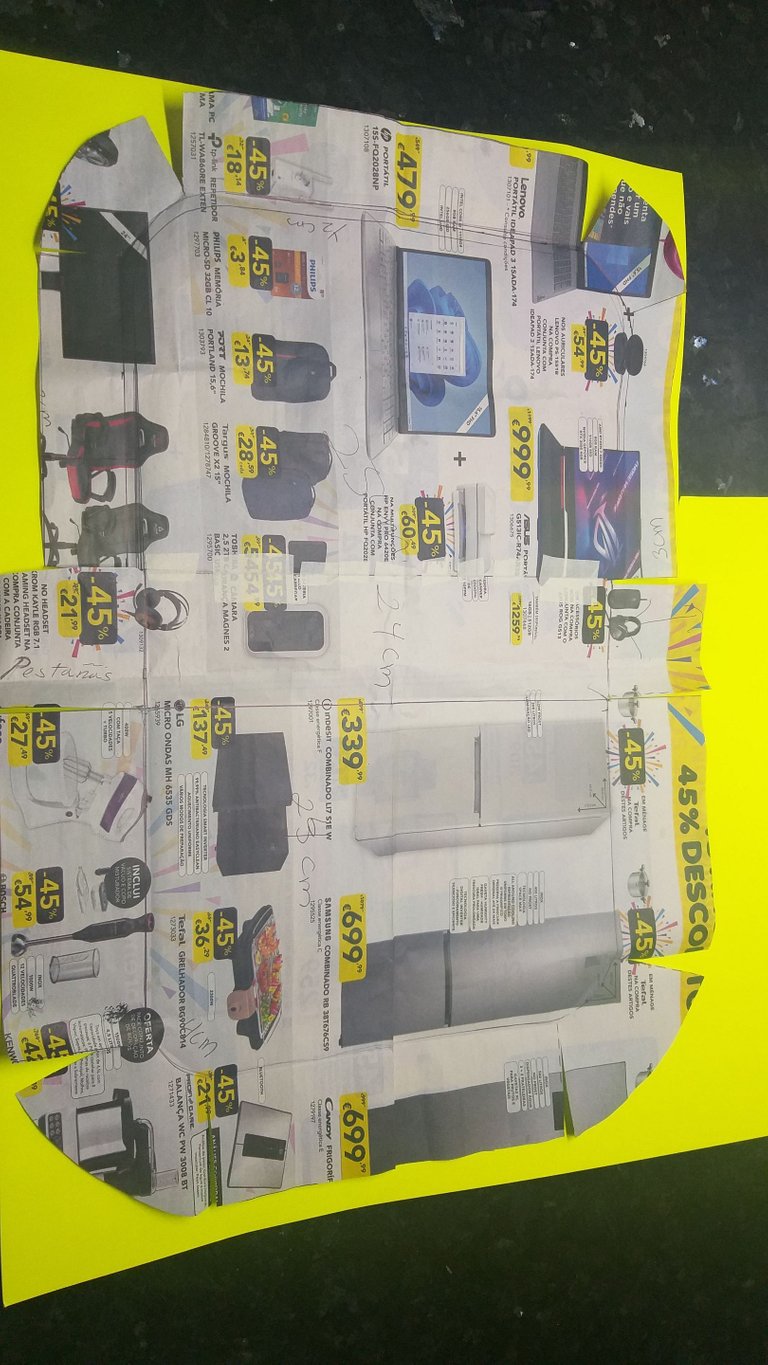
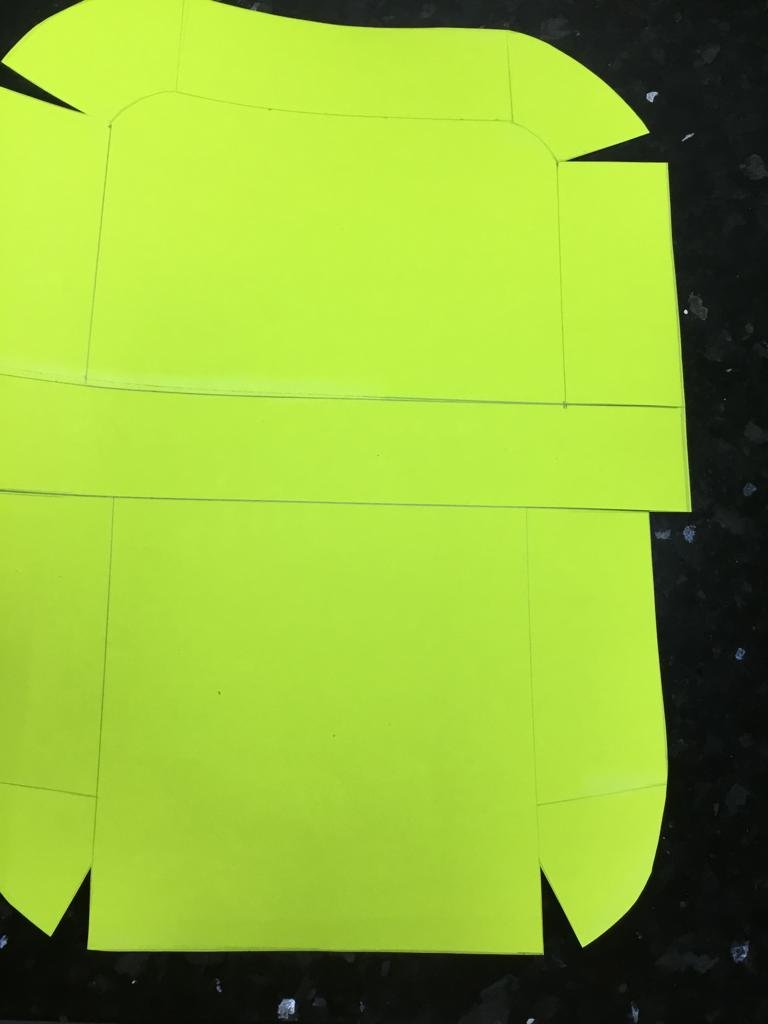
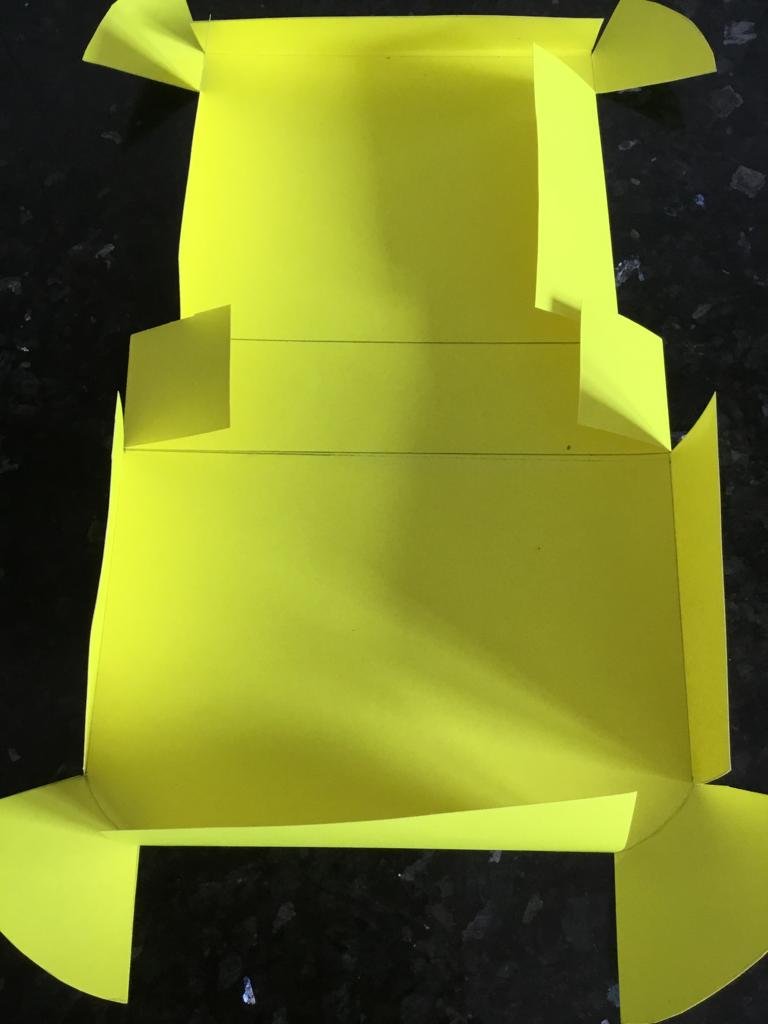
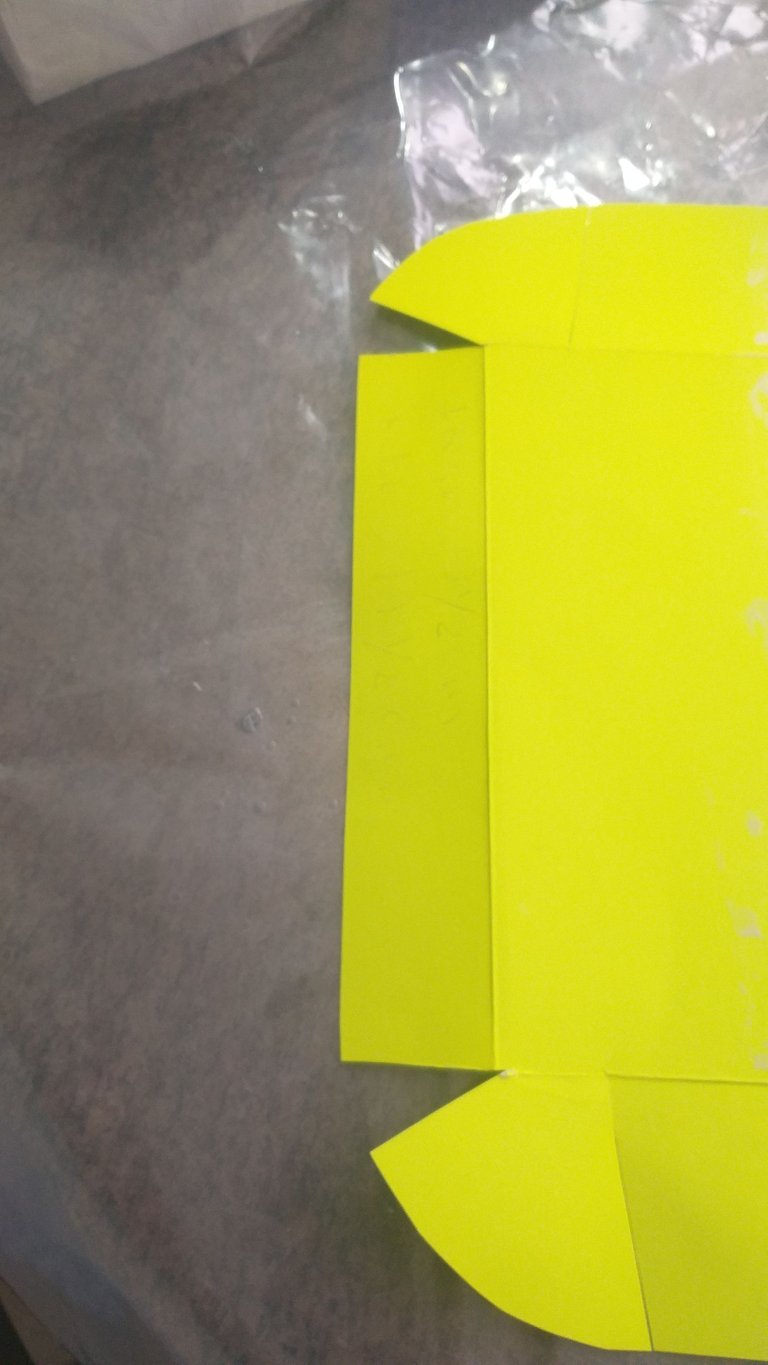
2👣🎁. El molde lo transferí primero en el periódico porque lo tenía que estar corrigiendo las medidas y borrando. Ahora ya con todas las medidas cuadradas; transferir a la cartulina y fijar con pedacitos de tirro o cinta de construcción en algunos sitios para que no se mueva el molde provisional y después marcar con el lápiz todo el molde, para poder pegar y cerrar le dejé varias pestañas y luego recorte el molde y también con la tijera haga un corte en todas las líneas de alrededor que son pestañas.
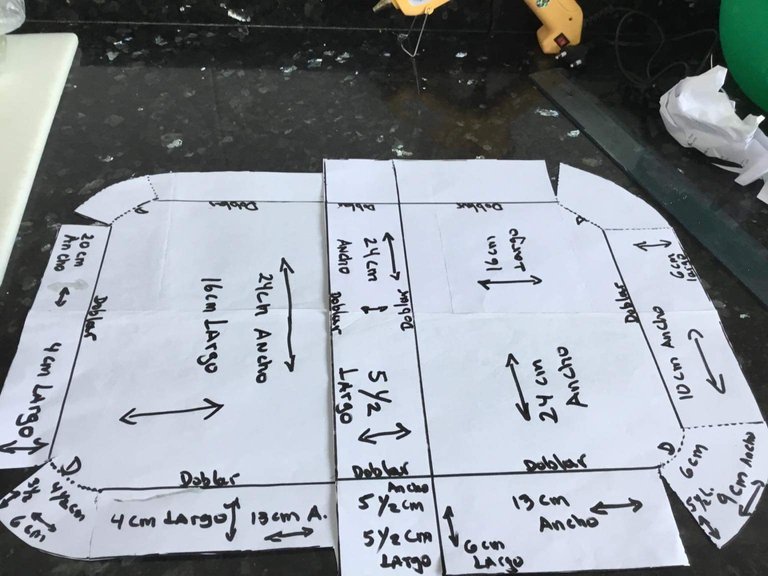
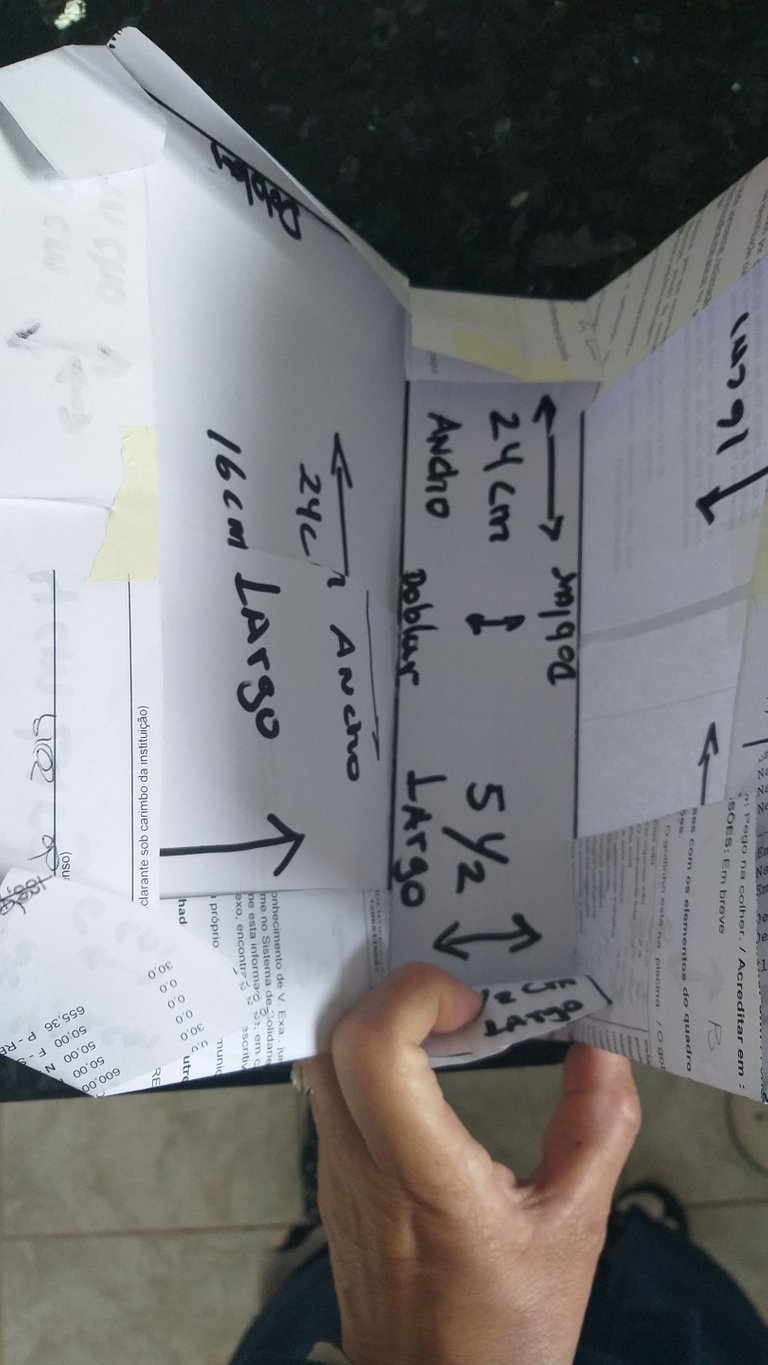
Las medidas y el molde para que tengan como guía
☆ Las medidas de un lado son exactamente igual al otro por ese motivo no las escribí.
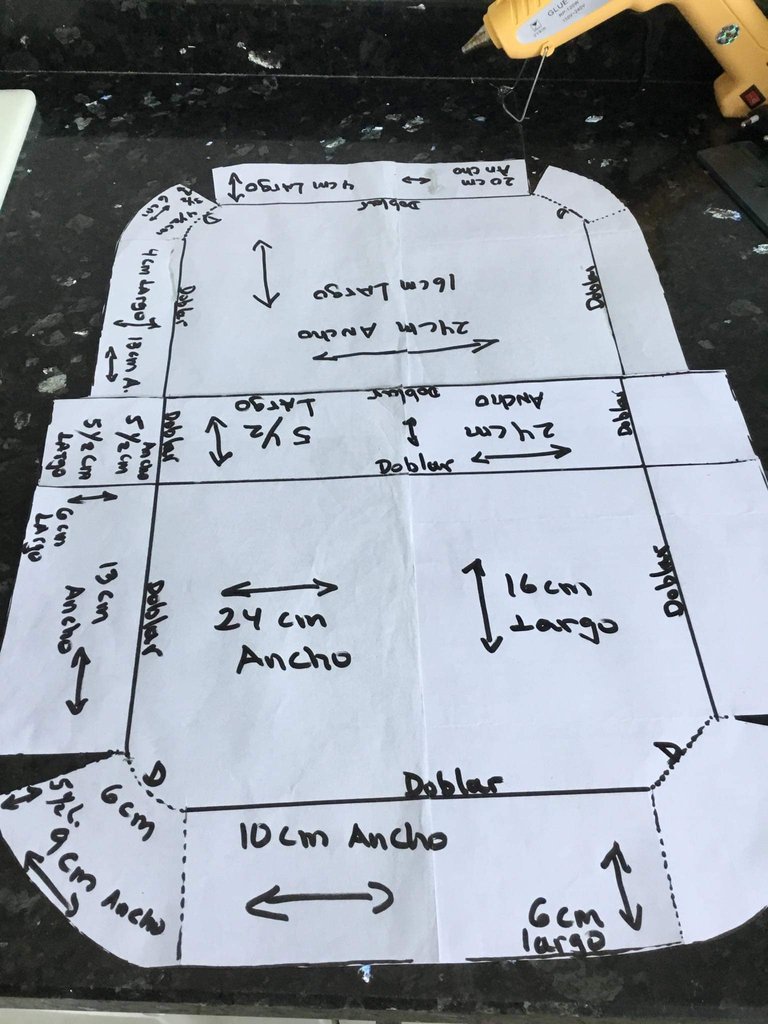
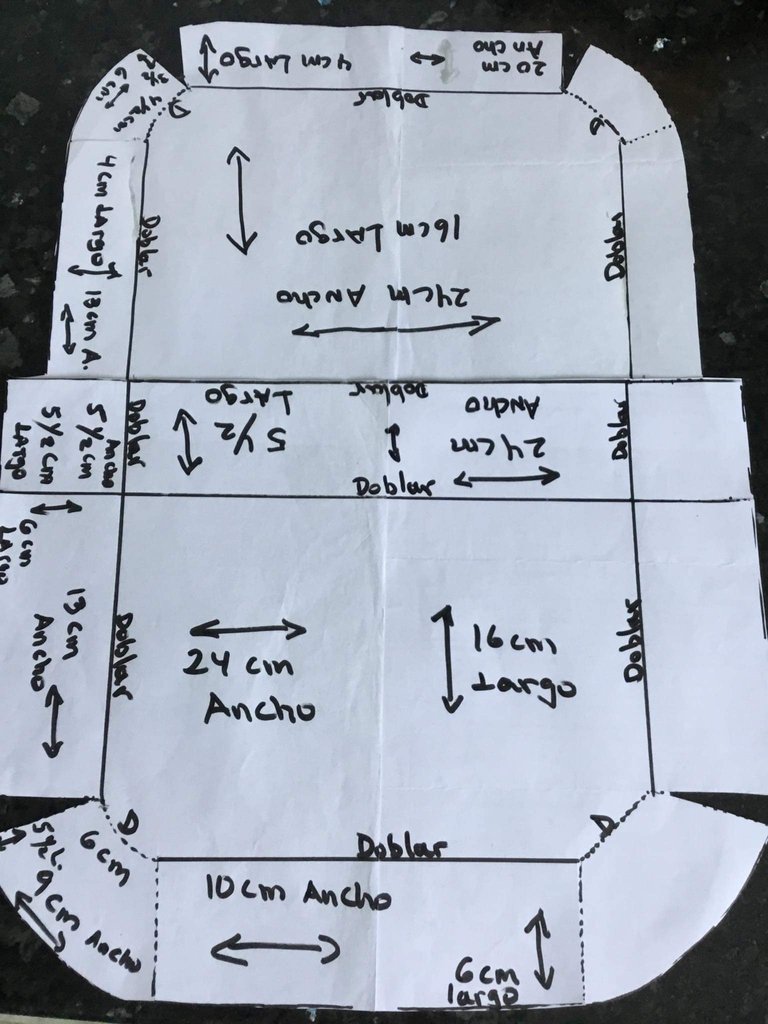
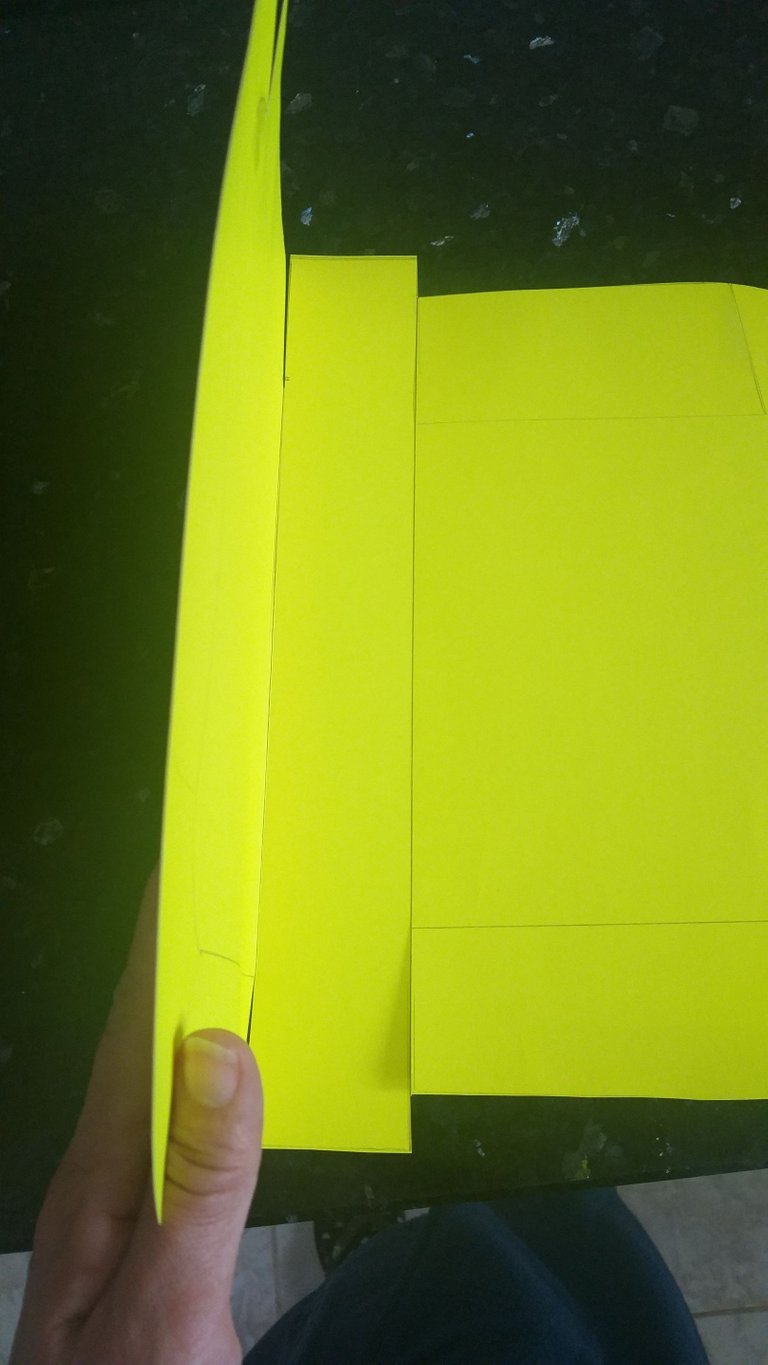
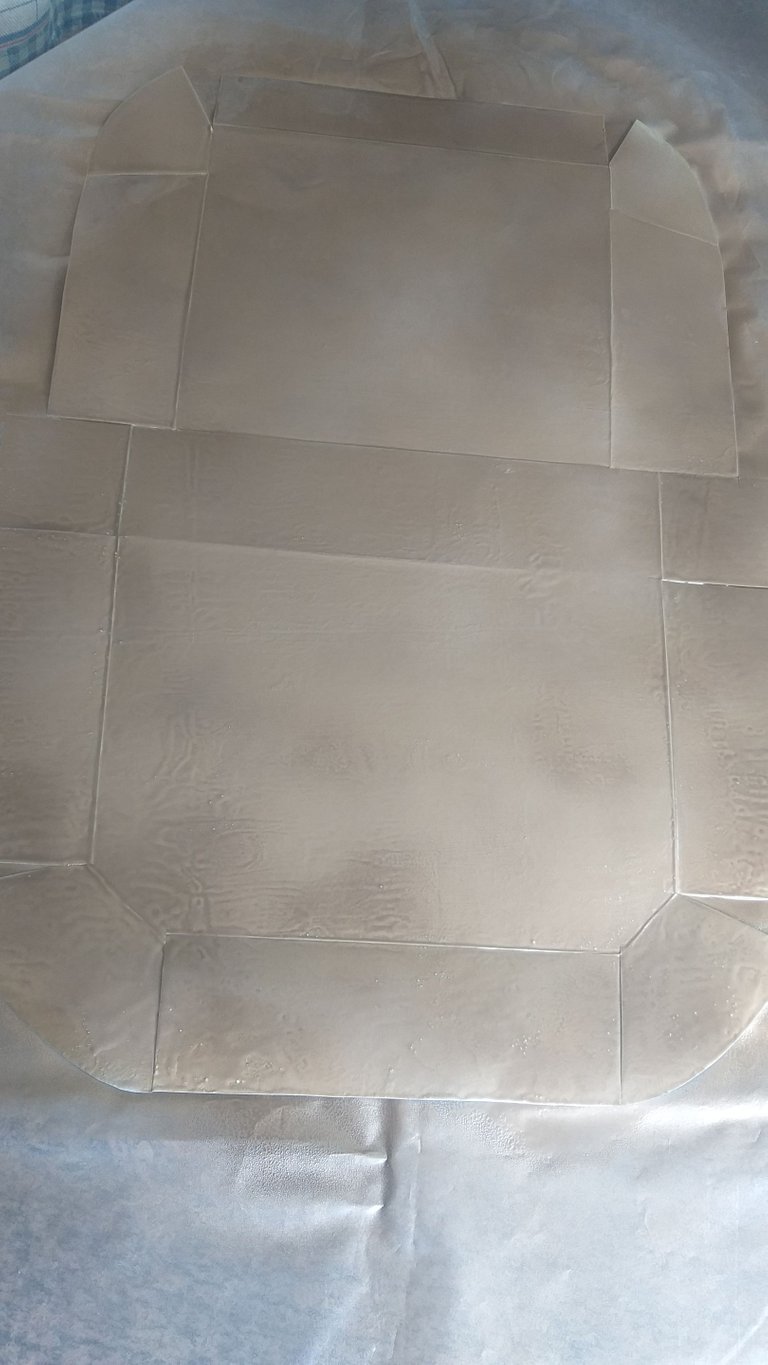
3👣🎁. En este paso vamos a doblar con la ayuda de la regla la partes del centro la cual va hacer la parte de atrás del mini neceser, doblar todas las pestañas. En la imagen les marqué las medidas y donde no tienen es porque son exactamente las mismas medidas del otro lado y escribí donde debes doblar.

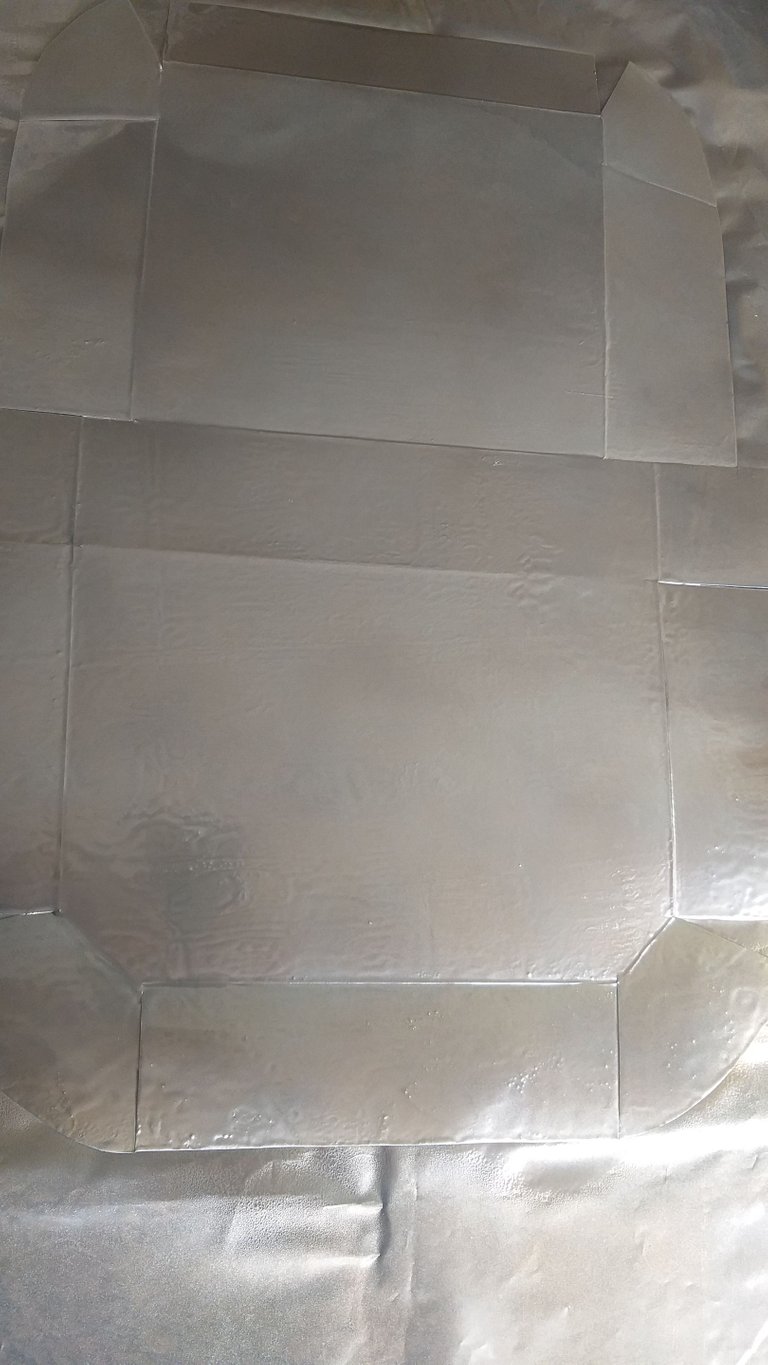
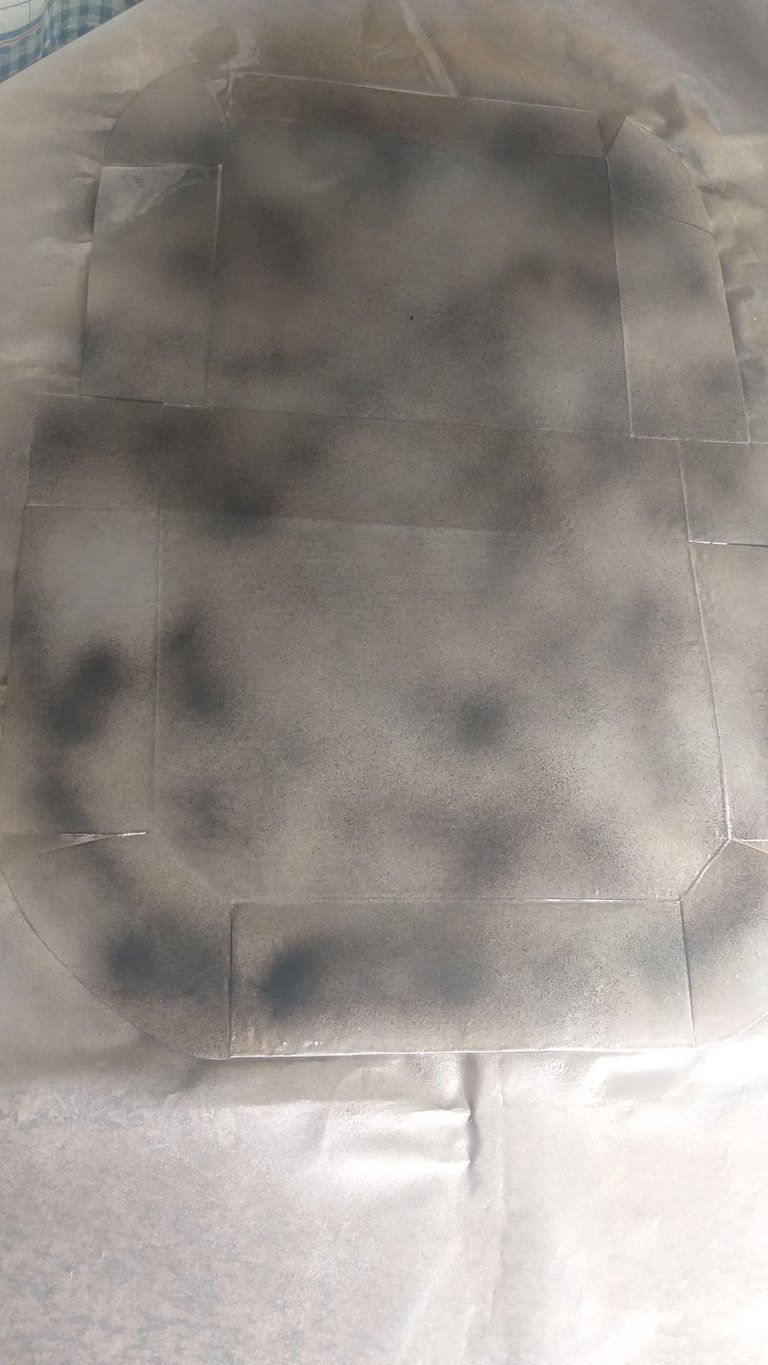
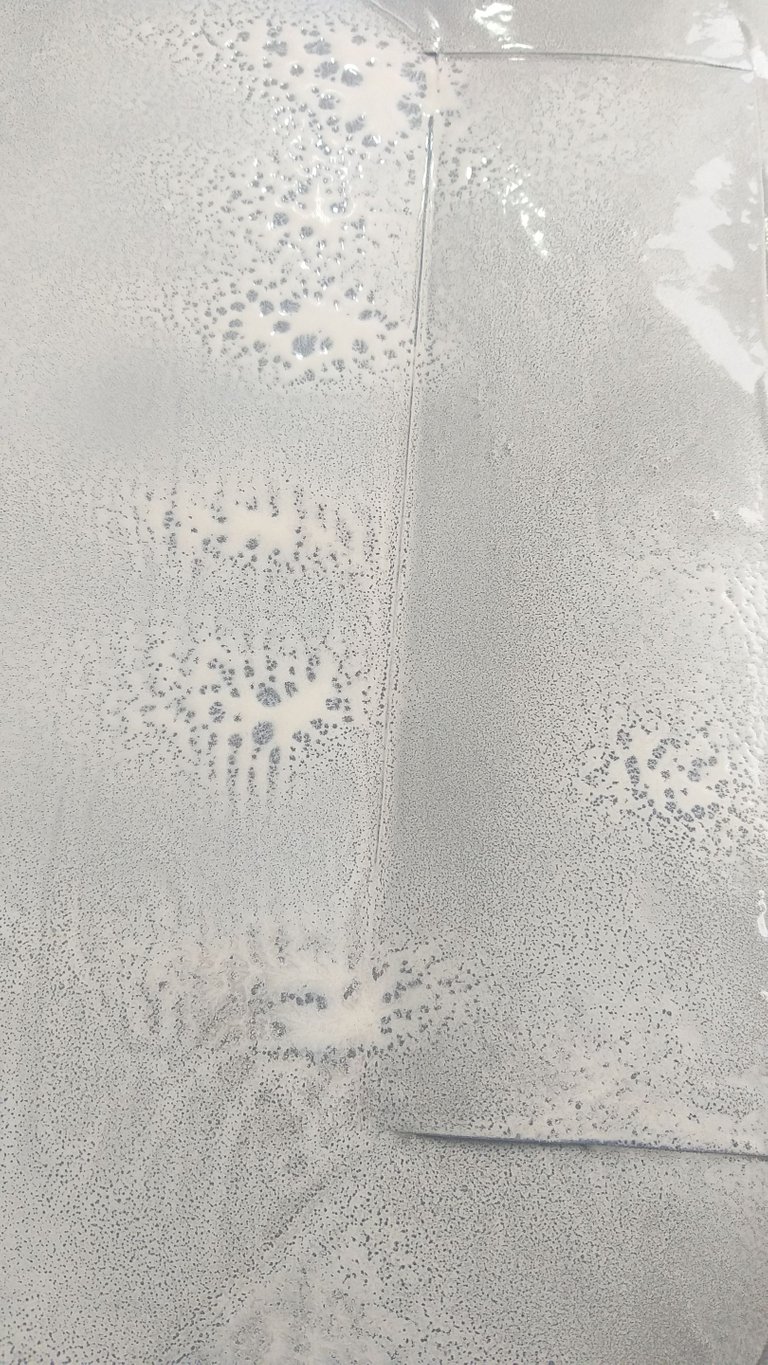
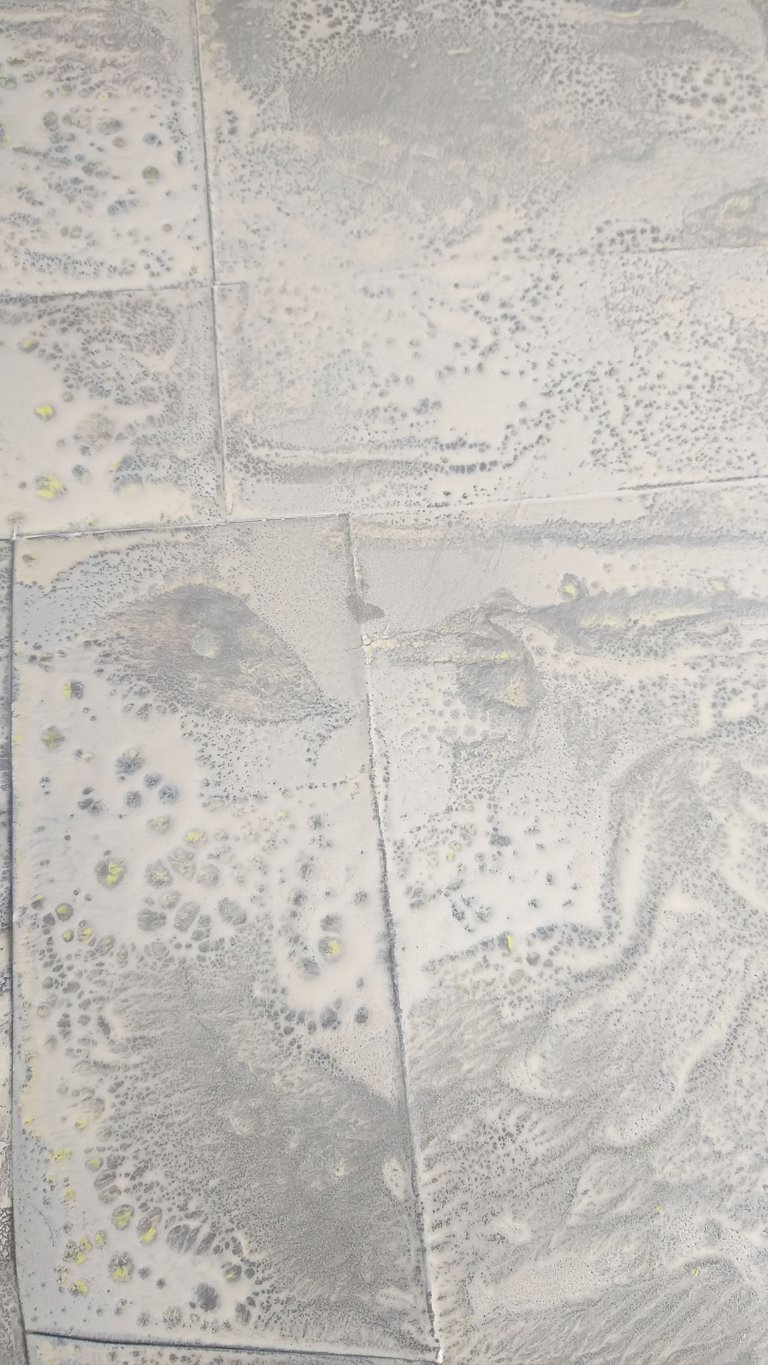
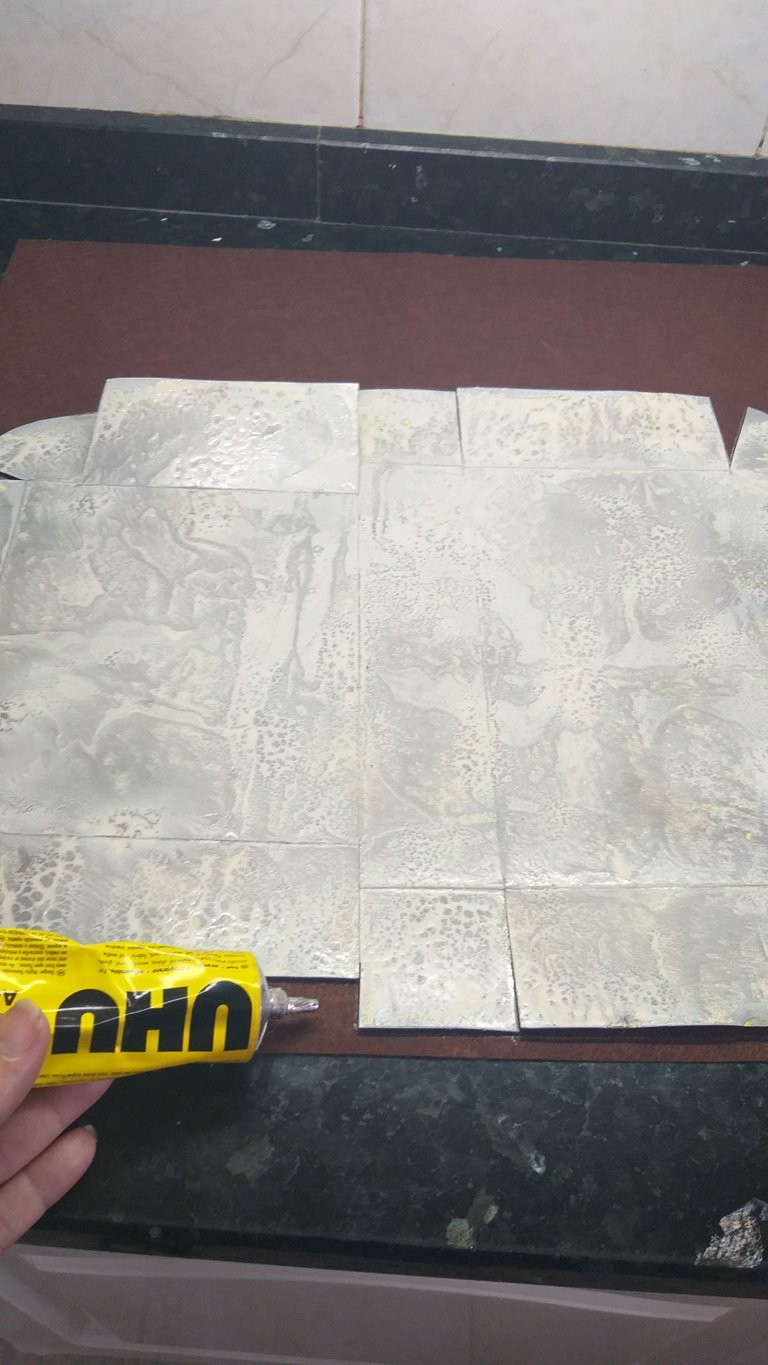
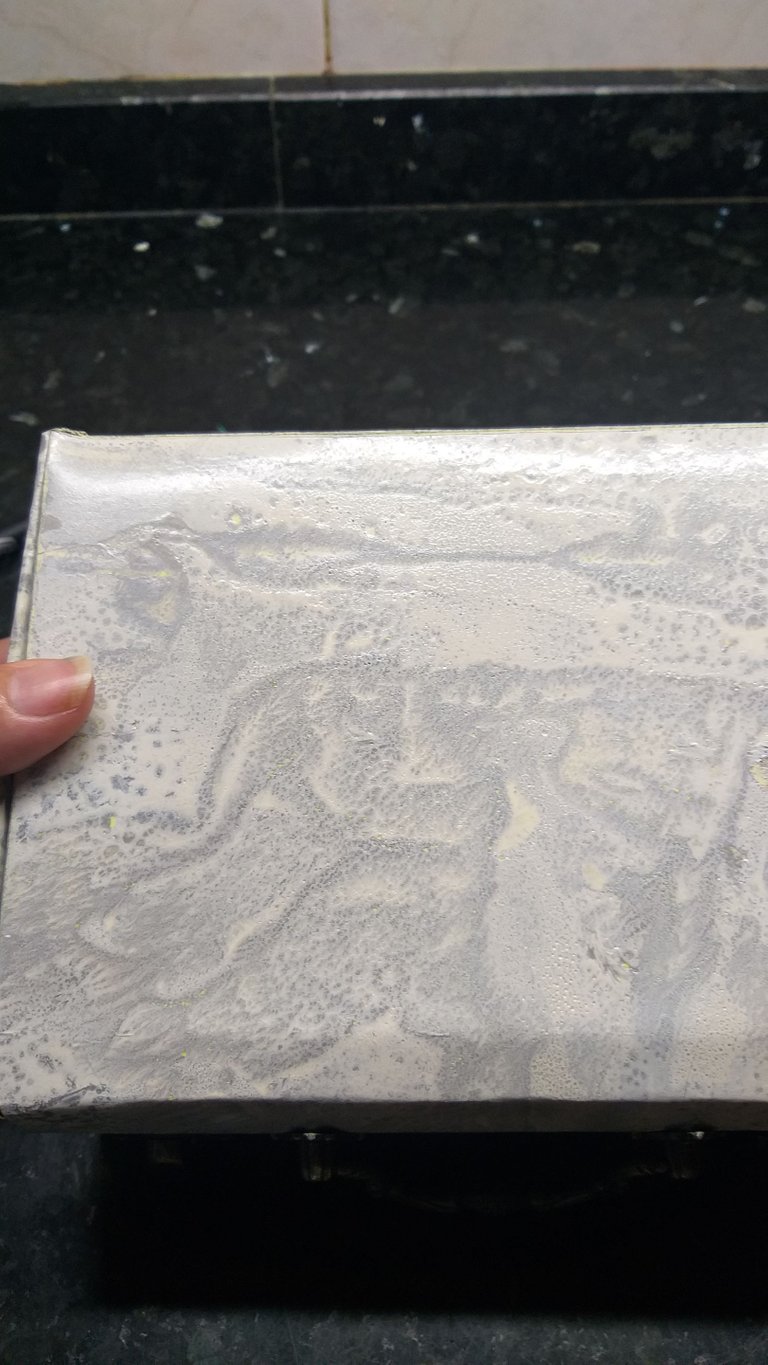
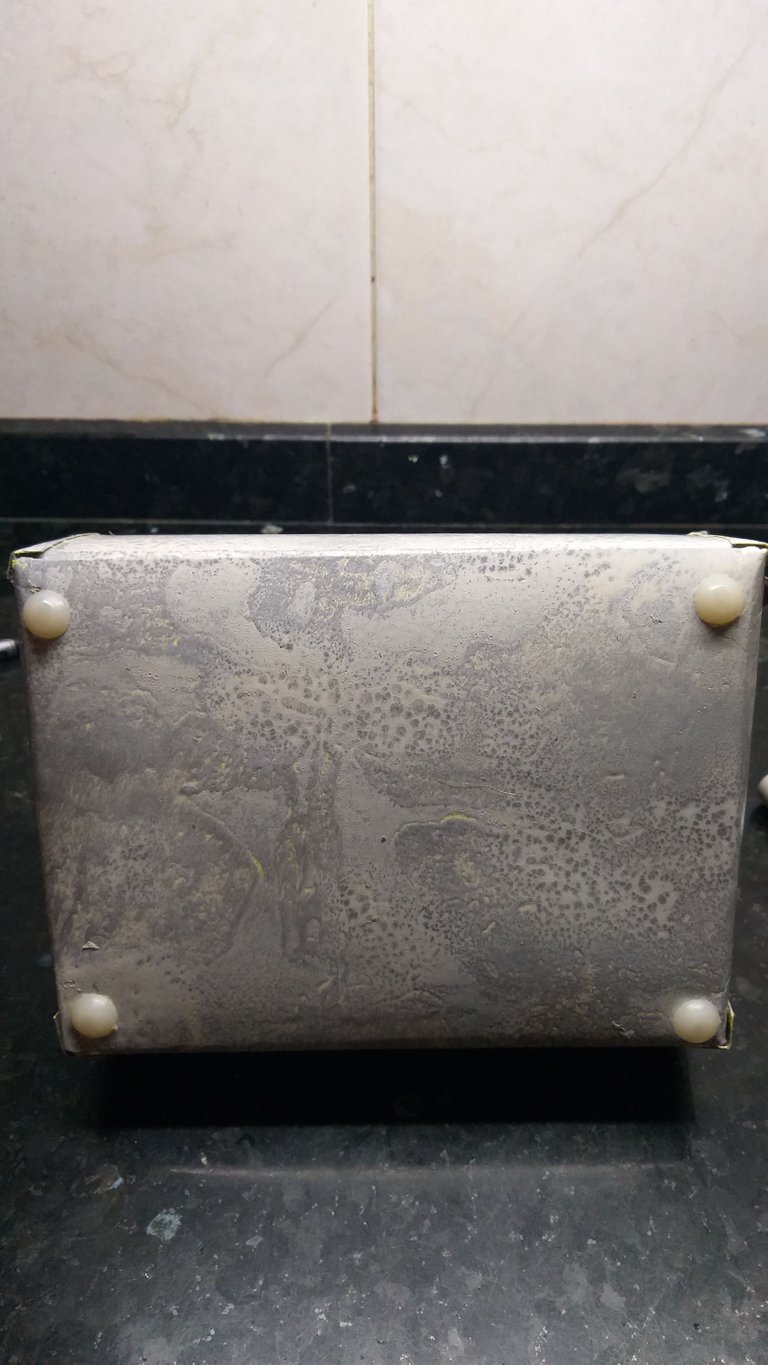
4👣🎁. Luego que ya tenemos nuestro molde todas las líneas que van dobladas, ahora vamos a pintar el molde con los sprays; primero lo pinte con el blanco, luego con el dorado y el plateado y con el negro realicé como manchas y por último lo pinté de nuevo con el blanco que quería que resaltara ese color, 👀 no deje secar la pinturas para aplicar la otra porque de lo contrario no obtendrá ese efecto de mármol. Si llegan a experimentar verán que queda como un plástico la cartulina y además queda resistente.
*Nota: Recuerde cubrir la mesa donde vaya a pintar y que sea al aire libre y por seguridad cubrir la nariz y la boca.
- Color Blanco
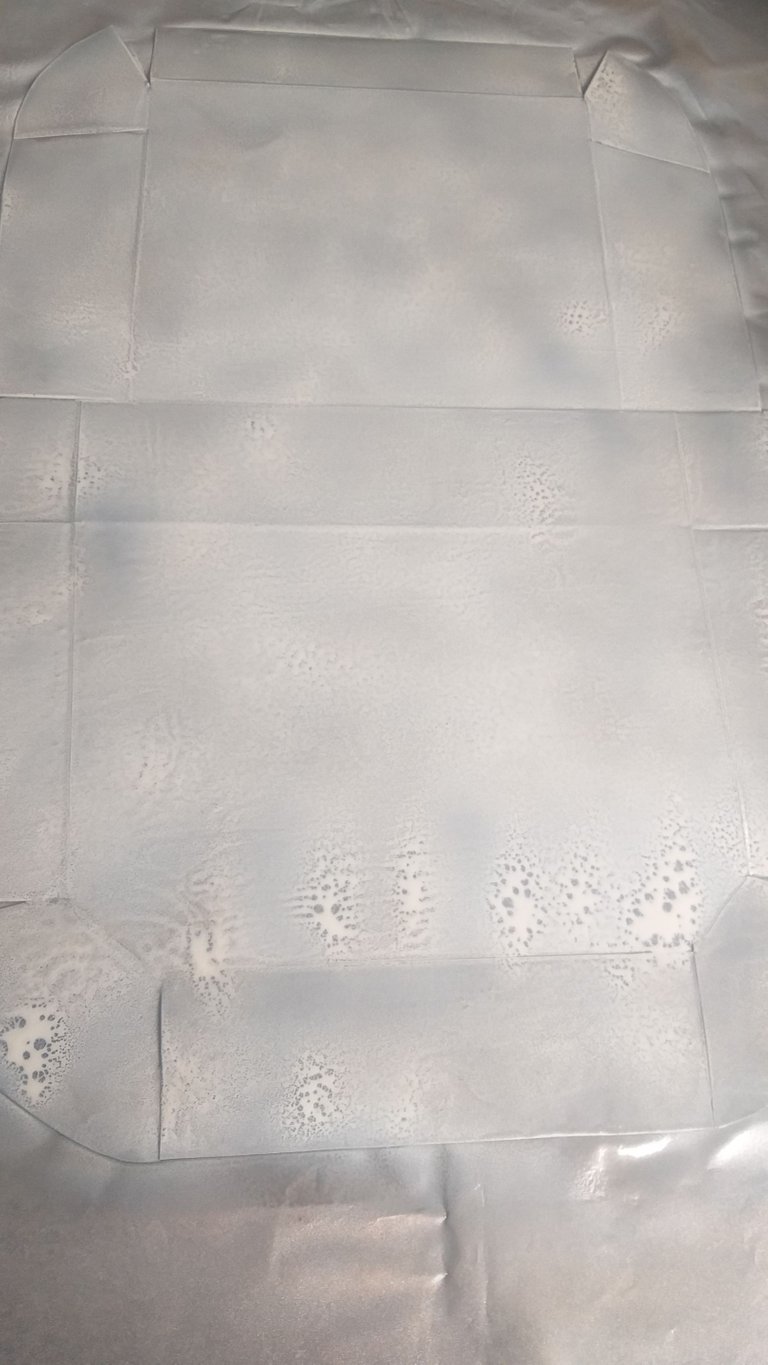
- Color dorado
- Color plateado
- Color negro
- Por último de nuevo el color blanco y pueden ver como va quedando y ahora sí dejen secar
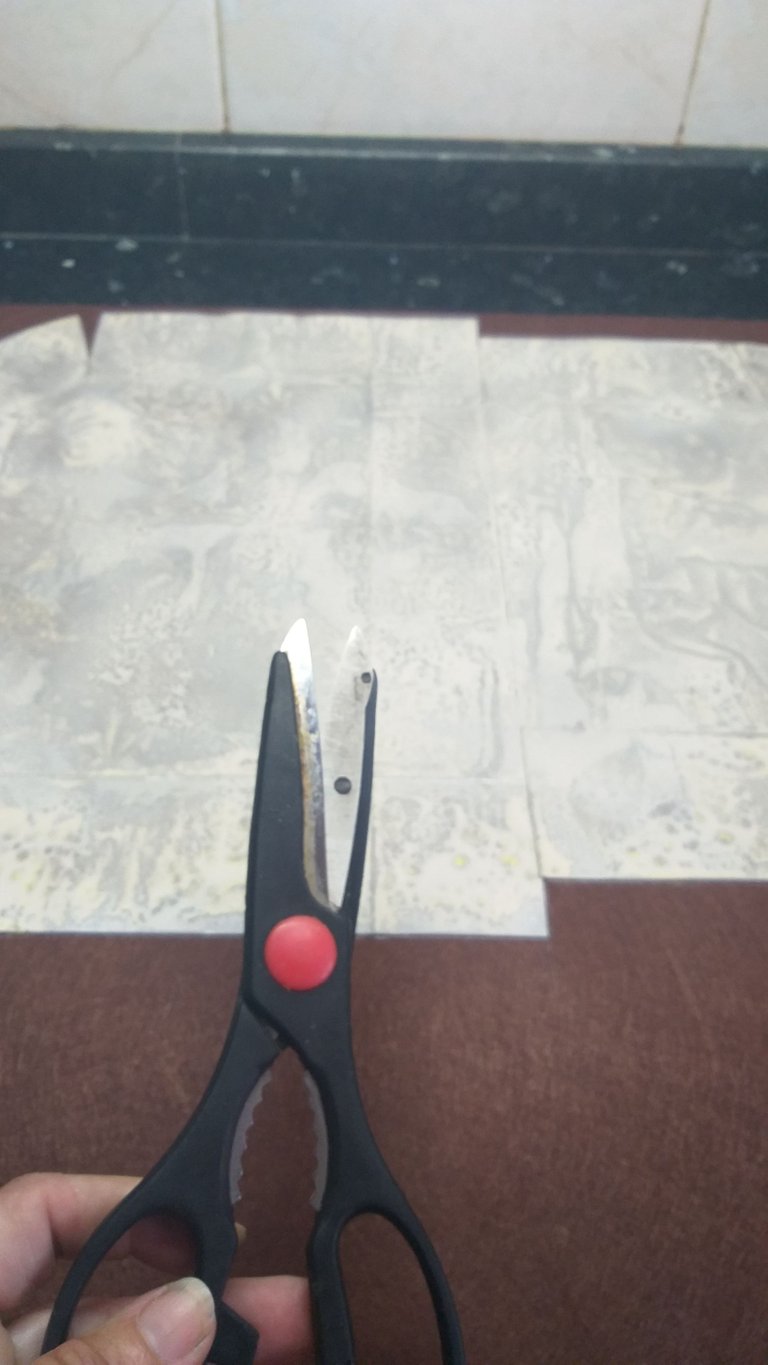
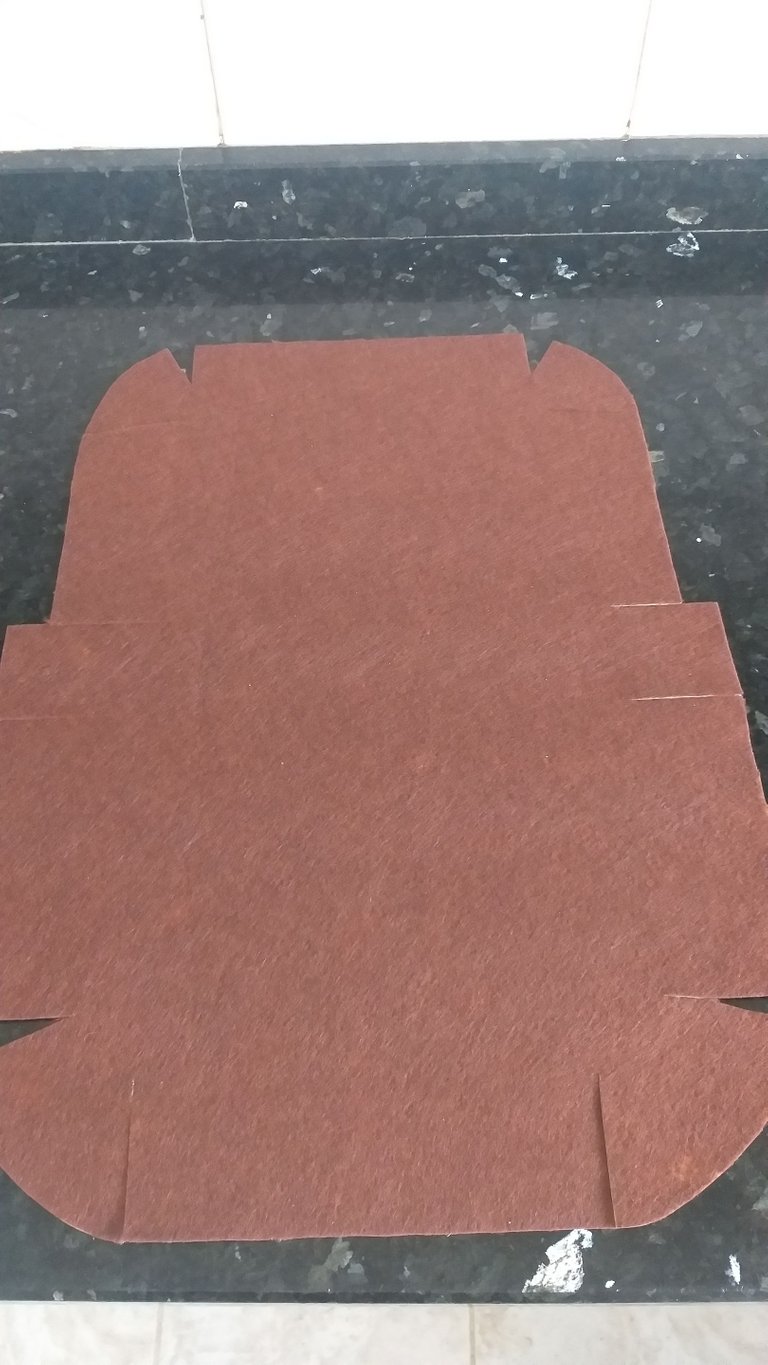
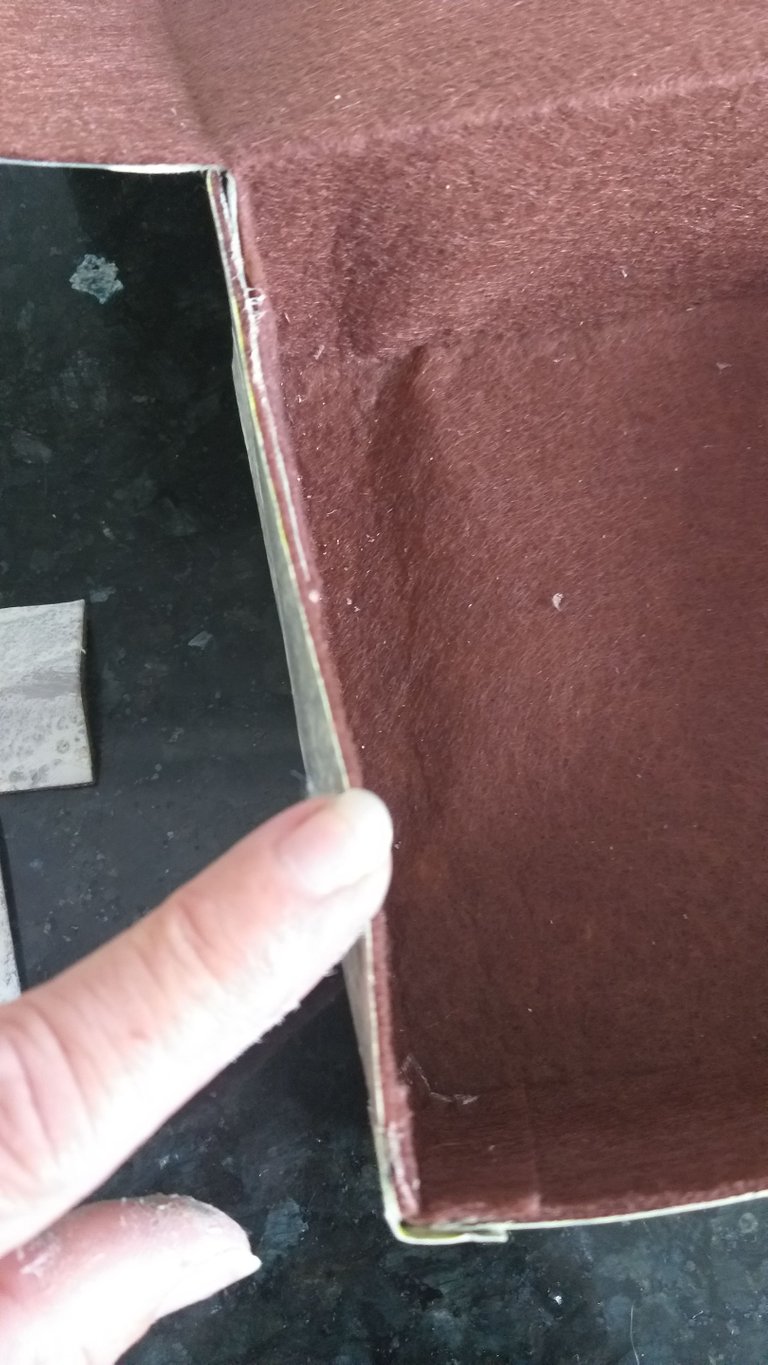
5👣🎁. Vamos a pegar el molde al fieltro de color marrón o el color que sea de su gusto, luego recortar con la tijera todo los bordes y donde van las pestañas.Como le dije anteriormente debe cortar las líneas que van hacer dobladas.
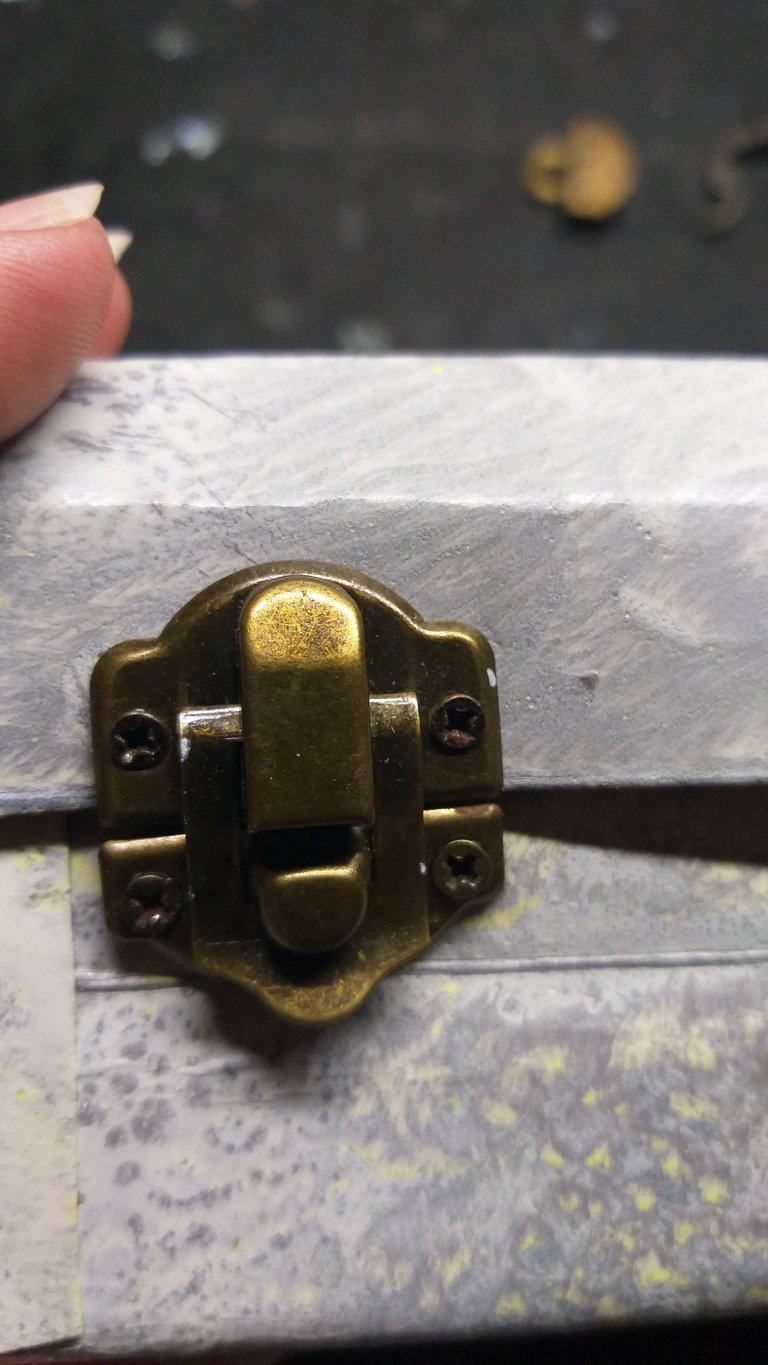
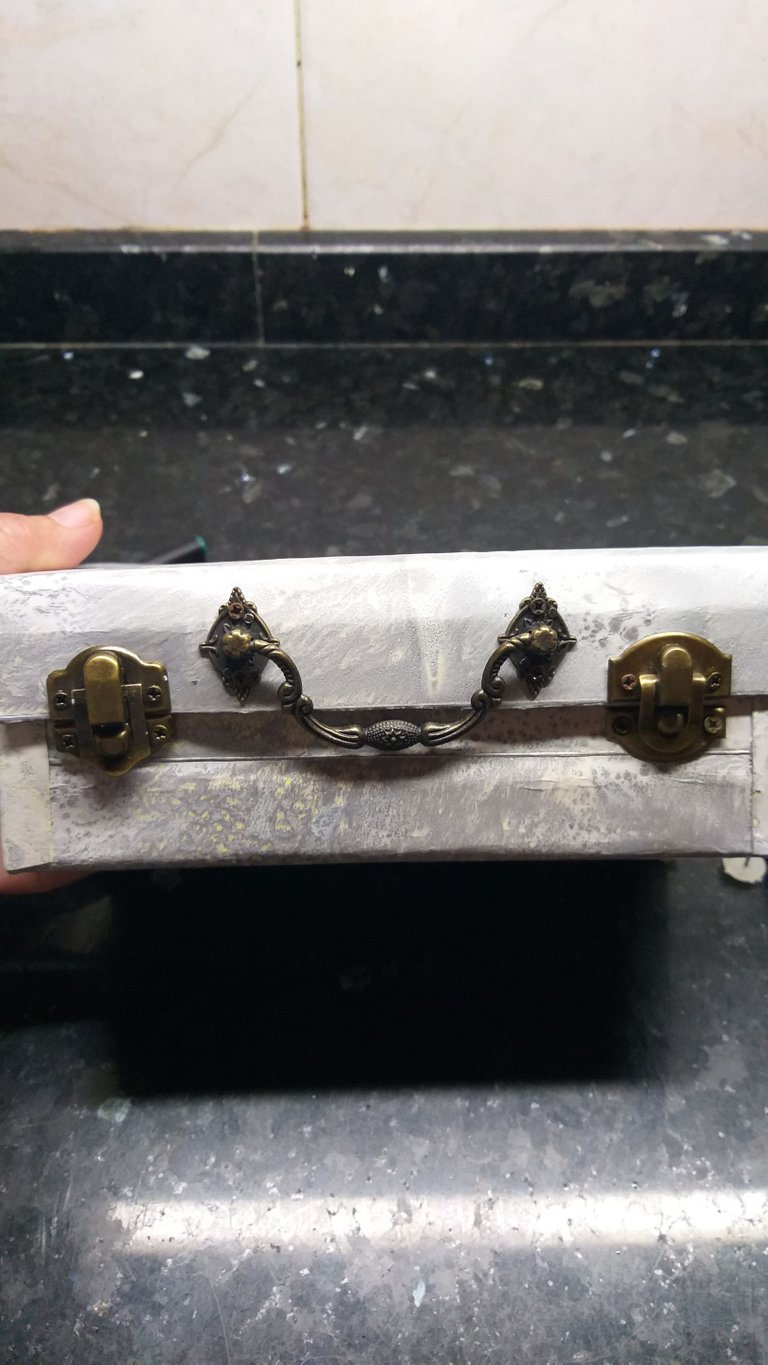
6👣🎁. Vamos armar el mini neceser pegando las dos pestañas como le muestro en la imagen pegar esa con la del lado y la que está en la misma línea también con la que tiene al lado; cuando digo la del lado me refiero a la tapa que servirá como base del mini neceser. El fieltro debe quedar por dentro; después que tenga ambos lados pegado la otra tapa que será la de arriba colocarla hacia adelante donde vamos a poner los cierres del mini neceser y un herraje.
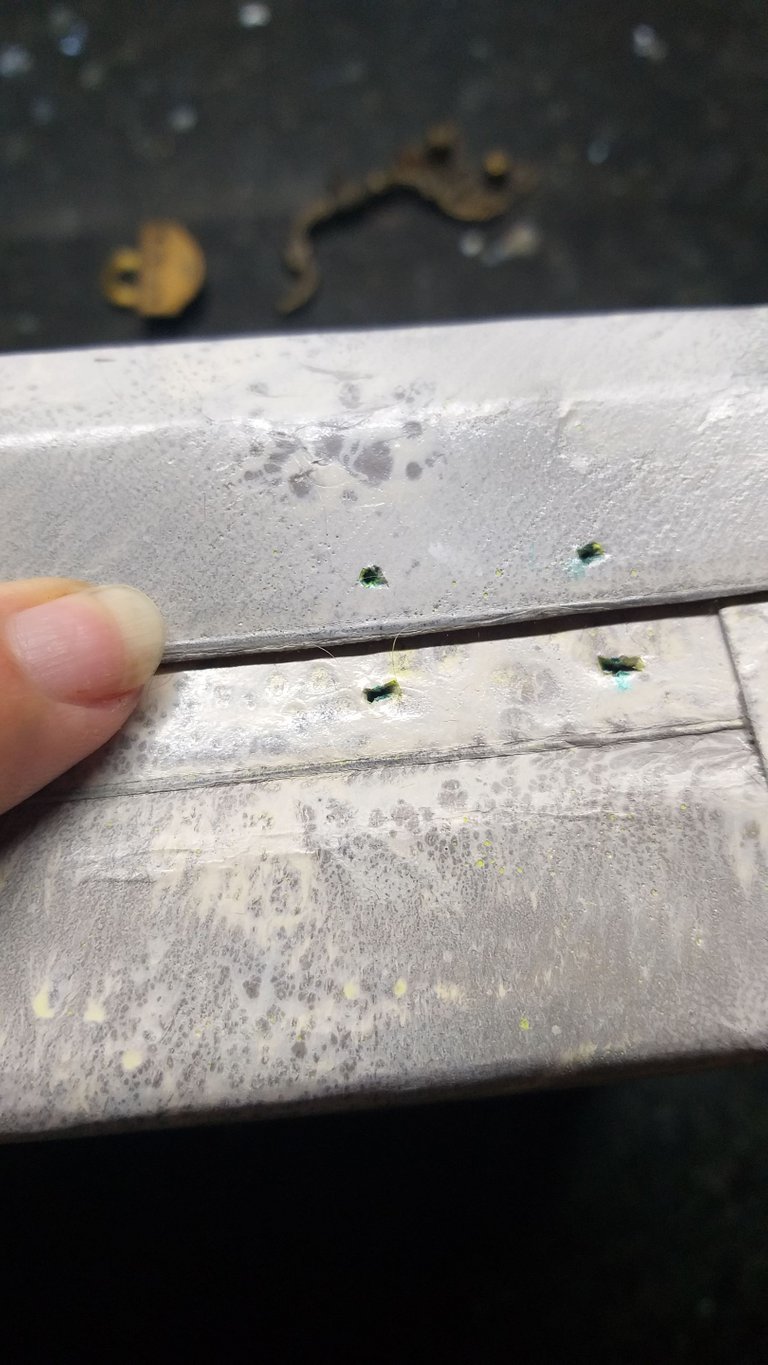
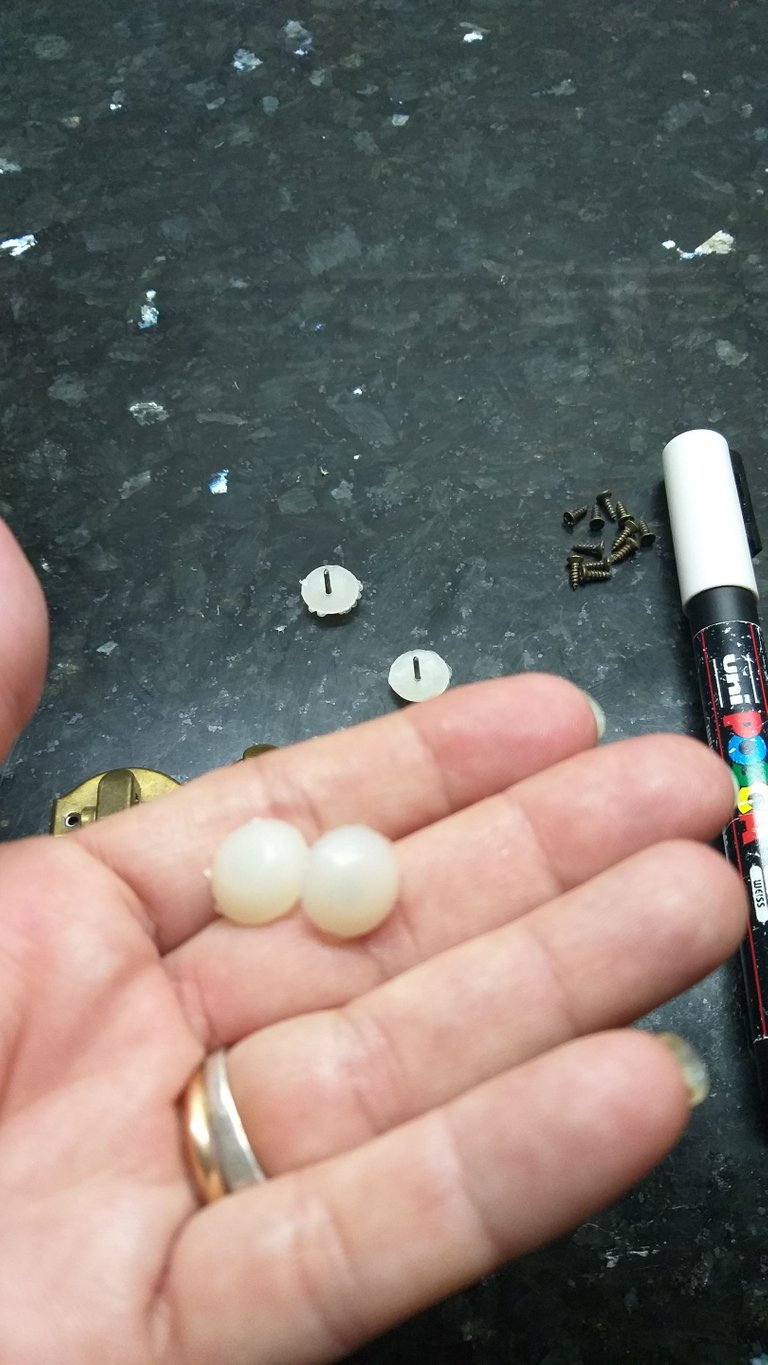
7👣🎁. En la imagen le muestro el material que utilizaremos con el lápiz o un marcador vamos a marcas todos los puntos donde colocaremos cada pieza.Deben calcular que tengan la misma medidas y con el destornillador o cuchillo atornillar todos los tornillitos.

8👣🎁. Con unos chichen pegar y incrustar el clavo en las esquinas dejando un espacio; estas serán las paticas del mini neceser.
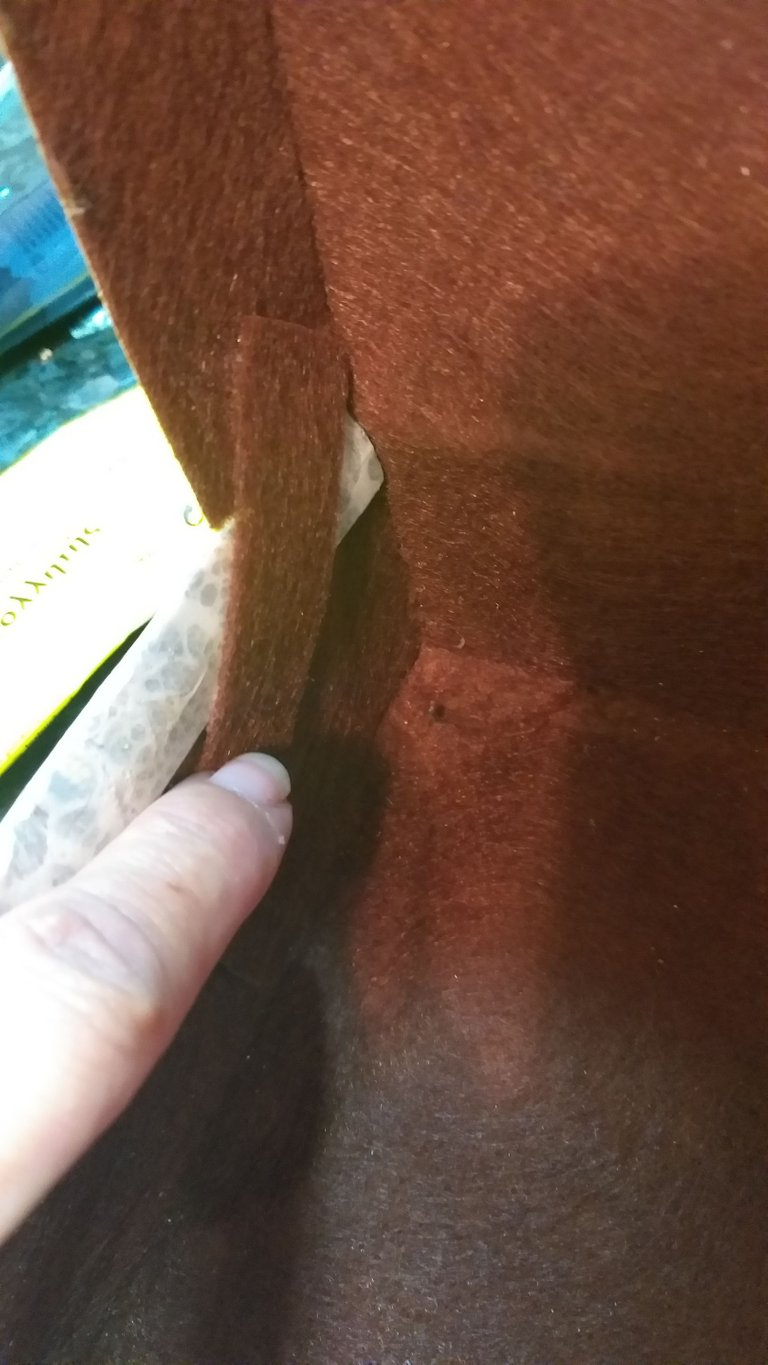
9👣🎁. Con dos pedazos del fieltro marrón recortar dos tiras de 5cm cada una y con el pegamento pegar ambas tiras de cada lado del neceser por dentro rsto permitirá a que la tapa no se caiga toda hacia atrás cuando lo vayan abrir.
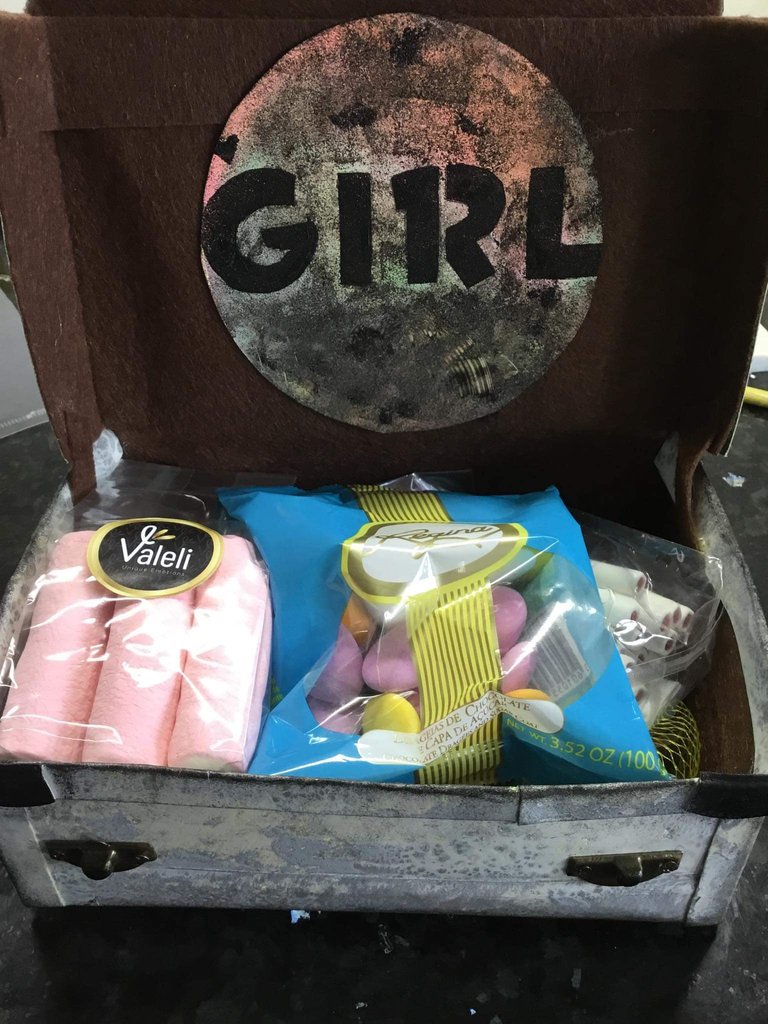
10👣🎁. A la persona que le regalaré este mini neceser que va a servir de meterte unas golosinas que le encanta🥰, esta amiga llama a nadie por su nombre si no le dice a todas chica, por eso decide hacer una plantilla para explicarles de una forma rápida como se hacen. Las decoraciones con las plantillas quedan hermosas. Le enseñaré en hacer la palabra Girl que seguro se reira cuando abra el mini neceser😜.
Materiales para la plantilla
Acetato o cualquier material plástico duro
Un cúter
Marcador de color blanco
plato desechable de material torna solado
Un pedazo de esponja
Pintura a acrílica de color negro
Una tabla de picar verduras
una hoja blanca y un lápiz
Tirro o cinta de construcción
- Corcho
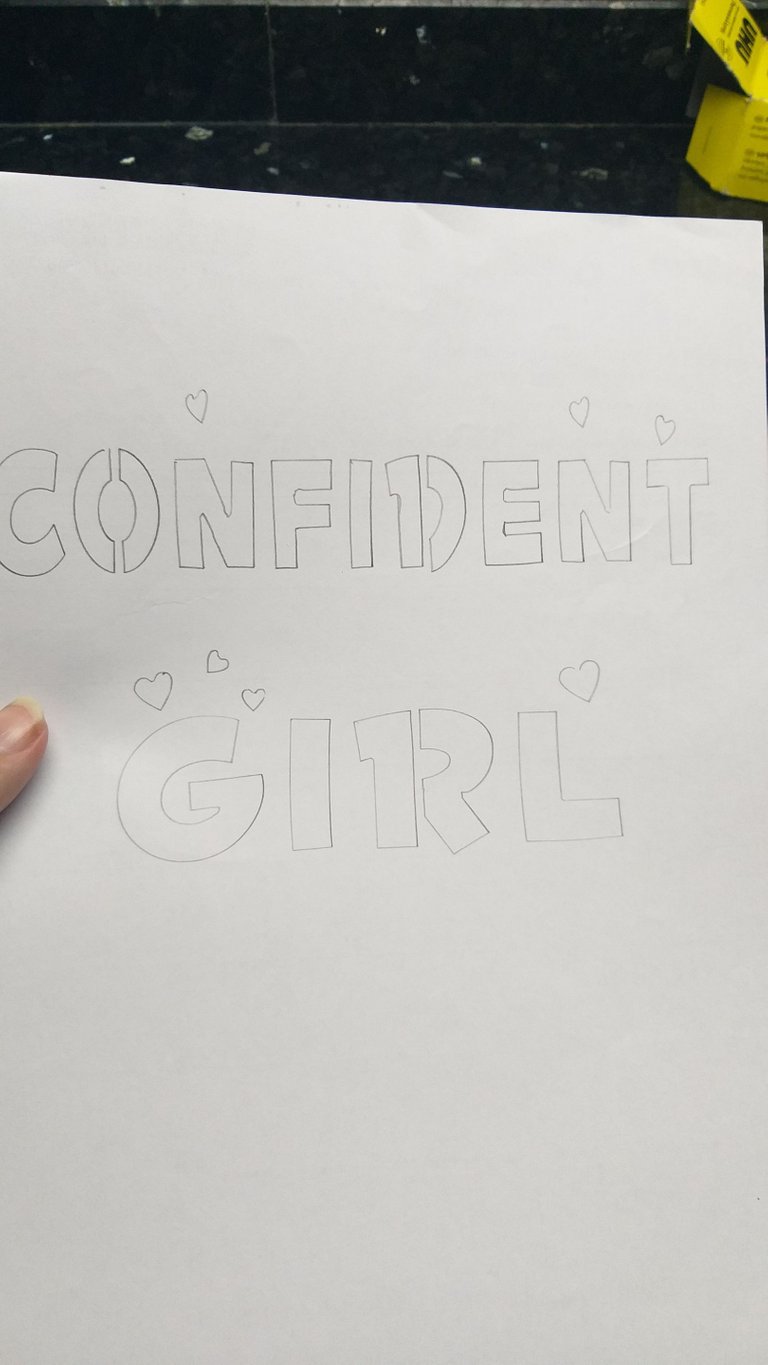
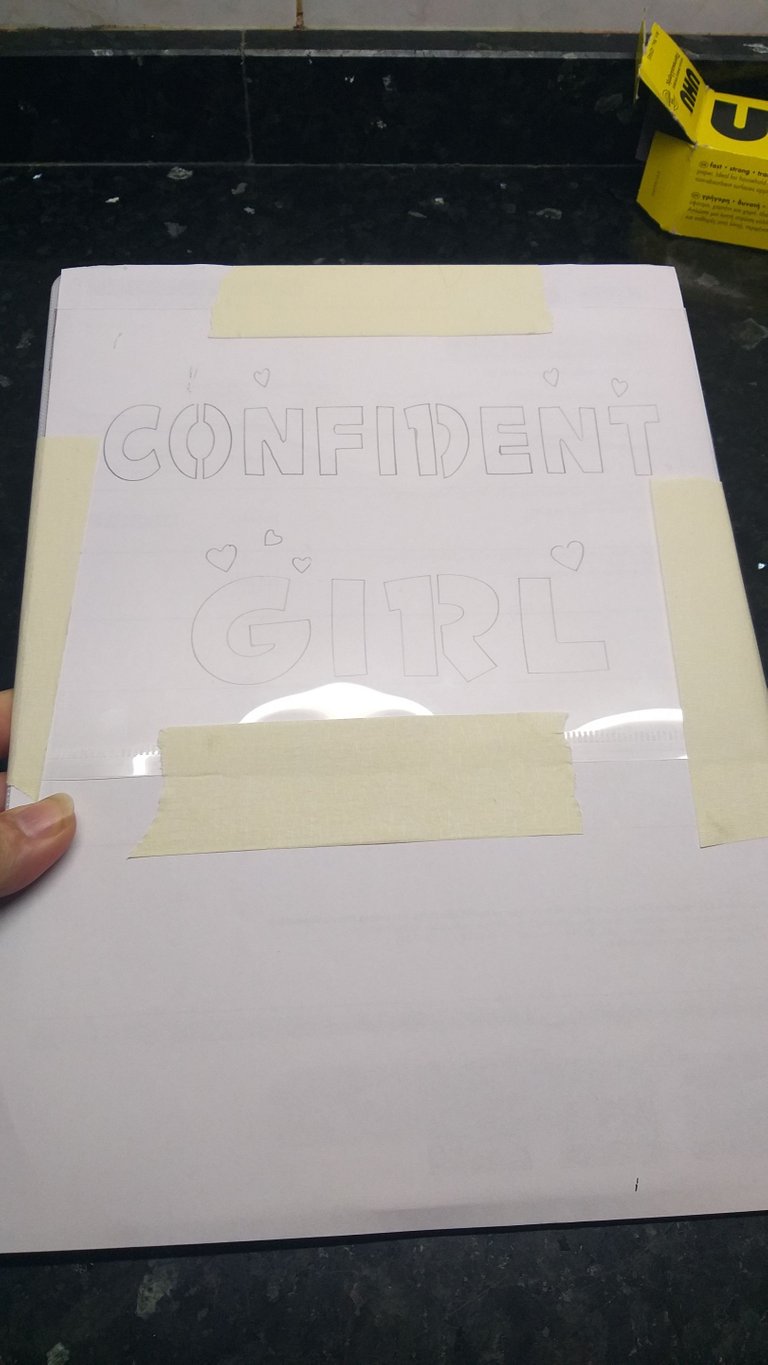
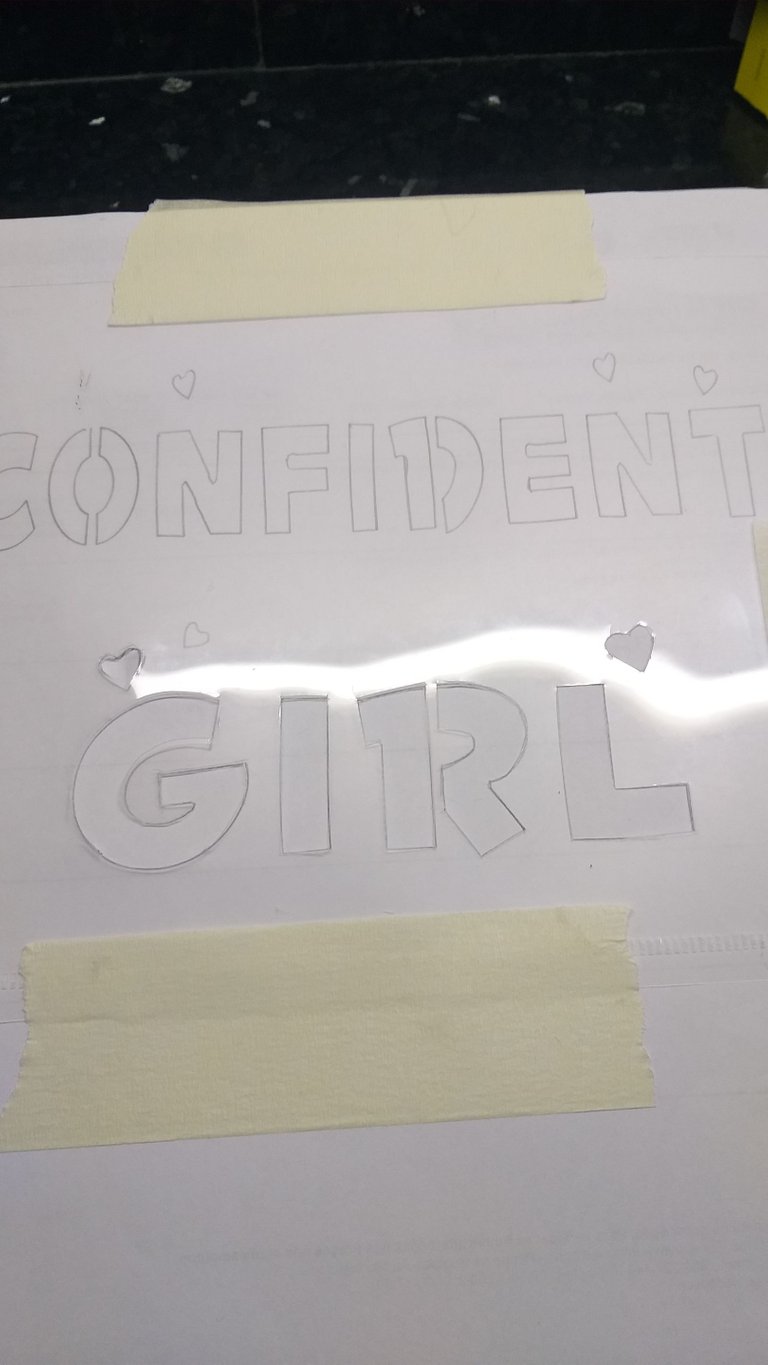
👣1. Lo primero que debemos hacer es dibujar la figura o palabra en este caso Girl y también escribí confidente para después hacer esa palabra en plantilla; en hoja blanca escribimos la palabra Girl y le dibuje unos corazones para que queden en la plantilla.
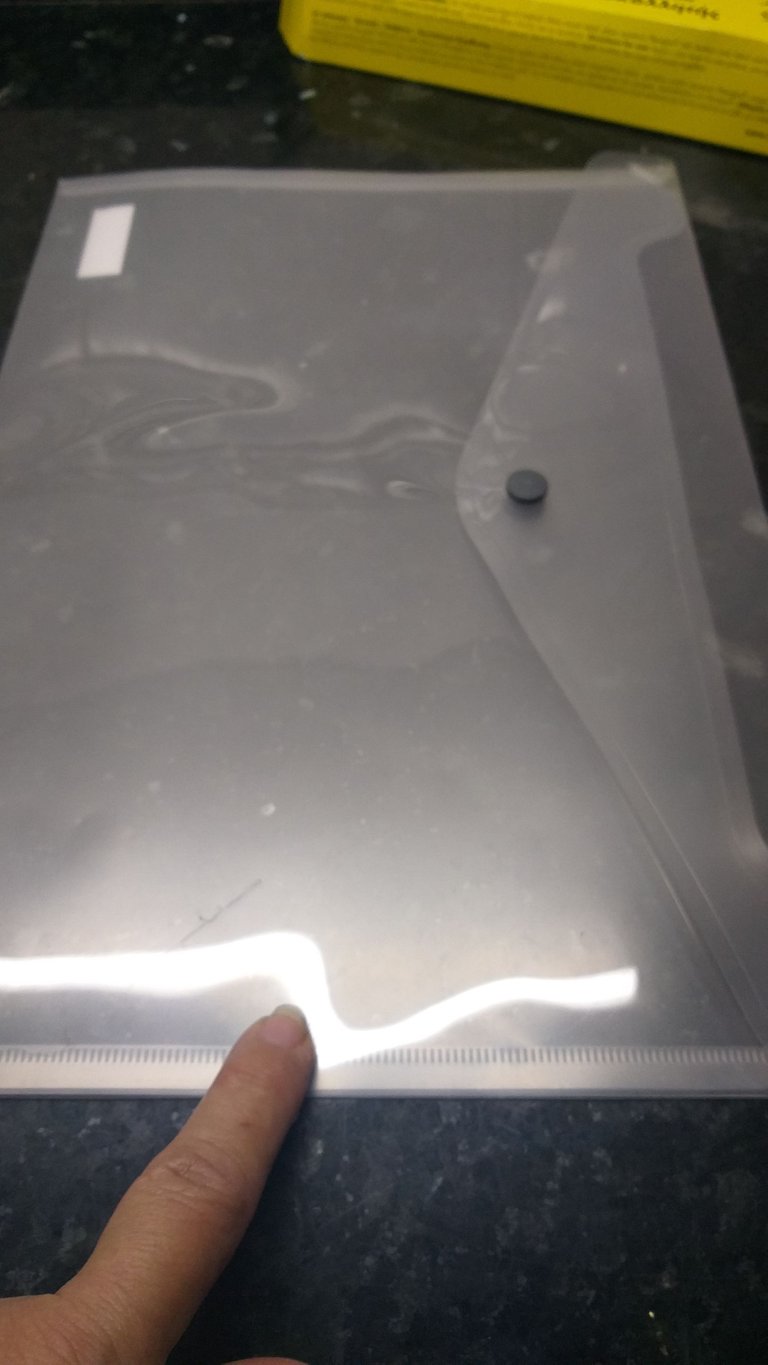
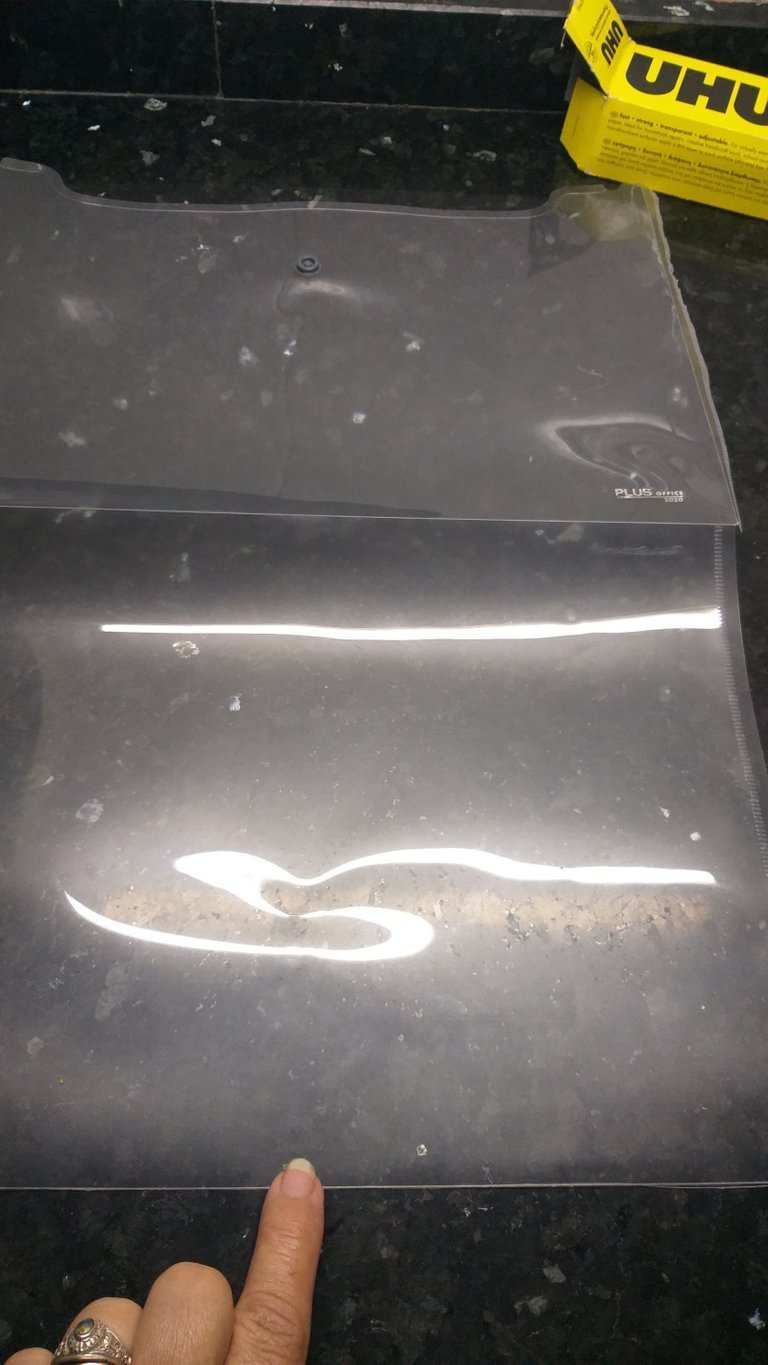
👣2. Para la plantilla utilicé una carpeta de material de acetato que tenía; a mi me gusta utilizar un acetato que sea de más grosor para que la plantillas duren más tiempo. La carpeta la abrí por la mitad y luego con la tijera la corté a la medida de la letras.
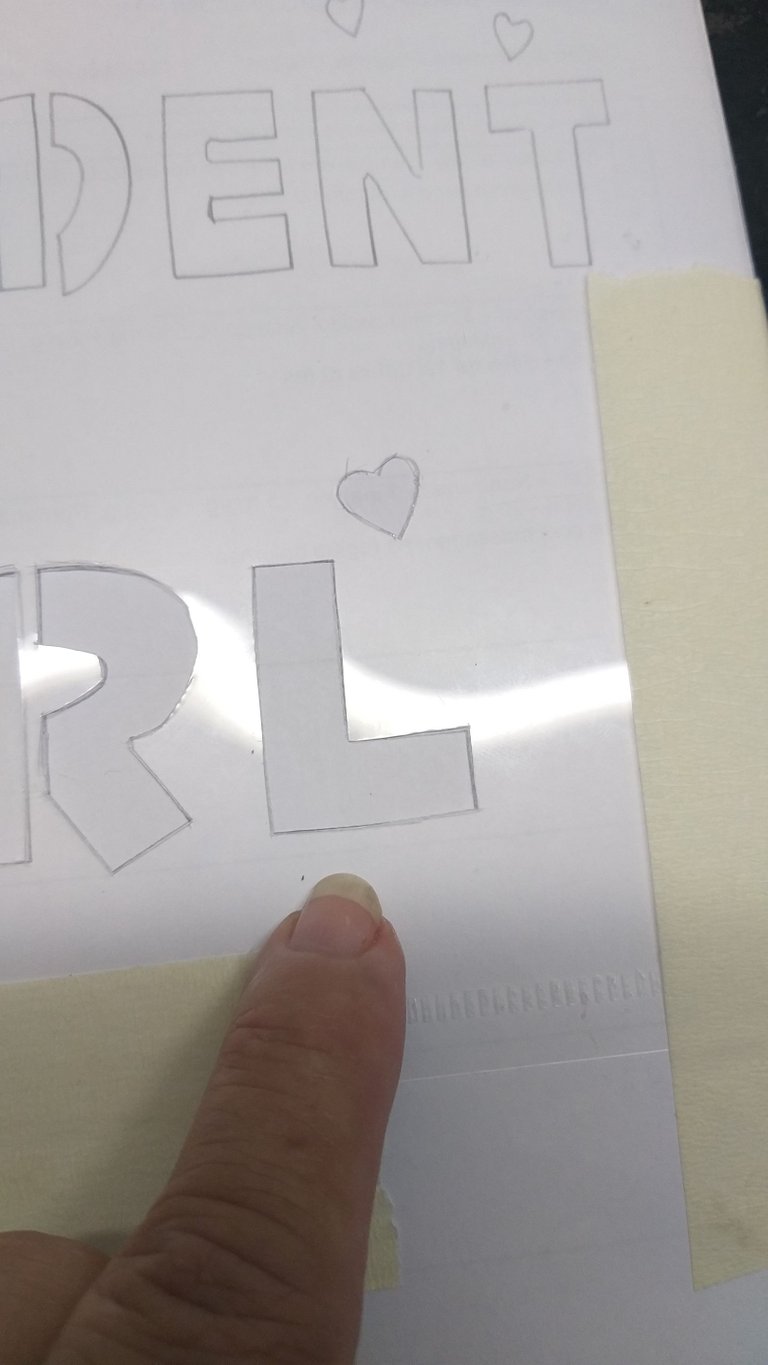
👣3. Coloque la hoja con las letras debajo de la lámina de acetato y con el tirro fijarla a la tabla de cortar verduras.
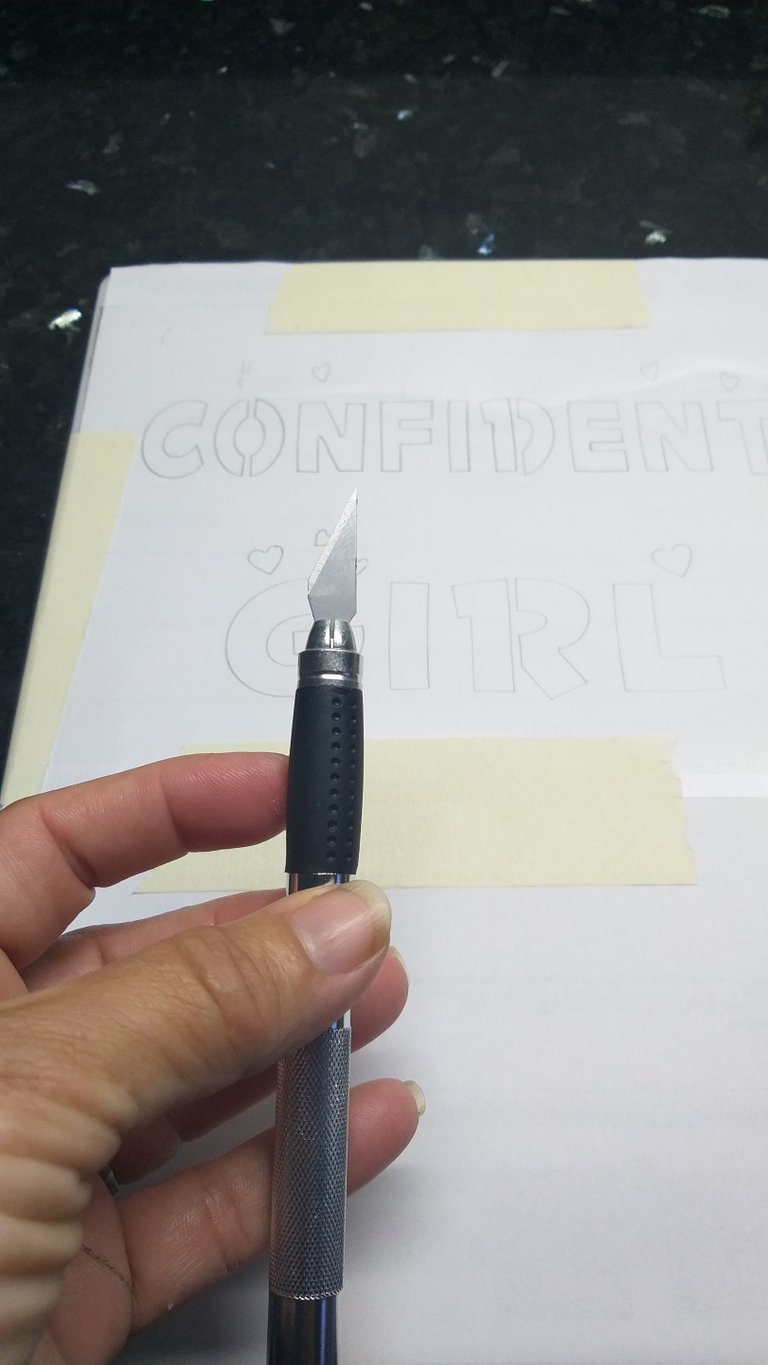
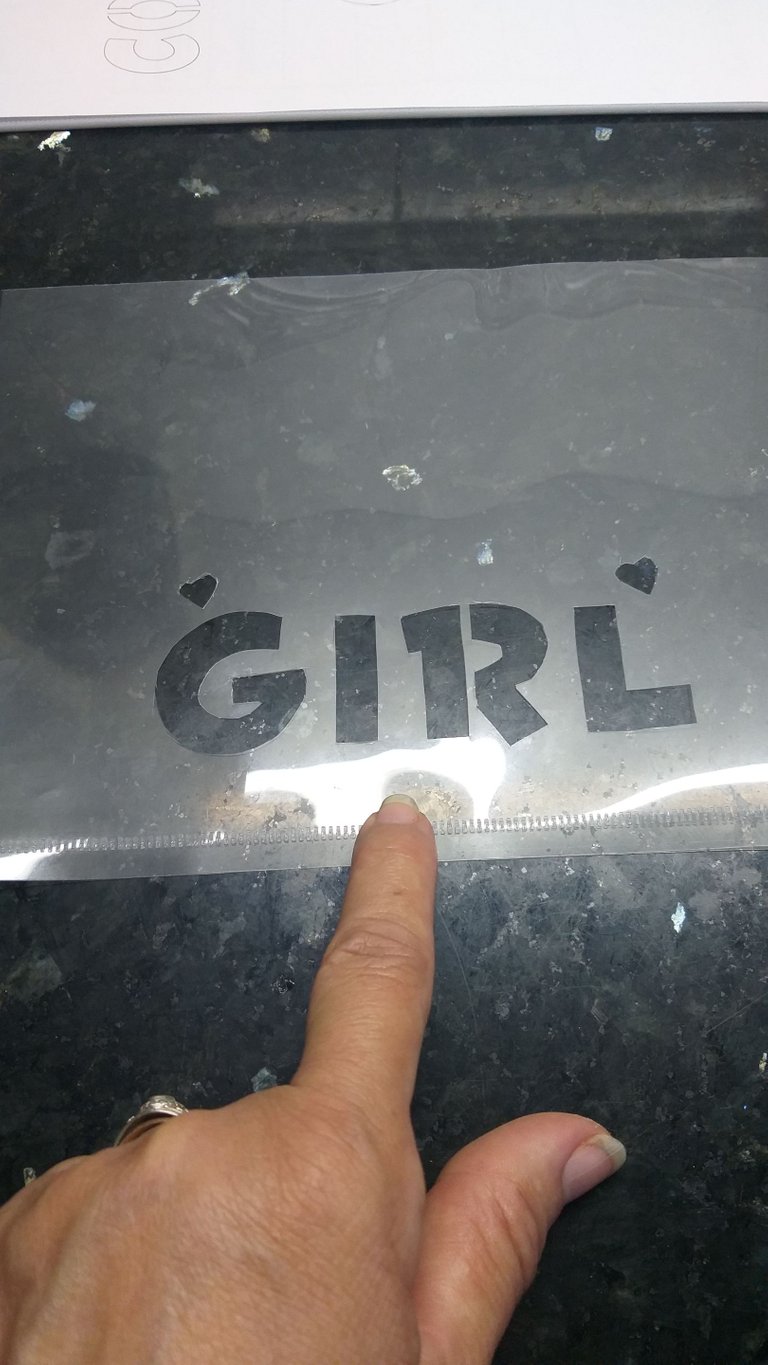
👣4. Luego con el cuter cortar todo lo de adentro de cada letra, hágalo con cuidado. En las curvas coloque el cúter de forma parada ( de punta)
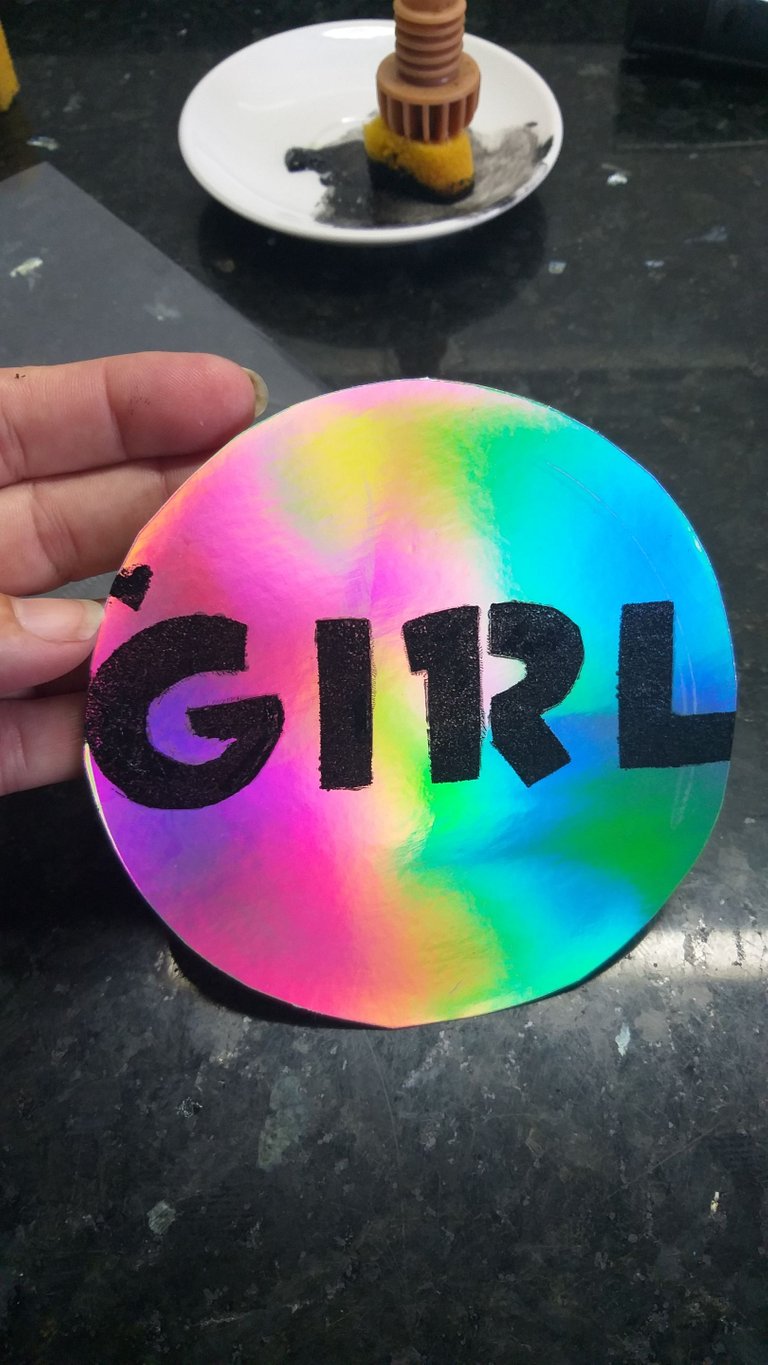
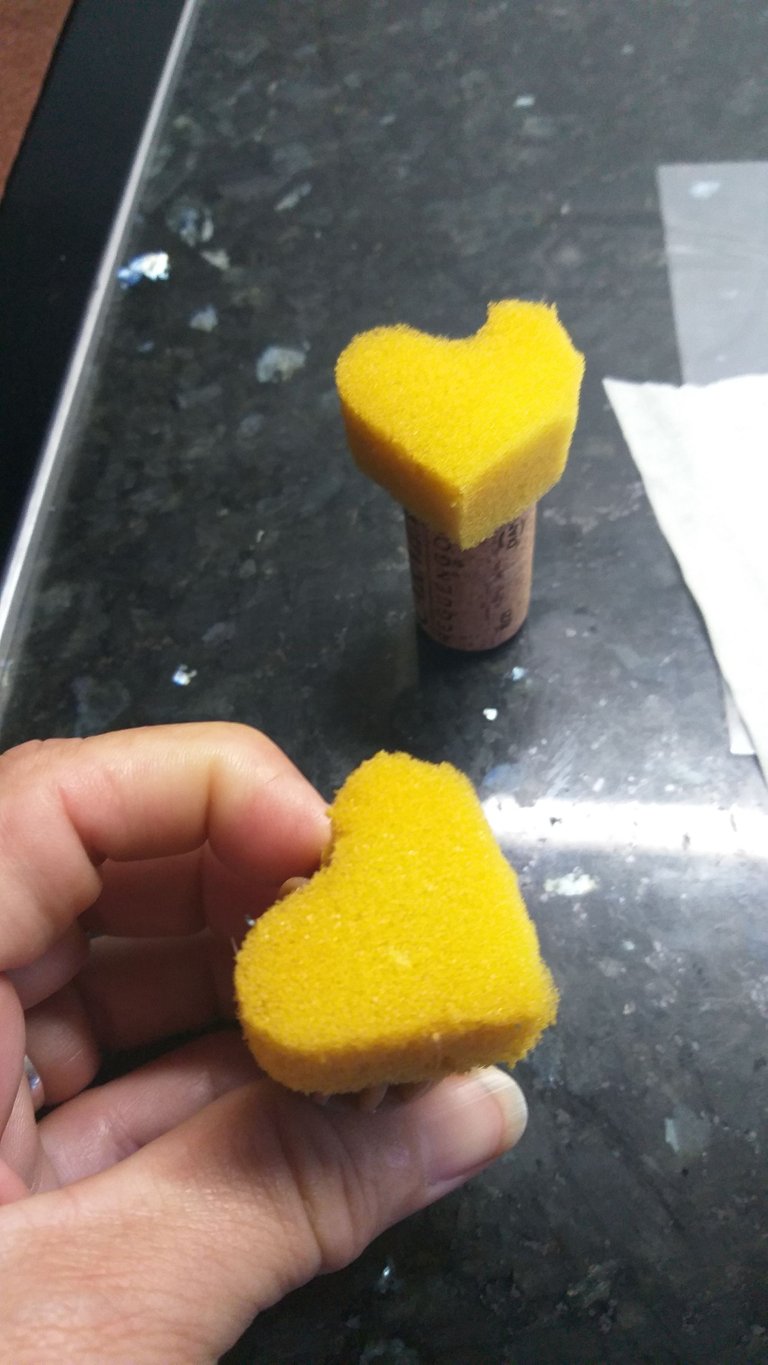
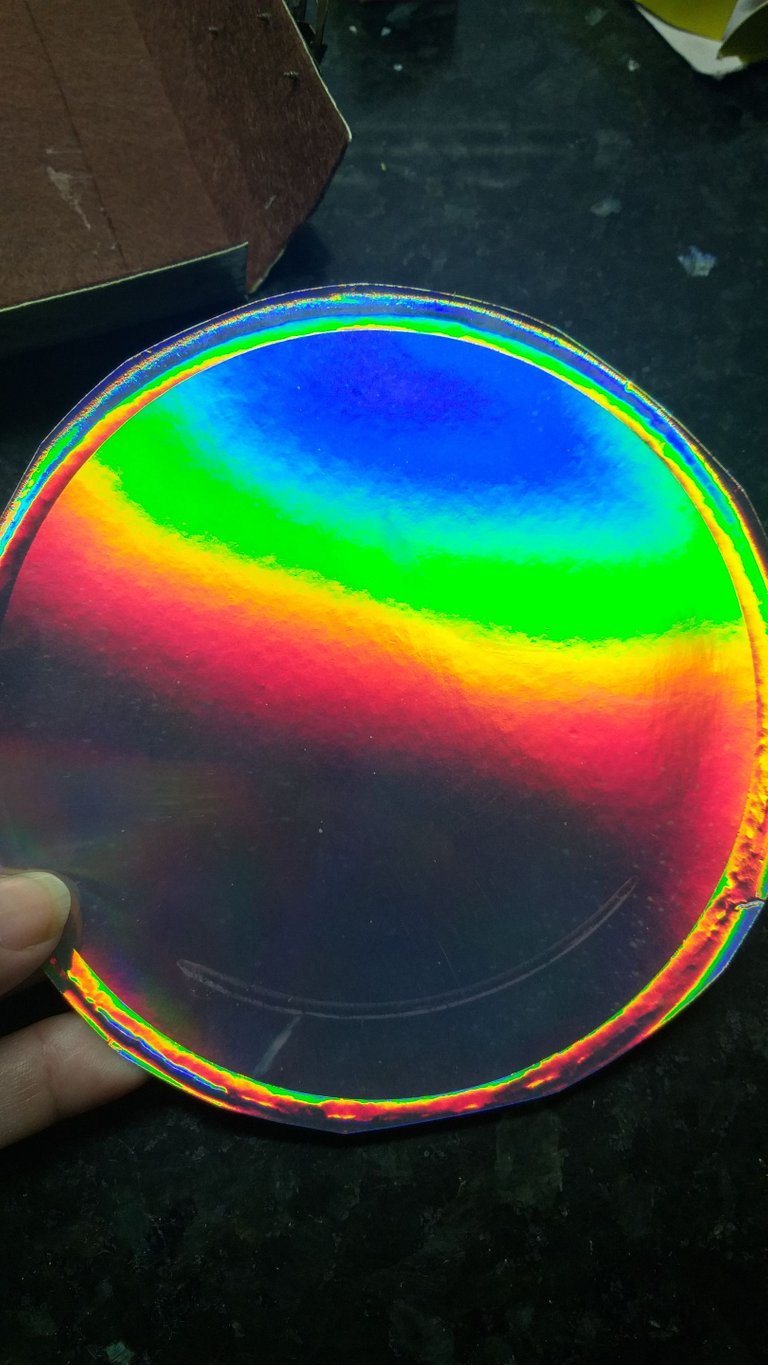
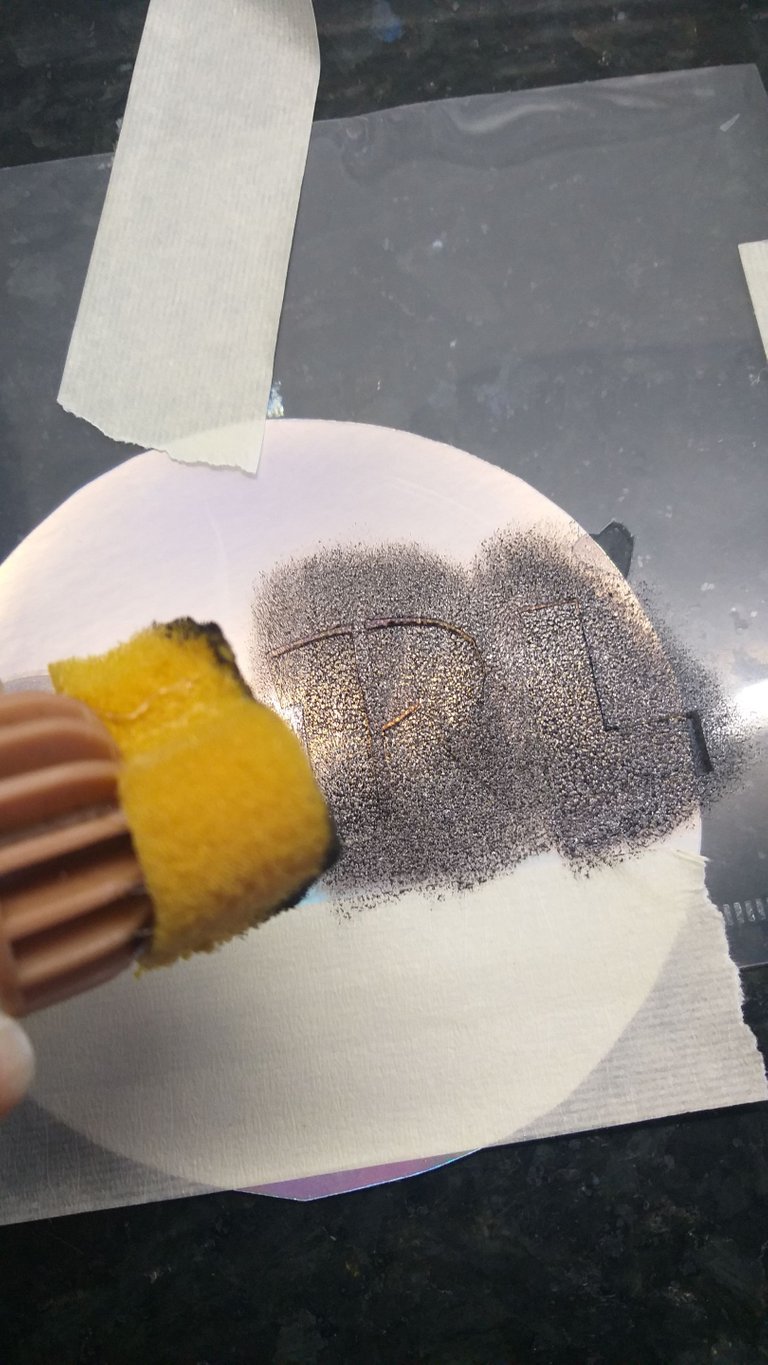
👣5. Con un pedazo de esponja y la pintura negra vamos a motear las letras cargando y descargando la pintura en un pedazo de cartón o en el mismo objeto que esté utilizando para colocar la pintura en éste caso se usó un plato. El objeto donde voy a transferir la palabra es un plato de plástico transparente tornasol, la cual le recorte las orillas que tienen figura de pétalos. Para la esponja utilicé un corcho y le pegué un pedazo de esponja arriba👌.
👣6. Fijar con el tirro la plantilla al plato que recortó.
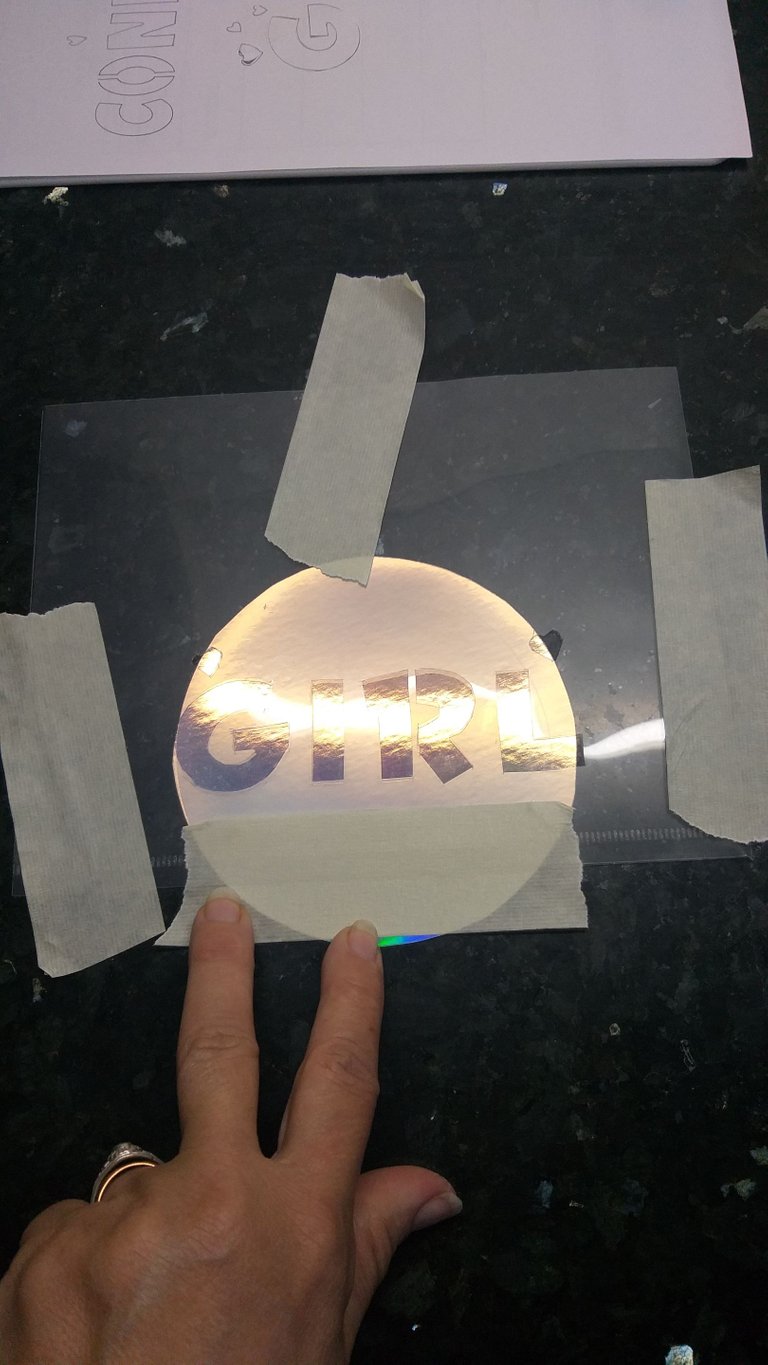
👣7. Luego con las esponjas comience a motear las letras, hasta quedar el color que desee dejar secar.
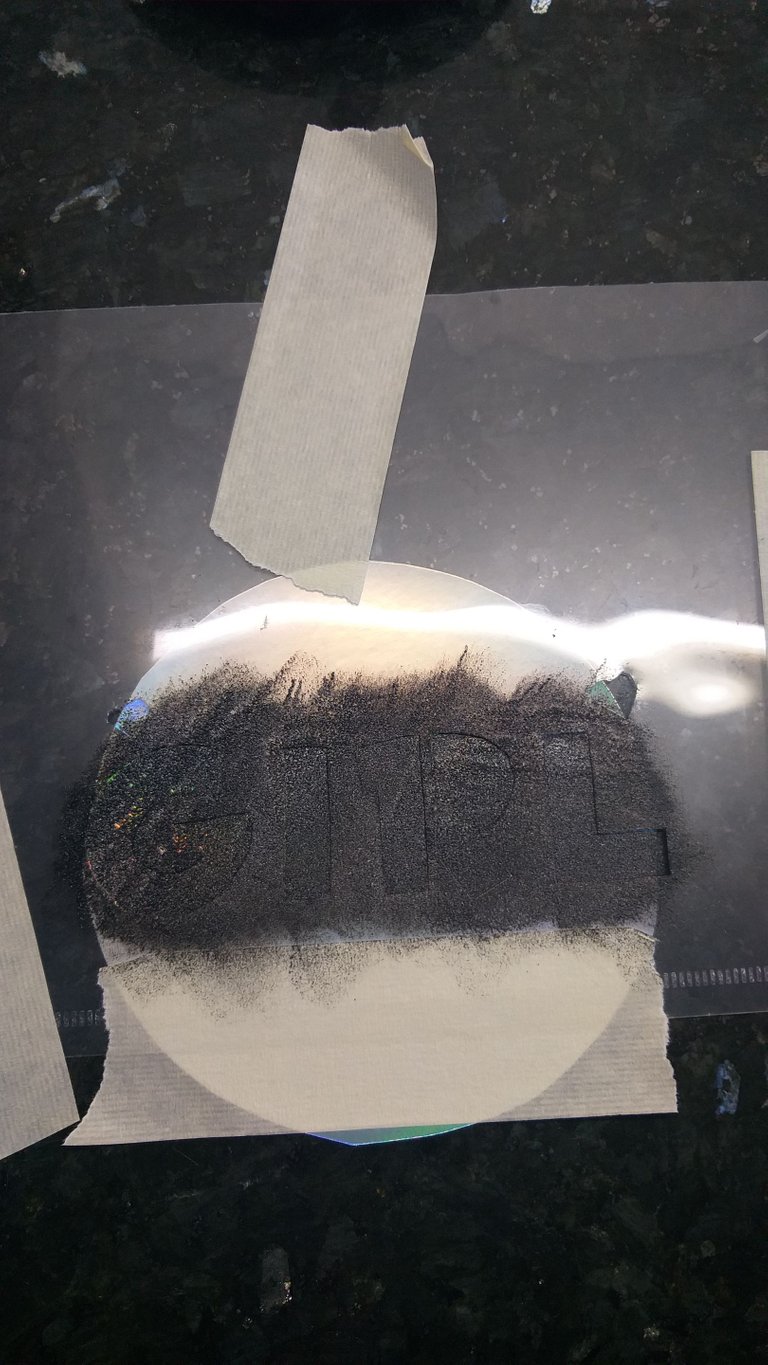
👣8. Con el pegamento vamos a pegar la letra Girl dentro del mini neceser, que cuando mi amiga lo abra se consiga con la palabra y las golosinas. Con la esponja le di más oscuridad al plato porque su veía muy chillón😛🤭
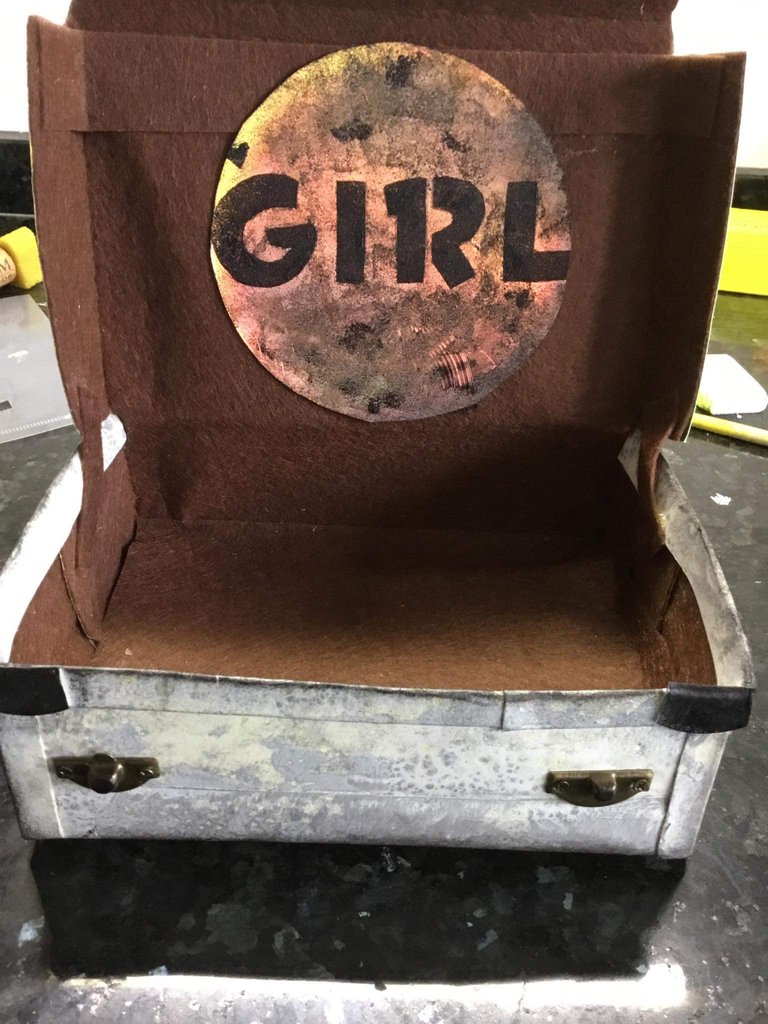
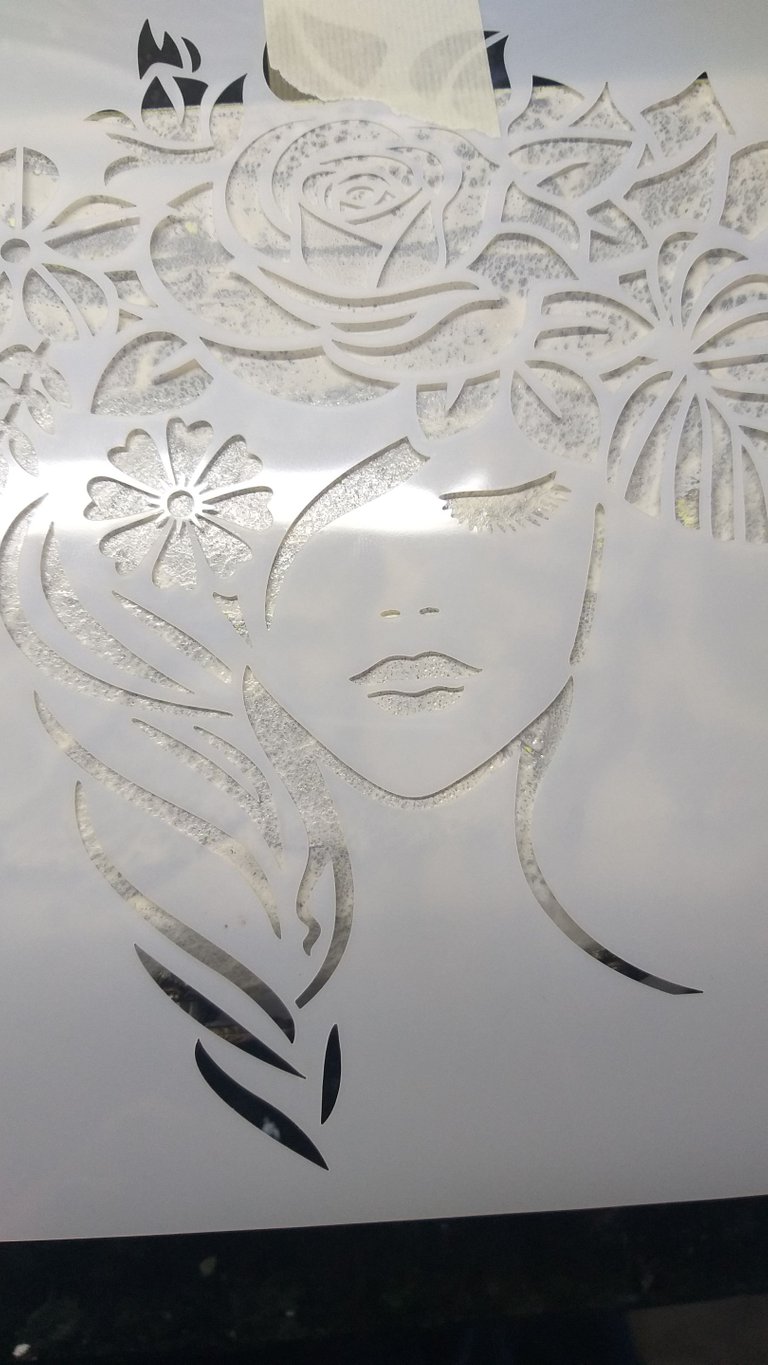
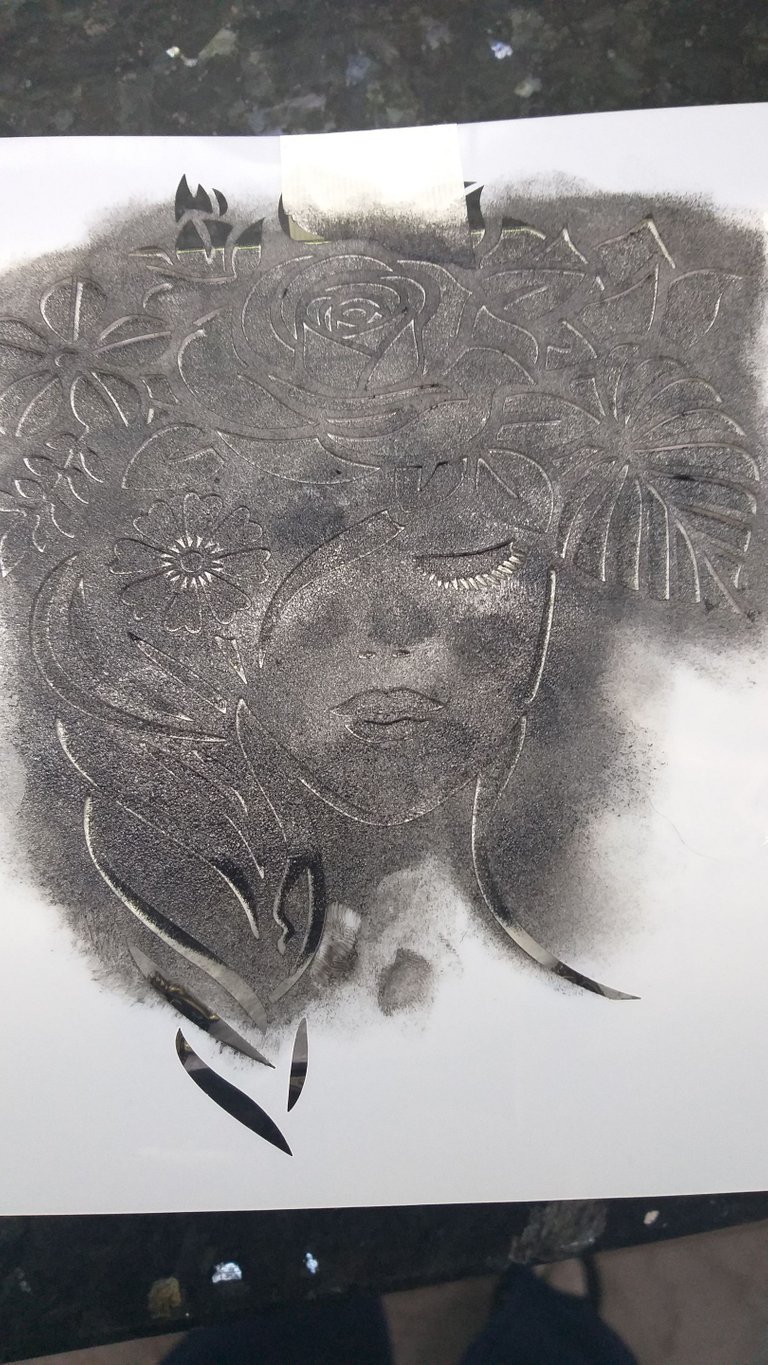
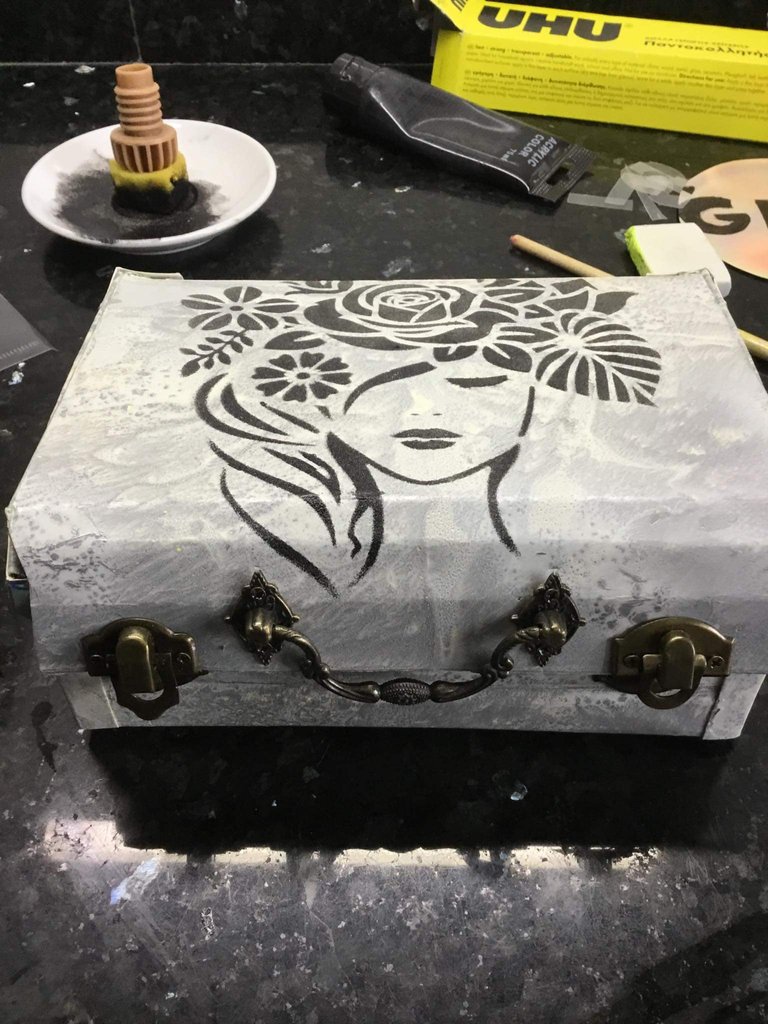
♡Vamos a decorar por fuera el mini neceser; aunque no hace falta pero quise personalizarlo y darle el toque envejecido. Con una plantilla de la cabeza de una mujer la transferí a la tapa del mini neceser, haga el mismo proceso con el que hizo la letra Girl con la técnica drl moteado y deje secar. Con la orillas del plato coloque en las puntas del neceser yvcon la esponja motear de negro y por todas las orillas del mini neceser; también por las esquinas. Se creó el efecto de la técnica del envejecimiento👍
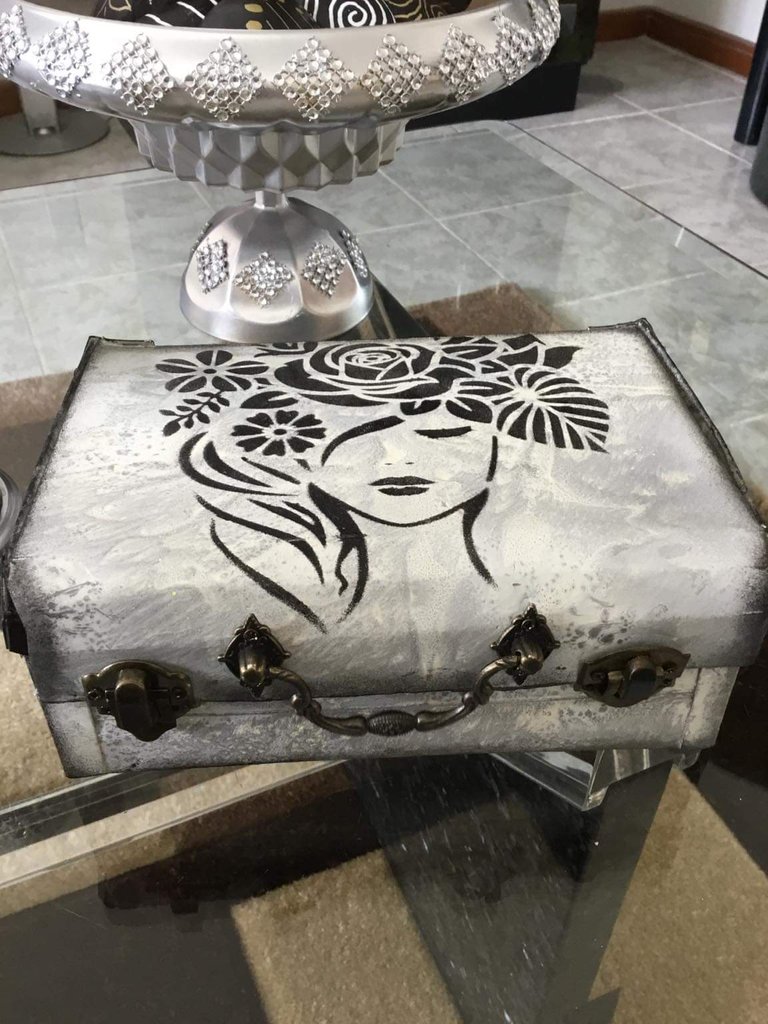
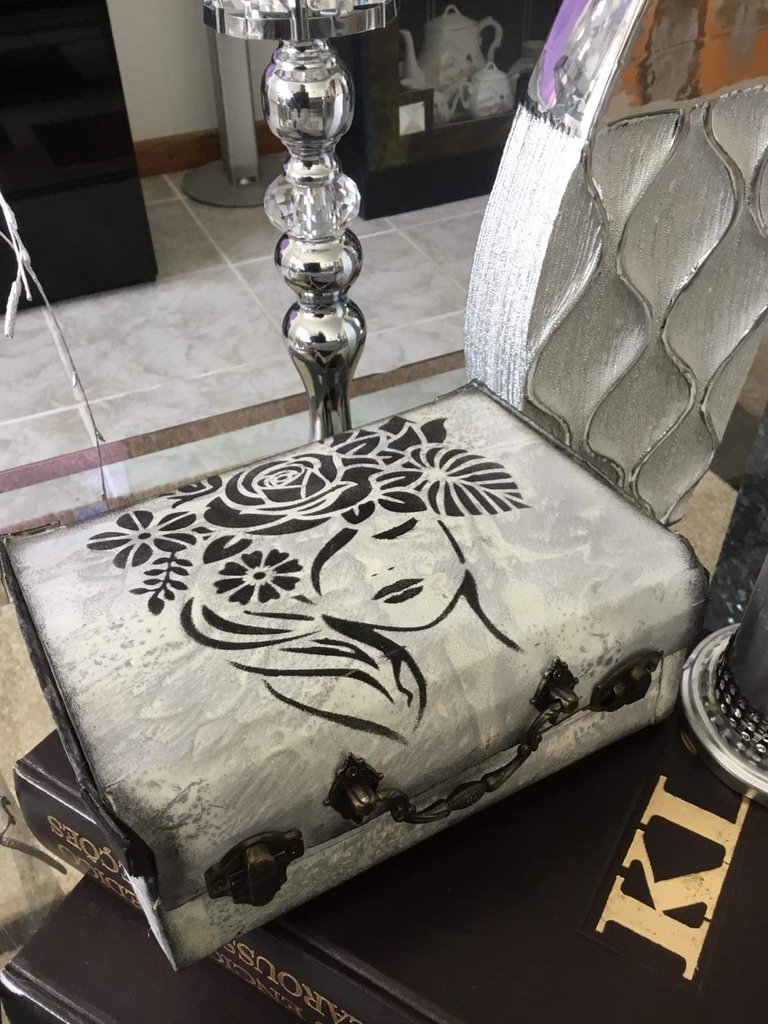
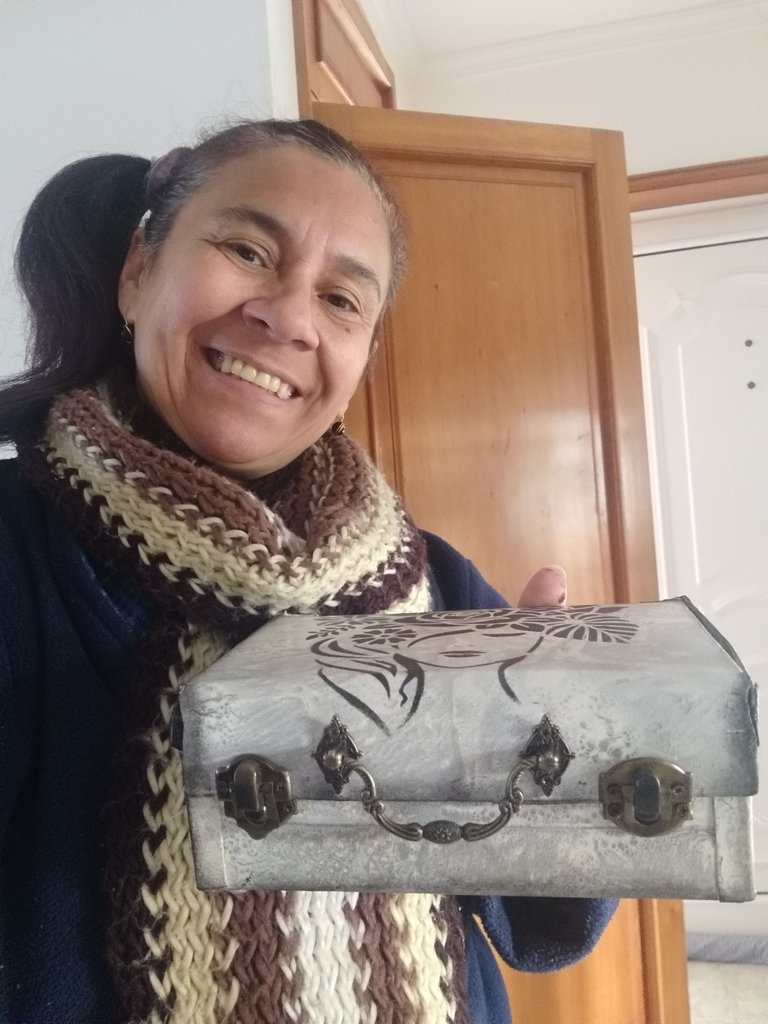
Resultado final utilizando molde y plantilla en un mini neceser❤🤩
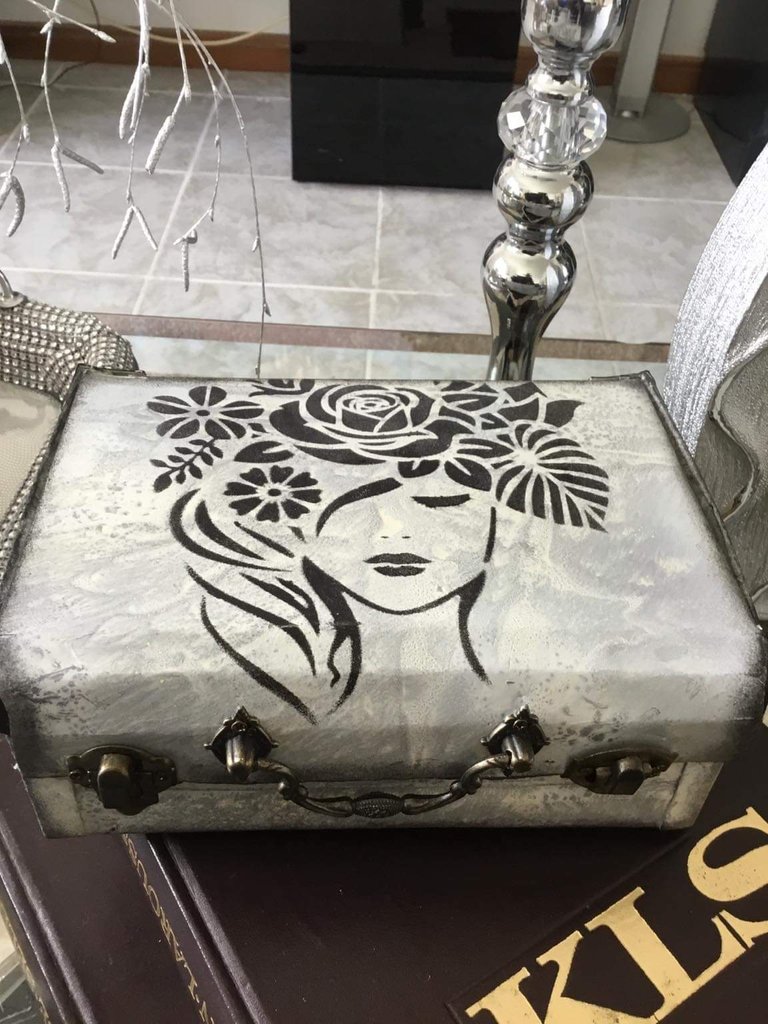

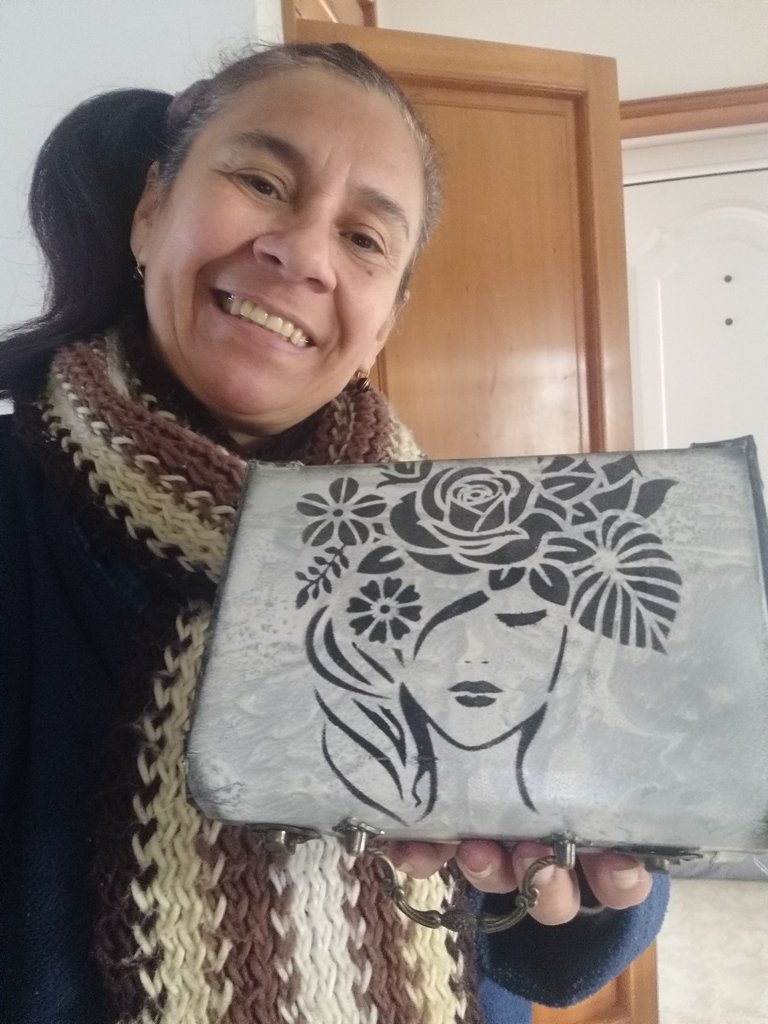
Que opinan amigos del resultado de mí mini neceser; les cuento que no me esperaba éste resultado, me encantó y se que a mí amiga le gustará más, hasta pensé quedarme con él y meter las golosinas en una bolsa🤭🤭😛😜. Gracias por su apoyo a todas las comunidades y las diferentes personas que me dejan su lindo comentario. Dios me los colme de Bendiciones.❤👏👏
Quiero hacer una invitación especial a mi amiga @mayifiestas para que se una a este concurso y demuestre la creatividad que ella tiene que son muchas❤. También quiero invitar a todos aquellos que quieran participar y expresen sus cualidades.
Las fotos son de mi propiedad tomadas por mi teléfono móvil Samsung Galaxy A6.
English
Receive a cordial greeting to all the people who make life to the different communities of this great and beautiful HIVE hive; I hope you are well and I wish you a happy weekend. The #hivediy community opened a new contest and of course I couldn't stop participating😛👍; and I was fascinated by the idea of making templates and molds to detail a box, personalized envelopes and a bag that can be used to give a present 🎁 to a loved one.
It is very emotional and motivating to receive a person an object that another person made with their own hands; The best way to express appreciation, I love you, I love you or I'm sorry, is through a gift or present🎁. I love giving gifts to family and friends, I always have goody bags and boxes stored that I do with time and at Christmas time; I no longer have to buy 🎁👌😁.
The contest has rules and among them there is one that the design must be ours 😳 and at work I spent two days thinking about what to do 🧐 and then I started to invent 🤯 and decided to make a box like a vanity case but small and the material that I'm going to use will be cardboard; to paint the cardboard, use spray paint so that it looks like plastic and it came out with a design that I didn't expect👍 and it can get wet, to decorate it I'm going to use some templates that I made a long time ago; they are easy to make if you have the right material😘 I also thought of putting something on it so that it could be closed, I will not tell you more and come with me to make this box turned into a mini toiletry bag 👝 to give it to a very special friend😍.
Materials to use
A sheet of cardboard
Pencil and an eraser
Scissor
Universal glue or silicone
Silver, white, gold and black spray paint
A rule
Half a meter of brown felt
A plastic bag
Two box closures
one hardware
*Strip or construction tape
Small screws (10 units)
A small screwdriver or knife
Newspaper or any type of paper to make the temporary mold
- 4 white sheets to make the mold
Steps to follow
1👣🎁. Once we have thought about the design that we are going to create; We must carry out a test and I did it on newspaper, then I transferred it to white sheets and finally to the cardboard sheet.
The design of the mini bag is oval at the ends and has rectangular parts, it was very difficult for me to create it in one piece 😩😜 it will have two lids, one on the bottom and the one on top and joined by a rectangle. Observe the image although it is not well appreciated in the newspaper, later you will see it better when it is transferred to the cardboard.
2👣🎁. I transferred the mold first to the newspaper because I had to correct the measurements and erase it. Now with all the square measures; transfer to the cardboard and fix with pieces of plaster or construction tape in some places so that the temporary mold does not move and then mark the entire mold with a pencil, to be able to glue and close it, I left several tabs and then cut out the mold and also with the scissors make a cut in all the surrounding lines that are eyelashes.
The measurements and the mold to have as a guide
☆ The measurements of one side are exactly the same as the other, that's why I didn't write them.
3👣🎁. In this step we are going to fold with the help of the ruler the parts of the center which will make the back of the mini bag, fold all the tabs. In the image I marked the measurements and where they do not have it is because they are exactly the same measurements on the other side and I wrote where you should fold.
4👣🎁. After we have our mold all the lines that are folded, now we are going to paint the mold with the sprays; first I painted it with white, then with gold and silver and with the black I did as stains and finally I painted it again with white that I wanted that color to stand out, 👀 don't let the paint dry to apply the other one because of otherwise you won't get that marbled effect. If you get to experiment you will see that the cardboard is like a plastic and it is also resistant.
*Note: Remember to cover the table where you are going to paint and that it be outdoors and for safety cover the nose and mouth.
- White color
- Golden colour
- Silver colour
- color black
- Finally again the white color and you can see how it is turning out and now let it dry
5👣🎁. We are going to stick the mold to the brown felt or the color of your choice, then cut all the edges and where the tabs go with scissors. As I said before, you must cut the lines that are going to be folded.
6👣🎁. We are going to assemble the mini toiletry bag by gluing the two tabs as I show you in the image, paste that with the one on the side and the one that is on the same line with the one on the side; when I say the one on the side I mean the lid that will serve as the base of the mini bag. The felt should be on the inside; After both sides are glued, the other cover, which will be the one on top, place it forward where we are going to put the closures of the mini bag and a hardware.
7👣🎁. In the image I show you the material that we will use with the pencil or a marker we will mark all the points where we will place each piece. You must calculate that they have the same measurements and with the screwdriver or knife screw all the little screws.
8👣🎁. With a few chichen paste and embed the nail in the corners leaving a space; These will be the legs of the mini bag.
9👣🎁. With two pieces of brown felt, cut two strips of 5cm each and with the glue stick both strips on each side of the toiletry bag inside, this will allow the lid not to fall all the way back when you open it.
10👣🎁. To the person I'm going to give this mini toiletry bag that's going to serve you with some goodies that she loves🥰, this friend calls no one by name if she doesn't tell everyone, girl, that's why she decides to make a template to explain them quickly how they are done The decorations with the templates are beautiful. I will teach her how to make the word Girl that will surely laugh when she opens the mini bag😜.
Materials for template
Acetate or any hard plastic material
A cutter
White marker
disposable tray made of torna solado material
A piece of sponge
Black acrylic paint
A vegetable chopping board
a white sheet and a pencil
*Strip or construction tape
- cork
👣1. The first thing we must do is draw the figure or word in this case Girl and I also wrote confidante to later make that word in template; On a white sheet of paper we write the word Girl and draw some hearts so that they remain on the template.
👣2. For the template I used a folder of acetate material that I had; I like to use an acetate that is thicker so that the insoles last longer. I opened the folder in half and then with scissors I cut it to the size of the letters.
👣3. Place the sheet with the letters under the acetate sheet and fix it to the vegetable cutting board with the tape.
👣4. Then with the cutter cut everything inside each letter, do it carefully. In the curves place the cutter in a stopped way (pointed)
👣5. With a piece of sponge and black paint we are going to mottle the letters by loading and unloading the paint on a piece of cardboard or on the same object that you are using to place the paint in this case a plate was used. The object where I am going to transfer the word is a transparent plastic litmus plate, which I cut out the edges that have the shape of petals. For the sponge I used a cork and glued a piece of sponge on top👌.
👣6. Fix the template to the plate that he cut out with the shot.
👣7. Then with the sponges begin to mottle the letters, until the color you want to dry is left.
👣8. With the glue we are going to stick the letter Girl inside the mini bag, so that when my friend opens it she gets the word and the sweets. With the sponge I gave the plate more darkness because hers looked very garish😛🤭
♡We are going to decorate the mini bag on the outside; although it is not necessary but I wanted to personalize it and give it the aged touch. With a template of a woman's head I transferred it to the lid of the mini bag, do the same process with which I made the Girl letter with the speckled drl technique and let it dry. With the edges of the plate, place on the ends of the bag and with the black speckled sponge and on all the edges of the mini bag; also around the corners. The effect of the aging technique was created👍
Final result using mold and template in a mini bag❤🤩
What do friends think of the result of my mini bag; I tell you that I did not expect this result, I loved it and I know that my friend will like it more, I even thought I would keep it and put the goodies in a bag🤭🤭😛😜. Thank you for your support to all the communities and the different people who leave me your nice comment. God fill me with Blessings.❤👏👏
I want to make a special invitation to my friend @mayifiestas to join this contest and show her creativity, which is many❤. I also want to invite all those who want to participate and express their qualities.
The photos are my property taken by my Samsung Galaxy A6 mobile phone.
Felicidades amiga simplemente hermoso un trabajo de calidad bien elaborado, como todo lo que elaboras, quedó bellísimo, saludos 💯🌹💋
Mi bella un gran saludo para ti también. Gracias mi cielo por tu apoyo como siempre con comentarios positivos y motivador❤👏👏
WoW... Esto requirió tiempo y dedicación. Me he percatado que te gustan los trabajos de envergadura, tiene tantos detalles y al final el resultado es ... Fenomenal. Que Dios siga bendiciendo tu creatividad querida @zullyarte. 🤗☺️
!discovery 31
Siii tenía que llegar de trabajar y dedicarle un tiempito 😛. Gracias por tu apoyo y tu hermoso comentario.
This post was shared and voted inside the discord by the curators team of discovery-it
Join our community! hive-193212
Discovery-it is also a Witness, vote for us here
Delegate to us for passive income. Check our 80% fee-back Program
Your content has been voted as a part of Encouragement program. Keep up the good work!
Use Ecency daily to boost your growth on platform!
Support Ecency
Vote for new Proposal
Delegate HP and earn more
Congratulations @zullyarte! You have completed the following achievement on the Hive blockchain and have been rewarded with new badge(s):
Your next target is to reach 700 comments.
You can view your badges on your board and compare yourself to others in the Ranking
If you no longer want to receive notifications, reply to this comment with the word
STOPTo support your work, I also upvoted your post!
Check out the last post from @hivebuzz:
Amiga, que trabajo más espectacular!!!🥰👍🏼😊☺️😉🤗😃
Los detalles de las bisagras y las paticas fueron mi parte favorita. 😊👍🏼
Y las plantillas en acetato una estupenda idea. Te felicito y te deseo suerte en el concurso 🤞🏼😉
Saludos!
💖🌺🌻🌷🏵️🍁💋💐🌸🌼🌹🥀💜
Bello y animador tu comentario amiga. Si mi linda la decoración con plantillas son excelentes. Besito y gracias por tu apoyo. Dios te bendiga
Dios mío Zully!!! siewmpre impactándonos con tu creatividad!!!! está mega genial! Gracias por participar.
Graciaaas querida amiga¡¡ la hice con mucho amor porque a la persona que se la voy a dar es una amiga que me da estudios bíblicos y me tiene una paciencia🤭 es muy humilde😍. Bendecido día 👏👏🤗
Excelente trabajo como siempre amiga 😍🥰 felicidades. 😘❤️
Gracias corazón por tu apoyo. Un fuerte abrazo🤗
Amiga que belleza. Me encantó 💕 y los pasos están muy bien explicados. Esta bien elegante ese neceser me fascinó de verdad. Buen trabajo prima. Mucha suerte en el concurso. Abrazos 🤗
Gracias prima 😍 tu tan bella como siempre. La hice con mucho amor porque la amiga es la que me da estudios bíblicos❤. Besito y te deseo éxito en el concurso. Dios te cuide
Un excelente trabano de decoración, es evidente como se puede crear algo genial usando una plantilla con patrones sencillos. Me habría gustado ver cómo elaboró la plantilla que luego plasmó en la cartulina y las herramientas que usó para el diseño de la misma.
Con todo, la publicación quedó genial. Gracias por compartirla con nosotros.
Gracias por tu comentario ❤. La plantilla que transferí en la tapa es acetato blanco de 4mm, eso lo compramos hace mucho tiempo cuando hice un curso. Estuve buscándolo y no conseguí ni el transparente y por tal motivo usé una carpeta de acetato pero era muy fino para ese tipo de dibujo. Ya me dijeron donde podría conseguir el acetato a lo que lo tenga en mano hago un tutorial de plantilla. Feliz y Bendecido día😘👏👏
Esya hermoso
Gracias mi niña bella❤Dios te colme de bendiciones 👏👏
Me encantó tu trabajo y cada uno de los detalles que le elaboraste, estoy segura que tu amiga quedará encantada con ese lindo obsequio! Saludos y suerte en el concurso @zullyarte.
Muchas gracias flaca38. Por tu apoyo y tu bello comentario, espero que le guste sino me quedo con ella🤭🤭😜
te quedo hermoso, esa plantilla me encanta, te deseo mucha suerte en el concurso.
Muchas gracias por tu deseo y Amen. En el concurso hay lindos trabajos🎁😍. Mil bendiciones para Ti👏👏
He quedado sin palabras un trabajo impecable, me encantó ver todo el proceso es sorprendente ver como inicias con un patrón, y terminas con un cofre, excelente trabajo.
Gracias por tu apoyo¡¡ Si hasta Yo no me lo esperaba jaja. Cuando uno inventa puede tener buenos resultados o como no. Mil bendiciones amiga
Reblog your posting dear
Thank very much ❤🤗
Que belleza de trabajo amiga Zully, ese toque vintage de tu caja a juego con los demás elementos la hacen ver super elegante, especialmente las manillas, y su estilo baúl grita por todos lados glamour.
Tus trabajos no tienen desperdicio de principio a fin, tus acabados son geniales y el buen gusto siempre está presente en tus obras, eres una artista de los detalles, no se te escapa ninguno y eso no es solo tener talento, eso es tener mucha inteligencia y creativa para desbordar. Dios te bendiga y espero que tengas el mayor de los éxitos en este nuevo concurso.
😳😩😪🤧 Me dejaste sin palabras; cuando le hacen esos comentario tan hermosos y motivadores uno se queda emocionado. Te deseo éxito y muchas bendiciones en tus trabajos; aunque tus trabajos son excelentes y también de calidad por eso me emociona tú comentario. 👏👏🤗❤
Quede tan impresionado por los detalles en cada proceso que no quería que se terminara. Estoy maravillado!
☺😊Bello¡¡ . Yo sí estaba loca terminar el mini neceser jaja😛. Gracias mi lindo amigo por tu apoyo, es halagador recibir un comentario positivo de un artista👏🤩. Bendecido día
Al ver esta decoracion me trajo a la mente muchas cosas, como la caja de pandora, se puede conservar mucho alli o obsequiar cosas grandes. me gusto
Gracias corazón por tu precioso comentario ❤🤗
Wouuuuu y mil veces wouuuu AMIGAAAA¡¡¡ Que trabajo tan maravilloso. Siempre haciendo trabajos espectaculares e inundando nuestra vista con tanta creatividad. Mis admiraciones para ti. Realmente eres fabulosa. La mejor de las suertes. Besos y bendiciones... 💕🌹🐦🌈
🤧😪Que motivador tu comentario amiga ❤ . Hay un decir: La persona es como se expresa; es decir tú eres una excelente persona y de buen corazón, un fuerte abrazo y Bendiciones👏👏👏😘
Amen mi corazón. Tengo la misma opinión de tu persona. Besotessss... 😘💕